Category Archives: Dessertalicious

Coo Coo for Koulourakia

Today I am getting my Greek on. I have exactly zero Mediterranean blood in my veins, but I have some in my heart. This thanks to my favorite Greek friends, who are warm and sometimes fiery; they are generous in spirit, passionate in their beliefs and above all FUN.

One of my faves recently enlisted my son in making a mega batch of traditional Greek cookies, Koulourakia. Seeing them in the kitchen together via Facetime, working on the cookie-production line, made me smile. It reminded me of being in the kitchen with my own mom.

As we have documented here on this blog, Nina was not invested in cooking unless the cooking was collateral necessity for some messy crafting or shenanigans that brought together kids or grandkids. Despite her own holiday baking ennui, she encouraged us to pursue our own culinary itches, which were usually things that bore little resemblance to the magazine pictures that had inspired us. Cases in point: rock-hard pretzels from ZOOM (the show not the app), a gloppy soft cheese “pine cone” flavored with bacon bits and studded with almonds, dentally challenging popcorn balls, and so, so many more.  

My point is….Nina had her priorities straight. Our holiday kitchen experiments brought us together in one place. The only really important part about the holidays are the people—the family you are born into and the family you grow into. If you’re living a rich life, that family ends up being big and varied and sprinkled all over the country, if not the globe.

That is why seeing the kitchen production half a country away inspired me to try out the Koulourakia recipe I’ve been eyeing (and trying to pronounce) for quite a while. The cookies did not disappoint and will be a holiday staple here. They are sturdy, keep well, travel well and as a bonus are both nut-free and Vegan. They’re low-key addictive—not quite as sweet as a cookie, and less of a commitment than a muffin, making them the perfect late morning or mid-afternoon accompaniment to a cup of something comforting. Book group? Cookie exchange? Hostess gift? Holiday snack arsenal for unexpected guests? Yes and yes on down the line.

There are admittedly many versions of Koulourakia, using seasonal flavors and sweeteners, or butter vs olive oil. I went with Mina Stone’s favorite orange- and cinnamon-flavored version, from her book Lemon, Love and Olive Oil, (purchased at the always magical Woody’s Mercantile). She does the pro option of brushing the tops with honey water and pressing the cookies in sesame seeds. Other versions skip the honey wash and simply roll the rope in sesame seeds before forming the cookies into a circle. You do you, preferably in a messy kitchen with good company and an excellent playlist!

       Koulourakia, Colorado version

Koulourakia

From Lemon, Love and Olive Oil

 Ingredients

The Wet Ingredients:

  • 1/2 cup (120 ml) light olive oil or vegetable oil
  • 1/2 cup tahini (120 ml)
  • 1 cup (240 ml) orange juice
  • 1 cup (200g) granulated sugar

The Dry Ingredients:

  • 4 cups (480g) all-purpose flour
  • 1 teaspoons baking powder
  • 1 teaspoons baking soda
  • 2 teaspoons kosher salt
  • 4 teaspoons ground cinnamon

Topping:

  • 1 Tbsp honey
  • ½ cup water
  • ½  cup sesame seeds

Method

Preheat the oven to 350 °F, 180 °C

Line 2-3 baking trays with parchment paper.

Make the Cookie Dough:

  • Combine all of the dry ingredients in a bowl and whisk them together.
  • Combine all of the wet ingredients in a large bowl and whisk them together. Add the dry ingredients in 2-3 batches and whisk together. Switch to a spatula and mix until a smooth soft dough, adding another spoonful of flour if it’s too sticky. Cover loosely with a towel and set aside to rest for 20 minutes.

Make the Cookies:

  • Take about a tablespoon of dough and roll it into a ball. Roll the ball into a 5-inch (12-13 cm) long rope. Shape it into an S or into a circle.
  • Dissolve 1 Tbsp honey in 1 cup water. Form the cookies on the baking tray, brush tops with honey/water mixture then press each cookie into sesame seeds and replace on sheet. Alternatively, roll the rope in the sesame and then place on the prepared baking pan. 
  • Bake the cookies 13-15 minutes, until golden brown on the bottom and lightly toasted on top). Cool on rack.
  • Transfer the cookies to cookie jars or to an airtight container and store at room temperature up to 2 weeks.

Serve with cozy bevvie of choice, or go full Greek and shake up a cold frappe. It’s totally a thing.
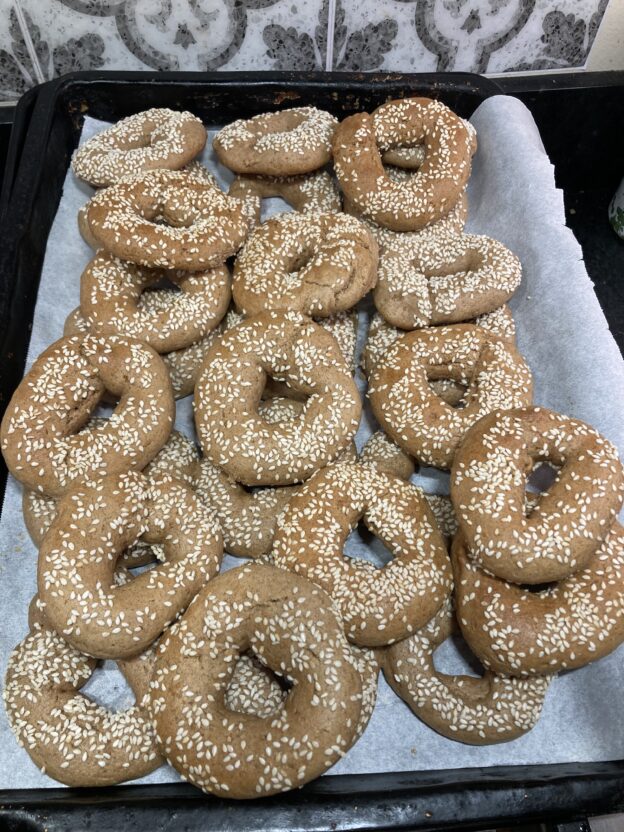
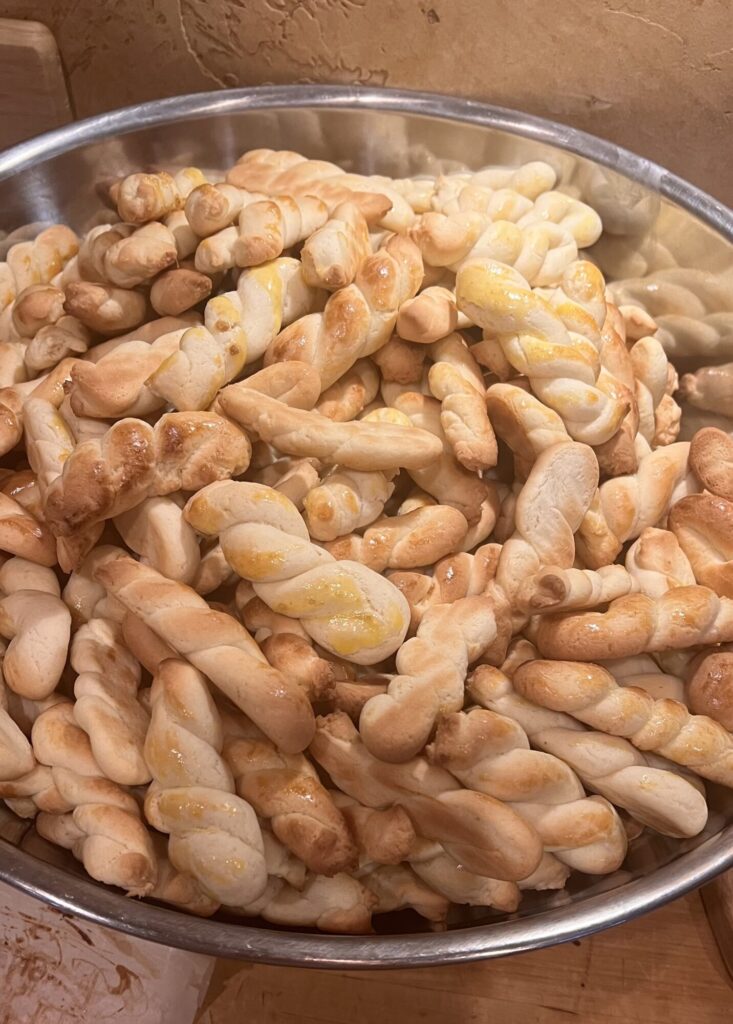
     Traditional yodeling marmots and Koulourakia unite!

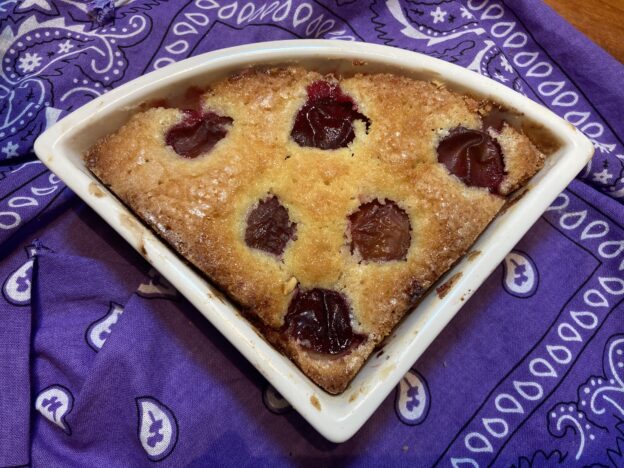
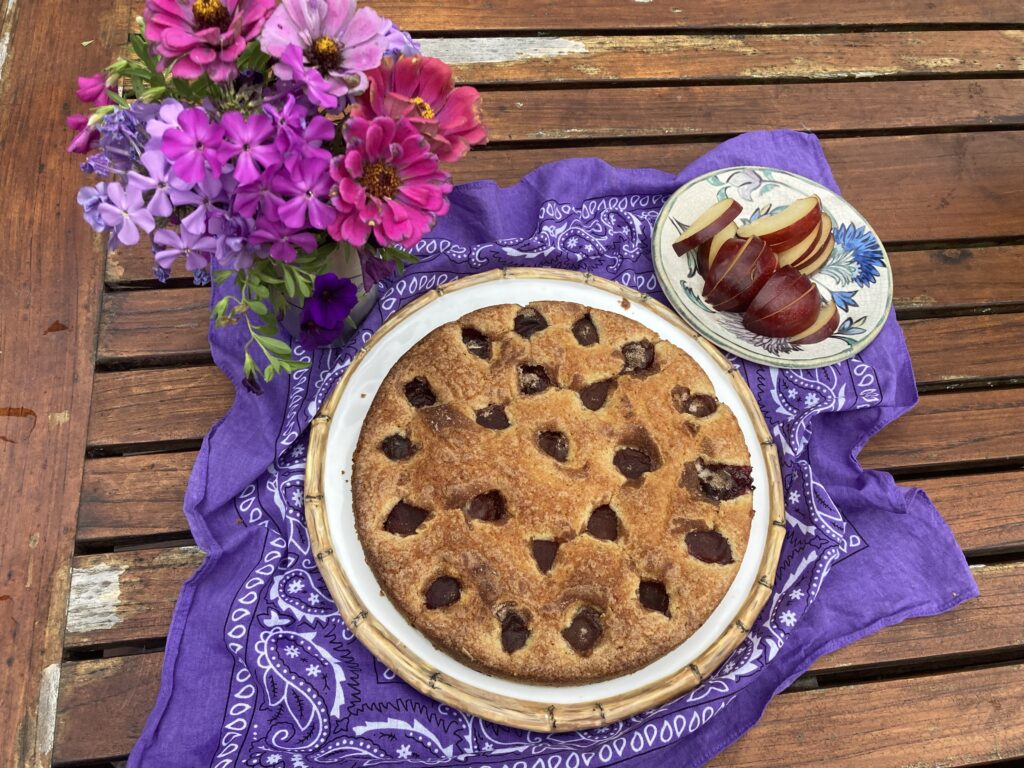
Love the One You’re With Plum Torte

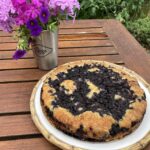
Not to be bossy but, MAKE THIS DESSERT!

This recipe popped into my life just as I was looking for something purple to post in honor of the Walk to End Alzheimer’s (shameless plug and donation link here). Purple is the color of the cause. Both the cause and the color are dear to me because of my awesome mama Nina who happened to LOVE the color purple.

My first purple food efforts included braised red cabbage and some spiced beets. Both were pretty and delicious but felt a little more like weeknight homework than weekend fun. And who needs more homework in September?

Browned up, cinnamon sprinkled Purple Fantasia

Then, like magic, the New York Times offered up its most requested recipe of all time—Marian Burros’s Plum Torte, resplendent with purple plums.

There are many reasons why this recipe is brilliant. First off, it is easy, and infinitely flexible; hence, the name. In keeping with the Stillsian “love the one you’re with” sensibilities it can be made with really any kind of fruit you’d find in pie. It is made with regular ingredients (not many, and in totally memorizable quantities) you probably have on hand right now, and in whatever pan you’ve got, with a mixer or a fork. It travels like a champ, freezes easily, and is essentially un-messupable.

It’s even easier than Nina’s specialty margarita pie, and considering that the Times has printed it annually since 1983, Nina may have even made it in her day.

It took me a while to try it out because at first I couldn’t find the smaller Italian purple plums, and needed my larger black plums to ripen. They never really did, and still, it was delicious. Don’t let a lack of any specific fruit keep you from making it, because, as the recipe promises, it can be used with any seasonal fruit, from berries and stone fruit in summer to apples and pears in the fall, to cranberries and frozen berries in winter.

I literally road tested my first effort—sliced it in the pan, wrapped it whole then enjoyed it with friends from a tailgate after mountain biking. I made it again with frozen blueberries, and again with the proper, and much smaller, Italian plums. And then again with fresh raspberries. All good! Next up (obviously in this neck of the woods) apples.

An international crew of testers, albeit young and hungry, gave a unanimous thumbs up. They voiced a slight preference for leaving the plums halved, as in the original vs sliced, as suggested in some of the 2,125 comments.

So, make it with anything you’ve got, and share it with anyone you love. Or just share it with whoever you’re with because, you never know.

Love the One You’re With Plum Torte
originally by Marian Burros for the New York Times

Ingredients:

Yield: 8 servings

  • ¾ cup (150 grams) sugar
  • ½ cup unsalted butter, softened
  • 1 cup (120 grams) unbleached flour, sifted
  • 1 teaspoon baking powder
  • Pinch of salt
  • 2 eggs
  • 24 halves pitted purple plums
  • Sugar, lemon juice and cinnamon, for topping

Method:

Heat oven to 350 degrees.

Cream the sugar and butter in a bowl. Add the flour, baking powder, salt and eggs and beat well.

Spoon the batter into a lightly greased and floured spring-form pan of 8, 9 or 10 inches. Place the plum halves skin side up on top of the batter. Sprinkle lightly with sugar and lemon juice, depending on the sweetness of the fruit. Sprinkle with about 1 teaspoon of cinnamon, depending on how much you like cinnamon. (I like 1 Tbsp sugar mixed with ½ tsp cinnamon, then sprinkled together on top)

Bake 1 hour, approximately, checking at 45 minutes. Remove and cool; refrigerate or freeze if desired. Or cool to lukewarm and serve plain or with whipped cream or, duh, ice cream. (To serve a torte that was frozen, defrost and reheat it briefly at 300 degrees.)

Tips

Here is where I’ll guide you to the highpoints of the rabbit hole that is the comment section at the end of  this and every NYT recipe. As proof of this recipe’s brilliance, the notes are far less snarky/judgemental and more contributory/helpful than the usual NYT comment fare.

  • To freeze securely for the apocalypse wrap the torte in plastic, then double wrap in foil.
  • For some of the most popular variations, including flour combos, its best to go to this easy guide.
  • Use whatever pan you’ve got, but DO grease and flour it—the original recipe does not mention that step, but that is a subtle plot from the baking elite to undermine the rest of us baking hacks.

AND NOW, MY PURPLE SPIEL

Today just happens to be GO PURPLE DAY. If you’re still with me, here is my purple pitch, for how to support the Alzheimer’s Association and/or the Walk. Everyone is welcome to join the walks that happen in 600 plus towns across the country. In our hood it’s on Saturday Sept 30 starting at 9:30 at Hanover High School. Sign up right here! Catch the incomparable Cindy Pierce turn her comic genius to Alzheimer’s at Sawtooth on Sept 28, or Go Purple—today or anytime leading up to the walks—to support the cause. Finally a HUGE THANK YOU to all you purple angels who have donated to this cause that means so much to me. Come by for some torte!


Chocolate Peanut Butter Easter Eggs

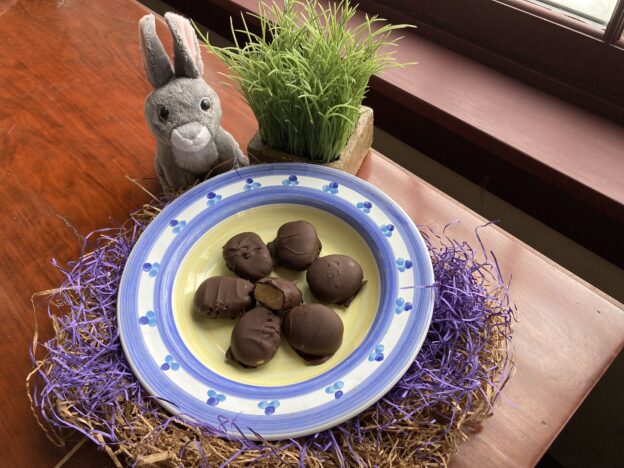
Spring is by far my favorite season. Although New England tries hard to convince me otherwise, with too many springs of all mud and no snow, this year spring is back, baby! Even in the east, we’ve got snow on the mountain and sun (sometimes) in the sky. And in the west, you have 20x all that.

I also love spring because it means Easter and Easter means good things like happy kids, tons of candy and cute bunnies. AND it reminds me of my mom, Nina. She hated the effort, planning and hoopla of the big holidays, but Easter—which is all about creativity and messy fun, and no rules—Easter was Nina’s jam!

Let’s be honest here, the green light on eating chocolate throughout the day, starting at breakfast, was and is a big draw. As much as I wish I could buy up all the half price malted milk robin’s eggs and Reese’s peanut butter eggs at CVS the day after Easter, it’s just not a good life plan.

That said, if there was a healthy, yummy, easy-to-make alternative that I could mass produce and keep in my freezer year-round, I’d be all over it. Well don’t you know, there is such a thing, and this recipe straight from Minimalist Baker is it.

The interior taste and texture is spot on, but without any hazardous ingredients. For God’s sake they’re Vegan, gluten-free and grain-free. We’re talking peanut butter, almond flour, maple syrup and salt. And it’s all wrapped up in the chocolate of your choice so you can pick your own adventure there.

My Easter candy fantasy ship has come in, and I invite you to climb aboard. These may or may not forever change your life, but at the very least they’ll let you feel a lot better about eating candy for breakfast. Hippity Hop and Happy Easter to all!

Chocolate Peanut Butter Possibly Breakfast Easter Eggs

AKA Easy Vegan Peanut Butter Eggs from Minimalist Baker

Ingredients

  • 2/3 cup almond flour
  • 1/3 cup creamy, drippy peanut butter
  • 2 ½ Tbsp maple syrup
  • 1/8 tsp sea salt
  • 1/2 cup semi-sweet chocolate chips (for Vegan/dairy-free Minimalist Baker suggests Enjoy Life)
  • 1 tsp coconut oil

Method

  • Line a small baking sheet or plate with parchment paper and set aside.
  • To a small mixing bowl, add almond flour, peanut butter, maple syrup, and sea salt. Use a spatula or spoon to thoroughly mix together. If it seems too wet to handle, add more almond flour. If it seems too dry, add more peanut butter.
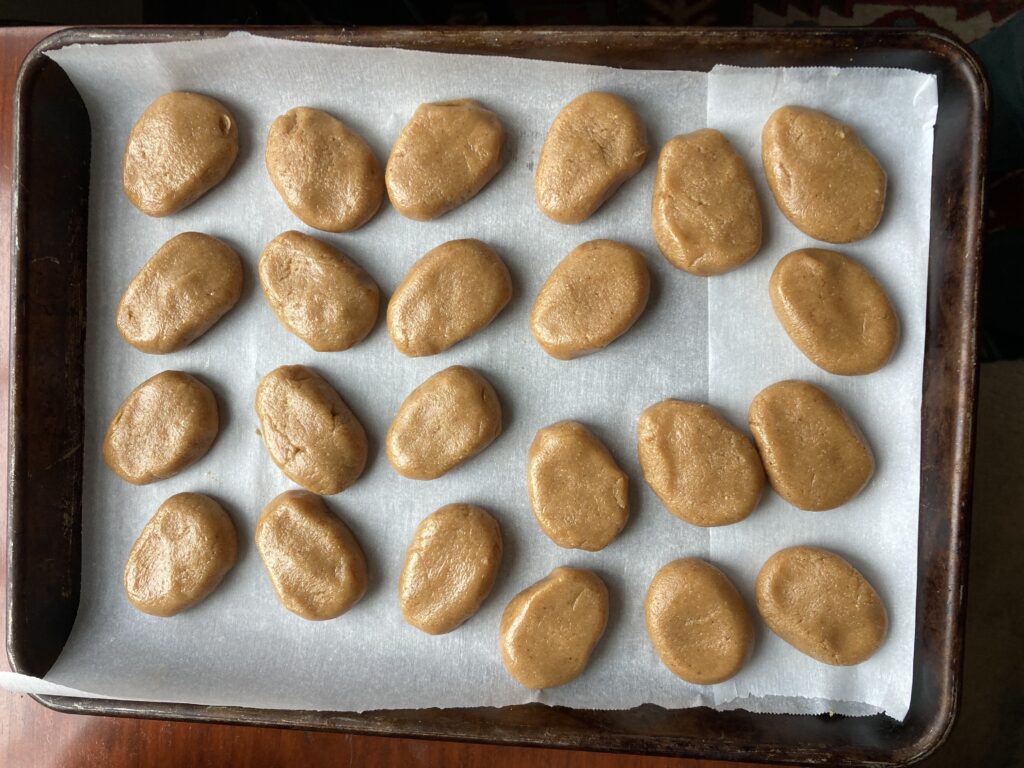
  • Use a tablespoon-sized measuring spoon to measure out 1 scant Tbsp of filling and roll it in between your hands to form an oval. Flatten it slightly to form it into an egg shape. Place on the parchment-lined baking sheet or plate. Repeat with the remaining dough.

A double batch of nekkid eggs, chillin’

  • Once all of the eggs are formed, place the baking sheet or plate into the freezer and freeze for at least 15 minutes.
  • Meanwhile, place the chocolate chips and coconut oil into a small microwavable bowl (small is better than large so that you can more easily dip the eggs into it) and microwave in 30-second intervals, stirring in between to prevent burning, until smooth and melted. You can also melt on the stovetop by adding chocolate and coconut oil to a small glass or metal bowl and carefully placing it over ~1 inch of simmering water in a small saucepan, then stirring until melted. Set aside.
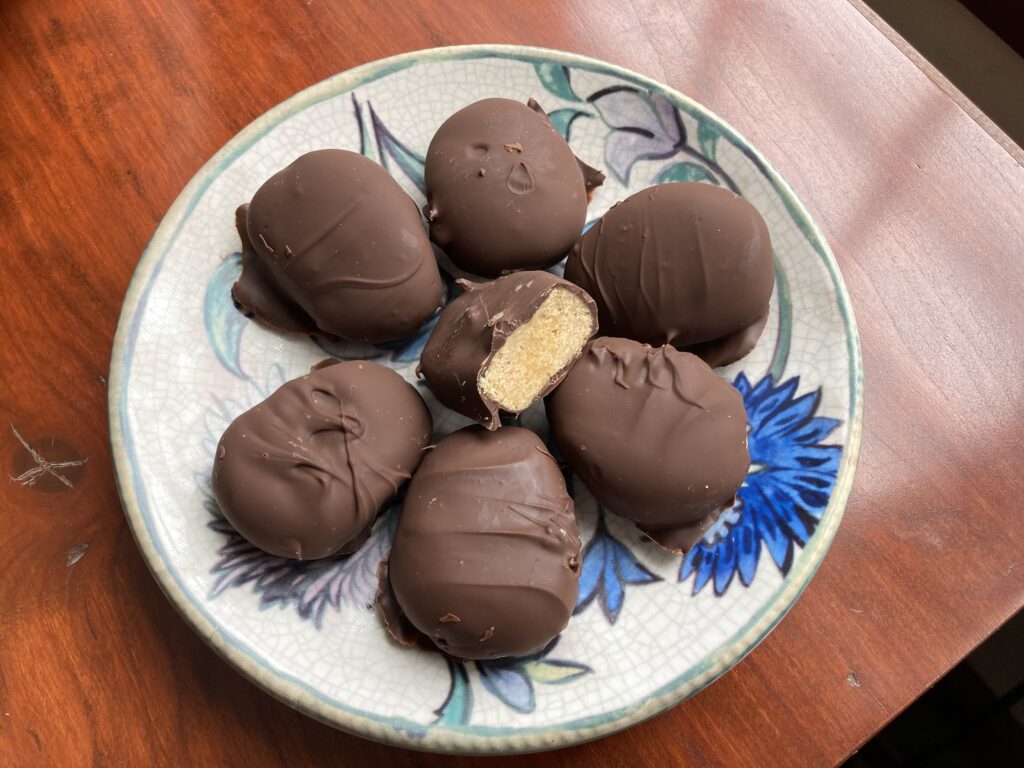
  • When the peanut butter filling is set, remove it from the freezer and use a fork to dip an egg into the melted chocolate, turning it over to coat evenly. Shake off the excess chocolate and place the egg back onto the baking sheet. Repeat with the remaining eggs.
  • When finished coating, place the eggs back into the freezer until set — at least 10 minutes. You can enjoy them directly from the freezer or store in the refrigerator. Store leftovers in the refrigerator for up to 1-2 weeks or in the freezer for up to 1 month.

Bringing It:

Channel your inner Easter Bunny and have at it!

Note: If you are at all nervous about your chocolate coating/dipping skills, I highly suggest following the instructions closely and watching the short video on the original post. I have a history of toddler-level chocolatiering but I followed the instructions and mine turned out perfectly first try.

     and voila!


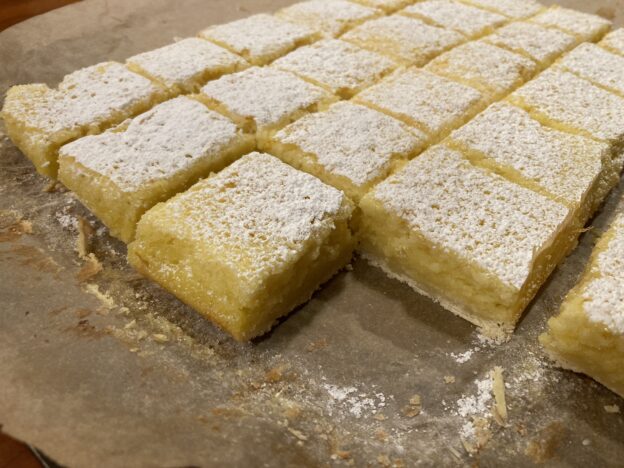
Golden Ticket Lemon Bars

This post goes out in preparation for the Hahnenkamm Downhill, the most fearsome event on the World Cup skiing tour, which takes place this weekend on “The Streif” in Kitzbuhel, Austria. Specifically, though it goes out in honor of Eric Keck, the American Downhiller who etched his name in Hahnenkamm legend by launching over the “safety fence” in 1991, and emerging bloodied but whole, wielding his broken ski like a battle prize. This remembrance of Keck by Steve Porino comes as close to capturing that particular moment, and the essence of Eric Keck, as the written word can.

Keck, ready to roll as always

Keck left us far too soon, in 2020, but his warrior spirit—a combo of bravery, mischief, humor, and the-sky’s-the-limit aspiration—remains with all who knew him and especially on the Streif. The contact high of being around Eric and his exuberance felt like getting a golden ticket, a window into life’s possibilities. Fittingly, the charity honoring Eric is called “Keck Golden Ticket” and aims to strengthen kid’s lives through the power of action sports.

Eric’s birthday was on January 11, and his favorite cake was not a cake at all. It was his mom Bev’s lemon bars. The recipe got further customized by Eric’s wife Beth, to accommodate Eric’s request for “twice the lemon, half the crust.”

Beth is herself another magical being. She reminds us that lemons are, “Where summer hides in January.” To Bev’s original version, she doubles the custard, and reduces the proportions of sugar. Beth rolls with 2 cups total vs 3, which is plenty for my tastes. Even when halved from the original, the crust is still plenty sturdy to hold the filling. She also sometimes subs out almond flour for the regular flour in the crust.

I took Beth’s adapted version and cross-referenced it with this recipe for lemon bars from John at Preppy Kitchen. He fills in some details and pro moves that don’t make the shorthand of handed-down family recipes. Among them: line the pan with parchment paper; wet the knife to cut the bars; freeze them if, say, you cannot be trusted alone with an entire batch of lemon bars in the dark days of January.

The Preppy version processes the zest into the sugar first, which is brilliant and I support the move, but in fuss-free kitchens…that ain’t happenin’! Plus, I kind of love the texture of zest when I run into it.

There are lots of options here, but there are some hard and fast rules:

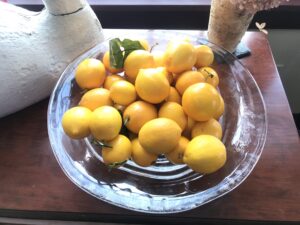
  • Use fresh lemon juice…from real lemons you or your minions squeezed. Make us all happy by using Meyer lemons* if possible.
  • Chill before cutting, or you’re in for a messy situation. Better yet, make them the day ahead and you’ll be as ready as your lemon bars.
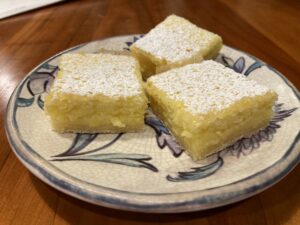
  • Enjoy every bite! No guilt, no excuses. Like Eric, these are pure goodness —bright, bold, sweet, sassy with just enough New England crust to keep their integrity.

I hope you enjoy this recipe as much as Eric did, and bonus points for enjoying them straight out of the pan with a fork while watching the Hahnenkamm this weekend. If you want to help more kids live large like Eric, please consider donating to Keck Golden Ticket.

Golden Ticket Lemon Bars

Ingredients

CRUST

  • 1 cup flour
  • 1/4 c confectioner’s sugar
  • 1/2 cup butter

FILLING

  • 8 eggs
  • 2 cups granulated sugar
  • *2/3 cup fresh lemon juice
  • *Zest of two lemons
  • ½ cup flour
  • 1 tsp baking powder

*Special shout out to Sister A for this particular Meyer lemon haul, and to my other lemon angels/dealers: Sister B, Cousin D and Auntie T (also featured in this splash of sunshine recipe). Have I mentioned using Meyer Lemons??? Ok, moving on…

Instructions

Make the crust:

  • Preheat oven to 325.
  • Prepare a 9 x 13 pan by spraying it, greasing it, or IDEALLY lining with parchment paper, pressed and folded nicely into the corners.
  • With a fork, cut butter into flour and confectioner’s sugar until it is the size of small peas. (I have not tried it, but Preppy John melts the butter then adds it). It won’t hang together until you dump it all into the pan and press into an even layer. Bake 20 minutes, until just golden (or however you like it).

Make the filling:

  • Beat eggs and add sugar, lemon juice, zest and flour. Combine well and pour mixture over the warm crust. Bake another 20-25 minutes, until set.
  • Cool, then chill two hours.
  • Sprinkle w confectioner’s sugar and cut into bars with a sharp knife. Wipe the knife with a damp cloth between cuts to make your edges nice and sharp, like you’d want them on the Streif.

Storing, Keeping, Bringing

Keep these in the fridge until they are gone, or freeze on a baking tray, then wrap tightly and freeze for up to three months (so they say). They travel like champs when the layers are separated by parchment or plastic wrap.

      Keck, taking a friend along for the ride


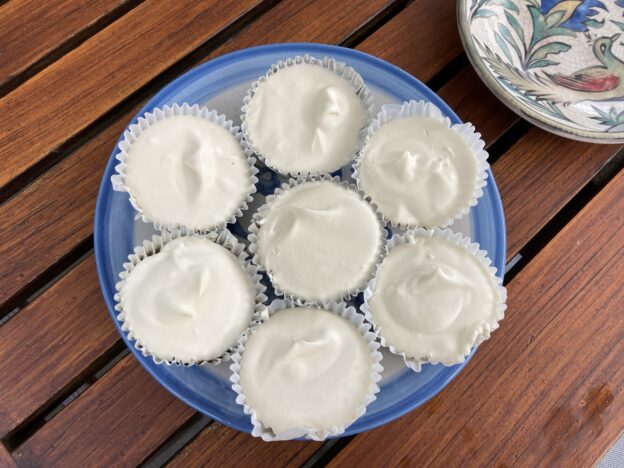
Mini Maple Creemee Pies

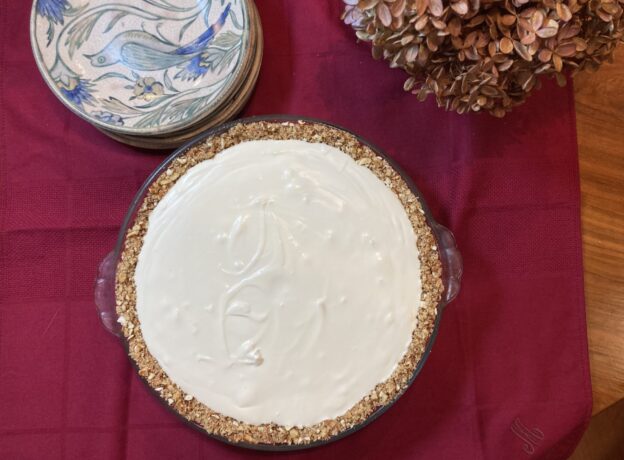
Dedicated readers will know that I already posted a recipe for maple creemeee pie, back in November. Then, it was a way to fill a seasonal void. At the height of summer in New England maple creemee options abound, but…what about our friends in the rest of the country? And around the globe? What are they to do?

And, what about those times when you want “just a taste” of maple creemee goodness and you don’t want to get in your car? Enter mini maple creemee pies, the best idea since, well, maple creemee pie.

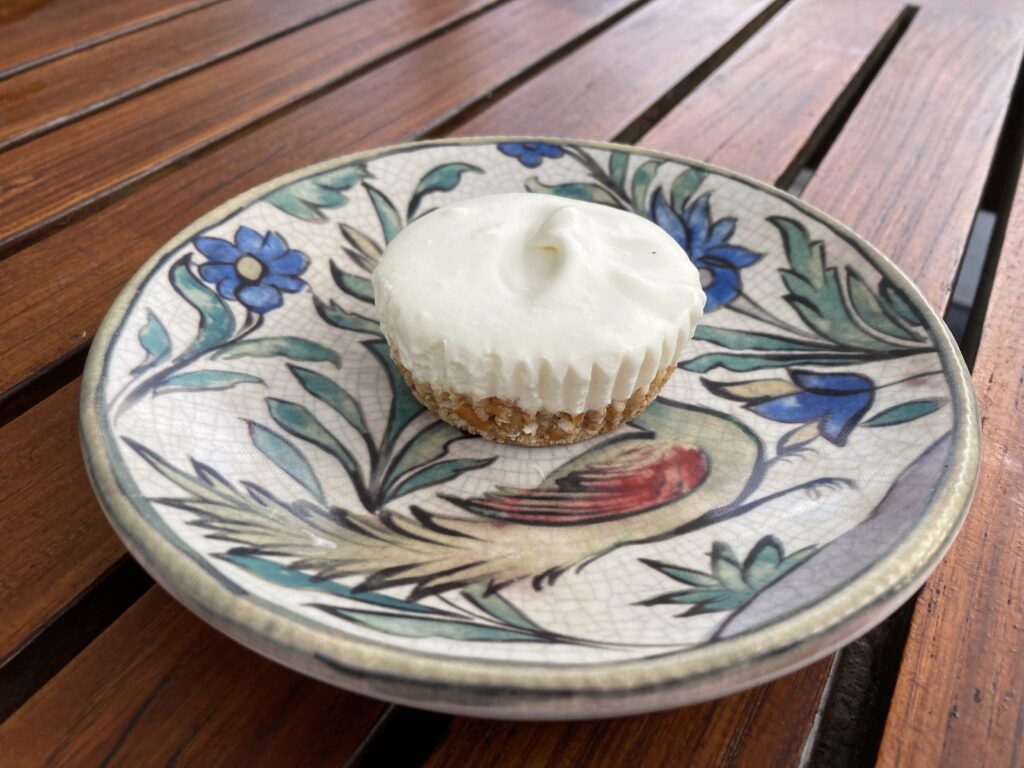
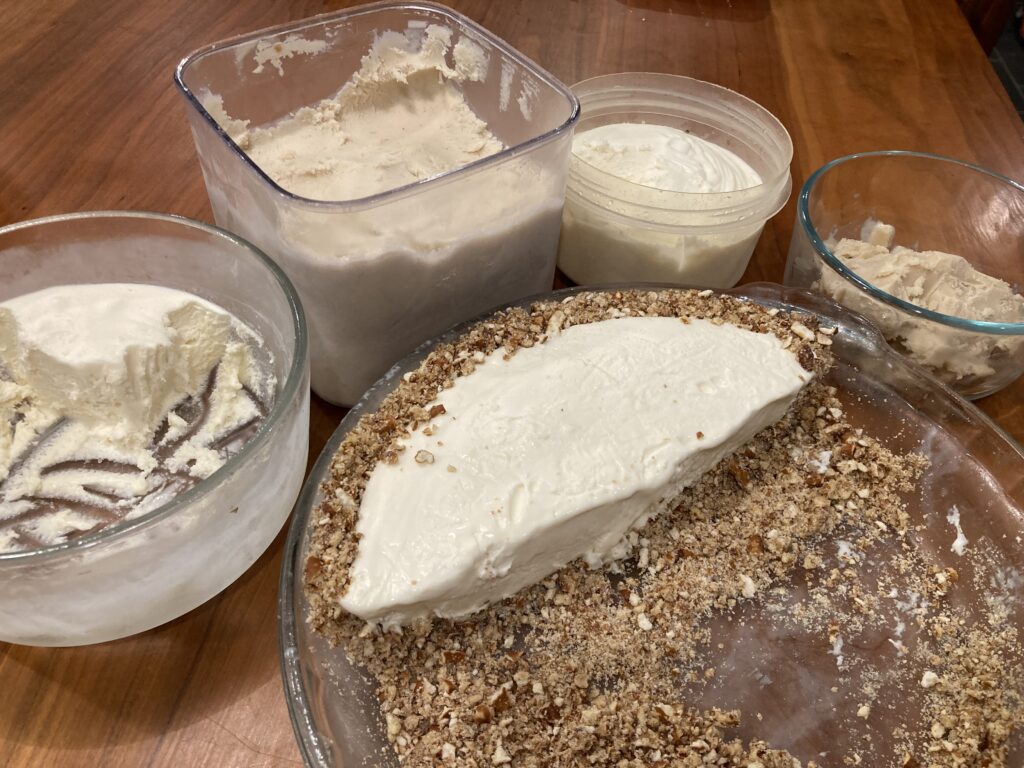
Here’s the basic concept. Whip up the same amazing pretzel crust, but press it into lined muffin tins. Ladle in the same creamy filling, then pop the tray in the freezer. A couple hours later you’ll have individual servings you can eat by hand, using the liner as a napkin; alternatively you can be civilized, put it on a plate (even top it with some berries) and eat it with a fork.

The civilized version, ready for berries or just your fork

As discussed at length in the original post, my preferred version relies on the alcohol in maple liqueur for both extra flavor and to keep the filling from freezing up like a brick. To make up for both, the non alcoholic version called for more maple syrup. I got some feedback that the sober version was too sweet. I have since adjusted down the syrup in that version, and upped the cream in both versions. All that said, this is wayyyyy more art than science, so give a taste along the way and follow your heart. 

For non maple fans, or for a citrus option, this technique can easily be used to make mini versions of Nina’s Margarita Pie. Finally, to my Vegan friends. I still have not had a victory here, but this is the latest recipe I am going to try, once I find unsweetened oat milk creamer. If you beat me to it, let me know how it goes.

Now, my friends, as a late summer treat, I give you mini maple creemee pies. I hope you love them!

Maple Creemee Pies of All Sizes

Prep time: 15 mins, plus at least 4 hours freezing time for a big pie, and 2 for the minis.

Makes 1 yummy pie, or up to 20 mini pies

Ingredients

  • 12 cup margarine or butter
  • 14 cup sugar
  • 3 cups pretzels (to equal about 1 14 cups crushed)
  • 1 (14 ounce) can sweetened condensed milk
  • 3 Tbsp maple syrup*
  • ¼ cup maple liqueur* (mine was 30% alc/60 proof)
  • 1 ½-2 cups heavy cream**
  • Optional: Maple sugar candies crumbled on as topping***

*For non alcoholic version, omit liqueur, and adjust to use 1/4 cup maple syrup, or to taste,  plus 1/2 tsp vanilla (optional).

** I like the full 2 cups of cream. If you don’t use the liqueur, and boost the maple flavor with more than 1/4 cup syrup, extra cream is the right call. And make sure to whip it like you mean it!

*** These are way optional. Veteran testers say leave it alone as is, but one rogue tester notes that the pro pies at Mac’s Maple (with a far inferior crust BTW) featured these. He was enamored by the flourish.

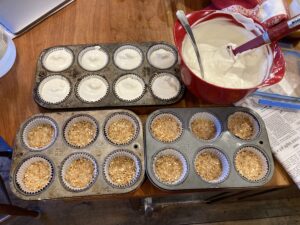
The production line

Method:

Make Pie Crust:
Melt margarine or butter and combine with sugar and pretzel pieces. Press into buttered 9” pie pan. For the mini versions, line 20 (ish) regular sized muffin tins with cupcake liners. Spoon the crust mixture into the cups until it is all used up, then use an empty liner to press the crust in place firmly. Refrigerate or freeze to cool while you make the filling.

Filling: Combine condensed milk, maple syrup and maple liqueur and whisk until it is well incorporated.

Whip the cream until it is very thick and stiff. I mean it—this is your structure. Fold in the whipped cream as gently as you can until it is fully incorporated. Pour into pie crust or ladle into the mini crusts and freeze for at least four hours, more to be safe. Two hours for the minis should do it.

Bringing it:

If you are celebrating away from home, where you have the time and space for it to freeze, it is easily assembled on site. Just prep the pretzels first and put them in a Ziploc bag. Portion out the booze and syrup, grab a pie plate and fill a bag with the rest of the ingredients— cream, a stick of butter and that can of sweetened condensed milk that expires sometime this decade. Make the pie right away so it has max time to freeze, and you have max time to put your feet up and prepare to be worshipped.

On a side note, I had previously said it was not advisable to travel with this in warm weather. I stand corrected. I sent a pie, in the back seat in a reusable freezer bag, to a friend’s house, with instructions for the courier to immediately put it in the freezer. You can guess what didn’t happen. Flash forward to the following morning…the pie is secretly returned from the back seat to our own freezer, hidden under a big bag of blueberries.  Flash forward two weeks…I unearth the buried pie, have a piece and it’s still delish! That, my friends is a true story of survival.

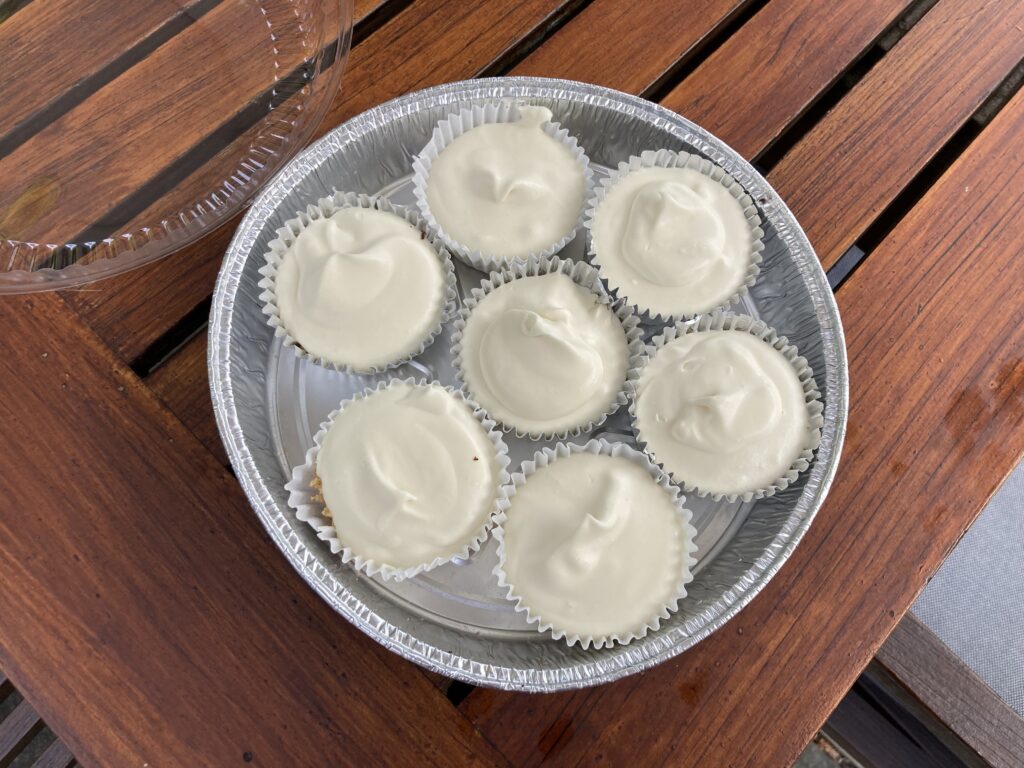
A 9-inch cake pan, with plastic lid, is the perfect getaway vehicle.

When Life Gives You Lemons, Say Thank You!

It’s a dreary Sunday here in the east, with the promise of rain to take what’s left of our precious snow. As if in anticipation of this day, a heavy Priority Mail box from California recently arrived. Cousin D, in a race to save her California hillside of citrus from a cold snap, did a mass harvest and shared some of it with me. As a former Vermonter, D knows the mixed blessing of March in New England–winter’s easing its grip, but…the mud!–and the curative power of Meyer lemons. On top of that, she’s just darned thoughtful!

Rather than reinvent the citrus wheel, I’m going to revisit some favorites from Lemonpalooza 1, (Lemon simple syrup, and roasted lemon shallot vinaigrette for an off the hook chicken bread salad) and from the sequel, Lemonpalooza 2 (lemon pudding cake, preserved lemons and the lemon blueberry sunshine loaf that I discovered the last time Cousin D bestowed her citrus bounty on me.)

For breakie, squeeze some on top of the classic Dutch Bunny to put a big smiley face on your day, orrrr nothing says “I love you” and also “Don’t mess with me” like Sassy Sansa Lemon Ginger scones. If you really want to jumpstart summer, make up a Lemon Beach Pie.

Of course, there’s nothing wrong with plowing through your lemons as straight up lemon juice in and on everything. Tea? Smoothies? Sprtizers? Cocktails? Yes please!

If you’ve already embarked on spring training, squeeze them up for some minty snap pea salad, lemony shrimp and bulgur salad, lemon cauliflower couscous or pretty much anything that could use some fresh zip.

Wherever you are on this spring day I hope you find some brightness and warmth.

PS. We’re taking votes for your favorite lemon recipes. First vote is by Aunt D for lemon posset, in Lemonpalooza 1. Solid choice!


Maple Creemee Pie

The saddest day of the year for me is the day they stop serving maple creemees in my hood. That was on the last weekend of October, when Mac’s Maple closed. It wasn’t a real ice cream day, but to honor the occasion I secured two of their maple creemee pies. I figured they would be my step-down program, and perhaps inspiration for my own recipe for the same. Rigorous testing ensued.

The first test was between the purchased version—the control pie— and my own creation, a riff of Nina’s Margarita Pie. Scouring the Internet for ingredients of legit maple creemees had confirmed that this was a good master recipe to use as a starting point. Immediately, my group of testers confirmed that the control pie’s waffle cone crust was, as one tester indelicately put it “f’ed up.” It was indeed far inferior to the pretzel crust of Margarita Pie.

Still, it needed some tweaks. My first creation tasted good but, as another tactless tester (this one related to me) noted, “you need an axe to get through it.” Here’s where the science came in. I realized that margarita pie contains alcohol, which keeps it from freezing up like a brick. Adding more whipped cream could also help the pie retain a softer, more utensil-friendly, consistency.

I’ll spare you the details to the entire process, but a stalwart tester, when confronted with the two latest versions, said he felt a bit like Chuck Yeager. He was not far off. When Thanksgiving is this close, every pie matters! We needed something as good as Joni Mitchell Apple Pie, Knock Out Vegan Pumpkin Pie and Pilgrim Pie. And, this being a new player amongst traditional faves, we needed perfection.

Friends, my testers unanimously confirm, we now have it. I offer here maple creemee pie perfection, the clear winner, and a non-alcoholic version as well which is a worthy silver medalist. The use of alcohol, I assure you, is not gratuitous—it’s where good science meets good taste. That said, you can save yourself a trip to the liquor store, use a little more maple syrup and a touch of vanilla, and still have yourself a darned good maple creemee pie.

The constants in both versions: The crust is the bomb! It is equally excellent with regular and gluten-free pretzels. The cream is your structural integrity, so whip it good, until it has very stiff (even jagged) peaks, yet hasn’t turned the corner to butter.

Finally, to my Vegan friends. I failed you on this round. I tried two oat milk fillings, this one with nut butter and this one with cashews. I know there are pros out there who can work their sweet magic with such ingredients (looking at you, Sister A), but not me, not yet. I have not given up, but I need a rest. Sometimes, a girl’s gotta not eat.

One happy side note, is that after all this testing, and knowing that I can get my fix anytime, I really am ok with waiting six plus months for my next maple creemee. But you out there? You’ve got a lot more creemee pie capacity in you. I hope you enjoy this and every other deliciousness on your Thanksgiving table. Holidays, here we come!

Maple Creemee Pie

Prep time: 15mins, plus at least 4 hours freezing time.

Makes 1 yummy pie, or up to 20 mini pies

Ingredients (updated August 2022)

  • 12 cup margarine or butter
  • 14 cup sugar
  • 3 cups pretzels (to equal about 1 14 cups crushed)
  • 1 (14 ounce) can sweetened condensed milk
  • 3 Tbsp maple syrup*
  • ¼ cup maple liqueur* (mine was 30% alc/60 proof)
  • 1 ½-2 cups heavy cream**
  • Optional: Maple sugar candies crumbled on as topping***

*For non alcoholic version, omit liqueur, and adjust to use 1/4 cup maple syrup, or to taste,  plus 1/2 tsp vanilla (optional-Chuck Yeager opts out of it).

** I like the full 2 cups of cream. If you don’t use the liqueur, and boost the maple flavor with more syrup, extra cream is the right call.

*** These are way optional. Veteran testers say leave it alone as is, but one rogue tester notes that the pro pies featured these, and he was enamored by the flourish.

Method

Make Pie Crust:
Melt margarine or butter and combine with sugar and pretzel pieces. Press into buttered 9” pie pan. For the mini versions, line 20 regular sized muffin tins with cupcake liners. Spoon the crust mixture into the cups until it is all used up, then use an empty liner to press the crust in place firmly. Refrigerate or freeze to cool while you make the filling.

Filling: Combine condensed milk, maple syrup and maple liqueur and whisk until it is well incorporated.

Whip the cream until it is very thick and stiff. Fold in the whipped cream as gently as you can until it is fully incorporated. Pour into pie crust and freeze for at least four hours, more to be safe.

Bringing it:

Warm weather travel with this is not recommended, but if you are celebrating away from home, and have the time and space for it to freeze, it is easily assembled on site. Just prep the pretzels first and put them in a Ziploc bag. Portion out the booze and syrup, grab a pie plate and fill a bag with the rest of the ingredients— cream, a stick of butter and that can of sweetened condensed milk that expires sometime this decade. Make the pie right away so it has max time to freeze, and you have max time to put your feet up and prepare to be worshipped.

We can’t all be winners


Pilgrim Pie: When cranberries get nutty

Here’s an idea. Since this Thanksgiving is going to be necessarily smaller, probably weird and definitely unique, maybe we take a different approach. Maybe we bag the turkey and the hassle of all those sides, cut to the chase and make it all about pie.

I know…ain’t gonna happen. Once everybody gets themselves swabbed for COVID before showing up, they’re going to deserve a proper feast for the effort.

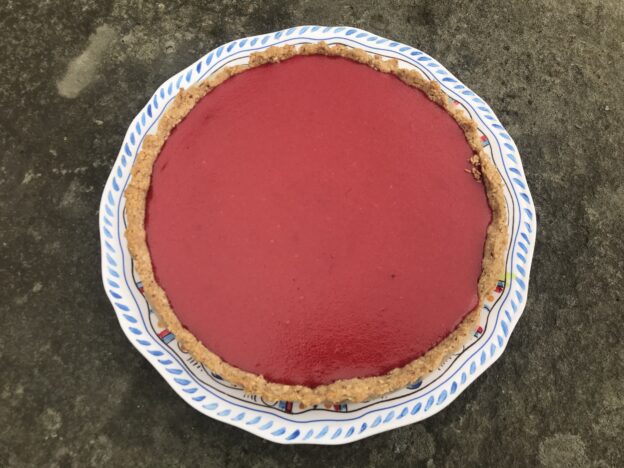
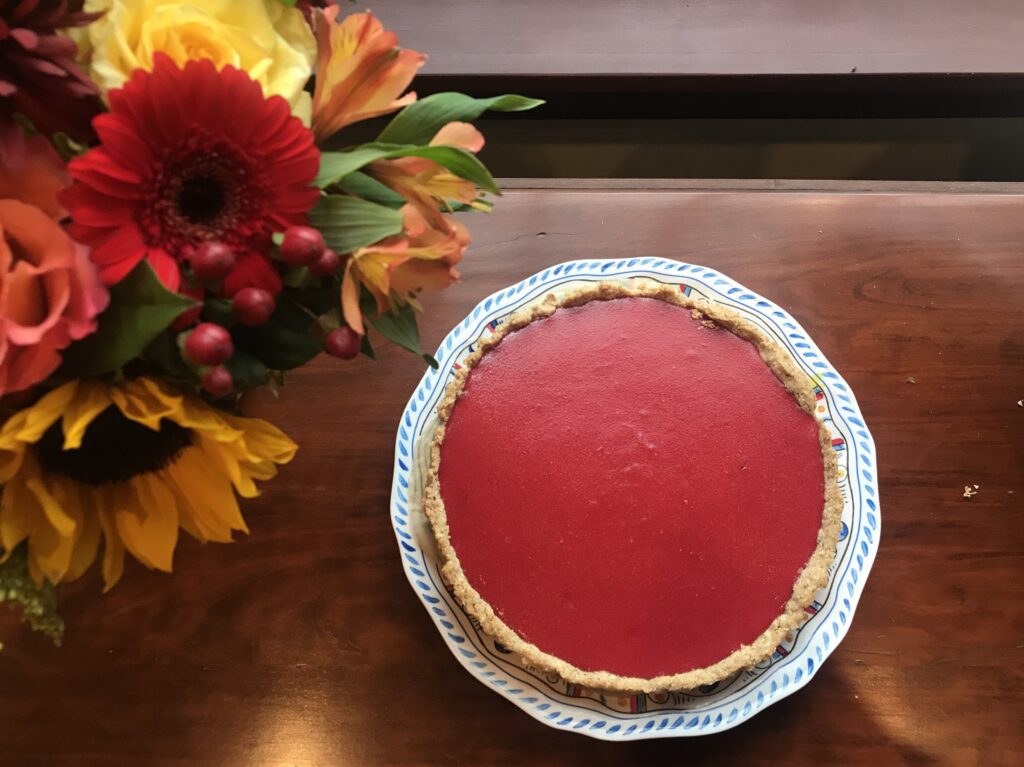
But for some of us, it’s still all about pie. For a new take on it this year, I highly suggest Pilgrim Pie, AKA the cranberry curd tart that has been all over the Internet. It’s kind of like a lemon meringue pie but with cranberries and without the meringue. With the toasted nut crust it definitely becomes it’s own thing.

This version is a hybrid of the one that appeared recently in the New York Times and the one in the Hannaford flyer. It is the best of both recipes. As a bonus, I sifted through the hundreds of comments on the NY Times one (you’re welcome, and…damn those readers have a lot to say!) and assimilated the complaints and suggestions into hacks and options. Because it took me three pies to get a decent photo, I got a lot of practice with all my tweaks.

Bottom line: Make this pie! I know you need pumpkin and apple and pecan and maybe mincemeat for that one person who insists it is edible.  I feel your pain. But I urge you to dig deep. It’s Thanksgiving and we’re all hanging on by a thread. One thing you CAN handle is another pie.

Some notes: The nut crust is what really does it for me. I have tried it as written, with hazelnuts, and also with almonds and a mix of almonds and walnuts. Love the nut you’re with. For a healthier version the pecan coconut crust from knockout vegan pumpkin pie would also be divine, especially if you doubled it and made it super thick like this one.

The filling is strained through a sieve, and you will need a rubber spatula for this. Some rogue commenters didn’t bother straining the filling and said it was just fine that way, so if you’re the rustic type go for it. If you’re going for perfection, do scrape the sides of the pan periodically with that rubber spatula as it cooks, to keep the filling silky smooth .

That’s all. Happy Baking!  

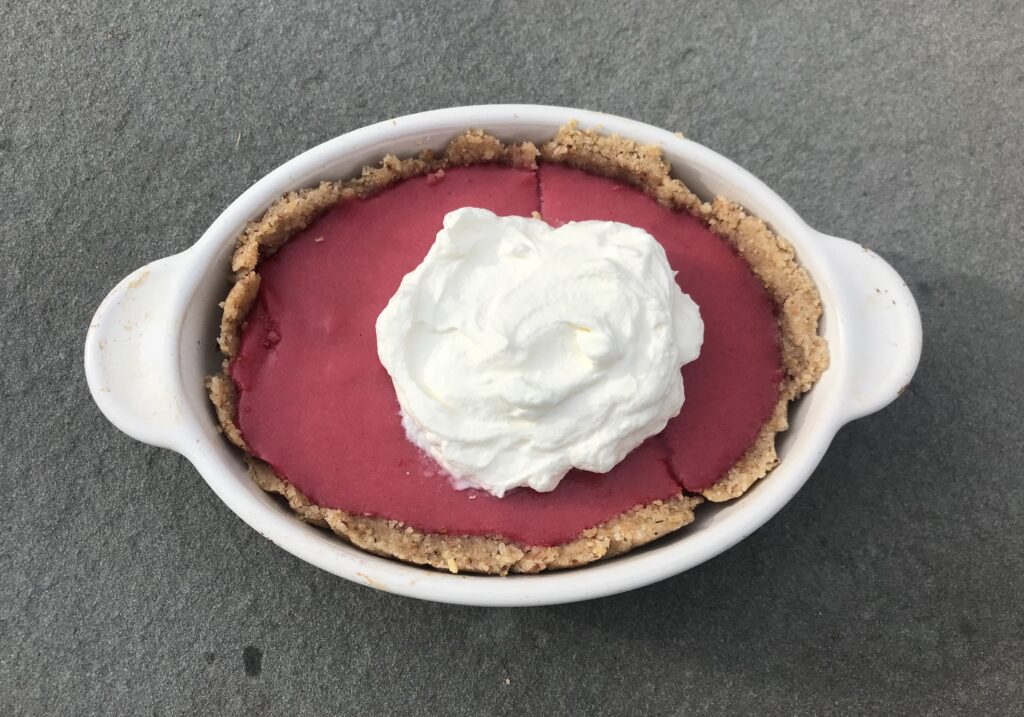
Size matters? Not so much. With pie it’s all good!

Pilgrim Pie

Ingredients

For the nut crust:

  • 1 ¼ cups raw hazelnuts or sliced almonds.
  • 1 cup flour (rice flour to go GF, sprouted wheat flour to be fancy)
  • ¼ teaspoon salt
  • ½ cup sugar
  • 6 tablespoons softened butter

For the cranberry curd:

  • 12 ounces cranberries (~3 cups)
  • 1 cup plus 2 Tbsp sugar
  • ½ cup water
  • 1 tsp lemon zest
  • ¼ cup fresh lemon juice
  • ¼ tsp salt
  • 2 large eggs plus 3 egg yolks
  • 8 Tbsp unsalted butter (1 stick), cut into 8 chunks

Method

  1. Make the crust: Heat oven to 325 degrees. If using hazelnuts, roast them on a baking sheet for 10 to 15 minutes, until skins darken and crack. Put roasted nuts in a clean towel and rub off skins. Discard skins and let nuts cool. For sliced almonds, 10 minutes of toasting ought to do it.
  2. In a food processor, grind nuts. Add the flour and salt and pulse together. Add the cut up butter and pulse until it hangs together when you squeeze a bit of it.
  3. Press dough evenly into the bottom and around sides of a 10-inch tart pan or 9-inch pie dish; Prick bottom with a fork and freeze for 30 minutes (or several days if desired).
  4. Heat oven to 350 degrees. Bake chilled tart shell about 15 minutes until lightly brown. Cool.
  5. While the crust bakes and cools, make the cranberry curd: Put cranberries, sugar, water and lemon zest in a saucepan over medium heat. Simmer until cranberries have popped and softened, about 10 minutes. Puree the cranberries in a food processor until smooth (careful here—they’re hot), wipe out the pan, then strain mixture through a fine-mesh sieve back into the saucepan, pressing on solids with a rubber spatula. Discard solids (or sneak them on toast to bide your time). You can also use an immersion blender to puree the mixture, then strain it into another saucepan.
  6. Combine eggs and egg yolks into a bowl and beat lightly. Slowly whisk 1/3 cup of the warm cranberry liquid into the eggs to temper, then pour eggs into the saucepan and whisk together.
  7. Cook over low heat, stirring constantly and scraping the sides and bottom with a rubber spatula until mixture has thickened and reaches 170 degrees (8-12 minutes if you, like me, can’t find that dang thermometer)
  8. Remove from heat, whisk in butter one chunk at a time until fully incorporated, then whisk in lemon juice.
  9.  If using immediately, let cool to room temperature-ish. If working ahead, cool to room temperature, cover with plastic wrap (press wrap against curd) and refrigerate. (Curd may be cooked up to 1 day ahead.)
  10. Pour cooled cranberry curd into the cooled prebaked tart shell and smooth top with a spatula. Bake at 350 degrees for 10 minutes to set curd. Cool on a rack. Store at room temperature for up to 2 days.
  11. Serve topped with whipped cream.

Variations:

Healthy it up a bit with the pecan coconut crust from this Vegan pumpkin pie.

Sub in orange zest and juice for the lemon zest and juice.

Go nutty and switch out the nuts with whatever turns your crank

That’s about all I’m going to mess with here. It’s darned near perfect.

Squash Season with a side of Pumpkin Muffins

Those cute Halloween pumpkins?  Going, going…gone! It’s time to put them to work. It seems we skipped right over apple season. I know that we didn’t really skip over it. Pies and crisps were made, cider was chugged. But apples did not get their due on Bring It this year. Let’s just blame COVID and move on.

Move right along to squash.  The phrase “too many squash” is never uttered in my kitchen (by me at least). Butternut and denser, drier kabocha squash fill the void left by watermelon at summer’s end, finding their way into my cart every time I go to the grocery store.  This year, I hit the jackpot when a friend shared her bounty of homegrown butternut squash and sugar pumpkins (thank you Carole!), so we’re having a full-on Squashtacular.

To celebrate, I’m sharing a round up of my favorite winter squash recipes, with a bonus new pumpkin muffin recipe at the end. They are my faves by far after way too much experimenting. For me, pumpkin baked goods can be a tough sell, as they usually involve way too much sugar, oil and spice to overcompensate for being vegetable based. They’re like the macho player of baked goods.

BUT, put squash in the savory role, and it becomes something else entirely, something comfortable with itself that doesn’t have to try too hard. It adds body and nutrition and enough sweetness to become its own special treat without dressing itself up like dessert.

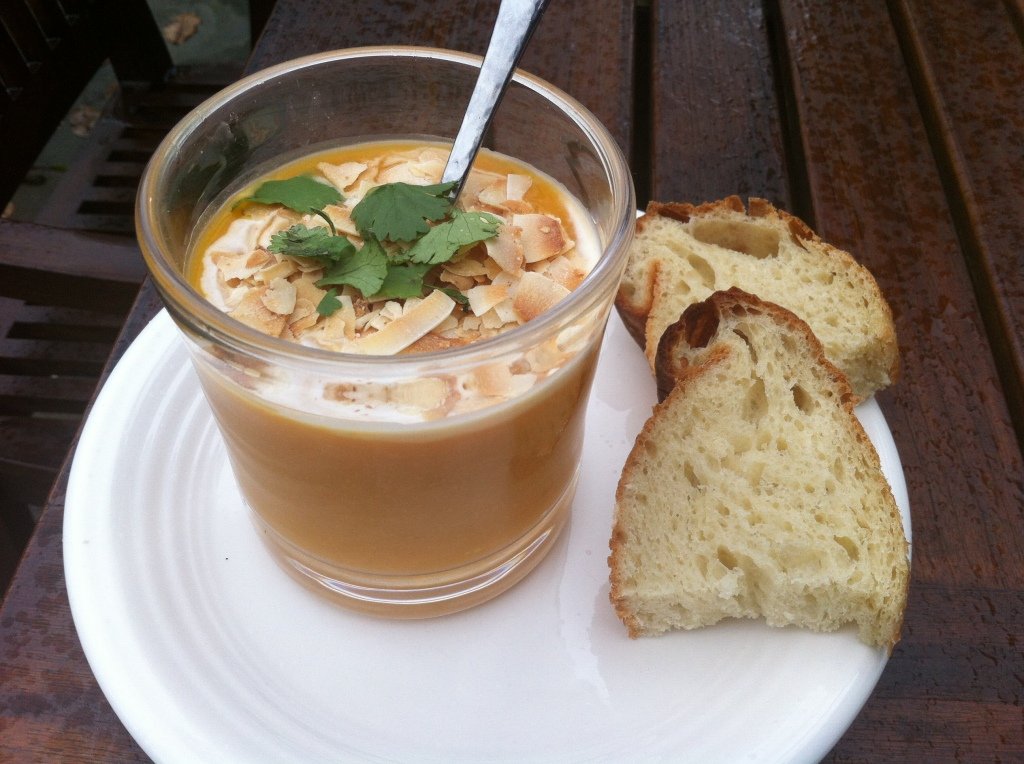
My go-to squash recipes start with the ever-satisfying Sugar and Spice Squash Soup, featuring the brilliant threesome of red curry paste, coconut milk and candied ginger. For an even simpler, an very similar version try almost instant Halloween Soup.

Almost instant squash soup, with pro toppings for extra credit.

For appetizers, you can’t go wrong when you invite caramelized onions into the mix with some butternut squash on toast. Work through your kale supply with the easily made ahead Roasted Squash, Kale and Cranberry salad.

If you’re willing to get a little weird on pizza (or pasta) night, try Butternut Squash Sauce, or an easy, outstanding creamy pumpkin pasta  (a little crumbled bacon on top shuts the doubters right up).

And finally, my baked goods comment notwithstanding, I’ve fallen back in love with Knockout Vegan Pumpkin Pie. It’s all about the crust, which I made with hazelnuts instead of pecans this time. Soooo good. 

If you still have some pumpkins hanging around, fergawdssakes get them into the oven! …and save a bit to try these healthyish whole grain muffins that are proud to be themselves—just sweet enough, moist but not greasy, and only mess up one bowl in your kitchen. Happy November…the countdown is on!

Proud Pumpkin Muffins

Based on these from Cookie and Kate

Makes 12 muffins

Ingredients

  • ⅓ extra-virgin olive oil or melted coconut oil 
  • ½ cup maple syrup or honey (as if…maple all the way baby!)
  • 2 eggs, at room temperature (or 6 Tbsp aquafaba)
  • 1 cup pumpkin (or winter squash) purée
  • ¼ cup milk of choice (plant, animal, whatev)
  • 2 teaspoons pumpkin spice blend (or 1 teaspoon ground cinnamon, ½ teaspoon ground ginger, ¼ teaspoon ground nutmeg, and ¼ teaspoon ground allspice or cloves)
  • 1 teaspoon baking soda
  • 1 teaspoon vanilla extract
  • ½ teaspoon salt
  • 1 ¾ cups whole wheat flour (preferably white whole wheat)
  • ⅓ cup old-fashioned oats, plus more for sprinkling on top
  • Optional: 2 teaspoons turbinado (raw) sugar for a sweet crunch

Method

  1. Preheat oven to 325. Grease or line all 12 cups of your muffin tin.
  2. In a large bowl, beat the oil and maple syrup or honey together with a whisk. Add the eggs or aquafaba, and beat well. Add the pumpkin purée, milk, pumpkin spice blend, baking soda, vanilla extract and salt.
  3. Add the flour and oats to the bowl and mix with a large spoon, just until combined (a few lumps are ok). If you’d like to add any additional mix-ins, like nuts, chocolate or dried fruit, fold them in now. (a heaping half cup chopped walnuts is outstanding)
  4. Divide the batter evenly between the muffin cups. Sprinkle the tops of the muffins with about a tablespoon of oats, followed by a light sprinkle of raw sugar and/or pumpkin spice blend if you’d like. Bake muffins for 22 to 25 minutes, or until a toothpick inserted into a muffin comes out clean.
  5. Place the muffin tin on a cooling rack to cool. These muffins are delicate until they cool down. You might need to run a butter knife along the outer edge of the muffins to loosen them from the pan.
  6. These muffins taste even better after they have rested for a couple of hours! They’ll keep at room temperature for up to 2 days, or in the refrigerator for up to 4 days. They keep well in the freezer in a freezer-safe bag for up to 3 months (just defrost individual muffins as needed).


Lemonpalooza Part Deux and Lemon Almond Pudding Cake

Well hello spring! It finally warmed up enough to unclench the earth, and to make the outside inviting. On cue, enter the black flies. Thank you, New England! Back in the kitchen, the work of feeding the tribe something more than frozen pizza continues. As I was about to embark on finding something to make with the glorious box of lemons from last week, I got a King Arthur email full of pictures and recipes featuring their five favorite citrus recipes. We’re on the same page!

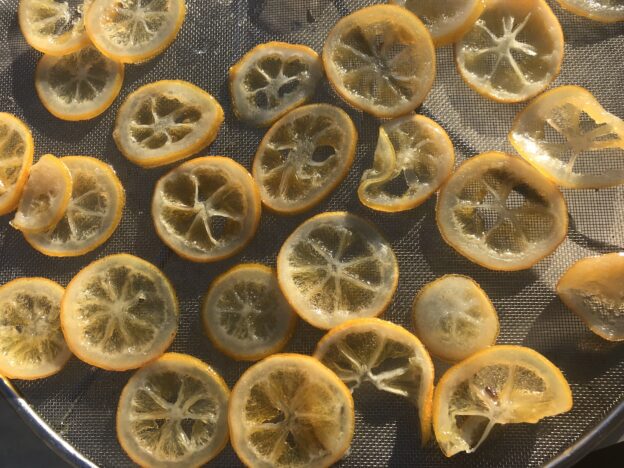
Here’s where we’ve been with my lemons. They’ve gone in tea, of course, and they’ve been thinly sliced to go atop slow baked salmon. They’ve gone in to this spring vegetable Israeli couscous  (hello asparagus and peas!), preserved lemons and for no reason other than flaunting my bounty, I made these candied lemon slices. (I have no idea what to do with them, but they’re hanging in my fridge, looking pretty and ready to roll.)

Come here, my pretty

Rocky Mountain correspondent Tania sent me this recipe for Lemon Tiramisu which looks amazing, but also has too many steps for this particular phase of quarantine. How has going nowhere become so time consuming?

For today’s recipe, I looked for something even easier than Lemon Beach Pie (don’t get me started on this beauty!), something easy and delish. This came from the quarantine recipe club—not the recipe chain letter you may fear, but a weekly newsletter with all kinds of recipes contributed from all kinds of people like us, who are wrassling up vittles for a houseful, with an ever changing list of available ingredients.

Enjoy your Sunday!

Now, THAT’S dessert, or maybe dinner.

Lemon Almond Pudding Cake

Ever so slightly adapted from How Sweet Eats

Ingredients

  • 3/4 cup sugar
  • 1/3 cup all-purpose flour
  • 1/4 teaspoon salt
  • 3 large eggs separated
  • 2 tablespoons unsalted butter  melted and slightly cooled
  • 1 cup milk the original recipe calls for skim, I used whole with good results
  • 5 tablespoons fresh lemon juice
  • 1 teaspoon finely grated lemon zest
  • 1/2 teaspoon almond extract
  • powdered sugar and sliced almonds for topping. Fresh berries wouldn’t hurt either!

Method:

  1. Preheat the oven to 350 degrees F. Spray a 9-inch pie plate with nonstick spray liberally. Or brush it with melted butter!
  2. In a bowl, whisk together the sugar, flour and salt.
  3. In another bowl, whisk together the egg yolks and melted butter. Whisk in the milk, lemon juice, almond extract and lemon zest until combined. Stir in the dry ingredients.
  4. Beat the egg whites in the bowl of your electric mixer until stiff peaks form. Slowly fold the egg whites into the lemon mixture, gently, until combined. Pour the batter into the pie plate.
  5. Bake for 30 to 35 minutes, until set. Top with a dusting of powdered sugar and a handful of sliced almonds and serve.

Get more lemon inspiration at Lemonpalooza Part 1


Holiday Do’s and Dont’s

It’s go time…the last week of shopping and baking and pretending to work before we get completely sucked in to the holiday vortex. In reality, we’re already there, which makes this week of quasi denial even tougher. But you’re here, you’re reading, and you’re definitely thinking of what to make for the neighbors, the party hosts, the UPS guy and your family…in that order.

So, no new recipes this time (because, who really needs another cookie recipe right now?), but I listed a few faves at the end. Others are embedded in these tips and cautions. Good luck my friends, and when you feel like you’re about to snap, just smile and wave.

DO make a whopping batch of Champion Chip Cookies so you’re ready to make someone’s day. DON’T think you’re so smart that you can make them by heart and end up using double the flour.

DO, figure out a few things you enjoy making (crackle, crackers, spiced nuts) and make a whole lot of them. DON’T go long on an untested recipe and end up with a whole lot of mediocre or inedible treats.

DO watch this clinic on deseeding a pomegranate. It will open your world to mass pomegranate consumption. DON’T position your 2 cups of pomegranate arils precariously in the fridge in a poorly sealed container.

Per above, DO keep a lot of seltzer on hand for stains. DO wear the same color you are drinking. DON’T forget the power of aprons.

If you’ve got people with special diets coming, DO make Knock Out Vegan Pumpkin Pie. DON’T go rogue and substitute the pecan coconut crust with a gluten free pretzel crust. Gah!

DO make Guinness Fondue for a cozy evening gathering. Don’t try to pass off this puree of roasted rutabagas and potatoes spiked with nutritional yeast as “fondue”, even in air quotes. That said, DO make up a batch of the above “faux fondue” (air quotes be damned), or of Sugar and Spice Squash Soup, and offer it as a healthy option alongside the real stuff, but DON’T oversell it. Just have it available and you may be surprised how many people appreciate (and dare I say like) it.

Do plan ahead, read through your recipes and check all your ingredients before you dive in. DON’T, realize too late you are missing a key ingredient, or make your treat arsenal when you are hungry. It is astounding how adversely this affects your yield.

DO have a refreshing or comforting drink and get into the spirit by turning on fun music or entertaining podcasts. DON’T Listen to Impeachment hearings. It will not make you jolly.

DO read this cocktail shaking guide, and consider a monster cocktail shaker as a hostess gift. DON’T shake fizzy drinks in a cocktail shaker. Just don’t.

DO divvy it up, vs taking it all on yourself. DON’T be a holiday martyr. Ain’t nobody got time for that!

DO get into the spirit by dressing up in something super fancy or super cheesy. DON’T let your fraternity brother pick your outfit.

The downside of using a personal shopper.

Here are some of my favorite holiday gifting recipes. I promise–they taste best when made with love and a smile.

Healthy and Healthyish

Heart of Darkness Chocolate Cups
Reeses Redemption Cups
Endurance Crackers
Lifechanging crackers
Paleo Crackers
Gingerbread Granola
Seed Bark Granola
NUTS! Like rosemary maple walnuts, honey thyme walnuts, sesame almonds
Triple Crunch Sesame Peanut Snack Bars

Not so healthyish

Crackle
Crackle 2.0
Cheddar Crisps
Champion Chip Cookies
Morning Paper Oatmeal Cookies
Cholliesauce


Trickless Treats: Quick and Clean Chocolate Mousse

Halloween used to be so easy. You scurried around all night, gorged on candy, felt not a twinge of guilt and moved on. Now, it’s more complicated. Candy is not so dandy the morning after. But still, we all want to walk on the wild side on Halloween. Enter healthy treats, for which we turn to our crafty Vegan friends.

Vegan cuisine is rife with creativity. That said, I have no patience for food creations that are called something they’re not. Cashews with nutritional yeast, while it can be tasty, is not queso.  And as my husband sternly pointed out, chickpeas mashed with tahini is NOT tuna salad (though I do love this one).

Along those lines, when it comes to healthy treats, don’t tell me that date paste rolled in peanuts is just like a Pay Day because it’s not. It’s just not. And tofu blended with chocolate chips taste just like, drumroll please…tofu blended with chocolate chips.

But then sometimes you find legit healthy alternatives for your treat fix. For Exhibit A I call up cocoa nutty balls; And Exhibit B: Heart of Darkness cups made here with pumpkin seed butter (because who doesn’t have some of that laying around) which gets extra Halloween points for ghoulish green insides.

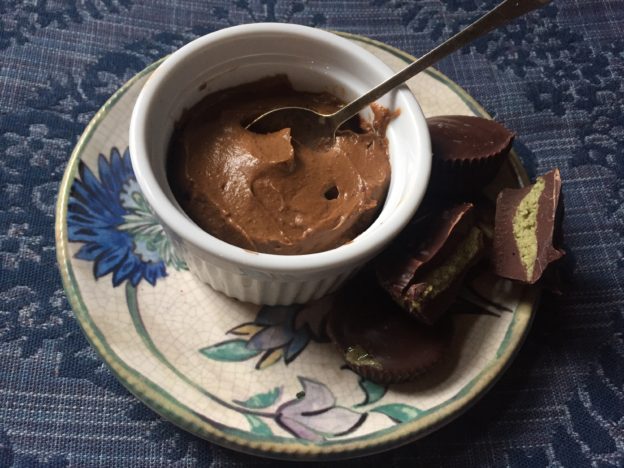
This chocolate mousse/pudding is another win. It was borne of too many ripe avocados, an upcoming trip and that Yankee streak that hates to waste even one bit of a perfectly good fresh produce.

The sheer ease and speed of making it (hello food processor) would be enough to make this a win, but it’s also delish and not one bit bad for you. After all, healthy fats are a thing and maple syrup, in responsible amounts, is like mainlining nature.

If you do want to witness dates and peanuts trying their hardest to be a PayDay, check this out from Minimalist Baker:  

Go ahead—have a treat, or two, and feel damn good about it. Happy Halloween!

Quick and Clean Chocolate Mousse

Total Time: 5 minutes (you’ve got that don’t you?)

Makes 4 servings

From Chocolate Covered Katie

Ingredients

  • flesh of 2 ripe avocados (240g)
  • 1/4 cup regular cocoa powder
  • 1/4 cup melted chocolate chips
  • 3-4 tbsp milk of choice
  • 1/2 tsp pure vanilla extract
  • 1/8 tsp salt
  • 1/4 cup pure maple syrup

Method

Combine all ingredients in a blender or food processor until completely smooth. Pour in four little bowls or one big one, and refrigerate it if you want it thicken up. Dress up if you must and feel 100 percent totally good about yourself.


Nina’s Margarita Pie

It’s 5 pm somewhere. Wait a sec…it’s 5 pm here! That means it’s a perfect time to eat your margarita. It is Sunday after all, and time to reel it in from the weekend.

Today is my mother’s birthday, and she would have turned 85. In her honor, I am posting one of the recipes that makes me think of her. Nina was not a cook by any stretch, but she had some go-tos. This was one of them, for some obvious reasons, of equal import. First, it is easy. Second, it involves margaritas. Third, it is delicious.

This is similar to luscious Lemon Beach Pie, a cold, lemony affair with a saltine crust. On a really hot day, however, this is even better because it involves zero cooking. For those of you techies who own a working microwave, you can melt the butter in that and have no relationship whatsoever with the stove.

There are many versions of this, all good I am sure, including some imposters with a hybrid graham cracker/pretzel crust. They are probably delicious as well, but when it comes to Margarita Pie I’m a purist. It has to be all pretzel. The recipe gives you the option to use Cool Whip or whipped cream. No judgment, but know that it will then be sweeter and, well, Cool Whippy. If that’s your thing, enjoy the convenience.

See notes below for bringing it, and don’t be afraid to say you’ll bring dessert to the next weekend away, IF you have enough time at your destination for it to freeze. When you’re enjoying your pie, give a little smile for Nina and it’ll taste even better.

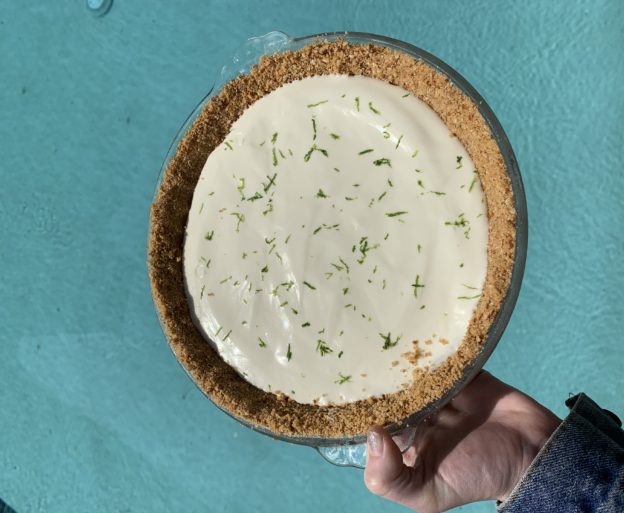
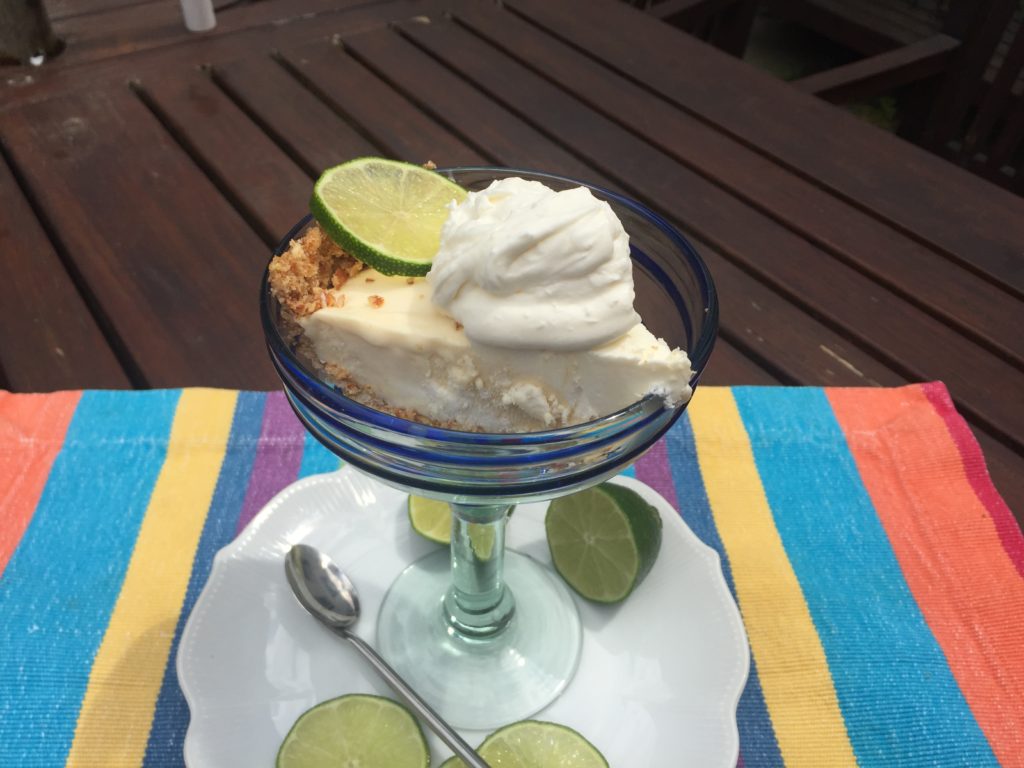
*Special thanks to my fabulous niece Maddie for these pics of actually beautiful pies. That is something I have yet to master (see below, but points for creative styling).

Quite possibly the perfect Sunday supper?

Nina’s Margarita Pie

READY IN: 15mins, plus freezing time.

SERVES: 8

INGREDIENTS

  • 12 cup margarine or butter
  • 14 cup sugar
  • 2 -3 cups pretzels (to equal about 1 1/4 cups crushed)
  • 1 (14 ounce) can sweetened condensed milk
  • 13 cup lime juice
  • 1 Tablespoon tequila
  • 1 Tablespoon triple sec
  • 4 drops green food coloring, green (optional. I say bag it)
  • 1 cup whipped cream (or more. I say more). Cool Whip is also, well, cool, especially if on-site prep space is a challenge.
  • Topping
  • additional whipped cream

Method

Pie Crust:
Melt margarine or butter and combine with sugar and pretzel pieces. Press into buttered 9 inch pie pan.

Filling: Combine condensed milk, lime juice, alcohol and food coloring, if using.
Fold in whipped cream.
Pour into pie crust and freeze for 4 hours.

Bringing it:

Traveling any distance with this is tough in the heat, but low impact assembly on site is easy as long as you can melt butter, whip cream, and get some freezer space on site. Just prep the pretzels first and put them in a Ziploc bag. Portion out the booze, grab a pie plate and fill a bag with the rest of the ingredients—limes, cream, stick of butter and that can of sweetened condensed milk that has been in your cupboard since the moon landing (don’t tell!). Make the pie right away so it has time to freeze and then get yourself a real margarita to celebrate.

The “I want to go to your parties” shot.

Stupid Easy Strawberry Buttermilk Ice Cream

Ok, so here’s a little summer quiz: What did we learn last week, other than the fact that 3-day work weeks rock? Well, careful readers, we learned that this year’s strawberry season was late to arrive but is awesome. We are, in mid-July, only halfway through the heart of strawberry season, which means we will have zero downtime before it’s blueberry season. And all this is overlapping with the greater “ice cream season” (a subset of maple creemee season, which  some people believe should last all year.)

Let me connect the dots here. It’s time to bust out the ice cream maker in your basement. This recipe came to me via Sister B, who lives amidst California’s produce  bonanza. It is, as promised, ridiculously easy, and kind of healthy, or at least not that unhealthy thanks to the buttermilk. It is for sure best with organic strawberries, buttermilk and cream, but also awesome with items from the standard fare at the air-conditioned Nirvana of your grocery store. No need to pre-make and pre-chill the mix, and, if you are feeling very Laura Ingalls, it can be made without an ice cream maker.

It’s summer—no need to prolong this. There are places to go, things to eat. Have a great weekend!

Stupid Easy Strawberry Buttermilk Ice Cream

This recipe is adapted from How To Eat A Peach, by Diana Henry. Our friends like Diana, in Mother England, know a thing or two about strawberries and cream.

Ingredients

  • 18 oz strawberries
  • 1 cup superfine sugar, divided
  • 1 vanilla pod, split lengthways, or 1/2 tsp vanilla
  • 1 3/4 cups buttermilk
  • ½ cup sour cream
  • 1 pinch sea salt flakes

Method

  1. Hull and slice the strawberries. Put them into a bowl with half the sugar and the seeds from the vanilla pod (scrape out the seeds using the tip of a knife. or…dump in the vanilla.
  2. Leave this to sit for about 30 minutes. The strawberries will become soft and exude some juice.
  3. Transfer the fruit with all the juice and the rest of the sugar to a food processor and whizz (God I love the Brits) to a purée.
  4. Push the purée through a nylon sieve (or whatever you’ve got) to get rid of the seeds. Mix with the buttermilk, sour cream and salt.
  5. Churn in an ice cream machine, or transfer to a shallow container and put in the freezer.
  6. If you’re using the manual method, take the ice cream out and churn it – either using electric beaters or by putting the mixture in a food processor – 3 times during the freezing process. Do this first after about 1 hour, when the mixture is setting round the edges, then at 2-hour intervals. (Extra points for wearing a gingham dress during this escapade). Cover with a lid, or with cling film or greaseproof paper, between each churning, and when you store it. Freeze for around 8 hours or until completely firm.
  7. Take the ice cream out of the freezer about 10 minutes before you want to serve it, to allow it to soften slightly.

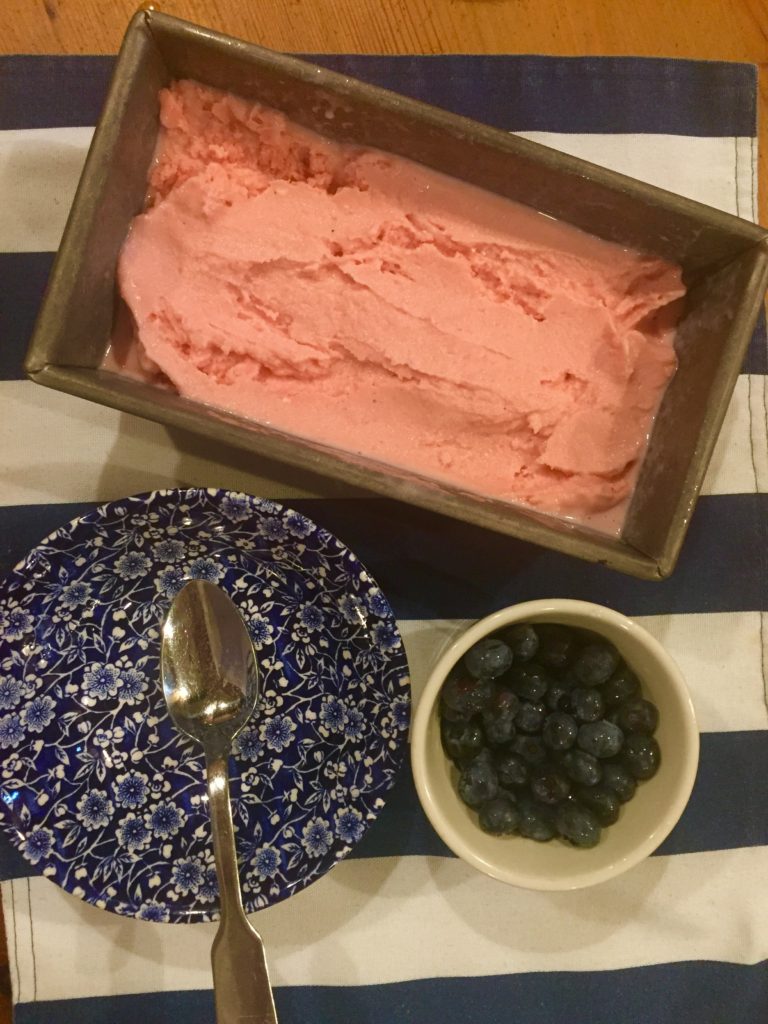
Strawberries, blueberries, ice cream. What is wrong with this picture? Nothing!


If you need something else cold, refreshing and summery to bring to the party might I suggest:

watermelon gazpacho

watermelon sangria

Frose or Frosecco

Lemon Beach Pie


No Guilt Nutella: Chocolate for Breakfast Goes Legit

You say Nutella, I say…ain’t happening for breakfast in this house.

I grew up in a pre Nutella-For-Breakfast world. We had plenty of heinously unhealthy food, like pop tarts and cocoa puffs. But putting frosting on toast and calling it breakfast wasn’t a thing. Even if it happened (looking at you, chocolate Easter bunnies), it wasn’t sanctioned, let alone encouraged.

My kids grew up in a post NFB world, thanks to brilliant marketing from the Italians, who needed a real game-changer to dress up their melba toast and give their people a reason to get up for breakfast. Still, I did not serve Nutella to my kids. That may help explain why they so easily, dare I say eagerly, transitioned to sleepovers, camp and really any opportunity to leave home. There’s no need to get into my reasoning unless you really want a buzz-kill. I think we can all agree that commercial Nutella is not a solid foundation for the most important meal of the day.

But WHAT IF Nutella was made with no added sweeteners, fat or scary ingredients? What if it was made with the holy trinity of healthy treat ingredients—dates, nuts and cocoa—and nothing much else? Now that would be something I could get behind. And don’tcha know, I have. It’s not just for breakfast of course—it’s for any time you damn well please.

No Guilt Nutella soars past the teenage boy test, the teenage girl test, the man test and the “gimme that spoon I just need a chocolate fix ” test. If you are a Nutella connoisseur you will not be fooled by this, but the concept of a chocolate spread you can eat by the spoonful without a shred of guilt or secrecy may win you over nonetheless. Vegans, Paleos and Gluten-free peeps? Yeah, this is your jive too.

As with last week’s treats, your food processor earns its keep making these. It’s pretty foolproof though, as long as you make an honest attempt to skin the hazelnuts* and then process those babies until they really turn to butter. Be patient. It will happen.

No Guilt Nutella

Ingredients

  • 1 cup hazelnuts (or a mix of hazelnuts and almonds)
  • 1 packed cup medjool dates, pitted (or more, see notes)
  • 2 Tbsp water
  • 3 Tbsp unsweetened cocoa powder
  • ½ tsp vanilla extract
  • 1 Tbsp flavorless oil
  • ¼ tsp salt
  • ½ cup almond milk

Method:

  1. Roast hazelnuts at 350 degrees for 20 minutes. Transfer onto a kitchen towel and roll with your hands to remove skins. (no need to remove skins on almonds, if using)
  2. Puree hazelnuts in a food processor for 8 to 10 minutes until a butter forms. Take the time to do it right! You’ll know when you’ve crossed from ground nuts to butter.
  3. Remove hazelnut butter, and scrape out food processor as best you can. Add dates and water. Puree until smooth and creamy.
  4. Add hazelnuts to date paste and pulse a few times.
  5. Add cocoa, vanilla, oil, and salt and blend. 
  6. With food processor running, slowly pour in almond milk. Scrape down the sides and pulse a few times to blend into creamy goodness.
  7.  

Notes

*To completely remove hazelnut skins (for the smoothest possible spread), boil nuts in a pot of water with few tablespoons of baking soda for 4 minutes. Immediately strain and place nuts in ice water for a minute or so, until the skins peel off easily. You still need to roast the nuts to loosen up all the oils and bring out the flavor. Google will not corroborate this, but I find this process takes a little mojo out of the nuts. I prefer the less perfect/more flavorful roasting and rolling technique. You will stain the dishtowel, but such are the sacrifices we make. See here for a THOROUGH demo.

If your dates are hard, or you are using Deglet dates, soak them in warm water for an hour or two before pureeing.

…and furthermore, depending on the sweetness of your dates and the strength of your cocoa, you may need to add more dates at the end to find your sweet spot. 

I swear the notes are done.

Store leftovers in the fridge, and put your guilt in the rear view mirror!

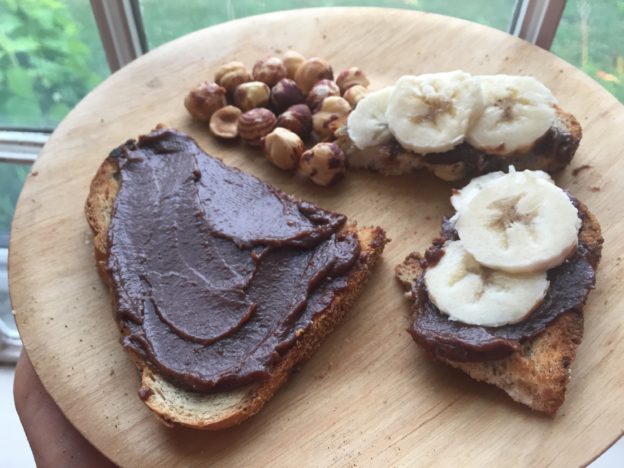
Breakfast in America, reimagined.

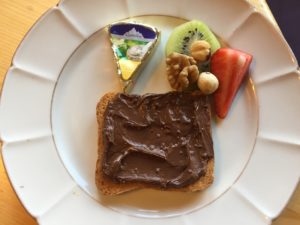
The real thing, at the breakfast table, on the dreaded melba toast, in its homeland.

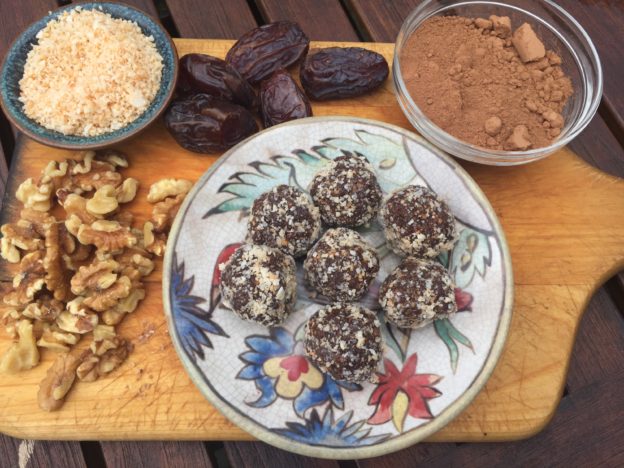
Cocoa Nutty Balls

This is the first of two posts featuring the holy trinity of healthy treat ingredients: dates, nuts and cocoa. Why so holy? If you can get your Vegan, Paleo and Gluten-free friends at the same table, eating the same thing and loving it, there’s some divine intervention going on.

I’m posting them separately so they each get full credit, and you can find them more easily when needed. Both recipes are quick, easy and 100 percent free of added sweeteners, dairy, or grains. This first one is slightly more labor intensive because, well, balls require some care. (sorry, couldn’t resist). Neither recipe requires one bit of cooking, but they both will give your food processor an honest workout.

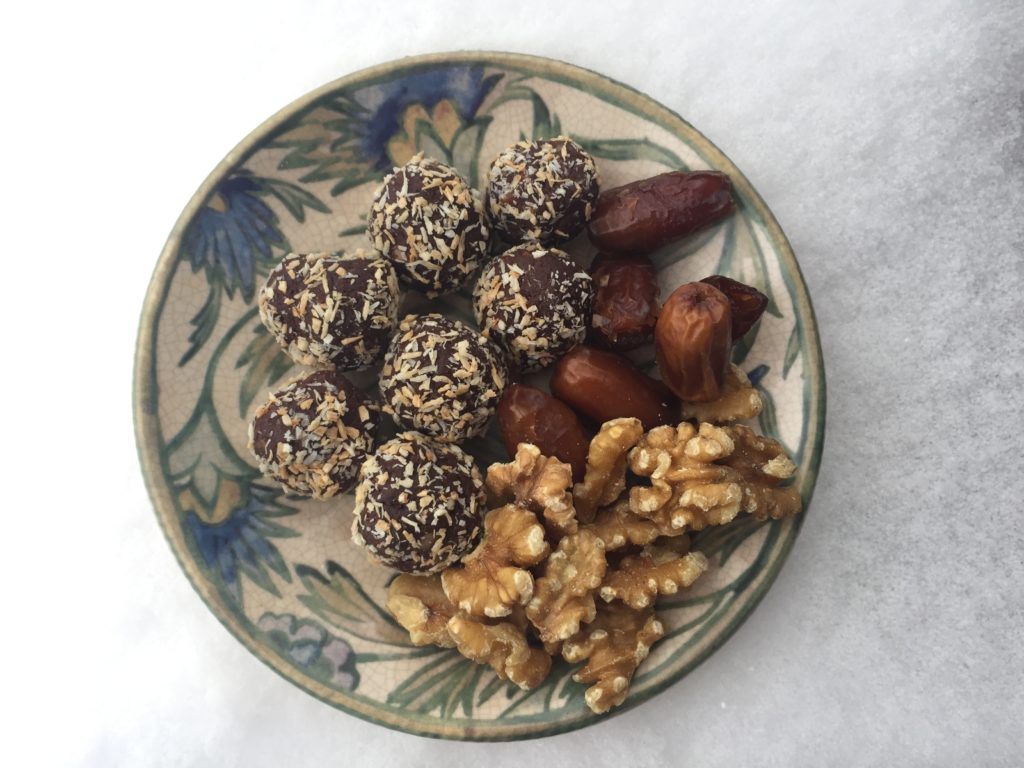
First up, are these cocoa nutty balls. (If you do the highly recommended pro move and roll them in toasted coconut when you’re done you can call them coconutty balls. See how that works? ) These are well known and loved in the paleo world and for good reason. They get sweetness and smoothness from dates, heft and texture from walnuts and chocolatey goodness from cocoa. The pinch of salt gives them some sass and the optional coating lets you add your own customized cha-cha.

But wait there’s more! These can hang out in the freezer until you need them. They transport well for hiking, picnics, lunchboxes, road trips or any eating on the fly. I offered these to a bunch of burly ski racers between their runs and they inhaled them. Either the lodge had run out of cheeseburgers or they actually liked them. I hope you’ll like them too!

Cocoa Nutty Balls

Ingredients

  • 1 1/2 cups walnuts (or a mix of walnuts and almonds or skinned hazelnuts*)
  • Pinch of salt
  • 1 cup pitted dates (Medjool if you can. Deglet if you must)
  • 1 tsp vanilla
  • 1/3 cup unsweetened cocoa powder
  • (Optional for pro version) Toasted unsweetened coconut—or whatever added crunch you like—for coating.

Method

Add walnuts and salt to a blender or food processor. Mix until the walnuts are finely ground.

Add the dates, vanilla, and cocoa powder to the blender. Mix well until everything is combined. With the blender still running, add a couple drops of water at a time to make the mixture stick together. (If it really won’t stick together in a ball, add another date or two)

Slacker version: Using a spatula, transfer the mixture to a small (8″x 8″) pan and smoosh it flat, sprinkle optional topping/coating evenly on top and press it into the surface. (A layer of parchment paper makes this easy.) Let cool in the fridge and cut into whatever sized bites or bars you want. 

Semi Pro Version: Transfer the mixture into a bowl. Using your hands, form small round balls (I aim for walnut sized), rolling in your palms. They’ll come together and feel a little greasy, making them perfect for the…

Pro Version: Toast raw coconut flakes or shreds in a 350ish degree oven a few minutes (until just golden) and let them cool. If flakes, whirl them in the food processor until finely ground, but not yet buttery. Add a pinch of salt is that’s your jive (it’s mine).** Remove the blade from the bowl and drop in three or four balls at a time, rolling them around to coat.

You can store bars or balls in an airtight container in the refrigerator for up to a week or the freezer for a looooong time.

*Skinning hazelnuts will be fully discussed in the next post. If you just can’t wait for this fascinating discussion (I know, you’re only human) check out this treatise on the topic.

**store leftover toasted coconut in a jar to sprinkle on yogurt, oatmeal, fruit, etc.

Just us fruits and nuts here, keeping our cool


Heart of Darkness Chocolate Cups

Come to the dark side, for the good of your heart and soul.

I hit the food stash jackpot, when Sister A rolled into town with a carry-on full of Trader Joes nuts. I already had a decent stash of raw walnuts and almonds, but she brought in the exotics: pecans, pistachios, pepitas, cashews, macadamias. My pre-holiday ship had come in!

This happy event coincided with the other fortunate circumstance of having a lot of really good dark chocolate on hand. It’s not a huge leap to imagine what happened next. Yes my friends, I had a Reese’s ah-ha moment. Maybe I could make a slightly more mainstream yet totally healthy version of Reese’s Redemption Cups.

The revelation here is homemade nut butter, ever-so-gently spiced up, but not sweetened…and dark chocolate…and a pixie dust sprinkling of flaky salt, but only if you dare. Dark chocolate is just plain better for you than a whole lot of un-fun things, and when the health police serve up an opening like this you run through it!

The below list of directions is daunting, but basically you are doing this: Making nut butter by roasting raw nuts and whirring them in a food processor with cocoa, cinnamon, vanilla and salt. Then you are melting chocolate, pouring a bit in the bottom of lined mini muffin cups, adding a blob of nut butter then spooning more chocolate on top of the whole shebang. With that vision, read on bravely, and know that you will end up with something delicious no matter what it looks like.

Don’t over think this one. Just make up a bunch when you’re feeling it, and enjoy them as needed. You will not regret having this stash on hand.

Heart of Darkness Chocolate Cups

Adapted from betterwithcake

Makes 14-16 mini cups of joy

First, you’ve got to make your nut butter. See below. From there it’s just a matter of melting chocolate. Again, whatever darned chocolate you feel like. The darker the chocolate, the higher percentage the cocoa, so the slower it will melt and the more temperamental it will be to work with. If you’re going way dark, add some coconut oil. You can also use vegetable oil, but it will thin the chocolate more and you will have fallen off the superfood wagon. Don’t worry. You won’t be lonely there.

Ingredients

  • 1/2 cup or so of homemade, chocolate hazelnut almond butter (or store bought chocolate hazelnut butter if you must. The texture will be gooier)
  • 1 bag (10-12 oz) good quality dark-as-you-dare chocolate chips, Vegan if needed.
  • 2-3 tsp coconut oil (optional, but it makes your life easier)
  • Flaky sea salt
  • Optional toppings of choice: toasted shredded coconut, finely chopped toasted nuts, dried fruit, crushed peppermints, leftover candy corn, etc, etc, etc. 

Method:

Line a mini muffin tin with 16 paper or silicone liners.

Melt chocolate, with coconut if you are using, by your preferred method. I do mine in a small, retro double boiler over simmering water. If you are among the tens of millions of people with a working microwave, you can try that method.

Use a teaspoon to drizzle some melted chocolate into each the muffin liner. Don’t use all your chocolate; save at least 1/3 of it to spread on top once your chocolate cups are filled. Adjust the number of cups you make accordingly.

(At this point, if you are making big cups (not mini), or if you going for perfection, put them into the freezer for a few minutes to set up. If using mini ones, you’re good to keep going.)

Drop a very scant (ideally a slightly flattened oval) teaspoonful of your nut butter into each cup (if you went pro and froze the first layer then go ahead and press down on the nut butter to level it).

Once all your cups are filled with the nut butter, use your designated chocolate spoon to cover the filling with the rest of the melted chocolate. Give the cups a sprinkle of salt and/or your garnish of choice and place them into the fridge to set, or the freezer to store longer term. They will keep in the fridge for several weeks and in the freezer for 3-6 months. Riiiiiiight.

Chocolate Hazelnut Almond Butter

The not very perfect but oh so delicious cross-section

~Vegan, Dairy Free, Paleo Friendly, Shazaam!

The beauty of this nut butter is that it’s easy, and the spices add cha-cha without any sweeteners. I go with cocoa and cinnamon but you can do a chai spiced one with cardamom, or a chile spiced one. Get creative and dream big here people. Once you’ve got the nut butter made you are totally set up for success.
Makes approx 2 cups of pretty darned healthy chocolate-hazelnut almond butter. This is way more than you need for a bag of melted chocolate chips, so you’ll be enjoying this on apples and toast, in smoothies and sandwiches, etc.

Ingredients –

  • 1 cup of raw almonds
  • 1 cup of raw skinless hazelnuts* (or use all almonds or sub hazelnuts with raw cashews or macadamias)
  • 1 Tablespoon of vanilla bean extract
  • 1 Tablespoon of cocoa (or cacao if you’re fancy)
  • 1/2 teaspoon of salt flakes

Method:

Preheat your oven to 350

Line a large baking sheet with baking/parchment paper (or a non stick silpat mat) and pour your raw nuts on, making sure they are spread evenly and not crowded.

Roast your nuts for 10 mins, until lightly roasted and slightly golden.

If you are unable to get skinless hazelnuts you’ve got an extra step here. roast them on a separate tray and once they are roasted, place on a clean dry hand towel and fold it in half. Rub it gently between your hands and the skins should come loose. Once the hazelnuts have shed their skins, discard the skins and proceed with the recipe as normal.

Pour your roasted almonds and hazelnuts into the bowl of your food processor or blender and process until smooth and creamy (or your desired consistency). It takes a minute or two to transform from ground nuts to creamy butter. Stop and scrape down the sides of the bowl occasionally as you go.

Once you’ve gotten the desired consistency, add the salt, cocoa (or cacao, whatev) and vanilla then process until combined.

Taste and adjust flavors accordingly – this is where you make you’re personal statement, adding extra salt or vanilla or maple syrup or whatever floats your boat. You can also lube it with a bit of coconut oil if you like.

Scrape that deliciousness into an air-tight jar and keep it in the
fridge for several weeks.

Bringing it:

My suggestion here is to keep a stash of this nut butter at the ready, and then, whenever you have a window of time and some extra chocolate lying around, make up some of these. With a stash of them in the freezer you are never without a healthy dessert, a peace offering, a hostess gift or just a little love bomb of chocolate.


Loosey Brucey’s Strawberry Rhubarb Crisp

From the rhubarb patch to the kitchen, with a little magic and a whole lot of forgiveness.

If you need exact recipes, do not read any further, because this recipe will irk you. If you can tolerate significant looseness with your dessert creations, read on.

Today we have strawberry rhubarb crisp, because if you don’t have a rhubarb patch, somebody you know probably does and it is time to take it down!

This one comes from Pierce’s Inn, more specifically from innkeeper Bruce Lingelbach’s head as he guides pinch-hitter food preppers in the kitchen. His instructions range in specificity based on food type and his degree of recipe ownership. They fall on the spectrum of extremely loose (fruit crisps you can’t possibly screw up), to highly specific yet humorously delivered (7 millimeter thick slices and the spread must completely cover the toast), to intentionally vague as when he is guarding a secret recipe (don’t mess with Bruce’s chili).

I love this recipe because, along with being seasonal and delicious, it is among the loosest, with easy to remember, even proportions that can be grown and shrunk without higher math skills. If there is any wavering on amounts, Bruce will shrug and say, “Who ever complained about too many strawberries? …or maple syrup/crumb topping, etc. The crumb topping would work with whatever berries or softish fruit you have on hand, and the process could not be easier. It’s all about filling a dish with fresh berries, pouring molten rhubarb over it, then topping it all with your crisp mixture and baking it. Best of all, it requires no more than a baking dish and a pot.

This recipe is really more about process than exact amounts or baking time. The amounts here are good for a big 9” x 13” baking dish, and you can adjust according to the size of your dish. (Up it to 2 sticks butter, 2 cups of all else. Downsize it to 1 stick butter, 1 cup of all else. You’ve got this!) The recipe, like Bruce, is mighty forgiving, and also lends itself to special diets. Use gluten free oats and flour mix for the GF’s, and Vegan butter sticks for the Vs. No special diets? Then go for it and toss in some chopped walnuts or almonds.

The only place I freelanced on this was by adding a bit of salt to the crisp and a hefty squeeze of lemon to the cooked rhubarb because, “who ever complained about a dash of salt or fresh squeezed lemon?”

Pierce’s Inn Strawberry Rhubarb Crisp

Ingredients:

For the fruit:

  • 2 pounds strawberries
  • A whole lot of rhubarb (5 stalks or more) cut into 1-inch pieces
  • Big slug of maple syrup
  • ¾ cup sugar
  • Juice from half a lemon (optional)
  • 1 tsp vanilla

For the topping:

  • 1 ½ sticks (12 Tbsp) butter, melted or very soft (Pierce’s uses only Kate’s Sea Salted. See Bruce’s comment below)
  • 1 ½ cups brown sugar
  • 1 ½ cups oats
  • 1 ½ cups flour
  • ½ tsp salt (optional)
  • roughly chopped nuts of choice (optional)

Method:

Preheat oven to 350.

Cut the rhubarb into one-inch pieces, put into a pot with sugar and maple syrup. Give it all a stir and turn it on medium high so it gets bubbling along. Let it cook for 20 minutes or so, until rhubarb falls apart when stirred. Give it a taste for sweetness and add some sugar or syrup if desired.

Meanwhile, quarter the strawberries directly into baking dish. When rhubarb is done, remove from heat and stir in the vanilla and lemon juice. Pour molten rhubarb over the berries and give it all a stir.

In the rhubarb pot you have rinsed or wiped out, melt the butter and combine with the rest of the ingredients. Distribute evenly across the fruit and bake.

Of course there is no exact time, but give it a solid 30 minutes before checking. It should look, well, awesome— golden brown on top with sweet red lava of goodness bubbling up. Let cool a bit before serving. If made ahead, gently rewarm before serving.

Top with vanilla ice cream or whipped cream…because whoever complained about too much of that?

Snow Day Lemon Mousse

Light and fresh, like the snow we dream about!

This comes straight outta Steamboat, from Rocky Mountain Tania, who describes this lemon mousse as, “Amazing. Easy, light and such a counter balance to heavy winter food.”  Tania says she’s  embarrassed how much she makes this, but who in the world would be embarrassed by this thing of beauty?

The coolest thing about it is that it involves fresh snow. I just got back a trip west, where there is plenty of that, and I have high hopes that the return of cold temps to the east this week will bring some of the white stuff here as well. To all of you who are wishing for the opposite…C’mon man! Just give us one more month. Then we can all feel good about the meltdown.

Chilled Lemon Mousse

Adapted from Cook’s Magazine, with full photo, recipe and commentary credit to food and photo sensei Tania Coffey.

You will need:
A one quart soufflé dish (or any 1-1½ qt serving bowl)
A Kitchenaid with whipping attachment (or this recipe could be a real pain)
snow (or a good ice-maker) to put in a big bowl for chilling custard quickly

Ingredients:

  • Juice from 3 lemons (1/2 cup)
  • Zest from one lemon (3 tsps)
  • 1 packet (1/4 oz) gelatin
  • 1 cup whole milk
  • 3/4 cup sugar divided*
  • 2 large egg yolks (3 small) plus 5 large egg whites at room temperature
  • 1/4 tsp cornstarch
  • pinch cream of tarter
  • 3/4 cup heavy cream chilled
  • mint, raspberries or finely chopped pistachios for garnish

Method:

Leave eggs out for a couple of hours to bring to room temperature.
Zest one lemon
Add zest to the 1/2 cup of lemon juice and sprinkle pack of gelatin over juice.  Stir and set aside to soften.

Heat milk and 1/2 cup of sugar in a medium saucepan over medium-low heat.
stir occasionally until the sugar dissolves (5 min)
Meanwhile, whisk together the yolks, 2 Tablespoons sugar and the cornstarch in a medium-large bowl until pale yellow and thickened.
Whisking constantly slowly add the hot milk to the yolks (a rubber bottomed bowl is so great here so it doesn’t move while you are whisking and pouring).
Return the egg yolk-milk mixture to the pan and cook over medium low heat, stirring constantly until the foam dissipates to a thin layer and the mixture thickens to the consistency of heavy cream (185 on an instant read thermometer).  About 4 minutes. Do not over cook here or it will get lumpy or worse.

Pour the mixture into a medium-large bowl (I use the already dirty one) and add the lemon/gelatin mixture and stir.

Chilling’ in the snow. Sooooo cool!

Set the bowl in a larger bowl of snow (sorry, if you don’t have fresh snow ice water works well).  Stir occasionally to cool.

While the custard is chilling crank up the Kitchenaid with the whipping attachment.
Beat the egg whites and cream of tarter at medium speed until foamy (1 minute)
Increase speed to medium high.
*Add 2 Tablespoons of sugar (I usually skip this addition because I like the mousse super tangy not sweet) and beat until glossy and the whites hold soft peaks.
Don’t over beat.

Remove custard from snow/ice bath.
Gently whisk in one third of the egg whites.
Then fold in the remaining whites with a rubber spatula.

In the same mixer bowl (don’t bother cleaning it) beat the cream on medium high speed until soft peaks form when whisk is lifted (2-3 minutes).
Fold the cream into the custard/egg white mixture until no white streaks remain.

Pour into a 1 quart soufflé dish (or any 1 1/2 quart serving bowl).  Refrigerate.

For best texture chill for 1-2 hours

Garnish as desired. PS. This recipe makes you look like a pro—try it quickly!

Squaw Valley USA, a looooong way from meltdown.

Morning Paper Oatmeal Raisin Cookies

The oatmeal cookie lid: one of many ways to keep warm this winter.


One of the greatest sources for food and drink recipes is the Wall St Journal. Who knew? Really, cocktails are their sweet spot, but they have a sophisticated spin on pretty much everything. Consequently, you don’t find a lot of cookies there, but when you do, you know they’re going to be good.

These cookies delivered, and turn out to be somewhat addictive, even for someone who is not a huge oatmeal raisin fan. It may have been the overdose of cinnamon, or the salt, or the plumped up raisins. It probably had little to do with the oats, but you never know. They even passed the suspicious kid test. 

I waited a long time to post these because the recipe, when strictly followed, asks you to leave the dough in the fridge for four days. Four DAYS. This is really handy for those tough Monday afternoons when you say to yourself, “Boy I feel like a warm oatmeal cookie…on Friday.” Needless to say, I have made many batches of these, and it took until today to achieve the recommended four day incubation.

Was it worth the wait? I did indeed notice the flavor was even better than the young, unseasoned cookies. BUT they are also really good with a one day rest, and even a zero day rest. I will leave the waiting up to you.

A few notes here: The mixer with the paddle attachment is real, as is the extra large egg. This dough is pretty crumbly, so pro mixing and the extra bit of egg both help. If you only have large eggs, just beat up another one and add a bit of it in. Then have yourself a hearty ¾ egg omelet or cook it up and add it to your salad. Or, if you are not pathologically averse food waste (as I am), just put it down the drain.

On cookie size: The original calls for a ¼ cup scoop. Those are massive cookies. I prefer to make mine golf ball sized and smoosh them as suggested, with a bit of parchment paper.

On refrigerating: It says to scoop them first. If you don’t happen to have that kind of real estate in your fridge, refrigerate the batter in a bowl and scoop just before baking.

Finally, on cooking time: 14 minutes was about right for my normal sized cookies, but start checking them at 12. Err on the side of underdone and they will firm up a bit as they cool.

Oatmeal Raisin Cookies

From Adapted by the Wall St. Journal from Sadelle’s, New York City.
Active Time: 10-15 minutes
Total Time: 1 hour, plus 4 days for chilling dough
Makes: 14 massive cookies. Or wayyyy more normal sized ones.

Ingredients:

  • 1 cup raisins
  • 1¼ cups all-purpose flour
  • 1 tablespoon plus 1 teaspoon ground cinnamon (yes this is a lot, and it is key!)
  • 2 teaspoons baking soda
  • 1½ teaspoons fine sea salt
  • 1½ sticks slightly softened butter
  • 1 cup light brown sugar, firmly packed
  • 6 tablespoons granulated sugar
  • 2 cups old-fashioned or rolled oats
  • 1 extra-large egg
  • 1½ teaspoons vanilla extract

 Method:

  1. Soak raisins in hot water for 30 minutes, then drain.
  2. Meanwhile, in a small bowl, sift together flour, cinnamon, baking soda and salt.
  3. Using an electric mixer fitted with paddle attachment, cream together butter and sugars on medium speed until light and fluffy, scraping down frequently. Take care not to overbeat.
  4. Add flour mixture to creamed butter and sugar and mix on low speed until combined. Mix in oats, followed by drained raisins, egg and vanilla.
  5. Use a ¼-cup measure to scoop dough onto a parchment-paper lined baking sheet. (See note above. Golf ball sized makes a regular-sized cookie.) Flatten each blob with base of measuring cup or your hand and a square of parchment paper. Cover baking sheet with plastic wrap and refrigerate 4 days (optional).
  6. To bake cookies: Preheat oven to 350 degrees. Bake until cookies are golden-brown on the outside but still soft in the middle, about 17 minutes (12-14 for smaller cookies). Remove from oven and let rest on baking sheet a few minutes, then transfer to a rack to cool.

A whole plate of yum, looking a little funky with a filter.


Salted Peanut Butter Cookies: Gluten-Free and Mini-Mart Sourced

Gluten-free, marmot approved.

Gluten-free, marmot approved

Here’s a hypothetical situation. It’s Christmas Eve, you gave away all your homemade cookies (if you happen to have made them in the first place), and you just found out Santa (or a guest) is gluten-free. There’s no way you’re going to the grocery store for special ingredients but you may be able to pull off a mini mart run. What if all that happened? What would you do?

You would make these cookies.  These are barely adapted from Smitten Kitchen who got them from the Ovenly cookbook. It’s the gift that keeps on giving. Here’s hoping you don’t need these tonight, and you stay clear of mini marts, but in case of emergency, you’re covered. Have a good one all, enjoy your people, and see you on the other side!

Salted Peanut Butter Cookies

Yield 26 to 28 cookies with a 1 2/3 tablespoon or #40 scoop.

  • 1 3/4 cups (335 grams) packed light brown sugar
  • 2 large eggs, at room temperature
  • 1/2 teaspoon vanilla extract
  • 1 3/4 cups (450 grams) smooth peanut butter (see note at end)
  • 1 cup (or so) of your favorite chocolate chips (optional)
  • Coarse-grained sea salt, to finish

Preheat the oven to 350°F. Line a rimmed baking sheet with parchment paper.

In a medium bowl, whisk together the light brown sugar and eggs until smooth. Whisk in the vanilla extract, then the peanut butter until smooth and completely incorporated; you shouldn’t be able to see any ribbons of peanut butter. Stir in chocolate chips, if desired.

Scoop or spoon the dough into balls — from a heaping Tablespoon to monster 1/4 cup sized. Place on prepared pan. For the tallest final shape, place the tray in the freezer for 15 minutes before baking.

Sprinkle the dough balls lightly with coarse-grained sea salt just before baking. Bake smaller cookies for 14 to 15 minutes and larger for 18 to 20. When finished, cookies should be golden at edges. They’ll need to set on the sheet for a minute or two before they can be lifted intact to a cooling sheet. With any luck Santa hits your house late enough to let them cool completely so the crispy outside/soft inside thing can really happen. 

Do ahead: You can make the dough in advance and either refrigerate it for a couple days or scoop out the cookies, freeze them, then bake them right from the freezer.

About chilling the dough: You can scoop and bake the cookies right away, but they keep their shape better if you chill them in the freezer for 15 minutes first.

Blueberry Dutch Bunny

Blueberry Durch Bunny

Fresh from the field and hot from the oven.

Sometimes you just get lucky. Friday was my day. I took a flyer and called Super Acres in Lyme to see if they were open for blueberry picking and learned it was opening day. Hallelujah! If you’ve never been to this PYO paradise it’s an Upper Valley rite of summer, and well worth a trip up River Rd.

Blueberry pints

The fruits of your labors

I coerced a friend— Super Acres newbie— to make the trek and he was suitably impressed.  This is not tedious, back-breaking work in a scorching field (I’m looking at you, strawberries). These are grassy rows of high bushes laden with so much ripe fruit that you can pick them like grapes. Somehow you can always seem to find a shady spot. Sheer brilliance! In about a half hour we easily picked four lbs each, without even taking a rest in the Adirondack chairs. Berry picking is about digging deep.

Super Acres provides picking buckets and pint baskets, though the pros bring their own giant Tupperware to make their pies and fill their freezers at home. Despite my aspirations, the allure of fresh berries is too much to resist in our house, and I have yet to freeze a single blueberry.

As for what to make, I had been angling for an excuse to make a blueberry version of Dutch Bunny, inspired by a recipe in Yankee magazine. Dutch Bunny (known outside my household as Dutch Baby, Sunday Pancake and Swedish Pancake) is my go-to weekend breakfast when I’m aiming to win friends. (Lifelong friends have been made over the magical emergence of Dutch Bunny on a vacation morning. True story) It’s hard to imagine a dish that is easier, more impressive or more appreciated by a houseful of guests.  Baking fresh blueberries into the whole shebang takes it over the top.

This is simply my standard Dutch Bunny recipe with fresh blueberries added to the mix. I linked you up but this saves you the trouble of hunting. You need your strength for blueberry picking.

Yield: Serves 4, or one hungry teenager.

 Ingredients

  • 3  Tbsp butter
  • 3  large eggs
  • 3/4  cup  milk
  • 1/2  tsp vanilla
  • 1/2  cup  all-purpose flour
  • 2  Tbsp sugar
  • 1/8  tsp salt
  • 1/2-3/4 cup fresh blueberries
  • Powdered sugar and fresh lemon wedge for topping
  • Whipped cream for topping, optional

 Method

  1. Melt butter in a 10-inch ovenproof frying pan over low heat. Remove from heat.
  2. In a large bowl or blender, beat or whirl eggs until light and pale. Beat or blend in milk, vanilla, flour, sugar, and salt.
  3. Pour batter into prepared pan and sprinkle blueberries on top (they will plop and sink—it’s all good).
  4. Bake in a 425° oven until pancake is puffed and lightly browned, 15 to 20 minutes.
  5. Dust with powdered sugar and squeeze fresh lemon on top. Slice into wedges and serve immediately.

Top with more berries, and whipped cream is you’re feeling it.

If you’re in the Upper Valley and want to visit Super Acres, it is located at 722 River Rd, north of Lyme. For more info call the hotline at (603) 353-9807. Unsprayed and awesome blueberries are $3/lb at the self-serve slot. Do the right thing and round up if you’re belly hurts from all the sampling. Oh, and it wouldn’t be a crime to save some room for a little detour to Whippi Dip in Fairlee on your way home.

Thanks to Olivia the great for her awesome pictures!

Super acres-kisk

Weighin’ and payin’ on the honor system.


Lemonpalooza

On-pillows-light

California Dreamin’ on Such a Winter’s Day

Lemonpalooza: n. a celebration of all that is warm, bright and tangy; hope in the home stretch of winter; antidote to a common addiction amongst native Californians and Floridians; yum.

As I was packing a shoe box of Meyer lemons in to my checked baggage, my sister suggested: “You need lemon rehab.” A day earlier I had packed a flat rate priority mail box with lemons and had just returned from the home tree with another batch. Earlier she had bottled a batch of lemon syrup for me, and the lemon possets for dessert were cooling in the fridge. Gnawing on the peel of a juiced half lemon (dentists everywhere are recoiling) I nodded. “You might be right.”

But there is no kicking this addiction. As I boarded my plane back to NH I could not help but have a pang for every Meyer lemon left unpicked in the family tree and in the entire Bay Area megalopolis. I take solace in knowing I did my best.

Here’s a small sampling of how those lemons will be worshiped this week:

The first recipe comes from “The Lemon Cookbook” (of lemon cauliflower couscous fame) which I gave to my sister. The book’s chicken and toasted bread salad has been among their family’s Bring-It staples ever since. It’s sturdy, hearty, delicately and boldly flavored (can that be? Yes, oh yes!) with co-roasted lemons and shallots. And here’s the real kicker—it’s even better the next day.

The ease of rotisserie chicken notwithstanding, reading and re reading all the steps makes the entire recipe a pain in the butt to make the first time. That said, virtually all the labor (and flavor) is in the dressing. So we’re going to take just that element on now, and it will make for many happy salads with or without chicken and toasted bread. 

The other recipes are ridiculously easy: Meyer lemon simple syrup is a juice-intensive staple to brighten tea, seltzer, pancakes, vodka, etc; and lemon posset is a sweet, tart, creamy, perfectly textured pudding/custard with no eggs or special techniques involved.

As good as these recipes are, they are merely a gateway to all the transformational possibilities of Meyer lemons in winter. Roast them, juice them, preserve them (Pickled lemon chutney? I’m looking at you next!), and let them bring a little sunshine in to your life.

Roasted Lemon-Shallot VinaigretteLemon-salad

Ingredients:

  • 1 lemon, halved and seeded with the tip of a sharp knife
  • 8 oz shallots peeled and halved if large
  • 3 large cloves garlic unpeeled
  • ¾ cup extra virgin olive oil, divided
  • 4 sprigs fresh thyme, divided
  • 2 ½ tsp kosher salt, divided
  • juice of one lemon

Method:

Preheat oven to 400. Toss lemon, shallots, garlic and 2 sprigs thyme in 1/4 cup oil and 1 tsp salt. Spread in baking dish in one layer, with cut sides of lemon down. Cover with foil and bake 45-55 minutes or so, until shallots are caramelized and lemons are totally soft. Remove from oven and let cool.

When cool, remove lemon pulp from peel and put it (minus peel and any remaining seeds) into the blender. Add shallots, garlic insides (squeezed from skin), lemon juice, and any accumulated liquid to the blender. Process until smooth. Add remaining oil in a stream. Stir in thyme leaves from remaining sprigs and salt to taste.

Say tuned for a pro version of the chicken and toasted bread salad, pictured above, which is leftover roasted chicken tossed with arugula, plumped currants, rustic bread—torn, tossed with oil and oven-toasted— and this dressing.

This next recipe comes from Cooks Illustrated, so even though it is super simple of course it has some crazy essential step. In this case it is measuring the hot liquid until it is the proper volume. They have a workaround which is even more complicated, so let’s just stick to Plan A. It’s no big.

Lemon Possetposset

  • 2 cups heavy cream
  • 2/3 cup sugar
  • 1 Tbsp lemon zest
  • 6 Tbsp Meyer lemon juice
  • Fresh blueberries or raspberries

Combine cream, sugar and zest in a medium saucepan over medium heat and stir to combine. Heat, stirring as mixture boils. Boil, stirring frequently, for 8-12 minutes, until reduced to 2 cups (pour it off into pyrex measuring cup to check when it’s there). Remove from heat, stir in juice and let cool 20 minutes. Strain into bowl or directly into six individual ramekins/posset containers (see at right. who knew?). Discard strained zest, or eat it when nobody is looking. Chill possets uncovered until set, at least 3 hours. Wrap and store in refrigerator for up to two days. To serve, unwrap and let sit at room temperature 10 minutes. Garnish with berries.


Meyer Lemon Simple SyrupSyrup-tree

2 cups strained fresh Meyer lemon juice
2 cups granulated sugar
zest of 3 Meyer lemons

Wash and gently scrub lemons. Using a zester or vegetable peeler, remove strips of zest from fruit, being careful to remove only the yellow zest, none of the bitter white pith.

Combine sugar, zest and lemon juice in medium saucepan. Heat until simmering over medium heat, stirring to completely dissolve sugar. Increase heat and bring to a gentle boil. Remove saucepan from heat. Cover and set aside to steep 10 minutes. Strain into glass containers. Discard zest, or, you know what I’d do.

Makes 3 cups. The syrup will keep 1 week in the refrigerator, 6 months in the freezer.

granite-lemons

Southern Comfort in the Granite State


Crackle 2.0—Toffee meets dark chocolate pretzels and beer


crackle2

Just when you thought you had covered everyone on your list…surprise! That’s why it makes darned good sense to cook up obscene quantities food gifts, put them in jars and cute boxes and have them at the ready.

My faves are salted caramel Cholliesauce, roasted and glazed nuts and of course, a constantly replenished stash of crackle. We’ve learned to love Crackle over the years, but it’s time to shake it up a little. It’s time to go to the Dark Side. Behold Crackle 2.0, a more grown up version of decadence from a favorite site: thebeeroness.com.

I love the idea of cooking with beer, and the whole consequence of recipes only calling for half a can (at most) of some shmancy beer, making it perfectly ok—even responsible—to finish the rest. There are lots of things I love about this, including of course the taste, which really isn’t beer-like or even alcoholic after all that boiling.

This recipe lets you decide on the thickness of both the toffee and the chocolate layers. Also, it does not require oven time, leaving your oven free for baking things like these and these and these. No baking means also no urgency between steps, which is nice. You can make the toffee part and then come back to slay the rest.

crackle3

Extra points if you make the edible peppermint plate.

Finally, the dark chocolate is a more sophisticated touch (even if you hedge and add some milk chocolate chips when you run out of the good stuff).

I have made this with Guinness and most recently with Lagunitas Little Sumpin ale, subscribing once again to the “love the one you’re with” method of ingredient selection. Do keep it to craft beer or something more complex than Bud. If you want to really experiment, read up on the Beeroness wisdom. Alternatively, just wing it, and try a new beer with each batch. Oh, and for presentation points, make this edible plate out of peppermint candies. You’re soooo Martha!

Chocolate Pretzel Beer Toffee

Adapted from The Beeroness

Ingredients:

Toffee:

1 Cup Sugar
1 Cup Butter (2 sticks)
1/2 Cup Amber Ale

Topping:

2 Cups Pretzels, Smashed
2 Cups Dark Chocolate Chips (60% cacao content)
1/4 Cup Amber Ale or Chocolate Stout
1 Tbsp or so coconut oil (optional but it gives the chocolate a nice gloss)

Method:

In a large pot over high heat add the sugar, butter and 1/2 cup amber ale, it will triple in volume during the cooking process so make sure to use a large pot. Stir until the mixture starts to boil. Allow to boil untouched until the mixture starts to darken and thicken at about 230 degrees. Stir continuously until it turns a very dark amber and hits 290 degrees. (Use the color as your guide. Too light means less caramel flavor. Be patient but vigilant!) This process will take between 15 and 20 minutes from start to finish. Pour onto a baking sheet covered with parchment paper or a Silpat. Immediately spread to desired thickness before it starts to harden. Allow to cool.

Add the chocolate to a large bowl. Heat the beer until hot but not boiling. You can heat it on a pot on the stove or microwave it in a microwave safe bowl. If you use the microwave, know that the beer will foam up once it reaches it’s boiling point. Pour the hot beer over the chocolate chips and stir until well combined and melted. (Alternatively, and preferably to SOME, do the whole shebang in a double boiler. See Edie notes below.)

Pour the chocolate over the toffee and smooth out in an even layer. Sprinkle the crushed pretzels over the chocolate and chill until the chocolate has set. Cut into pieces.

Beeroness Notes: If you use a chocolate with less than 60% cocoa content, it will have higher levels of milk solids, because of this it will have a more difficult time hardening once the beer is added. Try to find 60% and chill it to set.

Edie Notes: In my microwave-deprived house I made this as directed a few times but could not get the chocolate to be as glossy as I wanted. I had better results melting the chocolate and beer over water in a double boiler, and adding a bit of coconut oil. For chocolate I used a combo of 2 Ghirardelli Intense Dark 72 % Cacao bars, and enough milk chocolate chips to get to the right amount.

Crackle1

Why are you looking at this? Aren’t you at the store yet?


Knock-Out Vegan Pumpkin Pie

V stands for Very Tasty

V stands for Very Tasty

This pie was a revelation. The pie itself is fantastic, and is a stand-alone favorite, V or no V. It comes from the November issue of Self, the one with UFC star Ronda Rousey on the cover. That’s where the revelation comes in. I’ve been staring at that cover for a solid two weeks, flipping to the pie occasionally to remind myself of what ingredients not to forget this time I go to the store. Each time I flipped past the story on Ronda, looking at the pictures but not tempted to read a word of it (or to even google UFC. It’s Ultimate Fight Championship. Pretend you knew that—I won’t tell.

Then she got knocked out. Suddenly I heard her name pop up a lot. Even my husband commented on the great Ronda Rousey losing a match. Now, give me a loser and you have my interest. It’s not schadenfreude, but a strong aversion to packaged success stories…especially when they double as fashion spreads.

Anyway, I finally read the article (in which she is interviewed by a comedian) and it was hugely compelling: revealing, honest, unusual. She did talk about leaving a legacy as an undefeated champ. So much for that, but by losing she got at least one person who was only interested in pie to read her story and now care about her.  I am still not sure I could actually watch a UFC match—way too much blood, guaranteed—but go Ronda.

Now, on to pie. This is awesome. I made it with kabocha squash that I had baked. You could also use fresh pumpkin or butternut squash or the canned stuff. I can’t use the canned stuff, having recently been burned by a legacy can in the pantry. Oops.

With pumpkin pie the Vegan situation means no eggs, milk or cream in the pie and no butter in the crust. Coconut milk subs for the liquid and somehow enough squash just makes the egg factor go away. The crust—where you can really do some dietary damage with pies—is pretty darned healthy, and even easier to put together than a graham cracker crust. It’s a total win. Top it with whipped coconut cream for the full V experience, or with regular whipped cream from happy cows. It’s time to get your pomegranate game on, so you can get fancy and sprinkle some of those on top too. Either way, you’re going to wish you had room for seconds.

Vegan Pumpkin Pie

Ingredients:

  • 1  Pecan-Coconut Crust, frozen
  • 1 cup packed brown sugar
  • 3 tablespoons cornstarch
  • 3/4 teaspoons ground cinnamon
  • 1/2 teaspoon grated nutmeg
  • 3/4 teaspoon grated ginger
  • 1/2 teaspoon kosher salt
  • 1/2 teaspoon vanilla extract
  • 1 can (15 oz) pumpkin puree
  • 1 can (13 oz) coconut milk

Method:

Heat oven to 375°. In a bowl, whisk together sugar, cornstarch, cinnamon, nutmeg, ginger and salt. Add vanilla, pumpkin puree and coconut milk and mix until well combined. Place frozen shell on a baking sheet and slowly pour in filling. Bake on center rack of oven 25 minutes. Rotate 180 degrees and continue baking until filling is set and no longer looks wet at center, 20 to 30 minutes more. (Mine took longer. No eggs means it won’t set as firmly but it will set more as it cools.) Cool 2 to 3 hours. Serve lightly chilled.

Pecan Coconut Crust

Ingredients:

  • 1 cup pecan pieces
  • 1/2 cup shredded unsweetened coconut
  • 2 tablespoons sugar
  • 1/2 teaspoon kosher salt

Preparation:

In a medium skillet over medium heat, toast pecans until fragrant; set aside and cool. Reduce heat to medium-low and toast coconut, stirring, until golden, 2 to 3 minutes; cool. In a food processor, process pecans, coconut, sugar and salt until mixture is fine and sticks together slightly. Pour into an ungreased 9″ pie pan. Press into bottom and sides of pan. Freeze until solid. Makes 1 crust.

pumpkin-pie-rock


Classic Champion Chip Cookies

Honestly, do you really need another chocolate chip cookie recipe? Apparently, yes! These come to you from US Ski Team rising star Lila Lapanja, who contributed mightily to my condo survival guide in Ski Racing. Lila’s mom Margie is the baking legend behind Margie’s Cowboy Cookies and the author of four cookbooks that meld life and kitchen wisdom with soul-satisfying recipes. Margie is all about comfort food, so of course her chocolate chip cookies would be good.

I am not sure what makes these so fool-proof, but they are. Maybe it’s the combo of margarine and butter, or the nice round numbers that make the proportions easy to remember even if you cut the recipe in half or in quarters; or the way dough stays soft and easy to scoop even if it’s in the fridge for a while; or the way they cook evenly and stay just soft enough when cool. I’m not sure what the magic is, but it just is. The next time you’re making a care package (surely someone you know needs a boost!) try baking these and you won’t go wrong.

According to Margie and Lila, these cookies will bring you good luck if you eat them the night before your ski races or at lunch between runs.

Champion Chip Cookies

Ingredients:

  • 1 cup margarine, room temperature
  • 1 cup butter, room temperature
  • 2 cups brown sugar
  • 2 cups white sugar
  • 4 eggs
  • 2 teaspoons pure vanilla extract
  • 1 teaspoon salt
  • 2 teaspoons baking soda
  • 2 teaspoons baking powder
  • 6 cups unbleached flour
  • 4 cups chocolate chips*

(You can cut this recipe in half to make it more manageable. No calculator required!)

Method:

Preheat the oven to 350 degrees. In a large (at least 13-quart) mixing bowl, whip up margarine, butter, and sugars until fluffy with an electric mixer.  Add the eggs, vanilla, and salt and mix well. (Slackers note—if a fork is all you’ve got just make sure the butter and margarine are soft and whip it good!)

Blend the baking soda and baking powder into the flour and tap into the creamed mixture on low speed. Mix until it comes together. Stir in the chocolate chips with a strong wooden spoon.

Line a cookie sheet with baking parchment and scoop the dough with a small (1- to 2-ounce) ice cream scoop or with a large spoon. Bake for 9 to 11 minutes (depending on your stove…), until lightly golden in color with tiny cracks on top of the cookies. Note your baking time for the rest of the batch. Makes about 4 dozen 2-ounce (Mrs. Fields’-size) cookies.

* Yes, there is a secret to this recipe: the chocolate chips. My favorite baking chips are, have been, and will always be Hershey‘s…or Trader Joe’s. I like to use half semi-sweet and half milk chocolate. On festive occasions, try tossing in white chocolate chips, a few toffee chips, or mini-kisses.


Triple Crunch Sesame Peanut Coconut Snack Bars

Sweet, salty, crunchy goodness to ease you into fall. No bridge tolls or taxi rides needed.

Sweet, salty, crunchy goodness to ease you into fall. No bridge tolls or taxi rides needed.

Boom! And just like that it’s fall. A week ago we were in oppressive humidity, and now we’re looking for anything orange to wear. Not blaze orange just yet, but something subtler to ease our transition and go with all the pumpkin ale and pumpkin lattes they’ve been forcing on us since mid August. We’re supposed to be putting away the linen, and the white, but let’s do that slowly to ease the pain. How do we ease out foodwise?

First of all, we eat up all that watermelon in the fridge. If you need ideas, how about one more batch of watermelon lemonade, one ingredient watermelon sorbet , watermelon gazpacho or Joy the Baker’s groovy, spicy watermelon wedge salad that uses watermelon as the plate (it’s really good, but it was too much of a leap for my people).

What else? Keep eating corn like it’s your job. If you haven’t made the Colorado corn souper chowder please do so before I have to have a word with you in private. Charred and raw corn salad is also a good call as is this super quick and easy raw corn and radish salad from Food and Wine . And beets! We’ll be dealing much more with those soon, but in the meantime don’t forget this awesome beet salad. What else? Take that John Boy Peach Crostata recipe and substitute pears and walnuts for peaches and pecans. Transition, done!

If all that clicking and looking tired you out, you may need a salty, sweet, satisfying, easy-to-make snack that will hang out and wait patiently for your eventual cravings. Look no further. These sesame peanut bars (from Bon Appetit), remind me of the ones by the cash register at virtually every Korean deli in New York City…the same ones that taunted and tempted me at every transaction. These bars are softer (and easier on your dental work), healthier (they have coconut fergawdsakes), and do not require a trip to New York City, though that is another darned good thing to do in the fall.

One final note…ok three: I used maple syrup instead of honey for local flavor. An 8” pan makes thicker bars than what you’ll see at the deli counter. You may want to try adjusting pan size and reducing baking time for thinner bars. I haven’t tried it. Do use parchment paper like the recipe says. It may work without it but that’s not a risk I’m willing to take.

Ingredients

Servings: Makes about 16

  • Unsalted butter (for pan)
  • 1¼ cups white and/or black sesame seeds (slackers be assured, all white is fine)
  • ¾ cup unsweetened shredded coconut
  • ¼ cup unsalted, roasted peanuts
  • ¼ teaspoon kosher salt
  • ¼ cup honey (or maple syrup or a mix of both. c’mon New England…show your stuff!)
  • 2 tablespoons creamy peanut butter
  • ¼ teaspoon vanilla extract

Method

Preheat oven to 350°. Butter an 8×8″ glass baking dish (or larger you want thinner, crunchier bars); line with parchment paper, leaving a generous overhang (I mean it) on all sides. Mix sesame seeds, coconut, peanuts, and salt in a large bowl. Mix honey, peanut butter, and vanilla in a small bowl. Add to sesame seed mixture and mix well.

Scrape mixture into prepared baking dish; press firmly into an even layer. Use that generous overhang of parchment paper to really tamp down on the mix so it’s good and dense and holds together. Bake until golden brown around the edges, 20–25 minutes. Transfer to a wire rack and let cool until firm, 30–40 minutes. Lift out of baking dish (if it starts to crumble, let cool longer) and cut into 16 bars. Let cool completely.

Bringing it: Bars can be made 3 days ahead. Store tightly wrapped at room temperature. They do just fine in the fridge too (and last longer).


John Boy’s Rustic Peach Crostata

I am chomping at the bit for apple season. And yet, there are still watermelons and peaches and fresh corn to be had, not to mention the low maintenance fish tacos (coming soon) that can be the dinner anchor for all that fresh fruit. So back off, fall. Today we’re all about peaches.

So good, so luscious, so hard to bake them in to anything before eating them all fresh. BUT here is your best chance of that. I started summer by making a rustic blueberry crostata with a homemade crust. The crust had some whole wheat goodness and toasted pecans mixed in. It was indeed really good. But it involved crust making, which takes time and actual care. Let’s be honest. Homemade crust can be a dealbreaker. This recipe is built on a premade roll out crust, which I believe is one of the most life-enhancing low-tech inventions of the late 20th century. It brings pie and crostata making within reach of everyone who can cut a piece of fruit.

I was introduced to this by my sister who was introduced to it by our brother-in-law. As far as I am concerned, a man who makes crostata (and he made his own crust by the way) gets all the credit for its invention. Hence the name. The “Boy” is added in a nod to those pie-making Waltons of yore. I added the slacker reliance on premade dough, the optional rustic tweak of pecans and cornmeal to the crust, and the suggestion of yogurt whipped cream.

With that I give you a taste of late summer, and a solid stand against the inevitable onslaught of apples and pumpkins.

John Boy Rustic Peach Crostata

Makes 6 servings

Ingredients:

  • Prepared pastry dough (uncooked), enough for a 9-inch pie pan
  • 1 Tbsp or so cornmeal (optional)
  • 1/3 cup chopped toasted pecans (optional)
  • 4 large peaches, thinly sliced
  • 1/2 cup sugar
  • 2 tablespoons all-purpose flour
  • 1/2 teaspoon or more cinnamon if that’s your thing (totally optional and awesome)
  • 1 tablespoon butter
  • 1 whole egg, beaten
  • Ice cream, whipped cream or whipped yogurt cream (recipe below) for serving

Method:

Preheat oven to 375 degrees F.

Prepare a baking sheet by lining it with parchment paper. (A large rimmed baking sheet is best, as long as you can fit the dough into it. If using an un-rimmed baking sheet put another pan underneath to catch the drippings.) Sprinkle cornmeal (is using) on parchment paper and set the uncooked pie dough onto the baking sheet.

Sprinkle the dough with pecans, if using. Roll dough lightly with a rolling pin to smoosh them in.

In a bowl, gently mix peaches, sugar, flour (and cinnamon if using) together. Pour fruit mixture into the center of the pastry round, leaving about 2 1/2 inches around the edge. Fold up the edge of the pastry dough over the filling to make a rim. Fan the edge as you go around folding the dough.

Brush pastry with the beaten egg (milk and a sprinkle of sugar works too) and place the pat of butter on top of the fruit mixture. Bake for 30 to 45 minutes or until the pastry is golden brown and the fruit is bubbling. Cool the crostata on a rack and serve warm or at room temperature  with your favorite ice cream or whipped cream.

Yogurt Whipped Cream

Courtesy of Food52 and Saveur and dairy farmers everywhere

Makes about 3 cups of whipped cream

Ingredients:

  • 1 cup heavy cream, chilled
  • 1/2 cup plain yogurt, Greek or otherwise, full-fat or otherwise, chilled (I used nonfat Greek)

Method:

In the bowl of a stand mixer fitted with a whisk, or with a hand mixer or whisking by hand like Grandma Walton, beat heavy cream and yogurt on medium-high speed until soft peaks form. Taste and add more yogurt or cream to taste and whisk again to soft peaks.

Bringing it:

Don’t try to transfer this off the parchment paper…even if you really want to get a nice picture for a blog. High chance of failure, and possibly tears. Transport it on the baking sheet and rewarm it in the over, or put the crostata, parchment and all, onto a platter and serve it up at room temperature.

Lemon Beach Pie

If you love your people—and I know you do—make this pie now. In the wilds of the Internet it is known as Bill Smith’s Atlantic Beach pie. Anything called Beach Pie gets my attention. When its maker also calls it the “easiest recipe in the world,” I’m all in. This pie is not a secret. In fact, way before Ms. Kardashian tried to break the Internet I think this pie came close. For some reason, however, it took me until recently to make it.

What pushed me over the edge was the entire stick of butter on my counter, barely maintaining its solid form on a sweltering summer day. “Mix me with Saltines and a touch of sugar, then turn me into the crust of a glorious pie,” it seemed to be saying.

Perhaps that was the heat. At any rate, I obeyed the voice. The aforementioned Bill Smith created this version of a pie that is served up at coastal seafood restaurants in the North Carolina. It tastes darned good far from the beach too, and if for some reason you don’t finish it, just pop it in the freezer and bust it out whenever you need a taste of the beach. 

Make One Beach Pie

For the crust:

  • 1 1/2 sleeves of saltine crackers
  • 1/3 to 1/2 cup softened unsalted butter
  • 3 tablespoons sugar

For the filling:

  • 1 can (14 ounces) sweetened condensed milk
  • 4 egg yolks
  • 1/2 cup lemon or lime juice or a mix of the two
  • Fresh whipped cream and coarse sea salt for garnish

Method:

Preheat oven to 350 degrees.

Crush the crackers finely, but not to dust. You can use a food processor or your hands. Add the sugar, then knead in the butter until the crumbs hold together like dough. Press into an 8 inch pie pan. (If you only have a 9-inch pan just top the pie with more whipped cream.)  Chill for 15 minutes, then bake for 18 minutes or until the crust colors a little.

While the crust is cooling (it doesn’t need to be cold), beat the egg yolks into the milk, then beat in the citrus juice. It is important to completely combine these ingredients. Pour into the shell and bake for 16 minutes until the filling has set. The pie needs to be completely cold to be sliced. Load it up with fresh whipped cream give it a sprinkling of sea salt.

Peanut Butter Coconut Bites

These are tasty little energy bites that go a long way with flavor and energy. They are super easy to make, no bake and a vehicle for any flavor, chip, dried tidbit, or other food item you have on hand. I made half of these with chocolate chips and the other half with cinnamon chips. Both worked really well.  I bring them on hikes. bikes, or other vigorous outings. They travel well and provide a “zip” when you need it.

I got this recipe from a friend of mine who likes to eat super healthy and bring ‘good-for-you’ goodies to all those around her. She brought these to work one day and everyone raved about them. The original recipe is adapted from the Oh She Glows cookbook which we know and love at Bring It Eats!

These take about 10 minutes to make. Go for it and share. You will be happy with the results and they are a fun food to pass around at any time.

Ingredients

1 cup rolled oats (not instant)
2 TBSP coconut oil
2 TBSP peanut butter (or almond butter)
1/4 cup maple syrup (or other sweetener)
1 tsp vanilla
1/2 cup almond flour (or use whole wheat pastry flour – remember previous posts, we should not use almonds right now because of the drought in CA)
1/4 tsp salt (go light)
2 TBSP chocolate chips or any flavoring you like.

Method

Blend oats in blender until a fine flour forms.

Combine coconut oil, peanut butter, maple syrup, and vanilla with a hand mixer. Add almond (or other) flour, oat flour, and salt. Beat until combined. Add chocolate chips.

Form into 14 balls and freeze on parchment paper. Store in Tupperware in refrigerator until you are ready to eat. You can eat them cold or bring to room temperature.

Reese’s Redemption Cups


Go ahead...you deserve it. Take a bite of creamy, chocolatey, nut buttery goodness with loads of crunch and nothing at all spooky.

Go ahead…you deserve it. Take a bite of creamy, chocolatey, nut buttery goodness with loads of crunch and nothing at all spooky.

Last year, the day after Halloween I posted a recipe featuring a giant bowl of kale. I know. Mean. This year I’m going to be much nicer. This year you got a day of hedonism and now the Halloween step down program. Gradual detox comes in the form of a no-junk-in-the-trunk version of Reese’s Peanut Butter Cups featuring your nut butter of choice along with creamy chocolate, coconut butter and as much healthy crunch as you dare. I was going to call them Luscious C Cups—creamy, crunchy, chocolatey, coconutty—but kind of worried how that would pan out on a search engine.

Kale or no kale, I urge you to step away from the leftover Halloween candy and the booty your kids naively believe they have hidden from you. None of it will make you feel good. That said, you deserve something wonderful. Oh yes you do.

So get on out to the store, stock up on some healthy stuff that needs  a spot in your kitchen anyway, and make yourself a stash of luscious choco-coconutty crunch cups for your freezer or fridge. They are easy and quick to make and actually make a good, healthy energy boost for that exercise regime that you are so going to stick to as a pre-holiday health insurance policy.

Some notes, as ever: I got these from Mama’s Weeds who got them from Thriving Lisa so they have had some tweaks along the way, but the basic method and ingredients stay the same. I am hardcore on the crunch factor, so I make mine with all three crunch agents—coconut, hemp seeds and chia seeds. If that’s a bit too groovy for you, I recommend at least doing the coconut. But you know yourself and your people, so do what feels right.

I have tried this with almond butter, peanut butter and even sunbutter (which was a way to sneak in some extra sugar), and they’re all good. So use what you’ve got, swap away and love the one you’re with, baby. I do believe this is the perfect dessert after a nice bowl of kale.

Ingredients

2/3 cup coconut oil, melted
1/2 cup almond butter or nut butter of choice
1/4 cup cocoa powder
1/4 cup maple syrup or agave
1/4 cup chia seeds (optional)
1/4 cup hemp seeds (optional)
1/4 cup shredded coconut (optional, but not really)
pinch of salt

Method

  • Melt your coconut oil however you like—put the container in the microwave or in a pot of warm water stove top.
  • Mix your melted coconut oil, nut butter, maple syrup/agave and cocoa powder.
  • Stir in your crunchy mix-ins.
  • Add the salt. Remember the salt!
  • When all your ingredients are combined, corral 12 regular sized cupcake wrappers or many more mini ones in a flat container or dish.
  • Spoon mixture into the wrappers, making them whatever the heck size you want. (Know that cutting one in half or even quarters will not decrease your likelihood of eating the entire unit. The science on this is legit.)
  • Once your wrappers have been filled, put them in the freezer until firm (20-30 minutes).
  • Unwrap them at this point or right before you eat them. It’s all good. Move them to an air tight container and store in the freezer, or in the fridge if you like a softer texture.

 Pumpkin-face

How About Them Apples?

Full disclosure. This post is really an excuse to put up my favorite video clip of the season. Behold the way one chef dealt with a huge order of tarte tatins.   

https://www.youtube.com/watch?v=nbzw6y0pF3U

If more men knew that this was a step in the process of making apple pie we’d have a whole lot more male pie bakers. And while we are on the subject of men and food prep, you might enjoy the exploits of our favorite Russian Food hacker  (the kiwi and the pomegranate hacks were news to me).

But power tools aside, this is also the right time to remind everyone of all the great things to do with apples. There are lots of them this year, though not really in our orchard, which is a mixed blessing. No hauling bushels and grain sacks full of apples to the cider maker, but no homegrown apple cider. There are, however, more apples than we can possibly use, and here are my favorite ways to approach the task.

For Snacks:

Best, of course, is just eating these crisp juicy apples, which are the ideal for taking on the road or the trail. But when you need something a little more interesting, get dipping. Peanut butter and almond butter are excellent, healthy options, as is vanilla yogurt or one of my faves, a mixture of ground flaxseed and cinnamon. If you really need to make the hard sell on apple slices serve them with Nutella or, even better, with homemade salted caramel Cholliesauce.

For Breakfast:

It’s time for apple cheddar scones. It just is. Trust me on this. For apple cheddar pancakes (thank you Doug Haney) thinly slice up some Granny Smith or Mac- like apples and cook them down. Slice up sharp cheddar. Add both to the pancake right after you pour it on the griddle and cook the cakes as usual. You know to top them with–only real stuff!

For Lunch:

Add thinly sliced apples to your sandwich, especially if it’s in turkey and cheddar or grilled cheese family. Make a frittata with chopped apples and cheddar. Make an apple/ butternut squash soup like this one , or my slacker no recipe version that I swear I will post soon.

For Dinner:

Dip them in Guinness Fondue. Serve up some pork tenderloin with homemade caramelized applesauce. See below.

For Dessert:

If you haven’t already made this Apple Cake, do it! If you don’t have the mojo to make the cake at least make the brown sugar frosting and just smear it on an apple and call it good. Really good. The frosting is totally easy and all-time delish. And, especially if your apples aren’t winning any beauty contests make a Joni Mitchell apple pie.

For Fun:

Finally, if you prefer to drink your apples, mix up some hard cider sangria and enjoy the season!

Caramelized Applesauce Plus

rosy applesauce

Rosy pink applesauce from tree to table with one little stop on the stove.

This came about as a total mistake, after I got distracted while making a batch of applesauce with the thin-skinned apples that come off my favorite tree.  It appeared to be yet another burned disaster, another charred pot headed to the graveyard, but it did smell pretty good. The happy result was Applesauce Plus, which is sweet without added sugar and prettily pink. It was an instant family fave.

Ingredients:

  • As many tart, unpeeled red-skinned apples as you want.
  • Squeeze (or more) of fresh lemon juice.

Method:

Cut the cores from the apples and put them in a pot, barely covered with water. Boil until the water is thick and bubbly and the pot smells a bit like caramel. This takes a while, so you’ll want to ignore them for a while, but not be so far away that all the water boils away and you ruin your pot.

When the apples are sticking to the bottom just a bit and the pot smells really good, turn off the stove and let the whole thing cool. Smash the apples through a sieve or a food mill like this one (which is totally worth having), and add a squeeze of lemon. Enjoy it as is or on pretty much anything.

Apple Cake with Brown Sugar Frosting

It's apple picking season!

It’s apple picking season!


It’s apple picking season, hooray! I love this time of year when there are so many variations of apples and you want to try them all. To celebrate, we’ve decided to make September’s ingredient of the month apples. And so it’s time to get going with your apple tasting, apple picking, and apple recipes. I’m sure this will keep you busy for a while.

I was trying to think of what I wanted to post using apples, when on a hike a friend mentioned an apple cake he made recently. He was explaining the recipe and my mouth was watering for the next 10 minutes. I asked him for the recipe and it was from one of our favorite sites, King Arthur Flour. And so, I went home, bought the ingredients and went to work chopping, mixing, and baking. All was going well until I realized I was making this cake on a Monday night and I had no plans to go anywhere this week except driving the kids to soccer. What was I to do with a whole apple cake! I threatened my blog partner that I was going to drop it at her house under the cloak of darkness so she couldn’t refuse. Not that either of us didn’t want a piece or two – but a whole cake? You’ve seen my dessert posts – you know how much I like dessert!  This was very dangerous.

I decided to see if my husband and son would dig into it for dessert that night and maybe make a dent in it. They are big fans of dark chocolate so I wasn’t sure an apple cake would trump the specialty chocolate in the cabinet. Sure enough, one piece led to two, which lead to many more slivers until much of the cake was gone. Needless to say, it was a huge success. Make this cake, but be sure you have plenty of people to share it with or you might be on a cleanse the next day to ward off the sugar coma!

Ingredients

Cake
2 1/3 cups flour
1 2/3 cups sugar
2 tsp baking soda
1 tsp ground cinnamon
1/4 tsp ground ginger
1/4 tsp ground nutmeg
2 large eggs
1/2 cup (8 Tbsp) unsalted butter, softened
4 cups peeled, cored, chopped apples, about 1 1/3 pounds whole apples
1 cup diced toasted walnuts

Frosting
7 Tbsp unsalted butter
2/3 cup brown sugar
1/4 tsp salt
1/4 cup milk (regular, soy, or almond)
2 1/4 cups confectioners’ sugar
3/4 tsp vanilla extract 

Method

Preheat oven to 325. Grease and flour 9 x 13 inch pan.

To make the cake, mix all of the ingredients in a large bowl except the apples and nuts. Beat until well combined. The mixture will be very stiff and maybe even crumbly. Add the apples and nuts and mix until the apples release some of their juices (I did this step by hand and squeezed a little bit as I mixed). Continue to mix until you form a thick batter, somewhere between cookie dough and brownie batter in consistency.

Spread the batter in the prepared pan, smoothing with wet fingers (wet fingers are key as this stuff will stick to you like crazy and you’ll never get it spread across the pan evenly).

Bake cake for 30-45 minutes (I give a wide range because the recipe said to bake for 45 minutes and luckily I checked the cake at 30 minutes and it was done!). Basically, set the timer for 30 minutes, check for doneness by inserting a toothpick into the center of the cake to see if it comes out clean. If clean, then take the cake out of the oven and let cool. If it needs more time, continue to bake, checking every few minutes.

To make the frosting, melt the butter in a small pan over medium heat. Stir in the brown sugar and salt and cook, stirring until sugar melts. Add the milk, bring to a boil, and pour into a mixing bowl to cool for 10 minutes.

After 10 minutes, stir in confectioners’ sugar and vanilla. Beat well; if mixture appears too thin, add more confectioners’ sugar. Spread on cake while the frosting is still warm. Serve it up.

Hit the Trail Scones

Not just for tea time. These trail mix-y scones can go the distance.

Not just for tea time. These trail mix-y scones can go the distance.

Scones. They sound so proper, so fancy, so….much of a pain to make. I used to think scones were too labor intensive to consider for every day food. That was until early one morning I was confronted with the task of making something get-out-of-bed worthy and take-on-the-road worthy within an hour. Scones saved my butt.

Here’s why: They call for cold butter vs softened; they involve no eggs and therefore no separate mixing vessels; they require only one baking sheet vs muffin tins that must be greased or lined with the ever-elusive muffin liners. Scones vs muffins? No contest! And that’s before the short cuts.

I know the sermon—baking is a science, weigh vs measure, be exact, blah blah, blah. But in the real world short cuts are important. Sometimes knowing they are there, whether or not you use them, gives you the mojo you need to embark on creating something delicious. That is why I am including my own short cut version along with the legit directions.  

There’s nothing really trail-like about these scones, other than the fact that I made them as I was leaving on a long hike and wanted to bring something that was sturdy enough to travel but more enticing than trail mix. I needed a way to use up some cream and incorporate the chocolate chips and nuts that were just begging for the proper vehicle. Knowing that I could use a food processor, dump the whole shebang on a baking sheet and form the scones right on that same sheet made them a possibility. Out of this scenario, the Hit the Trail Scone, and it’s slightly healthier cousin, the Almond Joy scone, were born.

“Are they ok?” I asked my son who shies away from my more adventurous creations, particularly those involving nuts. “They’re ridiculous!” he said. “Don’t put them on the blog—keep them secret!” But you know how I feel about secret recipes, so here they are.

Please customize them to make them all yours!

Ingredients

2 cups (10 oz) all-purpose flour
1/4 cup (1 3/4 oz) granulated sugar
2 1/2 tsp baking powder
1/4 tsp salt
1 stick butter (4 oz) (cold, cut into pieces)
1 cup (8 oz) heavy cream (cold)
*1/2 – 3/4 c miniature chocolate chips (depending on preference)
*½ cup roasted almonds, coarsely chopped

* any combo of dried fruits, nuts and/or chips will work, so use what you love or what you have on hand. Think dried cranberries and walnuts, dried figs and almonds, white chocolate and macadamia nuts, butterscotch chips and walnuts for Ron Burgundy fans, peanut butter chips and crumbled bacon for Elvis fans, etc.

Topping
1 egg, lightly beaten (or more of that cream you need to use up)
2 Tbsp sanding sugar, granulated sugar or coconut sugar.

Official Method

Preheat over to 425 degrees

Mix together dry ingredients. Cut in butter with pastry blender, two knives or your  fingers.

Add chopped nuts, chocolate and cream to ingredients in the bowl and blend together quickly with a spatula. Do not overmix.

Turn dough on floured board and pat into a big square or round, 1-inch or so thick. Cut dough into shapes of roughly equal size. Move pieces to parchment or Silpat lined baking sheet.

Bake as directed below.

Short Cut Method

The short-cut method begs for artistic license.

The short-cut method begs for artistic license.

Mix together dry ingredients in bowl of food processor. Add butter to processor and pulse until the butter is in smallish bits. Do not over process!  (Butter bits give scones their flakiness. Without the bits, scones become not very excellent muffins.) Pour contents of food processor into a large bowl. Add nuts and chocolate chips to food processor and pulse several times until they are broken into bite-friendly bits.

Pour chocolate chips and almonds into bowl with other ingredients and stir until just mixed. Add cream and blend together quickly. Do not overmix.

Roughly divide dough into two equal mounds. Plop each mound onto it’s own side of one baking sheet and shape each into a round or square. Do not over handle the dough (body heat and scones do not mix! See above butter bits intel).

Score each circle deeply into 8 wedges (or cut all the way through and move pieces slightly apart to allow them to cook more quickly. If you go with the square, score or cut it into similarly sized shapes of your choice.

Baking for both methods

Brush with egg wash or with cream. Sprinkle with sugar, or coconut sugar if you want to take this tropical theme seriously.

Bake for 14-16 minutes (or more depending on size) until golden brown.

Almond Joy Scones

Make as above but substitute well-mixed, full-fat coconut milk for cream, and if you’re a real coconut freak like me mix in ½ cup toasted, unsweetened coconut flakes with the chocolate chips and almonds. These take a few minutes longer to bake.

Bring it

These grab and go babies travel well in the car, in a pack, in a picnic basket, on a boat or to any gathering anywhere.

Salty Malty Krispy Treats


Salty Malty Treats

There’s nothing like a classic… with a twist…and a swig of milk.

Malty Salty Krispy Treats

When it comes to recipes, what makes a classic? It has to be something so good that it stands on its own with no real need for improvement. It has to feature some basic key ingredients that are critical to its identity. It evokes nostagia as well as instant gratification.

I’d put Rice Krispy treats in that category. They are easy and inexpensive to make, tolerant of heat and cold, indestructible in their creation, transport and chosen arena of consumption. They require neither utensils nor serveware nor culinary skill. Oh, and most importantly, pretty much everyone loves them.

Truthfully, they warrant no improvement. But then again, sometimes it’s fun to take you and your snack over the edge to greatness by making a brilliant twist on a classic.

That’s what we’re doing here. We’re taking Rice Krispy treats and adding chopped up malted milk balls and a sprinkling of sea salt. Joy the Baker takes this experiment over the top by using browned butter (vs margarine) and adding malt powder. This gives them a hint of sophistication, which is important because when you spike your Rice Krispies and marshmallows with Whoppers you are definitely going for some high-brow cred.

There’s not a whole lot else to say about these, except that they earned the rare teenager rave at a recent party, which in my book is enough to make something a new classic.

Malty Salty Krispy Treats

Makes 9 big squares (no shame in doubling up!)

Ingredients

6 Tbsp unsalted butter
40 large marshmallows
1/4 tsp salt
6 cups rice cereal
1/3 cup malted milk powder (or “Classic Malt” Ovaltine if you can’t find the real stuff)
1 cup coarsely chopped Whoppers candy.
Coarse sea salt for topping

Method

In a large saucepan over medium heat, melt the butter. Melt butter until is begins to crackle and sizzle. Add marshmallows to the melted butter just as it begins to brown and reduce heat to low. Add salt and stir until the marshmallows are completely melted, and the marshmallows and butter are thoroughly combined.

Quickly add rice cereal and malt powder and stir to combine.  The mixture will be thick and sticky.

Allow mixture to cool just slightly before adding 3/4 cups of the Whoppers candy.  Stir until just combined.

Press the mixture into a 9×9-inch square greased pan. Sprinkle with salt. Use a greased piece of wax or parchment paper, or a sturdy clean plastic bag, to firmly press the mixture into the pan. The krispies will be thick.  Press the remaining Whoppers pieces into the top of the treats.

Allow to rest at room temperature (or speed it up in the fridge) until set and sliceable. Slice into 9 large squares.

Just the Rhubarb Scones

Fresh rhubarb scones

Fresh rhubarb scones holding court, with nary a strawberry in sight.

Here it is strawberry season, so you’re probably thinking strawberry rhubarb scones would be appropriate. After all, sweet strawberries and tart rhubarb show up in the garden around the same time and perfectly complement each other. But just because the two ingredients hang out a lot, doesn’t mean they’re married. Today I’m giving some props to straight rhubarb, hoping it steals the show for breakfast this weekend.

The deal with scones is that you want the butter to remain in little bits, rather than creaming it into the mixture. Those butter bits are what gives scones their flaky excellence, and why scone recipes call for chilled butter. Trust the bakers on this. If you make scones with softened butter, or over mix the butter into the batter you’ll end up with a bunch of big muffins. It’s not a tragedy, but not what you envisioned. And once you get hooked on good scones you won’t be truly satisfied with anything but the real, flaky, crumbly thing.
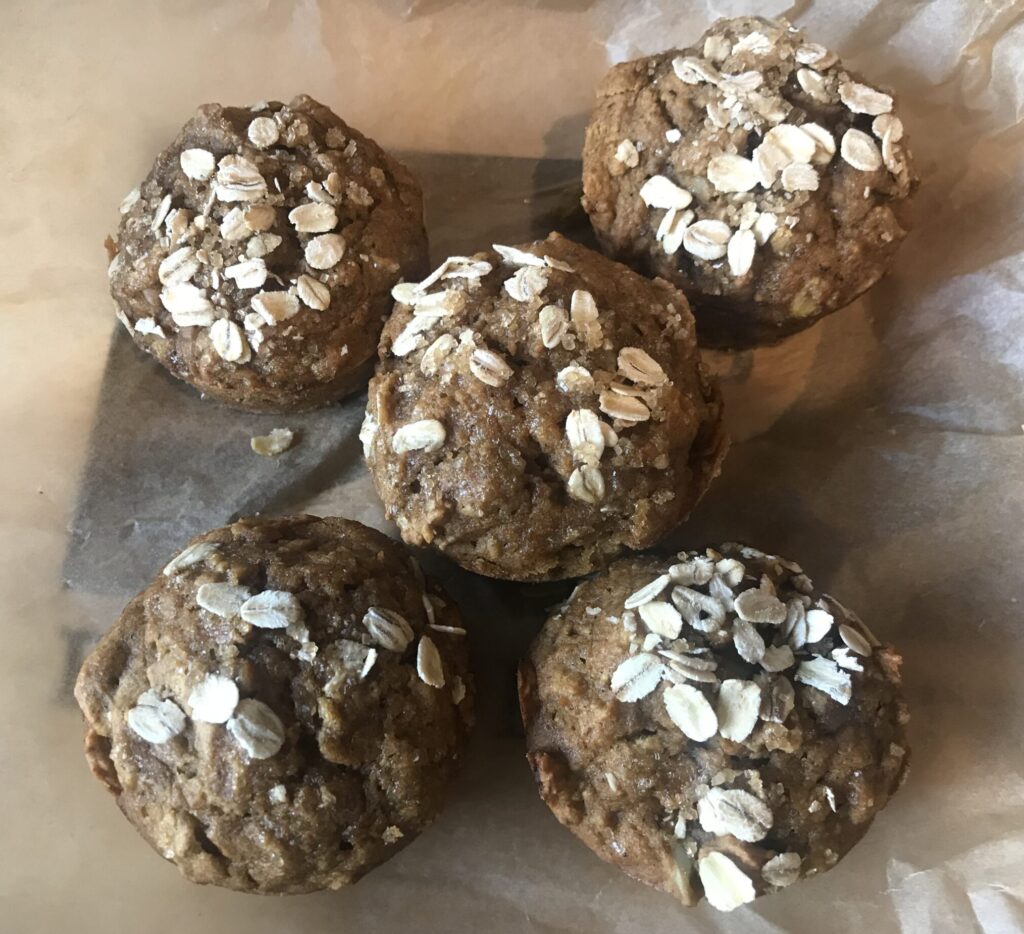
These babies, known elsewhere in the cyber food world as Naughty Rhubarb Scones, are delish as is, with whipped or clotted cream (for Brits) or, of course, with strawberry jam.

Makes 12-16 scones

Ingredients

3 stalks rhubarb (roughly 1½ cups when sliced)
2 1/2 cups flour
1 Tbsp baking powder
1/2 tsp salt
8 Tbsp unsalted butter
1/2 cup vanilla sugar (if using regular sugar add up to 1 tsp vanilla with the cream)
2/3—3/4 cups heavy cream

Method

Preheat oven to 425.

Slice rhubarb stalks 1/4 ” thick. Toss with 3 tablespoons of the sugar.

Sift flour, baking powder and salt together in large bowl or bowl of food processor.

Cut butter into flour mixture by hand (or pulse in food processor) until butter is the size of small peas.

Blend in 1/4 cup of the sugar.

Blend in sliced rhubarb. (If using the food processor, just pulse — you want the slices left mostly intact.)

Blend in cream until a soft dough forms. (note: you may need to add more than 2/3 cup depending on the weather,etc.)

Transfer dough to floured surface and divide in half. To make triangular scones, flatten into 6-inch disks and deeply score or cut each circle into 6-8 scones. Sprinkle with remaining sugar.

Arrange scones on ungreased or parchment-lined cookie sheet and bake about 20 minutes or until reddish-brown on top.

Enjoy and cheerio!


Strawberry Mania

Summer's strawberry bounty

Summer’s strawberry bounty in its many forms.

Strawberry season is getting off to a slow start in our corner of the world, but now the big grocery stores are full of them and with a little sunshine the farmers markets will soon be exploding with the good stuff. Of course, you’re not going to go wrong by simply washing them and letting everyone inhale them by the pint, but let’s go over just a few easy, yummy ways to use them.

Ready? Here we go…

First, a word on hulling strawberries. The frugal among us get torqued at wasting half a strawberry because SOME PEOPLE grab the stem, take one big bite and leave the rest for the compost bin. So we the frugal rush to hull all the strawberries and thereby enable maximum use of the fruit. The best way to do this of course is with a strawberry huller, and if you have one you are my culinary niche tool hero. If you don’t, here are two solutions to maximize each berry:

First, the most basic and humble vegetable peeler has a built in “potato-eye remover” at the end, which can just as well take on strawberry stems. You will quickly discover that you can’t manhandle a strawberry like a potato, but get as close as you can to the stem, plunge the tip of the peeler right in and dig out the stem. It takes about three strawberries to master this.

If that still sounds too much labor go ahead and chop off the tops, then use them to make your own shmancy strawberry water that will make you the envy of any yoga class:

Strawberry Water

After rinsing your strawberries, slice off their tops and dump them into a large jar. Fill it with water, let it sit for an hour or so and… Voila! Strawberry infused water. Drink deeply. Feel beautiful. Namaste

Worlds Easiest Strawberry Dessert

Ingredients:

  • Strawberries
  • Sour cream
  • Brown sugar

Method:

Grab a strawberry. Dip it first in sour cream, then in brown sugar. Eat. Repeat.

Strawberry-Rhubarb Compote:

This comes from the Bitten Word with inspiration from farmer Carrie at their CSA It is certified easy, very quick, kid pleasing, totally portable AND a great way to use up the rhubarb that might be taking over your garden. The guys at BW advise us not to get hung up on the amounts listed in this recipe. Depending on the amount of rhubarb and strawberries you have, the method is easily adapted. 

Ingredients:

  • 1 1/2 cups rhubarb, sliced into half-inch pieces
  • 1 cup strawberries, capped and halved (if using larger strawberries, you can quarter them)
  • 1/4 cup sugar

Method:

Place rhubarb in a saucepan. Sprinkle with sugar. Cook over medium heat until rhubarb begins to soften and fall apart (20 minutes). In the last 5 minutes of cooking, toss in the strawberries. Add a little lemon zest at this point for extra credit.

Remove from heat and let cool. Store in an airtight container in the refrigerator. Serve over good vanilla ice cream or yogurt, top with whipped cream or just put it on a spoon.

 Some Savory and Sweet Goodness

Balsamic vinegar and strawberries are a classic Italian-inspired combination. They can be served as a dessert, like in Ina Garten’s recipe below, in a salad with goat cheese and peppery greens (pepper is key to the strawberry/balsamic alchemy) like arugula or as an appetizer like on the bruschetta further down. I’ve even seen them on a pizza with bacon, but we’re not going there today.

 Balsamic Strawberries à la Ina Garten

 As with the compote, no need to be too particular on quantities. Just aim to get the proportions close:

Ingredients:

  • 4 pints (8 cups) fresh strawberries, sliced thick
  • 5 tablespoons balsamic vinegar
  • 2 tablespoon sugar
  • 1/4 teaspoon freshly ground black pepper
  • 2 pints vanilla ice cream, for serving
  • Freshly grated lemon zest, for serving

Method:

Thirty minutes to an hour before serving, combine the strawberries, balsamic vinegar, sugar, and pepper in a bowl. Set aside at room temperature.

Place a serving of the strawberries in a bowl with a scoop of ice cream or dollop of whipped cream on top and dust lightly with lemon zest.

Strawberry Goat Cheese Bruschetta

These are gooooood, kid approved and somewhat impressive to guests. Substitute whipped cream cheese if you’re not a goat cheese fan, but do try the goat cheese on your picky eaters. You might be surprised. This recipe makes 12 big slices which can easily be cut in half for easier eating. Remember the napkins!
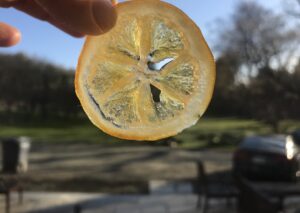
Ingredients:

  • 1/2 cup balsamic vinegar
  • 12 slices Italian bread
  • 1 tablespoon olive oil
  • 1 pound strawberries, washed and diced
  • 2 teaspoons fresh thyme leaves, plus more for serving
  • 1 cup goat cheese, room temperature
  • salt and freshly ground pepper to taste

 Method:

  1. Heat vinegar in a small skillet over medium-low heat. Simmer until reduced by about half, 8 to 10 minutes. Remove from heat and allow to cool to room temperature.
  2. Prepare a grill for high heat. Place bread slices on a foil-lined baking sheet and drizzle with olive oil. (alternatively, assemble bread in a baking sheet, brush slices with olive oil, sprinkle with salt and bake at 350 until toasted to your liking.)
  3. Combine strawberries and thyme in a small bowl and set aside. (If your strawberries aren’t farm fresh and super sweet sprinkle them with a little sugar when nobody is looking.)
  4. Grill bread on the preheated grill until browned, about 3 minutes per side.
  5. Spread goat cheese on toasted bread. Add black pepper, salt, and reduced vinegar to the strawberry mixture. Spoon over the goat cheese topped bruschetta. Garnish with additional thyme.

These are easy to bring if you pre-bake/toast the bread. Simply bring goat cheese, strawberry/balsamic mixture and bread in separate containers and assemble on site.

Now let’s hope the sun shines on those strawberry fields so the berry fest can begin!


A Real Belgian’s Waffle

Waffle love

Ooh La La! A plate full of waffle happiness.

Full disclosure. My grandfather was full-on Belgian. In fact my maiden name, Thys, is like Smith or Jones in the Antwerp phone book. Nonetheless, it’s fair to say the Belgians deserve huge thanks from all of us on this side of the pond for their addictive culinary contributions. No, not eels in green sauce (they still haunt me)—I’m talking about chocolate, beer, fries and of course, the almighty Belgian waffle.

This recipe comes from Sophie, a fellow ski racer parent (and genuine Belgian) who kindly shared her cherished family recipe for “Gauffres Quatre-Quart” AKA Belgian waffles. “My aunt used to make them by the dozens, to be shared with everyone,” Sophie recalls. “We loved when she would stop by!” Sophie humbly claims her waffles aren’t quite the same as her aunt’s, but her family eats them for breakfast, snack and basically anytime. “They are favorites at bake sales, and perfect for thank you gifts! We keep them in a box for a few days—they might dry out a bit, but are still delicious.”

All of the above makes them Bring It all-stars. Sophie thinks any kind of waffle maker would work except, ironically, the very large Brussels waffle makers.

Edie’s note: The original recipe is by weight. Approximate cup measurements are my addition, which worked perfectly when I halved the recipe and used four eggs. 

Sophie’s Gauffres Quatre-Quart

Makes about 20-24 mid-sized waffles, or 12-15 large ones

Ingredients

1 pound salted butter. If using unsalted, I would add some salt
1 pound sugar, or a little less (2 cups)
1 tsp vanilla extract (optional)
1 pound flour (4 cups)
2 tsp baking powder
7 or 8 eggs, depending on their size

Method

Melt the butter.
Beat the eggs until blended (or foamy if you are ambitious)
Add the sugar and vanilla. Blend in.
Add the melted butter. Blend in.
Add the flour and baking powder, about 1/4 pound at a time.
Let it rest for a few minutes while you warm up your waffle maker. The consistency should be thick on a spoon.

I scoop the mixture with a wooden spoon and place the equivalent of a large egg on the grid. Of course you can put more or less to make different size waffles. I cook each waffle for about 3 minutes until golden. The longer they stay, the crunchier/harder they get. Let it cool down on a rack— that is if you have the patience. We always eat the first one warm.

Et voila!

Belgian waffle with sugar

Sugar? Syrup? Ice cream? Bacon? It’s all good!

More note from a quasi Belgian: These waffles are substantial and structurally sound. They can stand up to strawberries and whipped cream, Nutellla, peanut butter and bacon or whatever you care to put on them. The best part is that they turned out great on my first try with no tweaking, babysitting or special handling.
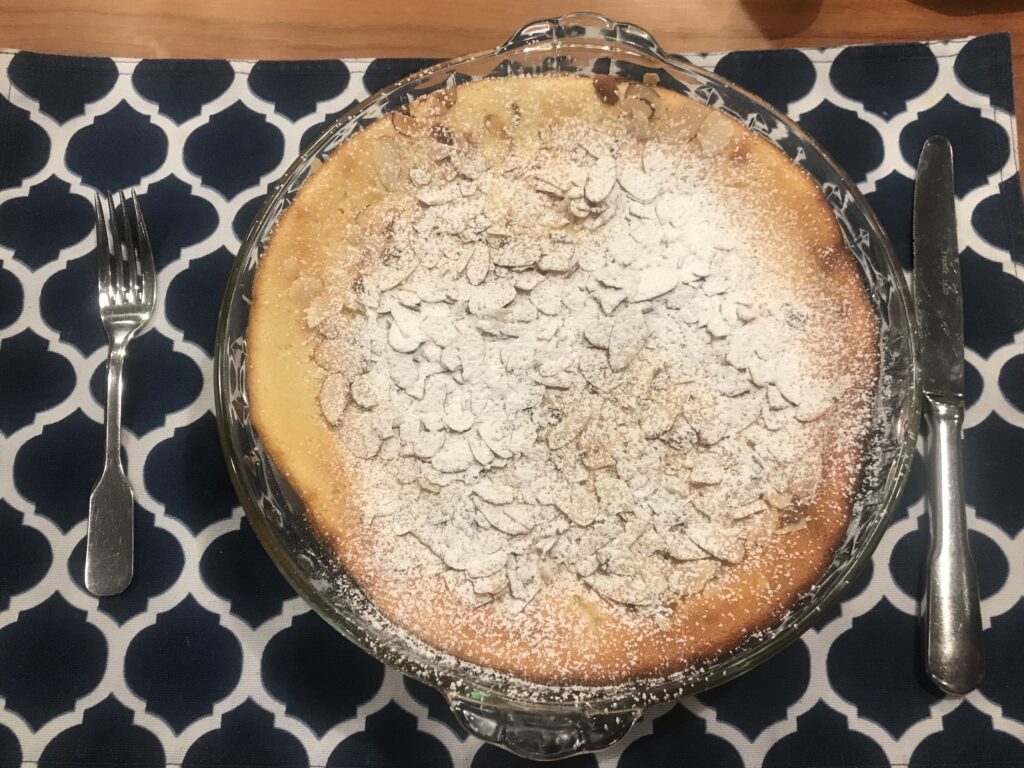
Touché, Waffle Huts!

Love and Lagunitas

Love and Lagunitas

How do we feel about Lagunitas? Here’s a clue!

In honor of Valentine’s Day and the Olympics, we want to give a gold medal shout out to a really cool sport and the really cool company that helps keep them flying. The sport is ski jumping. This year ski jumping is especially exciting because for the first time ever (a mere 90 years after the men started), women ski jumpers are allowed to compete in the Olympics.
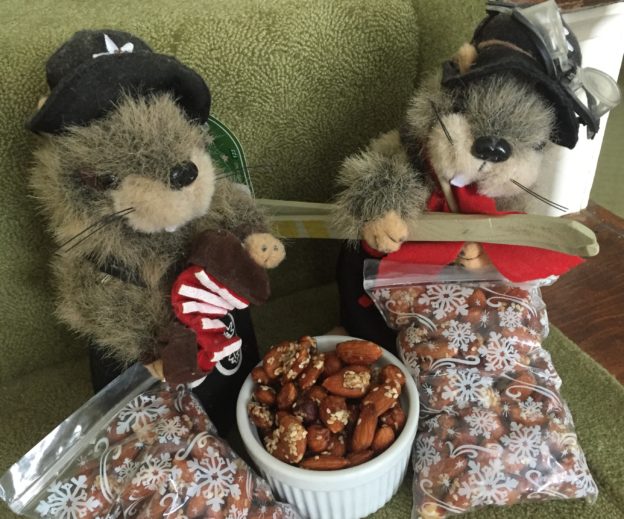
In Europe top ski jumpers have rock star status. In this country ski jumpers are rarely featured between Olympics. The sport struggles to find funding for the training needed to fly, oh, a football field plus, nearly straight downhill. That’s where Lagunitas, a groovy craft beer company from Northern California, comes in. As sponsor of the US Ski Jumping Team Lagunitas has become more like family than funder. Since they are in Sochi, cheering on the team, we figure we can do our part by cheering from home, while drinking Lagunitas of course. Today happens to be a snow day here, and a Friday, and Valentine’s Day, and the day the men take to the “large” (read crazy) hill, so it seems like a good time to start.

Let’s be real. Valentine’s Day can be amateur night, sort of like New Years Eve, with a lot of undeliverable hype and expectation. What we need are options that maximize togetherness and minimize contrived, awkward and complicated situations.

Here’s a low investment/high return plan. Grab a six pack of the good stuff (might we suggest Lagunitas, which happens to be extra strength) and anything that looks good for dipping. This can be pretzels, apples, dried fruit, veggies, nuts, crackers, bread, cookies—really anything that you like at the store or have on hand. At home, open one of the beers. Make a super easy beer and cheese sauce. While that is warming up make an even easier chocolate dipping sauce.
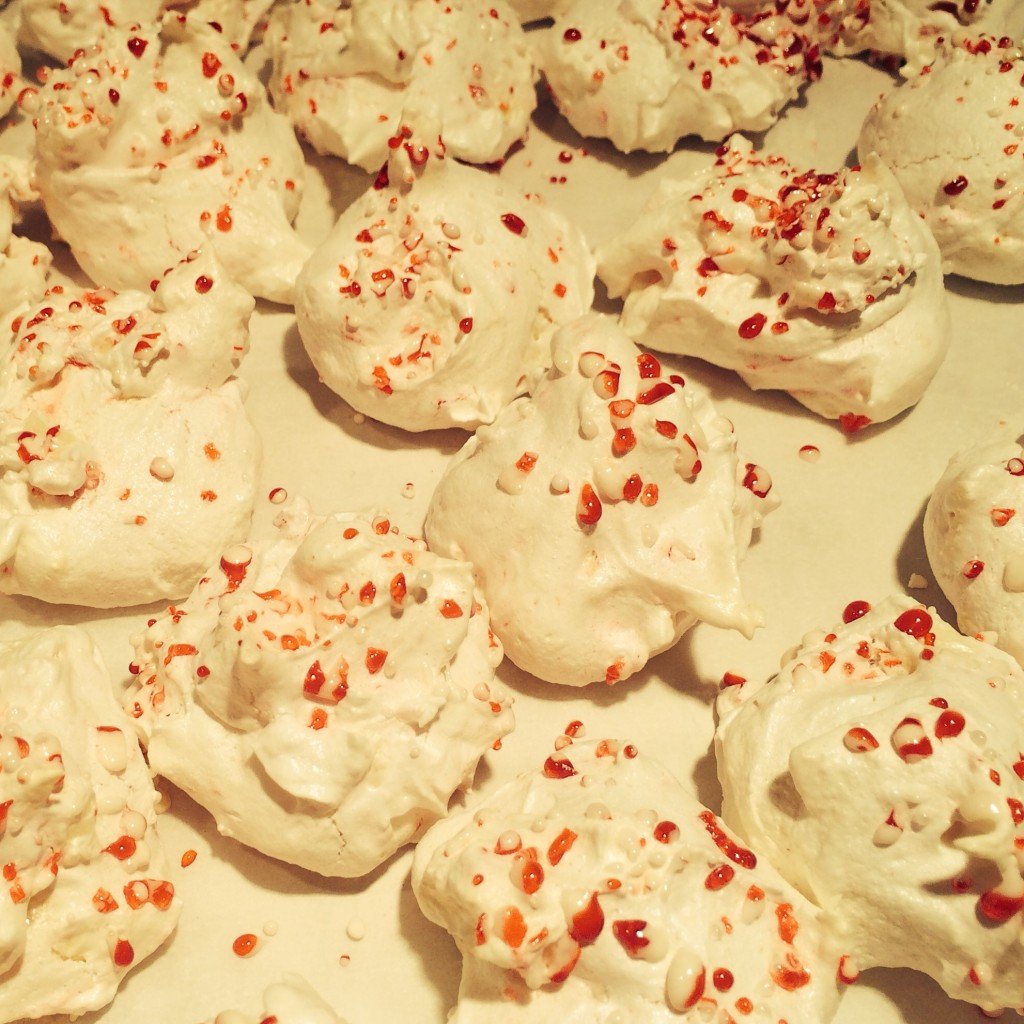
At your final destination, or when your guest arrives, assemble the remaining five beers into Olympic ring formation. Get psyched. Arrange dips and dippers in easy reach. Turn on TV. Get cozy on the couch and let the Games—whatever they may be—begin.

Lagunitas IPA Olympic Rings

Take a cold one for the team!

I Love You More Than Beer (and cheese) Sauce

From the “The Beeroness” (Don’t you just love her sight unseen?)

Ingredients

2 Tbsp butter, softened (or melted
2 Tbsp flour
1 Tbsp cornstarch
1 cup beer (use Lagunitas IPA for highest score from judges)
2 cup shredded Cheddar and/or Gouda, do not use pre shredded
1 cup whole milk
Salt and pepper, paprika optional (and tasty).

Method

Add all ingredients to a blender or food processor. Process on high until very well blended, about 5-8 minutes. Transfer contents to a saucepan over medium high heat. Whisk rapidly and continuously until thickened, about 5 minutes. Salt and pepper to taste. Serve warm.

Lagunitas cheese dip

Go ahead and get cheesy. It’s all good.

Dip it Good Chocolate Sauce

From Joy the Baker

Ingredients

1/2 cup dark chocolate chunks (ore more)
scant 1 cup heavy cream
pinch of salt
1/2 tsp espresso powder (optional)

Method

Place chocolate chunks, pinch of salt, and espresso powder (if using) in a medium bowl.  In a small saucepan, bring the heavy cream to a boil.  Pour the heavy cream over the chocolate pieces.  Let rest for 1 minute before whisking.  Whisk until chocolate is completely melted.  They say to serve it warm but it’s good at any temp. This sauce is pretty thin, so it also pours easily over fruit and ice cream.
Chocolate dip

Chocolate dip fantasia. Of course, cookies and ice cream work too.

Note: The potential for extra points abounds here. You can make your own Easiest French Bread Ever to bring to the party, add a round of Snowchis to the mix, or whip up some Cholliesauce for more dipping pleasure. And of course, nobody’s going to object to that box of chocolates that was Plan A!

fully popped popover

Overnight Blender Cardamom Popovers

There’s a lot going on in that title, but it needs every word to do this recipe justice. First off, I am all about make-ahead breakfasts, especially in the dead of winter when rallying out of bed and getting psyched to embrace the great outdoors can be a challenge. In fact, the pursuit of easy yet yummy breakfasts is such a priority this time of year that I’m going to make it my January theme. Stay tuned for overnight waffles and French toast, but for now we’ll start with these popovers.

They are a golden example of overnight brilliance, made even more convenient by the fact that you make, blend and store the batter in the same container. (If there isn’t one already, there should be an entire cookbook devoted to blender cuisine. Anyone?) Wake up, turn on the oven, pour the batter into some muffin tins or, better yet,  a shmancy popover pan and you’re good to go. Without the filling, these popovers are a perfect breakfast—barely sweet and subtly spiced. Spread them with a little butter, jam or honey and they are perfect for grab and go, eat-in-the-car-on-the-way-to-the-race scenarios. The options of storing the batter overnight or all day, and turning it into a dessert with a delish filling (the one below or really anything creamy that floats your boat) make this recipe even more versatile.

This originally came from AP Food Editor J.M. HIRSCH.

Start to finish: 45 minutes
Servings: 12

For the popovers:
2 cups all-purpose flour
2 cups milk
4 large eggs
2 tablespoons butter, melted
1 tablespoon sugar
1 teaspoon salt
1/2 teaspoon ground cardamom

For the filling:
Two 8-ounce tubs mascarpone
2 tablespoons honey
Juice and zest of 1 lemon
2 teaspoons cinnamon
Sliced strawberries or other fresh berries, to serve.

Heat the oven to 400 F. Coat a 6-cup popover pan or 8-cup muffin pan with cooking spray (or be kind to the ozone and butter the heck out of said pan).

In a blender, combine the flour, milk, eggs, butter, sugar, salt and cardamom. Blend until the ingredients form a very smooth batter, about 1 minute. At this point you can: proceed as directed, making half now and half later; make them all now if you have enough pan space; or put the entire blender in the refrigerator for up to 24 hours.

popovers ready to bake

Barely conscious? Perhaps. But popovers are on deck.


Fill each of the prepared popover pan cups about halfway with batter. You should use only half of the batter in the blender.

Bake for 30 minutes. Remove the popovers from the pan and use a knife to cut a small hole in the top of each to let the steam escape. Cool slightly.

Meanwhile, to prepare the filling, in a medium bowl gently stir together the mascarpone, honey, lemon juice and zest, and the cinnamon. When the popovers have cooled just enough to handle, carefully tear the opening in each just enough to be able to spoon in about 1/4 cup of the filling. Serve each with berries.

Popovers in oven

Almost there…a few more sips of coffee and these babies will be ready.


White Peppermint Meringues

Beautifully baked meringues

Beautifully baked meringues

This recipe comes to you from our very own Boot Camp Bonnie.  She brought these tasty delights to boot camp class and we gobbled them up right after finishing our killer work out.  They were beautiful when wrapped (see Bringing It In Style: Boot Camp Bonnie) and so delicious that I just had to have the recipe. These meringues are jammed packed with flavor. They are little bursts of sweet and pepperminty, soft and crunchy, light and delectable!  You will love them as will everyone around you.

I’ve learned that there are 2 keys to mastering the art of the meringue…

1) Make sure the eggs are not straight out of the refrigerator (difficult for someone like me who NEVER remembers to take eggs or butter out of the fridge until right before I need them). The eggs whites should be brought to room temperature, or more optimally, 70 degrees (again not something I would ever measure, but for those of you who want more specifics, there you go).

2) Make sure there is not a smidgen of yolk left  in the egg whites.  This will make it difficult for the meringues to form stiff peaks.

Attaining virtuosity is not something I’m willing to strive for, especially when it comes to whipping egg whites, but I’d say I’m somewhere on the “ethereal” spectrum and getting better all the time!

Ingredients

2 large egg whites (at room temperature)
1/8 tsp cream of tartar
1/2 tsp vanilla extract
1/8 tsp salt
3/4 cup sugar
1 cup white chocolate chips
1/3 cup, plus 3 Tbsp coarsely crushed peppermints

Method

Preheat oven to 250 degrees.  Beat egg whites and cream of tartar in a deep bowl with a mixer (using whisk attachment) until soft peaks form.  Add vanilla and salt.  With motor running and mixer on high speed, pour in 1 Tbsp of sugar and beat 10-15 seconds, then repeat until all sugar has been added.  At this point, meringue should form straight peaks when beaters are lifted. Fold in white chocolate chips and 1/3 cup peppermint candies with a flexible spatula.

Line 2 baking sheets with parchment paper.  Using a soup spoon, drop meringue in rounded 1 Tbsp portions slightly apart onto the baking sheets. Sprinkle remaining 3 Tbsp of peppermint candy evenly on top of meringues.

Bake until meringues feel dry and stiff when touched but still pale.  This will take approximately 30-35 minutes.  Switch pans halfway through to ensure even baking.  Once you feel you have reached the dry, stiff, yet pale point in the baking, turn off oven, open door, and let cookies stand about 10 more minutes in oven.  Let cool completely.  Makes approximately 32 cookies.

NOTE: These meringues are meant to be soft in the middle.  They are not undercooked when you try one and it melts so easily in your mouth.  Also, you can skip the peppermint and use chocolate chips instead of white chips for the chocolate lovers in the crowd.

Bring It

Try your hand at Bringing it in Style.  You’re sure to be successful with all the options available there. Even I had success in wrapping these cookies. I put them in little plastic holiday bags and wrapped a ribbon around the top.  I felt like Martha Stewart…. well….for a few minutes anyway!

Christmas giving!

Christmas giving!

Snow Ghost Pie

Snow Ghost

The first snow ghost of the season waits for his chance to steal a piece of pie.

Newsflash for you: We love winter.

And we love snow even more. Every year, in a bid for the weather Gods to answer our prayers for the first snow, we make Snow Ghost Pie. It originally appeared—along with a legend of the snow ghost— in a Hershey’s ad circa 1972. I clearly remember reading the story then, and of course making and eating the chocolate pie which, incidentally, requires no shmancy ingredients. The pie is as brilliant as the story, which convinces kids to offer up the pie to the snow ghost (who in the story was really the creepy handyman who had enlisted the kid to steal a piece of his grandma’s cooling chocolate pie). At any rate, if the ghost takes a piece of the pie, it will keep snowing and you won’t have school the next day. Not surprisingly I am asked to make snow ghost pie—and jumpstart winter— a lot this time of year. The filling also makes a great chocolate pudding on its own, but it’s the decorating and ghost-baiting that makes it fun.

Snow Ghost Pie story

The story of the Snow Ghost, as told by Hersheys

Snow Ghost pie ad

The original Snow Ghost Pie ad

 Ingredients

1 (9 inch) baked pastry shell or graham cracker/shortbread crust
1/2 cup Hershey cocoa
1 1/4 cup sugar
1/3 cup cornstarch
1/4 tsp. salt
3 cup milk
3 Tbsp. butter
1 1/2 tsp vanilla
1 1/2 sweetened whipped cream

Method

Combine cocoa, sugar, salt and cornstarch in a medium saucepan. Gradually blend milk into dry ingredients, stirring until smooth. Cook over medium heat, stirring constantly until filling boils; boil 1 minute.  Remove from heat, blend in butter and vanilla. Pour into  pie crust, carefully press plastic wrap directly into pie filling. Chill 3 to 4 hours.

Garnish with whipped cream, creating a cute little snow ghost if you like. And now for the totally unnecessary step that is key to keeping the legend alive. Set pie outside again to “cool” after decorating. Do your best to forget about it for a bit then check to see if the snow ghost visited and took a piece.

Snow ghost pie after ghost

Apres ghost. He wasn’t very hungry this time.

Snow ghost pie pre ghost

Pre-ghost pie


Bringing it:

This is an excellent dessert to bring to a family or kid gathering. Whip the cream and bring it separately so you can decorate the pie there and then set it out to “cool” before dessert. Just make sure it is not anywhere enticing to dogs (or squirrels).


Blue Ribbon Banana Cake

Blue-ribbon-banana-cake-amateur

Banana cake: the amateur version

Officially this is called double banana cake and it hails from a restaurant in Winnipeg via Bon Appetit’s Favorite Restaurant Recipes. That’s the official story of provenance. But in these parts, it is called *Blue Ribbon Banana Cake because it won first prize at the Sandwich Fair. If you have ever seen the line of entries for baking contests at this particular country fair, you are by now suitably impressed.

My dear friend, a humble, wildly talented cook and baker (whose masterpieces are created in a galley-sized kitchen) prefers to live in the witness protection program when it come to her prowess. So she spent years quietly contemplating entering one of her fabulous desserts in the fair. My only advice to her was to avoid the pie category, the judging of which I suspect is rife with nepotism. Pie, it seems, is the signature specialty of practically every revered country cook. And besides, who wants to spend weeks or months perfecting a pie crust when there are masses of women who can whip up a better one guided solely by instinct? After making this suggestion I tried her banana cake and there was no longer any doubt about how to make her fair debut.

With six bananas in the cake and two more layered in between, this cake is dense, moist and oh-so-fresh tasting. The real secret, however, is in the kosher salt, that gives both cake and frosting the blue ribbon sass. In deference to the champ, I made my version just as the recipes says and did not attempt to copy her tweak, which is to make it in three pans as a triple layer cake. Desserts are not my specialty, so the prospect of two layers of slippery bananas vs one was just too daunting. As it was, the actual blue ribbon winning cake had to be hastily rebuilt just prior to its fair entrance thanks to a surprise boulder in the parking field.

At any rate, if you have an occasion or a special meal or a whole lot of ripe bananas make this cake! And if you’re bringing it somewhere, do not expect to return with leftovers. Guests WILL divvy up any remains and spirit them away.

Blue-ribbon-banana-cake-pro

Blue Ribbon Banana cake: the Pro version. Even the grand marnier chocolate cake takes a back seat.

Double-banana- cake-served

The triple layer pro version, up close and personal.

 Ingredients

CAKE

1 1/2 cups (3 sticks) unsalted butter plus more for pans, room temperature
3 3/4 cups all-purpose flour
1 1/2 tsp baking soda
1 1/4 tsp kosher salt
2 1/4 cups sugar
6 large eggs
3 cups coarsely mashed very ripe bananas (about 6 large)
3/4 cup sour cream

FROSTING

1 cup (2 sticks) unsalted butter, room temperature
4 cups powdered sugar
1/2 cup heavy cream
1 tsp vanilla extract
1/2 tsp kosher salt
2 ripe but not mushy bananas, cut crosswise into 1/8-inch slices

Method

CAKE

Preheat oven to 325°. Butter two 8″-diameter cake pans with sides 2″ high. (The pro uses 3 pans for triple layer). Line bottoms of pans with parchment paper rounds. Whisk flour, baking soda, and salt in a large bowl. Using an electric mixer, beat 1 1/2 cups butter and sugar in another large bowl until light and fluffy, 2–3 minutes. Add eggs one at a time, beating to blend between additions. With mixer on low, gradually beat in flour mixture, scraping sides of bowl. Mix in bananas, then sour cream. Divide batter between pans.

Bake cakes until a tester inserted into the center comes out clean, 50–55 minutes. Let cool for 20 minutes in pans on wire racks.

Invert cakes onto wire racks; let cool completely. Remove parchment. Using a serrated knife, trim off rounded tops. (Slacker alert–I did not do this because my cakes were not very rounded. However, this is probably key to sound architecture.)

FROSTING

Using an electric mixer, beat first 5 ingredients in a large bowl until light and fluffy, 6–7 minutes.

Place 1 cake on a plate. Spread 1 cup frosting over. Arrange banana slices on top. Top with second cake. Spread a thin layer of frosting over top and sides of cake; chill for 30 minutes. Spread remaining frosting over top and sides of cakes.

Bring It!

After being in the fridge the cake is plenty sturdy and can simply be covered in plastic wrap on its platter. See story above and do position the cake wisely in case of any unforseen bumps. Those bananas can get mighty slippery.

*An observer did quietly admit that the first reaction by a judge upon tasting this cake was “Holy Crap!” Even though that sums up everyone’s first reaction to this cake, “Holy Crap Cake” just didn’t sound right.

Banana cake with first prize ribbons

To the victors, the spoils.


3-3/2-2 Crepes

windoe-2

Four very good reasons to get out of bed in November.

Stick season. Oh yeah. It’s cold, there’s no snow on the ground and its too early for Christmas lights and cookie making therapy. What we need now is a reason to get out of bed. Boom—got you covered! I know, I know. Crepes sound so high maintenance, so NOT what the average person would contemplate whipping up, especially for a weekday breakfast. But I promise you these will set you free, and take barely more time than it takes to toast up some Eggo’s.

The timesaving is twofold. First, the recipe is so simple to remember that your won’t be futzing around finding it. And second, it makes enough that you can use the same batter for two or three days. And I know I said twofold but I forgot a major benny. On any given morning you probably have all the stuff on hand.

If you’re going for sweet you can fill these with any type of jam, or with a bit of granulated sugar. If you’re feeling more meaty cheesy than sweet, then go for a bit of ham and cheese. And if you’re feeling like you need some serious love from your peeps you can fill them with Nutella or Cholliesauce.

Trust me on this: you do NOT have to be French or kitchen savvy in any way to master these—all it takes is a few rounds of practice. If you blow a few just call it crepe shrapnel dust it with a lot of powdered sugar and move on.

Ok, here we go.

Ingredients

3 eggs
3 Tbsp melted butter
2 cups flour
2 cups milk

½ fresh lemon
A wrapped stick of butter for greasing pan (you wont use much of it).

Method

Whirl eggs in a blender. Add butter, flour and milk.

Heat a frying pan (I use my All-Clad double handled one) over medium heat. Hold a stick of butter and coat the hot pan to create a layer. Pour (or ladle) about 1/3 cup batter into pan and tilt the pan to coat the bottom evenly. When the sides lift easily flip entire crepe. Spread desired filling on half of crepe, and fold crepe in half then in quarter. Lift crepe from pan to a serving plate. Dust with powdered sugar and a squeeze of fresh lemon juice.

Butter-in-pan

Greasing the easy way.

crepes-side-1

Side 1, ready to flip.


crepes-side-two

Side 2, ready to fill.

crepes-with-jam

Blurry, but you get the idea.


Store the batter for tomorrow’s breakfast, for an afternoon snack or for any moment that stick season is getting to you. Slip a couple of crepes into a baggie for a great school snack too.

Salted Caramel “Cholliesauce”


Halloween and Easter are my favorite holidays. The bar is low, family travel is typically not required and the popular traditions surrounding them involve candy. Candy makes people happy. Temporarily at least. So let’s live in the moment and make some creamy caramel sauce to celebrate Halloween and all the apples just begging to be dipped.

This particular golden elixir is a Bring It! all- star. It features only four ingredients, all of which—if not in your kitchen already—can be procured at a mini mart (ok, not the Maldon sea salt, but nobody will arrest you for using kosher salt). It is easy to make, you can memorize the recipe after one go round, it travels in its own storage jar and it will be a welcome contribution or hostess gift for any occasion. Oh, and it is fabuloso! Use it on ice cream and in 2-2/3-3 crepes (coming soon), drizzle it on pretty much anything or use it as a dip for pretzels, apples or just your spoon.

As for the name, it is a merging of our three sons’ names. We knew we wanted something to be called Cholliesauce, and after Sawyer took one taste he decided this was it. Ollie and Chauncey wholeheartedly agreed.


Ice cream: good

Ice cream: good

Ice cream with Cholliesauce: wayyyyyy better!

Ice cream with Cholliesauce: wayyyyyy better!

Ingredients

2 cups granulated sugar
12 Tbsp unsalted butter, at room temperature, cut into pieces
1 cup heavy cream, at room temperature
1 Tbsp fleur de sel or Maldon sea salt flakes

Method

1. First, make sure you have all of the ingredients ready. Once you start the caramel sauce you have to pay close attention so you don’t burn it. To begin, heat the sugar over medium high-heat in the bottom of a heavy 2-3 quart saucepan. When the sugar starts to melt, start whisking the sugar, making sure to reach into the sides of the pan. The sugar will clump up, but keep whisking. It will continue to melt. When the sugar is melted, stop whisking. You can swirl the pan to move the sugar around.

2. Continue cooking the sugar until it reaches a deep amber color. Make sure you watch the pan very closely. This is where it is easy to burn the caramel. If you are using a candy thermometer (I have tried but am better off eyeing it) you want the caramel to reach 350 degrees F.

3. As soon as the sugar reaches the dark amber color, carefully add the butter. Whisk until butter is melted. If the sugar gets stuck to the whisk, you can switch to a wooden spoon.

4. Remove the pan from the heat and slowly pour in the heavy cream. Whisk until cream is incorporated and caramel is smooth. Whisk in the fleur de sel or Maldon sea salt flakes.

5. Let the caramel sauce cool for about 10 minutes in the pan. Pour the caramel into a large jar or smaller jars and cool to room temperature. Put the salted caramel sauce in the refrigerator and store it there for about a month. Yeah, a month. Good luck with that.


Best Joni Mitchell Apple Pie

As apple season comes to a close it would be a crime to miss the topic of apple pie. And it would be more of a crime if you did not make an apple pie because you were daunted by making the crust. Despite what the aggro bakers say, it is not a crime to use Betty’s little helper, the refrigerated roll-out crust. I’ll never reveal them, but I know bakers at the highest level who resort to the Pillsbury solution on occasion with no damage to their reputations.

So let’s get to it. I made this pie with the last of our organic (read untended) pears and “Joni Mitchell” apples. You know, “…Give me spots on my apples, but let alone the birds and the bees now…”. I based it on the King Arthur Flour best apple pie recipe with the following slacker alterations:

Obviously, I skipped the homemade crust. I used pears and apples, did not peel them (they’re organic fergawdssake), and grated half the apples before I realized I had the wrong blade on the cuisinart. I subbed maple syrup for the apple cider syrup, used flour instead of “pie enhancer,” and subbed cinnamon and ginger for apple pie spice. Alright already! Here it is, and it was outstanding.

Ingredients

Crust:
Your favorite refrigerated roll-out pie crusts.

Filling:

3 1/4 pounds (about 9 whole apples, 10 cups) Cortland or other baking apples or pears, cored and sliced
3/4 cup (5 1/4 ounces) sugar
1 tsp cinnamon
1/2 tsp ground ginger
1/4 cup (scant) maple syrup
1 Tbsp rum (optional. I didn’t go there, but why not?)
2 Tbsp flour
1/8 tsp salt
2 tsp vanilla extract
juice of 1/2 lemon (about 2 Tbsp)

Method

To make the crust:  Take the box out of the fridge and let it warm up a bit.

To make the filling: In a large bowl, stir together the filling ingredients, mixing till well-combined. Set aside. (I LOVE that part!)

Assembly: Unfurl one piece of pie crust and lay it into a 9-inch pie plate. Spoon in the filling. Unfurl the other piece, lay it atop the filling, and seal and crimp the edges. Brush the top crust with milk, and sprinkle it with coarse sugar, if desired. Or, save out a bit of the crust, and cut decorative leaf designs, laying them in the center of the crust or around the edges. (yeah, right.)

Baking: Place the pie on a baking sheet to catch any drips. Bake in a preheated 425°F oven for 15 minutes. Reduce the heat to 375°F, and bake for an additional 45 minutes, or until the top is brown and filling is bubbly. Yield: 1 pie, about 10 servings.

pears-and-apple

Joni Mitchell apples and pears–not the prettiest, but darned tasty.


Crackle Bars

To balance all those healthy paleo and endurance crackers, I present to you a very unhealthy form of crack…er. This is ridiculously yummy and easy. Healthy? Not so much. Somebody brought a batch of this to book group and warned of its addictiveness. I started giving it as a neighborhood holiday gift and it quickly became an all-season, all-occasion favorite. It makes excellent bake sale material (which puts it in the Positive Snacks category), is darned good on a hike (add it to Better in a Backpack) and is a huge hit with hungry, sports-playing teenagers, who inspired the current batch.

Crackle-love

Child Labor–Happy and ready to spread.

And on the topic of kids, they can help you out here. They love the process of making it, especially spreading the melted chocolate chips (Hello bake sales!). It’s equally good with saltines or graham crackers, so use what you prefer or what is in your cupboard. These were introduced to me as “4th of July Bars” but the name did not stick. You do need to crack them to break them into pieces. And they’re made with crackers. The fact that they are as frighteningly addictive as something with a similar name is purely coincidental.

Ingredients

1 cup light brown sugar
1 cup butter
Saltines or graham crackers
12 oz milk chocolate chips (ultra cheapo brands do not always melt as well)
Chopped nuts, roasted and salted (your choice–I love tamari almonds but my kids prefer peanuts which are easy and cheap so I don’t argue.)

Method

Have ready a 13 x 9 pan: foil lined and lightly greased. Preheat oven to 400 degrees.

Line the pan with a single layer of crackers. (saltines fit perfectly)

Combine sugar and butter in saucepan.  Bring to a boil and boil for 4 minutes exactly – no more.

Pour boiled mixture over the crackers. Bake for 5 minutes – no longer!

Remove from oven and while very hot scatter the chocolate chips on the surface. Spread chips out evenly as they melt and soften.

Scatter with chopped nuts. Refrigerate until hardened.  Then cut or break into pieces.

Makes a bunch.

crack-cooling

The cool down phase.

crack-smooth

The smoothing phase.


Bring It!

Store in a gallon-sized ready to tote ziploc bag in the fridge, or in individual plastic baggies that you can dole out as necessary. Make it fancy with tissue paper and a ribbon.

Glazed Lemon Cake

Sawyer on his 2nd piece!

Sawyer on his 2nd piece!


Edie’s son told her she had to post “those bacon wrapped thingies” on our blog.  My son told me I had to post “that lemon-y lemon cake”.  He said that lemon cake is the best dessert he has ever tasted IN HIS LIFE!  At 13, he’s not exactly a connoisseur but, he’s been around long enough and sampled enough desserts to be a trusted source.  So here it is, courtesy of my son Sawyer, the Glazed Lemon Cake straight from the Silver Palate Cookbook. If you own the cookbook, grab it off your shelf and make this cake now.  If you don’t own the cookbook, you should strongly consider this purchase. Every recipe is a winner. In the meantime, here is the recipe, straight up, no modifications.  And my motto…..if you have lemons, make lemon cake!

Ingredients

2 sticks salted butter, softened
2 cups sugar
3 eggs
3 cups all-purpose flour, sifted
½ tsp baking soda
½ tsp salt
1 cup buttermilk
2 tightly packed Tbsp grated lemon zest
2 Tbsp fresh lemon juice
Lemon Icing (see below)

Method

Preheat oven to 325 and grease 10 inch tube pan. Cream butter and sugar until light and fluffy.  Beat in eggs, one at a time, blending well after each addition.

Sift together flour, baking soda, and salt. Stir dry ingredients into egg mixture alternating with buttermilk, beginning and ending with dry ingredients. Add lemon zest and lemon juice.

Pour batter into prepared tube pan. Place in oven and bake for 1 hour 5 minutes or until cake pulls away from the sides of the pan and a tester inserted into the middle of the cake comes out clean. (I only bake this cake for 50-55 mins but my oven tends to cook things faster than what most recipes call for – so check cake early to see if it’s done early),

Cook cake in pan for 10 minutes.  Remove cake from pan and spread icing on it while cake is still hot.

Lemon Icing

1 pound confectioners’ sugar
1 stick salted butter, softened
3 tightly packed Tbsp grated lemon zest
½ cup fresh lemon juice

Method

Cream sugar and butter thoroughly.  Mix in lemon zest and juice. Spread on warm cake.


Pucker up!

Pucker up!

Lemon cake pre frosting

Lemon cake pre frosting

Lemon cake frosted

Lemon cake frosted

Editorial comments from Sue

The frosting can pack quite a PUCKER. You can tone it down a bit depending on your tastes by cutting the lemon zest and lemon juice amounts by maybe a third.  We all love the pucker at my house so we go full tilt.

Bring It!

Full disclosure, this cake is a bit of a mess.  Bringing this cake from your kitchen to a party, well, it might not be pretty but it will still taste great. If you have one of those round cake Tupperware containers, perfect. Use that.  Or, you can bring the cake unfrosted on a plate wrapped in foil. Transport the icing in a separate container and frost when you get there. Also, adding fresh fruit to the top, such as blueberries or strawberries would be a great addition.  Enjoy and pucker up!

Yoga Cookies

Yoga Cookies

These cookies came from my sister Amy who asked me to bring dessert to a gathering of primarily yoga instructors.  As you can imagine, yoga instructors have a focus on healthy food that cannot be deterred. I knew immediately that bringing Whoopie Pies or Double Chocolate Mousse Cake were out of the question. And so I turned to my sister, Yogi that she is, and asked for help. She sent me the recipe below which comes from her friend Anne Novak, an accomplished Kundalini yoga instructor, who lives and practices in northwestern Connecticut.  For a link to other recipes from Anne click here.

Ingredients

1 cup whole wheat flour
3/4 cup brown sugar or honey (use brown sugar to make these vegan)
2 cups oats
1/2 cup ground flaxseed
1 cup dried fruit (cranberries, blueberries, raisins, whatever you have on hand)
1 cup nuts (almonds, walnuts, pecans, again whatever strikes your fancy at the time)
1/2 cup sunflower seeds
1 cup shredded cocount (or as Edie has coined it, “vegan bacon”) (optional)
2 cups dark chocolate (optional)
2 tsp each cinnamon and ground ginger
1/2 tsp nutmeg
1/2 tsp baking powder
1/2 tsp salt
3/4 cup oil (sunflower or any good quality vegetable oil will do)
1 cup soymilk, almond milk, coconut milk, or regular milk

Method

Mix dry ingredients. If using honey, mix oil and honey together, then mix with dry ingredients.
Mix well, then add whatever milk product you’ve selected. Allow batter to sit for 10 mins.

Form 2 inch round balls on oiled cookie sheet (or use parchment paper). NOTE: They will be sort of runny before you bake but this is okay! Bake at 400 degrees for 10 minutes. Do a couple Downward Dogs while they bake.

Bring It!

You can put these in a fancy little bag with a bow or put in a cookie tin to deliver.  And you don’t have to be a Yogi to enjoy. These are great with or without regular yoga practice.  Namaste!