I’ve been holding out on you. Not on purpose of course. But somehow, in all this time of being with each other, I still have not shared my absolute favorite, go-to, eat-your-greens-and-feel-like-Popeye kale salad. Massaging may seem like an excessive step to take with your kale (I mean really, is it that deserving?), but trust me—it is a worthwhile technique to have in your repertoire.
This recipe calls just for salt in the massaging process. Other recipes call for olive oil alone or with lemon juice or with the entire dressing. Hey, you’re massaging your kale–it’s not going to complain. Massaging makes raw kale way more friendly, and with a batch of massaged kale at the ready, your options for creating quick, delicious, deconstructed meals soar.
As with other recipes, this is more about technique than hard and fast ingredients and proportions. Live loud and large—mix that kale with something crunchy, something creamy and something sweet and the rest will take care of itself.
Before my cousin Danielle beats me to the punch, I urge those of you who dabble in organic produce to buy organic kale. Danielle, the ultimate caregiver (and least righteous mostly Vegan I know) reminds us that kale is among the “Dirty dozen” of produce items that pack the nastiest pesticide punch. Thanks Little Dan, for always having our backs! (and forgive me for all the gratuitous bacon talk.)
Without further ado I give you:
Massaged Kale Salad
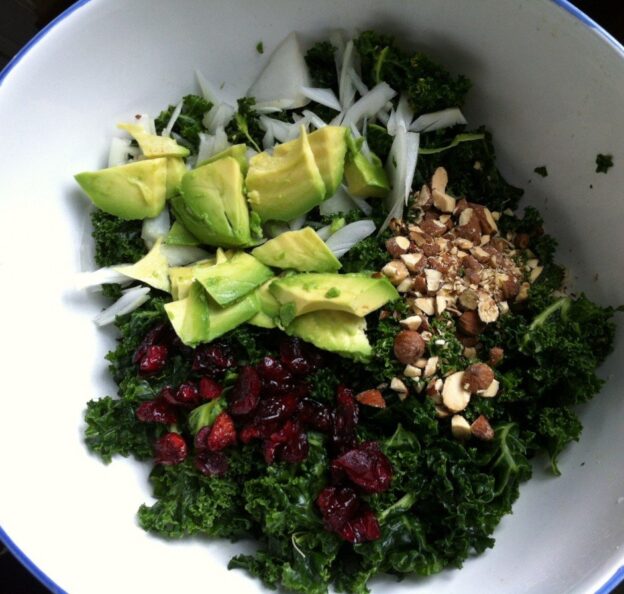
Ingredients
1 bunch kale (I use curly because that’s what we get)
1 t salt
1/4 medium-small red onion, thinly sliced or diced
1/3 cup chopped toasted almonds or nuts of choice
1/3 cup raisins, currants or dried fruit of choice
1/2 large avocado, diced
1/4 cup olive oil
2 Tbsp apple cider vinegar
Method
Soak kale in water to loosen any dirt. Wash individual leaves as you de-stem them (pull leaf away from thickest parts of stem). Shake dry. Chiffonade leaves (stack, roll and slice into thin ribbons) and put in a large bowl. (Edie’s note: Chiffonade if you must, but tearing the kale in pieces works just fine and sort of makes me feel like a Tuscan). Sprinkle salt over kale and, using hands, massage kale for 3-4 minutes. After about a minute you’ll notice a big difference in the leaves – they’ll start to soften and turn a dark green almost as though you were steaming them. When done, drain off any liquid that collects on bottom of bowl (may or may not happen) and set kale aside.
If you are starting with raw nuts…Heat a small sauce pan, toss in whole nuts and toast until nuts start to brown slightly. Shake pan on occasion to brown nuts evenly and to keep from burning them. Walnuts, pecans, filberts or even sunflower seeds are great in this salad too. Remove nuts from pan and give them a rough chop on your cutting board. Add nuts to bowl of kale.
Add diced avocado, onions and raisins to bowl (again, raisins, currants, your fave dried fruit in raisin-sized pieces or whatever you have on hand). Pour olive oil and apple cider vinegar evenly over bowl of goodness, then toss until all ingredients are thoroughly mixed.
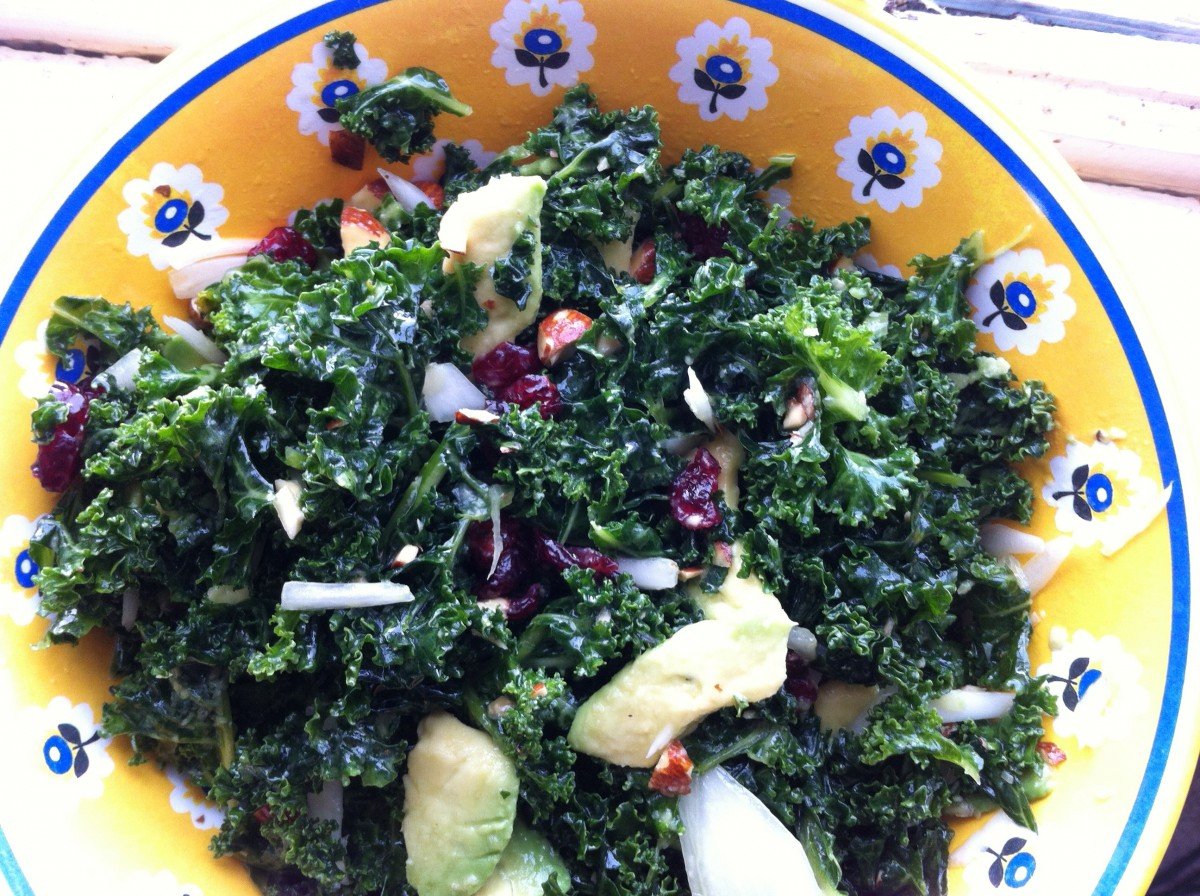
Kale salad, post massage, fully dressed.
Bring It
One of the many beauties of kale is its indestructibility (if that’s a word). You can bring this anywhere in anything, store it wherever and it will not suffer. I have transported it in everything from ziploc bags to salad bowls to recycled takeout containers and it has survived in backpacks for hours before being enjoyed for lunch or apres ski.


