Monthly Archives: December 2013

New Year’s Shrimp Appetizer

Shrimp and Artichoke App

Do you want the perfect appetizer for New Year’s Eve that will be the hit of the party?  If you answered yes to that question, read on.  This is a winner!  All you have to do is marinate shrimp and artichokes for 24 hours in an oil and vinegar marinade. That’s it.  It could not be easier.

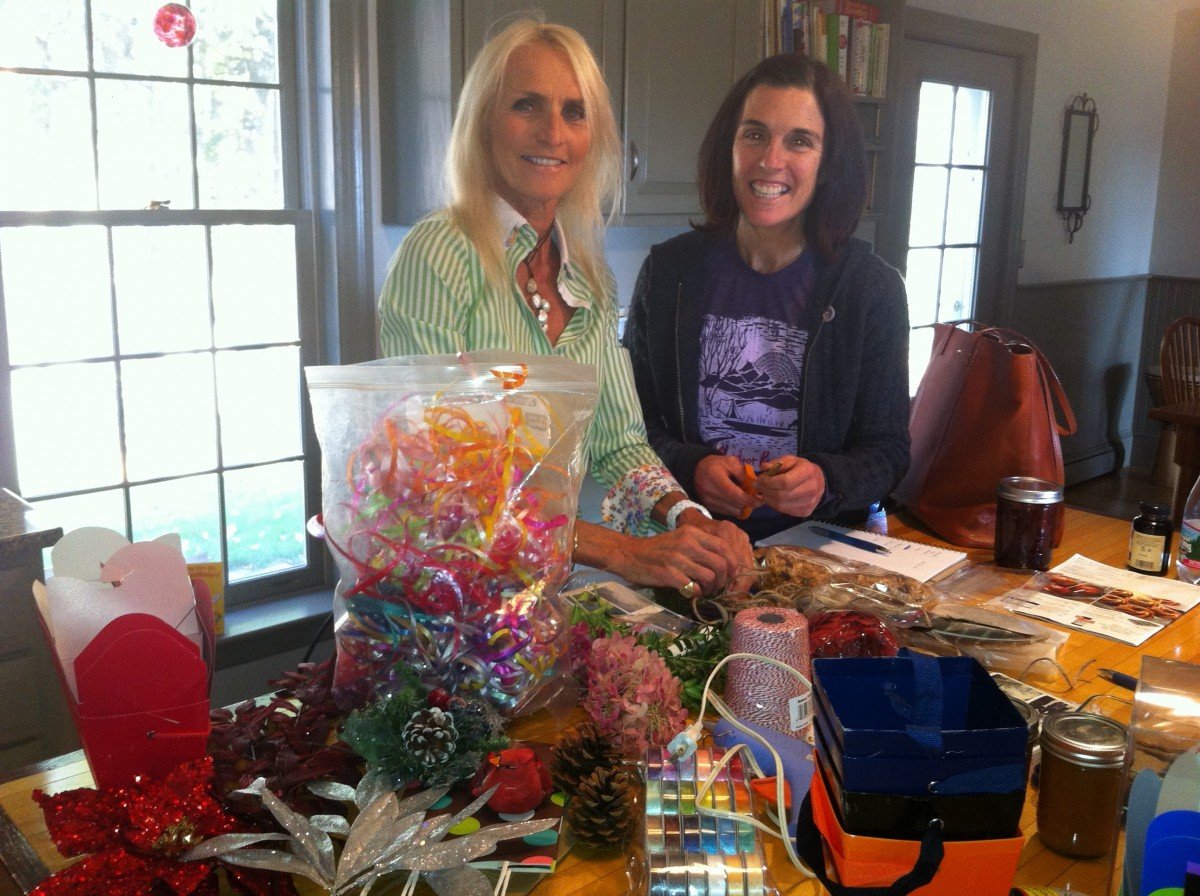
I have to give credit to my friend Jane for this recipe.  Jane and I go on almost every vacation together.  Our vacations are always in remote areas with many challenges that present themselves daily while trying to cook for our families. We usually have a small camp stove which we hope works for the duration of our trip. Running out of fuel for the stove or better yet, having the fuel tip over onto our box of food can test even the most creative cook. The grocery stores can be 5-6 hours away or more making it essential to get all provisions days in advance.  Not to mention there is a huge output by our group each day creating a hunger that would put a 16 year old boy to shame.  We eat a lot of pasta and bagged salad (yes the kind that comes with the little bag of croutons, dressing, and cheese inside).  Sometimes we jazz things up with a meal as chic as quinoa but most often it is solid, hearty food that will fuel us for the day’s activities.  Jane is a foodie like me – so when we are preparing these camp meals we often talk about what we really like to cook and eat when we are home.  I asked her for one of her top recipes and immediately she said, “you have to make my shrimp and artichoke appetizer”.  And so, here it is, courtesy of my friend Jane – no modifications – straight up.  I saved it for New Year’s Eve because it is a special recipe that is perfect for a fun, festive New Year’s celebration!  Thank you Jane and I look forward to planning our 2014 vacations and menus!

Ingredients

2 pounds medium or large sized frozen cooked shrimp (tails on)
1 large red onion, sliced thin
2 8.5 oz cans artichokes, drained and quartered
16 bay leaves

Marinade:

1 1/2 cups canola oil
1 1/2 cups white wine vinegar
2 tsp ground celery seed (or 1 Tbsp celery seed)
6 Tbsp capers with juice
1 Tbsp salt (have a light hand with the salt)
20 drops Tabasco sauce (or hot sauce of your liking)

Method

Thaw shrimp in cold water.  Place shrimp, sliced onions, artichokes, and bay leaves in a large Tupperware.  Mix marinade in a separate bowl and then pour over shrimp mixture.  Marinade for 24 hours, flipping container a few times during the 24 hour period to make sure the marinade it mixing with well.

To serve, drain most of marinade and place shrimp mixture in a bowl.  I was worried about it being messy but nobody cared. Most people just grabbed the shrimp tail with their fingers and popped it in their mouth (and they weren’t afraid to dig in to the artichokes with their fingers either).  I had plenty of napkins and toothpicks nearby just in case someone preferred a more civilized approach!

Bring It

Make sure you have a good seal on your Tupperware because if this spills en route, your vehicle is going to smell like shrimp marinade for quite some time!  Maybe not the worst thing but at least you’ve been warned.

Ginger Ade: Simple Syrup to the Rescue

ginger simple syrup

Ginger Syrup and a couple of tasty sipping options.

I need a drink. And I hate to drink alone, so you need a drink too. Oh I know—at this point in the holidays we’re all ready to detox, but hang with me. I’m going to give you a healthy, refreshing concoction that can be used in alcoholic and non alcoholic drinks. In fact, I first came upon this tasty elixir in Rebecca Katz’s awesome book the Cancer Fighting Kitchen. So I’m looking out for you here.

The concept is pretty simple. You just boil down a ton of ginger with sugar and water to make a simple syrup infused with the zesty goodness of ginger. Strain out the ginger and you can add the syrup with a squeeze of lemon to hot or cold herbal tea, to seltzer, or of course to your favorite cocktail fixin’s.

Being quite lazy, especially in the post holiday coma, I looked extensively for a recipe that featured unpeeled ginger. I was victorious with this one from David Lebovitz  that gets boiled a good long time for some serious ginger sass. The caveats are a darker syrup (which screams Dark and Stormy to me, so it’s all good), and the warning  that you can’t reuse the unpeeled ginger in things like gingersnaps, marmalade and ice cream. This triggered my age-old struggle between being lazy and being cheap.

In the end, I opted for lazy, and snacked on the sweet ginger afterwards anyway, proving that yes indeed you can be both lazy and cheap. Hooray! Ok, here’s the super simple recipe for super fresh ginger syrup.

Makes about 2 cups:

Ingredients

8 ounces  fresh ginger, unpeeled
4 cups water
2 cups sugar
pinch salt

Method

Slice the ginger thinly, then chop it into rough, smaller pieces.

Combine ginger water, sugar, and salt in a saucepan. Heat to a boil, then reduce the heat to a steady simmer. Cook for 45 minutes to one hour.

Cool, then strain the syrup through a fine-mesh strainer. Store the strained syrup in the refrigerator, covered, until ready to use. It should keep for at least two weeks refrigerated.

There are googles and googles of ginger cocktails out there, like these ones from Tablespoon  For a festive sparkler add a tablespoon of syrup and some candied ginger to a champagne glass and fill with your bubbly of choice. My quick fix is to fill a glass with ice, pour a tablespoon or so of syrup over the ice then add vodka according to your immediate need. Fill the glass almost to the top with seltzer then add a splash of cranberry juice for cha-cha and color.

For ginger soda start with 1/3 glass of syrup and a generous squeeze of fresh lemon or lime juice. Fill the glass with ice then top with sparkling water or tonic and garnish with a round of citrus or fresh mint.

The sky is the limit here so spice things up, be creative and feel virtuous about bringing a whole lot of healthy ginger into your life.

Whole Wheat Cinnamon Scones

Scones Sugaring

What better treat to make for Christmas morning than a warm, melt-in-your-mouth scone!  I learned how to make these scones at the Baking Education Center at King Arthur Flour in Norwich Vermont.  It was phenomenal class.  I am a self-taught baker (i.e. I learn by baking experiments gone bad), which made this class very enlightening. I learned more about baking in the first 15 minutes than I’ve learned from years of baking in my home.  So, thank you King Arthur for your cooking classes.  If you live in the area, or even if you don’t, you should take a class. You can check out the school, the store, and the café here.  This recipe comes from King Arthur Flour as well so all credit to them for these wonderful scones.

I flavored my scones with cinnamon chips and a thick vanilla syrup (Madagascar Bourbon Pure Vanilla Bean Paste) which gives them an extra hit of flavor. I also topped them with sparkly white sugar.  But you can flavor your scones with whatever combination of flavors you want or whatever is on hand in your pantry.  When you take a class at King Arthur, they have every chip, dried fruit, nut, and spice available for you to choose from.  The selections are almost paralyzing.  Once I settled on cinnamon vanilla, I was quite happy. And I had already made a deal with my friend, who selected currants and walnuts, that we were to split our takes in half at the end of the class.  It was a win/win!

Ingredients

2 cups whole wheat flour
2 Tbsp sugar
2 tsp baking powder
1/2 tsp baking soda
1/2 tsp salt
1/2 cup chilled, unsalted butter
3/4 cup buttermilk
1 egg yolk (save the white for topping scones)
1/2 cup cinnamon chips (or whatever flavoring you like)

For the topping:
1 egg white
Sparkling sugar

Method

  1. Place the dry ingredients in a large bowl and mix well.
  2. Cut in butter with pastry blender or two knives.
  3. Whisk together buttermilk and egg yolk and stir into dry mixture until it a dough forms. Transfer dough to a lightly floured work surface and gently and quickly knead in the optional cinnamon chips (or dried fruit, nuts, etc…). Pat the dough into a flat disk about 7 inches across and cut it into wedges.
  4. Transfer the disk to a parchment-lined or lightly greased baking sheet. For crispier scones, separate the wedges.  For softer, higher rising scones, leave them in a circle.
  5. Brush the tops of the scones with the egg white and sprinkle with white sugar.
  6. Bake them in a preheated 375 degree oven for 25 to 27 minutes, inspecting at the midpoint to admire and turn.
  7. Remove scones from the oven when they are light, golden brown and cool on a wire rack.

I’m sure you noticed that these scones are made with whole wheat, so a tad on the healthier side. But if you want to go full tilt health nut, you can make the following substitutions:

1/2 cup canola oil instead of butter
3/4 no fat plain yogurt instead of buttermilk
1 Tbsp egg beaters instead of egg yolk
1/2 cup dried fruit instead of cinnamon chips
No sparkly sugar (eh, what the heck, live a little and keep the sparkly sugar!)

Bring It

These scones are the perfect gift to bring to a friend’s house if you are visiting for the holiday.  Bring them with a jar of your favorite jam and a bag of coffee beans.  You are sure to get invited back!

Scone Flavoring

Honey thyme walnuts

It’s honey thyme…with walnuts.

Honey. Doesn’t the thought of it just make you feel calm? We need a bit of calm right now, and that’s why I’m here. Sit on down with a mug of tea, or just take a deep breath, and read this post because first I’m going to give you an awesomely easy recipe and then I’m going to remind you of all the delicious things you can make as gifts that will be much more appreciated than whatever you’re going to wrestle from the stores in a last minute frenzy. It’s time to look to your cupboards for sanity now.  Breathe in, breathe out. ‘Tis the season to give everyone a break, including yourself.

This recipe came from Bon Appetit a while back. They say to “drizzle this fragrant honey over your favorite cheese, or use it as a condiment on prosciutto panini.” I say it is also amazing with cambozola or any brie like cheese, makes a mean pizza or bruschetta topping and turns the humble grilled cheese into something you might refuse to share.

Ingredients

1 cup walnut pieces (or pecans)
3/4 cup orange blossom honey (or whatever you’ve got)
1/2 cup walnut oil or extra-virgin olive oil
Kosher salt, freshly ground pepper
1 tablespoon fresh thyme or rosemary leaves plus 2 sprigs
1/4 teaspoon finely grated lemon zest
4 whole dried chiles de árbol*

*I used Japones peppers, cut into thirds, because that’s all I could find. You can also use dried pepper flakes for more cha-cha throughout.

Method

Preheat oven to 325°F. Spread the walnuts on a rimmed baking sheet. Bake, stirring occasionally, until lightly browned and fragrant, about 15 minutes. Let cool. Coarsely chop; set aside.

Whisk honey and oil in a medium bowl to blend. (It may seem obvious, but measure the oil first so the honey will slide right out of the cup). Season to taste with salt and pepper (I am not shy with either). Fold in walnuts, thyme, and lemon zest. Add chiles. Divide between four “take me to a party” 4-ounce jars or two “I really love you”  8-ounce jars. Cover and chill.

Can be made 1 month ahead. Keep chilled. Bring to room temperature and stir before using.

More yum…

And now, here are some other great DIY food gifts to consider. Of all the things I make and give, the most requested/addictive is crackle, which breaks up nicely into treat bags.  Cholliesauce is another winner, and you may have all the ingredients in your kitchen right now. Peppermint or chocolate chip meringues are festive, tasty and pretty darned easy. And of course you can’t go wrong with roasted nuts. For savory Mediterranean types give a jar of sicilian caponata with some nice store bought crackers or (for the uber healthy friends, endurance crackers.  If you’re kicking around the house it takes time but next to no effort to mix up a batch of easiest French bread ever, and you’ll have two loaves to give. Package it with a dish towel and a French bread pan and BOOM you’ve made someone a baker.

And if you don’t feel like making a darned thing that’s fine too. Just remember to relax, breathe and have some good laughs with your friends. There’s always time for that!

An arsenal of holiday cheer. Ho-ho-ho baby!

An arsenal of holiday cheer. Ho-ho-ho baby!


Ginger glazed almonds pre-baking

Nuts!

Nuts! What’s not to love about them? Ok, unless you have nut allergies, in which case you’ll want to skip right past this post and continue online shopping for yodeling marmots because one really can’t have enough of those this time of year. Roasted nuts are a perfect Bring It staple, because they do double duty as a host/hostess gift and a yummy contribution to any party or gathering. They beat myrrh and frankincense hands down. Also, nuts are the perfect candidates for showcasing your packaging savvy gleaned from Bringing It in Style.

Below are three favorite takes on three favorite nuts. All are easy to prepare (no beaten egg whites or fussy preparation) and all will disappear so fast you won’t  need to worry about a shelf life. That said, they include butter, so those of you with a measure of restraint will want to store them in the fridge. Oh yeah, and clean up is instant if you line your baking sheets with parchment paper.

Ginger Glazed Almonds

Makes 2 1/2 cups. Active time: 10 min Start to finish: 40 min

 Ingredients

2 Tbsp unsalted butter
3 Tbsp packed brown sugar
2 Tbsp water
1 Tbsp finely grated peeled fresh ginger
1 1/4 tsp kosher salt
1/4 tsp ground ginger
1/4 tsp cayenne
2 1/2 cups whole almonds with skins (9 oz)

Method

Preheat oven to 300°F. Melt butter in a 12-inch nonstick skillet over moderate heat. Add remaining ingredients except almonds and cook, stirring, until sugar is dissolved. Remove from heat, then add almonds and stir until coated.

Spread almonds in a lightly oiled or parchment-lined shallow baking pan and bake, stirring occasionally, until insides of nuts are golden (cut one to test), about 25 minutes. Cool completely.

Ginger glazed almonds pre-baking

GInger glazed almonds, pre baking

GInger glazed almonds

and apres baking.

Rosemary Walnuts

Adapted from Martha Stewart. Beyond the fresh rosemary you can use any combo of spices (or none at all) to suit your tastes. I went for chile powder and paprika, but many recipes call for the cha-cha of cayenne. Be bold. Be creative. Make Martha proud.

Ingredients

2 1/2 Tbsp unsalted butter
3 cups walnuts
1/2 tsp (or more) coarse salt
1 Tbsp chopped fresh rosemary
1/2 tsp chile powder
1/2 tsp paprika
2 Tbsp light-brown sugar
1 Tbsp water
1 Tbsp Worcestershire sauce

Method

Melt butter in a large skillet over medium heat. Add rosemary and chile powder. Cook, stirring, 15 seconds. Add walnuts, salt, sugar, water, and Worcestershire sauce. Stir to coat. Pour nuts on parchment lined baking sheet and bake 10-15 minutes, testing for doneness. Cool completely.

Note: If you don’t want to do the baking step you can keep stirring and cooking the mixture stovetop for 4-5 minutes until “glossy and fragrant” then spread nuts on the baking sheet to cool. I prefer the fully roasted flavor you get from baking.

Sea Salt Roasted Pecans

Honestly, you can’t improve much on a plain toasted pecan, and at a certain point in the holiday season your body will high-five you for anything in its natural state. But if you want to give your pecans that little black dress of specialness try this simple recipe.

Ingredients

2 cups pecan halves
3 Tbsp unsalted butter, melted
1 1/4 tsp fine sea salt

Method

Preheat oven to 325°F. Toss pecans and melted butter in medium bowl to coat. Add sea salt and toss. Spread pecans in single layer on rimmed baking sheet. Bake until fragrant and slightly darkened in color, about 15 minutes. Cool pecans on baking sheet.

The official word is that these roasted pecans keep 2 days if stored airtight at room temperature. That seems mighty conservative to me and they keep way longer in the fridge.

party time nuts


The Champagne of Party Tricks

Sabering champagne

Nothing says party time like a bottle of champagne, a saber and yodeling marmots.

Everyone has one somewhere along the way— that aunt, uncle, godparent or family friend who inspires all the fun and naughty stuff we get to do as kids. The one who lets you drive when you’re 12, lets you stay up late watching inappropriate movies, brings you fireworks, etc. For my kids that’s their Auntie Anne. Not to be confused with the woman who sells pretzels in the airport, this Auntie Anne brings cutting edge entertainment, quite literally.

For the past few years she has always shown up with a bottle of champagne. The first time she did this I thought it was sweet that she was marking a casual family reunion as a special champagne-worthy occasion. I soon realized she had ulterior motives. As steward of my children’s vocational training she was going to be sure they knew how to saber a champagne bottle. Not surprisingly, she found two eager students, and we had the first of many fine celebrations.

Because you need to get out and practice this well before New Year’s Eve, I’m jumping right and giving you the instructions (as well as a most informative video link), knowing full well that Auntie Anne will chime in, correct what’s wrong and contribute more tips from her vast experience.

Watch this Champagne sabering video first and then:

1. Grab your saber if you are a pirate, or a solid butcher’s knife if not. (I am not mentioning a sabering pimp ring, because if you have one of those, clearly you will not be reading this tutorial.) Have some glasses at the ready, and a few towels if you are indoors.

2. Grab your bubbly. The experts claim you must super-chill the bottle of champagne (38-40°F, tops) to “calm” the bubbly and perhaps make the neck more brittle. No doubt the experts are right, but just pop it in the freezer for a bit and you’re good to go.  Remove the foil wrapper and little wire cage.

3. Grasp the bottle with authority, by the base (purists you go ahead and put your thumb in the punt, the dent in the bottom of the bottle). Point it away from any onlookers (this is key). Hold it at a 30 to 45-degree angle, as if you are holding a Roman candle (that your aunt also brought).

4. Locate one of the two vertical seams running up the side of the bottle to the lip (or, annulus if you must know). The bottle will break the most cleanly there, so that’s where you want to aim your saber stroke.

5. Making sure you have an audience, hold the knife flat against the bottle, blunt edge toward the top and sharp edge facing you. Run your saber or knife slowly back along the seam toward your body. (Take a few practice strokes to assure your motion keeps the blade flat against the bottle). Then, exuding rakish confidence, quickly and firmly thrust it back up the seam toward the bottle’s tip, striking the lip with no mercy while making sure the leading edge of the saber stays down and in toward the crook of the lip. As with every athletic/heroic maneuver, follow through is key.

6. Enjoy…both the adulation and the champagne. If you’ve succeeded, the cork (avec annulus) will fly off the end of the bottle. Any rogue shards will be long gone as well, unless you do this indoors, in which case you’ll want to break out the Swiffer.

Note that French bottles can be especially tough, and may take a try or two. So, as ever, be patient with the French and you will be amply rewarded.

Major note: Clearly there are all kinds of hazards involved with this pursuit, with reported consequences ranging from minor cuts to a shattered $3,000 bottle of cognac across the room. My best advice is to try this first outdoors, AWAY FROM PETS AND SMALL  CHILDREN. (Ahem all you aunties). Disclaimers aside, it’s darned fun and yes, Anne, you are our hero!

White Peppermint Meringues

Beautifully baked meringues

Beautifully baked meringues

This recipe comes to you from our very own Boot Camp Bonnie.  She brought these tasty delights to boot camp class and we gobbled them up right after finishing our killer work out.  They were beautiful when wrapped (see Bringing It In Style: Boot Camp Bonnie) and so delicious that I just had to have the recipe. These meringues are jammed packed with flavor. They are little bursts of sweet and pepperminty, soft and crunchy, light and delectable!  You will love them as will everyone around you.

I’ve learned that there are 2 keys to mastering the art of the meringue…

1) Make sure the eggs are not straight out of the refrigerator (difficult for someone like me who NEVER remembers to take eggs or butter out of the fridge until right before I need them). The eggs whites should be brought to room temperature, or more optimally, 70 degrees (again not something I would ever measure, but for those of you who want more specifics, there you go).

2) Make sure there is not a smidgen of yolk left  in the egg whites.  This will make it difficult for the meringues to form stiff peaks.

Attaining virtuosity is not something I’m willing to strive for, especially when it comes to whipping egg whites, but I’d say I’m somewhere on the “ethereal” spectrum and getting better all the time!

Ingredients

2 large egg whites (at room temperature)
1/8 tsp cream of tartar
1/2 tsp vanilla extract
1/8 tsp salt
3/4 cup sugar
1 cup white chocolate chips
1/3 cup, plus 3 Tbsp coarsely crushed peppermints

Method

Preheat oven to 250 degrees.  Beat egg whites and cream of tartar in a deep bowl with a mixer (using whisk attachment) until soft peaks form.  Add vanilla and salt.  With motor running and mixer on high speed, pour in 1 Tbsp of sugar and beat 10-15 seconds, then repeat until all sugar has been added.  At this point, meringue should form straight peaks when beaters are lifted. Fold in white chocolate chips and 1/3 cup peppermint candies with a flexible spatula.

Line 2 baking sheets with parchment paper.  Using a soup spoon, drop meringue in rounded 1 Tbsp portions slightly apart onto the baking sheets. Sprinkle remaining 3 Tbsp of peppermint candy evenly on top of meringues.

Bake until meringues feel dry and stiff when touched but still pale.  This will take approximately 30-35 minutes.  Switch pans halfway through to ensure even baking.  Once you feel you have reached the dry, stiff, yet pale point in the baking, turn off oven, open door, and let cookies stand about 10 more minutes in oven.  Let cool completely.  Makes approximately 32 cookies.

NOTE: These meringues are meant to be soft in the middle.  They are not undercooked when you try one and it melts so easily in your mouth.  Also, you can skip the peppermint and use chocolate chips instead of white chips for the chocolate lovers in the crowd.

Bring It

Try your hand at Bringing it in Style.  You’re sure to be successful with all the options available there. Even I had success in wrapping these cookies. I put them in little plastic holiday bags and wrapped a ribbon around the top.  I felt like Martha Stewart…. well….for a few minutes anyway!

Christmas giving!

Christmas giving!

Bringing it in Style: Boot Camp Bonnie


Bonnie and Sue with just a smattering of supplies.

Bonnie and Sue with just a smattering of supplies.

The best defense is a good offense. I’m not talking football here— I’m talking about the holidays. All that giving and sharing and jolly spirit is a whole lot easier if you are prepared. We’re pretty good on the cooking end of it, but when it comes to presentation we went to a pro. We went to Bonnie, AKA Boot Camp Bonnie (because of her dedication to early morning sweating).

Bonnie is not only incredibly generous, but also creative, which is a killer combo this time of year. She doesn’t just show up with cookies for the group—she shows up with a candy-striped hat box brimming with individually wrapped packages of peppermint meringues. Starting with a paper bag she ends up with something that could grace the cover of Martha Stewart magazine (if Martha ever shared the stage, that is). Bonnie was kind enough to share some of her tricks, and the arsenal of staples she keeps on hand to turn humble mason jars, paper bags and boxes into gift-worthy pieces of art. Everything can be found at party stores, craft stores, department stores, pharmacies and even grocery stores. Bonnie looks out for deals year round and stocks up when the getting is good. Here are some things to look out for:

Gift bags

Daunting, yes, but your friendly neighborhood craft or dollar store has plenty to offer.

The Basics: Containers in a variety of shapes and sizes–these can range from cardboard boxes, wire-handled takeout containers, fancy embellished boxes and hat boxes to coffee mugs, decorative bowls, paper bags and metal pails or buckets; lots of ribbon, bows, raffia and raffia wrap; festive plastic bags and twist ties; washed and repurposed bottles or jars and the never fail mason jars.

 Accent materials: Sparkly stuff like leaves, stars and snowflakes; silk flowers and greenery; fancy ribbon like moss ribbon, textured or stretchy ribbon; stray jewels, bling and beads.

Natural materials: Boxwood and evergreen sprigs; hardy fresh herbs like rosemary and bay leaves; flowers in season like hydrangeas and sunflowers; dried flowers; shells and sand dollars; feathers; pinecones, acorns, seeds, pods and whole nuts; whole spices like cinnamon sticks and star anise.

Ornaments and decorations: miniature bells, toys, figures, props; clip on birds and mini stuffed animals; seasonal cookie cutters or small kitchen novelties.

One word--Clearance!

One word–Clearance!

Stamps (rubber and stick-on), seals and stickers: These are great to close up takeout containers or to write gift messages on. Get them at stationery and sundry stores.

Tools: If you have but one tool, make it the small but mighty glue gun. Use it to affix or join ribbons, put pine cones and shells on packaging. Gold and silver metallic sharpies in wide and fine tips. Scissors and both single side and double stick tape.

Gift tags and labels: You can never have enough! If you keep them on the plain side you can use them year round.

Wrapping and Tissue Paper: Again, be an opportunist and keep a good supply, especially of tissue paper which does everything from adding a decorative touch to a gift bag to protecting a stack of fresh baked cookies. Also, keep a stash of heavy duty paper for the good stuff and for gifts that need to stand up to transport.

This is just a partial list. As Bonnie reminds us, the main thing is to be creative and have fun with it. If you need a little inspiration on what to wrap here’s the recipe for some killer Christmas cookies, courtesy Bonnie our Good Gifting Goddess.


Snow Ghost Pie

Snow Ghost

The first snow ghost of the season waits for his chance to steal a piece of pie.

Newsflash for you: We love winter.

And we love snow even more. Every year, in a bid for the weather Gods to answer our prayers for the first snow, we make Snow Ghost Pie. It originally appeared—along with a legend of the snow ghost— in a Hershey’s ad circa 1972. I clearly remember reading the story then, and of course making and eating the chocolate pie which, incidentally, requires no shmancy ingredients. The pie is as brilliant as the story, which convinces kids to offer up the pie to the snow ghost (who in the story was really the creepy handyman who had enlisted the kid to steal a piece of his grandma’s cooling chocolate pie). At any rate, if the ghost takes a piece of the pie, it will keep snowing and you won’t have school the next day. Not surprisingly I am asked to make snow ghost pie—and jumpstart winter— a lot this time of year. The filling also makes a great chocolate pudding on its own, but it’s the decorating and ghost-baiting that makes it fun.

Snow Ghost Pie story

The story of the Snow Ghost, as told by Hersheys

Snow Ghost pie ad

The original Snow Ghost Pie ad

 Ingredients

1 (9 inch) baked pastry shell or graham cracker/shortbread crust
1/2 cup Hershey cocoa
1 1/4 cup sugar
1/3 cup cornstarch
1/4 tsp. salt
3 cup milk
3 Tbsp. butter
1 1/2 tsp vanilla
1 1/2 sweetened whipped cream

Method

Combine cocoa, sugar, salt and cornstarch in a medium saucepan. Gradually blend milk into dry ingredients, stirring until smooth. Cook over medium heat, stirring constantly until filling boils; boil 1 minute.  Remove from heat, blend in butter and vanilla. Pour into  pie crust, carefully press plastic wrap directly into pie filling. Chill 3 to 4 hours.

Garnish with whipped cream, creating a cute little snow ghost if you like. And now for the totally unnecessary step that is key to keeping the legend alive. Set pie outside again to “cool” after decorating. Do your best to forget about it for a bit then check to see if the snow ghost visited and took a piece.

Snow ghost pie after ghost

Apres ghost. He wasn’t very hungry this time.

Snow ghost pie pre ghost

Pre-ghost pie


Bringing it:

This is an excellent dessert to bring to a family or kid gathering. Whip the cream and bring it separately so you can decorate the pie there and then set it out to “cool” before dessert. Just make sure it is not anywhere enticing to dogs (or squirrels).