Category Archives: Breads

Squash Season with a side of Pumpkin Muffins

Those cute Halloween pumpkins?  Going, going…gone! It’s time to put them to work. It seems we skipped right over apple season. I know that we didn’t really skip over it. Pies and crisps were made, cider was chugged. But apples did not get their due on Bring It this year. Let’s just blame COVID and move on.

Move right along to squash.  The phrase “too many squash” is never uttered in my kitchen (by me at least). Butternut and denser, drier kabocha squash fill the void left by watermelon at summer’s end, finding their way into my cart every time I go to the grocery store.  This year, I hit the jackpot when a friend shared her bounty of homegrown butternut squash and sugar pumpkins (thank you Carole!), so we’re having a full-on Squashtacular.

To celebrate, I’m sharing a round up of my favorite winter squash recipes, with a bonus new pumpkin muffin recipe at the end. They are my faves by far after way too much experimenting. For me, pumpkin baked goods can be a tough sell, as they usually involve way too much sugar, oil and spice to overcompensate for being vegetable based. They’re like the macho player of baked goods.

BUT, put squash in the savory role, and it becomes something else entirely, something comfortable with itself that doesn’t have to try too hard. It adds body and nutrition and enough sweetness to become its own special treat without dressing itself up like dessert.

My go-to squash recipes start with the ever-satisfying Sugar and Spice Squash Soup, featuring the brilliant threesome of red curry paste, coconut milk and candied ginger. For an even simpler, an very similar version try almost instant Halloween Soup.

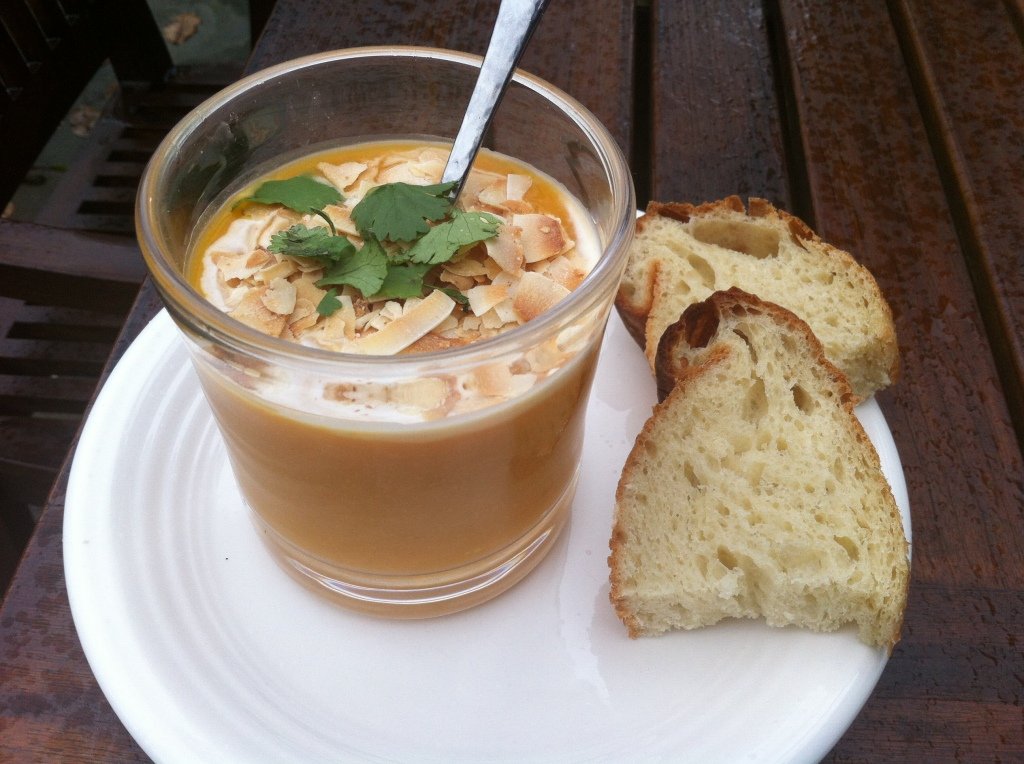
Almost instant squash soup, with pro toppings for extra credit.

For appetizers, you can’t go wrong when you invite caramelized onions into the mix with some butternut squash on toast. Work through your kale supply with the easily made ahead Roasted Squash, Kale and Cranberry salad.

If you’re willing to get a little weird on pizza (or pasta) night, try Butternut Squash Sauce, or an easy, outstanding creamy pumpkin pasta  (a little crumbled bacon on top shuts the doubters right up).

And finally, my baked goods comment notwithstanding, I’ve fallen back in love with Knockout Vegan Pumpkin Pie. It’s all about the crust, which I made with hazelnuts instead of pecans this time. Soooo good. 

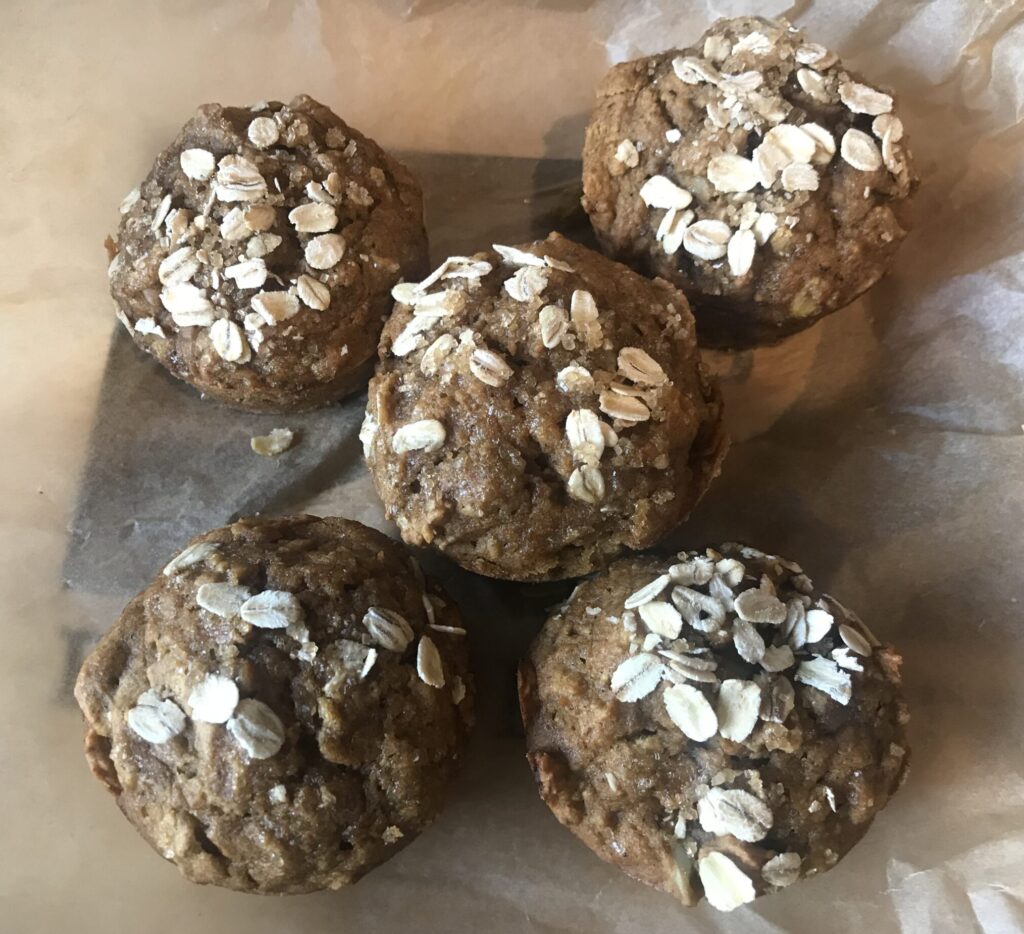
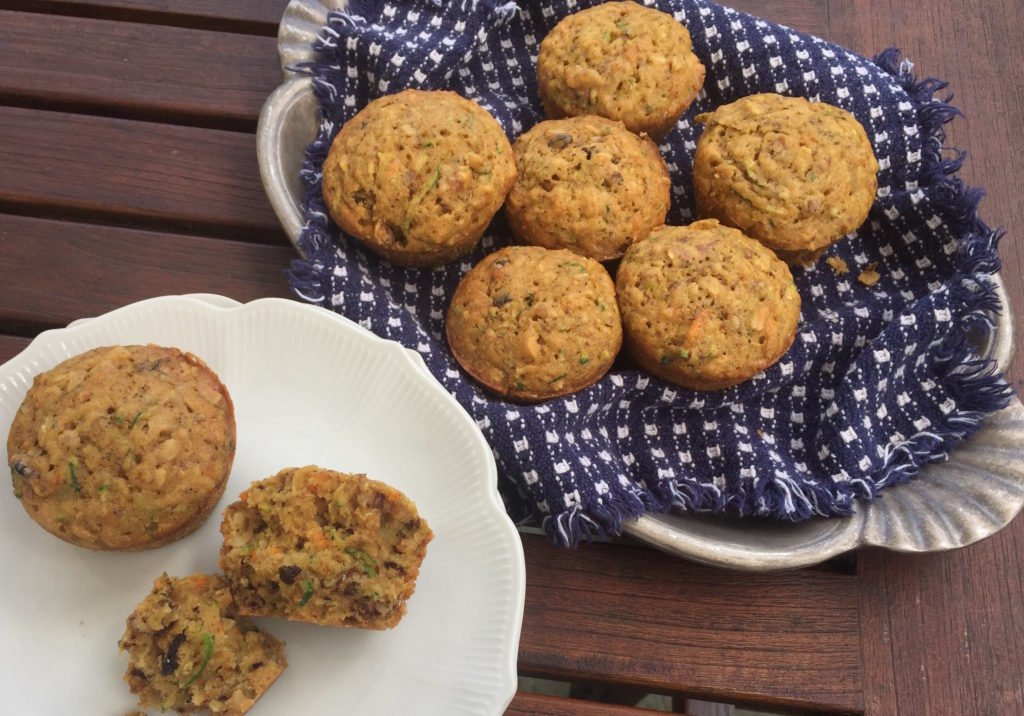
If you still have some pumpkins hanging around, fergawdssakes get them into the oven! …and save a bit to try these healthyish whole grain muffins that are proud to be themselves—just sweet enough, moist but not greasy, and only mess up one bowl in your kitchen. Happy November…the countdown is on!

Proud Pumpkin Muffins

Based on these from Cookie and Kate

Makes 12 muffins

Ingredients

  • ⅓ extra-virgin olive oil or melted coconut oil 
  • ½ cup maple syrup or honey (as if…maple all the way baby!)
  • 2 eggs, at room temperature (or 6 Tbsp aquafaba)
  • 1 cup pumpkin (or winter squash) purée
  • ¼ cup milk of choice (plant, animal, whatev)
  • 2 teaspoons pumpkin spice blend (or 1 teaspoon ground cinnamon, ½ teaspoon ground ginger, ¼ teaspoon ground nutmeg, and ¼ teaspoon ground allspice or cloves)
  • 1 teaspoon baking soda
  • 1 teaspoon vanilla extract
  • ½ teaspoon salt
  • 1 ¾ cups whole wheat flour (preferably white whole wheat)
  • ⅓ cup old-fashioned oats, plus more for sprinkling on top
  • Optional: 2 teaspoons turbinado (raw) sugar for a sweet crunch

Method

  1. Preheat oven to 325. Grease or line all 12 cups of your muffin tin.
  2. In a large bowl, beat the oil and maple syrup or honey together with a whisk. Add the eggs or aquafaba, and beat well. Add the pumpkin purée, milk, pumpkin spice blend, baking soda, vanilla extract and salt.
  3. Add the flour and oats to the bowl and mix with a large spoon, just until combined (a few lumps are ok). If you’d like to add any additional mix-ins, like nuts, chocolate or dried fruit, fold them in now. (a heaping half cup chopped walnuts is outstanding)
  4. Divide the batter evenly between the muffin cups. Sprinkle the tops of the muffins with about a tablespoon of oats, followed by a light sprinkle of raw sugar and/or pumpkin spice blend if you’d like. Bake muffins for 22 to 25 minutes, or until a toothpick inserted into a muffin comes out clean.
  5. Place the muffin tin on a cooling rack to cool. These muffins are delicate until they cool down. You might need to run a butter knife along the outer edge of the muffins to loosen them from the pan.
  6. These muffins taste even better after they have rested for a couple of hours! They’ll keep at room temperature for up to 2 days, or in the refrigerator for up to 4 days. They keep well in the freezer in a freezer-safe bag for up to 3 months (just defrost individual muffins as needed).


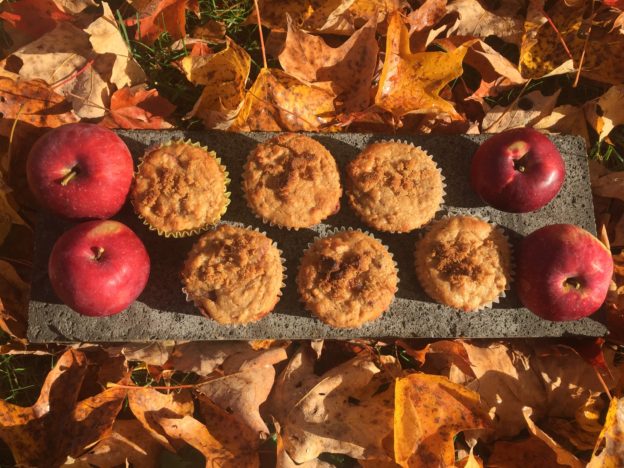
Triple Apple Muffins

Welcome to apple season. Yes, we have been here for a while, but last week’s windstorm that brought down all those high, out-of-reach apples has brought urgency to the situation.  That, and the King Arthur Flour Mother Ship has deemed it Apple Week so , let’s join in.

I’m not a huge muffin person. I like muffins enough, but most muffins are a thinly disguised excuse to eat cake in the morning. Nothing against cake, but I don’t need more reasons to eat it for breakfast. These muffins, however, are pretty healthy on the muffin meter. First, they’re packing  apple overload–in grated, chopped, and sauce form. They’re made with whole wheat flour, olive oil for the fat and maple syrup for the sweetener. They’re also easy to make, though they  do require chopping and grating, plus a little more effort if you channel your inner Laura Ingalls and make your own applesauce (I had to do it. See windstorm, above).

This recipe is good to have in your arsenal for apple season, and as advertised, do indeed get better after hanging out for a bit,

Triple Apple Muffins
From Cookie and Kate

From thought to table in half an hour. Maple syrup and a triple dose of apple makes these healthy muffins a bite of New England.

Ingredients

  • 1 ¾ cups white whole wheat flour or regular whole wheat flour
  • 1 ½ teaspoons baking powder
  • 1 teaspoon ground cinnamon
  • ½ teaspoon baking soda
  • ½ teaspoon salt
  • 1 cup grated apple
  • 1 cup apple diced into ¼” cubes
  • ⅓ cup melted coconut oil or extra-virgin olive oil
  • ½ cup maple syrup (or honey*)
  • 2 eggs, preferably at room temperature (or 6 tbsp aquafaba**)
  • ½ cup plain Greek yogurt (or non dairy yogurt of choice**)
  • ½ cup applesauce
  • 1 teaspoon vanilla extract
  • 1 tablespoon turbinado sugar (also called raw sugar), for sprinkling on top

Instructions

  1. Preheat oven to 425 degrees Fahrenheit. Grease or line all 12 cups on your muffin tin with butter or non-stick cooking spray.
  2. In a large mixing bowl, combine the flour, baking powder, cinnamon, baking soda and salt. Blend well with a whisk. Add the grated apple (if it is dripping wet, gently squeeze it over the sink to release some extra moisture) and chopped apple. Stir to combine.
  3. In a medium mixing bowl, combine the oil and maple syrup and beat together with a whisk. Add the eggs and beat well, then add the yogurt, applesauce and vanilla and mix well. (If the coconut oil solidifies in contact with cold ingredients, gently warm the mixture in the microwave in 30 second bursts.)
  4. Pour the wet ingredients into the dry and mix with a big spoon, just until combined (a few lumps are ok). The batter will be thick, but don’t worry! Divide the batter evenly between the 12 muffin cups. Sprinkle the tops of the muffins with turbinado sugar. Bake muffins for 13 to 16 minutes, or until the muffins are golden on top and a toothpick inserted into a muffin comes out clean.
  5. Place the muffin tin on a cooling rack to cool. If you have leftover muffins, store them, covered, at room temperature for up to 2 days, or in the refrigerator for up to 4 days. Freeze leftover muffins for up to 3 months.

Notes

*If you are baking with honey: Honey tends to brown quickly, so to avoid overdone muffins, bake muffins at 325 degrees Fahrenheit until a toothpick inserted in the center comes out clean, about 23 to 25 minutes.

**Veganize these by using flax eggs or aquafaba, and non dairy yogurt


Game of Scones: The Iron Scone

You knew it was coming: the crowning glory of all the build-up, the driving force of this obsession—the Iron Scone. Until last week, I thought this culminating creation might need to be something with dragon fruit. But after Dani Girl’s  Ring of Fire joyride, methinks there will be no dragons or dragon queens ruling the Seven Kingdoms.

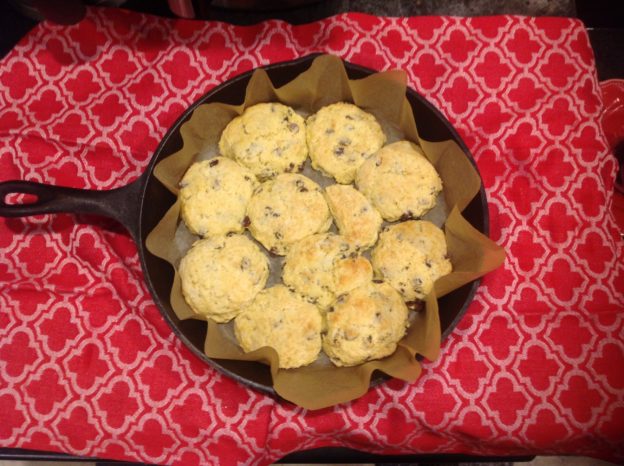
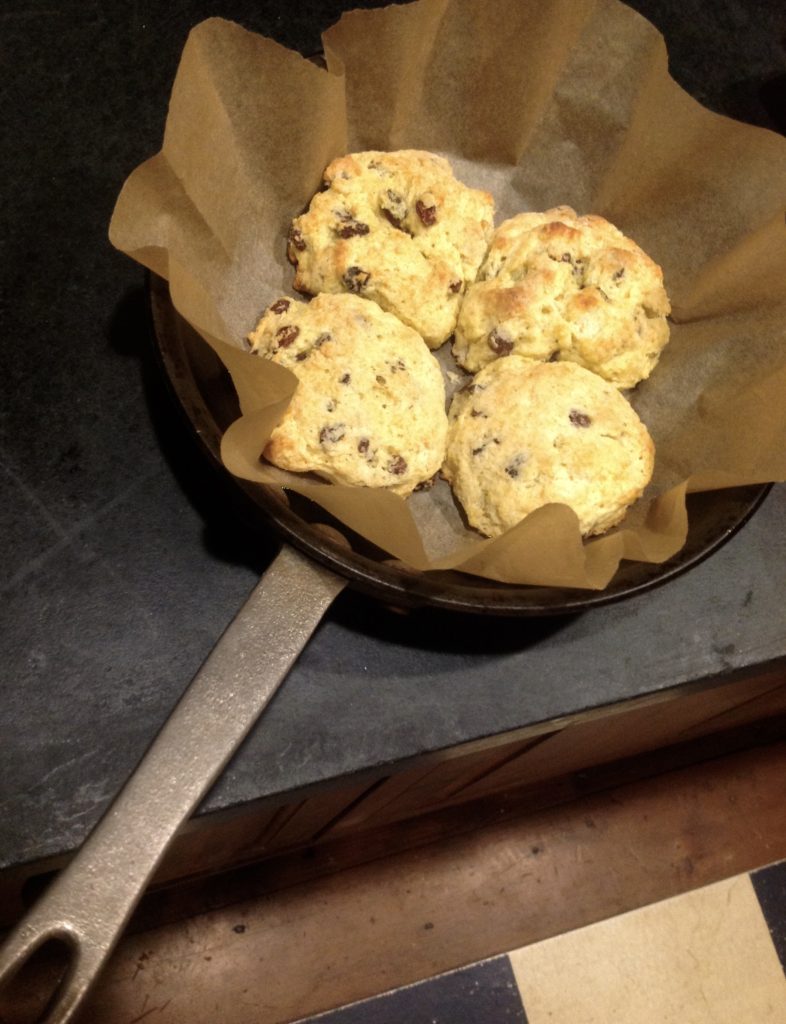
I’m betting on tradition and some sense of justice to win out, so I went with a classic currant scone. Currants happen to be an excellent source of iron, and to bring the theme home I made these scones in a cast iron pan. Instead of making familiar wedges, I made these as a more British version of scones, by cutting them in circles and nestling them together in the pan.

To find the perfect starter recipe for this grand finale, I deferred to royalty, and consulted with King Arthur Flour’s legendary baker and blogger PJ Hamel. She pointed me to her go-to basic scone recipe that lives on the KAF website. The recipe itself is excellent, and is essential scone reading. In addition to the many tips at the end of the recipe, PJ added this bit of scone wisdom:

“Don’t overbake. You want them just barely light brown. Otherwise they’ll be dry. And they’re like biscuits: the more you handle the dough, the more you risk making the scones tough. So, once you bring the dough together (after adding the liquid), don’t keep stirring; turn it out of the bowl, shaggy mess that it may be, divide it in half (a scale helps), and gently pat the two pieces into 3/4″ to 1″-thick rounds. And do refrigerate (or place in the freezer) for 30 minutes before baking; this helps their texture.”

So there you have it. The beauty of this scone is that it can be adapted to any flavors and ingredients, to accommodate whomever lands in that throne: White Hot Jon Snow; Sassy Sansa; Bittersweet Tyrion; and even the ghosts of the Loving Lannisters. Indeed, we could have started this whole Game of Scones journey with this master recipe and tweaked it accordingly, but what would be the fun in that?

The Iron Throne, which, quite honestly, does not look very comfy.

The Iron Scone

From King Arthur Flour’s Basic Scone Recipe

I pared down the recipe to the necessities, and included my own adaptation for the cast iron pan version (in bold), but I highly recommend going to the KAF site for their Baker’s tips at the end of the recipe. Another very cool feature of the recipes on the KAF site it being able to toggle between measuring by volume, ounces or grams. I like to weigh my flour and but not necessarily the rest of the ingredients. So, go King Arthur…way to support the new ruler!

Ingredients:

Dough

  • 2 3/4 cups King Arthur Unbleached All-Purpose Flour or Gluten-Free Measure for Measure Flour
  • 1/3 cup sugar
  • 3/4 teaspoon salt
  • 1 tablespoon baking powder
  • 1/2 cup cold butter
  • 1 cup to 2 cups dried currants (or add ins of choice)
  • 2 large eggs
  • 2 teaspoons vanilla extractor the flavoring of your choice
  • 1/2 cup to 2/3 cup half-and-half or milk. (see tips in KAF recipe, but basically you’ll need more liquid in cold dry weather and less in hot humid weather.

Topping

  • 2 teaspoons milk
  • 2 tablespoon sugar, turbinado sugar or cinnamon sugar, optional

Instructions

  1. In a large mixing bowl, whisk together the flour, sugar, salt, and baking powder.
  2. Work in the butter just until the mixture is unevenly crumbly; it’s OK for some larger chunks of butter to remain unincorporated.
  3. Stir in the fruit, nuts and/or other mix-ins if using.
  4. In a separate mixing bowl, whisk together the eggs, vanilla or other flavor, and half and half or milk.
  5. Add the liquid ingredients to the dry ingredients and stir until all is moistened and holds together.
  6. Line a baking sheet with parchment; if you don’t have parchment, just use it without greasing it. Sprinkle a bit of flour atop the parchment or pan. If using a cast iron pan or skillet, line it with parchment paper. Wing it or check out this slick trick.
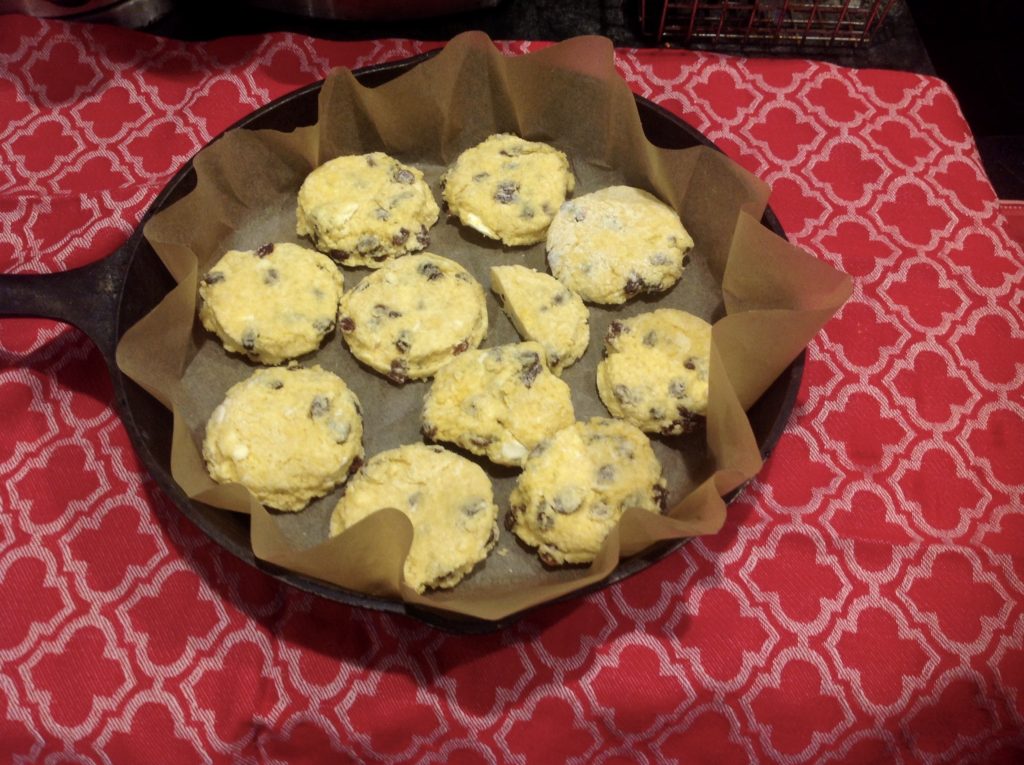
  7. Scrape the dough onto the floured parchment or pan, and divide it in half. Round each half into a 5″ circle (if you haven’t incorporated any add-ins); or a 6″ circle (if you’ve added fruit, nuts, etc.). The circles should be about 3/4″ thick. (If using a cast iron pan or other skillet, use a biscuit cutter or the top of a can or drinking glass to cut each circle into rounds of whatever size makes you happy. Arrange them in the lined pan so there is about ½” of space in between them. Mush scraps into scone-like shapes. They too will be delicious.

    Unbaked, lightly frozen scone pucks in their iron home

  8. Brush each circle with milk, and sprinkle with coarse white sparkling sugar or cinnamon sugar, if desired.
  9. If making wedge shaped scones: slice each circle into 6 wedges, using a knife or bench knife that you’ve run under cold water. Carefully pull the wedges away from the center to separate them just a bit; there should be about 1/2″ space between them, at their outer edges.
  10. For best texture and highest rise, place the pan of scones (on just the parchment if that is easier to fit) in the freezer for 30 minutes, uncovered. Chilling the scones relaxes the gluten in the flour, which makes the scones more tender and allows them to rise higher. It also chills the fat, which will make the scones a bit flakier. While the scones are chilling, preheat the oven to 425°F.
  11. Bake the scones for 20 to 25 minutes, or until they’re golden brown (mine were smaller, and done in 20). When you pull one away from the others, it should look baked all the way through; the edge shouldn’t look wet or unbaked.
  12. Remove the scones from the oven, and cool briefly on the pan. Serve warm. They’re delicious as is, but add butter and/or jam, if you like.
  13. When the scones are completely cool, wrap them in plastic and store at room temperature for up to several days. To reheat room-temperature scones, place on a baking sheet, tent lightly with foil, and warm in a preheated 350°F oven for about 10 minutes.

Make ahead: This is straight from the KAF Bakers Tips, but I had to include it here too because it was a revelation: “Want to make scones well ahead of time? Simple. After the unbaked scones’ 30 minutes in the freezer (or whenever they’re frozen solid), place them in a zip-top plastic bag. Return to the freezer, and store for up to a month. Bake as directed (without thawing), adding a couple of extra minutes if needed.”

To bake up just a few scones at a time, any size oven-proof skillet will do.

Game of Scones: The Loving Lannisters Gluten Free Apricot Almond Scone

OnSome things just should not go together, like siblings and sex. Similarly, the terms gluten free and scones really do not belong in the same sentence. And yet, just as Jaime and Cersei somehow seem to work as the couple you love to hate, it turns out that gluten free scones are darned tasty.

As we come in to Episode 5, let’s review our cast. We have the White Hot Jalapeno Cheddar Jon Snow (AKA, the true hot king) Scone, the Sassy Sansa Lemon Ginger Scone and the Bittersweet Tyrion Whole Wheat Mini Scone. But now, just in time for Mother’s Day we head south to warmer climes and the Mad Queen, Mother of the Year, evil twin Cersei

For these scones I used Pamela’s gluten free baking mix, as recommended by Santa Cruz Susan. Susan is kind of an angel on earth, which is to say, the opposite of Cersei. Susan apologized that using a mix is sort of cheating, which happens to be appropriate for this particular scone, because nobody cheats more than Cersei, and gets away with it.

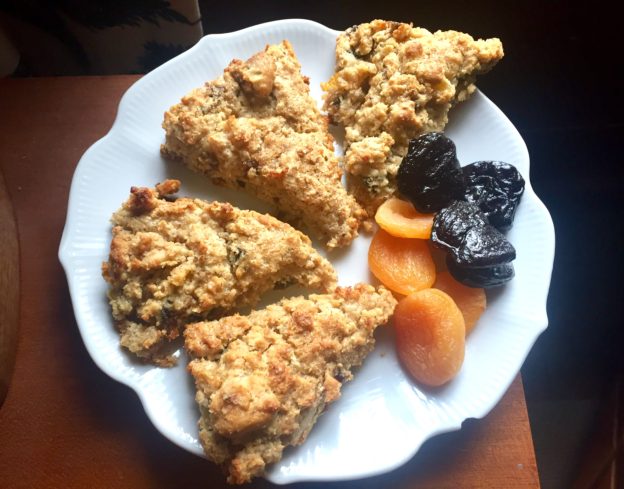
The Loving Lannister scone features apricots, prunes and almonds, all members of the prunus family. Not coincidentally, prunus siblings have a bitter cyanide compound in the seed that makes them poisonous (kind of like kisses from Spain). Toxic combos that are related to each other? Could there be a more perfect scone to honor the first family of King’s Landing? And sure, you don’t expect to get black-hearted prunes and golden apricots in one bite, but social norms never stopped a Lannister. And who doesn’t like a little plot twist?

Cooking notes: For this scone, I defied the recipe and tried to make them into the traditional round mound, cut into wedges. It required a lot of back alley repair, which nobody needs to see or repeat. Give yourself a pardon and make them as drop scones, as directed. They are unexpectedly delicious!

Oh beHAVE you two!

Gluten Free Apricot Almond Scones

INGREDIENTS:

  • 2-1/3 cups Pamela’s Baking & Pancake Mix
  • 1/3 cup sugar (preferably coconut or demerera sugar), plus 1 Tbsp for sprinkling
  • 1 tsp baking powder
  • 1/2 cup dried apricots and dried prunes (in any proportion), roughly chopped
  • 1/3 cup almonds, roughly chopped or painfully slivered
  • 4 tbsp butter (as cold as Cersei’s heart, which is to say frozen if possible)
  • 1 egg, beaten (ruthlessly)
  • 2/3 cup milk or cream

DIRECTIONS:

For scone newbies, see Queen Bee’s Kitchen’s short course in sconeology here for some excellent guidance. Feel free to substitute any dried fruit or nuts of choice, even if they are “just friends” and unrelated to each other.

Preheat oven to 375.
Mix the dry ingredients (through almonds) together. Cut in the butter using two knives (or make it easy on yourself and grate it in). Add the milk and beaten egg. Mix together with a fork. Dough will be thick. Drop large, tall dollops of dough (scones will spread when baking) onto lightly greased or parchment-lined baking sheet. Sprinkle lightly with remaining coconut sugar. Bake for 15-17 minutes or until they look dangerously irresistible.


Game of Scones: Bittersweet Tyrion Chocolate Chip Mini Scone


Let’s talk about Tyrion. He’s been on the sidelines so far this season, but I trust his day is coming.  We love that little guy. He’s quite rugged and harbors his share of bitterness (about the whole ‘least favored bastard’ thing among other issues). He’s also soft and quite sweet on the inside. (Dude, we saw you looking at Sansa in the crypt!)

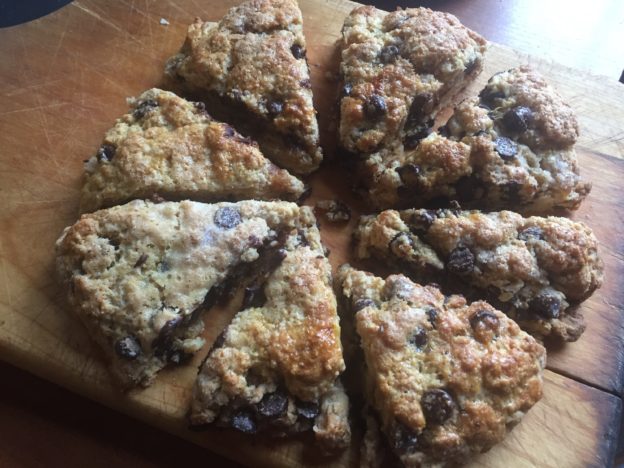
With all that in mind, it’s time for Tyrion — like White Hot Jon Snow and Sassy Sansa to have his very own scone. For Tyrion we have a mini scone made with whole wheat flour for some grit, and studded with bittersweet chocolate chips. The original recipe from Baker By Nature  calls for semi sweet mini chocolate chips, but there is nothing small about the chips Tyrion bears on his shoulders, so I opted for bigger, more bitter chips.    

Just as Tyrion has become my favorite character, this might be my favorite scone so far. Scones can feel like such a commitment, but mini scones feel much more doable. Plus, whole wheat flour gives them a wholesome heft that eases the guilt factor of eating so much butter in each bite.

As emphasized in this scone tutorial, make sure your butter is cold, even frozen if you are going to grate it. Making mini scones is just a matter of dividing the dough and making two mounds instead of one, and then cutting each into eight wedges. I pegged the slacker meter by shaping the scone mounds directly on the baking sheet.  And yes, they turned out just fine. They may not look perfect, but as with Tyrion, the beauty of these scones lies in their imperfections.

He’s little, gritty, and a little bitter, but sweet on the inside.

Bittersweet Tyrion Whole Wheat Chocolate Chip Mini Scones

Prep 10 mins
Cook 20 mins
Total 30 mins
Yield 16 scones

Ingredients

  • 1 cup whole wheat flour (preferably white whole wheat).
  • 1 and 1/2 cups all-purpose flour
  • 1/2 teaspoon salt
  • 1 tablespoon baking powder
  • 1/2 teaspoon baking soda
  • 1/3 cup light brown sugar, packed
  • 1 stick (4 ounces) unsalted butter, VERY cold and cut into tiny pieces, or grated on a box grater
  • 1 large egg, beaten
  • 1 teaspoon vanilla extract
  • 1/2 cup full-fat sour cream
  • 3 tablespoons milk
  • 1 cup bittersweet chocolate chips

For the egg wash:

  • 1 large egg, beaten1 teaspoon milk or water
  • 2 tablespoons turbinado sugar (or regular sugar if that’s all you’ve got), for sprinkling.

Instructions

  1. Preheat oven to 400°(F). Line a large baking sheet with parchment paper; set aside. In a large bowl mix together flour, salt, baking powder, baking soda and sugar.
  2. Cut the butter into small cubes (or, even better, grate it on a box grater) then quickly work it into the mixture (using your fingers, or just two forks if you grated the butter) until it resembles a coarse meal.
  3. In a small bowl, whisk together the egg, vanilla, sour cream, and milk, then add to flour and butter mixture. Use a fork to stir everything together until just moistened.
  4. Add in the chocolate chips and gently fold them into dough with a spatula.
  5. Pour the shaggy dough out onto a clean, floured work surface. Divide it into two equal portions  and shape the dough into a 6ish-inch circle. Cut the dough into 8 wedges and carefully transfer to the prepared sheet. (alternatively, dump the whole shebang directly onto the parchment lined sheet and form into two mounds
  6. Lightly brush each scones with the egg wash, then sprinkle the top of each scone with sugar. This is key. White sugar is ok if it is all you’ve got. Turbinado, demerera or coconut sugar gets you bonus points.
  7. Bake for 16-20 minutes, or until the tops are lightly golden brown.

Feel Good Zucchini Bread (and muffins)

It’s that time of year—time to figure out what to do with the zucchinis that have grown into something with the heft (and taste) of a Duraflame log. Enter zucchini bread, a brilliant use of the bounty. The only downside of zucchini bread and their muffin progeny, is that most of them also seem like a ploy to get rid of all the oil and white sugar in your house. Eat a piece of your standard zuke bread and your fingers look like you’ve just wrangled a basket of French fries. And the sugar that’s involved…oy!  

Quick breads and muffins exist on a taste/texture profile continuum from dirt to donuts.  Ever since hearing about the 800 calorie Costo muffin I’ve gravitated towards the dirt end of the spectrum. In fact I have a stalker-like attraction to the Earth Muffin at our local bakery, Lou’s. Upon studying the insanely lengthy and small fonted ingredient list I learned they are full of ground nuts, chopped nuts, seeds, dried fruit, maple syrup, grains, meals and every Vegan trick in the book. Even when Lou’s tries to pawn their day old Earth Muffins off as fresh (as if we dirt lovers can’t detect nuance), something about all that texture, heft and granular mystery still satisfies my need for weirdness. These muffins do feel like treats, but not irresponsibly so.

Feel Good Zucchini Muffins, with a whole lot of goodness

Perhaps you’re not up for the true grit experience in the morning, but you probably don’t fully enjoy walking away from breakfast knowing you’ve already used up your daily dessert quota. That’s where this recipe strikes the perfect balance, erring on the nutritious side of the muffin spectrum, but with enough sweetness and light to start your day with a smile. The recipe features white whole wheat flour, not a ton of sugar, a LOT of zucchini, and olive oil to make every heart beat a little faster. It’s a muffin/bread you can eat in the morning and feel good knowing that today, there’s still room for ice cream!

Feel Good Zucchini Bread

Poached with utmost respect from Food52, where there is also an excellent discussion on this topic.
Makes: 1 loaf or about 12 muffins

Ingredients

  • 2/3 cup olive oil (143 grams), plus more for the pan
  • 1 1/3 cups white whole-wheat flour (170 grams), plus more for the pa
  • 2 1/3 cups grated zucchini (from about 11 ounces zucchini)*
  • 1/3 cup sugar (67 grams)
  • 1/3 cup brown sugar (71 grams)
  • 2 large eggs (Vegans, grab your flax meal or aquafaba)
  • 1/2 teaspoon baking powder
  • 1/2 teaspoon baking soda
  • 3/4 teaspoon kosher salt
  • 2/3 cup walnuts (75 grams)
  • 1/3 cup golden raisins (53 grams)
  • 1/3 cup oats (33 grams), plus more for topping

*If you’re scant on the zukes, or just feel like a little more color, you can add in some grated carrot.

Method

  1. Preheat the oven to 350° F. Grease a 8 1/2- by 4 1/2-inch loaf pan (muffin pans if using) )with some oil. Add some flour and tap around to distribute evenly. Gather the zucchini in a kitchen linen or paper towel and squeeze over the sink to get rid of any excess moisture. This step is KEY!
  2. Combine the sugars, eggs, and oil in a large bowl. Whisk until smooth. Add the zucchini to the bowl and use a rubber spatula to combine. Add the baking powder, baking soda, and salt. Stir to combine. Add the flour, walnuts, raisins, and oats. Stir to combine.
  3. Pour the batter into prepared pan. Sprinkle oats on top. Bake for about 1 hour until a thin knife inserted in the center comes out clean. If making muffins, start checking them at 15 minutes and take them out when they are set and slightly browned.
  4. Let cool in the pan for 15 or so minutes before turning onto a wire rack. Cool completely before slicing and serving.

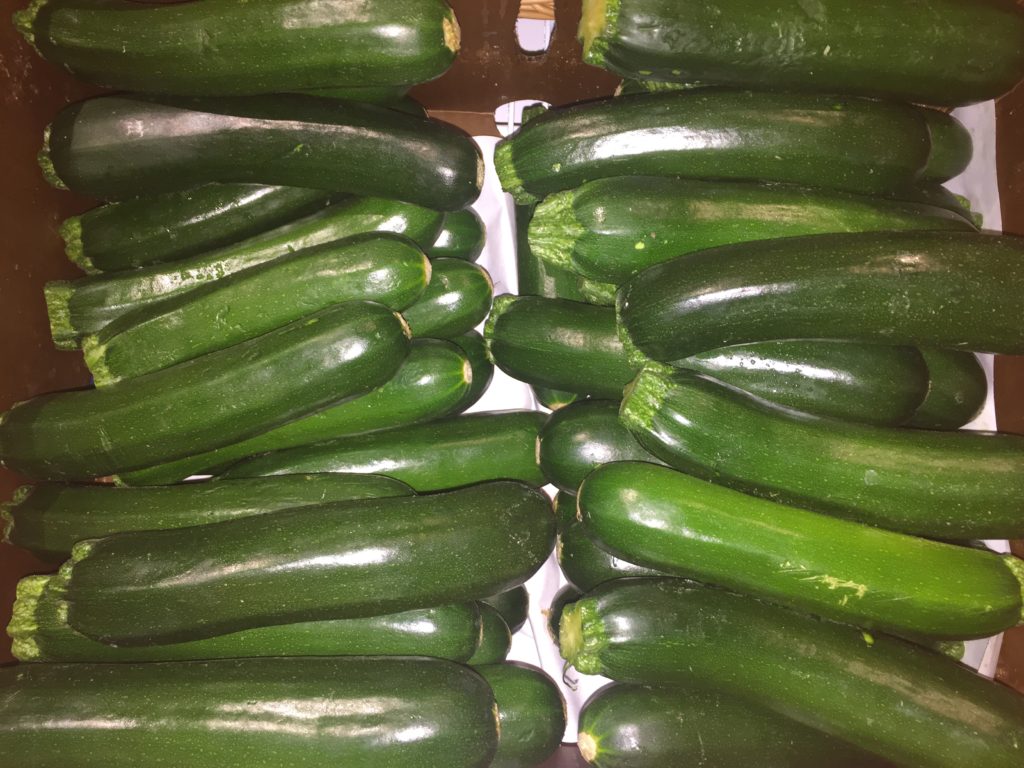
The zucchini army at rest

No Knead Challah

    C'mon. You know you want to at least try. Right?C’mon. You know you want to at least try. Right?

Stop right there. I know what you are thinking. NEXT! As in, I am not a bread baker, and even if I was I am surely not a bread braider and baker. But please, give me a chance here…unless you are gluten-free and/or Vegan. If that’s the case you may want to move on from this egg, honey and flour fantasia of a recipe. If you’re still with me, take a deep breath and say, “I can do this!”

The no-knead aspect of this 5-Fold Challah recipe drew me in, as did the memories of the first time I had challah while living with the classic Jewish mother, who worked all day teaching middle school English and still managed to turn out home cooked meals for 5 kids, three of whom were not even her own. Kaki, you opened your heart and your home and gave me many wonderful things, including a lifelong taste for chicken and onions, real bagels and challah. For this and so much more, thank you!

So, just to put this in context, the loaves pictured were made on my very first try at this recipe. And I am NOT a bread baker. The only bread I make consistently is Easiest French Bread Ever, which can be done in a coma, and Lifechanging “Dirt” Bread, which requires the entire contents of a birdfeeder but no yeast or skill. What I’m saying here is, I think you should try this. It would make a fine base for a chicken and onion sandwich. (To Kaki if you ever happen to read this: Sorry for all the run-on and fragmented sentences and YES, I am getting enough to eat!)

Notes: I have read you can replace the oil with melted unsalted butter. God only knows why I have not tried this yet. For non bread bakers this looks like a lot of work, but it’s tiny bits of effort (folding) with unattended time in between, and remedial braiding. Even more importantly, the timing is flexible and the challah is very accommodating to changes of (your) schedule. Finally, for all you over achievers, check out Jessica Fechtor’s full version on Food52 for all the possibilities of incorporating cinnamon sugar, raisins, etc.

No Knead Challah

From Jessica Fechtor and Food52
Makes 2 Loaves

Dry ingredients

  • 4 cups (500 grams) bread flour
  • 1 1/2 teaspoons instant dry yeast
  • 2 teaspoons fine sea salt

Wet ingredients + shaping

  • 2 large eggs plus 1 large egg yolk (save the extra white in a covered glass in the fridge for glazing later on)
  • 3/4 cup (190 grams) water
  • 1/3 cup (75 grams) olive oil
  • 1/4 cup (85 grams) honey
  • For sprinkling, before baking (optional): Sesame seeds, poppy seeds, flaxseeds, rolled oats, sunflower seeds, and/or pumpkin seeds

Method:

  1. Whisk together the dry ingredients in a large bowl, and the wet ingredients in a smaller bowl. Dump the wet ingredients into the dry ingredients and stir with a rubber spatula until a wet, sticky dough forms. Cover the bowl with plastic wrap and let sit for 10 minutes.
  2. Peel back the plastic. Grab an edge of the dough, lift it up, and fold it over itself to the center. Turn the bowl a bit and repeat around the entire lump of dough, grabbing an edge and folding it into the center, eight turns, grabs, and folds in all. Then flip the dough so that the folds and seams are on the bottom. Cover tightly again with the plastic, and let sit for 30 minutes.
  3. Repeat the all-around folding, flipping, covering, and resting four more times. (I keep track by drawing hash marks in permanent marker right on the plastic.) The dough flops more than it folds in the first round or two. Then, as the gluten develops, you’ll get proper folds. By the final fold, the dough will be wonderfully elastic, and you’ll be able to see and feel the small pockets of air within. Pull the plastic tight again over the bowl and refrigerate for 16 to 24 hours—any longer and you risk over-proofing.
  4. Cover a baking sheet with parchment paper and set aside. Transfer the dough to a lightly floured surface and divide into six equal pieces. Roll into six strands, each about a foot long and 3/4 inch in diameter, dusting sparingly with flour when necessary to prevent sticking. (You’ll want to add as little extra flour as possible.)
  5. Form two three-strand braids, and transfer the loaves to the prepared pan. Cover with plastic and let proof at room temperature for 2 to 3 hours, until the dough is noticeably swollen and puffed and bounces back very slowly, if at all, when you poke it lightly with your finger.
  6. Preheat the oven to 375° F. Remove the plastic wrap from the loaves and brush with the reserved egg white. If you’d like, sprinkle with seeds. Poppy and sesame seeds are traditional challah toppings. Fechtor typically co

    Challah1

    Not sure how that little orphan loaf worked in, but I’m sure it was well-loved.

    vers one with a combination of flaxseeds and rolled oats, and the other with sunflower seeds and pumpkin seeds, though lately she’s been opting for no seeds at all.

  7. Bake for about 20 minutes, until the bread is golden and gorgeous and a tester inserted into the center comes out clean. You can also check for doneness with a thermometer. The internal temperature of the loaves will be 190° F when fully baked.
  8. Transfer to racks and let cool.
  9. These loaves freeze very well: Wrap the cooled loaves in plastic wrap, then put them in zip-lock bags and freeze. Thaw directly in the bag on the counter, then remove the plastic and reheat in a warm oven. You won’t be able to tell it’s been frozen


Holiday Hybread: Pumpkin Gingerbread with Cream Cheese Filling

Banana-gingerbread

Two breads in one, with a tasty filling. C’mon, who’s better than you at this party?

Ok my pretties (and I know you are bringing your A-game tonight), this is going to be a quick one. Quick because I left posting this until New Year’s Eve on an airplane and quick because you have places to go, things to do and fun people to see! So, go ahead and read this recipe tomorrow when you are reclined on the couch. But before you go, please do three things for me:

  1. Review this party trick just in case. Your A Game, remember?
  2. If you happen to find yourself with leftover champagne (imagine?), SAVE IT! Here are 16 uses for leftover champagne and one of them surely will sound good tomorrow, even if it’s the ice cubes for your oj. If you can only manage to pour it into a mason jar, then do that and you’ll have awesome vinegar by Valentines Day.
  3. Get fancy and celebrate New Years however the heck you want, whether that means ditching champagne entirely or crawling into your new flannel jammies at 9.

Now, go have fun and be safe out there! When you come back…

Slacker bakers unite for Round 2. We’re in the home stretch. You’ve got one more weekend of planned and spontaneous get-togethers, of late nights and chocolate for breakfast, of “how-long-does-that-stuff-in-the-foil-keep?”  What you need here is something edible that is easy to throw together, widely appreciated, mostly homemade and somewhat more impressive than a regifted box of chocolates (not that there is one single thing wrong with that!)

You can get on your pomegranate game, and it never hurts to have fondue fixin’s at the ready, but if you’re still up for baking, here is a little slice of brilliance which involves boxed bread mixes. Now you’re with me, right? This comes from Sister B, who has made it more times than she can count in the past few weeks. The original version combines gingerbread with pumpkin bread, but she prefers it with banana bread (and includes a recipe for that below, so keep your scrolling skills up).banan-gingerbread-ingredients

This Holiday Hybread is nothing gourmet, but it’s yummy, and it can say a lot about you. Like… “I’ve still got some holiday swagger in me,” or, “I know exactly what to get at Trader Joe’s,” or “See what I can do with all that cream cheese I never used for the shrimp dip?” My only note is that this recipe calls for half boxes of both breads. My suggestion is to double it, make two loaves and do away your need for higher math.

And now, I turn it entirely over to sister B, AKA Beatie the Artiste, who took the edible peppermint plate to an entirely new level. More on that later.

Holiday Hybread: Pumpkin Gingerbread with Cream Cheese Filling

Easy, yummy, and  holiday-ish!  A crowd pleaser.

Note: If you don’t have a Trader Joe’s Betty Crocker mixes work too, but TJ’s (or an upscale boxed version) is way better.

Makes one loaf

Ingredients:

  • ½  package Trader Joe’s pumpkin bread mix plus what the box asks for (egg, water, oil)
  • ½ package Trader Joe’s gingerbread mix (plus, egg, water oil)   
  • 12-oz  cream cheese (1 ½  8 oz. packages)
  • 3/8 cup sugar
  • a few drops vanilla

Method:

Preheat oven to 350.

Grease the bottom of a 9” x 5” ish bread pan or spray with cooking spray.

Make your gingerbread and pumpkin bread batters, according to package directions.

Make cream cheese filling:  place cream cheese in microwave safe bowl and zap for
40 seconds.  Stir in sugar and few drops of vanilla until smooth.  Set aside.

SCRAPE pumpkin bread mixture into loaf pan.  Level it as best you can.

PLOP the cream cheese mixture all over the top of the pumpkin bread batter, covering it.  It may be lumpy and uneven…that’s ok, so are some of the best of us. If you care, level it carefully with a knife…but try to let it go.

Now TOP that with your gingerbread batter.  

Bake for about an hour…maybe a little more.  Check it with a toothpick to know for sure.  Cool on a wire rack and then remove from pan. Slice, impress and enjoy!

And now for Sister B’s sister recipe to the above. This was discovered by happy accident, some overripe bananas in the freezer and a WHAT IF inspiration. As in, WHAT IF I tried the same thing but with a layer or banana bread instead of pumpkin this time? Insane, right?  And yet, banana/gingerbread bumped pumpkin/gingerbread off the top of the podium and into the silver medal position.

This recipe uses a proper (and awesome) banana bread recipe from Cooks Illustrated. It’s not out of a box, but it’s already halved for your convenience.

Banana Gingerbread with Cream Cheese Filling

Proceed exactly as above, but for the pumpkin bread part substitute this:

Banana Bread (this is the half recipe. Double it for two loaves of Holiday Hybread or one loaf of straight banana bread)

Ingredients:

  • 1 cup flour
  • 3/8 cup sugar
  • 3/8 tsp baking soda
  • ¼ tsp salt
  • 2  very ripe bananas, mashed well (3/4 cup)
  • 1/8 cup plain yogurt
  • 1 egg, lightly beaten
  • 3 tablespoons unsalted butter, melted and cooled
  • ½ tsp vanilla

Method:

Whisk flour, sugar, baking soda, salt together in a large bowl and set aside.
Mix the mashed bananas, yogurt, eggs, butter, vanilla in a medium bowl.
Lightly fold banana mixture into the dry ingredients until just combined.

THE Panzanella

PANZANELLA

It’s toasted bread! It’s veggies! It’s panzanella coming to the rescue!

First off, apologies all around for the technical difficulties last week, and to those of you who got a sad, gray, “Legacy IP DNS blah blah” message instead of a recipe for Watermelon Rosemary Lemonade. Thanks to a kind man named Piotr who desperately needs a vowel, we are back up and running. Now, on to this weekend.

Some recipes you just have to know. Ina Garten’s panzanella is one of them, especially in summer. In addition to being a way to use a whole lot of summer’s best produce, it’s easy to prep, easy to bring, easy to assemble and it’s DELISH. Plus, it’s a way to eat crispy bread and call it dinner (or breakfast if you can’t help yourself the morning after). Ina (AKA The Barefoot Contessa, and the goddess of bringing it) has many panzanellas in her repertoire, including an awesome greek version, but if you only master this one (and you will on your first try) the Kingdom of Picnic Greatness is yours. 

As I mentioned in the recipe for Asparagus Panzanella, you can use your imagination, your cravings and the contents of your produce bin to tweak panzanella in all kinds of ways. It’s a tasty go-to on some seriously hot days. And by the way, if you live in the Upper Valley and are looking for some places to cool off check out this post on Swimming Holes and Soft Serve.

Ok peeps, stay cool out there!

Ina’s Panzanella

Serves 12

INGREDIENTS

For the Salad:

  • 3 tablespoons good olive oil
  • 1 small French bread or boule, cut into 1-inch cubes (6 cups)
  • 1 teaspoon kosher salt
  • 2 large, ripe tomatoes, cut into 1-inch cubes (I have used halved cherry or grape tomatoes as well.)
  • 1 hothouse cucumber, unpeeled, seeded, and sliced 1/2 inch thick
  • 1 red bell pepper, seeded and cut into 1-inch cubes
  • 1 yellow bell pepper, seeded and cut into 1-inch cubes
  • 1/2 red onion, cut in half and thinly sliced
  • 20 large basil leaves, coarsely chopped
  • 3 tablespoons capers, drained

For the vinaigrette:

  • 1 teaspoon finely minced garlic
  • 1/2 teaspoon Dijon mustard
  • 3 tablespoons champagne vinegar
  • 1/2 cup good olive oil
  • 1/2 teaspoon kosher salt
  • 1/4 teaspoon freshly ground black pepper

Method:

Heat the oil in a large sauté pan. Add the bread and salt; cook over low to medium heat, tossing frequently, for 10 minutes, or until nicely browned. Add more oil as needed.

For the vinaigrette, whisk together the ingredients.

In a large bowl, mix the tomatoes, cucumber, red pepper, yellow pepper, red onion, basil, and capers. Add the bread cubes and toss with the vinaigrette. Season liberally with salt and pepper. Serve, or allow the salad to sit for about half an hour for the flavors to blend.

Bringing it:

You can prep the bread, veggies and vinaigrette in advance and store in their own containers. Mix it all up on site a half hour before serving.

Sun-baked Banana Bread

A small rappel into a beautiful canyon

A small rappel into a beautiful canyon

For those of you living in the northeast, I don’t have to tell you, it’s been COLD here since last October!   Although we are a gritty type and can normally take whatever weather comes our way, I don’t think I’m speaking out of turn when I say, we are ready for some warmth and sunny skies. Unfortunately, the cold weather is persisting, but the warm weather will eventually come our way. It always does.

In the meantime, many of us high-tailed it out of here for Spring break hoping to find weather to warm our hearts and souls. My family, and some fine friends, headed to the southern Utah for a week of canyoneering in the desert slots. We were looking forward to that blast of hot air that hits as you walk off the plane.  As it turned out, this was not the case. The weather was okay…..until it snowed. And then, as if the snow as not enough, we were greeted with mixed precip….hale, sleet, snow, rain, and wind….. which was a real treat!  We muddled through, as we always do; and fortunately, most days, the weather was fine and did not curtail our outdoor canyoneering activities. We had a lot of fun making our way through the canyons (see photo above) and the trip was amazing despite the slight chill (see photo below).

With that introduction, I move onto the topic at hand….. how to make the sun-baked banana bread….. that’s what you came here for after all…

My friend Tom, who is good at everything he does (his main strengths being all outdoor activities, Scrabble, and baking banana bread) made this amazing banana bread. When he pulled this out one chilly morning and we toasted it on the grill with a dab of butter, it was heart and soul warming (if the sun can’t warm us, the food can, right?). But, even better than this delicious bread was the way he baked it. He used a sun oven. This sun oven is mobile. He can place it in his back yard in the direction of the sun whenever he wants to bake on a sunny day (which is most days in southern Utah). There is a photo of the sun oven below and a link to get more information. This oven gets up to almost 300 degrees Fahrenheit and can cook a regular size banana bread in just about an hour.

Thanks Tom for the banana bread and the fun time in the slots. I’ll give you a Plus One for the effort!

Ingredients

1 stick of butter or 1/2 cup canola oil
1/2 cup sugar
2 eggs
2 overripe bananas
1.5 tsp vanilla
1.5 cups whole wheat flour
1 tsp baking soda
1 tsp baking powder
Pinch of salt
1/2 cup chopped walnuts, pecans, or hazelnuts (filberts, if you¹re from Oregon)
 1/2 cup chocolate chips (optional) 

Method

Mix butter and sugar until smooth. Add eggs and bananas one at a time into butter/sugar mixture. Then add vanilla and mix until blended.

Mix dry ingredients together (flour, baking soda, baking powder, and salt). Then add to wet ingredients slowly, being careful not to over mix. Add nuts and chocolate chips if using.

Fold into bread pan and bake at 325 for 50 minutes (or 1 hour at 275 in sun oven – if you are lucky enough to live where you can use one of these puppies).


Brrrr.....cold morning at camp

Brrrr…..cold morning at camp

Tom rounding the top

Tom rounding the top

For more information on sun ovens, check out this quick video

No need to turn on the oven on a hot day with the sun oven!

No need to turn on the oven on a hot day with the sun oven!