Tag Archives: breakfast

All the heft and taste, none of the effort

Dirt Bread 2.0: Gluten-Free Cottage Cheese Bread

People who know me or have seen me cook know that I am the slacker queen. It’s not that I cut corners entirely out of laziness. I cut them to find an easier way to a just-as-good or better outcome. These it no victory quite like winning the short-cut.

Case in point: Slacker chile crisp, which takes a fraction of the time effort and ingredients of the original chile crisp (PS interesting article on how chili crisp took over America right here), and which I now prefer. And then there are funitella bruschetta and easiest tomato soup both of which I will always and unapologetically make with canned tomatoes. Don’t get me started on sourdough. Not a chance I am going through that when I can make easiest French bread ever with ~3 minutes of active time.

So that brings me to today’s recipe for a nut-free, gluten-free bread that is reminiscent of the famous lifechanging loaf of bread (AKA Dirt Bread); BUT it requires fewer (and more normal) ingredients, and half the effort. As with all things miraculous, it came from Instagram, from a fleeting place I have never re-found. Let’s say a little prayer for screen shots.

A word here about gluten. I am a fan. I am also a little over-glutened at the moment, having taken a class at Gesine Bullock Prado’s Sugar Glider Kitchen. Her classes sell out in minutes so there not a chance I would have gotten this opportunity had it not been for Suzi the Great, knower of all the best things in life and giver of same. I now know how to properly cream butter and sugar (it takes forever), why to use room temperature eggs, Baker’s math, the virtues of cheap disposable pie pans, how to make and use a proper Swiss buttercream and so much more. I can’t wait to deploy my knowledge bombs for deliciousness

But there are times when that heft and chew of a dense, seedy, substantial bread is needed. And there are times when your gluten-free, nut-free people need something homemade and yummy. You could make them rustic Everyone Crackers OR you could be hero with a fraction of the effort and make this. It gets its body from oats, cottage cheese and eggs and its texture/cha-cha from flax, sesame and sunflower seeds. We’re talking pretty basic ingredients, and no rising involved. You just mix everything up, shape it into a football as best you can and bake it for an hour.

If you like Dirt Bread you will love this. If you’ve never committed to Dirt Bread, ease into the concept by trying this first.

What this is:

  • Easy
  • Quick (for bread)
  • Delicious
  • Gluten- and nut-free
  • High-protein
  • Cheapish

What this is not

  • Vegan
  • Yeasted
  • Shelf-stable: Store it in the fridge or sliced in the freezer

I am so sorry Vegans. Between the cottage cheese and the eggs, I’m seeing a lot of high risk substitutions, but please do let me know if you crack the code! Also, the mystery poster of this was a Brit, so all measurements are in grams. I approximated volume measurements, but live a little! Putting a bowl on a scale (<$20 people), adding each ingredient and zeroing it out after each addition is way easier and more accurate.
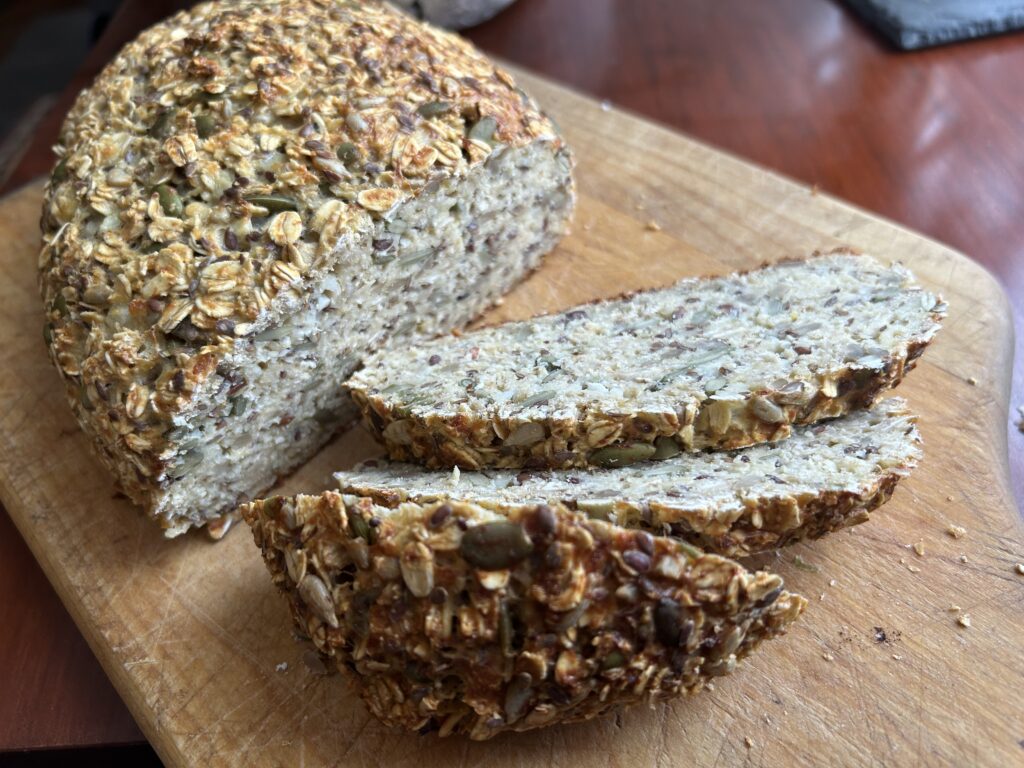
Dirt Bread 2.0: Gluten-Free Cottage Cheese Bread

Preheat oven to 360

Ingredients

500 grams cottage cheese (about 2 cups)
3 eggs
300 grams oats (about 3 cups)
1 tsp baking powder
½ tsp salt
50 grams flaxseed, heaping ¼ cup
50 grams sunflower seeds,  1/3 cup
50 grams pumpkin seeds, scant ½  cup
Optional but advised, 50 grams dried fruit of choice (cranberries are my jam, and I usually but not always chop them a bit)


Method

  • Combine all the ingredients in a bowl. Mix well, making sure everything is completely mushed together (no yellow yolk streaks and break down the big chunks of cottage cheese).  Dump it onto a parchment-lined pan and use your hands to shape it the into your best, well-packed loaf like shape.
  • Bake 1 hour

Cool completely before slicing. This is key to it holding it’s shape so…patience! Store in fridge or (my fave) slice and store, wrapped tightly, in freezer so you can grab a slice or two and toast it up as needed.
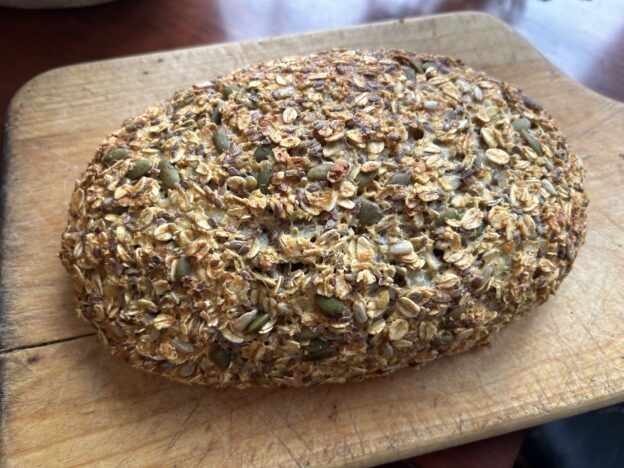
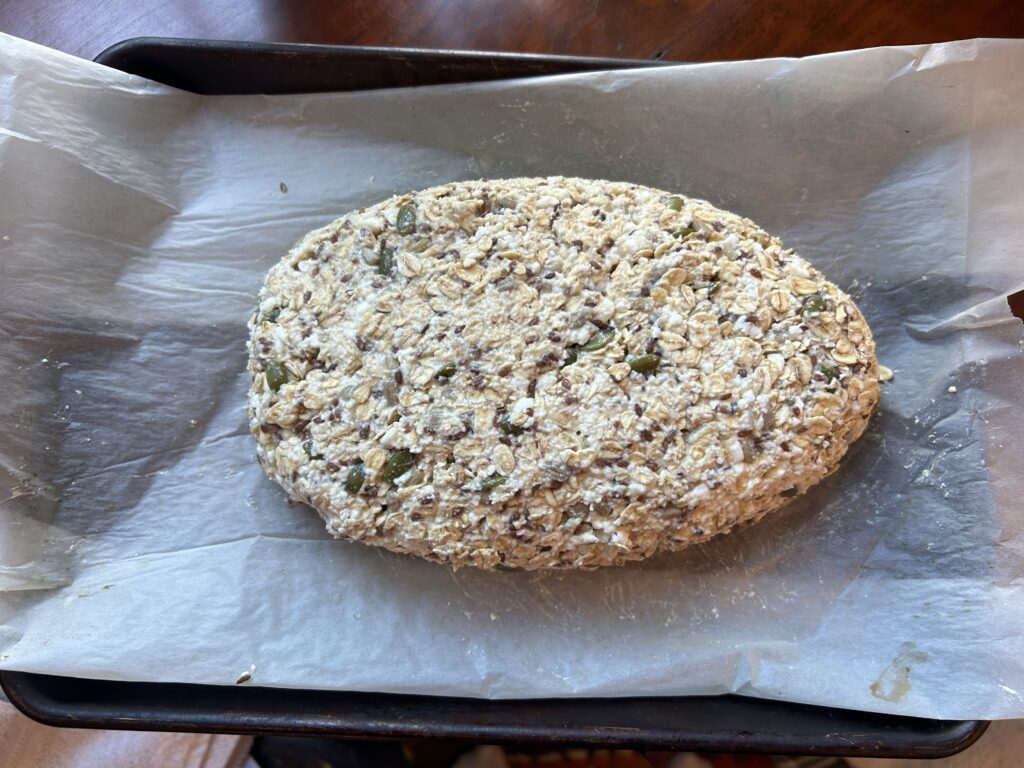
The pre-baked, nice, tight football-like loaf


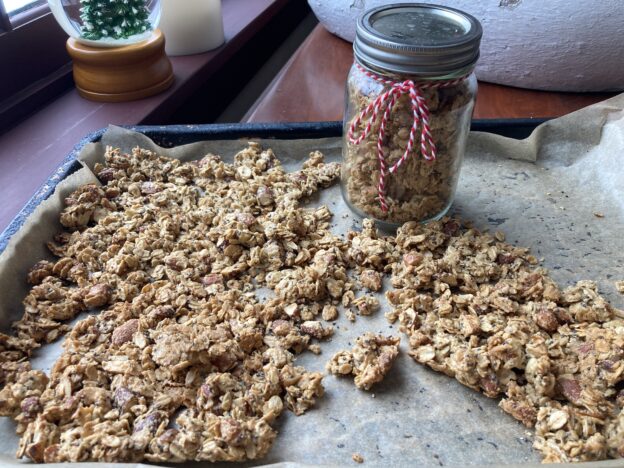
Crunch Time Tahini Granola

The internet is full of recipes that are made to look easy, but are a pain. This is especially true at the holidays where we are all looking for that holy grail food item—that thing to bring or give that is both delicious and memorable. Case in point, the Nutella puff pastry Christmas tree currently all over Instagram and so many other cleverly pieced-together videos. More often than not they lure you down the rabbit hole of something that may indeed be easy, but only after making it for a generation. And honey, we ain’t got no time for that during the holidays.

When I’ve tired of failed baking experiments I often go back to granola. In the pantheon of homemade treats—from this chocolate sauce that can be made in your sleep, to these GD chocolate dipped peanut butter balls (beware of anything that has to be rolled into individual balls! And/or dipped!)—granola is among the easiest. Not the cheapest, thanks to the precious nuts and honey/syrup, but the easiest. So, when I see easiest and granola together in one heading, I perk up.

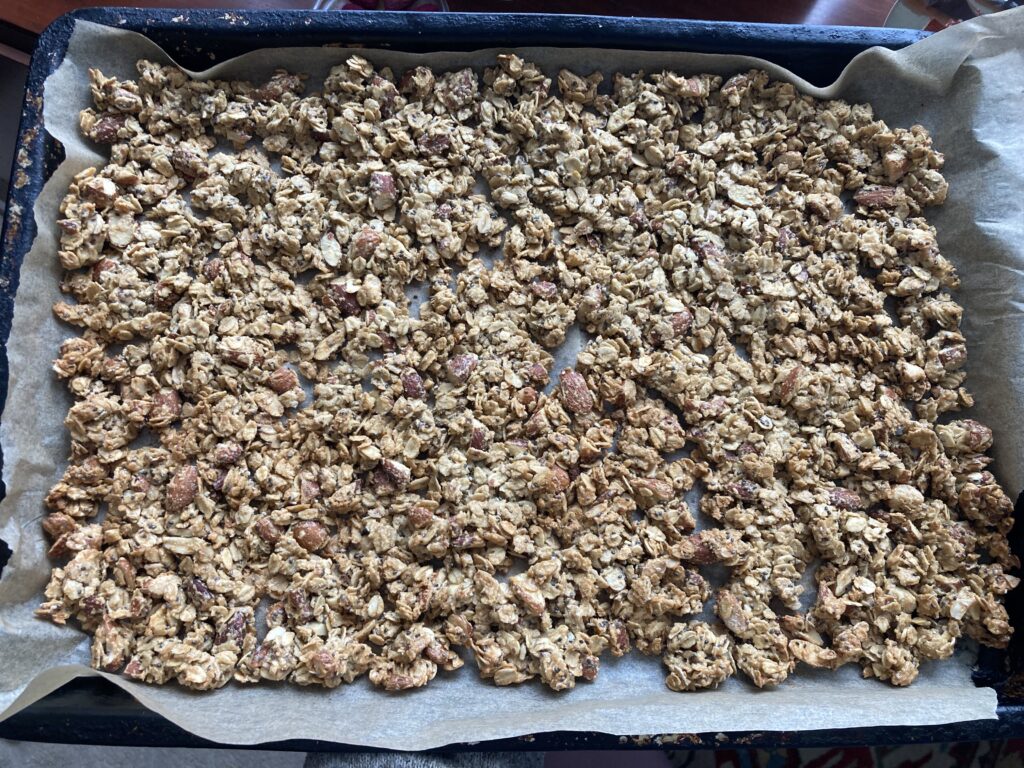
This recipe delivers on its claim. Of course the ease comes with a price. You’ll swap out some steps and ingredients by springing for the jar of tahini. And if you go with pistachios as written (I used roughly chopped almonds), they’re the priciest option. BUT, they also require zero chopping, bringing this recipe to Level 1 on the effort meter. You will be rewarded for your lack of work with a delicious, not-too-sweet, crunch-perfect granola and extra time on your hands.

As with every recipe there is a slight catch, something that keeps the trained monkeys from taking over production. The catch here is the step of spreading the thick granola mass evenly on the cookie sheet. I used little chopping motions with a rubber spatula. You do whatever it takes, and it does not need to be perfect—we’re just aiming for somewhat even thickness so the granola at the edges doesn’t burn up while the stuff in the center stays soft and cuddly.

I wish you success in all your experiments. No matter how they turn out you deserve a gold star and a chocolate kiss for trying.  

Easy Tahini Granola

From Jenné Claiborne via Food52 Genius Recipes

Prep time: 5 min
Cook time: 15 min

Ingredients

  • 1/2 cup (125g) well-stirred tahini
  • 1/3 cup (80ml) maple syrup
  • 1 teaspoon vanilla extract
  • 1/4 teaspoon fine sea salt
  • 2 cups (180g) old-fashioned rolled oats
  • 1/2 to 1 cup (60 to 120g) shelled raw pistachios (or another nut or pepitas)
  • 2 tablespoons chia seeds
  1. Stir everything together: Heat the oven to 350°F (175°C) with a rack in the center. Line a sheet pan with a silicone baking mat or parchment paper. In a large mixing bowl, stir together the tahini, maple syrup, vanilla, and salt with a silicone spatula until it’s smooth and evenly combined. Stir in the oats, pistachios, and chia seeds.
  2. Bake the granola: Spread the wet, sticky oats onto the sheet pan in a thin, even layer. Bake for 10 minutes, then, using oven mitts, take the pan out of the oven and stir the granola—this will help it finish baking evenly. Return the pan to the oven and bake until the granola is dry and golden brown, another 5 to 10 minutes. Keep a close eye toward the end to make sure it doesn’t start to burn at the edges.
  3. Eat, Store, Give: Let the granola cool completely to crisp up, about 20 minutes, before breaking it into clumps with your hands. Eat as one does with granola. Store in a sealed container at room temperature for a week or more if you are disciplined. Pack it up in mason jars or treat bags for giving.  

It’s crunch time!


When Life Gives You Lemons, Say Thank You!

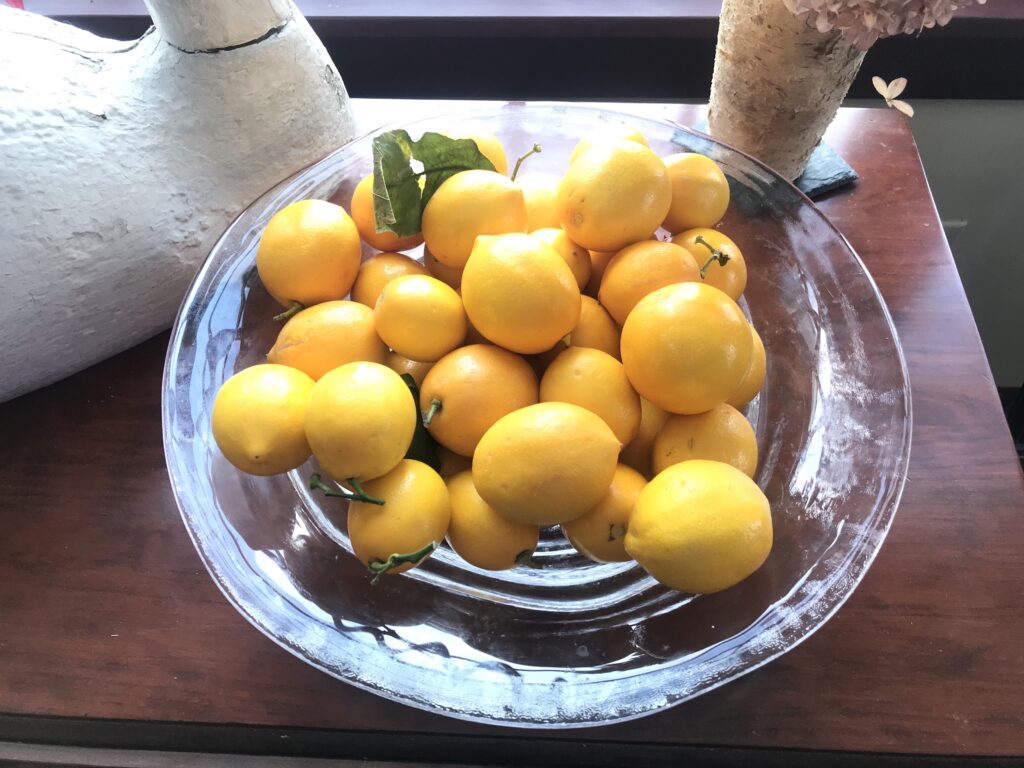
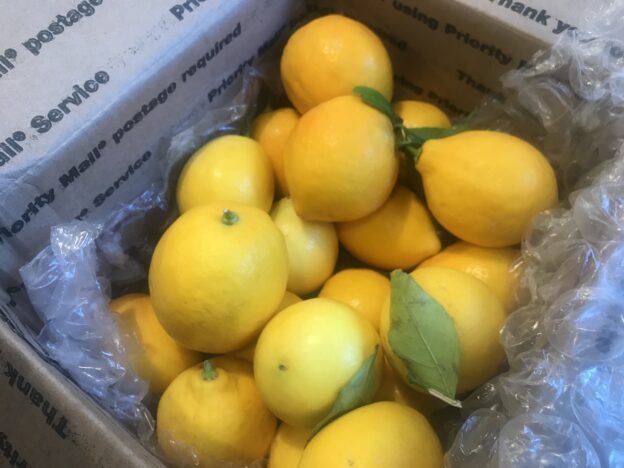
It’s a dreary Sunday here in the east, with the promise of rain to take what’s left of our precious snow. As if in anticipation of this day, a heavy Priority Mail box from California recently arrived. Cousin D, in a race to save her California hillside of citrus from a cold snap, did a mass harvest and shared some of it with me. As a former Vermonter, D knows the mixed blessing of March in New England–winter’s easing its grip, but…the mud!–and the curative power of Meyer lemons. On top of that, she’s just darned thoughtful!

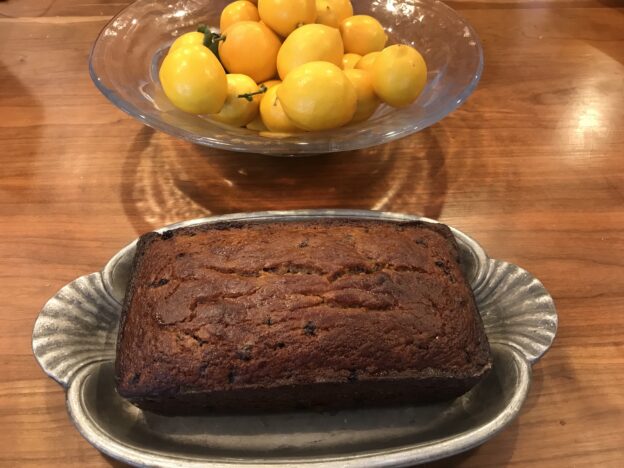
Rather than reinvent the citrus wheel, I’m going to revisit some favorites from Lemonpalooza 1, (Lemon simple syrup, and roasted lemon shallot vinaigrette for an off the hook chicken bread salad) and from the sequel, Lemonpalooza 2 (lemon pudding cake, preserved lemons and the lemon blueberry sunshine loaf that I discovered the last time Cousin D bestowed her citrus bounty on me.)

For breakie, squeeze some on top of the classic Dutch Bunny to put a big smiley face on your day, orrrr nothing says “I love you” and also “Don’t mess with me” like Sassy Sansa Lemon Ginger scones. If you really want to jumpstart summer, make up a Lemon Beach Pie.

Of course, there’s nothing wrong with plowing through your lemons as straight up lemon juice in and on everything. Tea? Smoothies? Sprtizers? Cocktails? Yes please!

If you’ve already embarked on spring training, squeeze them up for some minty snap pea salad, lemony shrimp and bulgur salad, lemon cauliflower couscous or pretty much anything that could use some fresh zip.

Wherever you are on this spring day I hope you find some brightness and warmth.

PS. We’re taking votes for your favorite lemon recipes. First vote is by Aunt D for lemon posset, in Lemonpalooza 1. Solid choice!


Blueberry Breakfast Cake

And, an entire summer later, we’re back in the blogosphere. Long story short, there has been plenty of cooking and feeding going on, but not a ton of uploading and chronicling. Thanks to some kind friends I’ve gotten back to using real, hard copy cookbooks, and the Internet has been as relentless as ever serving up delicious wins and epic fails. Now, it’s time to revisit these favorite recipes so I, a: remember where they are, and b: can share them with my peeps!

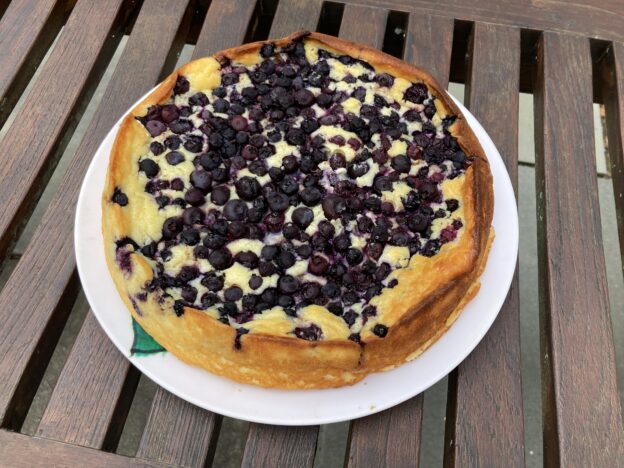
We’re going to start back nice and easy. Then we’re going to get a little weird. I promise it’s all good stuff, but weird nonetheless. For now, we have Blueberry Breakfast Cake that I made more times than I can remember last summer. It’s like a delicious collision of a Dutch Bunny a blueberry muffin and a cheesecake.

This comes straight from King Arthur Flour, and it is foolproof. My only additional note is to use a cookie sheet on the rack below if you are using a springform pan, so you don’t bake any blueberry goodness onto your oven floor. Yes, I learned that the hard way.

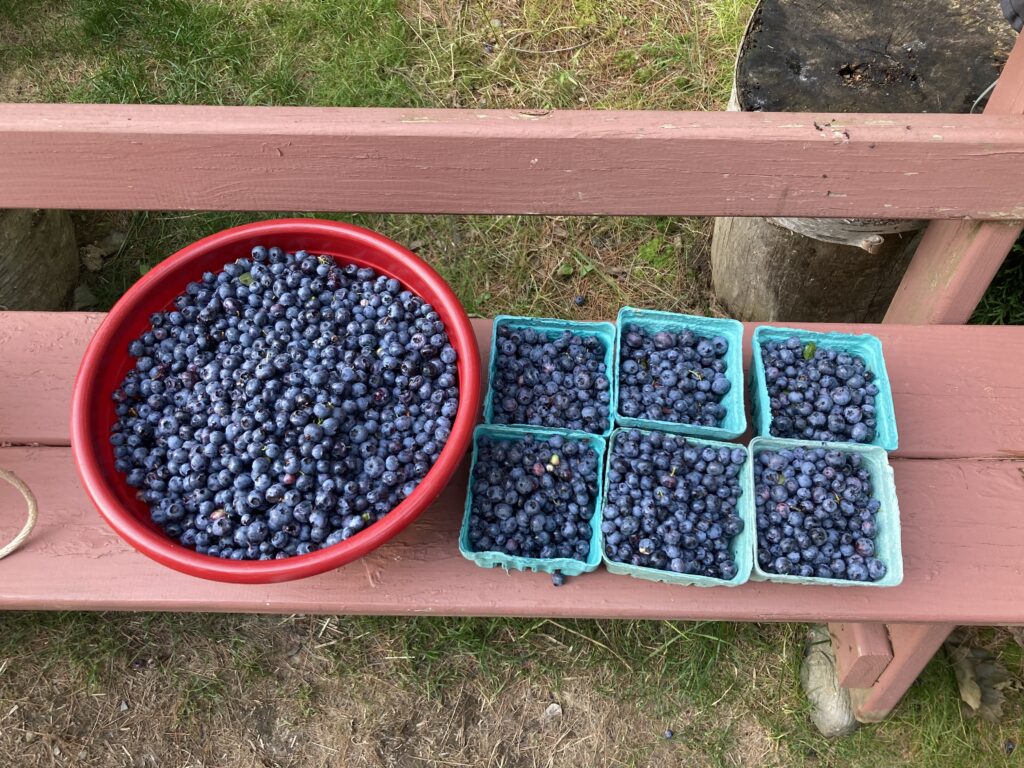
Other than that, this is bombproof, and perfect for those late harvest blueberries or the ones in your freezer. I hope you love it!

Blueberry Breakfast Cake

Ingredients:

  • 3 large eggs
  • 1/2 cup + 2 tablespoons (124g) granulated sugar
  • 6 tablespoons (85g) melted unsalted butter
  • 1 cup (227g) ricotta cheese
  • 1 cup (227g) sour cream
  • 1 teaspoon vanilla extract
  • 1 cup (120g) King Arthur Unbleached All-Purpose Flour
  • 1/2 teaspoon salt
  • 1 1/4 teaspoons baking powder
  • 1 1/2 cups (255g) blueberries, fresh or frozen
  • cinnamon or confectioners’ sugar, for serving (optional)

Method:

  1. Preheat the oven to 350°F. Lightly grease an 8″ round cake or springform pan that’s at least 2″ deep. 
  2. In a large mixing bowl, using a whisk attachment (or by hand Laura Ingalls Wilder style), beat together the eggs and sugar until thick and lighter in color. Add the butter, ricotta, sour cream, and vanilla.
  3. Add the flour, salt, and baking powder, mixing until combined.
  4. Pour the batter into the pan and scatter the berries evenly over the top.
  5. Bake the cake for 45 to 50 minutes if using fresh berries (55 to 65 minutes for frozen), until the edges of the cake are lightly browned. The cake should be set throughout, although it will still jiggle when gently shaken.
  6. Remove from the oven and let rest at room temperature for 30 minutes to firm up. Serve warm with cinnamon or confectioners’ sugar (if desired).
  7. Store leftovers in the fridge for up to 5 days.


Lemon Blueberry Sunshine Loaf

Some days we need a little sunshine. Heck, some years we need it. This would be one of those days in one of those years. This recipe is one I have been meaning to post since the day, in the depths of winter, a glorious box of Meyer lemons arrived from Cousin D in California. As if the lemons weren’t treat enough, they concealed some vintage lederhosen, which of course EVERYONE needs.

Similarly, everyone needs a bit if sunshine, and this loaf (easily Veganized) serves it up.  It comes straight from Cookie and Kate, and was the answer to many questions, like:

What can I make that uses every part of these luscious lemons?
What can I make that is easy and delish?
What can pass off as a homemade dessert when we have visitors, or a satisfying snack or breakfast when we don’t?
What’s going to hit the above and have some redeeming nutritional qualities?

This is the answer to all that! I hope you like it, and that it brings a little sunshine to your day. After seeing what lemon zest does to sugar you will never let your lemons go unzested again.

Lemon Blueberry Sunshine Loaf

Ingredients

  • 1 ½ cups white whole wheat flour or regular whole wheat flour, plus more for dusting
  • 2 teaspoons baking powder
  • ½ teaspoon fine grain sea salt
  • 2 medium lemons, preferably organic, to be zested and juiced
  • 1 cup sugar (organic cane sugar if you’re fancy)
  • ¾ cup plain whole-milk (full fat) yogurt or Greek yogurt
  • 3 extra-large eggs (aquafaba works great too)
  • ½ teaspoon pure vanilla extract
  • ½ cup extra-virgin olive oil
  • 1 cup fresh or frozen blueberries (if frozen, do not defrost!)
  • 2 teaspoons honey
  • Optional accompaniments: coconut whipped cream or regular whipped cream or vanilla ice cream

Method

  1. Preheat the oven to 350 degrees Fahrenheit. Generously butter and flour a 8½ by 4¼ by 2½-inch loaf pan.
  2. In a medium mixing bowl, whisk together the flour, baking powder, and salt.
  3. Pour the sugar into a separate medium-sized mixing bowl. Grate all the zest from the lemons. Rub the zest into the sugar until the sugar is yellow and fragrant. Add the yogurt, eggs and vanilla to the sugar mixture. Whisk well, until the ingredients are combined.
  4. When the mixture is well blended, gently whisk in the dry ingredients, just until incorporated. Switch to a spatula and fold in the oil, making sure it’s all incorporated. The batter will be shiny. In a separate bowl, toss the blueberries with about one teaspoon flour (this will help prevent them from sinking while the cake bakes.) Gently fold the blueberries into the batter.
  5. Pour the batter into the prepared loaf pan and smooth the top. Bake the cake for 50 to 55 minutes, or until the top is golden and the sides just start to pull away from the sides of the pan. A toothpick inserted into the center should come out clean.
  6. Let the cake cool in the pan for 30 minutes. Meanwhile, warm 2 tablespoons lemon juice and two teaspoons honey just long enough for you to whisk the honey into the juice. You can do this in your smallest saucepan over medium-low heat or in brief bursts in the microwave. Once the honey is mixed in, taste it—it should be pleasantly tart. If it’s too sour, mix in more honey. Using a pastry brush, brush the lemon-honey glaze on top of the warm cake. Repeat until you have no more liquid left.
  7. Run a knife between the cake and the sides of the pan to loosen. Unmold the cake by placing a large plate or cutting board upside down over the loaf pan and carefully turning it over. Turn the cake back onto a flat surface to cool completely. Then slice and serve!

Bringing it:

This is the PERFECT offering to bring anywhere anytime. It’s portable, sturdy and easy to eat at any venue. Bring it on!

A Box Full of Sunshine for Mother’s Day

Happy Mother’s Day! My gift came a day early, from California. My amazing Auntie Tina, who knows how much I covet her Meyer Lemon tree, sent a surprise care package straight from her tree and her kitchen.  It was the very best thing in the world to open on a snowy, windy May morning in New Hampshire. Money may not buy you happiness, but fresh lemon marmalade on toast sure will.

Tina makes me think of great moms and of the way they make you feel special on every day. My Nina was all that, and I’m really happy and excited that she’s getting some airtime in today’s New York Times. I hope you get a chance to read this, and that it brings a little peace to people who need it on Mother’s Day, or any day.

For kids out there, of any age, wondering if you can pull off making breakfast for your Mom, you CAN! And you can probably do it with what you have on hand. Might I suggest Dutch Bunny, Blueberry Dutch Bunny, Popovers or 3-3/2-2 crepes, all of which benefit from a squeeze of fresh lemon. Whatever you come up with, you know she’ll appreciate the effort, so here’s the only part of the recipe you truly need to follow: Serve it up with a whole lotta love!

Whether or not cooking is happening, let’s give it up for our mom’s today. And when life gives you lemons, say “Thank you!” 

 Thank you for the sunshine Tina!

Italian Breakfast Biscotti

Well hello! What say we spend a quiet weekend at home with family? I know, bad joke. But really, at any other point in time that probably sounded like a comforting luxury, so let’s enjoy it. And, how better to enjoy it than with cookies? But, wait, it gets better. How about breakfast cookies? NOW we’re talking.

This recipe come from “A Blissful Feast” the book I mentioned a couple of posts ago, after going to a reading at the Norwich Book Store. The author, the supremely talented Teresa Lust, is my neighbor in bustling Hanover Center, and the reading happened to be that last social event before we all scurried into our holes for the duration. Teresa’s first book, Pass the Polenta got a shout-out from none other than Julia Child, so I knew this chronicle of her culinary journey—through Italian culture, history and family—would be entertaining, informative and well written. As a bonus, it’s full of unfussy recipes that I wanted to try pronto!

Part history, part story and all great recipes

This was the first recipe I wanted to make, and it did not disappoint. I love that these call for olive oil instead of butter, which helps when cooking with heart health in mind, and means you don’t have to soften butter. I also love that they use lemon zest because the only things I have hoarded are Meyer lemons. And I love that I now have a new creation that impresses my kids and makes everyone happy at any time of day. When Teresa graciously encouraged me to share the recipe here, she warned me that it was possible to eat half the batch in one sitting. She was not wrong.

As I prepare to make them again, I need to time production so I have some left for tomorrow’s Easter festivities which include…cookies for breakfast and not much else. I’m saving A Blissful Feast for bedtime reading, going through it slowly, imagining a trip to Italy and enjoying it like a long family meal. 

A few notes: This is the recipe exactly as it is written in the book, but with a few *notes where Teresa provided some extra guidance and assurance for the baking impaired (like me). I suspected these would be great with other fruit/nut combos, and Teresa gives that a big thumbs up, especially dried cherries or cranberries and almonds, pistachios. or hazelnuts. I say any combo that speaks to you (ideally from your pantry).

Cantucci: Breakfast Biscotti

Makes about 4 dozen

These twice baked cookies are traditionally served with a sweet dessert wine at the end of the meal. The addition of dried apricots, almonds and oats gives them all the ingredients you need for breakfast, too, served with an espresso or steaming cup of caffelatte.

Ingredients:

  • 2 cups flour, plus 1 Tbsp for tossing with apricot pieces
  • 1 tsp baking powder
  • ½ tsp salt
  • 1 cup sugar
  • 2 large eggs
  • ¼ cup olive oil
  • zest of a lemon
  • 1 tsp vanilla extract
  • ½ tsp almond extract
  • 1 cup dried apricots, chopped
  • 1 cup blanched almonds, (whole or slivered)
  • ½ cup old fashioned oats (not instant)

Combine 2 cups flour, baking powder and salt in a small bowl and set aside.

Place sugar, eggs and olive oil in the bowl of a stand mixer with the paddle attachment and mix on low speed until smooth. Add lemon zest, vanilla and almond extract, and continue mixing, until combined.

In a small bowl, toss remaining tablespoon of flour with dried apricots to keep the pieces from sticking and set aside.

Add flour mixture to wet ingredients, stirring just until blended and make sure to scrape bottom and sides of bowl with a spatula to thoroughly incorporate dough.

Stir in chopped apricots, almonds, and oats. Covered though and refrigerate 30 minutes (or up to several hours or overnight).

Preheat oven to 350°. Grease a baking sheet or lined with parchment paper. Divide dough in half, roll into logs (about 12 x 2 inches) and place on baking sheet a few inches apart.*

Flatten the logs into loaves about 1 inch high. Bake until golden brown, about 30 minutes, rotating pan halfway through.

Reduce oven temperature to 300°F. Let loaves cool slightly, then cut into 1/2 inch slices.** Arrange cut side down on baking sheet and return to oven until biscotti start to harden and turn golden (they’ll still feel a bit soft, but will continue to harden as they cool), 15 to 20 minutes.

Teresa’s guidance:

*I roll them out on the counter—I don’t dust the counter with flour, but if they are sticky you could do that. (There’s a lot of variation in different types/brands of flour, also humidity and freshness of flour can affect things.) Then I transfer them  to a baking sheet.

**I cut them on a cutting board, while they are still warm, but cool enough to handle, I’ve used both a chef’s knife and a serrated bread knife, which works better if you’ve forgotten about them and let them cool down all the way.

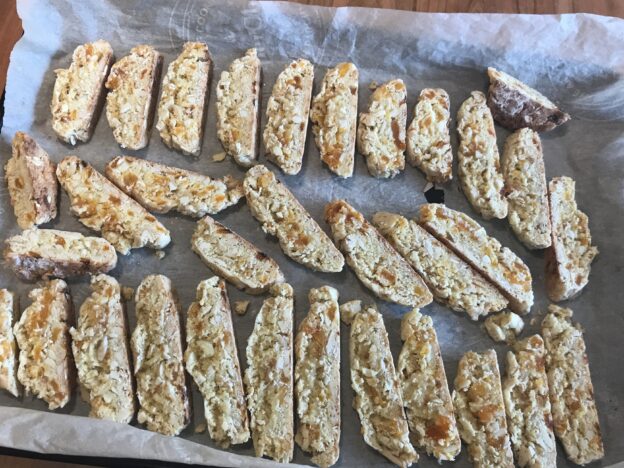
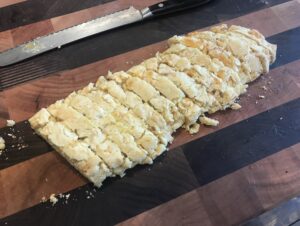
Partially baked, sliced and ready for the final act.

and then there’s this option

Strangely Awesome Buckwheat Granola

Buckwheat granola is a roasty toasty taste of fall

Buckwheat granola is a roasty toasty taste of fall

So here it is mid October, and where’s the apple post? Apples rule my life in the fall. They beg to be picked. Their fermented scent spikes the air when I step outside. They pile up on the ground until they are weaponized by the lawnmower. I can’t pick them, eat them or cook them up fast enough. So I was feeling badly about not doing an apple post…until I realized we did a pretty complete one last year. In case you missed it, here it is. It’s got you covered on apple scones, pie, soup, cake, sangria, sauce and a few more apple inspired extravaganzas.

That frees us up for something different, even weird, on this Columbus Day. It involves buckwheat groats, which sound sufficiently scary. I’ve always loved their rustic, earthy taste, even though I never really knew what to do with them. Now I know!

I fully admit that I have weird food tastes (my sister even advised I seek medical advice on the particular quirk at one point), so before posting this granola I tried it on many people. Even those with mainstream tastes either loved it right away or quickly warmed up to its sneaky, crunchy addictiveness. It’s good, it’s good for you, it’s super easy, it’s different and it’s indestructible. All that makes it wayyyyy Bring It worthy.

And here’s the October bonus: you can substitute applesauce for the mashed banana. So you get to try something new while staying seasonal and plugging away on that apple stash.

Buckwheat Granola

Very slightly adapted from Food52

Makes about 4 cups

Ingredients:

  • 2 cups raw buckwheat groats
  • 1 1/2 cups mixed seeds and nuts (I use sunflower seeds and either almonds or pecans, roughly chopped)
  • 1 cup unsweetened coconut flakes
  • 1 teaspoon ground cinnamon
  • 1 teaspoon ground ginger
  • ½ tsp salt
  • 1 ripe banana, or ½ cup applesauce
  • 2 tablespoons olive oil (or coconut oil or almond butter)
  • 2 tablespoons maple syrup

Method:

Preheat oven to 350° F.

In a bowl, stir the buckwheat groats together with seeds, nuts, coconut, and spices.

In a separate small bowl, smash the banana with a fork and add it (or the applesauce) to the groats mixture, along with olive oil and maple syrup. Stir until everything is nicely coated. Spread across a baking sheet (lining it makes for easier clean-up) and bake for 20 to 30 minutes, stirring once halfway through, until fragrant and golden. Let cool before storing in a glass container.

Some for you and some for a friend. Granola is always the right thing to bring.

Some for you and some for a friend. Granola is always the right thing to bring.

apples

Apple Cheddar Scones

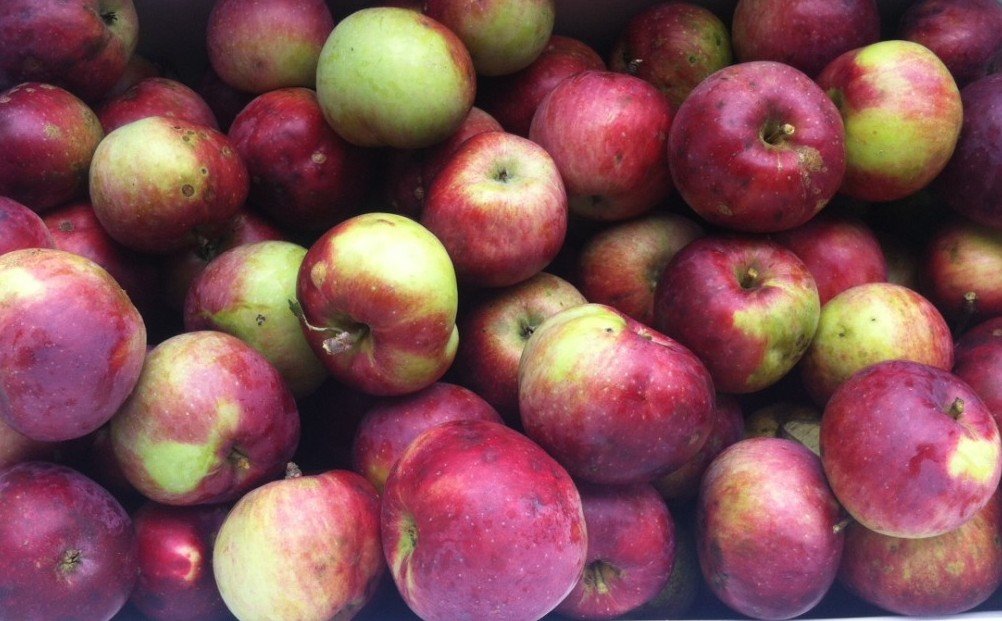
Summer is skipping out and it’s just plain sad every year. But on the bright side, it’s apple season! We’ve only got a row of apple trees—six or so, with two pear trees thrown in—but darned if that doesn’t serve up more fruit than I can handle. It hasn’t even gotten chilly yet and already the apple fest has begun. We’ve made applesauce, apple cider, apple cider syrup (yum!), apple muffins, apple pie, apple compote and just now the first batch of apple cheddar scones. Oooh baby–they are the ultimate in apple goodness. Sadly, they don’t use many apples (get into cider and sauce for that), and they have a few more steps than my favorite slacker scones. They even require eggs fergawdssake, which is so un scone-y. But they’re worth it, and they work any time of day for any type of occasion, from picnic to shmancy party.  This recipe, slightly tweaked at every stop, came via The Bitten Word and they got it from a book called The Perfect Finish. So there’s the provenance. If you need apples come on over.

Ingredients

Makes 6 generous scones (at least 8 normal sized ones).

2 firm tart apples (1 pound. I used about 5 small ones)
1 1/2 cups all-purpose flour
1/4 cup sugar plus 1 1/2 tablespoons for sprinkling
1/2 Tbsp baking powder
1/2 tsp salt plus additional for egg wash
6 Tbsp unsalted butter, chilled and cut into 1/2-inch cubes plus additional for baking sheet if not lining it with parchment
1/2 cup sharp cheddar, shredded (white is recommended, rogue westerners.)
1/4 cup heavy cream
2 large eggs

Method

Position a rack at the center of oven and preheat oven to 375 °F. Line baking sheet with parchment paper.

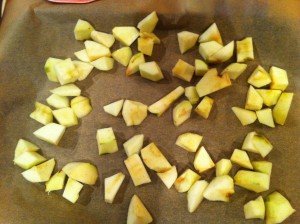
Peel and core apples, then cut them into chunks. Placed them in a single layer on a baking sheet lined with parchment paper and bake them until they take on a little color and feel dry to the touch, about 20 minutes. They will be about half-baked. Let them cool completely (in the fridge if you are eager). Leave oven on.

roasted-apples

roasted-apples

Sift or whisk flour, sugar, baking powder and salt together. Set aside. Place butter in the bowl of an electric mixer with a paddle attachment (or a hand mixer or by hand, but it is more work), along with cooled apple chunks, cheese, cream and one egg. Sprinkle flour mixture over the top and mix on low speed until the dough just comes together. Do not overmix.

Generously flour your counter top and place the scone dough on top of it. Sprinkle with flour. Use a rolling pin to gently roll (or use your hands to pat) the dough into a 1 1/4-inch thick, 6-inch circle. Cut circle into 6 wedges. Transfer them to a baking sheet that has either been buttered or lined with a fresh sheet of parchment paper. Leave at least 2 inches between each scone.

scones pre baking

Ready to bake

Beat remaining egg in a small bowl with a pinch of salt. Brush the scones with egg wash and sprinkle them with remaining tablespoon of sugar. (I have blown off the egg wash on occasion, which is just fine, but it actually does make it better.) Bake until firm and golden, about 30 minutes. With a spatula, lift them to a wire rack to cool for 10 minutes. Eat. Enjoy. Repeat.

Bring It!

Baked apple cheddar scones

Fully baked and ready to be demolished

Scones can be made ahead of time and stored unbaked in the freezer until you need them. Just take them on their baking sheet and at your destination brush them with the egg wash, sprinkle them with sugar, and bake them still frozen for just a couple extra minutes. Full disclosure, I have never done this, but it seems like a good idea. I hear these are not so awesome the next day, but ours have never lasted long enough to test that.