Tag Archives: gluten free

All the heft and taste, none of the effort

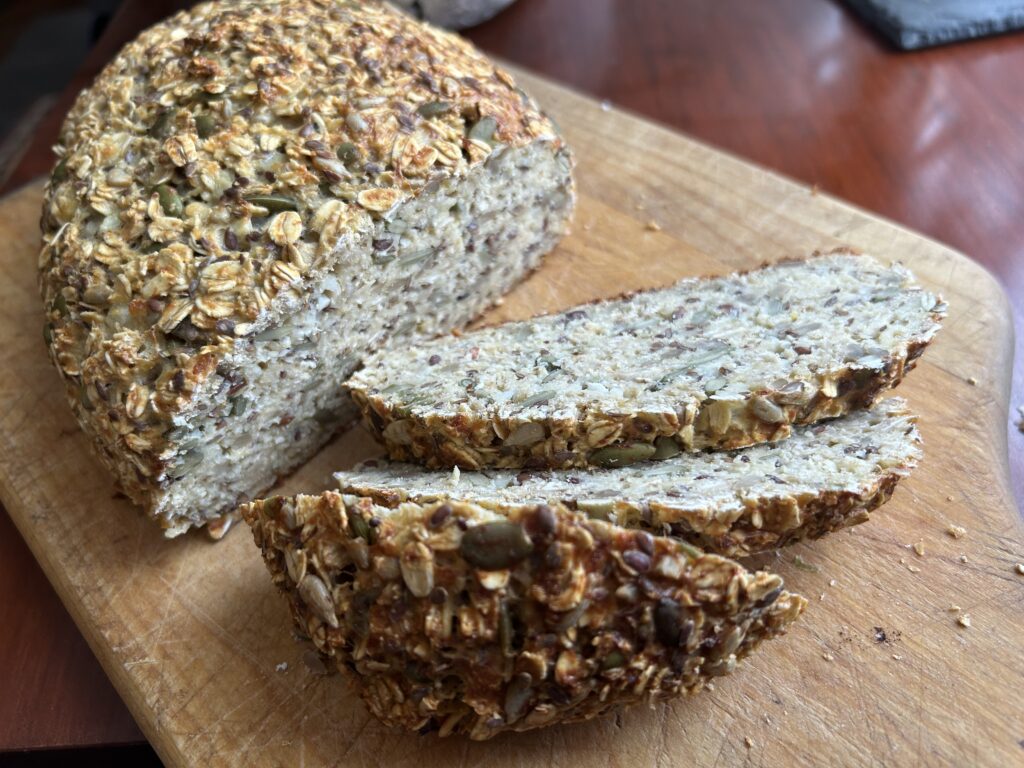
Dirt Bread 2.0: Gluten-Free Cottage Cheese Bread

People who know me or have seen me cook know that I am the slacker queen. It’s not that I cut corners entirely out of laziness. I cut them to find an easier way to a just-as-good or better outcome. These it no victory quite like winning the short-cut.

Case in point: Slacker chile crisp, which takes a fraction of the time effort and ingredients of the original chile crisp (PS interesting article on how chili crisp took over America right here), and which I now prefer. And then there are funitella bruschetta and easiest tomato soup both of which I will always and unapologetically make with canned tomatoes. Don’t get me started on sourdough. Not a chance I am going through that when I can make easiest French bread ever with ~3 minutes of active time.

So that brings me to today’s recipe for a nut-free, gluten-free bread that is reminiscent of the famous lifechanging loaf of bread (AKA Dirt Bread); BUT it requires fewer (and more normal) ingredients, and half the effort. As with all things miraculous, it came from Instagram, from a fleeting place I have never re-found. Let’s say a little prayer for screen shots.

A word here about gluten. I am a fan. I am also a little over-glutened at the moment, having taken a class at Gesine Bullock Prado’s Sugar Glider Kitchen. Her classes sell out in minutes so there not a chance I would have gotten this opportunity had it not been for Suzi the Great, knower of all the best things in life and giver of same. I now know how to properly cream butter and sugar (it takes forever), why to use room temperature eggs, Baker’s math, the virtues of cheap disposable pie pans, how to make and use a proper Swiss buttercream and so much more. I can’t wait to deploy my knowledge bombs for deliciousness

But there are times when that heft and chew of a dense, seedy, substantial bread is needed. And there are times when your gluten-free, nut-free people need something homemade and yummy. You could make them rustic Everyone Crackers OR you could be hero with a fraction of the effort and make this. It gets its body from oats, cottage cheese and eggs and its texture/cha-cha from flax, sesame and sunflower seeds. We’re talking pretty basic ingredients, and no rising involved. You just mix everything up, shape it into a football as best you can and bake it for an hour.

If you like Dirt Bread you will love this. If you’ve never committed to Dirt Bread, ease into the concept by trying this first.

What this is:

  • Easy
  • Quick (for bread)
  • Delicious
  • Gluten- and nut-free
  • High-protein
  • Cheapish

What this is not

  • Vegan
  • Yeasted
  • Shelf-stable: Store it in the fridge or sliced in the freezer

I am so sorry Vegans. Between the cottage cheese and the eggs, I’m seeing a lot of high risk substitutions, but please do let me know if you crack the code! Also, the mystery poster of this was a Brit, so all measurements are in grams. I approximated volume measurements, but live a little! Putting a bowl on a scale (<$20 people), adding each ingredient and zeroing it out after each addition is way easier and more accurate.
Dirt Bread 2.0: Gluten-Free Cottage Cheese Bread

Preheat oven to 360

Ingredients

500 grams cottage cheese (about 2 cups)
3 eggs
300 grams oats (about 3 cups)
1 tsp baking powder
½ tsp salt
50 grams flaxseed, heaping ¼ cup
50 grams sunflower seeds,  1/3 cup
50 grams pumpkin seeds, scant ½  cup
Optional but advised, 50 grams dried fruit of choice (cranberries are my jam, and I usually but not always chop them a bit)


Method

  • Combine all the ingredients in a bowl. Mix well, making sure everything is completely mushed together (no yellow yolk streaks and break down the big chunks of cottage cheese).  Dump it onto a parchment-lined pan and use your hands to shape it the into your best, well-packed loaf like shape.
  • Bake 1 hour

Cool completely before slicing. This is key to it holding it’s shape so…patience! Store in fridge or (my fave) slice and store, wrapped tightly, in freezer so you can grab a slice or two and toast it up as needed.
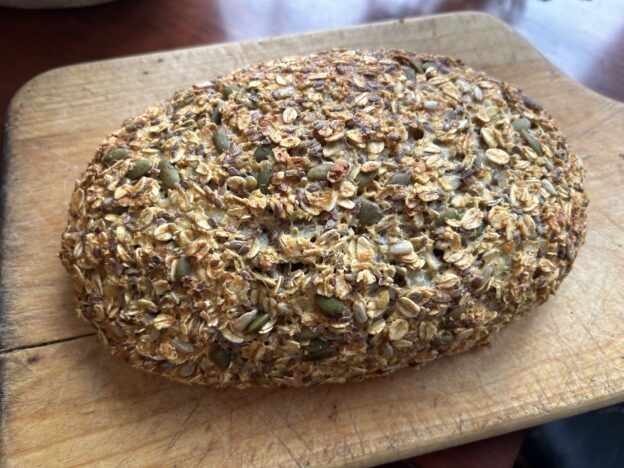
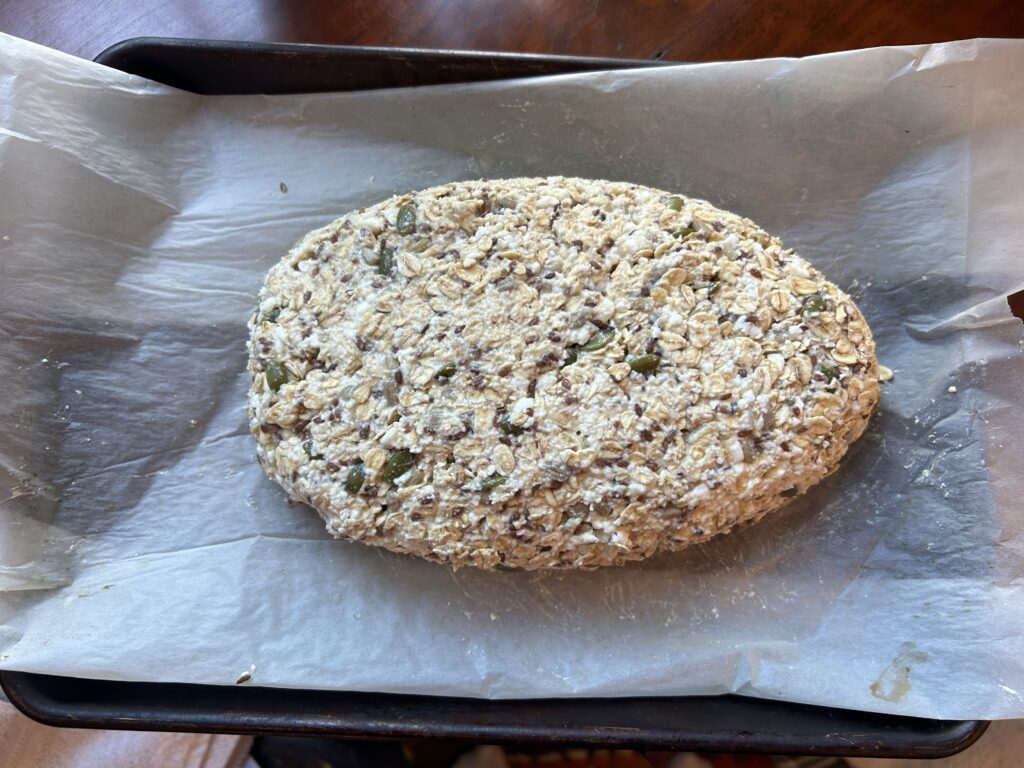
The pre-baked, nice, tight football-like loaf


Everyone Crackers: Because Special Orders Don’t Upset Us

“Hold the pickles hold the lettuce….” If you had a heartbeat in the 70’s you know what comes next (and if not, there’s this https://youtu.be/pprTvtHnnTo)

Cutting to the chase of the Burger King jingle, special orders don’t upset us in this house. Granted, as a mother of bottomless pit boys, I love it when people eat everything with glee; but,  I also enjoy the challenge of the hunt when finding recipes to accommodate the “specials” — the gluten frees, the vegetarians, the paleos, the nut-frees, the dairy-frees, the garlic and cilantro haters, the Vegans and any “special combo” of the above. 

Regularly catering to a Paleo, Gluten-free, Vegan “special combo” might put me over the edge. But then again, I’d just make a LOT of these crackers. Everyone Crackers are the reverse concept of Everything seasoning, in that they have few main ingredients and tons of flavor options so they can accommodate everyone. Even the sesame averse have an easy workaround (see recipe notes at the end). 

These goes out to Jules, who also brought us the triple spicy margarita. For that alone she is worth any amount of extra effort. Jules is a “special combo” of gluten free and nut free. That last part is especially tough for someone like me who tries to slip nuts into everything. It’s also difficult because so many gluten free baked goods depend on the heft and flavor of nut flour. 

Say hello to cassava flour, the longtime secret weapon of the gluten-averse paleo crowd. Even for people with no dietary restrictions, these crackers that come straight from the Bojon Gourmet (kinda my food hero) are solid gold. They make a fine addition to any app spread and a vehicle for anything (well hello again, chile crisp!)

Full disclosure, making crackers is a bit of a pain. Within the cracker-making realm, however, these are as easy as it gets: One bowl, few ingredients and no chopping, pre-bake scoring, flipping, or resting time on the counter. The only real skill involved is getting them to a uniform thickness, and if you’ve done any time with Play-doh you’ve got this.  

You will need parchment paper and ideally two baking sheets without rims. Other than that, no special equipment. The ingredients, once you have them, last a good long time so you’ll be set for several batches.

Besides being substantial and delicious, these crackers allow for plenty of room to riff with seasonings in the mix or on top. I left the recipe exactly as written with my notes in italics. Stay tuned for another partner recipe from Bojon Gourmet–this one a crazy-good Vegan “paté”  that has only one wacky ingredient and stands on its own with meat eaters. It does have nuts so, sorry Jules…you’ll have to double down on the crackers!


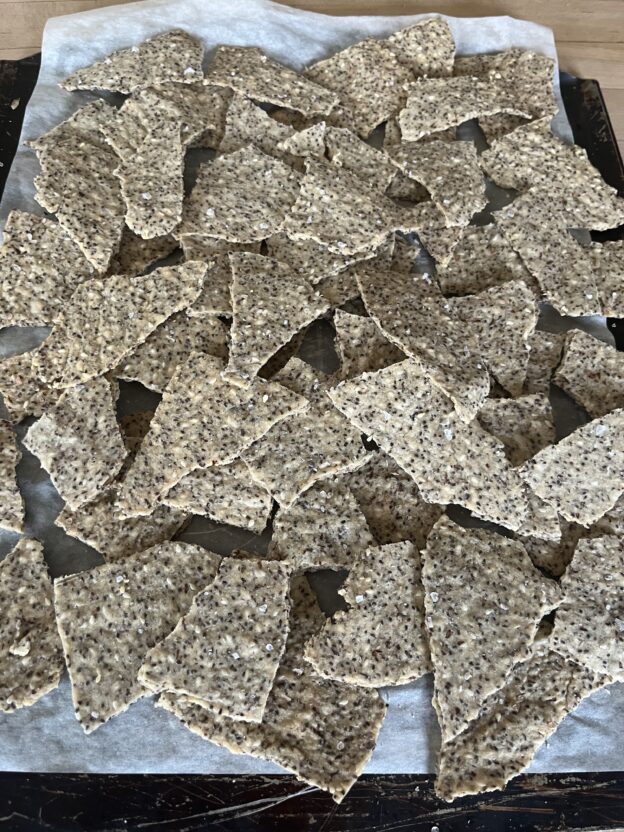
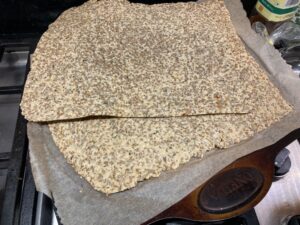
Crackers, pre-breakup

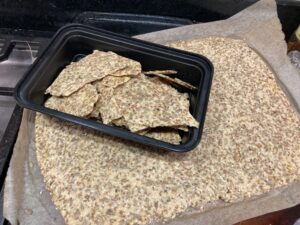
…and after the bust

Everyone Crackers

From Alanna Taylor-Tobin AKA the Bojon Gourmet
Prep Time: 30 minutes minutes
Cook Time: 50 minutes minutes
Total: 1 hour hour 20 minutes minutes
Servings: 40ish crackers

Ingredients

  • 1 cup (160 g) cassava flour*
  • ½ cup (85 g) flax seeds (ground flax seeds will also work in a pinch)
  • ½ cup (70 g) sesame seeds
  • ½ cup (60 g) sunflower seeds
  • ½ teaspoon fine sea salt
  • 1 cup + 2 tablespoons (265 ml) boiling water*
  • ¼ cup (55 g) olive oil, plus 2 tablespoons for brushing (I often forget to add the oil until after everything is mixed. It still works out, but aim higher than me here and add the oil with the water)
  • flaky salt, for sprinkling

Method

  • Position racks in the upper and lower thirds of the oven and preheat to 300ºF.
  • Stir together the flour, seeds, and salt in a large bowl.
  • Add the olive oil and water, stir to combine. Let sit 10 minutes, then knead with your hands in the bowl into a smooth ball. Divide in two.
  • Roll one piece of dough between two pieces of parchment paper into a large, thin sheet that’s about the size of a baking sheet. If the dough cracks or tears, just squish it back together. You can trim away the wonky edges, stick them into the corners, and continue rolling to make a rectangle. Repeat with the other piece of dough.
  • Brush the dough all over with olive oil and sprinkle with flaky salt.
  • Bake the crackers until light golden, about 40-50 minutes (check at 15 minutes if using a different flour as some bake much faster than others).
  • Let the crackers cool, then break them into 2 to 3-inch pieces. If the crackers aren’t crisp enough after cooling, just return them to the oven for another 10 minutes or so.
  • Store the crackers airtight for up to a week or two… if you can make them last that long!

Notes and substitution suggestions:

For a non-paleo version, try these with buckwheat or corn flour. Or for a more traditional gluten-ful version, use rye flour or spelt flour. Decrease the water to 1 cup if using a flour other than cassava. 

Feel free to play fast and loose with the seeds, using any combination you like. You can try adding hemp, poppy, chia, and/or pumpkin seeds. See why I love this woman???

Seasoning suggestions (add to the dough or on top of the crackers):-minced fresh rosemary-everything bagel seasoning-1 teaspoon cumin or fennel seed-oregano-garlic and/or onion powder-nigella seed-flavorful oil, such as walnut or toasted sesame-chile flakes, Aleppo pepper, or togarashi-nutritional yeast. This is where you can really customize these, which I do differently every time. I often add lemon zest to the dough but my latest batch has Oaktown Spice Vadovan (fancy curry powder) in the mix. The endless array of seasonings from Trader Joe’s make great toppers. 


Game of Scones: The Loving Lannisters Gluten Free Apricot Almond Scone

OnSome things just should not go together, like siblings and sex. Similarly, the terms gluten free and scones really do not belong in the same sentence. And yet, just as Jaime and Cersei somehow seem to work as the couple you love to hate, it turns out that gluten free scones are darned tasty.

As we come in to Episode 5, let’s review our cast. We have the White Hot Jalapeno Cheddar Jon Snow (AKA, the true hot king) Scone, the Sassy Sansa Lemon Ginger Scone and the Bittersweet Tyrion Whole Wheat Mini Scone. But now, just in time for Mother’s Day we head south to warmer climes and the Mad Queen, Mother of the Year, evil twin Cersei

For these scones I used Pamela’s gluten free baking mix, as recommended by Santa Cruz Susan. Susan is kind of an angel on earth, which is to say, the opposite of Cersei. Susan apologized that using a mix is sort of cheating, which happens to be appropriate for this particular scone, because nobody cheats more than Cersei, and gets away with it.

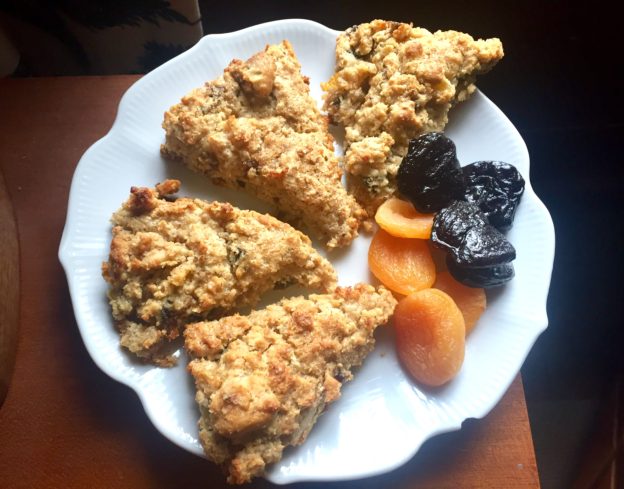
The Loving Lannister scone features apricots, prunes and almonds, all members of the prunus family. Not coincidentally, prunus siblings have a bitter cyanide compound in the seed that makes them poisonous (kind of like kisses from Spain). Toxic combos that are related to each other? Could there be a more perfect scone to honor the first family of King’s Landing? And sure, you don’t expect to get black-hearted prunes and golden apricots in one bite, but social norms never stopped a Lannister. And who doesn’t like a little plot twist?

Cooking notes: For this scone, I defied the recipe and tried to make them into the traditional round mound, cut into wedges. It required a lot of back alley repair, which nobody needs to see or repeat. Give yourself a pardon and make them as drop scones, as directed. They are unexpectedly delicious!

Oh beHAVE you two!

Gluten Free Apricot Almond Scones

INGREDIENTS:

  • 2-1/3 cups Pamela’s Baking & Pancake Mix
  • 1/3 cup sugar (preferably coconut or demerera sugar), plus 1 Tbsp for sprinkling
  • 1 tsp baking powder
  • 1/2 cup dried apricots and dried prunes (in any proportion), roughly chopped
  • 1/3 cup almonds, roughly chopped or painfully slivered
  • 4 tbsp butter (as cold as Cersei’s heart, which is to say frozen if possible)
  • 1 egg, beaten (ruthlessly)
  • 2/3 cup milk or cream

DIRECTIONS:

For scone newbies, see Queen Bee’s Kitchen’s short course in sconeology here for some excellent guidance. Feel free to substitute any dried fruit or nuts of choice, even if they are “just friends” and unrelated to each other.

Preheat oven to 375.
Mix the dry ingredients (through almonds) together. Cut in the butter using two knives (or make it easy on yourself and grate it in). Add the milk and beaten egg. Mix together with a fork. Dough will be thick. Drop large, tall dollops of dough (scones will spread when baking) onto lightly greased or parchment-lined baking sheet. Sprinkle lightly with remaining coconut sugar. Bake for 15-17 minutes or until they look dangerously irresistible.


No Guilt Nutella: Chocolate for Breakfast Goes Legit

You say Nutella, I say…ain’t happening for breakfast in this house.

I grew up in a pre Nutella-For-Breakfast world. We had plenty of heinously unhealthy food, like pop tarts and cocoa puffs. But putting frosting on toast and calling it breakfast wasn’t a thing. Even if it happened (looking at you, chocolate Easter bunnies), it wasn’t sanctioned, let alone encouraged.

My kids grew up in a post NFB world, thanks to brilliant marketing from the Italians, who needed a real game-changer to dress up their melba toast and give their people a reason to get up for breakfast. Still, I did not serve Nutella to my kids. That may help explain why they so easily, dare I say eagerly, transitioned to sleepovers, camp and really any opportunity to leave home. There’s no need to get into my reasoning unless you really want a buzz-kill. I think we can all agree that commercial Nutella is not a solid foundation for the most important meal of the day.

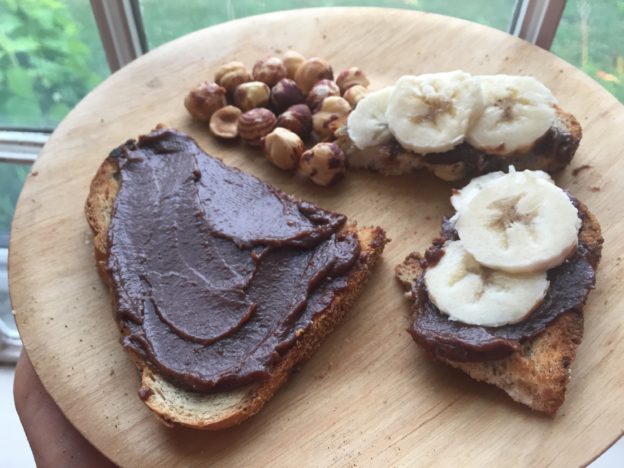
But WHAT IF Nutella was made with no added sweeteners, fat or scary ingredients? What if it was made with the holy trinity of healthy treat ingredients—dates, nuts and cocoa—and nothing much else? Now that would be something I could get behind. And don’tcha know, I have. It’s not just for breakfast of course—it’s for any time you damn well please.

No Guilt Nutella soars past the teenage boy test, the teenage girl test, the man test and the “gimme that spoon I just need a chocolate fix ” test. If you are a Nutella connoisseur you will not be fooled by this, but the concept of a chocolate spread you can eat by the spoonful without a shred of guilt or secrecy may win you over nonetheless. Vegans, Paleos and Gluten-free peeps? Yeah, this is your jive too.

As with last week’s treats, your food processor earns its keep making these. It’s pretty foolproof though, as long as you make an honest attempt to skin the hazelnuts* and then process those babies until they really turn to butter. Be patient. It will happen.

No Guilt Nutella

Ingredients

  • 1 cup hazelnuts (or a mix of hazelnuts and almonds)
  • 1 packed cup medjool dates, pitted (or more, see notes)
  • 2 Tbsp water
  • 3 Tbsp unsweetened cocoa powder
  • ½ tsp vanilla extract
  • 1 Tbsp flavorless oil
  • ¼ tsp salt
  • ½ cup almond milk

Method:

  1. Roast hazelnuts at 350 degrees for 20 minutes. Transfer onto a kitchen towel and roll with your hands to remove skins. (no need to remove skins on almonds, if using)
  2. Puree hazelnuts in a food processor for 8 to 10 minutes until a butter forms. Take the time to do it right! You’ll know when you’ve crossed from ground nuts to butter.
  3. Remove hazelnut butter, and scrape out food processor as best you can. Add dates and water. Puree until smooth and creamy.
  4. Add hazelnuts to date paste and pulse a few times.
  5. Add cocoa, vanilla, oil, and salt and blend. 
  6. With food processor running, slowly pour in almond milk. Scrape down the sides and pulse a few times to blend into creamy goodness.
  7.  

Notes

*To completely remove hazelnut skins (for the smoothest possible spread), boil nuts in a pot of water with few tablespoons of baking soda for 4 minutes. Immediately strain and place nuts in ice water for a minute or so, until the skins peel off easily. You still need to roast the nuts to loosen up all the oils and bring out the flavor. Google will not corroborate this, but I find this process takes a little mojo out of the nuts. I prefer the less perfect/more flavorful roasting and rolling technique. You will stain the dishtowel, but such are the sacrifices we make. See here for a THOROUGH demo.

If your dates are hard, or you are using Deglet dates, soak them in warm water for an hour or two before pureeing.

…and furthermore, depending on the sweetness of your dates and the strength of your cocoa, you may need to add more dates at the end to find your sweet spot. 

I swear the notes are done.

Store leftovers in the fridge, and put your guilt in the rear view mirror!

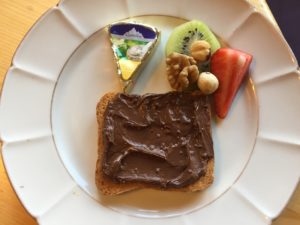
Breakfast in America, reimagined.

The real thing, at the breakfast table, on the dreaded melba toast, in its homeland.

Salted Peanut Butter Cookies: Gluten-Free and Mini-Mart Sourced

Gluten-free, marmot approved.

Gluten-free, marmot approved

Here’s a hypothetical situation. It’s Christmas Eve, you gave away all your homemade cookies (if you happen to have made them in the first place), and you just found out Santa (or a guest) is gluten-free. There’s no way you’re going to the grocery store for special ingredients but you may be able to pull off a mini mart run. What if all that happened? What would you do?

You would make these cookies.  These are barely adapted from Smitten Kitchen who got them from the Ovenly cookbook. It’s the gift that keeps on giving. Here’s hoping you don’t need these tonight, and you stay clear of mini marts, but in case of emergency, you’re covered. Have a good one all, enjoy your people, and see you on the other side!

Salted Peanut Butter Cookies

Yield 26 to 28 cookies with a 1 2/3 tablespoon or #40 scoop.

  • 1 3/4 cups (335 grams) packed light brown sugar
  • 2 large eggs, at room temperature
  • 1/2 teaspoon vanilla extract
  • 1 3/4 cups (450 grams) smooth peanut butter (see note at end)
  • 1 cup (or so) of your favorite chocolate chips (optional)
  • Coarse-grained sea salt, to finish

Preheat the oven to 350°F. Line a rimmed baking sheet with parchment paper.

In a medium bowl, whisk together the light brown sugar and eggs until smooth. Whisk in the vanilla extract, then the peanut butter until smooth and completely incorporated; you shouldn’t be able to see any ribbons of peanut butter. Stir in chocolate chips, if desired.

Scoop or spoon the dough into balls — from a heaping Tablespoon to monster 1/4 cup sized. Place on prepared pan. For the tallest final shape, place the tray in the freezer for 15 minutes before baking.

Sprinkle the dough balls lightly with coarse-grained sea salt just before baking. Bake smaller cookies for 14 to 15 minutes and larger for 18 to 20. When finished, cookies should be golden at edges. They’ll need to set on the sheet for a minute or two before they can be lifted intact to a cooling sheet. With any luck Santa hits your house late enough to let them cool completely so the crispy outside/soft inside thing can really happen. 

Do ahead: You can make the dough in advance and either refrigerate it for a couple days or scoop out the cookies, freeze them, then bake them right from the freezer.

About chilling the dough: You can scoop and bake the cookies right away, but they keep their shape better if you chill them in the freezer for 15 minutes first.

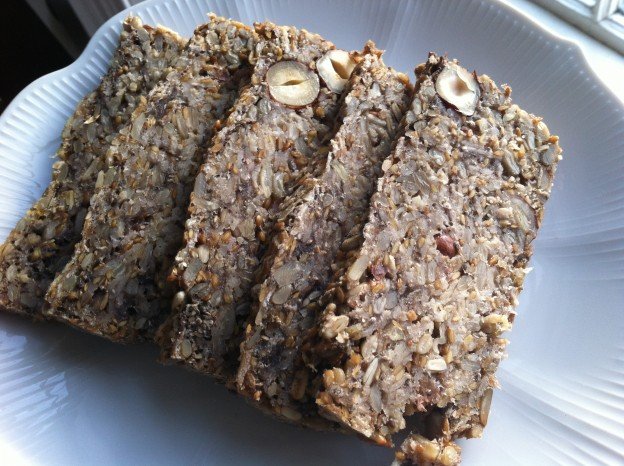
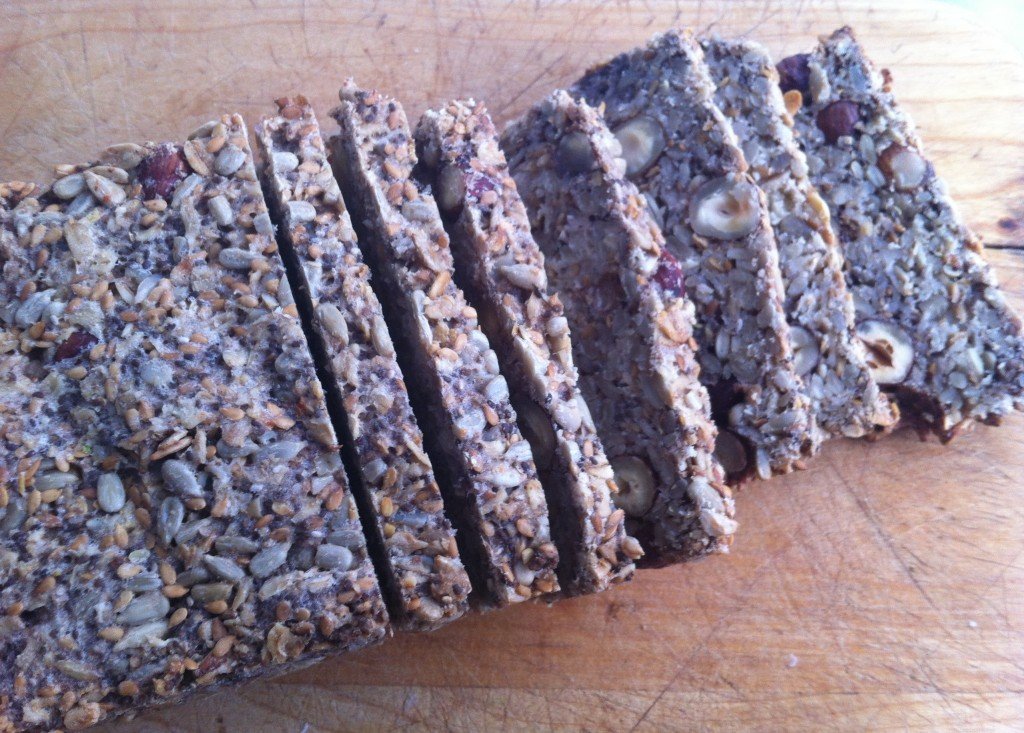
Bread of Life, sliced

The Bread of Life, or “That’s Life” Bread

Elsewhere on the Internet (namely on My New Roots) this seedy, flourless, unleavened, barely sweet and totally nutrition-packed bread is called the “Lifechanging Loaf of Bread.” That is quite a claim and one that begs to be debunked, particularly by my own family, some of whom refer to this as my “dirt bread.”

What can I say? Haters gonna hate. That’s life; hence, the abbreviated name for this bread. But for the right person—and you know who you are—this is, if not lifechanging, at least addictive. It relies on oats, chia seeds and psylium husks to hang together and get its breadiness. Whole hazelnuts give it texture and a touch of maple syrup makes it all just right. Toast it, or not, and top it with butter, honey, cheese, caramelized onion, roasted veggies or pretty much anything and give yourself a big fat gold star for healthy eating. Go you!

I’ll leave it to Sara Britton to answer any questions about substitutions and how in the heck she came to experiment with psylium husks. I will tell you, however, to find them in CVS with the Metamucil. Be sure to get the unflavored variety, unless you want your bread to actually taste like Metamucil.

A few other notes: She uses coconut oil or ghee (which I can’t pronounce let alone find) but you can also use butter; I add chopped dates for some chewiness and sweetness; she uses a flexible loaf pan for both mixing and baking. I don’t have one of those so I just used a regular loaf pan and lined the bottom with parchment paper to ease the first turnout (totally worth the effort, unless you want a bonus botched loaf to snack on); finally, I lived large and mixed it all in a bowl, which took away the stress of mixing in tight spaces, which I hate.

And now, just to go on record, for me this is absolutely addictive and perhaps even lifechanging, on a slow day that is.

That’s Life Bread

From My New Roots
Makes 1 loaf

Ingredients

1 cup / 135g sunflower seeds (or 1/2 cup each pumpkin seeds and sunnies)
½ cup / 90g flax seeds
½ cup / 65g hazelnuts or almonds, roughly chopped or sliced*
**½ cup dried dates or dried fruit of choice, roughly chopped 
1 ½ cups / 145g rolled oats
2 Tbsp chia seeds
4 Tbsp psyllium seed husks (3 Tbsp. if using psyllium husk powder)
1 tsp fine grain sea salt (add ½ tsp. if using coarse salt)
1 Tbsp maple syrup
3 Tbsp melted coconut oil or ghee (or butter)
1 ½ cups / 350ml water

*update: sliced almonds are my go-to for ease of both prep and slicing
**next update: Dates or dried fruit are optional but now an essential part of my dirt bread experience.

Method

1. In a flexible, silicon loaf pan (or a parchment lined regular loaf pan), combine all dry ingredients, stirring well. Whisk maple syrup, oil and water together in a measuring cup. Add this to the dry ingredients and mix very well until everything is completely soaked and dough becomes very thick (if the dough is too thick to stir, add one or two teaspoons of water until the dough is manageable). Smooth out the top with the back of a spoon. Let sit out on the counter for at least 2 hours, or all day or overnight. To ensure the dough is ready, it should retain its shape even when you pull the sides of the loaf pan away from it it.
2. Preheat oven to 350°F / 175°C.
3. Place loaf pan in the oven on the middle rack, and bake for 20 minutes. Remove bread from loaf pan, place it upside down directly on the rack and bake for another 30-40 minutes. Bread is done when it sounds hollow when tapped. Let cool completely before slicing (difficult, but important).
4. Store bread in a tightly sealed container for up to five days. Freezes well too – slice before freezing for quick and easy toast!

Life Bread by the loaf

Living life bread, a slice at a time.

Bring It

As mentioned above, for the right person this is the perfect host/hostess gift. If you’re bringing it to a mixed crowd you can always cover your bases (and maximize fans) by adding a loaf of easiest french bread ever or maple oat breakfast bread