Monthly Archives: July 2018

No Guilt Nutella: Chocolate for Breakfast Goes Legit

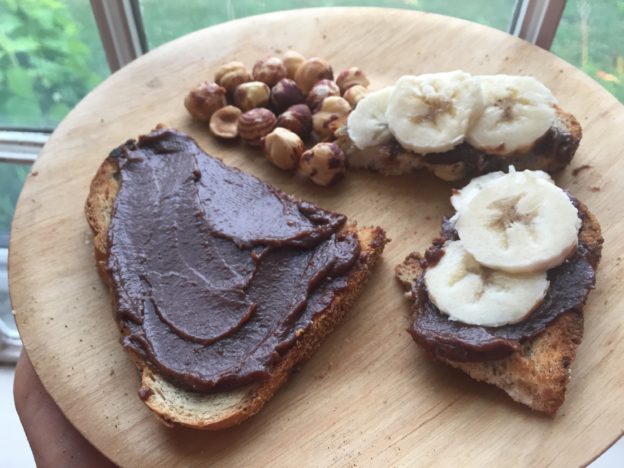
You say Nutella, I say…ain’t happening for breakfast in this house.

I grew up in a pre Nutella-For-Breakfast world. We had plenty of heinously unhealthy food, like pop tarts and cocoa puffs. But putting frosting on toast and calling it breakfast wasn’t a thing. Even if it happened (looking at you, chocolate Easter bunnies), it wasn’t sanctioned, let alone encouraged.

My kids grew up in a post NFB world, thanks to brilliant marketing from the Italians, who needed a real game-changer to dress up their melba toast and give their people a reason to get up for breakfast. Still, I did not serve Nutella to my kids. That may help explain why they so easily, dare I say eagerly, transitioned to sleepovers, camp and really any opportunity to leave home. There’s no need to get into my reasoning unless you really want a buzz-kill. I think we can all agree that commercial Nutella is not a solid foundation for the most important meal of the day.

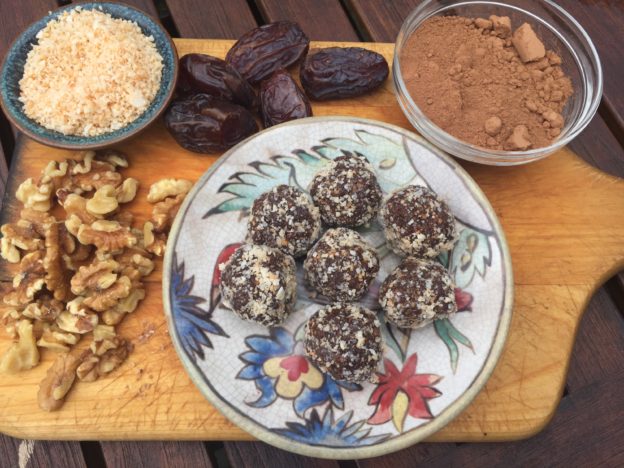
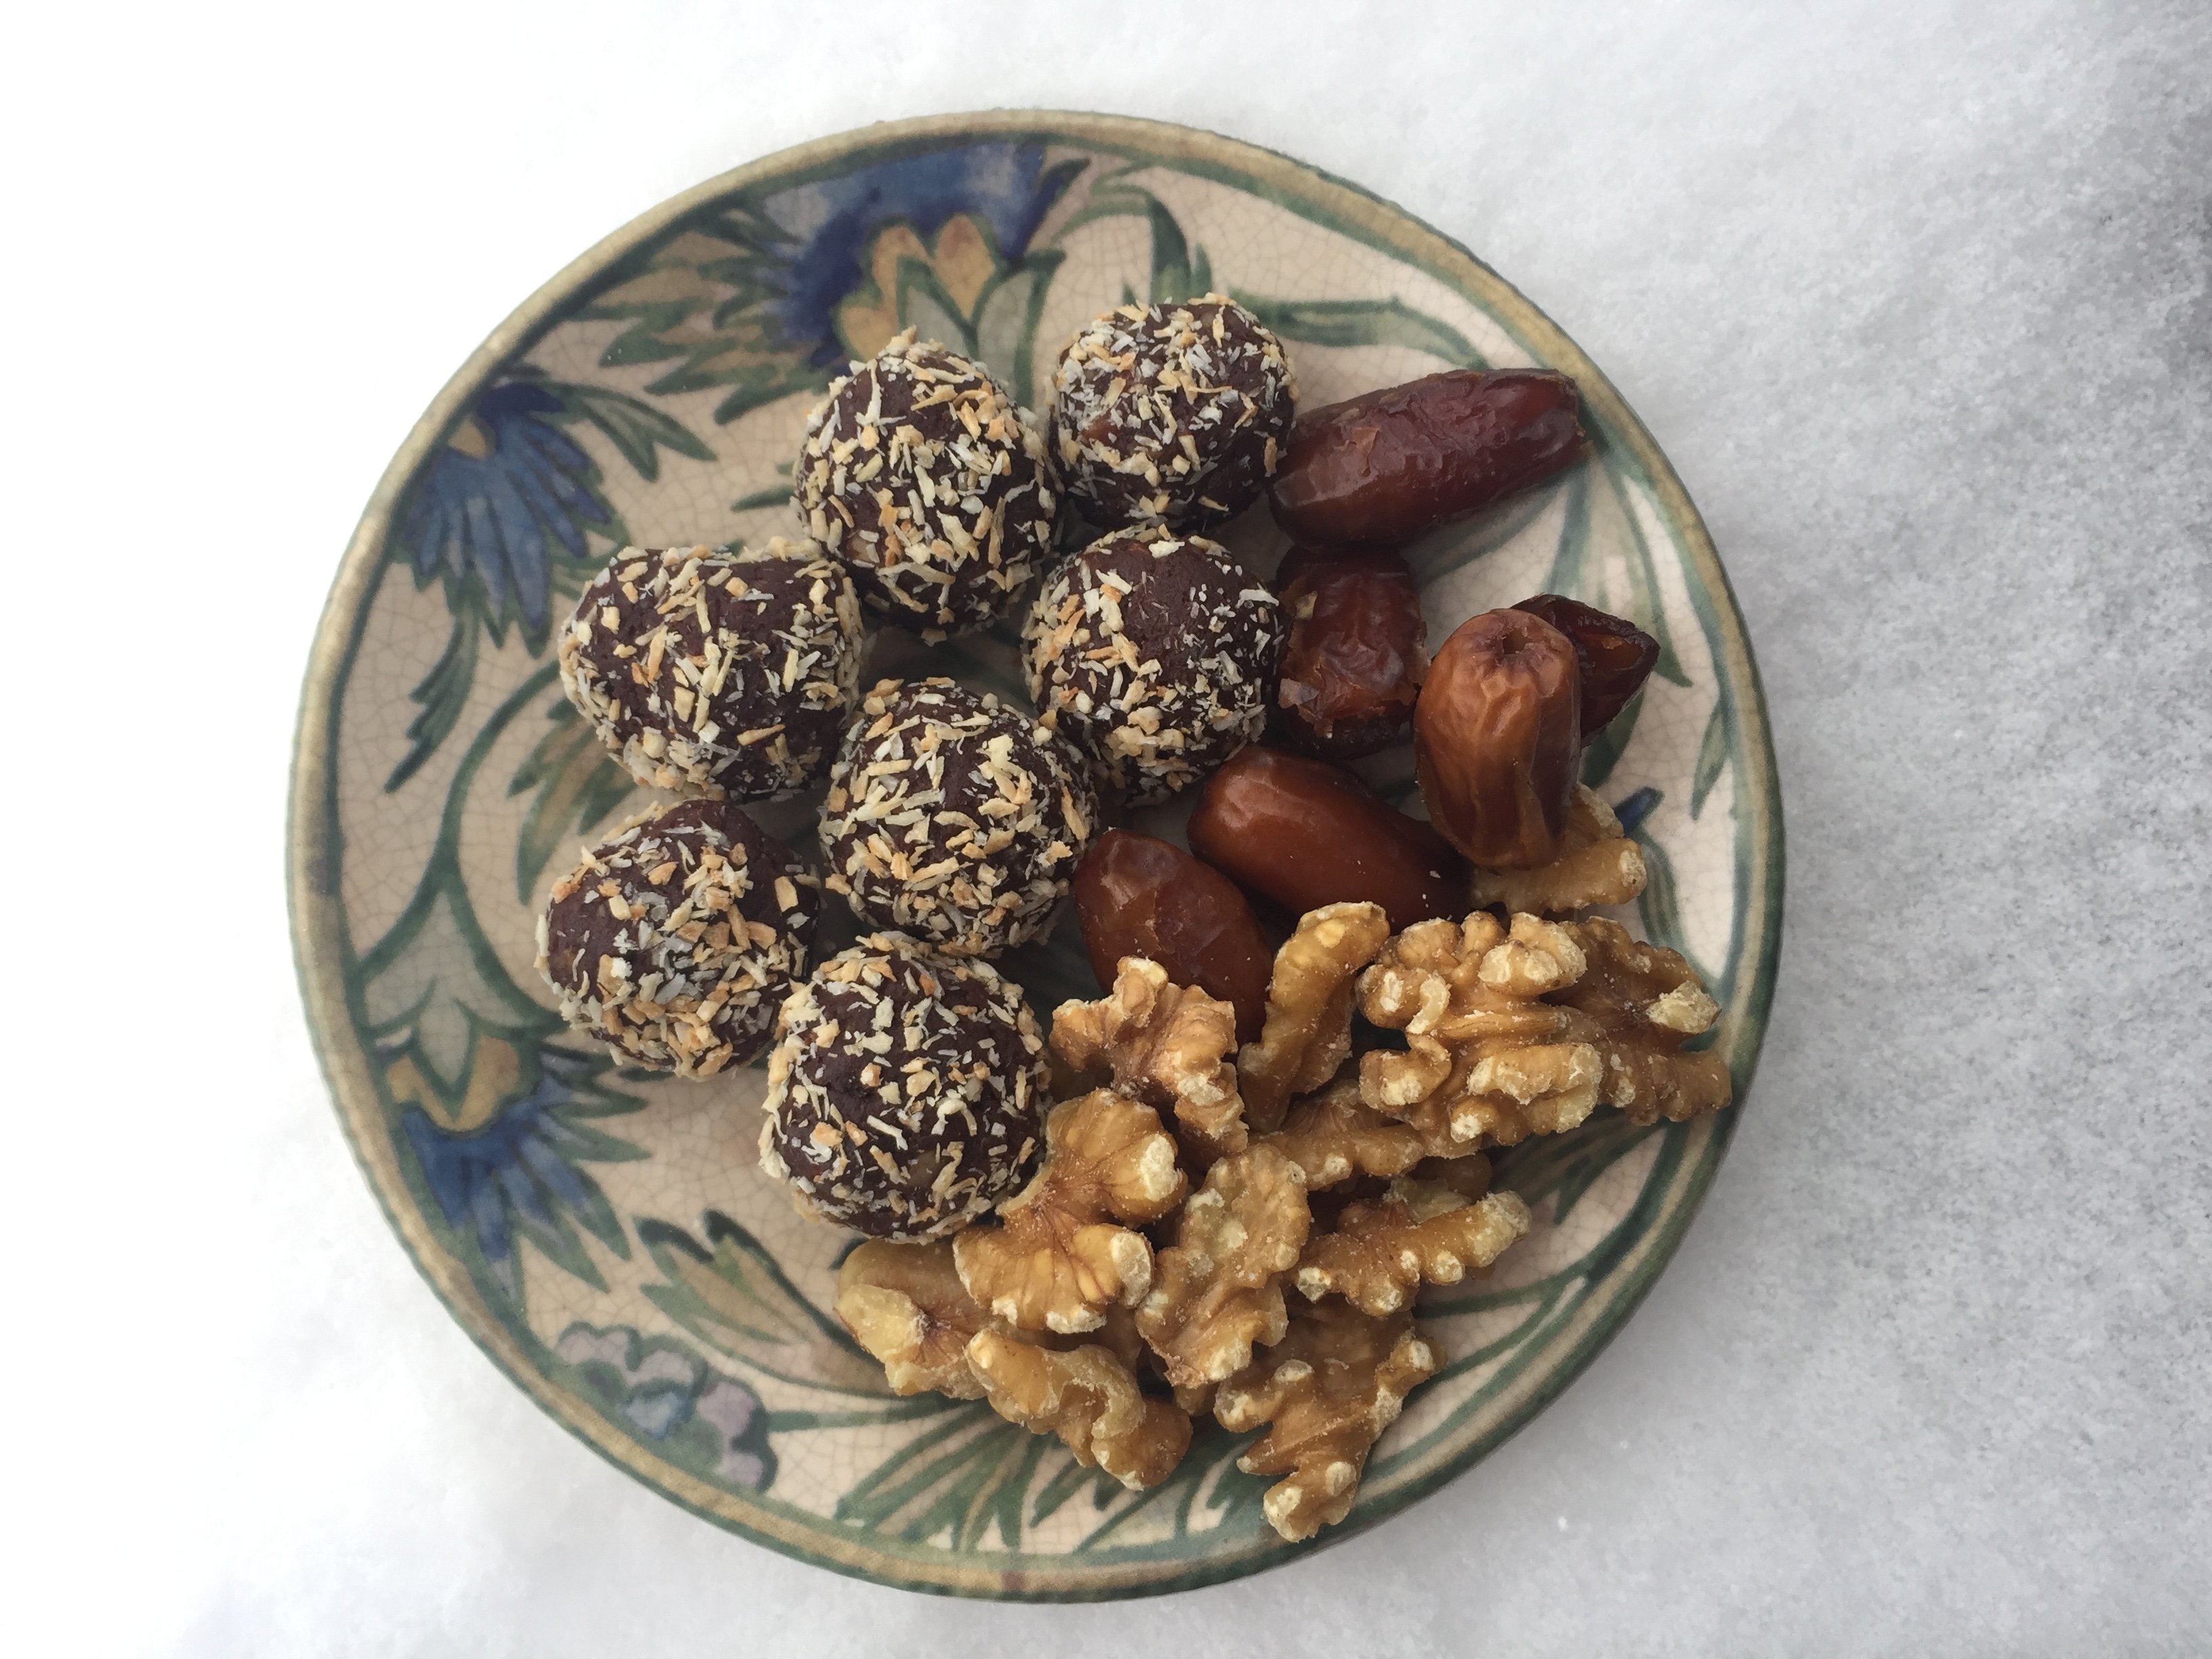
But WHAT IF Nutella was made with no added sweeteners, fat or scary ingredients? What if it was made with the holy trinity of healthy treat ingredients—dates, nuts and cocoa—and nothing much else? Now that would be something I could get behind. And don’tcha know, I have. It’s not just for breakfast of course—it’s for any time you damn well please.

No Guilt Nutella soars past the teenage boy test, the teenage girl test, the man test and the “gimme that spoon I just need a chocolate fix ” test. If you are a Nutella connoisseur you will not be fooled by this, but the concept of a chocolate spread you can eat by the spoonful without a shred of guilt or secrecy may win you over nonetheless. Vegans, Paleos and Gluten-free peeps? Yeah, this is your jive too.

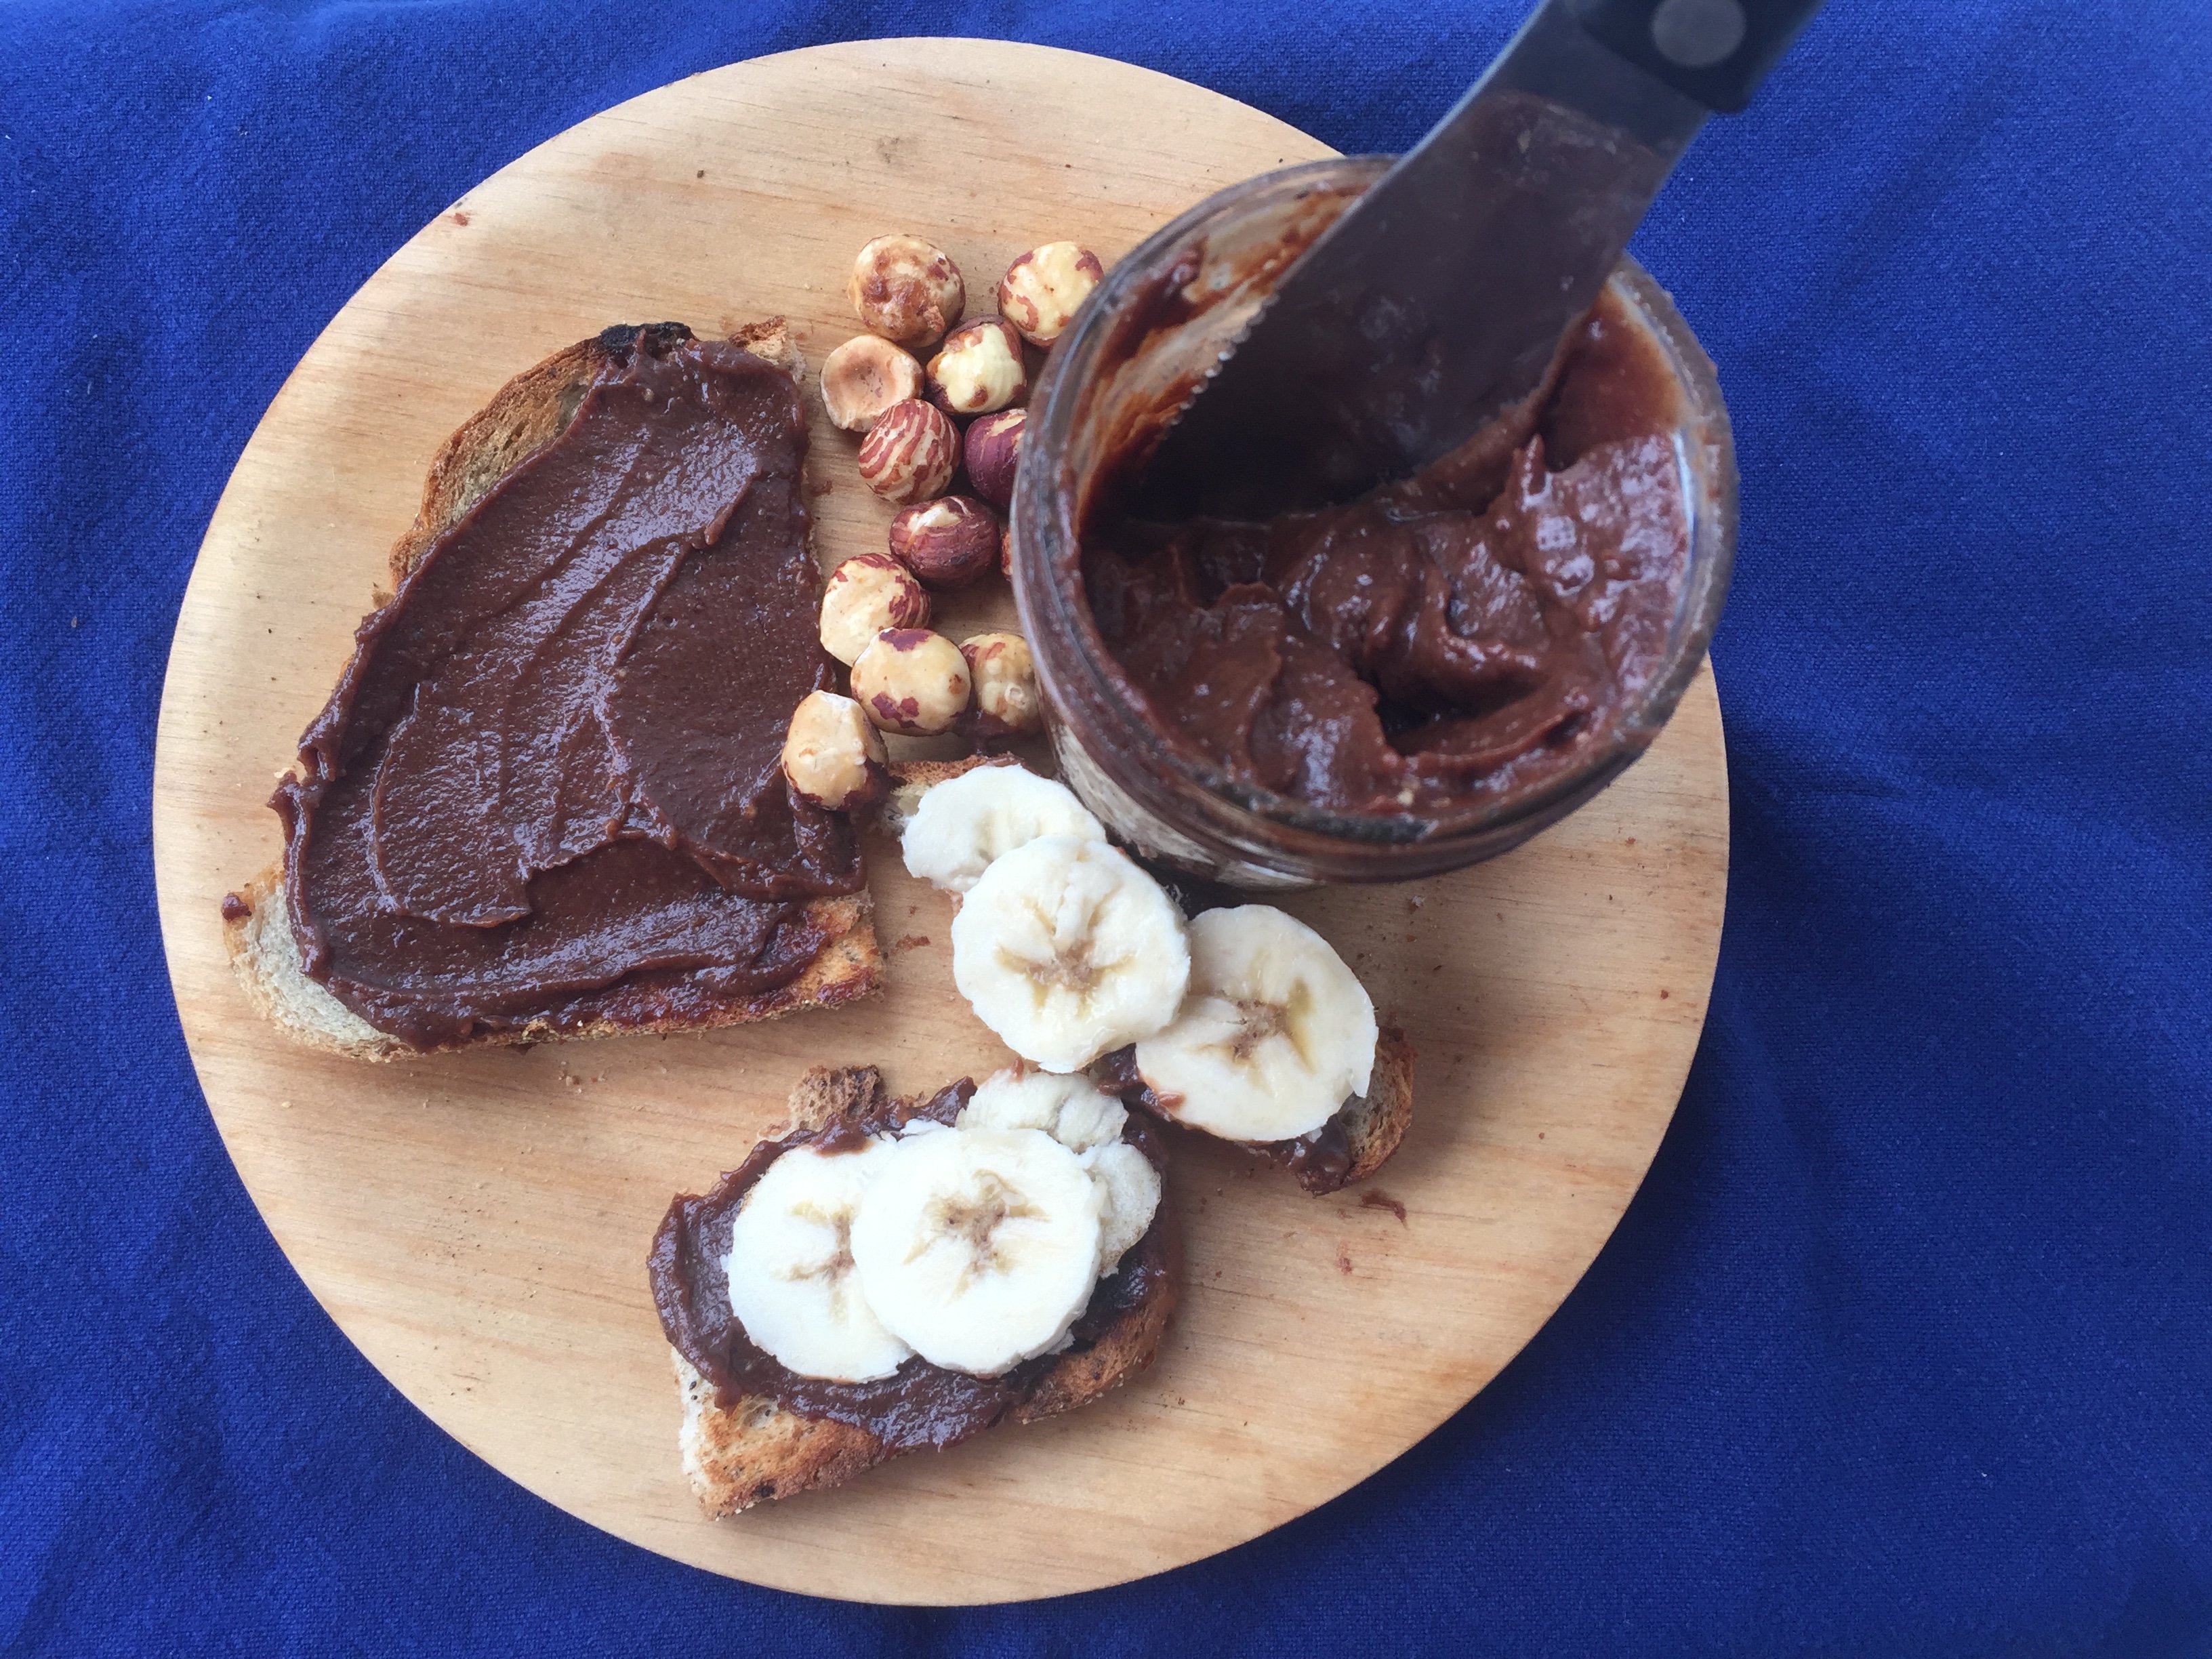
As with last week’s treats, your food processor earns its keep making these. It’s pretty foolproof though, as long as you make an honest attempt to skin the hazelnuts* and then process those babies until they really turn to butter. Be patient. It will happen.

No Guilt Nutella

Ingredients

  • 1 cup hazelnuts (or a mix of hazelnuts and almonds)
  • 1 packed cup medjool dates, pitted (or more, see notes)
  • 2 Tbsp water
  • 3 Tbsp unsweetened cocoa powder
  • ½ tsp vanilla extract
  • 1 Tbsp flavorless oil
  • ¼ tsp salt
  • ½ cup almond milk

Method:

  1. Roast hazelnuts at 350 degrees for 20 minutes. Transfer onto a kitchen towel and roll with your hands to remove skins. (no need to remove skins on almonds, if using)
  2. Puree hazelnuts in a food processor for 8 to 10 minutes until a butter forms. Take the time to do it right! You’ll know when you’ve crossed from ground nuts to butter.
  3. Remove hazelnut butter, and scrape out food processor as best you can. Add dates and water. Puree until smooth and creamy.
  4. Add hazelnuts to date paste and pulse a few times.
  5. Add cocoa, vanilla, oil, and salt and blend. 
  6. With food processor running, slowly pour in almond milk. Scrape down the sides and pulse a few times to blend into creamy goodness.
  7.  

Notes

*To completely remove hazelnut skins (for the smoothest possible spread), boil nuts in a pot of water with few tablespoons of baking soda for 4 minutes. Immediately strain and place nuts in ice water for a minute or so, until the skins peel off easily. You still need to roast the nuts to loosen up all the oils and bring out the flavor. Google will not corroborate this, but I find this process takes a little mojo out of the nuts. I prefer the less perfect/more flavorful roasting and rolling technique. You will stain the dishtowel, but such are the sacrifices we make. See here for a THOROUGH demo.

If your dates are hard, or you are using Deglet dates, soak them in warm water for an hour or two before pureeing.

…and furthermore, depending on the sweetness of your dates and the strength of your cocoa, you may need to add more dates at the end to find your sweet spot. 

I swear the notes are done.

Store leftovers in the fridge, and put your guilt in the rear view mirror!

Breakfast in America, reimagined.

The real thing, at the breakfast table, on the dreaded melba toast, in its homeland.

Cocoa Nutty Balls

This is the first of two posts featuring the holy trinity of healthy treat ingredients: dates, nuts and cocoa. Why so holy? If you can get your Vegan, Paleo and Gluten-free friends at the same table, eating the same thing and loving it, there’s some divine intervention going on.

I’m posting them separately so they each get full credit, and you can find them more easily when needed. Both recipes are quick, easy and 100 percent free of added sweeteners, dairy, or grains. This first one is slightly more labor intensive because, well, balls require some care. (sorry, couldn’t resist). Neither recipe requires one bit of cooking, but they both will give your food processor an honest workout.

First up, are these cocoa nutty balls. (If you do the highly recommended pro move and roll them in toasted coconut when you’re done you can call them coconutty balls. See how that works? ) These are well known and loved in the paleo world and for good reason. They get sweetness and smoothness from dates, heft and texture from walnuts and chocolatey goodness from cocoa. The pinch of salt gives them some sass and the optional coating lets you add your own customized cha-cha.

But wait there’s more! These can hang out in the freezer until you need them. They transport well for hiking, picnics, lunchboxes, road trips or any eating on the fly. I offered these to a bunch of burly ski racers between their runs and they inhaled them. Either the lodge had run out of cheeseburgers or they actually liked them. I hope you’ll like them too!

Cocoa Nutty Balls

Ingredients

  • 1 1/2 cups walnuts (or a mix of walnuts and almonds or skinned hazelnuts*)
  • Pinch of salt
  • 1 cup pitted dates (Medjool if you can. Deglet if you must)
  • 1 tsp vanilla
  • 1/3 cup unsweetened cocoa powder
  • (Optional for pro version) Toasted unsweetened coconut—or whatever added crunch you like—for coating.

Method

Add walnuts and salt to a blender or food processor. Mix until the walnuts are finely ground.

Add the dates, vanilla, and cocoa powder to the blender. Mix well until everything is combined. With the blender still running, add a couple drops of water at a time to make the mixture stick together. (If it really won’t stick together in a ball, add another date or two)

Slacker version: Using a spatula, transfer the mixture to a small (8″x 8″) pan and smoosh it flat, sprinkle optional topping/coating evenly on top and press it into the surface. (A layer of parchment paper makes this easy.) Let cool in the fridge and cut into whatever sized bites or bars you want. 

Semi Pro Version: Transfer the mixture into a bowl. Using your hands, form small round balls (I aim for walnut sized), rolling in your palms. They’ll come together and feel a little greasy, making them perfect for the…

Pro Version: Toast raw coconut flakes or shreds in a 350ish degree oven a few minutes (until just golden) and let them cool. If flakes, whirl them in the food processor until finely ground, but not yet buttery. Add a pinch of salt is that’s your jive (it’s mine).** Remove the blade from the bowl and drop in three or four balls at a time, rolling them around to coat.

You can store bars or balls in an airtight container in the refrigerator for up to a week or the freezer for a looooong time.

*Skinning hazelnuts will be fully discussed in the next post. If you just can’t wait for this fascinating discussion (I know, you’re only human) check out this treatise on the topic.

**store leftover toasted coconut in a jar to sprinkle on yogurt, oatmeal, fruit, etc.

Just us fruits and nuts here, keeping our cool


The Aperol Spritz: Ciao Bella!

In case we missed the memo last week, summer has arrived, in all its sweaty glory. This does not bring out my A-Game, because I’m more St. Bernard than Whippet, more Clydesdale than Thoroughbred, more Thelma than Daphne. 

I also tend to gain weight in the summer, which—with all that necessarily exposed flesh—is just…plain…awesome. I’m ok with it, really, but that doesn’t make it any easier to bear the peak heat and humidity of an eastern summer.

So what do we do? We get out of the kitchen and onto the patio. And we help each other by sharing our favorite patio fare. Stay tuned this week for some simple easy classics to have on hand that will help you stay cool in every way.   

Today’s feature: The Aperol Spritz. These first caught my eye on a recent trip to Europe, where every sidewalk café featured what appeared to be glasses of orange wine, complete with little floating orange slices. For a moment, I thought Europe was a few years late on the orange wine trend 2015, the one that never breached the NH border.  But then I remembered where I was: European sidewalk cafes don’t do trends. They do classics.

Rigorous research enlightened me to the Aperol Spritz. Aperol is an Italian aperitif (that’s fancy talk for dry not sweet) made of oranges, roots, herbs and—let’s be honest here—some serious food coloring.

All you need for a classic, refreshing, “I’m- for-sure-as-cool-as-any-of-you” summer drink is to fill a glass with ice and layer in three parts prosecco, two parts Aperol and one part seltzer…in that order.  Toss in your little slice of orange and…Salute! Cin cin! Oooh baby!

For a no heat dinner, enjoy your spritz California style like Sister A and Cousin D did with this fine feast. Fully- loaded watermelon poke bowls? Alfresco dining? Avocados, pickled ginger, chopped peanuts? Check, check, check, check, check!