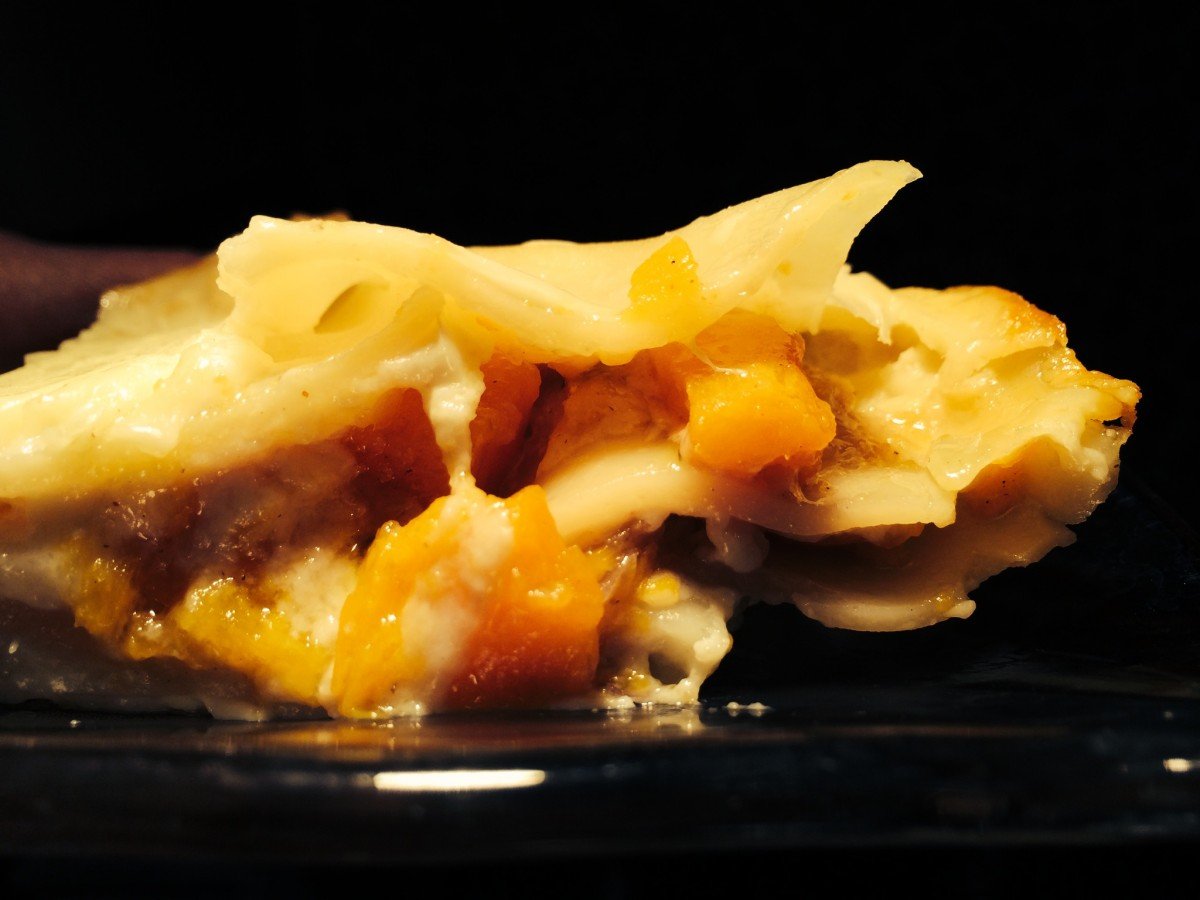
Butternut squash lasagna – a winner!
I have a foodie friend who claims to have a better butternut squash lasagna recipe than mine. I’ve tested his claim many times with friends and family, and hands down, this one is the winner. His recipe is good, but it does not compare to this masterpiece. He is a far better cook than me so I have to take the advantage where I can!
This is the perfect recipe for a vegetarian main dish at your Thanksgiving meal. Having said that, this recipe is not for the cook who is short on time. I once made this lasagna for a friend and he loved it. He asked for the recipe, counted the ingredients, and quickly responded with, “18 ingredients, I’m out”! Prepare for about 2 hours of prep, cooking, assembly, and clean up. That is about what it takes me and I’ve made this lasagna at least a dozen times. However, I must say, it is worth it.
Ingredients
Squash Filling:
1 large onion
3 Tbsp unsalted butter
3 lbs butternut squash, peeled, seeded, and cut into ½ inch pieces
1 tsp minced garlic
1 tsp salt
½ tsp white pepper
2 Tbsp chopped fresh flat-leafed parsley
4 Tbsp chopped fresh sage
1 cup hazelnuts (4 oz) toasted, loose skins rubbed off, coarsely chopped
Sauce:
1 tsp minced garlic
3 Tbsp unsalted butter
5 Tbsp all-purpose flour
5 cups milk (I used 1%)
1 bay leaf
1 tsp salt
Assembling lasagna:
½ lb fresh mozzarella, coarsely grated (about 2 cups)
1 cup finely grated Parmigiano-Reggiano (3 oz)
12 sheets no-boil lasagna
Method
Make filling:
Cook onion in butter in a deep, 12-inch skillet over moderate heat, stirring occasionally until golden (about 10 minutes). Add squash, garlic, salt, and white pepper. Cook, stirring occasionally, until squash is tender (about 15 minutes). Remove from heat and stir in parsley, sage, and hazelnuts. Cool filling.
Make sauce while squash cooks:
Cook garlic in butter in 3-quart sauce pan over moderately low heat, stirring, 1 minute. Whisk in flour and cook roux, whisking, 3 minutes. Add milk in a stream, whisking. Add bay leaf and bring to a boil, whisking constantly. Then reduce heat and simmer, whisking occasionally, 10 minutes. Whisk in salt and white pepper and remove from heat. Remove bay leaf. Cover surface of sauce with wax paper if not using immediately.
Assemble lasagna:
Preheat oven to 425 degrees. Toss cheeses together. Spread ½ cup sauce on bottom of buttered 9×13 inch pan, cover with 3 pasta sheets, leaving space between sheets. Spread 2/3 cup sauce and one third of filling, then sprinkle with heaping ½ cup cheese. Repeat, layering 2 more times beginning with pasta sheets and ending with cheese. Top with remaining 3 pasta sheets, remaining sauce, and remaining cheese.
Bake covered 30 minutes, then uncovered for 10 – 15 minutes. Let sit 10 minutes before serving.
Note: Sauce and filling can be made 1 day before, kept separate, covered and chilled. Bring to room temperature before assembling.
Bring It
Make sure your host has room in the oven to heat the lasagna and probably a good idea to bring printed copies of the recipe because there is no doubt you will be asked!
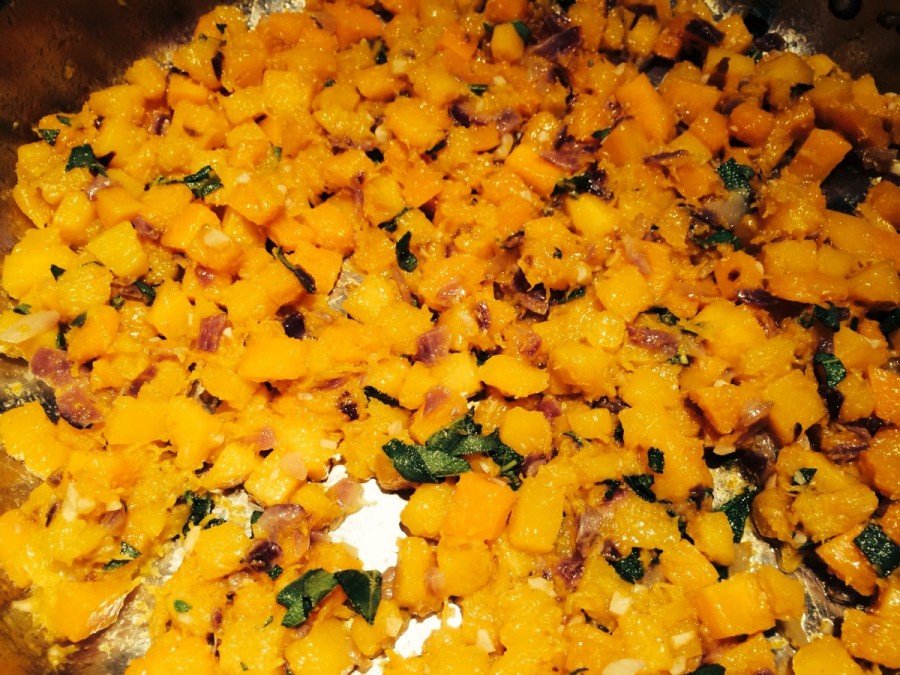
Sautéed squash would be a great side dish even without the lasagna
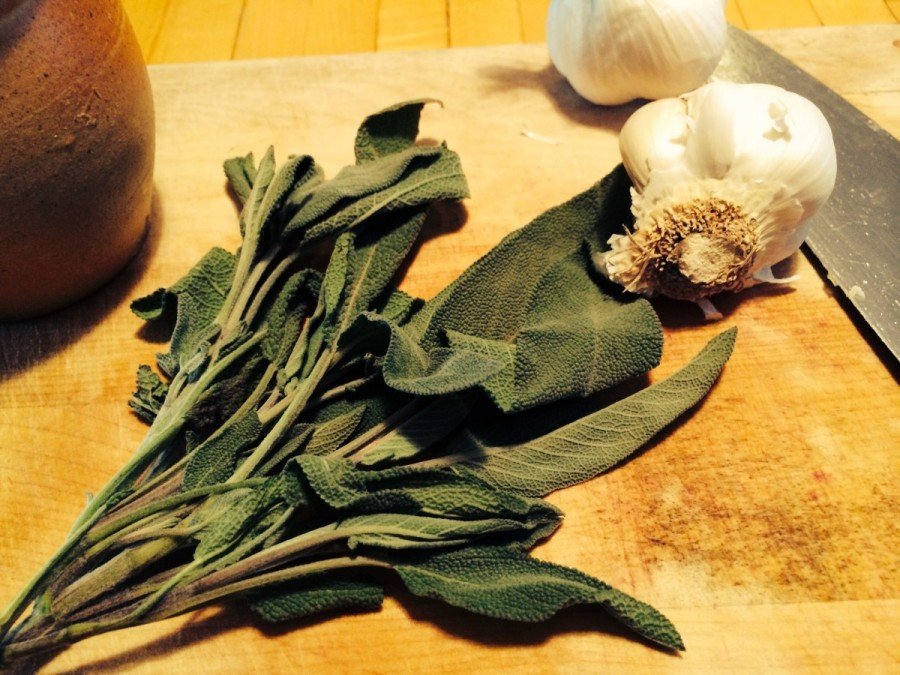
Sage and garlic make a great accompaniment