Got your attention right? If so, we’re halfway there to you having an excellent, healthy go to appetizer to add to your arsenal of fall food and tailgate all-stars (looking at you, Funitella Bruschetta). Furthermore, we have surmounted the hurdle that has, until now, prevented this deliciousness from breaching the confines of the Vegan recipe domain.
Elsewhere on the Internet, this recipe (technically chickpea panisse) is known as “chickpea fries.” As one who deeply resents food impostering, I get why calling these fries is a turnoff. Those two words do not belong together. So, rather than calling this creation fries, think of it as a snackified polenta—comfort food goodness that you can pick up and eat with your hands. It’s sounding better already.
The magic here, however, is not cornmeal. It’s chickpea flour, or besan, which is now one of my kitchen staples. In case you missed it, there is actually a cookbook out called, “Chickpea Flour Does It All.” (Christmas is coming people). This I learned from “Hey Nutrition Lady” who is a big fan of it, and featured this recipe on her site as proof.
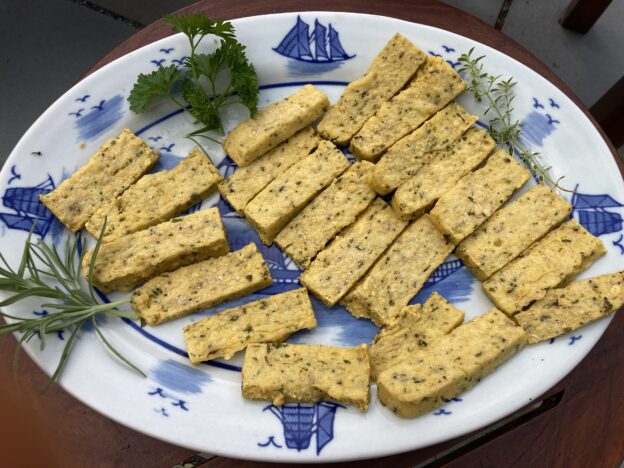
The process here is very easy to do and to remember once you’ve done it. Bring a pot ofwater to a boil, and gradually whisk in the chickpea flour (using a 2:1 ratio of water to flour). Once the mixture is thickened, add some olive oil, fresh chopped herbs, salt and pepper. Pour that into a baking dish and let it chill in the fridge. Later (even days later), you can cut your slab into whatever shapes you like and call them whatever you like: “Fries” “Burgers” “Sliders” etc…or ditch the air quotes and just call them hot chicks. Spray or brush them with olive oil, bake ‘em up, give a shake of salt and you’re good to go.
Creamy on the inside, crispy and salty on the outside and eminently dippable…what’s not to love? I have served these many times now, to a variety of company, ranging from full Vegan to righteously carnivorous, and everyone in between. All have come back for more. Leftovers also make an excellent component of the next day’s lunch.
For a full expose on the bennies of chickpea flour and very thorough coverage of chickpea panisse, check out the full post here.
In the meantime get on out there for a bag of besan and you’ll never be stumped for an appetizer again.
Ingredients
- 6 cups water
- 3 cups chickpea flour
- 1 teaspoon each salt and freshly ground black pepper
- 3 tablespoon olive oil
- 2 tablespoon parsley finely minced
- 2 tablespoon oregano finely minced (rosemary and/or thyme are excellent as well)
Method:
Make the Chicks
- Generously butter or oil a 9 x 11 baking sheet and set aside.
- In a large pot, bring the water to the boil over medium-high heat.
- Once the water is boiling, reduce the heat to medium and whisk in the chickpea flour a little bit at a time.
- Continue whisking for about 10 minutes, until the mixture is thick and smooth (I find that a few lumps are unavoidable, but you won’t notice them later).
- Stir in the olive oil, herbs, and a bit of salt and pepper to taste.
- Pour the chickpea mixture into the greased baking sheet and spread out into an even layer. Once it has cooled slightly, cover with plastic wrap and refrigerate for at least 1 hour, or overnight (slackers, this can be a few days as well).
Bake the Chicks
- Pre-heat your oven to 400°F / 200°C (this is a good place for your convection fan, if you’ve got one).
- Line a large baking sheet with parchment paper or a silpat. Slice the firm batter into sticks for chickpea fries, or rounds for burgers, etc.
- Line them up on the baking sheet, and brush or spray with a bit of olive oil.
- Bake for 10 minutes, then turn to the other side, brush again, and replace in the oven to bake for another 10 minutes. They should be slightly golden and crispy on the outside.
- Remove from the oven, salt generously, and serve with dip* of choice (think anything that goes with burgers and fries, or perhaps some liquid gold) and a glass of whatever makes you happy.
*Extra credit for serving Hot Chicks with this homemade version of “Bitchin’ Sauce” Vegan dip Nirvana that makes a fine accompaniment to Hot Chicks. We’ll make it here later, I promise. And my spicy friends, let’s not forget to invite chile crisp to this party!)