Tag Archives: appetizers

Fruit and Nut Crackers

Ready to bring your app game to the next level? I thought so.

First I just have to say….Whoa! That was a long break. But, let’s leave the excuses for later and get right back into it because we’re fully into summer and you have mouths to feed and people to impress. Enter, homemade crackers.

Crackers are a go-everywhere, anytime win to have in your snack arsenal. I seem to have posted quite a few over the years (see Everyone Crackers and my recently rediscovered crush, Paleo Crackers. I have long dreamed of making those expensive fruit and nut crackers that I hoover down when they appear at any spread, but never tried to make them.

Well friends, the wait is over. With the recipe below, from Crowded Kitchen I became a near-instant pro. Here’s why this recipe is a Bring It! all star:

  • First, it is easy—add everything to one bowl mix it up and bake it in a loaf pan.
  • Second, it is not time sensitive. Once you bake the loaf and it cools you can keep the loaves wrapped in the freezer until you’re ready to slice and finish them with the second bake.
  • Third, but really first, these crackers are deLISH!

For bonus territory, they are eminently customizable, and a true “love the one you’re with” situation as far as what you use for the dried fruits and nuts or seeds. My first attempts were with dried apricots and golden raisins for the fruit, walnuts sliced almonds and pumpkin seeds for the nuts. My second version had a different mix and equally as good. Pick your own adventure. Same goes for the type of milk (I used almond milk because I had it) and sweetener (I used maple syrup because it’s kind of the law around here.

SOME EDIE NOTES, as ever: The recipe calls for using two mini loaf pans which I will likely never own. Alternatively, I used one regular loaf pan and cut the loaf in half to make—ta-da!— two mini loaves. I did the cutting in half (with a sharp serrated knife!) after the loaf was completely cool but it could also happen after it is frozen. I like my way because then you can leave one mini-loaf frozen and only need to commit to one loaf’s worth of crackers (for me about 38) at a time. Also, the original recipe does not say to spray the lined pans with cooking spray, but not all parchment paper is created equally. Spraying them assures the paper will easily peel off.

That’s it!

  • Total Time: 4 hours (breathe! most of it is inactive)
  • Yield: It depends but I got 38 out of each half loaf. Original recipe says 52. Points to me for thin slices.

Gourmet Fruit and Nut Crackers

Originally from Crowded Kitchen

Ingredients

  • 1/2 cup all purpose flour
  • 1/2 cup whole wheat flour
  • 1 teaspoon baking soda
  • 1 1/2 teaspoon kosher salt
  • 1 tablespoon fresh rosemary, finely chopped (or 1 tsp dried)
  • 1 tablespoon fresh thyme, finely chopped (or 1 tsp dried)
  • 1/2 teaspoon cinnamon
  • 1/8 teaspoon nutmeg
  • 1/8 teaspoon black pepper
  • 3/4 cup dried fruit, chopped (apricots, figs, dates, raisins, cherries, etc)
  • 3/4 cup nuts or seeds, chopped (pecans, pumpkin seeds, pistachios, walnuts, almonds, sunflower seeds etc)
  • 1 tablespoon orange or lemon zest
  • 1 cup milk of choice (we used oat milk, but any kind works)
  • 1/4 cup honey

Method

  1. Preheat oven to 350˚F and line two mini loaf pans (~5 1/2” x 3 1/4”) or one regular sized loaf pan (~8 1/2” x 4 1/2”) with parchment paper. Spray them to make your life easier.
  2. Add both flours, baking soda, salt, herbs, cinnamon, nutmeg, pepper, dried fruit, nuts and zest to a large mixing bowl. Stir until well combined. Stir in the milk and honey until well combined and no streaks of honey remain.
  3. Divide between the 2 mini pans. Bake for ~25-28 minutes, or until a toothpick comes out mostly clean.
  4. Let cool to room temperature, then wrap tightly in plastic wrap and freeze for at least 4 hours, overnight (or up to 3 months.) If you used a regular loaf pan, you can now carefully slice it in half lengthwise with a serrated knife before or after freezing.
  5. Preheat oven to 300˚F.
  6. Remove from the freezer and use a serrated knife to slice into 1/8” thick slices. Place on a baking sheet lined with parchment paper. 
  7. Bake for 12 minutes, then flip each cracker over. Bake for another 12 minutes, then check for doneness. If they aren’t quite done, flip again and cook for another 3-8 minutes. They should be golden brown and feel dry to the touch, but they may still look soft due to the fruit. Don’t worry – they will crisp up as they dry! See storage information below. 

All sliced up for round two

Notes from Crowded Kitchen

Loaf pan size: We used two of these mini loaf pans for this recipe. The size is about 5 1/2 inch x 3 1/4 inch. You can also use one standard size loaf pan (~8 1/2” x 4 1/2”), but if you do, the crackers will be much longer and shorter. This may also change the cook time. 

Bake time: When you’re baking these in loaf pans, use a toothpick to test doneness. If it comes out clean, you’re ready to go.

Second bake: You’ll know your second bake is done when the crackers turn a nice brown color – almost like the rye chips in a package of Chex mix. They’ll be slightly crispy, and will harden up even more as they cool.

Use a serrated knife to slice the frozen loaf into about 1/8″ slices. 

Freeze and bake later: You can bake several loaves of these and then wrap tightly in plastic wrap and freeze for later. If stored properly, they will last for a few months in the freezer. When you’re ready to bake, simply remove from the freezer, slice and bake. 

Storage: Store leftovers in an airtight container for up to a few days. If they start to get soft from the dried fruit, you can always pop them back in the oven for a few minutes to crisp them up. Note that dried fruit with higher moisture content (like apricots or figs) will make these go soft faster than fruit like dried cranberries.

Nutrition

  • Serving Size: 4 crackers
  • Calories: 126
  • Sugar: 10.7 g
  • Sodium: 249.3 mg
  • Fat: 4.8 g
  • Carbohydrates: 20.1 g
  • Fiber: 2.3 g
  • Protein: 2.7 g

Obatzda: How Bavarians say “Cheese!”

I’ll come right out and say it: No body needs this recipe. I mean, there is nothing healthy about it. BUT, need is a fickle thing. If you are having a party and want an easy, make-ahead cheese dip that does not need to be kept warm; or, if you have enough pretzels in your house to feed a small school; or, if you are heading to a tailgate and want something yummy and portable that goes with any proper tailgate fare; or, if you know that sometimes “putting some cheese on it” is the answer to your cravings….well if any of those things are happening in your life right now, then you might just need this dip.

This comes straight from Dirndl Kitchen, which I figure is as legit as it gets. In good Euro fashion, it was invented as a way to use up rando bits of cheese, but it works splendidly with fresh cheese right out of the wrapper. I use whatever wheel of brie or camembert is available at the supermarket. The 1-lb wheel is perfect for a double recipe (a few grams short but this is no time for exact measurements! Just aim for a 2:1 ratio of camembert to cream cheese).

If you are looking for a way to embrace the beery cheesiness of the season, mix up a batch of this for your next hungry crowd. Happy Oktoberfesting all!

Obatzda Bavarian Cheese Dip

From Dirndl Kitchen  

Ingredients

  • 250 grams camembert cheese (8 oz ish), room temperature, with the rind left on. Or a young brie cheese, just go for the one with the farthest out expiration date.
  • 120 grams (4 oz ish) cream cheese, room temperature.
  • 10 grams butter (a little less than 1 Tbsp) , room temperature.
  • 2 Tablespoons finely chopped chives reserve a little as garnish on top
  • 2 Tablespoons finely chopped onion
  • 1 teaspoon paprika powder The ‘sweet’ kind, not spicy or smoked. Plus more for sprinting on top. Add a little bit of cayenne powder if you like some kick.
  • 100 milliliters (a little less than 1/2 cup) beer. More or less, depending on the consistency you like. I typically like a spreadable consistency unless I serve it as a dip at parties. I used Paulaner Lager.

Method:

Bring all ingredients to room temperature (either by waiting or putting in them microwave for a few seconds). Using a fork, or a potato masher, mash together the cheese (rind and all), cream cheese and butter until you have a chunky paste-like consistency.

Add in the onions and chives and paprika and continue mixing/mashing until combined. Finally add in just enough beer to bring to a spreadable consistency. Add more beer if using a dip for parties etc.

Garnish with paprika powder and chopped chives. Serve with whatever pretzels you have. Extra credit for homemade. My go-to is this pretzel beer bubble bread, also from Dirndl Kitchen, which makes very manageable and delicious pretzel nuggets that you can also freeze before baking. Veggies are a solid dipping choice too.

Bringing it, storing it:

Some recipes say to make it up to a day ahead to let the flavors blend. Handy if you want to prep ahead, but it is also delish when freshly made. Leftovers can be kept tightly covered in the fridge for up to 3 days (easily a week in my house).

Thanksgifting

As the rest of you are toiling away in the kitchen, taking or giving orders and wondering why every year it takes so much brainpower to figure out turkey math, I’ll be cooking…nothing. I’m not that happy about it. To me, a proper Thanksgiving involves an element of chaos. This from the second youngest of 12 grandchildren, whose clan always gathered en masse for Thanksgiving; that is, except for the rare occasion when Thanksgiving coincided with a powder day, in which case Thanksgiving was a do-over at Howard Johnsons on the drive home from the mountains Sunday. As I grew into personhood and became a ski racer, Thanksgiving was always an away game, taking place wherever we were training for the start of the season.  

Perhaps that is why, to me, Thanksgiving is less sacred than rogue. I love taking on too many cooking projects, making old favorites, enjoying the satisfaction of new recipes that are surprisingly good (Knock-Out Vegan Pumpkin Pie), and suffering the consequences of epic fails (pretzels that could break your teeth). Ideally, there’s a little bit of all that going on, and nobody really remembers the food anyway because of the chaos and the company.

With the kids gone on their own ski racing journeys, our Thanksgivings have become very small affairs. This year, my culinary responsibilities come down to making a mustard dill sauce for smoked salmon. This task takes all of three ingredients and five minutes, if you are a slow chopper.

It’s is a solid recipe, from one of my few remaining cookbooks, The Silver Palate Cookbook. I have the 1982 edition, with “Thys” penciled in my Mom’s handwriting on the inside cover. As the stains throughout attest, this baby has lived on the front lines for many a Thanksgiving.

Here is the recipe in its entirety, though I’ll be making ¼ recipe which will still be too much:

Dill Mustard Sauce

from the Silver Palate Cookbook

  • 1 cup sweet mustard (the really sweet honey ham stuff)
  • 1 cup sour cream
  • ½ cup chopped fresh dill

Mix all ingredients together. Cover and refrigerate until ready to use.

And that, my friends, is all am making for Thanksgiving; but it just feels wrong, so I’ll bring something else for sure. Bringing an unassigned dish to a small Thanksgiving, however, can be tricky. You don’t want to boss a new dish on everyone when the pressure is on to try it and enjoy it; or steal the host’s mojo by creating a direct competitor to a favorite dish.

It has to be something that can be easily served as a complement, and/or politely stored away for another occasion. If you happen to be in this situation, here are a few suggestions:

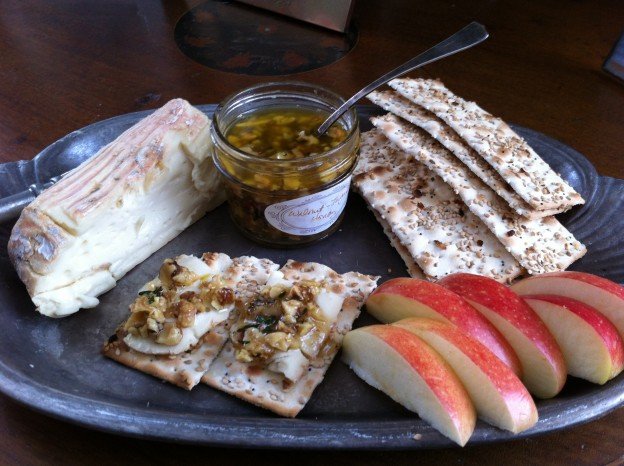
You’ll never go wrong with nuts, especially at the holidays. Honey thyme walnuts go well with any cheese spread, and anything from the Bring It nut anthology can stand alone. The app table can always use some substantial Everyone Crackers that accommodate most all special diets, except sesame allergies.

A jar of chili crisp will add a little sass to the turkey without stealing any cranberry thunder (they’re definitely different food groups). Homemade granola is a good call, especially if you are staying over. Press the Easy button with Tahini Granola (sorry again sesame allergy peeps), or super healthy Seed Bark Granola or my current fave Judson’s Crispy Granola from Martha’s Vineyard Magazine.

If you can’t cook, you also can’t come empty-handed. (Huge bonus points for anyone with vintage miniature Pilgrim candles btw). You’re never going to go wrong with flowers, a bag of good coffee, a box of chocolates or a bottle of something fun. Might I suggest Ancho Reyes, which can spice up any margarita or Bloody Mary, either of which may come in handy when the family’s been together for a few days.

That’s all I’ve got for now, because I must go chop my handful of dill and rest. Happy Thanksgiving to everyone!

For the host who has everything, rice krispy  turkey legs are just the thing.

Hot Chicks: Let’s get the party started!

Got your attention right? If so, we’re halfway there to you having an excellent, healthy go to appetizer to add to your arsenal of fall food and tailgate all-stars (looking at you, Funitella Bruschetta). Furthermore, we have surmounted the hurdle that has, until now, prevented this deliciousness from breaching the confines of the Vegan recipe domain.

Elsewhere on the Internet, this recipe (technically chickpea panisse) is known as “chickpea fries.” As one who deeply resents food impostering, I get why calling these fries is a turnoff. Those two words do not belong together. So, rather than calling this creation fries, think of it as a snackified polenta—comfort food goodness that you can pick up and eat with your hands. It’s sounding better already.

The magic here, however, is not cornmeal. It’s chickpea flour, or besan, which is now one of my kitchen staples. In case you missed it, there is actually a cookbook out called, “Chickpea Flour Does It All.” (Christmas is coming people). This I learned from “Hey Nutrition Lady” who is a big fan of it, and featured this recipe on her site as proof.

The process here is very easy to do and to remember once you’ve done it. Bring a pot ofwater to a boil, and gradually whisk in the chickpea flour (using a 2:1 ratio of water to flour). Once the mixture is thickened, add some olive oil, fresh chopped herbs, salt and pepper. Pour that into a baking dish and let it chill in the fridge. Later (even days later), you can cut your slab into whatever shapes you like and call them whatever you like: “Fries” “Burgers” “Sliders” etc…or ditch the air quotes and just call them hot chicks. Spray or brush them with olive oil, bake ‘em up, give a shake of salt and you’re good to go.

Creamy on the inside, crispy and salty on the outside and eminently dippable…what’s not to love? I have served these many times now, to a variety of company, ranging from full Vegan to righteously carnivorous, and everyone in between. All have come back for more. Leftovers also make an excellent component of the next day’s lunch. 

For a full expose on the bennies of chickpea flour and very thorough coverage of chickpea panisse, check out the full post here.

In the meantime get on out there for a bag of besan and you’ll never be stumped for an appetizer again.

Ingredients

  • 6 cups water
  • 3 cups chickpea flour
  • 1 teaspoon each salt and freshly ground black pepper
  • 3 tablespoon olive oil
  • 2 tablespoon parsley finely minced
  • 2 tablespoon oregano finely minced (rosemary and/or thyme are excellent as well)

Method:

Make the Chicks

  1. Generously butter or oil a 9 x 11 baking sheet and set aside.
  2. In a large pot, bring the water to the boil over medium-high heat.
  3. Once the water is boiling, reduce the heat to medium and whisk in the chickpea flour a little bit at a time.
  4. Continue whisking for about 10 minutes, until the mixture is thick and smooth (I find that a few lumps are unavoidable, but you won’t notice them later).
  5. Stir in the olive oil, herbs, and a bit of salt and pepper to taste.
  6. Pour the chickpea mixture into the greased baking sheet and spread out into an even layer. Once it has cooled slightly, cover with plastic wrap and refrigerate for at least 1 hour, or overnight (slackers, this can be a few days as well).

Bake the Chicks

  1. Pre-heat your oven to 400°F / 200°C (this is a good place for your convection fan, if you’ve got one).
  2. Line a large baking sheet with parchment paper or a silpat. Slice the firm batter into sticks for chickpea fries, or rounds for burgers, etc.
  3. Line them up on the baking sheet, and brush or spray with a bit of olive oil.
  4. Bake for 10 minutes, then turn to the other side, brush again, and replace in the oven to bake for another 10 minutes. They should be slightly golden and crispy on the outside.
  5. Remove from the oven, salt generously, and serve with dip* of choice (think anything that goes with burgers and fries, or perhaps some liquid gold) and a glass of whatever makes you happy.

*Extra credit for serving Hot Chicks with this homemade version of “Bitchin’ Sauce”  Vegan dip Nirvana that makes a fine accompaniment to Hot Chicks. We’ll make it here later, I promise. And my spicy friends, let’s not forget to invite chile crisp to this party!)


The Resta the Fiesta

Cinco de Mayo is coming at us like a Hump Day freight train. This year, we’ve got masks, we’ve got shots for the most part. We’re ready! Let’s review. We’re all set with triple spicy margs, and salsa verde, and today we’re adding one new non-recipe app to get the party started.

But first, we’re visiting to the archives for some basics:

For the apps, there must be guac. Lots of guac. I know full well you do not need a recipe for it, but in case you want to go a little off the reservation, there’s this crazy one with apples, pecans and tequila. For a more mainstream option try this Mango jicama guacamole or just add some chopped jicama to your guac for a refreshing crunch. Score points for doing (slightly) more than using your can opener with some easy and delish balsamic black beans. They can be an app or go on/into tacos, burritos enchiladas, quesadillas, tostadas, etc.

For the sides? Bust out the Hero Slaw. Full stop. It’s right for any party but especially for a fiesta because it’s fresh, crunchy, spicy, make-aheadable and feeds a crowd. It’s got it all, and neighborhood lore to boot. So, do that. For a more tropical totally refreshing salad Hot Cha Cha Pineapple Avocado Salad is a strong move. There’s got to be a corn course somewhere in there, and for some reason I have no go-to corn salsa recipe. Not to worry! This Mexican street corn inspired corn salad will do quite nicely.

As for the main event, let’s give ourselves the gift of simplicity. That could be: Baked tacos; quesadillas spiced up with Chile crisp, or not; a batch of Chicken taco chili all made easy in the crockpot; summer simmer chicken or some baked salsa verde chicken made with your salsa verde reserves.

Dessert, if you choose to eat it, has got to be Nina’s Margarita Pie. It just does. That said, nobody will complain if you bust out cholliesauce, call it dulce de leche and pour it on anything.

And now, for the non recipe pictured above. These Spicy Shrimp Bites, passed down through a friend chain, are deLISH and so basic. I hope they kick off many fun fiestas to come!

Spicy Shrimp Bites

Ingredients:

Tostitos scoops corn chips
Guacamole of choice (no shame in store-bought for this)
Smallish raw shrimp* (nekkid-no shells or tails)
Touch of oil for cooking
Taco seasoning

Method:

Cook up the shrimp in a skillet with a bit of oil until just done (a few minutes each side). As they are cooking, sprinkle them with taco seasoning on each side, and give them all a little stir together when they’re done.

Fill each chip with a bit of guac and top with a shrimp. Ta-da and Olé!

*Shrimp sizing on the package is a little like jean sizing. Not reliable. Your best bet is to eyeball the shrimp and imagine the Tostito boat it’s going in. I’m thinking 51/60 is a good zone, but if you find your shrimp are too big just cut them in half.

Bringing it:

If your trip is relatively tame, bring these pre-assembled, covered on a rimmed dish. Otherwise, these are easy and quick to put together on site. Just make sure you are kind to your Tostitos so there are enough intact to build your bites.

Tomato Overload

Guess what didn’t take Labor Day off? The tomatoes in your garden. It’s hard to keep up with the crop, though I’m trying my darndest, and probably headed for whatever toxic event occurs from too many tomatoes. I swear those suckers ripen by the hour. It’s all good though, except that there’s this one doctor out there on the interwebs who gets really bad on tomatoes. I just have to ignore his advice for the next couple of weeks. Same with the corn haters. Now is NOT the time.

Rather than reinvent the wheel, let’s just revisit some of our all-time tomato season favorites. Purists of course will go no further than the white bread and mayo tomato sandwich. Solid. But it uses exactly one tomato. Not helpful. When you’re looking for mass consumption of the bounty, I suggest a batch or two of sweet and spicy tomato jam. For the easiest dinner on the planet, totally appropriate for hands off entertaining, go for Best of Summer Simmer Chicken. If your job is to bring a side, embrace the heat with Summer Perfection Watermelon Tomato Feta Salad, or just go straight for Most Popular with THE Panzanella.

If those don’t use up your tomato backlog, here is an easy way to give your tomatoes (and the taste of summer) a little more staying power.

If nothing else you should go to Smitten Kitchen just to look at the picture of the pre-roasting tomato rainbow. Impressive. Mine do not look like that. BUT I assure you they taste darned good, and they are perfect to throw on a pizza, spoon on bruschetta, toss into a salad, smoosh on bread, mix in pasta, etc. You get the picture.

Slow roasted tomatoes, just hanging with the fresh crowd.

Slow Roasted Tomatoes

From Smitten Kitchen

Ingredients

  • Cherry, grape or small Roma tomatoes
  • Whole gloves of garlic, unpeeled
  • Olive oil
  • Herbs such as thyme or rosemary (optional)

Method

Preheat oven to 225°F. Halve each cherry or grape tomato crosswise, or Roma tomato lengthwise and arrange on a parchment-lined baking sheet along with the cloves of garlic. Drizzle with olive oil, just enough to make the tomatoes glisten. Sprinkle herbs on, if you are using them, and salt and pepper, though go easily on these because the finished product will be so flavorful you’ll need very little to help it along.

Bake the tomatoes in the oven for about 3 hours. You want the tomatoes to be shriveled and dry, but with a little juice left inside–this could take more or less time depending on the size of your tomatoes. When they are done, you can remove the cloves of garlic and save them for another use. They’re a delish side bennie.

Use the tomatoes right away or let them cool, cover them with some extra olive oil and keep them in the fridge for the best summer condiment, ever.

Bring It Summer All Stars

Summer is here my friends. Just in time, the good people of the webhosting universe have fixed my site so subscribers will actually get posts. What a great idea? Thank you Bring It loyals for your patience. And now, on to the weekend!

Before you head out for the Memorial Day shop with the rest of humanity, I picked out some all star classics that will help you slay this weekend. With a little prep you can head into summer looking like the master entertainer you are at heart.

First and foremost…

Bring on The Slaw:
If you have never made Hero Slaw, just trust me on this. It will make you famous. Go ahead and claim it as your own if it helps. Prep it, bag it, put it in the fridge and you can take on any invite that comes your way. Or just enjoy it yourself for a few days. If nothing else, make up the dressing to have on hand and turn kale into something the family might actually eat.

Have Some Balls:
Buffalo chicken meatballs are back on my regular rotation (thank you Neely for reminding me!) until I master the perfect veggie balls. Stay tuned for that. Until then, make up a lot of these (ahead if needed) and know they will disappear fast.

Brush up on Your Bruschetta Fixin’s:
You will never be sorry to have a Funitella bruschetta stashed in the fridge. With the miracle that is petite diced canned tomatoes it take all of about 5 minutes. If you want to get more ideas, take a gander at bruschetta deconstructed, and the consider toppings like pickled fig, creamy cheese and crunchy nut crostini, strawberries and goat cheese, and Sicilian caponata.

Get Your Guac On:
You’ve got to have it, and it hardly requires a recipe. BUT if you want to go the extra distance this crazy one with apples and tequila is my new fave. Mango jicama guacamole is another solid contender. Both add crunch and assert that this is not your first guac fiesta.

Think (of drinking) Ahead:
You know you’re a pro when…You’ve got your Frosé and Sandy’s daquiris in the freezer, and fixins for some fancy lemonades. You bridge into genius status when you also have watermelon juice at the ready to whip up watermelonade, spicy watermelon margaritas and watermelon sangria.

Watermelon Sangria. Summer in a glass.

Watermelon Up:
While we’re on the topic of watermelon, cut up some watermelon and prep it for watermelon poke bowls and you are set for fresh weekend lunches for Vegans and non Vegans alike. If you double up on the feta you get for Funitella Bruschetta, and make summer perfection watermelon feta salad, I promise you won’t be sorry.

Sweet Endings:
Oh where do we begin on these? Well, summery Lemon Beach Pie, a whole mess of Rubble or Loosey Brucey Rhubarb crisp are a good place to start. As Bruce would say, nobody ever complained about to many good recipe ideas.

New recipes next time, but of now let’s go with what we know and get this summer party started.

Must…eat…more…pie. Sweet, salty, sweet, salty, and oh yeah—creamy, crunchy, cool and tart.

Love, and a Side of Buffalo Chicken Meatballs

 a few of the best friends in the world. Way better looking than meatballs in the sun.

A few of the best friends in the world. Way better looking than meatballs.

This is about meatballs, but it’s not really about meatballs. It’s about friends and family and communities and about the times that remind you how much you love all of the above. Those times are called parties.

I’m on spring break, which is why we’ve sort of lost touch (It’s not you, it’s me.) The anchor of the trip was the party (see happy purple people above) to honor my awesome mama. The whole process of throwing a party in your hometown—especially when you have no definitive vision or time or really any business thinking you can pull it off—is confirmation that Dorothy and her sparkly red shoes really had it right. There’s no place like home.

Friends appeared at just the right time to help me shop, delivered fondue pots, brought drinks and favorite dishes, ship-shaped the house, helped prep, cook, clean and tend each other throughout, took pictures and showed up with their rally caps on. They asked “how can I help?” and when I hesitated they just jumped in and did. The timeliness of the help was downright freaky, as when I was lamenting that I’d failed to order a cake and the phone rang: “Could I prepare a signature dessert to honor your mom?” I’m talking crazy good.

Like I said, this isn’t much about meatballs. BUT for this occasion I needed something easy I could make ahead and then pop in the oven, something that would not require any utensil beyond a toothpick, and something that was worthy of the best friends and family a girl could ever have. These mighty meatballs (poached from Epicurious) delivered in all areas. As a bonus, the leftovers were good the next day, cold and reheated.

Make these and have a party to remind yourself of all the good stuff and good people in your life.

Ingredients:

  • 2 tablespoons vegetable oil
  • 4 tablespoons (1/2 stick) unsalted butter
  • 1/3 cup Frank’s Red Hot Sauce or any other favorite hot sauce
  • 1 pound ground chicken, preferably thigh meat (turkey works too)
  • 1 large egg
  • 1/2 celery stalk, minced
  • 3/4 cup bread crumbs
  • 1 teaspoon salt
  • Some kind of Blue cheese dip or dressing

Method:

Preheat the oven to 450°F. Drizzle the vegetable oil into a 9×13-inch baking dish and use your hand to evenly coat the entire surface. Set aside.

Combine the butter and hot sauce in a small saucepan, and cook over low heat, whisking until the butter is melted and fully incorporated. Remove from the heat and allow the mixture to cool for 10 minutes.

Combine the hot sauce mixture, ground chicken, egg, celery, bread crumbs, and salt in a large mixing bowl and mix by hand until thoroughly incorporated.

Roll the mixture into round, 3/4 -inch balls, making sure to pack the meat firmly. Place the balls in the prepared baking dish, being careful to line them up snugly and in even rows vertically and horizontally to form a grid. The meatballs should be touching one another.

Roast for 15 to 20 minutes, or until the meatballs are firm and cooked through. A meat thermometer inserted into the center of a meatball should read 165°F.

Allow the meatballs to cool for 5 minutes in the baking dish before serving.

Serve with blue cheese dip for the real buffalo experience

 See? I told you. But don’t judge. Just make them. Trust me on this.

See? I told you meatballs aren’t as pretty as friends. But as with friends, don’t judge. Just make them, love them  and be happy.

Squash On!… on toast that is


Fall all over squash on toast

Fall all over yourself for these apps. Yep, they’re that good.

Foodwise, fall is my dream come true. First come the apples, and we’ve been through my apple addiction. They give us good excuses to make things like salted caramel cholliesauce and Joni Mitchell Apple Pie. Then comes Halloween season (it’s really not just a day you know) and all those excuses to make things like Crackle and Salty Malty Rice Krispy Treats with whatever Whoppers you didn’t polish off. And of course you’ve got the crock pot bubbling in the background with goodness like no-fuss chicken taco chili. Honestly though, what I love most are the fall veggies—the squash, brussels sprouts, beets and various roots all begging for their turn to get roasted in the oven.

In my fall food frenzy I’ve gone a little nutty on the winter squash, and now I find I’ll have to pace myself  because I have so many orange recipes to post. I’m starting with an appetizer, because it is the one that surprised me the most with its popularity and because party season is upon us!

Here, courtesy of  Jean Georges Vongerichten via NYT Minimalist Mark Bittman is the elegantly named “Squash on Toast.” I knew I’d like it well enough, because you know, the weirder the better. And onions caramelized into jam with maple syrup and apple cider vinegar? Come on! The mainstream was just as smitten. The first time I made these I brought them to a party and they were devoured. Crazy good.

Here we go with my disclosures. I used a kabocha squash, hollowed, filled with water and cooked whole in the oven. For cheese I used a spreadable brie because that’s what I had. Whipped cream cheese is also excellent. I adhered to directions and included the fresh mint which got high praise from all, so play by the rules here. For the bread I brushed thin slices of Easiest French Bread Ever with olive oil and toasted them in the oven. Make a lot of toasts so you don’t have to be mean and hide them from your family before party time.

Ok, squash on!

Ingredients

1 2 1/2- to 3-pound kabocha or butternut squash, peeled, seeded and cut into pieces 1/8- to 1/4-inch thick
3/4 cup extra-virgin olive oil
1/2 tsp dried chile flakes, more to taste
3 tsp kosher salt
1 yellow onion, peeled and thinly sliced
1/4 cup apple cider vinegar
1/4 cup maple syrup (or agave)
4 slices country bread, 1-inch thick
1/2 cup ricotta, goat cheese, feta or mascarpone
Coarse salt
4 Tbsp chopped mint

Preparation

1. Heat the oven to 450. Combine the squash, 1/4 cup olive oil, chile flakes and 2 teaspoons of salt in a bowl and toss well. Transfer the mixture to a parchment-lined baking sheet and cook, stirring every few minutes, until tender and slightly colored, about 15 minutes or a little longer. Remove from the oven.
 2. Meanwhile, heat another 1/4 cup olive oil over medium-high heat, add the onions and remaining teaspoon salt and cook, stirring frequently, until the onions are well softened and darkening, at least 15 minutes. Add the vinegar and syrup, stir and reduce until syrupy and broken down, again at least 15 minutes or so; the mixture should be jammy.
3. Combine squash and onions in a bowl and smash with a fork until combined. Taste for seasoning.
4. Add the remaining oil to a skillet over medium-high heat. Working in batches if necessary, add bread and cook until just golden on both sides, less than 10 minutes total; drain on paper towels. Spread cheese on toasts, then top with the squash-onion mixture. Sprinkle with coarse salt and garnish with mint.

Bring It

Deconstructed is the only way to transport, and remember to bring the right sized platter and a spreading knife. When you get to your destination have a fine little chat while assembling the toasts (and try to keep up with production as they are eaten off the platter).

Honey thyme walnuts

It’s honey thyme…with walnuts.

Honey. Doesn’t the thought of it just make you feel calm? We need a bit of calm right now, and that’s why I’m here. Sit on down with a mug of tea, or just take a deep breath, and read this post because first I’m going to give you an awesomely easy recipe and then I’m going to remind you of all the delicious things you can make as gifts that will be much more appreciated than whatever you’re going to wrestle from the stores in a last minute frenzy. It’s time to look to your cupboards for sanity now.  Breathe in, breathe out. ‘Tis the season to give everyone a break, including yourself.

This recipe came from Bon Appetit a while back. They say to “drizzle this fragrant honey over your favorite cheese, or use it as a condiment on prosciutto panini.” I say it is also amazing with cambozola or any brie like cheese, makes a mean pizza or bruschetta topping and turns the humble grilled cheese into something you might refuse to share.

Ingredients

1 cup walnut pieces (or pecans)
3/4 cup orange blossom honey (or whatever you’ve got)
1/2 cup walnut oil or extra-virgin olive oil
Kosher salt, freshly ground pepper
1 tablespoon fresh thyme or rosemary leaves plus 2 sprigs
1/4 teaspoon finely grated lemon zest
4 whole dried chiles de árbol*

*I used Japones peppers, cut into thirds, because that’s all I could find. You can also use dried pepper flakes for more cha-cha throughout.

Method

Preheat oven to 325°F. Spread the walnuts on a rimmed baking sheet. Bake, stirring occasionally, until lightly browned and fragrant, about 15 minutes. Let cool. Coarsely chop; set aside.

Whisk honey and oil in a medium bowl to blend. (It may seem obvious, but measure the oil first so the honey will slide right out of the cup). Season to taste with salt and pepper (I am not shy with either). Fold in walnuts, thyme, and lemon zest. Add chiles. Divide between four “take me to a party” 4-ounce jars or two “I really love you”  8-ounce jars. Cover and chill.

Can be made 1 month ahead. Keep chilled. Bring to room temperature and stir before using.

More yum…

And now, here are some other great DIY food gifts to consider. Of all the things I make and give, the most requested/addictive is crackle, which breaks up nicely into treat bags.  Cholliesauce is another winner, and you may have all the ingredients in your kitchen right now. Peppermint or chocolate chip meringues are festive, tasty and pretty darned easy. And of course you can’t go wrong with roasted nuts. For savory Mediterranean types give a jar of sicilian caponata with some nice store bought crackers or (for the uber healthy friends, endurance crackers.  If you’re kicking around the house it takes time but next to no effort to mix up a batch of easiest French bread ever, and you’ll have two loaves to give. Package it with a dish towel and a French bread pan and BOOM you’ve made someone a baker.

And if you don’t feel like making a darned thing that’s fine too. Just remember to relax, breathe and have some good laughs with your friends. There’s always time for that!

An arsenal of holiday cheer. Ho-ho-ho baby!

An arsenal of holiday cheer. Ho-ho-ho baby!