Tag Archives: dessert

Coo Coo for Koulourakia

Today I am getting my Greek on. I have exactly zero Mediterranean blood in my veins, but I have some in my heart. This thanks to my favorite Greek friends, who are warm and sometimes fiery; they are generous in spirit, passionate in their beliefs and above all FUN.

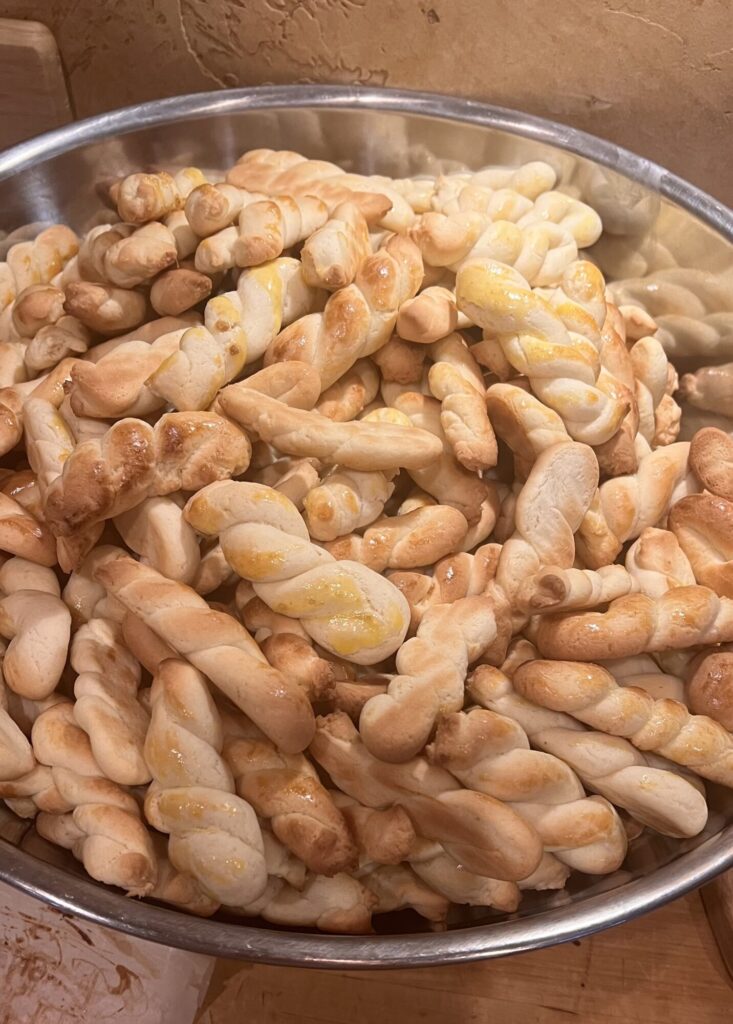
One of my faves recently enlisted my son in making a mega batch of traditional Greek cookies, Koulourakia. Seeing them in the kitchen together via Facetime, working on the cookie-production line, made me smile. It reminded me of being in the kitchen with my own mom.

As we have documented here on this blog, Nina was not invested in cooking unless the cooking was collateral necessity for some messy crafting or shenanigans that brought together kids or grandkids. Despite her own holiday baking ennui, she encouraged us to pursue our own culinary itches, which were usually things that bore little resemblance to the magazine pictures that had inspired us. Cases in point: rock-hard pretzels from ZOOM (the show not the app), a gloppy soft cheese “pine cone” flavored with bacon bits and studded with almonds, dentally challenging popcorn balls, and so, so many more.  

My point is….Nina had her priorities straight. Our holiday kitchen experiments brought us together in one place. The only really important part about the holidays are the people—the family you are born into and the family you grow into. If you’re living a rich life, that family ends up being big and varied and sprinkled all over the country, if not the globe.

That is why seeing the kitchen production half a country away inspired me to try out the Koulourakia recipe I’ve been eyeing (and trying to pronounce) for quite a while. The cookies did not disappoint and will be a holiday staple here. They are sturdy, keep well, travel well and as a bonus are both nut-free and Vegan. They’re low-key addictive—not quite as sweet as a cookie, and less of a commitment than a muffin, making them the perfect late morning or mid-afternoon accompaniment to a cup of something comforting. Book group? Cookie exchange? Hostess gift? Holiday snack arsenal for unexpected guests? Yes and yes on down the line.

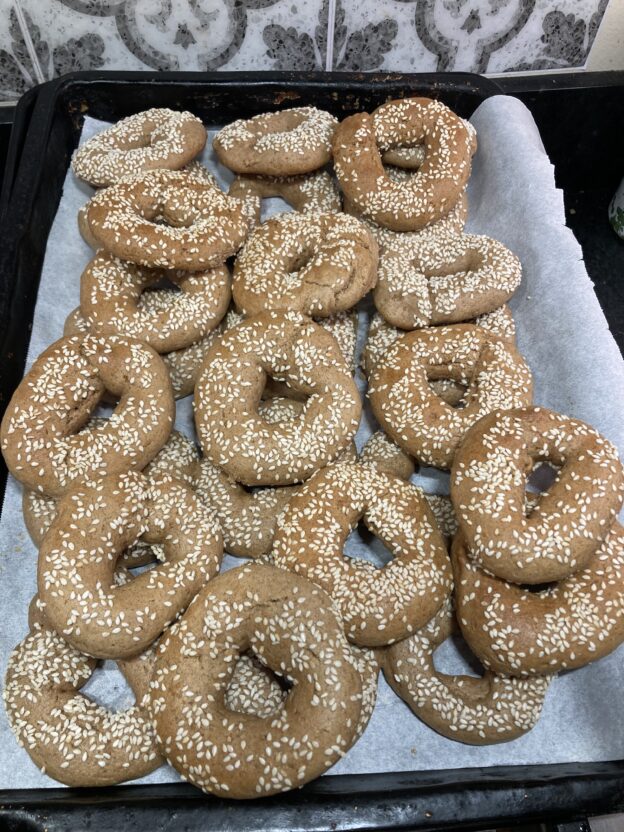
There are admittedly many versions of Koulourakia, using seasonal flavors and sweeteners, or butter vs olive oil. I went with Mina Stone’s favorite orange- and cinnamon-flavored version, from her book Lemon, Love and Olive Oil, (purchased at the always magical Woody’s Mercantile). She does the pro option of brushing the tops with honey water and pressing the cookies in sesame seeds. Other versions skip the honey wash and simply roll the rope in sesame seeds before forming the cookies into a circle. You do you, preferably in a messy kitchen with good company and an excellent playlist!

       Koulourakia, Colorado version

Koulourakia

From Lemon, Love and Olive Oil

 Ingredients

The Wet Ingredients:

  • 1/2 cup (120 ml) light olive oil or vegetable oil
  • 1/2 cup tahini (120 ml)
  • 1 cup (240 ml) orange juice
  • 1 cup (200g) granulated sugar

The Dry Ingredients:

  • 4 cups (480g) all-purpose flour
  • 1 teaspoons baking powder
  • 1 teaspoons baking soda
  • 2 teaspoons kosher salt
  • 4 teaspoons ground cinnamon

Topping:

  • 1 Tbsp honey
  • ½ cup water
  • ½  cup sesame seeds

Method

Preheat the oven to 350 °F, 180 °C

Line 2-3 baking trays with parchment paper.

Make the Cookie Dough:

  • Combine all of the dry ingredients in a bowl and whisk them together.
  • Combine all of the wet ingredients in a large bowl and whisk them together. Add the dry ingredients in 2-3 batches and whisk together. Switch to a spatula and mix until a smooth soft dough, adding another spoonful of flour if it’s too sticky. Cover loosely with a towel and set aside to rest for 20 minutes.

Make the Cookies:

  • Take about a tablespoon of dough and roll it into a ball. Roll the ball into a 5-inch (12-13 cm) long rope. Shape it into an S or into a circle.
  • Dissolve 1 Tbsp honey in 1 cup water. Form the cookies on the baking tray, brush tops with honey/water mixture then press each cookie into sesame seeds and replace on sheet. Alternatively, roll the rope in the sesame and then place on the prepared baking pan. 
  • Bake the cookies 13-15 minutes, until golden brown on the bottom and lightly toasted on top). Cool on rack.
  • Transfer the cookies to cookie jars or to an airtight container and store at room temperature up to 2 weeks.

Serve with cozy bevvie of choice, or go full Greek and shake up a cold frappe. It’s totally a thing.

     Traditional yodeling marmots and Koulourakia unite!

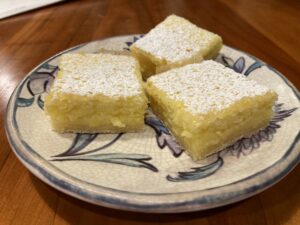
Golden Ticket Lemon Bars

This post goes out in preparation for the Hahnenkamm Downhill, the most fearsome event on the World Cup skiing tour, which takes place this weekend on “The Streif” in Kitzbuhel, Austria. Specifically, though it goes out in honor of Eric Keck, the American Downhiller who etched his name in Hahnenkamm legend by launching over the “safety fence” in 1991, and emerging bloodied but whole, wielding his broken ski like a battle prize. This remembrance of Keck by Steve Porino comes as close to capturing that particular moment, and the essence of Eric Keck, as the written word can.

Keck, ready to roll as always

Keck left us far too soon, in 2020, but his warrior spirit—a combo of bravery, mischief, humor, and the-sky’s-the-limit aspiration—remains with all who knew him and especially on the Streif. The contact high of being around Eric and his exuberance felt like getting a golden ticket, a window into life’s possibilities. Fittingly, the charity honoring Eric is called “Keck Golden Ticket” and aims to strengthen kid’s lives through the power of action sports.

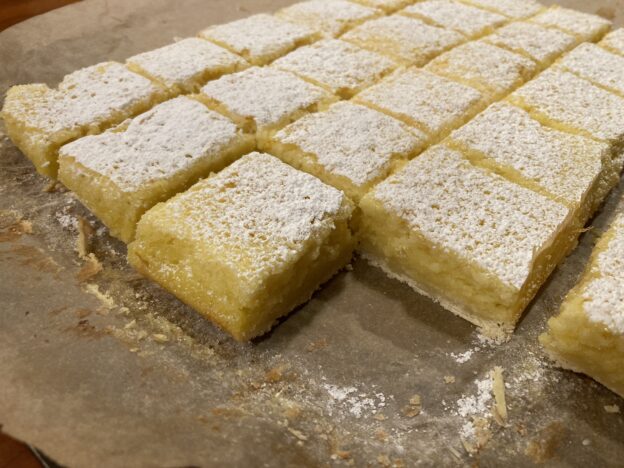
Eric’s birthday was on January 11, and his favorite cake was not a cake at all. It was his mom Bev’s lemon bars. The recipe got further customized by Eric’s wife Beth, to accommodate Eric’s request for “twice the lemon, half the crust.”

Beth is herself another magical being. She reminds us that lemons are, “Where summer hides in January.” To Bev’s original version, she doubles the custard, and reduces the proportions of sugar. Beth rolls with 2 cups total vs 3, which is plenty for my tastes. Even when halved from the original, the crust is still plenty sturdy to hold the filling. She also sometimes subs out almond flour for the regular flour in the crust.

I took Beth’s adapted version and cross-referenced it with this recipe for lemon bars from John at Preppy Kitchen. He fills in some details and pro moves that don’t make the shorthand of handed-down family recipes. Among them: line the pan with parchment paper; wet the knife to cut the bars; freeze them if, say, you cannot be trusted alone with an entire batch of lemon bars in the dark days of January.

The Preppy version processes the zest into the sugar first, which is brilliant and I support the move, but in fuss-free kitchens…that ain’t happenin’! Plus, I kind of love the texture of zest when I run into it.

There are lots of options here, but there are some hard and fast rules:

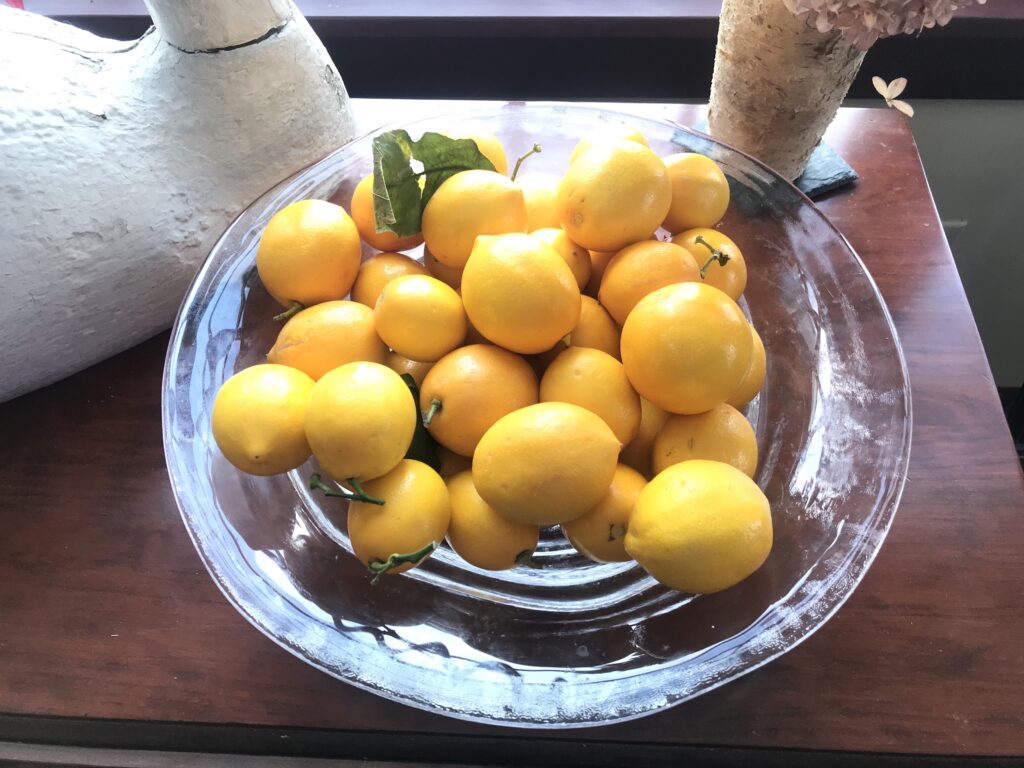
  • Use fresh lemon juice…from real lemons you or your minions squeezed. Make us all happy by using Meyer lemons* if possible.
  • Chill before cutting, or you’re in for a messy situation. Better yet, make them the day ahead and you’ll be as ready as your lemon bars.
  • Enjoy every bite! No guilt, no excuses. Like Eric, these are pure goodness —bright, bold, sweet, sassy with just enough New England crust to keep their integrity.

I hope you enjoy this recipe as much as Eric did, and bonus points for enjoying them straight out of the pan with a fork while watching the Hahnenkamm this weekend. If you want to help more kids live large like Eric, please consider donating to Keck Golden Ticket.

Golden Ticket Lemon Bars

Ingredients

CRUST

  • 1 cup flour
  • 1/4 c confectioner’s sugar
  • 1/2 cup butter

FILLING

  • 8 eggs
  • 2 cups granulated sugar
  • *2/3 cup fresh lemon juice
  • *Zest of two lemons
  • ½ cup flour
  • 1 tsp baking powder

*Special shout out to Sister A for this particular Meyer lemon haul, and to my other lemon angels/dealers: Sister B, Cousin D and Auntie T (also featured in this splash of sunshine recipe). Have I mentioned using Meyer Lemons??? Ok, moving on…

Instructions

Make the crust:

  • Preheat oven to 325.
  • Prepare a 9 x 13 pan by spraying it, greasing it, or IDEALLY lining with parchment paper, pressed and folded nicely into the corners.
  • With a fork, cut butter into flour and confectioner’s sugar until it is the size of small peas. (I have not tried it, but Preppy John melts the butter then adds it). It won’t hang together until you dump it all into the pan and press into an even layer. Bake 20 minutes, until just golden (or however you like it).

Make the filling:

  • Beat eggs and add sugar, lemon juice, zest and flour. Combine well and pour mixture over the warm crust. Bake another 20-25 minutes, until set.
  • Cool, then chill two hours.
  • Sprinkle w confectioner’s sugar and cut into bars with a sharp knife. Wipe the knife with a damp cloth between cuts to make your edges nice and sharp, like you’d want them on the Streif.

Storing, Keeping, Bringing

Keep these in the fridge until they are gone, or freeze on a baking tray, then wrap tightly and freeze for up to three months (so they say). They travel like champs when the layers are separated by parchment or plastic wrap.

      Keck, taking a friend along for the ride


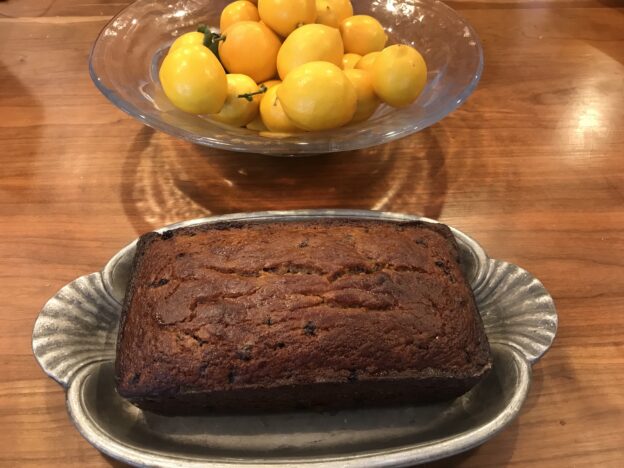
Lemon Blueberry Sunshine Loaf

Some days we need a little sunshine. Heck, some years we need it. This would be one of those days in one of those years. This recipe is one I have been meaning to post since the day, in the depths of winter, a glorious box of Meyer lemons arrived from Cousin D in California. As if the lemons weren’t treat enough, they concealed some vintage lederhosen, which of course EVERYONE needs.

Similarly, everyone needs a bit if sunshine, and this loaf (easily Veganized) serves it up.  It comes straight from Cookie and Kate, and was the answer to many questions, like:

What can I make that uses every part of these luscious lemons?
What can I make that is easy and delish?
What can pass off as a homemade dessert when we have visitors, or a satisfying snack or breakfast when we don’t?
What’s going to hit the above and have some redeeming nutritional qualities?

This is the answer to all that! I hope you like it, and that it brings a little sunshine to your day. After seeing what lemon zest does to sugar you will never let your lemons go unzested again.

Lemon Blueberry Sunshine Loaf

Ingredients

  • 1 ½ cups white whole wheat flour or regular whole wheat flour, plus more for dusting
  • 2 teaspoons baking powder
  • ½ teaspoon fine grain sea salt
  • 2 medium lemons, preferably organic, to be zested and juiced
  • 1 cup sugar (organic cane sugar if you’re fancy)
  • ¾ cup plain whole-milk (full fat) yogurt or Greek yogurt
  • 3 extra-large eggs (aquafaba works great too)
  • ½ teaspoon pure vanilla extract
  • ½ cup extra-virgin olive oil
  • 1 cup fresh or frozen blueberries (if frozen, do not defrost!)
  • 2 teaspoons honey
  • Optional accompaniments: coconut whipped cream or regular whipped cream or vanilla ice cream

Method

  1. Preheat the oven to 350 degrees Fahrenheit. Generously butter and flour a 8½ by 4¼ by 2½-inch loaf pan.
  2. In a medium mixing bowl, whisk together the flour, baking powder, and salt.
  3. Pour the sugar into a separate medium-sized mixing bowl. Grate all the zest from the lemons. Rub the zest into the sugar until the sugar is yellow and fragrant. Add the yogurt, eggs and vanilla to the sugar mixture. Whisk well, until the ingredients are combined.
  4. When the mixture is well blended, gently whisk in the dry ingredients, just until incorporated. Switch to a spatula and fold in the oil, making sure it’s all incorporated. The batter will be shiny. In a separate bowl, toss the blueberries with about one teaspoon flour (this will help prevent them from sinking while the cake bakes.) Gently fold the blueberries into the batter.
  5. Pour the batter into the prepared loaf pan and smooth the top. Bake the cake for 50 to 55 minutes, or until the top is golden and the sides just start to pull away from the sides of the pan. A toothpick inserted into the center should come out clean.
  6. Let the cake cool in the pan for 30 minutes. Meanwhile, warm 2 tablespoons lemon juice and two teaspoons honey just long enough for you to whisk the honey into the juice. You can do this in your smallest saucepan over medium-low heat or in brief bursts in the microwave. Once the honey is mixed in, taste it—it should be pleasantly tart. If it’s too sour, mix in more honey. Using a pastry brush, brush the lemon-honey glaze on top of the warm cake. Repeat until you have no more liquid left.
  7. Run a knife between the cake and the sides of the pan to loosen. Unmold the cake by placing a large plate or cutting board upside down over the loaf pan and carefully turning it over. Turn the cake back onto a flat surface to cool completely. Then slice and serve!

Bringing it:

This is the PERFECT offering to bring anywhere anytime. It’s portable, sturdy and easy to eat at any venue. Bring it on!

Pilgrim Pie: When cranberries get nutty

Here’s an idea. Since this Thanksgiving is going to be necessarily smaller, probably weird and definitely unique, maybe we take a different approach. Maybe we bag the turkey and the hassle of all those sides, cut to the chase and make it all about pie.

I know…ain’t gonna happen. Once everybody gets themselves swabbed for COVID before showing up, they’re going to deserve a proper feast for the effort.

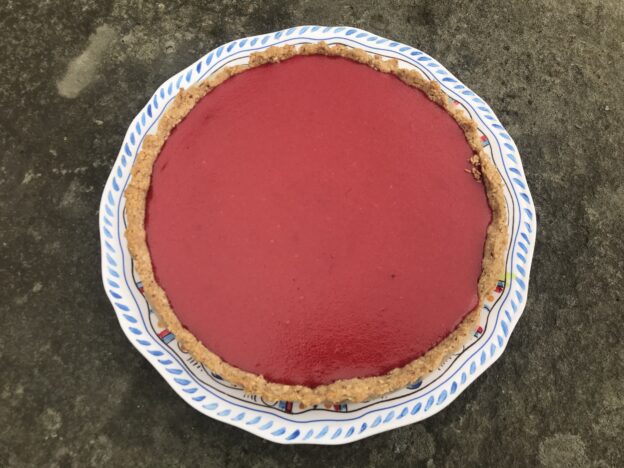
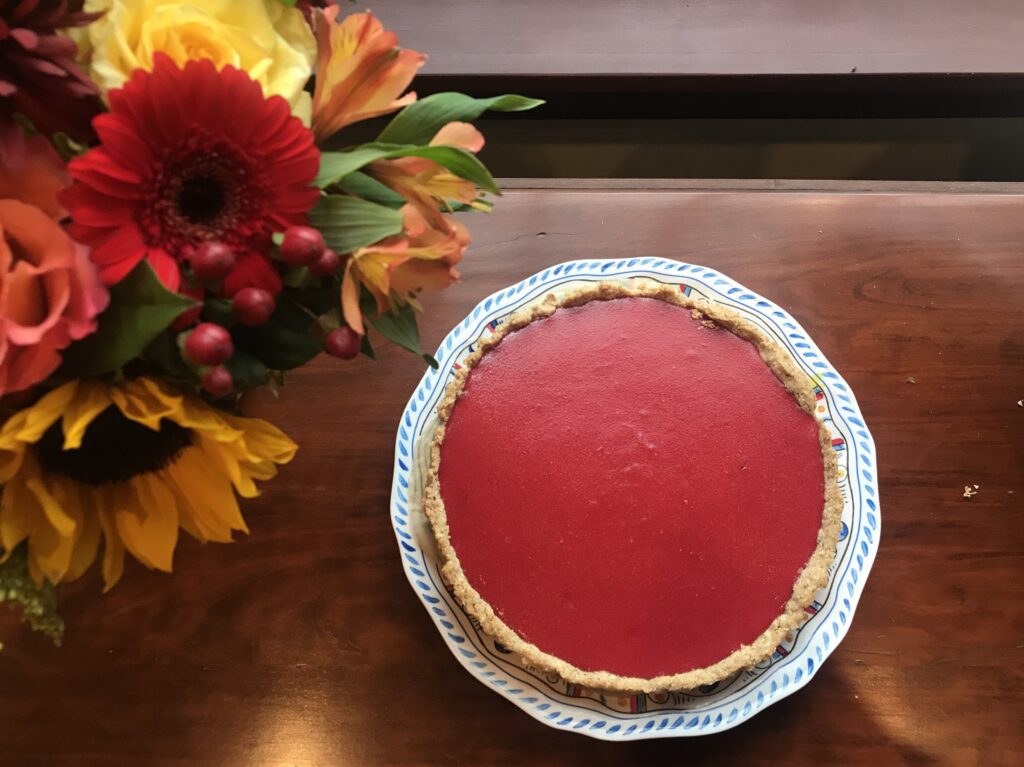
But for some of us, it’s still all about pie. For a new take on it this year, I highly suggest Pilgrim Pie, AKA the cranberry curd tart that has been all over the Internet. It’s kind of like a lemon meringue pie but with cranberries and without the meringue. With the toasted nut crust it definitely becomes it’s own thing.

This version is a hybrid of the one that appeared recently in the New York Times and the one in the Hannaford flyer. It is the best of both recipes. As a bonus, I sifted through the hundreds of comments on the NY Times one (you’re welcome, and…damn those readers have a lot to say!) and assimilated the complaints and suggestions into hacks and options. Because it took me three pies to get a decent photo, I got a lot of practice with all my tweaks.

Bottom line: Make this pie! I know you need pumpkin and apple and pecan and maybe mincemeat for that one person who insists it is edible.  I feel your pain. But I urge you to dig deep. It’s Thanksgiving and we’re all hanging on by a thread. One thing you CAN handle is another pie.

Some notes: The nut crust is what really does it for me. I have tried it as written, with hazelnuts, and also with almonds and a mix of almonds and walnuts. Love the nut you’re with. For a healthier version the pecan coconut crust from knockout vegan pumpkin pie would also be divine, especially if you doubled it and made it super thick like this one.

The filling is strained through a sieve, and you will need a rubber spatula for this. Some rogue commenters didn’t bother straining the filling and said it was just fine that way, so if you’re the rustic type go for it. If you’re going for perfection, do scrape the sides of the pan periodically with that rubber spatula as it cooks, to keep the filling silky smooth .

That’s all. Happy Baking!  

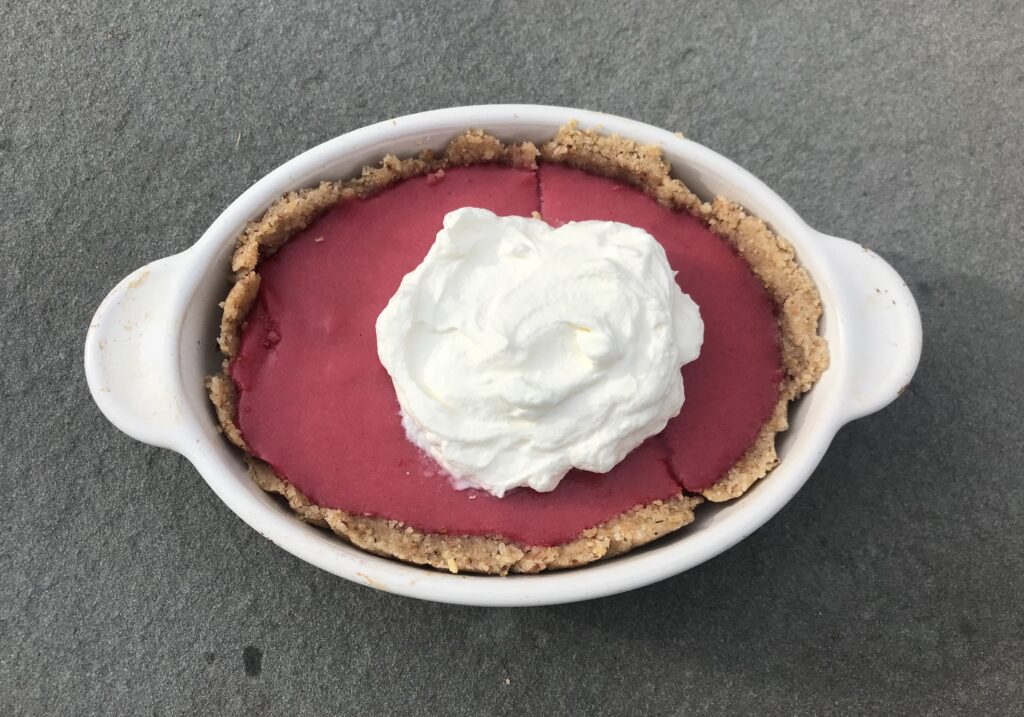
Size matters? Not so much. With pie it’s all good!

Pilgrim Pie

Ingredients

For the nut crust:

  • 1 ¼ cups raw hazelnuts or sliced almonds.
  • 1 cup flour (rice flour to go GF, sprouted wheat flour to be fancy)
  • ¼ teaspoon salt
  • ½ cup sugar
  • 6 tablespoons softened butter

For the cranberry curd:

  • 12 ounces cranberries (~3 cups)
  • 1 cup plus 2 Tbsp sugar
  • ½ cup water
  • 1 tsp lemon zest
  • ¼ cup fresh lemon juice
  • ¼ tsp salt
  • 2 large eggs plus 3 egg yolks
  • 8 Tbsp unsalted butter (1 stick), cut into 8 chunks

Method

  1. Make the crust: Heat oven to 325 degrees. If using hazelnuts, roast them on a baking sheet for 10 to 15 minutes, until skins darken and crack. Put roasted nuts in a clean towel and rub off skins. Discard skins and let nuts cool. For sliced almonds, 10 minutes of toasting ought to do it.
  2. In a food processor, grind nuts. Add the flour and salt and pulse together. Add the cut up butter and pulse until it hangs together when you squeeze a bit of it.
  3. Press dough evenly into the bottom and around sides of a 10-inch tart pan or 9-inch pie dish; Prick bottom with a fork and freeze for 30 minutes (or several days if desired).
  4. Heat oven to 350 degrees. Bake chilled tart shell about 15 minutes until lightly brown. Cool.
  5. While the crust bakes and cools, make the cranberry curd: Put cranberries, sugar, water and lemon zest in a saucepan over medium heat. Simmer until cranberries have popped and softened, about 10 minutes. Puree the cranberries in a food processor until smooth (careful here—they’re hot), wipe out the pan, then strain mixture through a fine-mesh sieve back into the saucepan, pressing on solids with a rubber spatula. Discard solids (or sneak them on toast to bide your time). You can also use an immersion blender to puree the mixture, then strain it into another saucepan.
  6. Combine eggs and egg yolks into a bowl and beat lightly. Slowly whisk 1/3 cup of the warm cranberry liquid into the eggs to temper, then pour eggs into the saucepan and whisk together.
  7. Cook over low heat, stirring constantly and scraping the sides and bottom with a rubber spatula until mixture has thickened and reaches 170 degrees (8-12 minutes if you, like me, can’t find that dang thermometer)
  8. Remove from heat, whisk in butter one chunk at a time until fully incorporated, then whisk in lemon juice.
  9.  If using immediately, let cool to room temperature-ish. If working ahead, cool to room temperature, cover with plastic wrap (press wrap against curd) and refrigerate. (Curd may be cooked up to 1 day ahead.)
  10. Pour cooled cranberry curd into the cooled prebaked tart shell and smooth top with a spatula. Bake at 350 degrees for 10 minutes to set curd. Cool on a rack. Store at room temperature for up to 2 days.
  11. Serve topped with whipped cream.

Variations:

Healthy it up a bit with the pecan coconut crust from this Vegan pumpkin pie.

Sub in orange zest and juice for the lemon zest and juice.

Go nutty and switch out the nuts with whatever turns your crank

That’s about all I’m going to mess with here. It’s darned near perfect.

Salted Caramel “Cholliesauce”


Halloween and Easter are my favorite holidays. The bar is low, family travel is typically not required and the popular traditions surrounding them involve candy. Candy makes people happy. Temporarily at least. So let’s live in the moment and make some creamy caramel sauce to celebrate Halloween and all the apples just begging to be dipped.

This particular golden elixir is a Bring It! all- star. It features only four ingredients, all of which—if not in your kitchen already—can be procured at a mini mart (ok, not the Maldon sea salt, but nobody will arrest you for using kosher salt). It is easy to make, you can memorize the recipe after one go round, it travels in its own storage jar and it will be a welcome contribution or hostess gift for any occasion. Oh, and it is fabuloso! Use it on ice cream and in 2-2/3-3 crepes (coming soon), drizzle it on pretty much anything or use it as a dip for pretzels, apples or just your spoon.

As for the name, it is a merging of our three sons’ names. We knew we wanted something to be called Cholliesauce, and after Sawyer took one taste he decided this was it. Ollie and Chauncey wholeheartedly agreed.


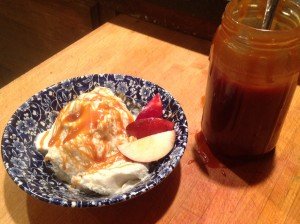
Ice cream: good

Ice cream: good

Ice cream with Cholliesauce: wayyyyyy better!

Ice cream with Cholliesauce: wayyyyyy better!

Ingredients

2 cups granulated sugar
12 Tbsp unsalted butter, at room temperature, cut into pieces
1 cup heavy cream, at room temperature
1 Tbsp fleur de sel or Maldon sea salt flakes

Method

1. First, make sure you have all of the ingredients ready. Once you start the caramel sauce you have to pay close attention so you don’t burn it. To begin, heat the sugar over medium high-heat in the bottom of a heavy 2-3 quart saucepan. When the sugar starts to melt, start whisking the sugar, making sure to reach into the sides of the pan. The sugar will clump up, but keep whisking. It will continue to melt. When the sugar is melted, stop whisking. You can swirl the pan to move the sugar around.

2. Continue cooking the sugar until it reaches a deep amber color. Make sure you watch the pan very closely. This is where it is easy to burn the caramel. If you are using a candy thermometer (I have tried but am better off eyeing it) you want the caramel to reach 350 degrees F.

3. As soon as the sugar reaches the dark amber color, carefully add the butter. Whisk until butter is melted. If the sugar gets stuck to the whisk, you can switch to a wooden spoon.

4. Remove the pan from the heat and slowly pour in the heavy cream. Whisk until cream is incorporated and caramel is smooth. Whisk in the fleur de sel or Maldon sea salt flakes.

5. Let the caramel sauce cool for about 10 minutes in the pan. Pour the caramel into a large jar or smaller jars and cool to room temperature. Put the salted caramel sauce in the refrigerator and store it there for about a month. Yeah, a month. Good luck with that.