Way Bettah Broccoli Salad

Bring It is back! No need to drag you all through a long preamble, but the short story is this: For the first time since New Year’s mama’s got a kitchen again… just in time for eating in place! OK, it’s alllllmost a full kitchen, but it involves running water, a fridge and a dishwasher, so we’re good to go.

I’m going to be serving up recipes with an eye towards feeding all those bonus people —less than 10 but more than two—who may be back in your house. If you don’t have a full house, you may be cooking for someone who doesn’t feel safe getting out to the grocery store or to pick up takeout from the local restaurants. Whatever your jam, chances are it involves more cooking and more time at home.

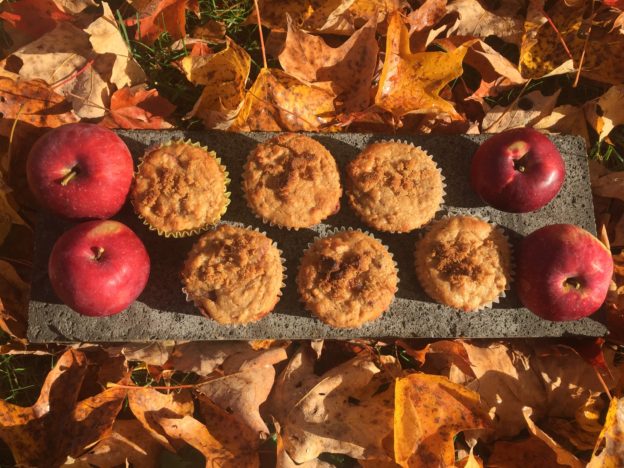
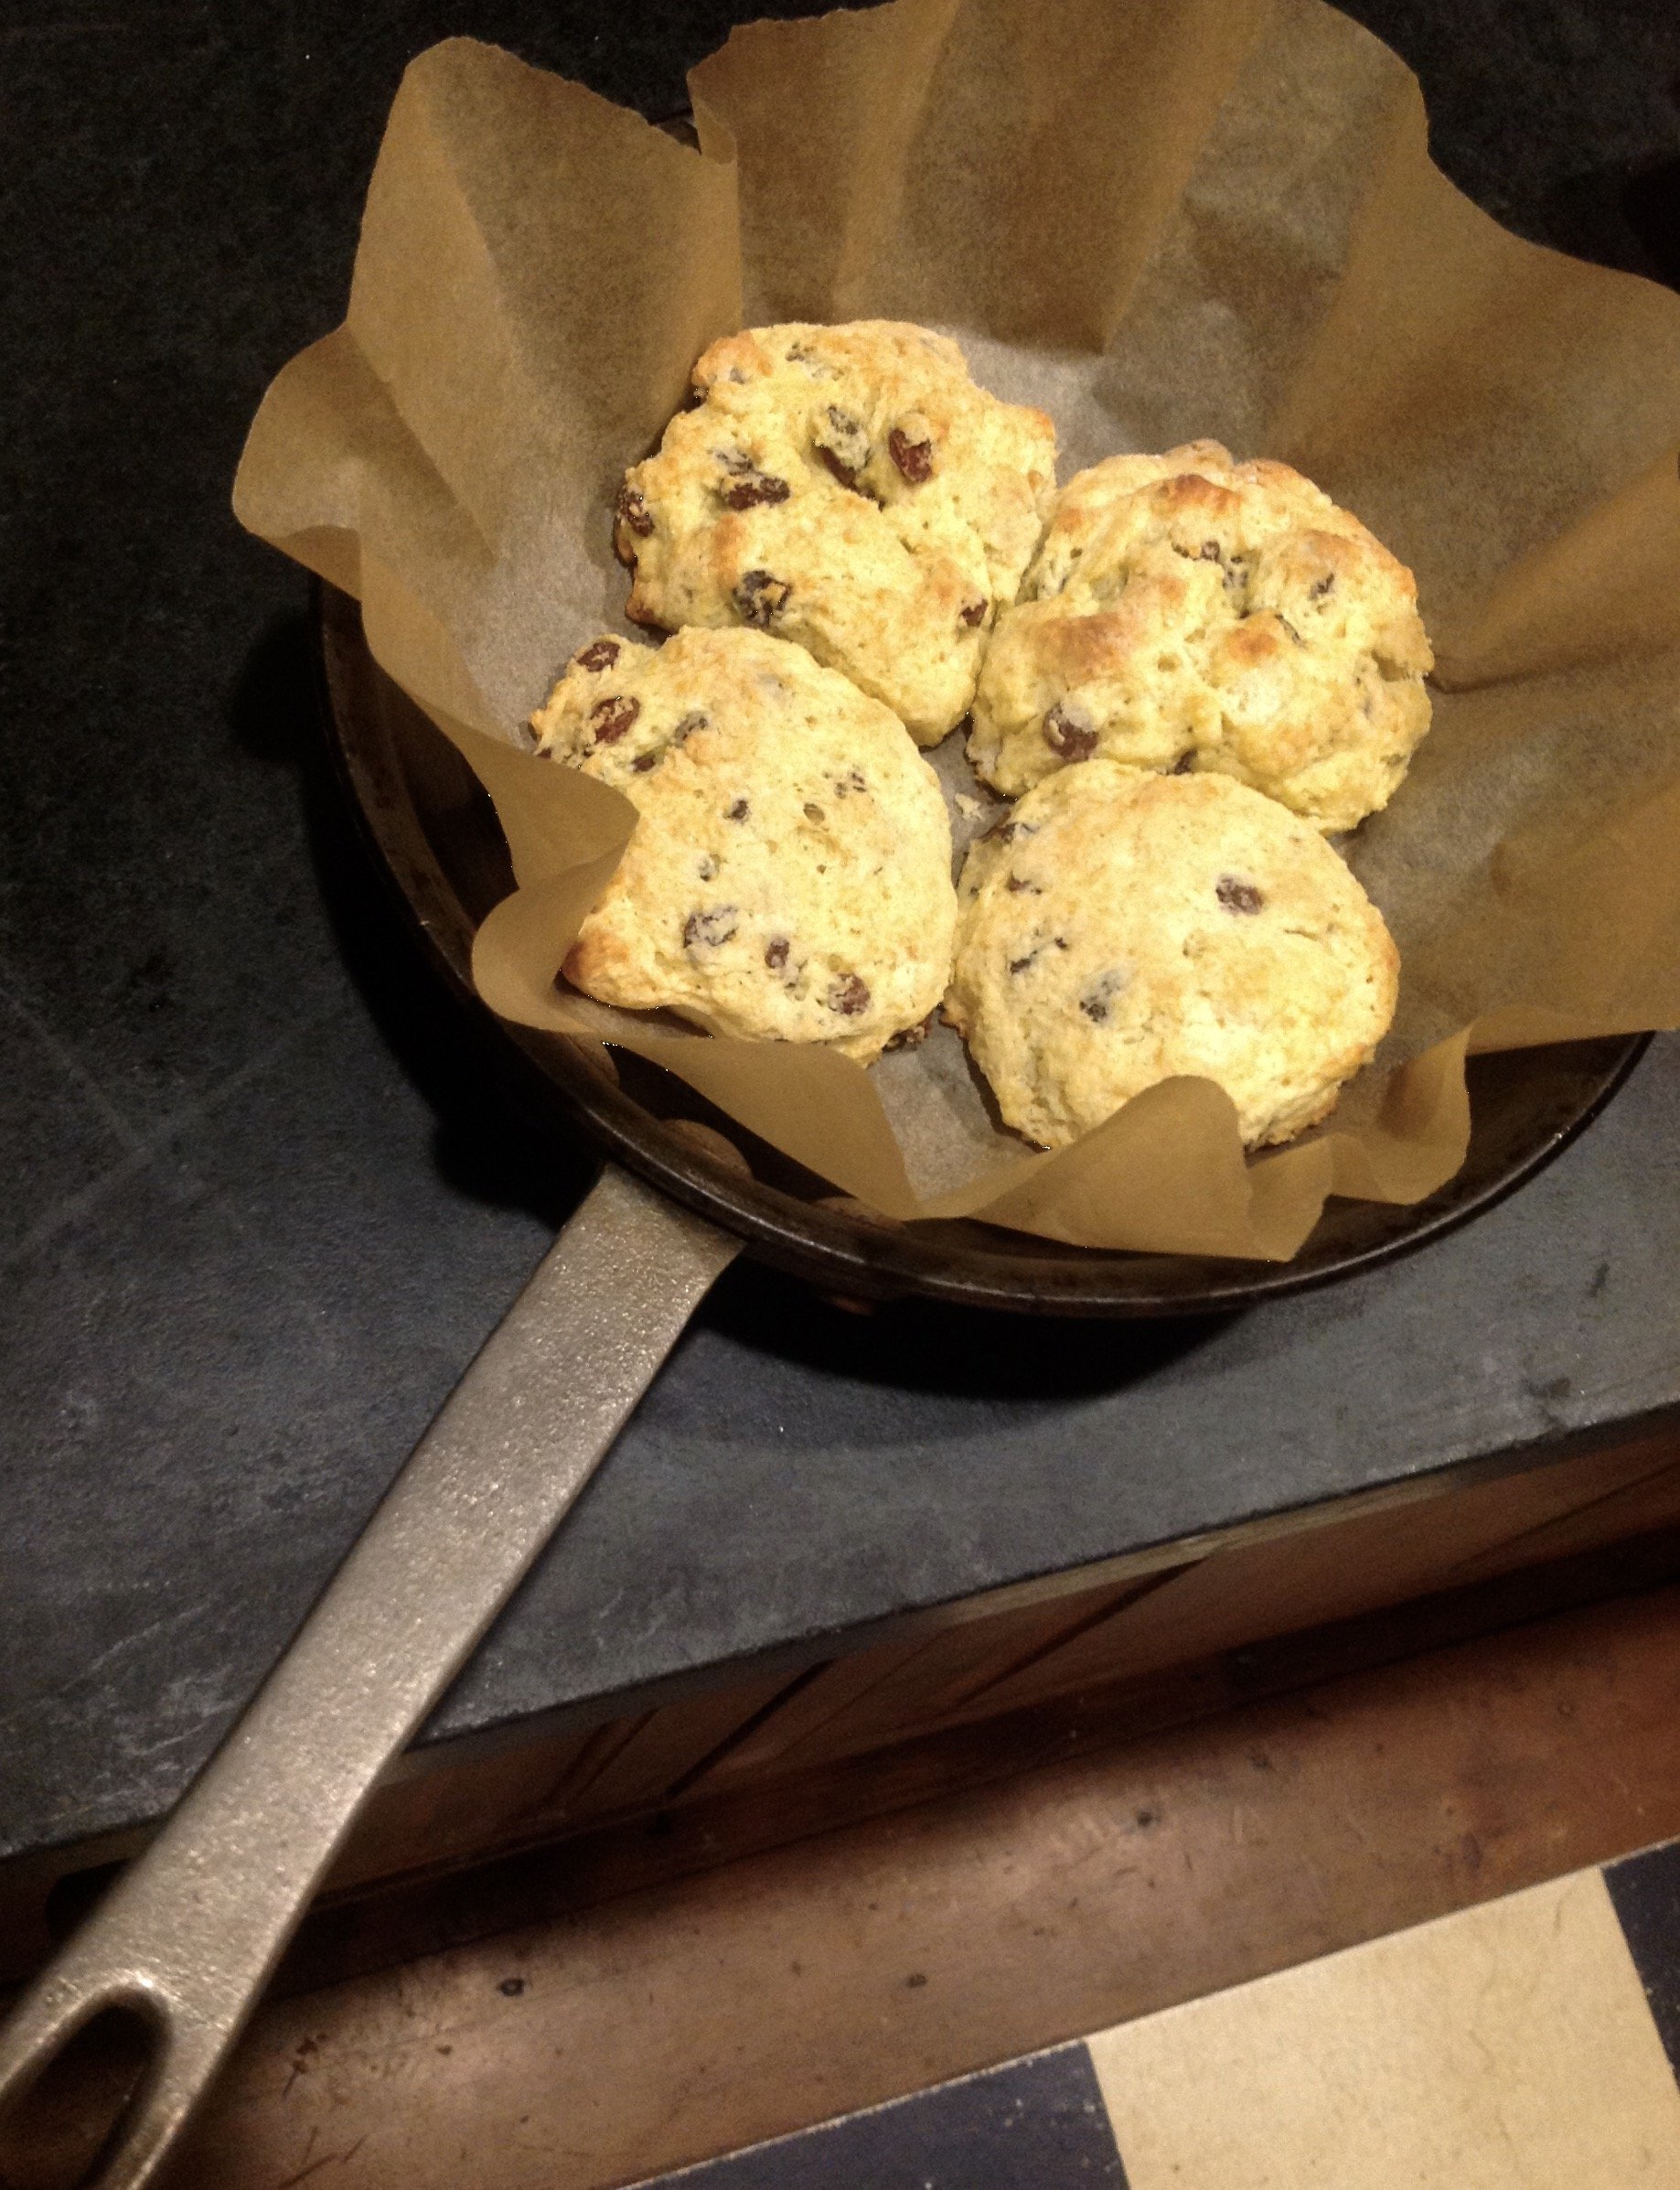
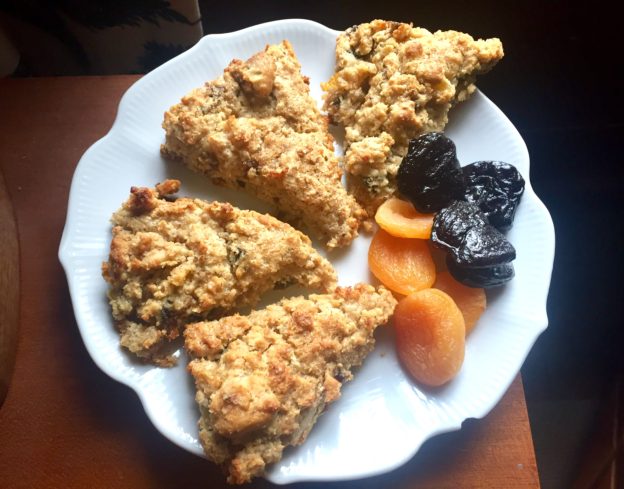
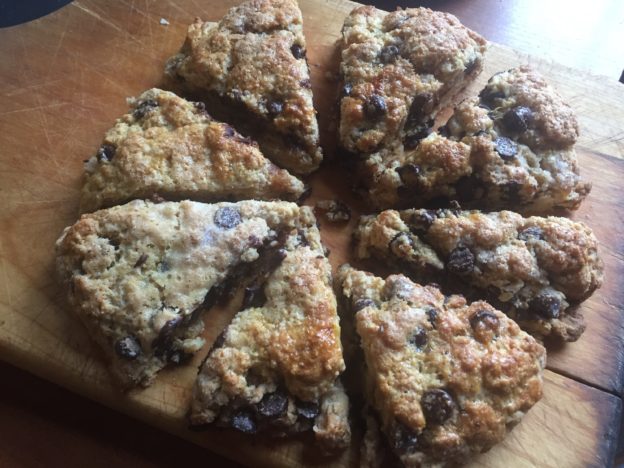
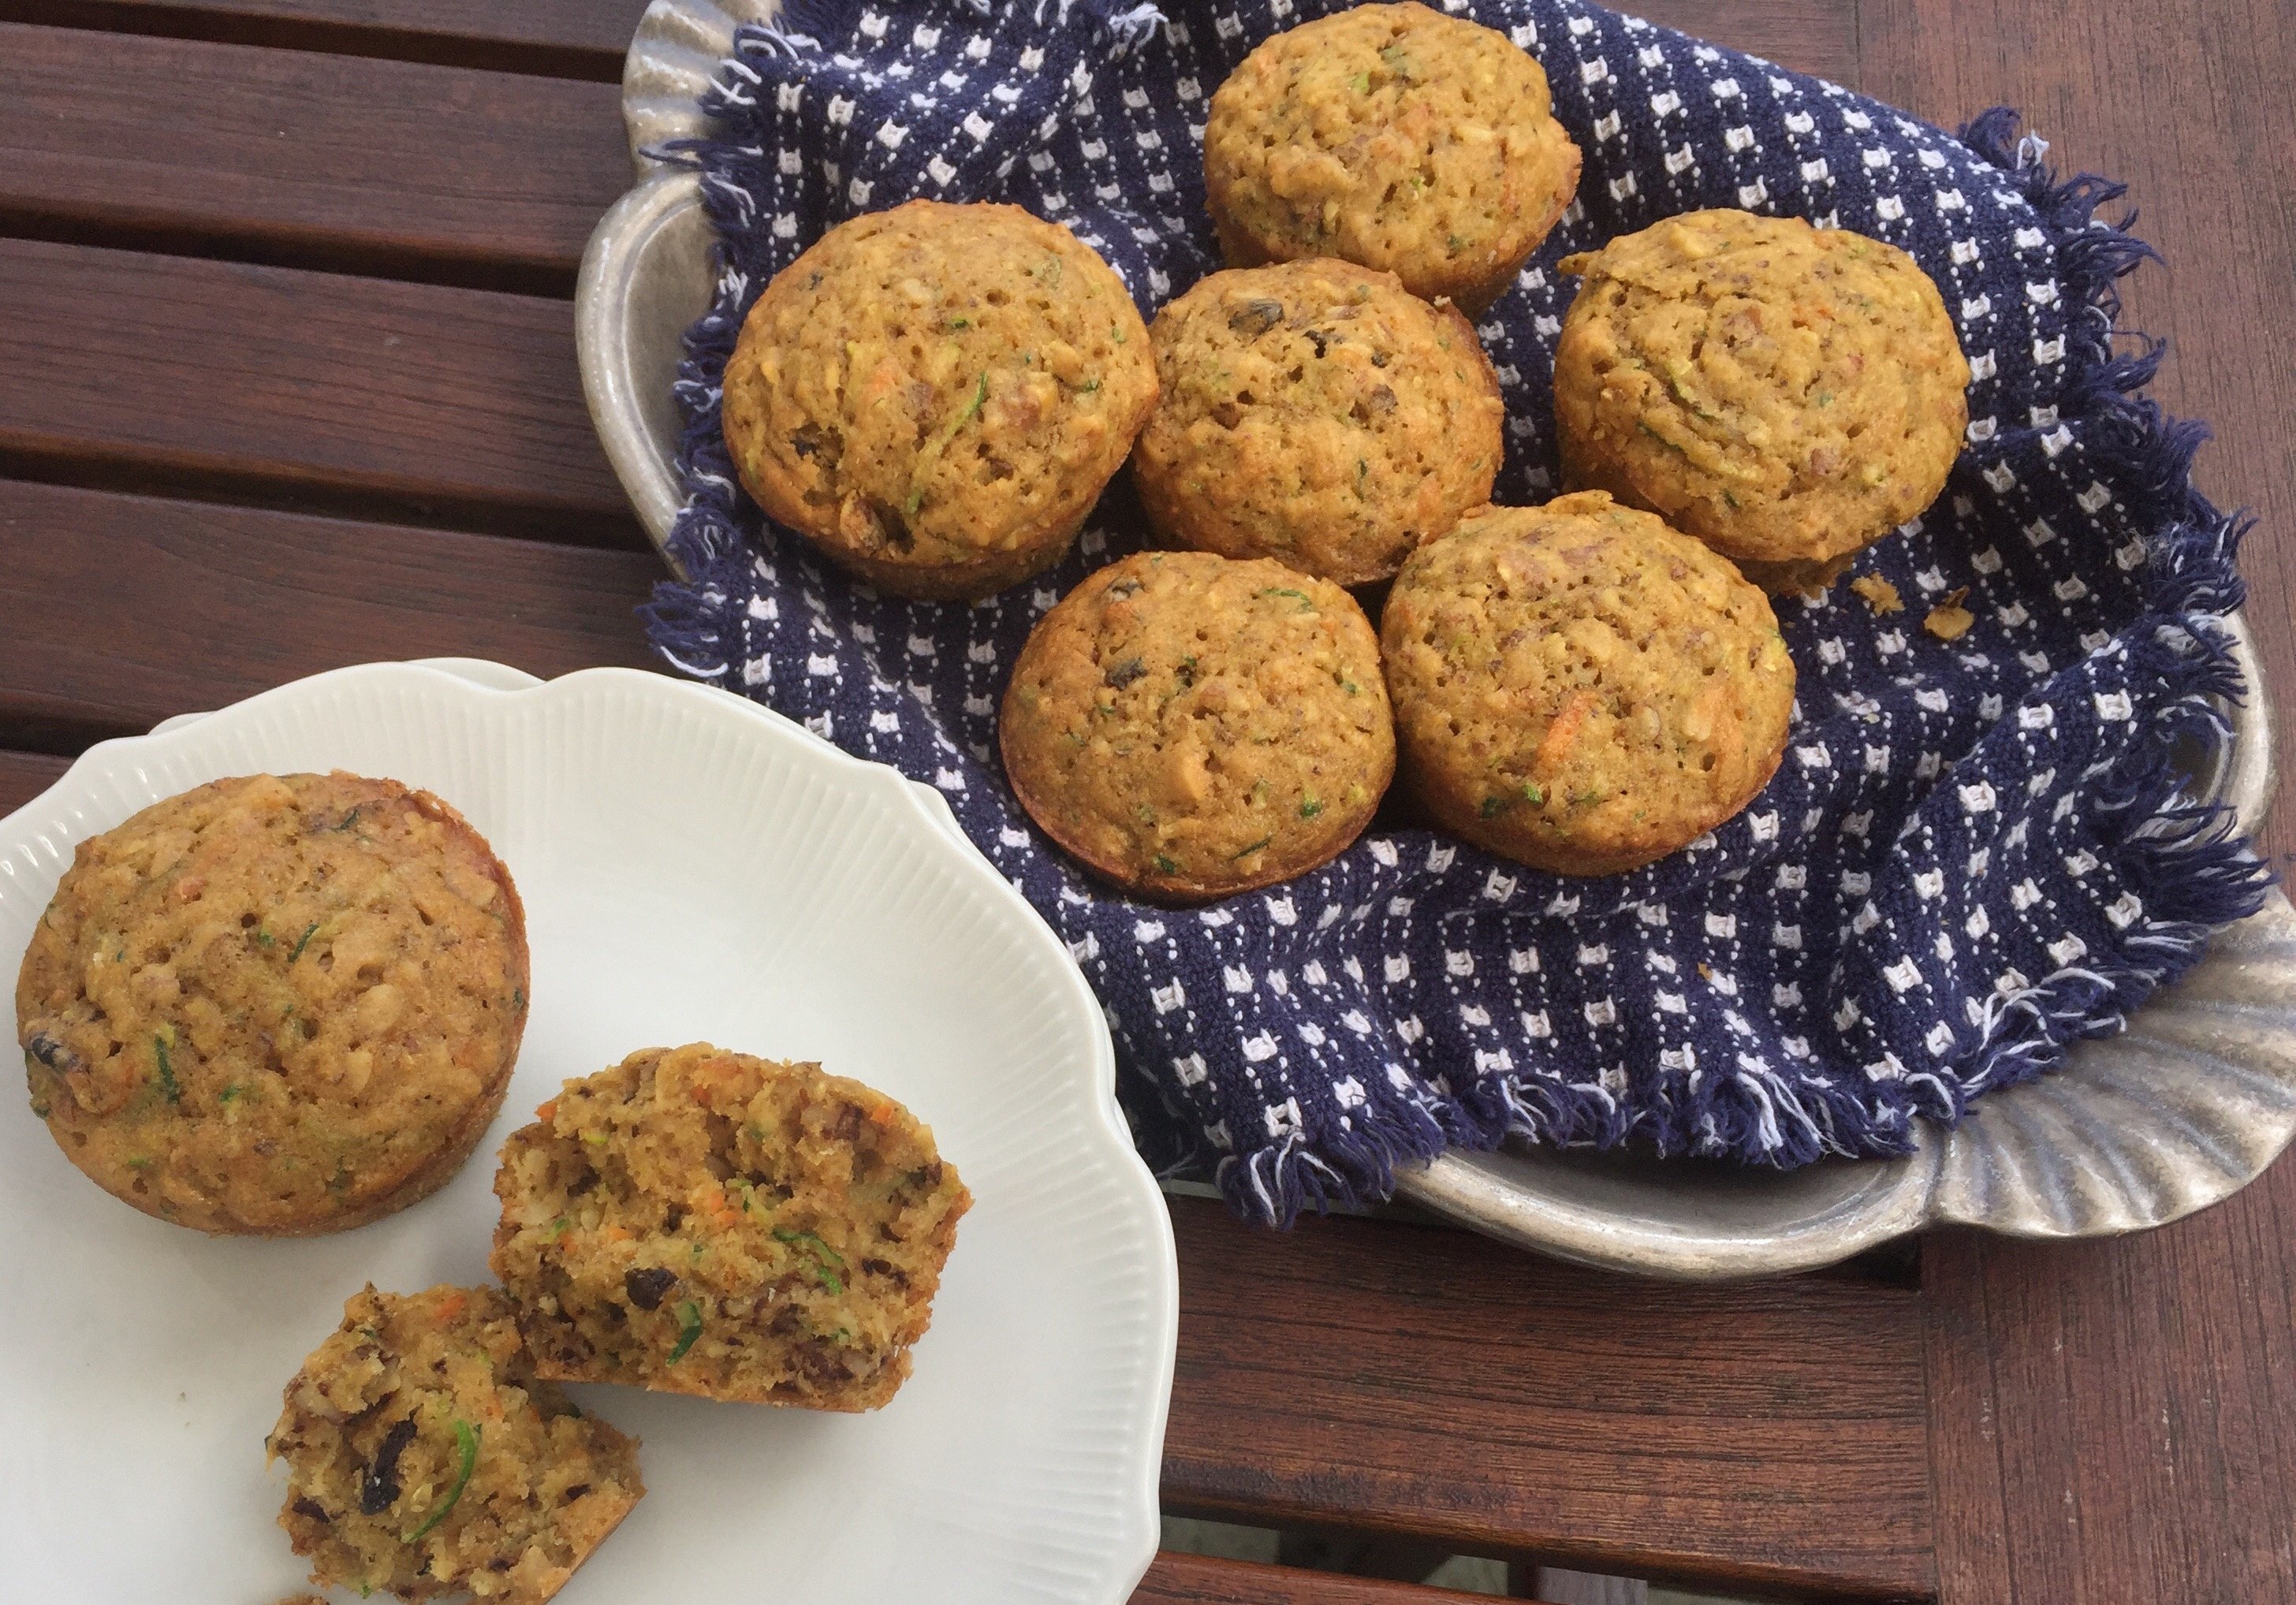
This is a funky time for sure, and because you may not know what’s available in the grocery store even if you can get there, we’re doubling down on our Bring It ingredients credo, which is: “Love the one you’re with.” As in, modify and substitute as needed, with conviction. Also, because you may find your self needing to provide actual breakfast vs leftovers or cereal, I highly suggest revisiting these overnight sensation muffins and popovers. Minimal evening effort + pantry staples = happy morning tribe.

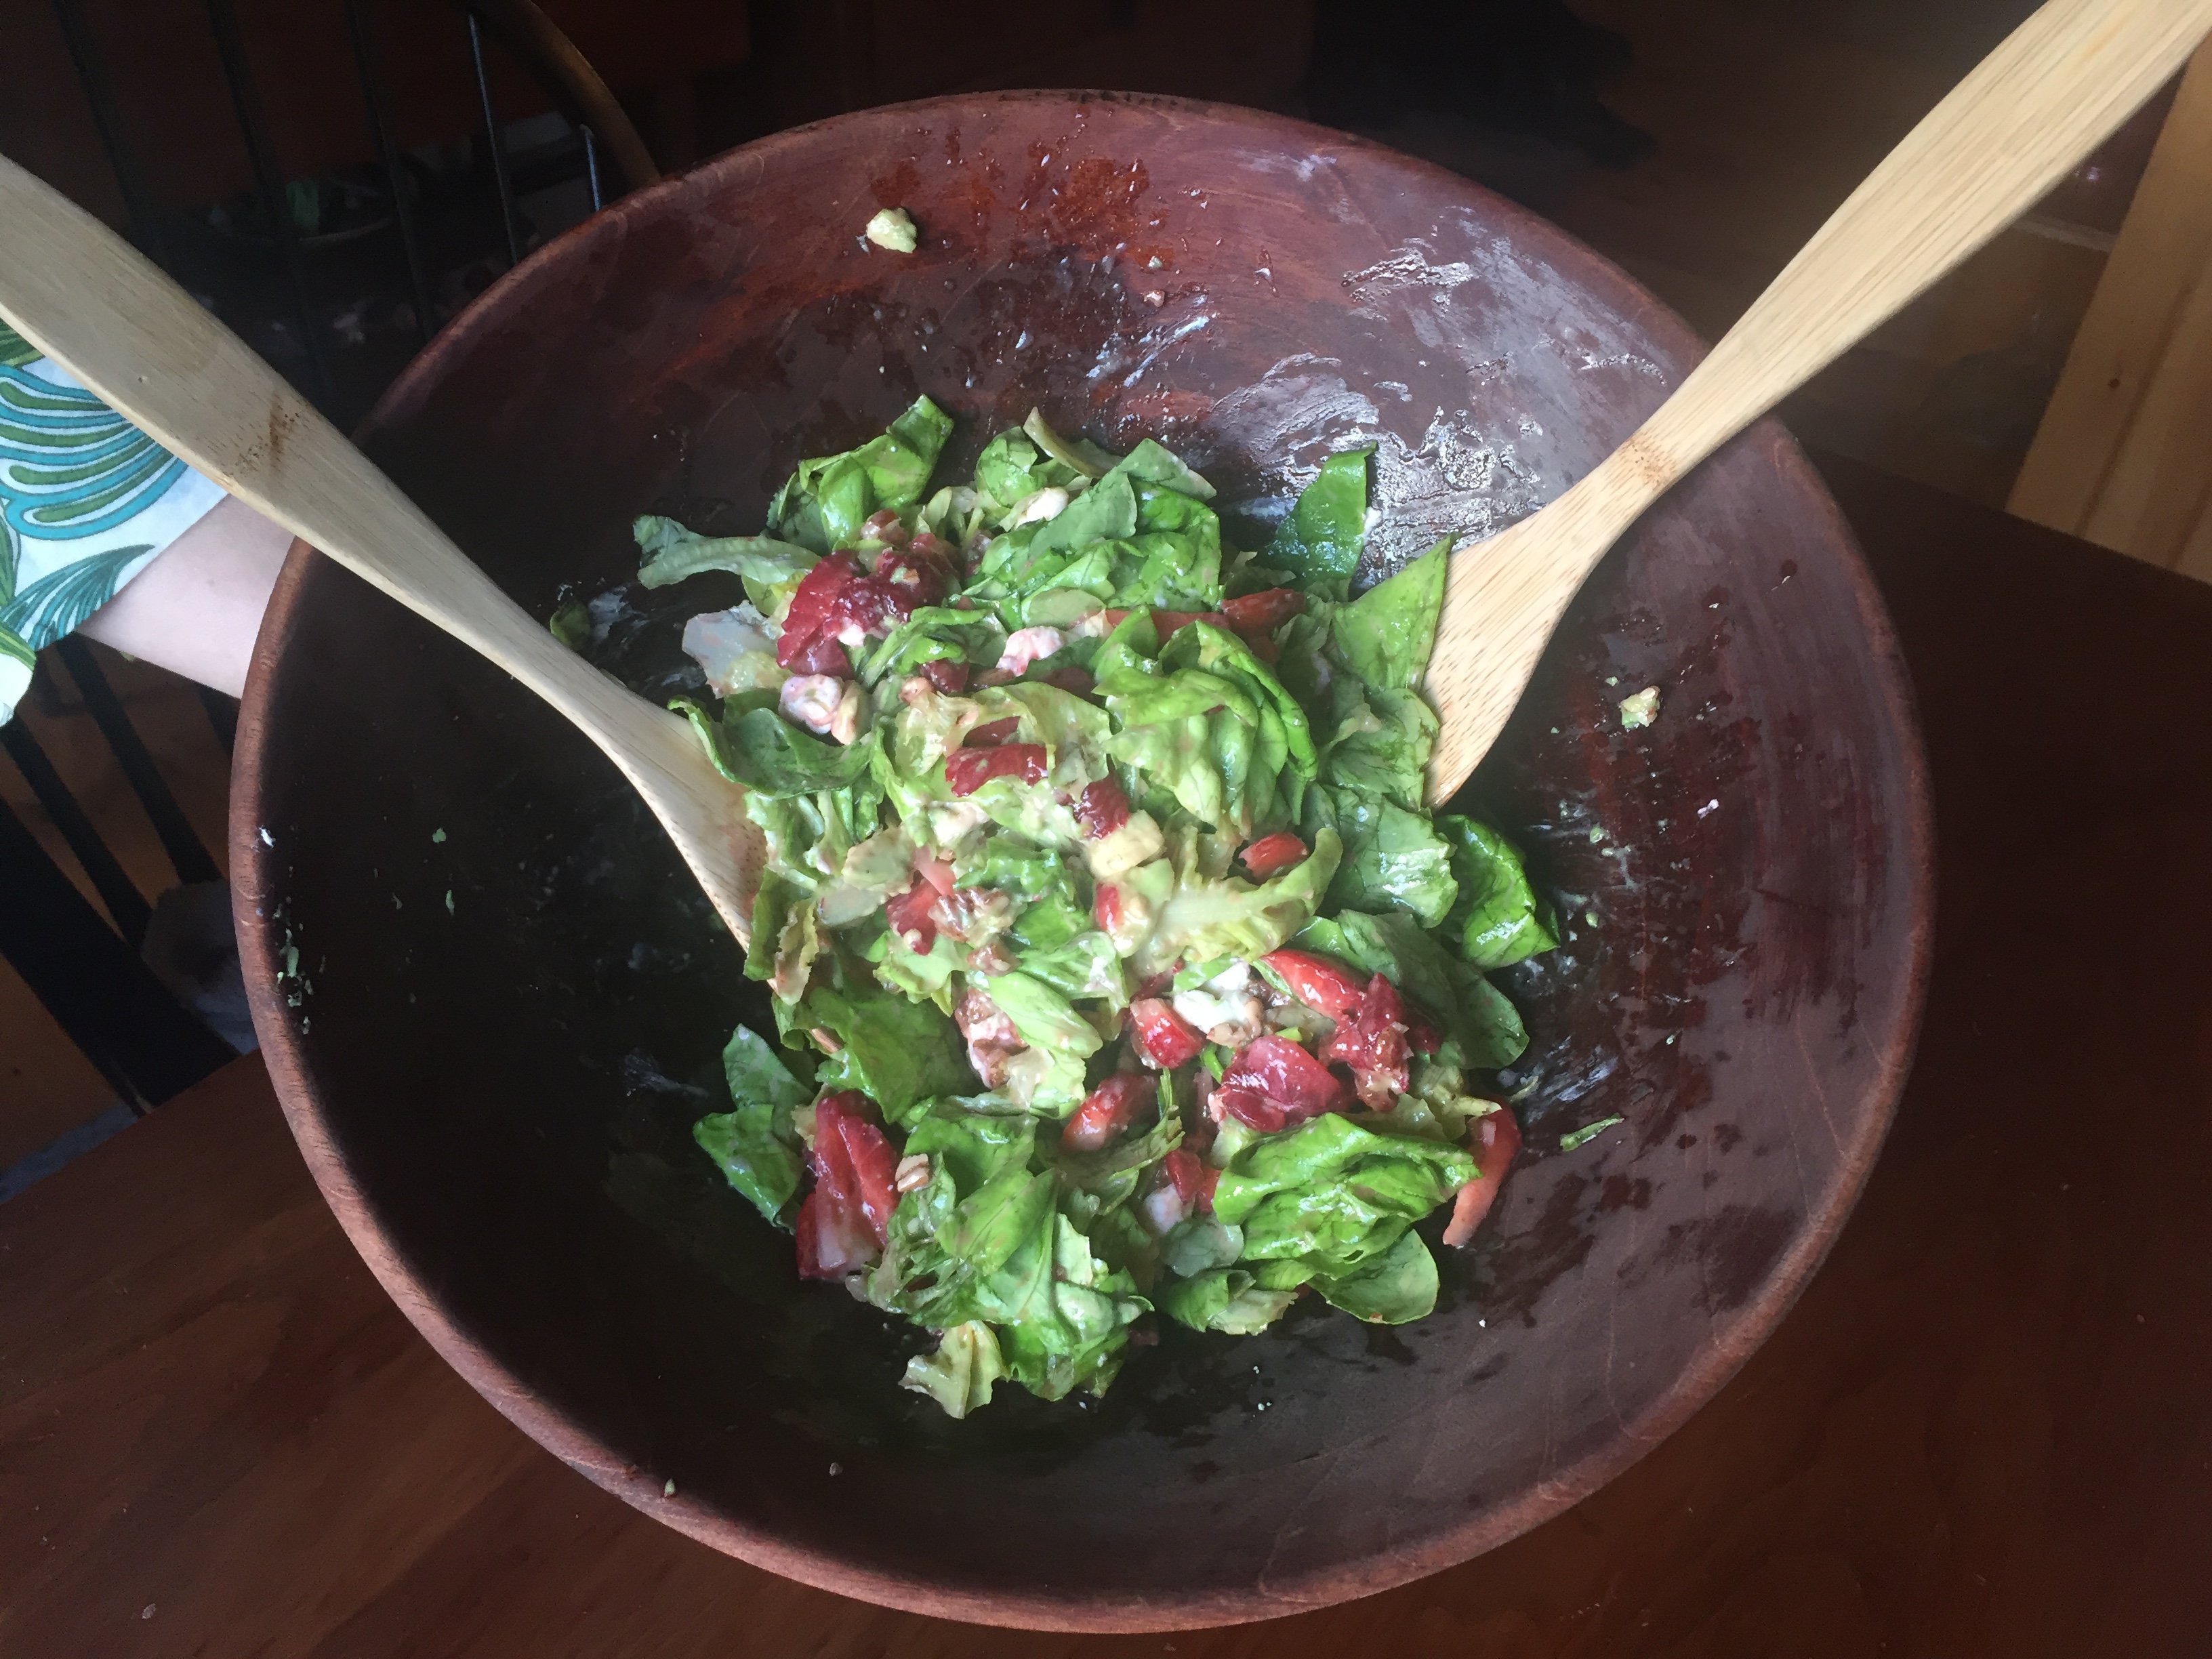
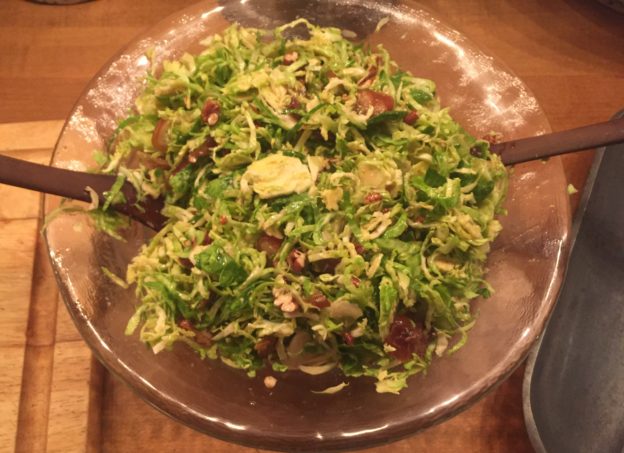
So, on to today’s recipe that I’ve made countless times since discovering it. It came from my quest for a healthier version of that guiltiest of picnic pleasures—the sweet and creamy bacon broccoli salad. This transcends age, gender and most dietary restrictions. It is a hit with pretty much everyone who eats vegetables. As with most salads, it’s all about the dressing, which features tahini and maple syrup. So, it’s not low fat or low sugar, but you can dial the sweetness (and the amount of dressing you use of course) up or down…or live a little and enjoy it as written.

This is how I make it, but feel free to riff on the options. There’s no wrong answer here. You’re eating raw broccoli fergawdsakes, protecting yourself from the inside out. Go you!

I hope you all stay healthy and happy and are eating well in place.

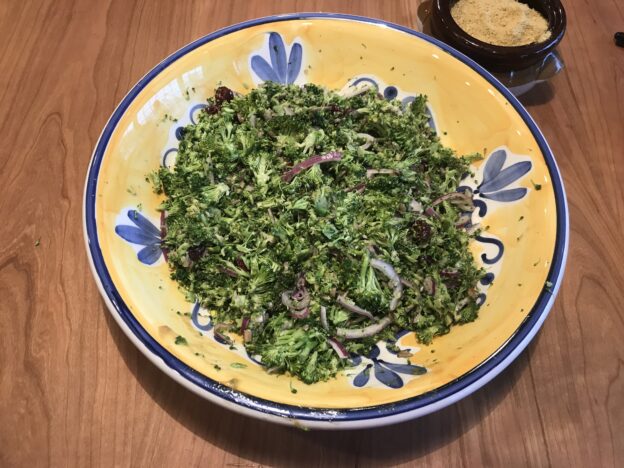
Way Bettah Broccoli Salad with Lemon-Tahini Dressing

Ingredients

For the salad:

  • 2 medium heads (3/4–1 lb) broccoli
  • 1/3 cup sliced almonds (or toasted sunflower seeds)
  • 1/3 cup raisins or dried cranberries
  • 1–2 shallots, thinly-sliced (or red onion in a pinch)
  • 1–2 tsp white sesame seeds (not a dealbreaker. This slacker has never used them)
  • optional: 1/4 cup feta or ricotta salata cheese (same as above)

For the dressing:

  • 3 Tbsp tahini
  • 3–4 Tbsp olive oil
  • 1/2 lemon, juiced
  • 2 Tbsp honey or maple syrup
  • 1 tsp fresh garlic, finely-minced
  • kosher salt and freshly-ground black pepper, to taste

Method

Uh…WASH YOUR HANDS (as if we’d forget, but still)

Make the dressing:

  1. In a small bowl, whisk together the tahini, 3 Tbsp olive oil, lemon juice, and honey until combined. Add up to another tablespoon of oil to thin as desired. Stir in the garlic, and season with salt and pepper to taste. Set aside.
  2. Or, if saving for later, transfer to an air-tight jar. May be made in advance and kept refrigerated for up to two weeks.

Assemble the salad:

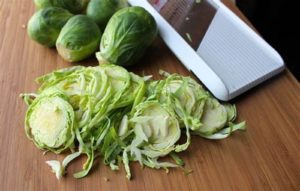
  1. Chop the broccoli into small bite-sized florets. Pro tip: See here how to butcher your broccoli. Basically, hold it by the stem and shave the broccoli tips with a sharp knife, like you’re giving it an all over hair cut. Save the stems for broccoli stem pesto, or soup or whatever moves you.
  2. Toss together the broccoli, shallots, and raisins or cranberries with the dressing. Refrigerate for about an hour. Just before serving, add the almonds, sesame seeds, and feta, if using. Serve chilled.


New Year’s Resolution Vegetables with Pomegranate Cha-Cha

Hey! You there by the last swig of eggnog. This is your year. It’s your year to be the one who brings vegetables to the party with your head held high, and your hand held up for a high five. This recipe is your first mission. 

It comes to us from Here and Now’s resident chef Kathy Gunst.  I first made it for this past Thanksgiving. Since then, it’s made a lot of appearances, thanks in large part to the pomegranate de-seeding savvy that can be yours in one quick video tutorial.

As Kathy notes this is a mix and match dish. There is no magic formula, so clean out the veggie drawer, grab the rogue pomegranate that is still hanging in the fruit bowl looking for a purpose, and prepare to impress. The main things to remember here are:

  • Roast vs steam the vegetables. As in, give them their space, and…
  • Group them by type so you can remove veggies that roast quicker and let the others get their due.

Other than that, this recipe is pretty loose, though I’d say Brussels sprouts, some kind of winter squash and red onion are kind of key. This recipe makes tons of dressing, so go ahead and overdo the vegetables if that’s your thing, or just be psyched to have extra pomegranate vinaigrette in your arsenal.

And as if this healthy, beautiful, tasty dish needed another bonus, the veggies can be roasted earlier in the day and the vinaigrette can be made a day ahead of time. Assemble it all just before serving, hot or at room temperature.

Roasted Vegetables with Pomegranate Cha-Cha

Ingredients

  • 8 new potatoes, scrubbed and left whole (if large, cut in half or into quarters)
  • 1 medium sweet potato, scrubbed, and cut into 1/2-inch thick pieces
  • 1 small Acorn or Carousel winter squash, peeled, cut in half, deribbed, deseeded and cut into 1/2-inch pieces
  • 1/2 to 1 pound Brussels sprouts, ends trimmed and outer leaves removed, left whole
  • 1 large sweet red pepper, cut into 3/4-inch wide strips
  • 1 whole garlic, 1/4-inch sliced off top and left whole
  • 1 medium red onion, peeled and cut in quarters
  • 1 sweet white Vidalia onion, peeled and cut into quarters
  • 1 cup baby turnips, ends trimmed and left whole (if turnips are bigger than a golf ball, cut in half or into quarters)
  • 8 ounces carrots — about 8 small carrots or 3 to 4 larger ones — peeled, trimmed and cut into 1/2-inch long pieces
  • About 1/4 cup olive oil
  • Salt and freshly ground black pepper
  • 1/3 cup balsamic vinegar

The Pomegranate Vinaigrette

  • 1 cup pomegranate seeds and 1/3 cup of pomegranate juice (from 2 fresh pomegranates, or use 1 cups preseeded pomegranate seeds plus 1/3 cup bottled pomegranate juice)
  • Salt and freshly ground black pepper
  • 3/4 cup olive oil
  • 1/3 cup balsamic or white or red wine vinegar

Instructions

  1. Heat the oven to 425 degrees.
  2. Prepare all the vegetables as described above. Place the vegetables a row at a time (keeping all the carrots together, all the onions together in row, etc.) on a large sheet pan or two pans or a shallow roasting pan. You don’t want to use a pan with high sides or it will steam the vegetables rather than let them roast and turn golden brown. Drizzle the olive oil on top and season liberally with salt and pepper. Roast for 20 minutes.
  3. Remove from oven and drizzle vinegar on Brussels sprouts. Flip vegetables over and then return the pan(s) to oven for 20 minutes. Check to see if vegetables are done by piercing with a small sharp knife. Remove any vegetables that are tender and continue cooking the others until softened, about 5 to 10 minutes. The vegetables can be roasted a day ahead of time; cover and refrigerate.
  4. Make the vinaigrette: In a small bowl or Mason jar, mix half the pomegranate seeds and juice (if using), salt, pepper, oil and vinegar. Taste for seasoning. The dressing can be made a day or two ahead of time.
  5. If you made the vegetables a day ahead of time, remove from the refrigerator. After you remove the turkey from the oven, place the vegetables in a 300-degree oven for about 10 minutes or until warmed through.
  6. Arrange the vegetables on a serving platter and drizzle with a few tablespoons of the vinaigrette and the remaining 1/2 cup of pomegranate seeds. Serve remaining vinaigrette on the side.

Holiday Do’s and Dont’s

It’s go time…the last week of shopping and baking and pretending to work before we get completely sucked in to the holiday vortex. In reality, we’re already there, which makes this week of quasi denial even tougher. But you’re here, you’re reading, and you’re definitely thinking of what to make for the neighbors, the party hosts, the UPS guy and your family…in that order.

So, no new recipes this time (because, who really needs another cookie recipe right now?), but I listed a few faves at the end. Others are embedded in these tips and cautions. Good luck my friends, and when you feel like you’re about to snap, just smile and wave.

DO make a whopping batch of Champion Chip Cookies so you’re ready to make someone’s day. DON’T think you’re so smart that you can make them by heart and end up using double the flour.

DO, figure out a few things you enjoy making (crackle, crackers, spiced nuts) and make a whole lot of them. DON’T go long on an untested recipe and end up with a whole lot of mediocre or inedible treats.

DO watch this clinic on deseeding a pomegranate. It will open your world to mass pomegranate consumption. DON’T position your 2 cups of pomegranate arils precariously in the fridge in a poorly sealed container.

Per above, DO keep a lot of seltzer on hand for stains. DO wear the same color you are drinking. DON’T forget the power of aprons.

If you’ve got people with special diets coming, DO make Knock Out Vegan Pumpkin Pie. DON’T go rogue and substitute the pecan coconut crust with a gluten free pretzel crust. Gah!

DO make Guinness Fondue for a cozy evening gathering. Don’t try to pass off this puree of roasted rutabagas and potatoes spiked with nutritional yeast as “fondue”, even in air quotes. That said, DO make up a batch of the above “faux fondue” (air quotes be damned), or of Sugar and Spice Squash Soup, and offer it as a healthy option alongside the real stuff, but DON’T oversell it. Just have it available and you may be surprised how many people appreciate (and dare I say like) it.

Do plan ahead, read through your recipes and check all your ingredients before you dive in. DON’T, realize too late you are missing a key ingredient, or make your treat arsenal when you are hungry. It is astounding how adversely this affects your yield.

DO have a refreshing or comforting drink and get into the spirit by turning on fun music or entertaining podcasts. DON’T Listen to Impeachment hearings. It will not make you jolly.

DO read this cocktail shaking guide, and consider a monster cocktail shaker as a hostess gift. DON’T shake fizzy drinks in a cocktail shaker. Just don’t.

DO divvy it up, vs taking it all on yourself. DON’T be a holiday martyr. Ain’t nobody got time for that!

DO get into the spirit by dressing up in something super fancy or super cheesy. DON’T let your fraternity brother pick your outfit.

The downside of using a personal shopper.

Here are some of my favorite holiday gifting recipes. I promise–they taste best when made with love and a smile.

Healthy and Healthyish

Heart of Darkness Chocolate Cups
Reeses Redemption Cups
Endurance Crackers
Lifechanging crackers
Paleo Crackers
Gingerbread Granola
Seed Bark Granola
NUTS! Like rosemary maple walnuts, honey thyme walnuts, sesame almonds
Triple Crunch Sesame Peanut Snack Bars

Not so healthyish

Crackle
Crackle 2.0
Cheddar Crisps
Champion Chip Cookies
Morning Paper Oatmeal Cookies
Cholliesauce


California Dreamin’ Persimmon and Pomegranate Salad

Sister B served me this salad on my last trip to CA, and I loved everything about it. It’s beautiful, interesting in taste and texture, healthy, and—most of all—it looked totally, easily replicable. We grew up with a persimmon tree in our backyard, but they were the acorn-shaped ones that turn your mouth to cotton when they are even slightly firm, and only become edible when they are the texture of ectoplasm. Suffice to say, I was not a fan.

In the intervening years, “Fuyu” persimmons—smaller, squat looking numbers that are delicious when eaten in their firm state—became readily available.

When my sister dug up this recipe, she did it as if playing a casual game of Google darts because in California (where every ingredient in this salad is something you might encounter underfoot on a sidewalk), needing a recipe for this salad is like needing a recipe for avocado toast. In the Yankee wilds, however, it qualifies as a fancy feast.

I approached this salad in the casual way one approaches non-toxic events, assuming that whatever persimmon I tracked down in NH would be the edible kind. Surely that old variety, if it appeared at all, would be sold with something akin to a skull and crossbones sign.

WRONG! One bite of my first-acquired persimmon brought back so many memories, none of them good. And so I returned to our groovy Coop and found the precious little Fuyus, which should have been sold in a velvet case. While I was paying $8 for my two small persimmons the cashier chuckled, having grown up in N. Carolina’s persimmon belt, where $8 would have gotten me the persimmons and, say, dinner.

Anyway, I got the goods, and armed with the pomegranate liberating technique in Pomegranates Unplugged, I was good to go. You’re basically tossing arugula with a bright, simple dressing, then laying on the goods—thinly sliced persimmons, avocado slices and pomegranate seeds. I hope you can find your Fuyu persimmons and try this yourself. I’ll try my best to get you some more Thanksgiving inspiration before T-Day. In the meantime, enjoy the season!

Callifornia Dreamin’ Persimmon and Pomegranate Salad

From Crumb, a food blog

Feel free to riff on this, with your own favorite dressing, baby spinach and blood oranges or grapefruit if you can’t find persimmons. Love the one you’re with, baby.

Ingredients

Dressing

  • 3 tbsp olive oil
  • 1 tbsp white wine vinegar
  • 1 tbsp white balsamic vinegar
  • 1 tsp Dijon mustard
  • Salt and pepper to taste

Salad

  • 8 cups baby arugula
  • 1 firm-ripe Fuyu persimmon, quartered and thinly sliced
  • 1 large avocado, cut into wedges
  • 1/2 cup fresh pomegranate aril
  • Handful of toasted pistachios or nuts of choice (optional)

Instructions

Prepare the Dressing:

  1. In a small bowl, whisk together olive oil, vinegars and mustard until combined. Season to taste with salt and pepper.

Assemble the Salad:

  1. In a large mixing bowl, toss arugula with dressing until well coated. Distribute between four individual salad bowls, or transfer to a single large salad bowl.
  2. Arrange persimmon and avocado slices on the arugula, then scatter with pomegranate and pistachios (if using). Serve immediately.

Bringing It:

In addition to being healthy, beautiful and delicious, this is very easy to bring to a group feast. Slice up the persimmons, prep your pomegranates and dressing and jar them each up separately. Bring the arugula and the whole avocado and assemble on site. Then take a victory lap in your fancy pants.


Trickless Treats: Quick and Clean Chocolate Mousse

Halloween used to be so easy. You scurried around all night, gorged on candy, felt not a twinge of guilt and moved on. Now, it’s more complicated. Candy is not so dandy the morning after. But still, we all want to walk on the wild side on Halloween. Enter healthy treats, for which we turn to our crafty Vegan friends.

Vegan cuisine is rife with creativity. That said, I have no patience for food creations that are called something they’re not. Cashews with nutritional yeast, while it can be tasty, is not queso.  And as my husband sternly pointed out, chickpeas mashed with tahini is NOT tuna salad (though I do love this one).

Along those lines, when it comes to healthy treats, don’t tell me that date paste rolled in peanuts is just like a Pay Day because it’s not. It’s just not. And tofu blended with chocolate chips taste just like, drumroll please…tofu blended with chocolate chips.

But then sometimes you find legit healthy alternatives for your treat fix. For Exhibit A I call up cocoa nutty balls; And Exhibit B: Heart of Darkness cups made here with pumpkin seed butter (because who doesn’t have some of that laying around) which gets extra Halloween points for ghoulish green insides.

This chocolate mousse/pudding is another win. It was borne of too many ripe avocados, an upcoming trip and that Yankee streak that hates to waste even one bit of a perfectly good fresh produce.

The sheer ease and speed of making it (hello food processor) would be enough to make this a win, but it’s also delish and not one bit bad for you. After all, healthy fats are a thing and maple syrup, in responsible amounts, is like mainlining nature.

If you do want to witness dates and peanuts trying their hardest to be a PayDay, check this out from Minimalist Baker:  

Go ahead—have a treat, or two, and feel damn good about it. Happy Halloween!

Quick and Clean Chocolate Mousse

Total Time: 5 minutes (you’ve got that don’t you?)

Makes 4 servings

From Chocolate Covered Katie

Ingredients

  • flesh of 2 ripe avocados (240g)
  • 1/4 cup regular cocoa powder
  • 1/4 cup melted chocolate chips
  • 3-4 tbsp milk of choice
  • 1/2 tsp pure vanilla extract
  • 1/8 tsp salt
  • 1/4 cup pure maple syrup

Method

Combine all ingredients in a blender or food processor until completely smooth. Pour in four little bowls or one big one, and refrigerate it if you want it thicken up. Dress up if you must and feel 100 percent totally good about yourself.


Triple Apple Muffins

Welcome to apple season. Yes, we have been here for a while, but last week’s windstorm that brought down all those high, out-of-reach apples has brought urgency to the situation.  That, and the King Arthur Flour Mother Ship has deemed it Apple Week so , let’s join in.

I’m not a huge muffin person. I like muffins enough, but most muffins are a thinly disguised excuse to eat cake in the morning. Nothing against cake, but I don’t need more reasons to eat it for breakfast. These muffins, however, are pretty healthy on the muffin meter. First, they’re packing  apple overload–in grated, chopped, and sauce form. They’re made with whole wheat flour, olive oil for the fat and maple syrup for the sweetener. They’re also easy to make, though they  do require chopping and grating, plus a little more effort if you channel your inner Laura Ingalls and make your own applesauce (I had to do it. See windstorm, above).

This recipe is good to have in your arsenal for apple season, and as advertised, do indeed get better after hanging out for a bit,

Triple Apple Muffins
From Cookie and Kate

From thought to table in half an hour. Maple syrup and a triple dose of apple makes these healthy muffins a bite of New England.

Ingredients

  • 1 ¾ cups white whole wheat flour or regular whole wheat flour
  • 1 ½ teaspoons baking powder
  • 1 teaspoon ground cinnamon
  • ½ teaspoon baking soda
  • ½ teaspoon salt
  • 1 cup grated apple
  • 1 cup apple diced into ¼” cubes
  • ⅓ cup melted coconut oil or extra-virgin olive oil
  • ½ cup maple syrup (or honey*)
  • 2 eggs, preferably at room temperature (or 6 tbsp aquafaba**)
  • ½ cup plain Greek yogurt (or non dairy yogurt of choice**)
  • ½ cup applesauce
  • 1 teaspoon vanilla extract
  • 1 tablespoon turbinado sugar (also called raw sugar), for sprinkling on top

Instructions

  1. Preheat oven to 425 degrees Fahrenheit. Grease or line all 12 cups on your muffin tin with butter or non-stick cooking spray.
  2. In a large mixing bowl, combine the flour, baking powder, cinnamon, baking soda and salt. Blend well with a whisk. Add the grated apple (if it is dripping wet, gently squeeze it over the sink to release some extra moisture) and chopped apple. Stir to combine.
  3. In a medium mixing bowl, combine the oil and maple syrup and beat together with a whisk. Add the eggs and beat well, then add the yogurt, applesauce and vanilla and mix well. (If the coconut oil solidifies in contact with cold ingredients, gently warm the mixture in the microwave in 30 second bursts.)
  4. Pour the wet ingredients into the dry and mix with a big spoon, just until combined (a few lumps are ok). The batter will be thick, but don’t worry! Divide the batter evenly between the 12 muffin cups. Sprinkle the tops of the muffins with turbinado sugar. Bake muffins for 13 to 16 minutes, or until the muffins are golden on top and a toothpick inserted into a muffin comes out clean.
  5. Place the muffin tin on a cooling rack to cool. If you have leftover muffins, store them, covered, at room temperature for up to 2 days, or in the refrigerator for up to 4 days. Freeze leftover muffins for up to 3 months.

Notes

*If you are baking with honey: Honey tends to brown quickly, so to avoid overdone muffins, bake muffins at 325 degrees Fahrenheit until a toothpick inserted in the center comes out clean, about 23 to 25 minutes.

**Veganize these by using flax eggs or aquafaba, and non dairy yogurt


Just Peachy Caprese Salad

I figured it was over…summer, patio nights, ice cream stands—the whole thing. But when I walked in the store earlier this week I saw them—peaches. In fact, we officially have a few more days of summer. So, hold your apples and squash. We’ll get to those soon enough. For now, we have, well, not really recipes, but inspiration for how to fully exploit the last of the summer produce. I’m looking at you, peaches. And corn, you’re next.

Wayyy earlier this summer a very stylish friend introduced me to the most gorgeous take on a caprese salad, substituting ripe peaches, nectarines and plums for tomatoes. Brilliant! It was so good and so perfect (so long ago) I figured I’d missed the peach train. But she was wily that friend, and must have had some inside track on perfect pre season peaches. Flash forward to a few weeks later in California, when another friend brought massive, juicy white peaches to the party. Still later back in the northeast another friend gave me a bag of the most insanely sweet pluots. I vowed, a: to keep these friends close, and b: to buy peaches, plums and related stone fruits like it was my job until they were gone.

If they weren’t ripe I shoved them into a paper bag and waited until they were. If they were ripe they were lucky to get home before getting cut up immediately. I made peach salsa, a simple concoction of peaches and all the usual salsa suspects: jalapeno, lime, red onion, cilantro. That morphed easily into a peach bruschetta by spooning it atop toasts spread with mascarpone cheese. I even made a sugarless, no oil or fat added super virtuous peach tart which was delicious but was also the least photogenic thing on the planet. I urge you to try it, and focus on its inner beauty. Then, there was the brilliant blogger who suggested freezing leftover white wine (what’s that anyway?) and blending it up with fresh peaches for an instant Happy Hour Slurpee.

So there we have it—a few ways to enjoy your peaches and stone fruits, even though they are perfect as is. If you need an actual recipe, here is one from Real Life Delicious (which never disappoints). If you’re good with freelancing it, here is a loose guide for making Peach Caprese Salad. If you are so moved to add a sprinkling of fresh corn, you might start a trend.

Just Peachy Caprese Salad

Ingredients:

  • Greens of choice
  • Ripe peaches, nectarines, plums or pluots in any combo
  • Fresh Burrata or Mozzarella or a bit of both
  • Avocado (optional, but kind of not optional for Vegans)
  • Pesto or torn basil leaves
  • Olive oil
  • Balsamic glaze or good balsamic vinegar (extra credit to mix the vinegar with some maple syrup if you don’t have the glaze)
  • Salt and pepper

Method:

Arrange greens in a layer on a platter.

Top with fruit slices.

Cover with slices or shreds of cheese, and/or slices of avocado.

Drizzle with pesto or scatter basil leaves on top.

Drizzle with just enough olive oil so all your ingredients feel a little love.

Drizzle (because you are so good at it now) with balsamic glaze, balsamic vinegar or balsamic/maple concoction.

Give the whole shebang a shake of salt and pepper.

Bringing it:

This is a total make on site thing. Bust out the fresh produce and get your friends to help, or let them drink their peach slurpees and watch you create the masterpiece. It’s all good.


Chile Crisp, Condiment of the Year

And now, in time for your Labor Day entertaining, I present the third of three condiments, and by far the best. I discovered this recipe way back in early summer, nestled in the margin of “The Simple Issue”  of Bon Appetit. Within a week the page was permanently folded back, stained and a little greasy, and since then my fridge has never NOT had a jar of chile crisp in residence.

The catch on this spicy, sassy, savory creation is that it takes some effort to make. You can cut yourself some slack by buying pre-peeled garlic cloves. Even with those, you’re still going to have to do a lot of thin slicing. Soooo, dig deep! It’s the last weekend of summer, people. Get yourself a sharp knife and a good playlist and get going. There’s still time to make yourself the MVP by bringing this to the party, or spicing up your own patio fare.

But first, a couple of things: I’ve now made this several times , and each time I’ve overdone it on the volume of shallots. Only once did they really crisp up—which was tremendous and worth cranking up the heat a bit and then babysitting the pot until they were evenly brown. That said, it was pretty tremendous all the other times too. Just make sure you brown the shallots and garlic without burning them. I now use a bigger pot than seems necessary, which allows the shallots to really relax in their hot oil bath.

It’s worth going to the original Bon Appetit recipe and reading the comments. I think “off the hook” is the best reader description. We’ve put it on burgers, quesadillas, sandwiches, pizza, baked sweet potatoes and eggs; into salads and on bruschetta and burratta and toast. It’s so going to get stirred into soups this fall. I may draw the line at using it as an ice cream topper, but…no promises.

Finally, there is apparently an excellent version of this at Trader Joe’s called chile onion crunch. Add that to the pain of not having a TJ’s near me. For now, I chop.

PS This one goes out to Sister B, who hates bread and butter pickles and cilantro (see quick, easy, cheap salsa), but hung in there for this. Three’s the charm, baby.

Chile Crisp

Ingredients

  • 4 small shallots, thinly sliced (I end up with 1 1/2 cups or so, which is probably wayyyy too much, but I’m greedy and my shallots are apparently jumbo)
  • 2 heads of garlic (HEADS, not cloves), separated into cloves, sliced. (Google says that’s about 24 cloves)
  • 1½ cups vegetable oil
  • 2 3″ cinnamon sticks
  • 6 star anise pods
  • 1 2″ piece ginger, peeled, very finely chopped
  • ¼ cup crushed red pepper flakes
  • 2 Tbsp. soy sauce
  • 2 tsp. sugar

Method:

  • Bring shallots, garlic, oil, cinnamon, and star anise to a simmer in a medium saucepan over medium heat. Cook, reducing heat as needed to maintain a gentle simmer and swirling pot occasionally, until garlic and shallots are browned and crisp, 20–25 minutes.

    Shallots prepping for the spa

    (Take your time—you want to drive all the moisture out before they brown.)

  • Mix ginger, red pepper, soy sauce, and sugar in a medium bowl. Strain shallot mixture through a fine-mesh sieve set over ginger mixture. Let garlic and shallot cool in sieve (this will allow them to crisp further) before stirring back into chile oil. This is the time to take out the cinnamon and star anise too.
  • Do Ahead: Crisp can be made 1 month ahead. Cover and chill.

Bringing It:

Divide the goods into one big jar or smaller jars that you can fit a spoon into. Put the lids on tight and prepare to make a lot of friends. If you pour off a bunch of the oil you can then use it to make a sassy version of aquafaba mayo.

A shortcut worth every penny

Quick, Easy, Cheap Salsa

I know, it’s summer and we should be all about fresh tomatoes (and corn of course). That said, when it comes to salsa, you can really never have enough. So, when there is a quick, easy and cheap way to make a boatload of salsa yourself, bring on the can opener. (For further proof of canned tomato greatness, see Funitella Bruschetta.)

No need to belabor the intro here. I love a chunky fresh salsa with all kinds or weirdness in it: beans, corn, mango, etc. I also love a straight up tomato salsa with fresh jalapeno, lime and cilantro. This is that salsa, AKA Pioneer Woman’s Restaurant Salsa (she even gives you a video in case pushing buttons is a challenge). It makes a TON, so get a few jars ready, fire up your food processor and be ready for the weekend.

Coming up next: The third of three must-have condiments. Get a playlist and a sharp knife and prepare for some chopping. I promise it’s worth it!

Quick, Easy, Cheap Salsa

Ingredients

Two 10-ounce cans diced tomatoes and green chiles, such as Rotel
One 28-ounce can whole tomatoes with juice 
1/2 cup fresh cilantro leaves (or more to taste)
1/4 cup chopped onion
1 clove garlic, minced
1 whole jalapeno, quartered and sliced thin, with seeds and membrane (2 is perfectly reasonable)
1/4 teaspoon ground cumin
1/4 teaspoon salt
1/4 teaspoon sugar
1/2 whole lime, juiced

Method

This is a very large batch. you’re totally safe with a 12-cup food processor, or you can process the ingredients in batches and then mix everything together in a large mixing bowl.

  • Combine the cilantro, onions, garlic and jalapeno in a blender or food processor and pulse a few times to get them in the same zone size wise, not too pulverized. (If you do this step you can be a little lazier with your chopping). Add the diced tomatoes, whole tomatoes, cumin, salt, sugar and lime juice.
  • Pulse until you get the salsa to the consistency you’d like. I do about 10 to 15 pulses. Test seasonings with a tortilla chip and adjust as needed. 
  • Refrigerate the salsa for at least an hour before serving.

Bringing it:

Divide the batch into as many jars as you like and you are ready to take your show on the road. This is NOT shelf stable, so keep it in the fridge.


Bread and Butter Pickles, the easy way

Got an update for you: It’s blueberry season. So why are you looking at pickles? Let me ‘splain. To be sure, every day that passes without me getting out to the amazingly awesome Super Acres to pick blueberries, reminds me summer is ticking by too fast. But, sadly, that ticking isn’t enough to get me out there…yet. Those of you who are more industrious can get busy with your blueberries by making Blueberry Dutch Bunnyovernight blueberry muffins or blueberry mint lemonade .

For the rest of you, here is a tasty consolation prize. I’m about to hit you with three straight posts on condiments. Sure, summer is all about grilling, and picnics, but both beg for condiments. Great condiments can elevate anything on a bun or a bed of greens. This summer (while not at the blueberry patch), I’ve been making three excellent condiments that now have permanent residence in my fridge.

First off, bread and butter pickles, for a lot of good reasons:

  1. They’re just so darned unsophisticatedly delicious.
  2. They add that little streak of brilliance to egg salad, tuna salad, sandwiches, burgers, the end of your fork, etc.
  3. For guilty pleasures, they are pretty low-consequence. Yes they’ve got sugar, but unless you are drinking the brine it can’t be THAT much, right?
  4. Pickles, even when not made by the super responsible canning process, keep fresh in the fridge for a long while.
  5. And finally, pickles because in fact you CAN have too many cucumbers.

I discovered this after a chance evening encounter with a neighbor who kindly gave me an armful of cukes. I’m always grateful for fresh produce, but cucumbers straight up can be a tough sell in my house. They are not easily disguised, either by grating into a burger or a stir fry, and they don’t freeze well, unless your end game is to weaponize them.

If you end up with a stash of cucumbers, or if you are a pickle lover with no patience for the canning process, these babies are for you. Just a few ingredients and zero talent required. All you need is a little time for them to hang out in the fridge. Basically you can go from evening neighbor garden encounter to proud pickle producer by the time you settle in to Netflix, or bed, or whatever makes you happy.

Just add…anything really. Get your pic-nic on!

Bread and Butter Pickles, the Easy Way

From Brown Eyed Baker

Prep 15 minutes; Cook 5 minutes
Resting 2 hours 40 minutes; Total 3 hours

Makes 4 cups of pickles

Ingredients

  • 5½ cups about 1½ pounds thinly sliced (about ¼-inch) pickling cucumbers
  • 1½ tablespoons kosher salt
  • 1 cup thinly sliced sweet onion
  • 1 cup granulated sugar
  • 1 cup white vinegar
  • ½ cup apple cider vinegar
  • ¼ cup light brown sugar
  • 1½ teaspoons mustard seeds
  • ½ teaspoon celery seeds
  • 1/8 teaspoon ground turmeric

Directions

  1. Combine cucumbers and salt in a large, shallow bowl; cover and chill 1½ hours. Move cucumbers into a colander and rinse thoroughly under cold water. Drain well, and return cucumbers to bowl. Add onion to the bowl and toss with the cucumbers.
  2. Combine the granulated sugar, white vinegar, apple cider vinegar, brown sugar, mustard seeds, celery seeds and ground turmeric in a medium saucepan; bring to a simmer over medium heat, stirring until the sugar dissolves.
  3. Pour the hot vinegar mixture over cucumber mixture; let stand at room temperature 1 hour. Cover and refrigerate 24 hours. Store in an airtight container in refrigerator up to 1 month.

Recipe Notes

As made here these are not shelf stable. Store them in the fridge. If you’re looking for proper canning instruction, get back on your google and good luck—I’ll be cheering you on!


Nina’s Margarita Pie

It’s 5 pm somewhere. Wait a sec…it’s 5 pm here! That means it’s a perfect time to eat your margarita. It is Sunday after all, and time to reel it in from the weekend.

Today is my mother’s birthday, and she would have turned 85. In her honor, I am posting one of the recipes that makes me think of her. Nina was not a cook by any stretch, but she had some go-tos. This was one of them, for some obvious reasons, of equal import. First, it is easy. Second, it involves margaritas. Third, it is delicious.

This is similar to luscious Lemon Beach Pie, a cold, lemony affair with a saltine crust. On a really hot day, however, this is even better because it involves zero cooking. For those of you techies who own a working microwave, you can melt the butter in that and have no relationship whatsoever with the stove.

There are many versions of this, all good I am sure, including some imposters with a hybrid graham cracker/pretzel crust. They are probably delicious as well, but when it comes to Margarita Pie I’m a purist. It has to be all pretzel. The recipe gives you the option to use Cool Whip or whipped cream. No judgment, but know that it will then be sweeter and, well, Cool Whippy. If that’s your thing, enjoy the convenience.

See notes below for bringing it, and don’t be afraid to say you’ll bring dessert to the next weekend away, IF you have enough time at your destination for it to freeze. When you’re enjoying your pie, give a little smile for Nina and it’ll taste even better.

*Special thanks to my fabulous niece Maddie for these pics of actually beautiful pies. That is something I have yet to master (see below, but points for creative styling).

Quite possibly the perfect Sunday supper?

Nina’s Margarita Pie

READY IN: 15mins, plus freezing time.

SERVES: 8

INGREDIENTS

  • 12 cup margarine or butter
  • 14 cup sugar
  • 2 -3 cups pretzels (to equal about 1 1/4 cups crushed)
  • 1 (14 ounce) can sweetened condensed milk
  • 13 cup lime juice
  • 1 Tablespoon tequila
  • 1 Tablespoon triple sec
  • 4 drops green food coloring, green (optional. I say bag it)
  • 1 cup whipped cream (or more. I say more). Cool Whip is also, well, cool, especially if on-site prep space is a challenge.
  • Topping
  • additional whipped cream

Method

Pie Crust:
Melt margarine or butter and combine with sugar and pretzel pieces. Press into buttered 9 inch pie pan.

Filling: Combine condensed milk, lime juice, alcohol and food coloring, if using.
Fold in whipped cream.
Pour into pie crust and freeze for 4 hours.

Bringing it:

Traveling any distance with this is tough in the heat, but low impact assembly on site is easy as long as you can melt butter, whip cream, and get some freezer space on site. Just prep the pretzels first and put them in a Ziploc bag. Portion out the booze, grab a pie plate and fill a bag with the rest of the ingredients—limes, cream, stick of butter and that can of sweetened condensed milk that has been in your cupboard since the moon landing (don’t tell!). Make the pie right away so it has time to freeze and then get yourself a real margarita to celebrate.

The “I want to go to your parties” shot.

Stupid Easy Strawberry Buttermilk Ice Cream

Ok, so here’s a little summer quiz: What did we learn last week, other than the fact that 3-day work weeks rock? Well, careful readers, we learned that this year’s strawberry season was late to arrive but is awesome. We are, in mid-July, only halfway through the heart of strawberry season, which means we will have zero downtime before it’s blueberry season. And all this is overlapping with the greater “ice cream season” (a subset of maple creemee season, which  some people believe should last all year.)

Let me connect the dots here. It’s time to bust out the ice cream maker in your basement. This recipe came to me via Sister B, who lives amidst California’s produce  bonanza. It is, as promised, ridiculously easy, and kind of healthy, or at least not that unhealthy thanks to the buttermilk. It is for sure best with organic strawberries, buttermilk and cream, but also awesome with items from the standard fare at the air-conditioned Nirvana of your grocery store. No need to pre-make and pre-chill the mix, and, if you are feeling very Laura Ingalls, it can be made without an ice cream maker.

It’s summer—no need to prolong this. There are places to go, things to eat. Have a great weekend!

Stupid Easy Strawberry Buttermilk Ice Cream

This recipe is adapted from How To Eat A Peach, by Diana Henry. Our friends like Diana, in Mother England, know a thing or two about strawberries and cream.

Ingredients

  • 18 oz strawberries
  • 1 cup superfine sugar, divided
  • 1 vanilla pod, split lengthways, or 1/2 tsp vanilla
  • 1 3/4 cups buttermilk
  • ½ cup sour cream
  • 1 pinch sea salt flakes

Method

  1. Hull and slice the strawberries. Put them into a bowl with half the sugar and the seeds from the vanilla pod (scrape out the seeds using the tip of a knife. or…dump in the vanilla.
  2. Leave this to sit for about 30 minutes. The strawberries will become soft and exude some juice.
  3. Transfer the fruit with all the juice and the rest of the sugar to a food processor and whizz (God I love the Brits) to a purée.
  4. Push the purée through a nylon sieve (or whatever you’ve got) to get rid of the seeds. Mix with the buttermilk, sour cream and salt.
  5. Churn in an ice cream machine, or transfer to a shallow container and put in the freezer.
  6. If you’re using the manual method, take the ice cream out and churn it – either using electric beaters or by putting the mixture in a food processor – 3 times during the freezing process. Do this first after about 1 hour, when the mixture is setting round the edges, then at 2-hour intervals. (Extra points for wearing a gingham dress during this escapade). Cover with a lid, or with cling film or greaseproof paper, between each churning, and when you store it. Freeze for around 8 hours or until completely firm.
  7. Take the ice cream out of the freezer about 10 minutes before you want to serve it, to allow it to soften slightly.

Strawberries, blueberries, ice cream. What is wrong with this picture? Nothing!


If you need something else cold, refreshing and summery to bring to the party might I suggest:

watermelon gazpacho

watermelon sangria

Frose or Frosecco

Lemon Beach Pie


Summer Strawberry Chopped Salad

Welcome to the steamy hot heart of summer! I was feeling like a slacker for being a solid month late in posting this strawberry salad. As with all the rhubarb recipes I meant to post, I thought I’d missed my window. BUT it seems fate and Mother Nature have conspired to make the timing downright perfect. Strawberry season is three weeks late here, thanks to all that June rain (that I missed in CA…#notsorry).

This recipe comes from the fabulous Bevin Wallace’s Real Life Delicious blog and is based on a salad at Vail’s Chophouse. If you can get away with a DIY version of anything in Vail you’re usually $100 ahead of a game, even when it comes to salad. Considering the other revelation that this year is serving up a bumper crop of strawberries, I’d highly encourage you to try this salad. The dressing alone is worth having on hand, and the whole shebang is a great addition to any gathering.

The only slightly labor intensive thing here are the candied pecans. You could of course use some fancy packaged pecans, or simply sub toasted pecans but, c’mon, live a little. It’s salad and it’s summer and as the strawberries will tell you, it’s been a gloomy spring. Time to celebrate!

Nothing says summahhhh like fresh strawberries

Summer Strawberry Chopped Salad

Ingredients

  • 1/2 lb. pecan pieces (you won’t need a half pound of pecans for the salad, but nobody every complained about having too many candied pecans on hand)
  • 1/3 cup sugar
  • 1/2 tsp. cinnamon
  • 1/2 tsp. salt
  • 1 egg white
  • 1 head butter lettuce
  • 1 pint strawberries, hulled and cut into bite-sized pieces
  • 1 avocado, cubed
  • 4 oz. crumbled goat cheese

For the dressing

  • 1 garlic clove, finely chopped
  • 2 tbs. dijon Mustard
  • 1/4 cup champagne vinegar
  • 2 tbs. fresh lemon juice (juice of 1/2 lemon)
  • 2 tbs. honey
  • Salt & pepper
  • 1/2 cup extra virgin olive oil

Method:

Make the candied pecans: Preheat oven to 250 degrees. Mix sugar, cinnamon, and salt in a bowl. Whisk egg white and 1 tbs. water together in a separate bowl until frothy. Toss pecans into the egg white mixture. Mix sugar mixture into pecan mixture until pecans are evenly coated. Spread coated pecans onto a baking sheet. Bake, stirring every 5 minutes, until pecans are evenly browned, about 25 mins. Allow to cool. In the meantime…

Make the dressing: Whisk together the garlic, mustard, vinegar, lemon juice, honey, salt & pepper in a bowl. Slowly whisk in the olive oil until the dressing is emulsified.

Make the salad: Tear the lettuce and place in a large (larger than you think you need) bowl. Add the strawberries, avocado, goat cheese, and about 4 oz. of the pecans. Drizzle on the dressing and toss gently.

Want more reason to get fresh berries? Check out these strawberry all stars.


Game of Scones: The Iron Scone

You knew it was coming: the crowning glory of all the build-up, the driving force of this obsession—the Iron Scone. Until last week, I thought this culminating creation might need to be something with dragon fruit. But after Dani Girl’s  Ring of Fire joyride, methinks there will be no dragons or dragon queens ruling the Seven Kingdoms.

I’m betting on tradition and some sense of justice to win out, so I went with a classic currant scone. Currants happen to be an excellent source of iron, and to bring the theme home I made these scones in a cast iron pan. Instead of making familiar wedges, I made these as a more British version of scones, by cutting them in circles and nestling them together in the pan.

To find the perfect starter recipe for this grand finale, I deferred to royalty, and consulted with King Arthur Flour’s legendary baker and blogger PJ Hamel. She pointed me to her go-to basic scone recipe that lives on the KAF website. The recipe itself is excellent, and is essential scone reading. In addition to the many tips at the end of the recipe, PJ added this bit of scone wisdom:

“Don’t overbake. You want them just barely light brown. Otherwise they’ll be dry. And they’re like biscuits: the more you handle the dough, the more you risk making the scones tough. So, once you bring the dough together (after adding the liquid), don’t keep stirring; turn it out of the bowl, shaggy mess that it may be, divide it in half (a scale helps), and gently pat the two pieces into 3/4″ to 1″-thick rounds. And do refrigerate (or place in the freezer) for 30 minutes before baking; this helps their texture.”

So there you have it. The beauty of this scone is that it can be adapted to any flavors and ingredients, to accommodate whomever lands in that throne: White Hot Jon Snow; Sassy Sansa; Bittersweet Tyrion; and even the ghosts of the Loving Lannisters. Indeed, we could have started this whole Game of Scones journey with this master recipe and tweaked it accordingly, but what would be the fun in that?

The Iron Throne, which, quite honestly, does not look very comfy.

The Iron Scone

From King Arthur Flour’s Basic Scone Recipe

I pared down the recipe to the necessities, and included my own adaptation for the cast iron pan version (in bold), but I highly recommend going to the KAF site for their Baker’s tips at the end of the recipe. Another very cool feature of the recipes on the KAF site it being able to toggle between measuring by volume, ounces or grams. I like to weigh my flour and but not necessarily the rest of the ingredients. So, go King Arthur…way to support the new ruler!

Ingredients:

Dough

  • 2 3/4 cups King Arthur Unbleached All-Purpose Flour or Gluten-Free Measure for Measure Flour
  • 1/3 cup sugar
  • 3/4 teaspoon salt
  • 1 tablespoon baking powder
  • 1/2 cup cold butter
  • 1 cup to 2 cups dried currants (or add ins of choice)
  • 2 large eggs
  • 2 teaspoons vanilla extractor the flavoring of your choice
  • 1/2 cup to 2/3 cup half-and-half or milk. (see tips in KAF recipe, but basically you’ll need more liquid in cold dry weather and less in hot humid weather.

Topping

  • 2 teaspoons milk
  • 2 tablespoon sugar, turbinado sugar or cinnamon sugar, optional

Instructions

  1. In a large mixing bowl, whisk together the flour, sugar, salt, and baking powder.
  2. Work in the butter just until the mixture is unevenly crumbly; it’s OK for some larger chunks of butter to remain unincorporated.
  3. Stir in the fruit, nuts and/or other mix-ins if using.
  4. In a separate mixing bowl, whisk together the eggs, vanilla or other flavor, and half and half or milk.
  5. Add the liquid ingredients to the dry ingredients and stir until all is moistened and holds together.
  6. Line a baking sheet with parchment; if you don’t have parchment, just use it without greasing it. Sprinkle a bit of flour atop the parchment or pan. If using a cast iron pan or skillet, line it with parchment paper. Wing it or check out this slick trick.
  7. Scrape the dough onto the floured parchment or pan, and divide it in half. Round each half into a 5″ circle (if you haven’t incorporated any add-ins); or a 6″ circle (if you’ve added fruit, nuts, etc.). The circles should be about 3/4″ thick. (If using a cast iron pan or other skillet, use a biscuit cutter or the top of a can or drinking glass to cut each circle into rounds of whatever size makes you happy. Arrange them in the lined pan so there is about ½” of space in between them. Mush scraps into scone-like shapes. They too will be delicious.

    Unbaked, lightly frozen scone pucks in their iron home

  8. Brush each circle with milk, and sprinkle with coarse white sparkling sugar or cinnamon sugar, if desired.
  9. If making wedge shaped scones: slice each circle into 6 wedges, using a knife or bench knife that you’ve run under cold water. Carefully pull the wedges away from the center to separate them just a bit; there should be about 1/2″ space between them, at their outer edges.
  10. For best texture and highest rise, place the pan of scones (on just the parchment if that is easier to fit) in the freezer for 30 minutes, uncovered. Chilling the scones relaxes the gluten in the flour, which makes the scones more tender and allows them to rise higher. It also chills the fat, which will make the scones a bit flakier. While the scones are chilling, preheat the oven to 425°F.
  11. Bake the scones for 20 to 25 minutes, or until they’re golden brown (mine were smaller, and done in 20). When you pull one away from the others, it should look baked all the way through; the edge shouldn’t look wet or unbaked.
  12. Remove the scones from the oven, and cool briefly on the pan. Serve warm. They’re delicious as is, but add butter and/or jam, if you like.
  13. When the scones are completely cool, wrap them in plastic and store at room temperature for up to several days. To reheat room-temperature scones, place on a baking sheet, tent lightly with foil, and warm in a preheated 350°F oven for about 10 minutes.

Make ahead: This is straight from the KAF Bakers Tips, but I had to include it here too because it was a revelation: “Want to make scones well ahead of time? Simple. After the unbaked scones’ 30 minutes in the freezer (or whenever they’re frozen solid), place them in a zip-top plastic bag. Return to the freezer, and store for up to a month. Bake as directed (without thawing), adding a couple of extra minutes if needed.”

To bake up just a few scones at a time, any size oven-proof skillet will do.

Game of Scones: The Loving Lannisters Gluten Free Apricot Almond Scone

OnSome things just should not go together, like siblings and sex. Similarly, the terms gluten free and scones really do not belong in the same sentence. And yet, just as Jaime and Cersei somehow seem to work as the couple you love to hate, it turns out that gluten free scones are darned tasty.

As we come in to Episode 5, let’s review our cast. We have the White Hot Jalapeno Cheddar Jon Snow (AKA, the true hot king) Scone, the Sassy Sansa Lemon Ginger Scone and the Bittersweet Tyrion Whole Wheat Mini Scone. But now, just in time for Mother’s Day we head south to warmer climes and the Mad Queen, Mother of the Year, evil twin Cersei

For these scones I used Pamela’s gluten free baking mix, as recommended by Santa Cruz Susan. Susan is kind of an angel on earth, which is to say, the opposite of Cersei. Susan apologized that using a mix is sort of cheating, which happens to be appropriate for this particular scone, because nobody cheats more than Cersei, and gets away with it.

The Loving Lannister scone features apricots, prunes and almonds, all members of the prunus family. Not coincidentally, prunus siblings have a bitter cyanide compound in the seed that makes them poisonous (kind of like kisses from Spain). Toxic combos that are related to each other? Could there be a more perfect scone to honor the first family of King’s Landing? And sure, you don’t expect to get black-hearted prunes and golden apricots in one bite, but social norms never stopped a Lannister. And who doesn’t like a little plot twist?

Cooking notes: For this scone, I defied the recipe and tried to make them into the traditional round mound, cut into wedges. It required a lot of back alley repair, which nobody needs to see or repeat. Give yourself a pardon and make them as drop scones, as directed. They are unexpectedly delicious!

Oh beHAVE you two!

Gluten Free Apricot Almond Scones

INGREDIENTS:

  • 2-1/3 cups Pamela’s Baking & Pancake Mix
  • 1/3 cup sugar (preferably coconut or demerera sugar), plus 1 Tbsp for sprinkling
  • 1 tsp baking powder
  • 1/2 cup dried apricots and dried prunes (in any proportion), roughly chopped
  • 1/3 cup almonds, roughly chopped or painfully slivered
  • 4 tbsp butter (as cold as Cersei’s heart, which is to say frozen if possible)
  • 1 egg, beaten (ruthlessly)
  • 2/3 cup milk or cream

DIRECTIONS:

For scone newbies, see Queen Bee’s Kitchen’s short course in sconeology here for some excellent guidance. Feel free to substitute any dried fruit or nuts of choice, even if they are “just friends” and unrelated to each other.

Preheat oven to 375.
Mix the dry ingredients (through almonds) together. Cut in the butter using two knives (or make it easy on yourself and grate it in). Add the milk and beaten egg. Mix together with a fork. Dough will be thick. Drop large, tall dollops of dough (scones will spread when baking) onto lightly greased or parchment-lined baking sheet. Sprinkle lightly with remaining coconut sugar. Bake for 15-17 minutes or until they look dangerously irresistible.


Game of Scones: Bittersweet Tyrion Chocolate Chip Mini Scone


Let’s talk about Tyrion. He’s been on the sidelines so far this season, but I trust his day is coming.  We love that little guy. He’s quite rugged and harbors his share of bitterness (about the whole ‘least favored bastard’ thing among other issues). He’s also soft and quite sweet on the inside. (Dude, we saw you looking at Sansa in the crypt!)

With all that in mind, it’s time for Tyrion — like White Hot Jon Snow and Sassy Sansa to have his very own scone. For Tyrion we have a mini scone made with whole wheat flour for some grit, and studded with bittersweet chocolate chips. The original recipe from Baker By Nature  calls for semi sweet mini chocolate chips, but there is nothing small about the chips Tyrion bears on his shoulders, so I opted for bigger, more bitter chips.    

Just as Tyrion has become my favorite character, this might be my favorite scone so far. Scones can feel like such a commitment, but mini scones feel much more doable. Plus, whole wheat flour gives them a wholesome heft that eases the guilt factor of eating so much butter in each bite.

As emphasized in this scone tutorial, make sure your butter is cold, even frozen if you are going to grate it. Making mini scones is just a matter of dividing the dough and making two mounds instead of one, and then cutting each into eight wedges. I pegged the slacker meter by shaping the scone mounds directly on the baking sheet.  And yes, they turned out just fine. They may not look perfect, but as with Tyrion, the beauty of these scones lies in their imperfections.

He’s little, gritty, and a little bitter, but sweet on the inside.

Bittersweet Tyrion Whole Wheat Chocolate Chip Mini Scones

Prep 10 mins
Cook 20 mins
Total 30 mins
Yield 16 scones

Ingredients

  • 1 cup whole wheat flour (preferably white whole wheat).
  • 1 and 1/2 cups all-purpose flour
  • 1/2 teaspoon salt
  • 1 tablespoon baking powder
  • 1/2 teaspoon baking soda
  • 1/3 cup light brown sugar, packed
  • 1 stick (4 ounces) unsalted butter, VERY cold and cut into tiny pieces, or grated on a box grater
  • 1 large egg, beaten
  • 1 teaspoon vanilla extract
  • 1/2 cup full-fat sour cream
  • 3 tablespoons milk
  • 1 cup bittersweet chocolate chips

For the egg wash:

  • 1 large egg, beaten1 teaspoon milk or water
  • 2 tablespoons turbinado sugar (or regular sugar if that’s all you’ve got), for sprinkling.

Instructions

  1. Preheat oven to 400°(F). Line a large baking sheet with parchment paper; set aside. In a large bowl mix together flour, salt, baking powder, baking soda and sugar.
  2. Cut the butter into small cubes (or, even better, grate it on a box grater) then quickly work it into the mixture (using your fingers, or just two forks if you grated the butter) until it resembles a coarse meal.
  3. In a small bowl, whisk together the egg, vanilla, sour cream, and milk, then add to flour and butter mixture. Use a fork to stir everything together until just moistened.
  4. Add in the chocolate chips and gently fold them into dough with a spatula.
  5. Pour the shaggy dough out onto a clean, floured work surface. Divide it into two equal portions  and shape the dough into a 6ish-inch circle. Cut the dough into 8 wedges and carefully transfer to the prepared sheet. (alternatively, dump the whole shebang directly onto the parchment lined sheet and form into two mounds
  6. Lightly brush each scones with the egg wash, then sprinkle the top of each scone with sugar. This is key. White sugar is ok if it is all you’ve got. Turbinado, demerera or coconut sugar gets you bonus points.
  7. Bake for 16-20 minutes, or until the tops are lightly golden brown.

Game of Scones: Sassy Sansa Lemon Ginger Scone

Hands down, Sansa is our favorite ginger in the Seven Kingdoms. Like the scone that is named for her, Sansa looks soft and sweet but is full of substance and spice. Three kinds of ginger—fresh, powdered and candied—give these scones a sassy edge. Fresh lemon—zest in the mix, and juice in the glaze—serves as a reminder that Sansa’s got some rightful, pure acid in her soul, because life is not all sweetness and light! (But it could be if she and White Hot Jon Snow had their way)

This recipe comes from Flour Bakery in Boston, via Martha Stewart, which is kind of perfect. Sansa has a bit of Martha’s exacting savvy in her, not to mention a ruthless streak (I’m looking at you, Ramsay…woof). Plus, à la Martha, Sansa is tough as nails AND knows how to get things done! While careful historians will note that Thrones era natives likely did not have food processors, Martha’s use of it here is, as she would say, “a good thing.” And let’s be real—if Martha were in the Seven Kingdoms she’d have had her minions figure out how to get anything done to perfection, no matter how much effort it took. In this case, the food processor spares us the toil of minions.

I have put the recipe here as it came from Martha, noting the changes I made, only out of desperation. I was working with the Sunday episode deadline, a near empty fridge and whatever hodgepodge was in the pantry after a long absence.

My scones were Sansational—which is to say, not Martha perfect, but pretty in pictures, interesting, substantial and great tasting, which is all that matters. Well, that and seeing what havoc gets unleashed in Episode 3, the halfway point for the final season. Stay tuned for the next scone or (spoiler alert) mini scone…

Special thanks to:
Alice for the creative spark that led to this and so many Game of Scones contestants.
Patty, Jean and Sister A for the supply of Meyer lemons from Northern and Southern Cal, the remains of which made it safely to NH in my luggage and kept my clothes lemony fresh!

The sassiest ginger in the kingdom

Sassy Sansa Lemon Ginger Scone

From Flour Bakery c/o Martha Stewart

Makes 10

For a full scone Tutorial see this post on the White Hot Jon Snow Scone by Erica Wilson of Queen Bee’s Kitchen

Ingredients

Scones

  • 2 3/4 cups unbleached all-purpose flour, plus more for dusting
  • 1/3 cup granulated sugar
  • 1 1/2 teaspoons baking powder
  • 1/4 teaspoon baking soda
  • 1/4 teaspoon kosher salt
  • 1/2 cup finely chopped crystallized ginger
  • 1/2 teaspoon ground ginger
  • Grated zest of 2 lemons
  • 1 3/4 sticks (14 tablespoons) cold unsalted butter, cut into 8 to 10 pieces
  • 1/2 cup cold buttermilk
  • 1/2 cup cold heavy cream
  • 1 large egg, well chilled
  • 2 tablespoons grated fresh ginger

Lemon Glaze

  • 1 cup confectioners’ sugar
  • 2 to 3 tablespoons fresh lemon juice

Directions

1. Scones: Preheat oven to 350 degrees with rack in center.

2. In a mixer fitted with the paddle attachment, beat together flour, granulated sugar, baking powder, baking soda, salt, crystallized ginger, ground ginger, and lemon zest. Add butter; beat on low speed until butter is somewhat broken down with some visible pieces remaining, about 30 seconds.

3. In a liquid-measuring cup, whisk together buttermilk, cream, egg, and grated ginger. With mixer on low, add buttermilk mixture and beat until dough just comes together, 20 to 30 seconds (there will still be some flour mixture at bottom of bowl).

4. Remove bowl from mixer. Using your hands, gather and lift dough, turning it over in the bowl, until remaining flour mixture has been incorporated into dough. *This so did not unfold this way for me, but see below and carry on.

5. Turn dough out onto a lightly floured surface and gently roll out 1 inch thick. Using a 2 1/2-inch round cutter, cut out 10 rounds, rerolling scraps as necessary. Transfer to a parchment-lined baking sheet, spacing about 2 inches apart. **Big Bring It slacker note here: My dough was too moist (perhaps I forgot a cup of flour??). Rather than cut the scones I dumped the whole shebang on a parchment lined cookie sheet and shaped it into two circles, which I cut into scone wedges, gently separating each a bit so they had their own baking space. We all need our own baking space.

6. Bake until light golden brown, 30 to 35 minutes. Transfer sheet to a wire rack; let cool 10 minutes.

7. Lemon Glaze: In a small bowl, whisk together confectioners’ sugar and enough lemon juice to make a smooth, thick, pourable glaze. Brush glaze over warm scones and serve.

Cook’s Notes

If you’re more Martha than Edie, here are the exact measuring weights. This probably would have saved me some anxiety:

385 grams unbleached all-purpose flour
70 grams granulated sugar
80 grams finely chopped crystallized ginger
200 grams cold unsalted butter, cut into 8 to 10 pieces
120 grams cold buttermilk
120 grams cold heavy cream
140 grams confectioners’ sugar

Unbaked scones can be frozen, tightly wrapped in plastic, up to 1 week. If baking from frozen, add 5 to 10 minutes to the baking time.

Scones are best enjoyed the day they are made, but can be stored in an airtight container at room temperature up to 3 days.

Glaze can be stored in an airtight container at room temperature up to 1 week.

*** More Slacker notes: Out of necessity, I used almond milk and lemon juice instead of buttermilk and cream. As mentioned above, I baked them as one big round, scored into scone wedges. In short, my execution was not excellent, but the scones were fantastic. As Sansa knows, even if you only get the execution right one time, you can be satisfied. 

Game of Scones: White Hot Jon Snow Scone

Game of Scones, Episode 1

To state the obvious, it’s been a long cold winter. We need a little heat. We need a little action. We need a little Game of Thrones…and we’re getting it. To celebrate the final season, which got underway last Sunday, Bring It is premiering its own Game of Scones. For each of these last six episodes Bring It’s bringing you a G.O.T. themed scone. First up, the White Hot Jon Snow scone, because really, we missed you Jon Snow.

To realize this dream, I teamed up with Granite State baker Erica Wilson, of Queen Bee’s Kitchen. Though not a thrones watcher, Erica embraced the spirit of the challenge and honed in on a recipe to honor Jon Snow, the oh-so-hot true king of the Seven Kingdoms. As surely as his butt belongs on the Iron Throne, these scones belong on your Easter table.

Like their namesake, these jalapeño cheddar scones will warm you up on a cold day while bringing in some fresh zing and the promise of brighter days. They feature WHITE cheddar cheese, because that’s the real deal (I’m looking at you, westerners), and diced jalapenos for a fresh, hotness of being that’ll make your heart beat faster

Check out Erica’s post for a more thorough scone tutorial. She talks of cold butter, and good butter, and cutting butter, and all the things that separate sconeology from mere biscuitology. If you’re new to scones you’ll want to check it out.

I highly suggest you bring some White Hot Jon Snow Scones wherever you go this Easter Sunday. Enjoy them while making nice with family and gearing up for the real event of the day—Episode Two. Then hunker in and ponder which character might inspire of our next creation. By the way, Queen Bee’s Kitchen can deliver anywhere in New Hampshire. If you need some hot little hunks of Jon Snow with zero effort contact the queen!

The Jon Snow Scone— white (cheddar) hot, and mighty fine all around

White Hot Jon Snow Scones

From Peter Oleyer at Calexico Carne Asada in Brooklyn, via NYMag and Smitten Kitchen

Ingredients

  • 2 cups all-purpose flour
  • 1 tablespoon baking powder
  • 1 teaspoon salt
  • 8 tablespoons (1 stick or 4 ounces) cold butter, diced
  • 1/2 cup heavy cream
  • 3 eggs divided
  • 1/4 pound sharp WHITE Cheddar cheese diced
  • 2 small jalapeños pepper minced

Method

Preheat oven to 400°F. In a small skillet, melt 1/2 tablespoon of butter and sauté the jalapeños in it until soft, about two minutes. Let them cool, then place them in a small bowl with the cheddar cheese and coat them with one tablespoon of the flour. Combine the remaining flour with the baking powder and salt. Cut in the remaining butter with a pastry blender, fork or two knives, until the butter bits are pea sized.

Lightly whip two of the eggs and cream and add to the flour-butter mixture. Using a wooden spoon, fold mixture until it begins to come together. Add the cheddar-jalapeño mixture to the dough and mix until everything is incorporated.

Turn out the dough onto a well-floured surface and knead gently for less than one minute. Pat dough out to a 3/4- to 1-inch thickness and either cut into 8 triangles or the shape of your choice with a biscuit cutter. Make an egg wash by beating the remaining egg with a teaspoon of water. Brush the scones with egg wash and place on a parchment-lined (or well-oiled) baking sheet. Bake for 25 minutes or until golden brown.

To get some goodness from Queen Bee’s Kitchen email queenbeeskitchennh.com

Shaved Brussels Sprouts Salad

 Well, I blew right by Thanksgiving and then went on tour. Since then, I have not cooked one bit, which, I have to admit, is kind of nice. I wanted to cook, but I’ve been on the road, and as a fairly messy cook it didn’t seem right to invade my hosts’ kitchens and disrupt their standards of neatness and order. If only there was some book like, “The Freeloaders Guide to Low-Impact Cooking.” Anyone want to get on that? Anyone?

Let’s loop back to Thanksgiving for a moment, and specifically to veggie sides, because ‘tis the season that we all need some healthy greens to balance the rest of what’s coming in. This salad is simple but tasty, easy to prep ahead and holds up (and even improves) over time.

I found it in desperation when I got a last-minute Brussels sprouts request. My go–to roasted Brussels sprouts require a hot oven and last minute prep, which was a deal breaker. Also, to keep the Thanksgiving peace, I wanted something less aggressive than the kale Brussels sprouts salad that was my previous go-to. This seemed like the perfect balance of healthy and mainstream, with a touch of sweetness and crunch to make it holiday material.

Shaved sprouts, mandoline style.

The only labor is shaving the Brussels sprouts, but you shoppers know there are ways to buy yourself out of that (I do like the thin slices you get from using a mandoline, but let’s not get picky over the holidays—bagged shortcuts are fine!) The recipe calls for dates, and I suggest the firmer (and cheaper, and easier to find) deglet vs medjool. You could also use dried cranberries or cherries if you prefer, for a more festive look, but the dates are darned good and less bossy in flavor.

OK that’s it! I hope you like this salad and it makes you feel better about eating cookies and chocolate for breakfast.

Shaved Brussels Sprouts Salad

From Foodiegoeshealthy

Ingredients:

 For the salad

  • 10 ounces of shaved Brussels sprouts (about 4 cups shaved)
  • ½ cup sliced, pitted dates
  • ½ cup chopped, toasted pecans (or sliced almonds)
  • ⅓ cup thickly grated Parmesan cheese (or other hard cheese like Pecorino Romano or Manchego. Can omit for a vegan dish.) Edie note here: I have never tried it with cheese, but I am sure that puts it over the top.

 For the dressing

  • 4 tablespoons extra virgin olive oil
  • 1-1/2 tablespoon fresh lemon juice
  • 1-1/2 tablespoon rice wine vinegar
  • 1 tablespoon Dijon mustard
  • 1 tablespoon honey
  • ½ teaspoon kosher or sea salt
  • Several grinds of freshly cracked black pepper

Method:

  1. To shave the Brussels sprouts: Remove any outer leaves that are coarse or damaged. Cut out the stem and core. Slice the sprouts in the food processor with the slicing blade. Pull the shreds apart into ribbons. Alternatively, slice the Brussels sprouts with a mandoline, or buy pre-sliced.
  2. To make the dressing: The honey needs to be thin and runny, so briefly microwave if necessary. Put all dressing ingredients in a glass jar with a tight-fitting lid. Shake well to combine. Set aside.
  3. Prep the other ingredients: slice dates; chop & toast pecans; grate cheese using large holes on a box grater.
  4. Store all components in the refrigerator for up to 3 days. When ready to serve, shake the dressing in a jar until well-combined. Then toss all the salad components together with the dressing and serve.


Roasted Squash, Kale and Cranberry Salad

To borrow a sentiment from Teen Angst, “what the world needs now is another kale salad like I need a hole in my head” And yet, here you have it. This came out of the Cooking Light archives—an actual print version that was hanging around my cluttered pantry of angst. It was the answer to my prayers when my garden of tomatoes died back enough to reveal a whole lot of kabocha (buttercup) and delicata squash. I’ve made this with both types of squash and it was fantastic. I suspect it’d be grand with butternut as well.

To make this meal-worthy salad you’re basically massaging up a bed of kale with a touch of olive oil. Now don’t be coy—we’re no strangers to massaging kale. Roasted squash goes on top of that, followed by thinly sliced red onion for sass and plumped up dried cranberries for a little sweet and same fall color.

It took all my will NOT add nuts to this bed of goodness, but I resisted and did not miss them a bit. Neither did my nut-weary family.

  • Bonus: This can be made ahead and hang out until dinner is served.
  • Double Bonus: It travels like a champ and is easily assembled on site.
  • Triple bonus: The leftovers are excellent, because we all know dressed kale can survive the apocalypse.

I hate to sounds bossy, but please make this now, so if you like it as much as I do you can sign up to bring it to Thanksgiving. I know…we’re not even at Halloween. But what can I say? Squash turns my crank. And now, on to pomegranates. Oh…yeah…baby! Happy Fall

Roasted Squash, Kale and Cranberry Salad

From Cooking Light

Ingredients

  • 1/2 large unpeeled green or orange kabocha squash (about 5 lb.), cut into 12 (1/2-in.-thick) wedges (or delicata squash, seeded and cut in 1/2″ rounds)
  • 2 tablespoons extra-virgin olive oil, divided
  • 2 teaspoons coarsely ground coriander seeds
  • 1/2 teaspoon black pepper
  • 1/2 teaspoon salt, divided
  • 6 tablespoons dried cranberries (or dried cherries to be tart and fancy)
  • 6 tablespoons red wine vinegar
  • 1 1/2 tablespoons brown sugar
  • 2 teaspoons mustard seeds
  • 1/2 small red onion, thinly vertically sliced
  • 2 tablespoons fresh lemon juice
  • 1 (7 1/2-oz.) bunch lacinato kale, stemmed and cut into 3/4-in.-wide strips (curly kale works fine too)

Method:

Preheat oven to 375°F

Combine squash, 1 tablespoon olive oil, coriander seeds, pepper, and 1/4 teaspoon salt in a large bowl, tossing gently with hands to coat. Spread in a single layer on a baking sheet. Cover with foil. Bake at 375°F for 10 minutes. Remove foil; bake 15 more minutes or until pumpkin is tender and browned, turning once.

While pumpkin roasts, combine cranberries, vinegar, brown sugar, mustard seeds, and 1/8 teaspoon salt in a small skillet over medium-low heat. Bring to a simmer; remove from heat. Steep 15 minutes or until almost all of the liquid is absorbed.

Place onion in a bowl of ice-cold water; let stand 10 minutes. Drain

Toss lemon juice, kale, remaining 1 tablespoon olive oil, and remaining 1/8 teaspoon salt in a large bowl, massaging kale with hands to soften. Transfer kale to a large serving platter; top with pumpkin and onion. Sprinkle with cranberries.

Bringing it:  Roast the squash, prep onions and cranberries and massage the kale in the privacy of your own home. Bring them all separately and assemble on a platter when you get to your destination. It can hang out until you’re ready to eat.

Tomato Overload

Guess what didn’t take Labor Day off? The tomatoes in your garden. It’s hard to keep up with the crop, though I’m trying my darndest, and probably headed for whatever toxic event occurs from too many tomatoes. I swear those suckers ripen by the hour. It’s all good though, except that there’s this one doctor out there on the interwebs who gets really bad on tomatoes. I just have to ignore his advice for the next couple of weeks. Same with the corn haters. Now is NOT the time.

Rather than reinvent the wheel, let’s just revisit some of our all-time tomato season favorites. Purists of course will go no further than the white bread and mayo tomato sandwich. Solid. But it uses exactly one tomato. Not helpful. When you’re looking for mass consumption of the bounty, I suggest a batch or two of sweet and spicy tomato jam. For the easiest dinner on the planet, totally appropriate for hands off entertaining, go for Best of Summer Simmer Chicken. If your job is to bring a side, embrace the heat with Summer Perfection Watermelon Tomato Feta Salad, or just go straight for Most Popular with THE Panzanella.

If those don’t use up your tomato backlog, here is an easy way to give your tomatoes (and the taste of summer) a little more staying power.

If nothing else you should go to Smitten Kitchen just to look at the picture of the pre-roasting tomato rainbow. Impressive. Mine do not look like that. BUT I assure you they taste darned good, and they are perfect to throw on a pizza, spoon on bruschetta, toss into a salad, smoosh on bread, mix in pasta, etc. You get the picture.

Slow roasted tomatoes, just hanging with the fresh crowd.

Slow Roasted Tomatoes

From Smitten Kitchen

Ingredients

  • Cherry, grape or small Roma tomatoes
  • Whole gloves of garlic, unpeeled
  • Olive oil
  • Herbs such as thyme or rosemary (optional)

Method

Preheat oven to 225°F. Halve each cherry or grape tomato crosswise, or Roma tomato lengthwise and arrange on a parchment-lined baking sheet along with the cloves of garlic. Drizzle with olive oil, just enough to make the tomatoes glisten. Sprinkle herbs on, if you are using them, and salt and pepper, though go easily on these because the finished product will be so flavorful you’ll need very little to help it along.

Bake the tomatoes in the oven for about 3 hours. You want the tomatoes to be shriveled and dry, but with a little juice left inside–this could take more or less time depending on the size of your tomatoes. When they are done, you can remove the cloves of garlic and save them for another use. They’re a delish side bennie.

Use the tomatoes right away or let them cool, cover them with some extra olive oil and keep them in the fridge for the best summer condiment, ever.

Feel Good Zucchini Bread (and muffins)

It’s that time of year—time to figure out what to do with the zucchinis that have grown into something with the heft (and taste) of a Duraflame log. Enter zucchini bread, a brilliant use of the bounty. The only downside of zucchini bread and their muffin progeny, is that most of them also seem like a ploy to get rid of all the oil and white sugar in your house. Eat a piece of your standard zuke bread and your fingers look like you’ve just wrangled a basket of French fries. And the sugar that’s involved…oy!  

Quick breads and muffins exist on a taste/texture profile continuum from dirt to donuts.  Ever since hearing about the 800 calorie Costo muffin I’ve gravitated towards the dirt end of the spectrum. In fact I have a stalker-like attraction to the Earth Muffin at our local bakery, Lou’s. Upon studying the insanely lengthy and small fonted ingredient list I learned they are full of ground nuts, chopped nuts, seeds, dried fruit, maple syrup, grains, meals and every Vegan trick in the book. Even when Lou’s tries to pawn their day old Earth Muffins off as fresh (as if we dirt lovers can’t detect nuance), something about all that texture, heft and granular mystery still satisfies my need for weirdness. These muffins do feel like treats, but not irresponsibly so.

Feel Good Zucchini Muffins, with a whole lot of goodness

Perhaps you’re not up for the true grit experience in the morning, but you probably don’t fully enjoy walking away from breakfast knowing you’ve already used up your daily dessert quota. That’s where this recipe strikes the perfect balance, erring on the nutritious side of the muffin spectrum, but with enough sweetness and light to start your day with a smile. The recipe features white whole wheat flour, not a ton of sugar, a LOT of zucchini, and olive oil to make every heart beat a little faster. It’s a muffin/bread you can eat in the morning and feel good knowing that today, there’s still room for ice cream!

Feel Good Zucchini Bread

Poached with utmost respect from Food52, where there is also an excellent discussion on this topic.
Makes: 1 loaf or about 12 muffins

Ingredients

  • 2/3 cup olive oil (143 grams), plus more for the pan
  • 1 1/3 cups white whole-wheat flour (170 grams), plus more for the pa
  • 2 1/3 cups grated zucchini (from about 11 ounces zucchini)*
  • 1/3 cup sugar (67 grams)
  • 1/3 cup brown sugar (71 grams)
  • 2 large eggs (Vegans, grab your flax meal or aquafaba)
  • 1/2 teaspoon baking powder
  • 1/2 teaspoon baking soda
  • 3/4 teaspoon kosher salt
  • 2/3 cup walnuts (75 grams)
  • 1/3 cup golden raisins (53 grams)
  • 1/3 cup oats (33 grams), plus more for topping

*If you’re scant on the zukes, or just feel like a little more color, you can add in some grated carrot.

Method

  1. Preheat the oven to 350° F. Grease a 8 1/2- by 4 1/2-inch loaf pan (muffin pans if using) )with some oil. Add some flour and tap around to distribute evenly. Gather the zucchini in a kitchen linen or paper towel and squeeze over the sink to get rid of any excess moisture. This step is KEY!
  2. Combine the sugars, eggs, and oil in a large bowl. Whisk until smooth. Add the zucchini to the bowl and use a rubber spatula to combine. Add the baking powder, baking soda, and salt. Stir to combine. Add the flour, walnuts, raisins, and oats. Stir to combine.
  3. Pour the batter into prepared pan. Sprinkle oats on top. Bake for about 1 hour until a thin knife inserted in the center comes out clean. If making muffins, start checking them at 15 minutes and take them out when they are set and slightly browned.
  4. Let cool in the pan for 15 or so minutes before turning onto a wire rack. Cool completely before slicing and serving.

The zucchini army at rest

No Guilt Nutella: Chocolate for Breakfast Goes Legit

You say Nutella, I say…ain’t happening for breakfast in this house.

I grew up in a pre Nutella-For-Breakfast world. We had plenty of heinously unhealthy food, like pop tarts and cocoa puffs. But putting frosting on toast and calling it breakfast wasn’t a thing. Even if it happened (looking at you, chocolate Easter bunnies), it wasn’t sanctioned, let alone encouraged.

My kids grew up in a post NFB world, thanks to brilliant marketing from the Italians, who needed a real game-changer to dress up their melba toast and give their people a reason to get up for breakfast. Still, I did not serve Nutella to my kids. That may help explain why they so easily, dare I say eagerly, transitioned to sleepovers, camp and really any opportunity to leave home. There’s no need to get into my reasoning unless you really want a buzz-kill. I think we can all agree that commercial Nutella is not a solid foundation for the most important meal of the day.

But WHAT IF Nutella was made with no added sweeteners, fat or scary ingredients? What if it was made with the holy trinity of healthy treat ingredients—dates, nuts and cocoa—and nothing much else? Now that would be something I could get behind. And don’tcha know, I have. It’s not just for breakfast of course—it’s for any time you damn well please.

No Guilt Nutella soars past the teenage boy test, the teenage girl test, the man test and the “gimme that spoon I just need a chocolate fix ” test. If you are a Nutella connoisseur you will not be fooled by this, but the concept of a chocolate spread you can eat by the spoonful without a shred of guilt or secrecy may win you over nonetheless. Vegans, Paleos and Gluten-free peeps? Yeah, this is your jive too.

As with last week’s treats, your food processor earns its keep making these. It’s pretty foolproof though, as long as you make an honest attempt to skin the hazelnuts* and then process those babies until they really turn to butter. Be patient. It will happen.

No Guilt Nutella

Ingredients

  • 1 cup hazelnuts (or a mix of hazelnuts and almonds)
  • 1 packed cup medjool dates, pitted (or more, see notes)
  • 2 Tbsp water
  • 3 Tbsp unsweetened cocoa powder
  • ½ tsp vanilla extract
  • 1 Tbsp flavorless oil
  • ¼ tsp salt
  • ½ cup almond milk

Method:

  1. Roast hazelnuts at 350 degrees for 20 minutes. Transfer onto a kitchen towel and roll with your hands to remove skins. (no need to remove skins on almonds, if using)
  2. Puree hazelnuts in a food processor for 8 to 10 minutes until a butter forms. Take the time to do it right! You’ll know when you’ve crossed from ground nuts to butter.
  3. Remove hazelnut butter, and scrape out food processor as best you can. Add dates and water. Puree until smooth and creamy.
  4. Add hazelnuts to date paste and pulse a few times.
  5. Add cocoa, vanilla, oil, and salt and blend. 
  6. With food processor running, slowly pour in almond milk. Scrape down the sides and pulse a few times to blend into creamy goodness.
  7.  

Notes

*To completely remove hazelnut skins (for the smoothest possible spread), boil nuts in a pot of water with few tablespoons of baking soda for 4 minutes. Immediately strain and place nuts in ice water for a minute or so, until the skins peel off easily. You still need to roast the nuts to loosen up all the oils and bring out the flavor. Google will not corroborate this, but I find this process takes a little mojo out of the nuts. I prefer the less perfect/more flavorful roasting and rolling technique. You will stain the dishtowel, but such are the sacrifices we make. See here for a THOROUGH demo.

If your dates are hard, or you are using Deglet dates, soak them in warm water for an hour or two before pureeing.

…and furthermore, depending on the sweetness of your dates and the strength of your cocoa, you may need to add more dates at the end to find your sweet spot. 

I swear the notes are done.

Store leftovers in the fridge, and put your guilt in the rear view mirror!

Breakfast in America, reimagined.

The real thing, at the breakfast table, on the dreaded melba toast, in its homeland.

Cocoa Nutty Balls

This is the first of two posts featuring the holy trinity of healthy treat ingredients: dates, nuts and cocoa. Why so holy? If you can get your Vegan, Paleo and Gluten-free friends at the same table, eating the same thing and loving it, there’s some divine intervention going on.

I’m posting them separately so they each get full credit, and you can find them more easily when needed. Both recipes are quick, easy and 100 percent free of added sweeteners, dairy, or grains. This first one is slightly more labor intensive because, well, balls require some care. (sorry, couldn’t resist). Neither recipe requires one bit of cooking, but they both will give your food processor an honest workout.

First up, are these cocoa nutty balls. (If you do the highly recommended pro move and roll them in toasted coconut when you’re done you can call them coconutty balls. See how that works? ) These are well known and loved in the paleo world and for good reason. They get sweetness and smoothness from dates, heft and texture from walnuts and chocolatey goodness from cocoa. The pinch of salt gives them some sass and the optional coating lets you add your own customized cha-cha.

But wait there’s more! These can hang out in the freezer until you need them. They transport well for hiking, picnics, lunchboxes, road trips or any eating on the fly. I offered these to a bunch of burly ski racers between their runs and they inhaled them. Either the lodge had run out of cheeseburgers or they actually liked them. I hope you’ll like them too!

Cocoa Nutty Balls

Ingredients

  • 1 1/2 cups walnuts (or a mix of walnuts and almonds or skinned hazelnuts*)
  • Pinch of salt
  • 1 cup pitted dates (Medjool if you can. Deglet if you must)
  • 1 tsp vanilla
  • 1/3 cup unsweetened cocoa powder
  • (Optional for pro version) Toasted unsweetened coconut—or whatever added crunch you like—for coating.

Method

Add walnuts and salt to a blender or food processor. Mix until the walnuts are finely ground.

Add the dates, vanilla, and cocoa powder to the blender. Mix well until everything is combined. With the blender still running, add a couple drops of water at a time to make the mixture stick together. (If it really won’t stick together in a ball, add another date or two)

Slacker version: Using a spatula, transfer the mixture to a small (8″x 8″) pan and smoosh it flat, sprinkle optional topping/coating evenly on top and press it into the surface. (A layer of parchment paper makes this easy.) Let cool in the fridge and cut into whatever sized bites or bars you want. 

Semi Pro Version: Transfer the mixture into a bowl. Using your hands, form small round balls (I aim for walnut sized), rolling in your palms. They’ll come together and feel a little greasy, making them perfect for the…

Pro Version: Toast raw coconut flakes or shreds in a 350ish degree oven a few minutes (until just golden) and let them cool. If flakes, whirl them in the food processor until finely ground, but not yet buttery. Add a pinch of salt is that’s your jive (it’s mine).** Remove the blade from the bowl and drop in three or four balls at a time, rolling them around to coat.

You can store bars or balls in an airtight container in the refrigerator for up to a week or the freezer for a looooong time.

*Skinning hazelnuts will be fully discussed in the next post. If you just can’t wait for this fascinating discussion (I know, you’re only human) check out this treatise on the topic.

**store leftover toasted coconut in a jar to sprinkle on yogurt, oatmeal, fruit, etc.

Just us fruits and nuts here, keeping our cool


The Aperol Spritz: Ciao Bella!

In case we missed the memo last week, summer has arrived, in all its sweaty glory. This does not bring out my A-Game, because I’m more St. Bernard than Whippet, more Clydesdale than Thoroughbred, more Thelma than Daphne. 

I also tend to gain weight in the summer, which—with all that necessarily exposed flesh—is just…plain…awesome. I’m ok with it, really, but that doesn’t make it any easier to bear the peak heat and humidity of an eastern summer.

So what do we do? We get out of the kitchen and onto the patio. And we help each other by sharing our favorite patio fare. Stay tuned this week for some simple easy classics to have on hand that will help you stay cool in every way.   

Today’s feature: The Aperol Spritz. These first caught my eye on a recent trip to Europe, where every sidewalk café featured what appeared to be glasses of orange wine, complete with little floating orange slices. For a moment, I thought Europe was a few years late on the orange wine trend 2015, the one that never breached the NH border.  But then I remembered where I was: European sidewalk cafes don’t do trends. They do classics.

Rigorous research enlightened me to the Aperol Spritz. Aperol is an Italian aperitif (that’s fancy talk for dry not sweet) made of oranges, roots, herbs and—let’s be honest here—some serious food coloring.

All you need for a classic, refreshing, “I’m- for-sure-as-cool-as-any-of-you” summer drink is to fill a glass with ice and layer in three parts prosecco, two parts Aperol and one part seltzer…in that order.  Toss in your little slice of orange and…Salute! Cin cin! Oooh baby!

For a no heat dinner, enjoy your spritz California style like Sister A and Cousin D did with this fine feast. Fully- loaded watermelon poke bowls? Alfresco dining? Avocados, pickled ginger, chopped peanuts? Check, check, check, check, check!

Bring It Summer All Stars

Summer is here my friends. Just in time, the good people of the webhosting universe have fixed my site so subscribers will actually get posts. What a great idea? Thank you Bring It loyals for your patience. And now, on to the weekend!

Before you head out for the Memorial Day shop with the rest of humanity, I picked out some all star classics that will help you slay this weekend. With a little prep you can head into summer looking like the master entertainer you are at heart.

First and foremost…

Bring on The Slaw:
If you have never made Hero Slaw, just trust me on this. It will make you famous. Go ahead and claim it as your own if it helps. Prep it, bag it, put it in the fridge and you can take on any invite that comes your way. Or just enjoy it yourself for a few days. If nothing else, make up the dressing to have on hand and turn kale into something the family might actually eat.

Have Some Balls:
Buffalo chicken meatballs are back on my regular rotation (thank you Neely for reminding me!) until I master the perfect veggie balls. Stay tuned for that. Until then, make up a lot of these (ahead if needed) and know they will disappear fast.

Brush up on Your Bruschetta Fixin’s:
You will never be sorry to have a Funitella bruschetta stashed in the fridge. With the miracle that is petite diced canned tomatoes it take all of about 5 minutes. If you want to get more ideas, take a gander at bruschetta deconstructed, and the consider toppings like pickled fig, creamy cheese and crunchy nut crostini, strawberries and goat cheese, and Sicilian caponata.

Get Your Guac On:
You’ve got to have it, and it hardly requires a recipe. BUT if you want to go the extra distance this crazy one with apples and tequila is my new fave. Mango jicama guacamole is another solid contender. Both add crunch and assert that this is not your first guac fiesta.

Think (of drinking) Ahead:
You know you’re a pro when…You’ve got your Frosé and Sandy’s daquiris in the freezer, and fixins for some fancy lemonades. You bridge into genius status when you also have watermelon juice at the ready to whip up watermelonade, spicy watermelon margaritas and watermelon sangria.

Watermelon Sangria. Summer in a glass.

Watermelon Up:
While we’re on the topic of watermelon, cut up some watermelon and prep it for watermelon poke bowls and you are set for fresh weekend lunches for Vegans and non Vegans alike. If you double up on the feta you get for Funitella Bruschetta, and make summer perfection watermelon feta salad, I promise you won’t be sorry.

Sweet Endings:
Oh where do we begin on these? Well, summery Lemon Beach Pie, a whole mess of Rubble or Loosey Brucey Rhubarb crisp are a good place to start. As Bruce would say, nobody ever complained about to many good recipe ideas.

New recipes next time, but of now let’s go with what we know and get this summer party started.

Must…eat…more…pie. Sweet, salty, sweet, salty, and oh yeah—creamy, crunchy, cool and tart.

Double Down Derby Day Guacamole

Some days we have difficult choices. Saturday will be one such day. Do you wear a fine hat and celebrate the first Saturday in May according to Kentucky tradition, or do you scarf down some tacos and join the Cinco de Mayo party?

Or, do you do the sensible thing and celebrate both? Well duh! I do not normally do this, but I am posting two untried recipes. Whyyyyyy? Because it’s important! Because it’s Kentucky Derby Day and Cinco de Mayo AND its almost summer. That means it’s high time to get your guac on.

I am a wing it kind of guac maker. As a Californian that is my birthright. That said, you can always improve. These two new takes on guac are both from Mexican food jefe Roberto Santibañez by way of Food52.  The first is unique in approach but features totally classic ingredients. It hits all the must haves and nothing more: lime, cilantro, jalapeño, onion are all pulverized FIRST then added to avocados. As Santibañez says, “There is a very important textural thing to guacamole — we never really mush up the avocado.” I knew I liked this guy. I really felt the love though when I read about his second creation, which is totally wacky. It involves a splash of tequila (he had me there), apples (hello New England) and pecans (a nod to the America south and more weirdness). My awesome neighbor just came back from Georgia bearing two bags of pecans that she harvested and shelled herself. Fate. Kismet. Weird guacamole.

Anyway, here are the recipes. I will be making and testing them both on Saturday, celebrating both occasions of course.  If you do the same please tell me what you think and we can discuss. Whatever you choose to celebrate, have a fantabulous weekend!

P.S. Post time is 6:12. For the worst odds and the best name I’m taking Patrona Margarita, with 50-1.

Numero Uno:

Roberto Santibañez Classic Guacamole

Adapted slightly from Truly Mexican (Wiley, 2011)

Makes: about 1 3/4 cups

  • 2 tablespoons finely chopped white onion
  • 1 tablespoon minced fresh serrano or jalapeno chile, including seeds, or more to taste
  • 1/2 teaspoon kosher salt, or 1/4 teaspoon fine salt (or to taste)
  • 1/4 cup chopped cilantro, divided
  • 1 large or 2 small ripe Mexican Hass avocados, halved and pitted
  • A squeeze of lime, if desired
  1. Mash the onion, chile, salt (the coarseness of kosher salt helps you make the paste), and half of the cilantro to a paste in a molcajete or other mortar. You can also mince and mash the ingredients together on a cutting board with a large knife or a fork, and then transfer the paste to a bowl.
  2. Score the flesh in the avocado halves in a crosshatch pattern (not through the skin) with a knife and then scoop it with a spoon into the mortar or bowl. Toss well (it should be like salad properly dressed in vinaigrette), then add the rest of the cilantro and mash very coarsely with a pestle or a fork. Season to taste with lime juice (if you’d like) and additional chile and salt.
  3. Guac Uno, as made beautiful on Food52

Numero Dos:

Roberto Santibañez’ Guacamole with Tequila & Apples

Author Notes: Roberto says:” The apple needs to be sweet and crunchy (not Granny Smith-tart) and diced not too fine, to contrast just vocally enough with the guac’s salty heat and richness. The pecans should be tossed in butter after toasting, not before, so you get fresh, unbrowned butter flavor, too. Adapted slightly from Truly Mexican (Houghton Mifflin Harcourt, 2011).

Makes: 2 cups
For the apples & pecans

  • 1 large crisp, sweet apple, such as Gala or Macintosh, peeled, cored, and finely diced
  • 1 tablespoon silver (blanco) tequila
  • 1 tablespoons freshly squeezed lime juice
  • 1/4 cup pecan halves, sliced crosswise or coarsely chopped
  • 1 teaspoon butter
  • 1/8 teaspoon fine salt, or 1/4 teaspoon kosher salt (or to taste)

For the guacamole

  • 1 fresh serrano or jalapeño chile, stemmed
  • 2 tablespoons finely chopped white onion
  • 1 teaspoon coarse salt, or 1/2 teaspoon fine salt (or to taste)
  • 3 tablespoons chopped cilantro, divided
  • 1 large or 2 small ripe Mexican Hass avocados, halved and pitted
  1. Toss the apple with the tequila and lime juice in a bowl and let the mixture stand for 30 minutes to 1 hour.
  2. Heat the oven or toaster oven to 350° F. Spread the pecans on a small baking pan and bake until golden and fragrant, 7 to 8 minutes. Add the butter to the pan and toss to melt the butter and coat the pecans. Sprinkle with salt, tossing to coat.
  3. Heat a comal, griddle, or heavy skillet over medium-low heat and roast the chile, turning it over with tongs once or twice, until tender, blistered all over, and blackened in spots, 10 to 15 minutes. Once cool enough to handle, remove the skin from the chile (you might have to use a paring knife).
  4. Mash the chile, onion, salt (the coarseness of the kosher salt will help you make the paste), and 2 tablespoons of the cilantro to a paste in a molcajete or other mortar. You can also mince and mash the ingredients together on a cutting board with a large knife, and then transfer the paste to a bowl.
  5. Score the flesh in the avocado halves in a crosshatch pattern (not through the skin) with a knife and then scoop it with the spoon into the mortar or bowl. Toss well, mashing the avocado coarsely with a pestle or fork, taking care to keep the avocado chunky.
  6. Gently stir in the apple mixture and most of the pecans just until it holds together. Garnish with the remaining pecans and cilantro. Serve right away with tortilla chips.


Lamb Meatballs: a twist on the Easter feast

 
Yes, the day before Easter is a little late to be making menu decisions, not to mention those that definitely require a trip to the grocery store. That said, you might want to live on the edge and make that store run because these are just plain tremendous.
 
Lamb and mint are familiar players at the Easter table, but not in meatball form. When you
taste these, however, you’ll wonder, “Why the hell not?” Even better than being delicious, these are beyond easy, requiring only one semi weird ingredient. I’m talking about you, harissa. Much as I love you, however, you can be replaced. The only change I made to the original recipe was to scale it up slightly. I also made them easier and healthier (you’re welcome) by baking them instead of frying them. This technique comes straight from our favorite buffalo chicken meatball recipe. 
 
There’s not much else to say about these. If you can’t make them for Easter I strongly suggest making them for some other occasion. I suspect they will go very well with leftover Easter candy.

Lamb Meatballs with Yogurt Sauce

Adapted from Matt Jennings Homegrown
 

Ingredients:

For the yogurt sauce:
  • 2 cups plain whole-milk yogurt 
  • 2 garlic cloves, finely minced 
  • 3 tablespoons finely chopped fresh dill 
  • 2 tablespoons finely chopped fresh mint 
  • Salt and freshly ground black pepper 
For the meatballs:
  • 2 pounds ground lamb 
  • 2 eggs, lightly beaten 
  • 3/4 cup fine fresh bread crumbs 
  • 1 large shallot, minced 
  • 1 1/2 tablespoon harissa (or sambal oelek, siracha or another red chile paste) 
  • 1 teaspoon kosher salt 
  • 1 teaspoon cumin seeds (or ground cumin)
  • ¼ teaspoon freshly ground black pepper 
 For garnish (totally extra credit but totally worth it):
  • Toasted sunflower seeds
  • Pickled chiles, homemade or store-bought

Method:

Preheat oven to 400.

Make the yogurt sauce: In a medium bowl, whisk together the yogurt, garlic, 2 tablespoons of the dill, and 1 tablespoon of the mint. Season to taste with salt and pepper and set aside.

Make the meatballs: In a large bowl, combine the lamb, egg, bread crumbs, shallot, harissa, salt, cumin, and pepper and mix well with your hands. Shape into golf ball sized meatballs, dipping your hands in cold water as needed to keep the mixture from sticking.

Assemble meatballs snugly in a lightly-oiled  13″ x 9″ baking dish (or any other combo of baking  dishes that work) so they touch each other. 

Bake for 20-25 minutes until they look yummy and done.

Spoon some yogurt sauce into the bottom of four bowls. Top with a few meatballs, and garnish with the remaining dill and mint, the sunflower seeds, and a few pickled chiles.

Serves 6 as a main course, our 4 with lotsa leftovers.

Spring Chicken Soup


This recipe is straight outta Steamboat from Tania, Bring It’s Rocky Mountain correspondent. Along with her husband, she invented this by merging three Thai recipes. As Tania  says,  “It can be tweaked anyway you want, but it is pretty amazing as written.” She also admits it’s a pain in the butt to make, but it’s really nothing more than a a few rounds of chopping sautéing and stirring. 

What I love about this soup, beyond it’s sheer freshness, is the way it builds in the pot, kind of like stone soup. I guess this is how Stone Soup would evolve in a community with really well stocked veggie drawers. It features a lot of greens, and can handle a lot of flexibility. That said, the first time I made it I was missing key ingredients—fish sauce, mint, red peppers—and used the wrong mushrooms and imposter jalapeños. (It’s New Hampshire. It happens).The result was ok but underwhelming. The next time I made it, with the right stuff, it got the kind of unsolicited rave reviews I NEVER get from soup.

There are no amounts listed for the fresh herbs, but be generous with them, according to your taste. If you want to freelance, I suggest doing it on the amount of oil and butter used at each phase, using whatever amount looks and feels right to you. It makes a lot, so as you reheat it during the week, give it fresh cha-cha  by adding more ginger, garlic and lime. 

Spring Chicken Soup

Courtesy of Chuck and Tania Coffey

Ingredients:

  • 8 cups of chicken stock
  • *olive oil
  • *butter
  • 1 ½ lb boneless/skinless chicken breasts
  • 6 cloves garlic minced
  • 3” ginger root peeled and minced
  • 2 red peppers sliced thinly
  • ¾ lb shitake mushrooms sliced
  • 3 limes (skin from one lime)
  • ¼ c fish sauce
  • fresh basil
  • fresh mint
  • fresh cilantro (leaves and stems)
  • 3 jalapenos diced
  • 2 fresnos cut in rings (easterners, you are forgiven if you can’t track these downw)
  • 2 cans coconut milk
  • 1 1/2 T brown sugar
  • red pepper flakes to taste
  • 11 oz  baby spinach (1 entire plastic coffin)
  • i package straight cut rice noodles

Method:

Pour all the stock into a big pot and heat on medium high.

Grill chicken (or cook up however works for you) 8-10 minutes per side. The breasts are undercooked because they are going in the soup.  When cool enough to cut, cube into 1” pieces and add to soup.

In a nonstick pan heat 1 T butter and 1T olive oil and cook garlic and ginger until fragrant.  Pour into pot.

In a large nonstick pan heat 2 T butter and 1T olive oil (I used less here) and cook mushrooms until fragrant and starting to brown. Add a half cup or so water to the cooking mushrooms if they seem dry.  Add to soup.

Add 1-2 T butter to pan and cook red peppers until slightly soft. Add to soup. You’re done with that pan now.

Grate the skin of a lime into soup. Add juice of 3 limes and the fish sauce to soup.Cut stems of cilantro into ½” pieces and add to soup.
Slice fresnos and mince jalapenos and add to soup.
Add coconut milk, red pepper flakes to taste and  brown sugar.
Chop basil, cilantro and mint leaves and add to soup with all of the spinach (you really have to use a big spoon to get it all in there).
Cover soup partially and cook until the spinach wilts (this happens fast).
In another pot bring water to boil and cook rice noodles according to directions. (alternatively serve this over jasmine rice)
To serve put noodles in a bowl and cover with soup.  Add red pepper flakes to taste.
The soup gets better the next day especially if you add a bit more garlic, ginger and jalapeno.

Looking for other fresh spring recipes? How about minty snap pea salad, or of course Marcharitas. And because it’s the confluence of soup season and sugaring season—what we lack in peppers around here, we make up for in maple—don’t forget maple oat breakfast bread.


Splash of Sunshine: Citrus Roasted Fennel and Red Onion

Roasted winter vegetables cheer right up with citrus cha cha.

This recipe is a shout-out to my Auntie Tina, who lives high on a hill in Marin County, surrounded by her beautiful garden. When I think of her, I think of sunshine and a warm smile. That’s what this dish does for me on a gray winter day, or, as is now the case, a gray spring day. The fact that I used clementines for this (her full name is Clementina) makes the dedication feel all the more appropriate.

Citrus is a sign of hope and cheer. Roasted citrus is not for everyone. You love it or you don’t, and you know who you are. I love it (chicken or broccoli roasted with Meyer lemons? Yeah baby!) After being served  this amazing roasted chicken with clementines, originally from the Jerusalem cookbook,  I took a brief tour of the interwebs and found a salad featuring a similar combo.

Molly Stevens’ creation has inspired many subtle riffs and tweaks. My favorites include: adding pomegranate arils before serving; swapping navel oranges for Satsuma or blood oranges; adding fresh, peeled rounds of said oranges after roasting; and adding some zap with a splash of a sherry vinegar before serving. Do what you like, and enjoy this bit of roasted sunshine. Serve it with love and a smile, just like Auntie Tina would.


The pre-roasted look

Citrus Roasted Fennel and Red Onion

Serves 4

  • 1 large or 2 small fennel bulbs (about 1 pound untrimmed)
  • 1 medium red onion
  • 3 clementines (or 1 large navel orange), scrubbed.
  • 2 tablespoons extra-virgin olive oil, plus more for drizzling
  • Kosher salt and freshly ground pepper
  1. Position a rack in the center of the oven and heat to 400 degrees F (375 degrees convection). Line a heavy-duty rimmed baking sheet with parchment paper (this prevents the oranges from sticking to the pan).
  2. Trim the fronds from the fennel. Stand a bulb on its base on the cutting board and cut it in half lengthwise, cutting from the core end to the stem end. (If the bulb is more oblong than round, as some are, you will create two halves that are thinner and flatter rather than thicker and bulbous.) Use a paring knife to remove most of the core from each half (no need to get it all out). Lay each half flat on the cutting surface and cut crosswise into 1/4-inch-thick crescent-shaped slices. Toss onto the baking sheet and repeat with the second fennel bulb if you have two.
  3. Cut the onion in half, cutting from root to stem end. Peel and remove the root end from both halves. Slice the onion halves crosswise into 1/4-inch-thick half-moons and add to the fennel.
  4. Next, slice 2 clementines into ¼ inch rounds. (If using large orange, first cut off the ends and use them for juicing at the end of the recipe.)
  5. Add sliced clementines to the fennel and onion. Drizzle the olive oil on top and season well with salt and plenty of pepper. Toss to coat and arrange in an even(ish) layer on the baking sheet.
  6. Roast, stirring with a spatula after 15 minutes to ensure even cooking and again every 10 minutes or so. The vegetables close to the edge of the pan will brown more quickly than those in the center, so stirring and then shaking the pan to restore an even layer helps everything cook at the same rate. Continue roasting until the vegetables and orange are tender and the outer edges are beginning to caramelize, 25 to 45 minutes.
  7. Transfer to a serving dish, ideally a wide, shallow bowl. Let cool for at least 15 minutes or to room temperature. Cut remaining clementine in half. Squeeze the juice of one half over the salad and taste. If it tastes a little flat, add a pinch of salt and squeeze the other half clementine over it. *Drizzle with a little of your best olive oil and serve warm or at room temperature.

* if you want to fancy it up with a vinaigrette, squeeze the orange ends or halved clementine for 1 Tbsp juice. Whisk with 1 tsp sherry vinegar and a pinch of sea salt. Slowly whisk in 2 tablespoons olive oil. Drizzle away!


Seed Bark Granola

Nutty, grainy, and way better tasting than bark. I promise!

January is not for sissies. In looking back on January posts just for this blog, there are some common themes: soups, breads…and a lot of complaining about the general bleakness all around. I’m not going to entirely break with tradition—I’ve had a perpetual pot of soup (any variation of Sugar and Spice Squash Soup is my fave) and have ditched all pretense of gluten-free living because, a girl’s gottta dunk something! But, I’ll skip the bellyaching this time.

This year’s January challenges come with an ongoing healthy eating quest, fueled by eating advice that ranges from confusing to Draconian. As discussed in November, when trying to eat for maximum brain and heart health there is a lot of conflicting info to navigate. As part of this mission, I’ve made things that look like dirt and some that taste like dirt. I’ve crammed way more vegetables into every meal but also “jumped the shark,” by putting kale in dishes where it has no business, thereby ruining my kale cred. I brought a peanut dip to a party that was pretty delicious but looked like baby poop, which turns out to be a significant enough deterrent.

At a certain point, you have to do the best you can, in a way that will be sustainable. As I forge though January I’ll post the best of what I find. Every recipe won’t meet everyone’s standards of “healthy” or “clean” eating. But my promise to you is that they will all be good enough to bring outside your home, and give with pride.

This granola/topping/snack comes straight from Engine 2 cookbook, which is a fantastic resource to have around. The Esselstyn tribe are Vegan, oil-free wizards. This granola reminds me of my beloved Bread of Life “Dirt” Bread, as well as the PITA lifechanging crackers. The good news here is that it’s a whole lot easier to make than either of them, and with no grains whatsoever it comes close to satisfying all versions of clean eating. The only debatable ingredient is maple syrup, but it doesn’t call for much and c’mon people—live a little!

Seed Bark Granola

From The Engine 2 Cookbook, with some pro tips

Ingredients

1 ½ c raw pumpkin seeds
½ cup raw sunflower seeds
¼ cup raw sesame seeds
¼ cup flaxseed meal
2 Tbsp chia seeds
2-3 Tbsp maple syrup (2 Tbsp was perfect for me)

Method:

Preheat 350. Line a baking sheet with parchment paper.

Combine all ingredients in a bowl, ending with the syrup. Mix it up well. Pour it all on the baking sheet and press it out to 1/4 -1/3 inch thick (no thicker than an almond). Pro tip: To make this easier and more uniform lay another sheet of parchment paper on top of the mixture and press down hard on it with another baking sheet.

Bake 18 minutes until fragrant and lightly browned on top. Rotate the pan halfway through if you are inspired and watch to be sure it does not burn.

Remove from oven and leave it to cool. As it cools, it will speak to you by crackling. It’s saying, “Leave me alone–I’m getting crispy, baby!” After at least 20 minutes, you can be dramatic and lift the cookie sheet a few inches then drop it. Or, break it up it yourself into whatever sized bits you want.

When completely cool, store it in an airtight container. It lasts 10 days or so they say. I would not know. I do know it is delicious, and is a healthy gift to anyone you love.

Bark, ready to bite

Sabering champagne

Holiday Favorites: Stay Sane, Go Nuts, Be Happy!

Fluff up your marmots and break out all things sparkly, the holidays are here. This is the season for many things: fake fur, sequins, fizzy drinks, warm everything. This is not the season for experimentation. We’re keeping our heads above water here, which means sticking with what we know. tried and true meals that make us happy, and treats to give that make others happy.

Maple oat breakfast bread

With that in mind, in my own kitchen I’m revisiting whole lot of Bring It tried and trues. That means soups like Thai Coconut Corn Soup, or Sugar and Spice Squash Soup. And yep, that means a crock pot full of Chicken Taco Chili that feeds a crowd with about 6 minutes of prep. All of the above, of course, beg for People’s Choice Cornbread or No Knead Challah or a honkin’ slice of Maple Oat Breakfast Bread to dunk in there. That is, UNLESS dirt bread is your thing…you know who you are, you little hemp seed eating chia pets. I’m with you there.

You might be needing some holiday entertaining staples like pomegranate everything (along with a genius pomegranate wrangling technique). What’s winter without fondue, and the easiest in the world Guinness Fondue at that? And what’s “How the Grinch Stole Christmas” without snacks? I highly recommend a batch of Nootch Popcorn or a bowl of Hail Mary Coconut.

As far as gifting and hostess offerings, you will never go wrong with crackle and its intriguing, slightly sophisticated dark cousin, pretzel and beer Crackle 2.0. And cookies? Yeah we’ve got those, basics like my faves—champion chip cookies—as well as totally slacker kiss my crust cookies, made from refrigerated pie crust and whatever chocolates you have around. If you need to scare up a snowstorm, or a reason to start a sweet family tradition make up a snow ghost pie.

Snow Ghost pie ad

And lest this be a pure re-hash of deliciousness we have an actual new recipe. I realize this blog has a somewhat extensive nut treatment, including honey thyme walnuts, spicy rosemary maple walnuts and an entire holiday nut anthology. But it turns out you really do need one more way to make roasted almonds. These are very similar to ginger glazed almonds (see anthology above), but without the ginger and with a coating of sesame seeds. You can choose a mix of sweeteners for your preferred flavor dimension (honey and sesame were pretty much born for each other), but for the best texture and glaze use at least some brown sugar.  

We’re talking nuts here, not rocket science, so be bold and mess around with flavorings, spices, herbs, types of nuts etc. Above all, enjoy the madness of the season and, like James says, remember “Shower the people you love with love.”

Sesame Almonds

Makes 3 1/2 cups almonds

Ingredients:

  • 3 tablespoons packed light brown sugar (or sub out up to 2 tablespoons with honey or maple syrup)
  • 1 tablespoon coconut oil (or your healthy oil of choice)
  • 1 teaspoon kosher salt
  • 1 teaspoon paprika
  • 1 teaspoon rice vinegar
  • 1 pound raw almonds (a scant 3 ½ cups)
  • 2 tablespoons (or more) white sesame seeds

Method:

Arrange a rack in the middle of the oven and heat to 350°F. Line a rimmed baking sheet and 2 wire cooling racks with parchment paper and set aside.

Pour the almonds into a mixing bowl. (If you keep your nuts in the freezer, warm them up in the oven for a few minutes first). In the microwave or on the stovetop stir together the brown sugar/honey/syrup, oil, salt, paprika, and vinegar over low heat. Pour mixture over the almonds and toss until the almonds are thoroughly coated. Transfer the almonds to the prepared baking sheet and spread into an even layer.

Bake, stirring every 5 minutes, until the almonds are brown and fragrant, 12 to 15 minutes total. They should be a rich brown color and just start to smell toasted as you open the oven door.

Sprinkle the sesame seeds over the hot almonds and stir to evenly distribute the seeds. This is where I go a little overboard, and try to get as many sesame seeds as possible to coat the almonds. Divide the nuts between the 2 prepared cooling racks and use a spatula to spread the nuts out so they do not touch. Cool completely, about 30 minutes.

Break apart any nut clusters that are stuck together if needed.

Bringing It:

Pour these babies into a treat bag, jar, tin or a cardboard takeout container lined with festive tissue paper, and store them in the fridge until you are ready to give them or devour them.


Aquafaba Mayo: Magic for the Leftover Feast

Let the sandwich building begin!

Yum. The work and the stress are over. All that remains are the leftovers. Well Hallelujah to that! The Holy Grail of the Leftover Kingdom is the turkey sandwich. It can be a straight up turkey affair, a turkey salad mixture or an elaborate layering of turkey, stuffing and cranberry. Any way you slice it, however, an essential element for many of us is the dollop of mayo.

Alas, mayo can turn an otherwise healthy meal into an irresponsible feeling indulgence. That is, until you discover aquafaba mayo. We’ve dabbled in aquafaba here before, and in the sheer wackiness of using the liquid from a can of chickpeas as an egg substitute. I mean, who knew?  This iteration tastes great, and can be made even more delicious by blending in fresh herbs or by cutting it with ABC Summer Sauce

But I’m getting ahead of myself here. Baby steps…first, make this heart-healthy mayo if you’re feeling experimental or impressing the Vegans in your midst. You can roast the chickpeas or use them in party time hummus for your weekend festivities. Then, start enjoying those leftovers—even this Vegan pumpkin pie— with a little extra glow in your halo. Happy Black Friday all. I hope you’re enjoying it in whatever way makes you smile!

Aquafaba Mayonnaise

Ingredients

  • 115-ounce can of chickpeas
  • 1 teaspoon white vinegar
  • ½ teaspoon fine salt
  • ½ teaspoon sugar
  • 1 teaspoon lemon juice
  • 2 teaspoons dry mustard
  • ¾ cup sunflower oil *

*Safflower and other neutral oils work also, but avoid using olive oil. It gives it a weird taste.

Method

  1. Drain the chickpeas, reserving the bean liquid. Save chickpeas for another use. Measure out 1/4 cup of the bean liquid (aquafaba) in a large glass measuring cup. Add vinegar, salt, sugar, lemon juice and dry mustard.
  2. Using an immersion blender (or a really good regular blender), mix until combined. With the blender running, very slowly drizzle in the oil in a thin stream. It should take 4 to 5 minutes to add all of the oil. The mixture will emulsify and thicken.

Heart of Darkness Chocolate Cups

Come to the dark side, for the good of your heart and soul.

I hit the food stash jackpot, when Sister A rolled into town with a carry-on full of Trader Joes nuts. I already had a decent stash of raw walnuts and almonds, but she brought in the exotics: pecans, pistachios, pepitas, cashews, macadamias. My pre-holiday ship had come in!

This happy event coincided with the other fortunate circumstance of having a lot of really good dark chocolate on hand. It’s not a huge leap to imagine what happened next. Yes my friends, I had a Reese’s ah-ha moment. Maybe I could make a slightly more mainstream yet totally healthy version of Reese’s Redemption Cups.

The revelation here is homemade nut butter, ever-so-gently spiced up, but not sweetened…and dark chocolate…and a pixie dust sprinkling of flaky salt, but only if you dare. Dark chocolate is just plain better for you than a whole lot of un-fun things, and when the health police serve up an opening like this you run through it!

The below list of directions is daunting, but basically you are doing this: Making nut butter by roasting raw nuts and whirring them in a food processor with cocoa, cinnamon, vanilla and salt. Then you are melting chocolate, pouring a bit in the bottom of lined mini muffin cups, adding a blob of nut butter then spooning more chocolate on top of the whole shebang. With that vision, read on bravely, and know that you will end up with something delicious no matter what it looks like.

Don’t over think this one. Just make up a bunch when you’re feeling it, and enjoy them as needed. You will not regret having this stash on hand.

Heart of Darkness Chocolate Cups

Adapted from betterwithcake

Makes 14-16 mini cups of joy

First, you’ve got to make your nut butter. See below. From there it’s just a matter of melting chocolate. Again, whatever darned chocolate you feel like. The darker the chocolate, the higher percentage the cocoa, so the slower it will melt and the more temperamental it will be to work with. If you’re going way dark, add some coconut oil. You can also use vegetable oil, but it will thin the chocolate more and you will have fallen off the superfood wagon. Don’t worry. You won’t be lonely there.

Ingredients

  • 1/2 cup or so of homemade, chocolate hazelnut almond butter (or store bought chocolate hazelnut butter if you must. The texture will be gooier)
  • 1 bag (10-12 oz) good quality dark-as-you-dare chocolate chips, Vegan if needed.
  • 2-3 tsp coconut oil (optional, but it makes your life easier)
  • Flaky sea salt
  • Optional toppings of choice: toasted shredded coconut, finely chopped toasted nuts, dried fruit, crushed peppermints, leftover candy corn, etc, etc, etc. 

Method:

Line a mini muffin tin with 16 paper or silicone liners.

Melt chocolate, with coconut if you are using, by your preferred method. I do mine in a small, retro double boiler over simmering water. If you are among the tens of millions of people with a working microwave, you can try that method.

Use a teaspoon to drizzle some melted chocolate into each the muffin liner. Don’t use all your chocolate; save at least 1/3 of it to spread on top once your chocolate cups are filled. Adjust the number of cups you make accordingly.

(At this point, if you are making big cups (not mini), or if you going for perfection, put them into the freezer for a few minutes to set up. If using mini ones, you’re good to keep going.)

Drop a very scant (ideally a slightly flattened oval) teaspoonful of your nut butter into each cup (if you went pro and froze the first layer then go ahead and press down on the nut butter to level it).

Once all your cups are filled with the nut butter, use your designated chocolate spoon to cover the filling with the rest of the melted chocolate. Give the cups a sprinkle of salt and/or your garnish of choice and place them into the fridge to set, or the freezer to store longer term. They will keep in the fridge for several weeks and in the freezer for 3-6 months. Riiiiiiight.

Chocolate Hazelnut Almond Butter

The not very perfect but oh so delicious cross-section

~Vegan, Dairy Free, Paleo Friendly, Shazaam!

The beauty of this nut butter is that it’s easy, and the spices add cha-cha without any sweeteners. I go with cocoa and cinnamon but you can do a chai spiced one with cardamom, or a chile spiced one. Get creative and dream big here people. Once you’ve got the nut butter made you are totally set up for success.
Makes approx 2 cups of pretty darned healthy chocolate-hazelnut almond butter. This is way more than you need for a bag of melted chocolate chips, so you’ll be enjoying this on apples and toast, in smoothies and sandwiches, etc.

Ingredients –

  • 1 cup of raw almonds
  • 1 cup of raw skinless hazelnuts* (or use all almonds or sub hazelnuts with raw cashews or macadamias)
  • 1 Tablespoon of vanilla bean extract
  • 1 Tablespoon of cocoa (or cacao if you’re fancy)
  • 1/2 teaspoon of salt flakes

Method:

Preheat your oven to 350

Line a large baking sheet with baking/parchment paper (or a non stick silpat mat) and pour your raw nuts on, making sure they are spread evenly and not crowded.

Roast your nuts for 10 mins, until lightly roasted and slightly golden.

If you are unable to get skinless hazelnuts you’ve got an extra step here. roast them on a separate tray and once they are roasted, place on a clean dry hand towel and fold it in half. Rub it gently between your hands and the skins should come loose. Once the hazelnuts have shed their skins, discard the skins and proceed with the recipe as normal.

Pour your roasted almonds and hazelnuts into the bowl of your food processor or blender and process until smooth and creamy (or your desired consistency). It takes a minute or two to transform from ground nuts to creamy butter. Stop and scrape down the sides of the bowl occasionally as you go.

Once you’ve gotten the desired consistency, add the salt, cocoa (or cacao, whatev) and vanilla then process until combined.

Taste and adjust flavors accordingly – this is where you make you’re personal statement, adding extra salt or vanilla or maple syrup or whatever floats your boat. You can also lube it with a bit of coconut oil if you like.

Scrape that deliciousness into an air-tight jar and keep it in the
fridge for several weeks.

Bringing it:

My suggestion here is to keep a stash of this nut butter at the ready, and then, whenever you have a window of time and some extra chocolate lying around, make up some of these. With a stash of them in the freezer you are never without a healthy dessert, a peace offering, a hostess gift or just a little love bomb of chocolate.


Bringing It With Heart: Peacemaking Pepitas

Bringing on the love, and healthy debate.

You can’t please all the people all the time. This is true when it comes to food, and especially when it comes to what people consider “healthy” food. For various reasons, I’ve been flirting lately with both Vegan and Whole 30 ways of eating.

For those of you oblivious to food trends, Vegans avoid all food that comes from something with a face—meat, fish and all dairy, including eggs. The most vigilant Vegans also avoid honey, to protest the enslavement of bees. Whole 30 basically lines up with the Paleos, who embrace “high quality” protein, and especially animal protein. They make the sign of the cross to all grains, beans, processed foods and soy, which means tofu, tempeh, seitan and the like. Paleos blame life’s ills on inflammation, which come from the body trying to deal with sugar, a whole lot of which comes from grains. Vegans embrace grains and beans because without all that Verboten animal protein they get darned hungry.

Vegans are among the most creative eaters, making cheese from nuts, milk from hemp and mayo from chickpeas. The paleos get crafty points too, making pancakes without flour, oatmeal without oats and pizza crust from cauliflower. Martha points for all! Vegans get smug when the topics of obesity and high cholesterol come up; Paleos get smug when the Vegans look wan and tired; and the topic of bacon will polarize a mixed crowd faster than you can say Trump. All of this explains the popularity of the Mediterranean diet, which cuts right down the middle. Mediterranean eaters sit back and watch the show, enjoying a little bit of everything. They snack on olives, guiltlessly savor their dark chocolate and red wine and think, “Ah, yes. Life is moderately good!”

We had a recent health scare in our house, which prompted a close look at nutrition. People showed up bearing delicious, heart-healthy meals, as well as plenty of dark chocolate. It reminded me of how much I love our community and inspired me to tweak Bring It towards the healthier end of the spectrum. Like many of our friends, we lead pretty healthy lives, but there’s always room for improvement.

As discussed above, “healthy” means different things to different people; but, we’ve all got to try to get along in this world, especially at the table, and especially while we striving towards our own healthy, realistic, sustainable way of eating. Most of us just want good, healthy food that won’t break the bank, or take all day and an advance culinary degree to prepare. Fortunately, there are a few things on which all zealots agree, and I like to picture them as overlapping areas of a Venn diagram. The overlapping area of foods to avoid or seriously limit includes sugar, processed foods and, sadly, cheese. The overlapping area of acceptable foods includes greens, colorful veggies and roots, nuts, avocados, fruit (more or less) and coconut in its many forms. So we’ve got a starting point for common ground.

Of course, there will be many things that are beyond the universal overlap of all “healthy” diets. There are also times when you just have to go off the reservation. I’ll point you to those recipes with gusto, even if I’m not making them myself for a while. Case in point are these bronzies that a friend brought over recently. They totally raise the dessert bar, and WILL make you MVG (Most Valuable Guest).

For today, we’re keeping it simple and healthy: Pepitas roasted with sweet/salty coconut aminos. Coconut aminos are soy- and wheat-free, and while they are still a form of sodium, it’s less than straight up salt (a Tablespoon of coconut aminos has 300 mg sodium, the same as in 1/8 tsp salt). Even better, the Paleos turn a blind eye to the main ingredient, coconut sap, which sure sounds like a form of sugar to me. Shhhh! Let’s just enjoy this.

These pepitas are great sprinkled on salad, soup (like this one!) or roasted vegetables or as a snack any time of day.

Peacemaking Pepitas

Tweak the amounts up and down, but for best results don’t crowd your baking sheet. 1½ cups of nuts at a time per sheet is about the max.

Ingredients:

  • 1 cup raw pepitas
  • 1 Tbsp coconut aminos (or more if you’re feeling it)
  • ½ -1 tsp chili powder (optional)

Method:

Preheat oven to 350. Line a baking sheet with parchment paper.

Pour pepitas on the parchment lined sheet, drizzle with aminos and stir them around to coat. Sprinkle with chili powder if using.

Bake for 10 minutes. Stir and check them for doneness. Return to over for 5 more minutes.

Let cool on baking sheet. Store in an airtight container (they get soggy otherwise).

Bringing it:

Warp ’em up! These make an excellent hostess gift or contribution to any feast.

Drunken Fig Jam: Where fresh figs go to party

Fig Jamming New England style, with cheddar of course

How did I make it through life this far without ever canning? Why did I start now? Two fine questions. My two fine answers are fresh figs and fresh corn. They’re only around for a bit and they are so darned good.

Let’s start with figs. This recipe come from Treas, out in Cali, head chef at Granite Chief Command Central. Her recipe, which she shared with me after two years of my passive yet unremitting coersion, says that fig season is only in August. This handy guide to all things fig, gives us a larger window. According to google, there is a short season in early summer and then a longer season in late summer/fall. Either way, fresh figs are not around forever, and once you buy them you’ve got to use them fast. We should have a few more weeks at least, and cognac is always in season, so we’re good there. 

A little heads up to you non-canners out there. You need a big pot, you need to know that when you fill it too full with water and then put your jars in, your stove may have a hazardous overflow situation. You can only use canning lids once, which is why that whole mysterious section of parts in the grocery store exists. I guess that’s about it. I was going to get into racks for the bottom of your pot, but this recipe doesn’t call for one, so let’s run with the “ignorance is bliss” theory.

Another small cautionary note: When you are heading out to book group for three hours it’s best to turn the burner under your boiling fig jam OFF.  Next up? Corn relish to give Stonewall Kitchen a run for their money…and a new stockpot.

Fancying up a fall salad

Drunken Fig Jam

Recipe and action shots from Treas Manning
Makes 6 1/2 pint jars

Ingredients

• 2 lemons
• 4 pounds ripe fresh figs (preferably black), stemmed,
cut into 1/2-inch pieces (use food scale for accuracy)
• 4 cups sugar
• 3/4 cup brandy or Cognac
• 1/2 teaspoon coarse kosher salt

Method:

Using a vegetable peeler, slice peel from lemons (try to avoid as much as the white part as possible) in long strips. Cut peel into matchstick-size strips. Combine lemon peel, figs, sugar, brandy, and 1/2 teaspoon coarse salt in heavy large deep saucepan; let stand at room temperature 1 hour, stirring occasionally.

Bring fig mixture to a boil over medium-high heat, stirring until sugar dissolves. Reduce heat to medium; continue to boil until jam thickens (30 to 35 minutes), and is reduced to 6 cups, stirring frequently and occasionally use a hand blender to puree the mixture. It’s fine if there are small bits of lemon peel and fig, but I do like the bits to be minimal. Remove from heat.

Ladle mixture into 6 hot clean 1/2-pint glass canning jars, leaving 1/4-inch space at top of jars. Remove any air bubbles. Wipe jar threads and rims with clean damp cloth. Cover with hot lids; apply screw bands. Process jars in pot of boiling water 10 minutes. Cool jars completely. Store in cool dark place up to 1 year.

Notes: At high altitude over 5500 feet, process the jars for 15 minutes.

Drunken Fig Jam is yummy:

  • on a toasted baguette with a slice of melted Irish Cheddar, and a walnut on top.
  • on crusty bread with fresh burratta or mozzarella
  • on a grilled bone in pork chop, or on slices of pork tenderloin
  • on whole wheat toast topped with a strip of bacon for breakfast.
  • with cheese, sliced pears and walnuts on a groovy pizza

Bringing It and Giving It:

Makes a darned nice Christmas gift, especially canned in a Ball and Mason squatty wide mouth jar


ZUKES! Zucchini Bruschetta and More Green Ideas

Summer’s Surplus, all fancied up and ready for company.

It’s that time of year when it’s perfectly ok to eat fresh corn every day, tomatoes appear at every meal, and zucchini magically appear on your doorstep. I’m NOT complaining about the zucchini bounty, especially now that I have my “as seen on TV” spiralizer (a brilliant gizmo everyone should own), but using it up does present a challenge.

You could go the zucchini bread route, but if you’re not in the baking mood or you’re not in to cranking up that oven on a hot summer day, here are some alternatives. First, is a brilliant zucchini bruschetta. I have long suspected that Martha Stewart cuts her recipes to fit the page, leaving out a step or an ingredient here and there. On the positive side, it cuts out the micromanaging of how to make your toasts. If you need a bruschetta clinic, I’ve got you covered. And if you need other ideas on what to put on them, try Funitella Bruschetta, Sicilian Caponata , this creamy crunchy pickled fig extravaganza or sooooo many more things. As for missing ingredients, the only thing Martha missed in this case was a squeeze of fresh lemon. The fact that she left off the fancy fresh herb chiffonades is just a pure gift to humanity.

Zucchini Bruschetta

Ever so gently adapted from Martha Stewart Living, July/August 2015. It’s a good thing, Martha. I promise. 

Pro move of the day: salting the zucchini before cooking it draws out water, eliminating sogginess.

Ingredients

  • 2 medium zucchini
  • Coarse salt and freshly ground pepper
  • 3 tablespoons unsalted butter 
  • 1/4 cup minced shallot
  • 1/4 teaspoon red-pepper flakes
  • a healthy squeeze of fresh lemon juice (not sure how Martha missed this!)
  • Toasted baguette slices
  • Extra-virgin olive oil, for serving (optional)
  • thinly sliced or grated cheddar cheese (optional)

Method

  1. Shred zucchini on the large holes of a box grater. (You should have about 4 cups.) Toss with 1/2 teaspoon salt in a colander set over a bowl. Let stand 10 minutes. Squeeze out excess moisture with your hands.
  2. Melt butter in a large skillet over medium-high. Add shallot; cook 1 minute. Add zucchini; cook until tender and golden, 5 minutes. Stir in red-pepper flakes; Squeeze fresh lemon over the whole shebang and season with salt and pepper. Serve atop baguette slices, drizzled with olive oil, if you must.

Double Zuke Roll-Ups

For the adventuresome (and truly zucchini laden) among you…Out of desperation for a suitable appetizer, I fell upon a brilliant way to put zucchini inside of zucchini. It seems a little cannibalistic, or like a vegetarian version of a turducken. But it all works and it’s tasty. It also uses pesto—preferably with fresh mint thrown in—to address other surpluses in your fridge or garden. Garnish with tomatoes because, well, August tomatoes. I am quite sure this would taste fabulous with some fresh corn stirred in. Yes go ahead try that! Blueberries? Easy now, let’s draw the line right there.

There are no amounts here because we’re using what we’ve got, right? Any leftovers are going into the spiralizer for a zoodle future.

Ingredients:

  • Whole zucchini, preferably on the larger side
  • Your favorite pesto. This Vegan one was darned good, but pick your fave and sub or add some mint for bonus points
  • Zucchini from zucchini bruschetta (see above)
  • Balsamic glaze (if you’re fancy, and I know you are)

Method:

Chop off the end of the zucchini and thinly slice into strips. Use either a mandoline (easiest), or bear down hard with a vegetable peeler. Spread some pesto on each strip, and then layer on some of the shredded zucchini mixture. Leave a little space at the end of each strip for a tidy closure. Roll up that bad boy and secure it with a toothpick. When you have all your roll ups on the plate, drizzle with balsamic glaze, if using, just before serving. You can also drizzle some oil on these and bake them to serve with the main meal. 

Do you have a favorite zucchini recipe? Or ten? Please let me know!

This picture right here is why you use balsamic GLAZE vs straight balsamic. Live and learn…


Best of Summer Simmer Chicken

Let’s be honest here about grilling and entertaining. Food that is hot off the grill is fantastic for everyone but the host, who is typically tied to said grill. If you really want to relax, it’s all about food that can be cooked long and slow with minimal effort and is very, very hard to mess up. Bonus points if it is good as leftovers. Some dishes that come to mind are crock pot pulled pork or carnitas and the king daddy of all picnic food: Chicken Marbella.

Ok, so maybe not pretty. But pretty tasty, which counts.

In case you have never met Chicken Marbella trust me when I say it is magical. It’s a Mediterranean classic, that even the most Mediterranean-averse eaters still love. That’s the magic. The only downside of Chicken Marbella is the long marinating time, and the longish list of ingredients.

With that in mind, this recipe is darned near perfect. It involves chicken that falls off the bone, and as much fresh basil tomatoes as you can handle. Even better, it takes easy to an impressively idiot-proof level. Any recipe that includes “throw” and “chuck” in the instructions has a place in my heart. With this recipe, and the supply of fresh corn coming your way, you’ve got summer dinners for any size crowd handled. While you’re figuring out what to do with your spare time, whir up a batch of ABC Summer Sauce to have on hand for the leftover chicken, veggies, pizzas, sandwiches, etc. I can’t count the number of times I’ve made it this summer, and it always gets raves.

Special slacker note: In three tries I have been foiled by bad pictures with this dish, but that hasn’t stopped me before. Honestly, though, a dish that makes even raw chicken looks somewhat pretty deserves some respect. Here’s hoping you get to step away from the grill and enjoy your summer evenings while they last!

Summer Simmer Chicken

AKA Jamie Oliver’s Tender and Sweet Chicken Legs with Sweet Basil and Tomatoes

From  Food52

Serves 4

Ingredients

  • 4 higher-welfare chicken leg quarters
  • Sea salt & freshly ground black pepper
  • 1 big bunch fresh basil, leaves picked, stalks finely chopped
  • 2 big handfuls red and yellow cherry or grape tomatoes and ripe plum or beefsteak tomatoes, cherry tomatoes halved, plum tomatoes quartered
  • 1 whole bulb garlic, broken into cloves (less works too)
  • 1 fresh red chile, finely chopped, or a big pinch of dried chile flakes
  • Olive oil
  • One 14.5-ounce/410 g can cannelini beans, drained and rinsed (optional)*
  • 2 handfuls new potatoes, scrubbed (optional)*

* I’m all for keeping it simple without the beans and potatoes, but if you need to extend the feeding power this is a great way to do it.

Method:

  1. Heat your oven to 350°F (180°C). Season your chicken pieces all over with salt and pepper and put them into a snug-fitting pan in one layer, skin side up. Throw in all the basil leaves and stalks, then chuck in your tomatoes. Scatter the garlic cloves into the pan with the chopped chile and drizzle over some olive oil. Mix around a bit, pushing the tomatoes underneath. Place in the oven, uncovered, for 1 1/2 hours, turning any of the exposed tomatoes halfway through, until the chicken skin is crisp and the meat is falling off the bone. If after an hour or so the skin isn’t crisping to your liking, you can turn up the heat and switch to convection, or just blast it under the broiler for a bit at the end, rotating the pan occasionally and watching closely, until you get the skin as brown as you like. Just don’t let the sauce simmer too vigorously or the meat might toughen up.
  2. If you fancy, you can add some drained cannelini beans or some sliced new potatoes to the pan along with the chicken. Or you can serve the chicken with some simple mashed potato. Squeeze the garlic out of the skins before serving. You could even make it part of a pasta dish—remove the chicken meat from the bone and shred it, then toss into a bowl of linguini or spaghetti and serve at once.


Okey Poke: Watermelon Poke Bowls

All the Fixin’s for a Poke Feast

At about this time, in the height of summer, we might as well throw up our hands and say, “It’s all about watermelon!” Seriously, between watermelon rosemary lemonade, watermelon salad, watermelon gazpacho and the soon-to-be shared watermelon jalapeño margaritas, I am hard pressed to get really excited about any other ingredient. But, like mama said, you must eat your veggies. And your protein. And your condiments (summer is condiment season after all).

This brings me to the poke bowl (say po-kay unless you want to horrify foodies and make Californians smirk). Poke originated as a thing in Hawaii, where fisherman needed a tasty way to use the trimmed scraps of freshly caught tuna. Bonus points for being able to serve it all out of a cooler. They did this by marinating it, putting it over sticky rice and then dressing it up with whatever condiments felt right. Intrigued by the sheer magnitude of food combining possibilities in one dish, I set out in search of my perfect poke match. I’m a huge fan of fresh raw tuna, as long as it is procured, prepared and paid for by someone else. When I saw watermelon poke taking over the Internet, I knew I’d met my destiny.

Watermelon poke, where watermelon stands in for tuna, is often made with raw watermelon which is quickly marinated. It is fine but bears little resemblance in taste or texture to tuna, and the perkiness drains right out of the watermelon after serving time. This version, adapted from Bon Appetit—in which the watermelon is marinated, cooked, then chilled until ready to be used—produces watermelon that is strangely similar in taste, texture and appearance to tuna. This not only gives you an easy, storable for days, cheap alternative to tuna, but it also makes the Vegans (not to mention the tuna) happy. Ba-da-bing! We have a winner!

As with any new type of food, the process can seem daunting at first. I promise, however, that it is low skill and effort/ high return. Here is what you’re doing:

  • Dicing the watermelon, and putting it in a simple marinade, ideally overnight.
  • Cooking that entire mixture down for 30 minutes then chilling it. At this point, or after the next step, it can chill in the fridge for up to a few days.
  • Tossing the cooked, cooled watermelon with sliced sweet and green onions, sesame seeds and soy sauce. Chill until needed (see above)
  • Cooking up a batch of sushi rice with some honey and vinegar. This can be served hot or made ahead and served cold.
  • Assembling your universe of your favorite fresh toppings, sauces and condiments.

Poke bowls are built around the upside of prep. Set up your basic elements and you can throw them together anytime, anywhere. They use what you have, what you love and what is fresh and available. They are the perfect cultural marriage of all your favorite things and a fully customizable feast.

With so many topping choices it is hard to decide what actual recipes to include here in your watermelon poke primer. For me, and for my very satisfied (and patient) extended family, the key components are the watermelon, the sushi rice and a few key condiments. The toppings are where you make this your own, and change it up based on mood, dietary constraints, availability, etc. My must haves among these are: pickled ginger for zing, avocado for creaminess, toasted peanuts or sesame seeds for crunch; scallions, chives or some such representative from the onion family to keep your taste buds honest.  

Sauces? Homemade are awesome, but sometimes enough is enough. Store bought faves can be as good or better.

And now, for the main event. Make a batch of the watermelon poke and store it in the fridge for poke bowls as needed. Bring it chilled, along with your cooked rice and an array of condiments to make a poke bowl bar for a party or picnic. This right here, my friends, will rocket you straight to the Bring It All Star Zone.

Watermelon Poke Bowl with a creamy sesame sriracha sauce.

Watermelon Poke Bowls

Mostly from justthefood.com 

  • Watermelon Poke (recipe below)
  • Sweet sushi rice (recipe below)
  • Diced cubed fresh vegetables
  • Savory sauces, crunchy toppings and condiments

The Watermelon Poke

Don’t fear cooking the watermelon. It will not disintegrate, but will assume the look and texture of raw tuna. Trust the process that will transform your watermelon from sweet to savory and into a weirdly awesome, Vegan-friendly science project.

For the marinated watermelon

Ingredients:

  • ¼ cup rice vinegar
  • 2 tablespoons sesame oil
  • 2 tablespoons Tamari or soy sauce
  • 1 tablespoon balsamic vinegar
  • 2 pounds cubed red seedless watermelon (about 6 cups), cut it into small cubes no larger than ½-inch. The consistent, smallish dice is key.

Method:

Mix together marinade in a shallow dish with a lid, or a re-sealable plastic bag.
Add watermelon and refrigerate for at least one hour, but it’s even better if you can do it overnight. Transfer marinated watermelon to a pan with a lid.
Cook covered on medium high heat for about 20 minutes, stirring occasionally.
Remove the lid and continue cooking for about 10 minutes more, or until deep red and translucent and most of the liquid has been absorbed. If you have a really juicy watermelon, you can drain off any excess liquid.
 Chill until ready to serve.

For the Poke

  • 1 recipe marinated watermelon
  • 1 cup julienne cut Maui Onions
  • 1 cup chopped green onion
  • 1 tablespoon sesame seeds
  • 2 teaspoons soy sauce

Add all ingredients to a bowl and toss to coat. Keep chilled until ready to serve.

The Sweet Sticky Rice

This sweet rice makes a perfect base to serve under your Poke. Use an Ice Cream Scoop for perfectly shaped balls of rice.

Ingredients:

  • 2 cups short grain arborio or sushi rice, rinsed
  • 3 1/2 cups water
  • 2 tablespoons honey or agave
  • 1 tablespoon rice wine vinegar
  • 1/2 teaspoon salt

Method:

Mix all ingredients together in the bowl of your rice cooker and follow the directions on your rice cooker. If you do not have a rice cooker, bring salt and water to a boil in a pot with a tight fitting lid. Stir in remaining ingredients. Return to a low simmer, cover and simmer for about 20 minutes, or until water has been absorbed. 

The Condiments

Here’s a list of options to get you started:

  • Pickled ginger
  • Cubed avocado
  • Cubed mango
  • Cubed cucumber
  • Thinly sliced radishes
  • Thinly sliced scallions
  • Chopped chives
  • Fried shallots
  • Dry roasted peanuts, roughly chopped
  • Toasted sesame seeds
  • sprouts and/or seeds
  • Cilantro or mint
  • Ponzu or shoyu sauce
  • Furikake (now that you’ve got it from your popcorn adventure)

Assembling the Poke Bowls

Mound a scoop of rice in a bowl (not on an plate—that’s just the way it’s got to be).

Top with a scoop of watermelon poke. Top it off with your favorite condiments, then add a drizzle of your favorite sauce(s). You know what to do!


Loosey Brucey’s Strawberry Rhubarb Crisp

From the rhubarb patch to the kitchen, with a little magic and a whole lot of forgiveness.

If you need exact recipes, do not read any further, because this recipe will irk you. If you can tolerate significant looseness with your dessert creations, read on.

Today we have strawberry rhubarb crisp, because if you don’t have a rhubarb patch, somebody you know probably does and it is time to take it down!

This one comes from Pierce’s Inn, more specifically from innkeeper Bruce Lingelbach’s head as he guides pinch-hitter food preppers in the kitchen. His instructions range in specificity based on food type and his degree of recipe ownership. They fall on the spectrum of extremely loose (fruit crisps you can’t possibly screw up), to highly specific yet humorously delivered (7 millimeter thick slices and the spread must completely cover the toast), to intentionally vague as when he is guarding a secret recipe (don’t mess with Bruce’s chili).

I love this recipe because, along with being seasonal and delicious, it is among the loosest, with easy to remember, even proportions that can be grown and shrunk without higher math skills. If there is any wavering on amounts, Bruce will shrug and say, “Who ever complained about too many strawberries? …or maple syrup/crumb topping, etc. The crumb topping would work with whatever berries or softish fruit you have on hand, and the process could not be easier. It’s all about filling a dish with fresh berries, pouring molten rhubarb over it, then topping it all with your crisp mixture and baking it. Best of all, it requires no more than a baking dish and a pot.

This recipe is really more about process than exact amounts or baking time. The amounts here are good for a big 9” x 13” baking dish, and you can adjust according to the size of your dish. (Up it to 2 sticks butter, 2 cups of all else. Downsize it to 1 stick butter, 1 cup of all else. You’ve got this!) The recipe, like Bruce, is mighty forgiving, and also lends itself to special diets. Use gluten free oats and flour mix for the GF’s, and Vegan butter sticks for the Vs. No special diets? Then go for it and toss in some chopped walnuts or almonds.

The only place I freelanced on this was by adding a bit of salt to the crisp and a hefty squeeze of lemon to the cooked rhubarb because, “who ever complained about a dash of salt or fresh squeezed lemon?”

Pierce’s Inn Strawberry Rhubarb Crisp

Ingredients:

For the fruit:

  • 2 pounds strawberries
  • A whole lot of rhubarb (5 stalks or more) cut into 1-inch pieces
  • Big slug of maple syrup
  • ¾ cup sugar
  • Juice from half a lemon (optional)
  • 1 tsp vanilla

For the topping:

  • 1 ½ sticks (12 Tbsp) butter, melted or very soft (Pierce’s uses only Kate’s Sea Salted. See Bruce’s comment below)
  • 1 ½ cups brown sugar
  • 1 ½ cups oats
  • 1 ½ cups flour
  • ½ tsp salt (optional)
  • roughly chopped nuts of choice (optional)

Method:

Preheat oven to 350.

Cut the rhubarb into one-inch pieces, put into a pot with sugar and maple syrup. Give it all a stir and turn it on medium high so it gets bubbling along. Let it cook for 20 minutes or so, until rhubarb falls apart when stirred. Give it a taste for sweetness and add some sugar or syrup if desired.

Meanwhile, quarter the strawberries directly into baking dish. When rhubarb is done, remove from heat and stir in the vanilla and lemon juice. Pour molten rhubarb over the berries and give it all a stir.

In the rhubarb pot you have rinsed or wiped out, melt the butter and combine with the rest of the ingredients. Distribute evenly across the fruit and bake.

Of course there is no exact time, but give it a solid 30 minutes before checking. It should look, well, awesome— golden brown on top with sweet red lava of goodness bubbling up. Let cool a bit before serving. If made ahead, gently rewarm before serving.

Top with vanilla ice cream or whipped cream…because whoever complained about too much of that?

Summer Perfection Watermelon Tomato Feta Salad

I had a feeling that Memorial Day weekend would deliver. It did in the form of this watermelon salad. Quite simply, you need this in your summer life. I’ve seen watermelon feta salads aplenty but for some reason have never made them. Perhaps too many failed attempts at grilling watermelon “steaks” killed my ambition to bridge the sweet/salty gap with watermelon.

But thanks to Jenny—who not only brought this salad to a party, but also preemptively tracked me down to deliver the recipe because she heard from so many people that I wanted it—here it is! Thank you to Jenny for saving me so much anxiety and sticky kitchen experimentation.

Looking through the notes on the original recipe there are all kinds of variations. While I applaud the will to experiment, for me, if it ain’t broke…After all, it’s only early June. We have all summer to try it with lime juice instead of vinegar, to saute the sliced almonds in a little butter first, or maybe to add some jalapenos or spice. But then again, maybe not. It may be as close to perfection as I can bear.

This recipe does make a ton, so adjust amounts accordingly if that concerns you. A platter of this salad atop arugula looks pretty darned impressive. Made as directed, the watermelon chunks, are big, which seems a little odd. But that also makes it a knife and fork salad, which is somehow more satisfying.

Summer Perfection Watermelon Tomato Feta Salad

From Epicurious

Makes 6 to 8 servings

Ingredients

  • 8 cups 1 1/4-inch chunks seedless watermelon (about 6 pounds)
  • 3 pounds ripe tomatoes (preferably heirloom) in assorted colors, cored, cut into 1 1/4-inch chunks (about 6 cups)
  • 1 teaspoon (or more) fleur de sel or coarse kosher salt
  • 5 tablespoons extra-virgin olive oil, divided
  • 1 1/2 tablespoons red wine vinegar
  • 3 tablespoons chopped assorted fresh herbs (such as dill, basil, and mint)
  • 6 cups fresh arugula leaves or small watercress sprigs
  • 1 cup crumbled feta cheese (about 5 ounces)
  • 1/2 cup sliced almonds, lightly toasted

Method

    1. Combine melon and tomatoes in large bowl. Sprinkle with 1 teaspoon fleur de sel and toss to blend; let stand 15 minutes. Add 4 tablespoons oil, vinegar, and herbs to melon mixture. Season to taste with pepper and more salt, if desired.
    2. Toss arugula in medium bowl with remaining 1 tablespoon oil. Divide arugula among plates. Top with melon salad; sprinkle with feta cheese and toasted almonds and serve.

Bringing It:

Keep the watermelon cold as long as possible before serving, and cut up the watermelon and tomatoes as close to serving time as you can. If you need to cut them up at home, hold off on tossing them with the salt until 15 minutes before serving. This looks beautiful on a platter atop the arugula, or in a big bowl with the arugula tossed right in.


Mochanut Granola

When I first ran across a recipe for mocha granola, it was an a-ha moment. Coffee, chocolate and breakfast all in one bite? Brilliant! It sounded like the perfect offering for a weekend away, a camping trip, a hike, etc. And so, the experimenting and recipe sampling began.

Granola making is neither rocket science nor an exact science. It involves mixing oats with all your favorite tastes and textures, lubing it up some fat and sweetener, and baking it in the oven until it is crisp but not burnt. How much fat and sweetener is where granola can go from pretty healthy to totally decadent. One swishy LA café’s mocha granola recipe involves two sticks of butter. Well, duh. Of course it tastes good. So does a cheesecake, but it doesn’t really get your day off to a healthy start. Some recipes call for only ground coffee, which can get gritty and  others for only brewed coffee which can be kind of wimpy. I needed to slay this beast.

In my excitement I misread the first recipe, and by measuring ground coffee vs brewed coffee ended up using a solid 8 times the intended amount of coffee. That first batch could have been named “True Grit.” Still, I didn’t want to back off that much on the coffee flavor, which happens if you use only brewed coffee. The extra liquid also means your granola takes longer to bake and crisp. I settled on using a combo of finely ground coffee, in the dry ingredients, along with brewed coffee mixed in with the oil and maple syrup.

The flavor profile of this reminded me of my youth, when Jamocha Almond Fudge ice cream turned my world upside down. I am pretty sure that in 6th grade I worked the flu for an extra day to stay home with this particular flavor. This recipe bridges the territory of breakfast and treat. It’s got a double dose of coffee— liquid and ground—which is balanced by a fair yet not indecent amount of sweetener, mostly in the form of maple syrup. I also added unsweetened flaked coconut, because when coconut rolls around and gets toasty with maple syrup it assumes bacon-like decadence.

You can sub butter or another oil for the coconut oil, and mess around with the type and quantity of sweetener you like (or have). Again, this is on the less sweet side for granolas. Play around with it, and when you walk back inside your house and it smells like coffee, chocolate and roasted nuts…you’re welcome!

Mochanut Granola

Ingredients:

  • 2 ½ cups rolled oats
  • 1 cup almonds (or nut of choice)
  • 1 cup unsweetened flakes coconut (1 ½ cups is the addict dose. Use your judgment)
  • 1 Tbsp cocoa
  • 1 tsp kosher salt
  • 1 Tbsp finely ground coffee
  • 2 Tbsp brown sugar
  • 3 Tbsp coconut oil
  • 3 Tbsp maple syrup
  • ½ tsp or more vanilla (optional, but why not?)
  • 5 oz strong brewed coffee

Method:

Preheat oven to 325. Line one or two baking sheets with parchment paper. (It will cook up and crisp faster in two.)

In a large bowl combine oats, almonds, coconut, cocoa,salt brown sugar and ground coffee.

In a small saucepan melt oil and stir it together with syrup and brewed coffee until combined.

Pour liquid mixture over oats and combine well. Spread granola evenly in pan(s).  

Bake, stirring and checking every 10 minutes, for ~30 minutes, until desired dryness. Don’t skip the stirring, especially if it’s all on one pan. And don’t be fooled by the dark color (thanks to the coffee and cocoa). Test it out to make sure it is done to your liking. The granola will crisp up more as it cools. Cool completely before storing.

Roasty and toasty, straight from the oven.

Bringing it:

Curl up that parchment paper and funnel this goodness straight into a mason jar. Bring it anywhere you want to be a morning hero.

Get Your Picnic On: Lemony Shrimp and Bulgur Salad

Driver Ed Lesson of the Day:Taking your shrimp show on the road.

Driver’s Ed is taking me down. This is my second round of Driver’s Ed, the five weeks of captivity that will eventually lead to liberty. This time it is in St Johnsbury—again nowhere near where I live—so it involves lots of scheduling and shuttling of hungry kids. It can also involve a boatload of cash if you’re not careful. Whether it’s Driver’s Ed or spring sports turning your car into a food truck, this is the time to get your picnic on.

One week in and I have already overworked my chicken rotation (oven fried chicken totally goes the distance).There is a tomato hater on board so the Panzanella of the Gods is out. I’m also not yet ready to surrender to the quick fix of pasta and meatballs, so I turned to a super easy, substantial and delish salad.

This salad is a brilliant go-to for potlucks and picnics. It stars bulgur, which is sort of my new best friend. The beauty of bulgur is that it requires no cooking AND it’s cheap cheap cheap. Bulgur just needs to soak for a bit and it’s ready to use, making is a nice alternative to overnight oats…but that’s another meal and another conversation. We’re sticking with the picnic message here.

What else makes this salad so great? It’s quick and easy to prep and pack, requires zero to minimal stove time and few ingredients, can be eaten at any temp and does leftovers like a boss. The spinach holds its own on Day 2, so even if you are an avowed leftover salad hater (helloooo entire rest of my family), this might entice you to change your ways.

The recipe calls for cooked shrimp. I usually start with raw, defrosted shrimp, and cook them in a pan with some olive oil and/or butter, and a squeeze of lemon or a splash of vinegar. Do shrimp how you do shrimp. It’s all good.

Grab that bag of shrimp from the freezer, soak some bulgur and make this salad. Then you’ll have all the time in the world to worry about having another driver in the house.

Lemon Bulgur Salad with Shrimp

This came from Food and Wine, but, as you can see in my notes nimbly veers to many variations. If you forget to get radishes you can go with any crisp, thinly sliced vegetable. No pine nuts? Use what you’ve got. Here, I used pecans.

Ingredients:

  • 1 1/2 cups coarse bulgur
  • 1 teaspoon finely grated lemon zest
  • 1/4 cup fresh lemon juice
  • 3 tablespoons chopped dill
  • 1/2 cup extra-virgin olive oil
  • 1 pound large cooked shrimp, shelled
  • 3 cups baby spinach
  • 4 radishes (or another crisp veggie), thinly sliced
  • 2 tablespoons pine nuts (or nuts/seeds of choice)
  • Kosher salt and freshly ground pepper

Method:

  1. In a bowl, cover the bulgur with warm tap water. Let stand until the grains are tender, about 2 hours. Drain the bulgur well. (If needed, speed up the process with hot water.)
  1. In a large bowl, whisk the lemon zest with the lemon juice and chopped dill. Whisk in the olive oil. Add the bulgur, shrimp, baby spinach, sliced radishes and pine nuts and toss to coat. Season with salt and pepper and serve.

Bringing It

The salad can be refrigerated for up to 1 day. Add the spinach, radishes and pine nuts just before serving. (It can also totally be eaten in the parking lot of a Driver’s Ed class, or wherever you can find free parking and wifi. )


Snow Day Lemon Mousse

Light and fresh, like the snow we dream about!

This comes straight outta Steamboat, from Rocky Mountain Tania, who describes this lemon mousse as, “Amazing. Easy, light and such a counter balance to heavy winter food.”  Tania says she’s  embarrassed how much she makes this, but who in the world would be embarrassed by this thing of beauty?

The coolest thing about it is that it involves fresh snow. I just got back a trip west, where there is plenty of that, and I have high hopes that the return of cold temps to the east this week will bring some of the white stuff here as well. To all of you who are wishing for the opposite…C’mon man! Just give us one more month. Then we can all feel good about the meltdown.

Chilled Lemon Mousse

Adapted from Cook’s Magazine, with full photo, recipe and commentary credit to food and photo sensei Tania Coffey.

You will need:
A one quart soufflé dish (or any 1-1½ qt serving bowl)
A Kitchenaid with whipping attachment (or this recipe could be a real pain)
snow (or a good ice-maker) to put in a big bowl for chilling custard quickly

Ingredients:

  • Juice from 3 lemons (1/2 cup)
  • Zest from one lemon (3 tsps)
  • 1 packet (1/4 oz) gelatin
  • 1 cup whole milk
  • 3/4 cup sugar divided*
  • 2 large egg yolks (3 small) plus 5 large egg whites at room temperature
  • 1/4 tsp cornstarch
  • pinch cream of tarter
  • 3/4 cup heavy cream chilled
  • mint, raspberries or finely chopped pistachios for garnish

Method:

Leave eggs out for a couple of hours to bring to room temperature.
Zest one lemon
Add zest to the 1/2 cup of lemon juice and sprinkle pack of gelatin over juice.  Stir and set aside to soften.

Heat milk and 1/2 cup of sugar in a medium saucepan over medium-low heat.
stir occasionally until the sugar dissolves (5 min)
Meanwhile, whisk together the yolks, 2 Tablespoons sugar and the cornstarch in a medium-large bowl until pale yellow and thickened.
Whisking constantly slowly add the hot milk to the yolks (a rubber bottomed bowl is so great here so it doesn’t move while you are whisking and pouring).
Return the egg yolk-milk mixture to the pan and cook over medium low heat, stirring constantly until the foam dissipates to a thin layer and the mixture thickens to the consistency of heavy cream (185 on an instant read thermometer).  About 4 minutes. Do not over cook here or it will get lumpy or worse.

Pour the mixture into a medium-large bowl (I use the already dirty one) and add the lemon/gelatin mixture and stir.

Chilling’ in the snow. Sooooo cool!

Set the bowl in a larger bowl of snow (sorry, if you don’t have fresh snow ice water works well).  Stir occasionally to cool.

While the custard is chilling crank up the Kitchenaid with the whipping attachment.
Beat the egg whites and cream of tarter at medium speed until foamy (1 minute)
Increase speed to medium high.
*Add 2 Tablespoons of sugar (I usually skip this addition because I like the mousse super tangy not sweet) and beat until glossy and the whites hold soft peaks.
Don’t over beat.

Remove custard from snow/ice bath.
Gently whisk in one third of the egg whites.
Then fold in the remaining whites with a rubber spatula.

In the same mixer bowl (don’t bother cleaning it) beat the cream on medium high speed until soft peaks form when whisk is lifted (2-3 minutes).
Fold the cream into the custard/egg white mixture until no white streaks remain.

Pour into a 1 quart soufflé dish (or any 1 1/2 quart serving bowl).  Refrigerate.

For best texture chill for 1-2 hours

Garnish as desired. PS. This recipe makes you look like a pro—try it quickly!

Squaw Valley USA, a looooong way from meltdown.

Morning Paper Oatmeal Raisin Cookies

The oatmeal cookie lid: one of many ways to keep warm this winter.


One of the greatest sources for food and drink recipes is the Wall St Journal. Who knew? Really, cocktails are their sweet spot, but they have a sophisticated spin on pretty much everything. Consequently, you don’t find a lot of cookies there, but when you do, you know they’re going to be good.

These cookies delivered, and turn out to be somewhat addictive, even for someone who is not a huge oatmeal raisin fan. It may have been the overdose of cinnamon, or the salt, or the plumped up raisins. It probably had little to do with the oats, but you never know. They even passed the suspicious kid test. 

I waited a long time to post these because the recipe, when strictly followed, asks you to leave the dough in the fridge for four days. Four DAYS. This is really handy for those tough Monday afternoons when you say to yourself, “Boy I feel like a warm oatmeal cookie…on Friday.” Needless to say, I have made many batches of these, and it took until today to achieve the recommended four day incubation.

Was it worth the wait? I did indeed notice the flavor was even better than the young, unseasoned cookies. BUT they are also really good with a one day rest, and even a zero day rest. I will leave the waiting up to you.

A few notes here: The mixer with the paddle attachment is real, as is the extra large egg. This dough is pretty crumbly, so pro mixing and the extra bit of egg both help. If you only have large eggs, just beat up another one and add a bit of it in. Then have yourself a hearty ¾ egg omelet or cook it up and add it to your salad. Or, if you are not pathologically averse food waste (as I am), just put it down the drain.

On cookie size: The original calls for a ¼ cup scoop. Those are massive cookies. I prefer to make mine golf ball sized and smoosh them as suggested, with a bit of parchment paper.

On refrigerating: It says to scoop them first. If you don’t happen to have that kind of real estate in your fridge, refrigerate the batter in a bowl and scoop just before baking.

Finally, on cooking time: 14 minutes was about right for my normal sized cookies, but start checking them at 12. Err on the side of underdone and they will firm up a bit as they cool.

Oatmeal Raisin Cookies

From Adapted by the Wall St. Journal from Sadelle’s, New York City.
Active Time: 10-15 minutes
Total Time: 1 hour, plus 4 days for chilling dough
Makes: 14 massive cookies. Or wayyyy more normal sized ones.

Ingredients:

  • 1 cup raisins
  • 1¼ cups all-purpose flour
  • 1 tablespoon plus 1 teaspoon ground cinnamon (yes this is a lot, and it is key!)
  • 2 teaspoons baking soda
  • 1½ teaspoons fine sea salt
  • 1½ sticks slightly softened butter
  • 1 cup light brown sugar, firmly packed
  • 6 tablespoons granulated sugar
  • 2 cups old-fashioned or rolled oats
  • 1 extra-large egg
  • 1½ teaspoons vanilla extract

 Method:

  1. Soak raisins in hot water for 30 minutes, then drain.
  2. Meanwhile, in a small bowl, sift together flour, cinnamon, baking soda and salt.
  3. Using an electric mixer fitted with paddle attachment, cream together butter and sugars on medium speed until light and fluffy, scraping down frequently. Take care not to overbeat.
  4. Add flour mixture to creamed butter and sugar and mix on low speed until combined. Mix in oats, followed by drained raisins, egg and vanilla.
  5. Use a ¼-cup measure to scoop dough onto a parchment-paper lined baking sheet. (See note above. Golf ball sized makes a regular-sized cookie.) Flatten each blob with base of measuring cup or your hand and a square of parchment paper. Cover baking sheet with plastic wrap and refrigerate 4 days (optional).
  6. To bake cookies: Preheat oven to 350 degrees. Bake until cookies are golden-brown on the outside but still soft in the middle, about 17 minutes (12-14 for smaller cookies). Remove from oven and let rest on baking sheet a few minutes, then transfer to a rack to cool.

A whole plate of yum, looking a little funky with a filter.


Inner Beauty Oven Fried Chicken

Confession: I’ve been wanting to share this recipe for a long time, but it wasn’t pretty enough. Just try to make fried chicken look appealing without a food stylist and studio lighting. If you succeed, let me know!

Let’s not let looks get in the way of substance because this, my friends, is a recipe you need to know…especially with Super Bowl, ski lodge lunch and après ski snack season upon us. (It will be equally useful for summer picnics, but we’re staying on message. And PS, see some Super Bowl recipe ideas way below.)

This recipe, by way of Food52, takes totally simple ingredients, and only asks that you adhere to an equally simple but all-important method:

 You brine it, you pat it, you coat it, you shake it hard and you bake it…in a hot oven on a hot roasting pan glistening with just enough melted butter. Oh, and you flip it. Because, you know, “chestnut golden brown” on only one side is just mean.

 My chicken took longer than 40 minutes for the first side to brown up, so use your good judgment on that. AND for max browning and crispiness be sure to use a metal roasting pan or rimmed baking sheet that gives each piece of chicken its space. I did some test pieces in a ceramic baking dish and they were not A-Team material.

 This totally passed the man test, the boy test, the boy-man test, the leftover test, the hot from the oven and cold from the fridge test, and the straight outta Tupperware in the lodge test. Be beautiful inside and out: Make this chicken!

Serves 4, or 3 big eaters

Provenance: From Food52 and Judy Hesser, whose daughter Amanda included it in her book Cooking for Mr Latte .

Ingredients:

  • 3 tablespoons sea salt (divided, plus more for serving)
  • 8 bone-in, skin-on chicken thighs (as good as you can get)
  • 2 tablespoons unsalted butter
  • 1/2 cup all-purpose flour
  • 1 teaspoon coarsely ground black pepper (plus more for serving)
  • Optional: grated Parmesan cheese and grated fresh lemon zest (I have not yet tried this variation but it looks awesome)

Method:

  1. In the morning, combine 2 tablespoons salt and about a cup of warm water in a large bowl or container. Stir to dissolve the salt. Trim the chicken of excess skin and fat. Add the chicken to the bowl. Cover with very cold water and add a tray of ice cubes. Swish around with your hand to disperse them. Chill in the refrigerator until dinner time.
  2. Preheat your oven to 400°F (200°C). Remove the chicken from the fridge and pat dry completely with paper towels (you can lay them on a clean dish towel to get off a lot of the moisture). Put the butter in a roasting pan large enough to fit the chicken in one layer (if you crowd them, they will stew vs. crisp). Place the pan in the oven. In a 1-gallon freezer bag, pour in the flour, remaining 1 tablespoon salt and pepper (along with the parm and lemon zest if you are using.) Give it a good shake. Add the chicken pieces two at a time and shake them until thoroughly coated. As you lift them out of the bag, shake them off vigorously. This is vital. You do not want a gummy coating. Line them up on a plate, and repeat with the rest.
  3. Lay the chicken pieces in the roasting pan, skin side down, and oven-fry until a chestnut brown and crisp on the bottom, about 40 minutes (sometimes it takes as long as an hour). Don’t flip them until this happens. Use a thin spatula to scrape them up off the pan and turn them; cook the other side until the bottom is browned, which will take less time, around 20 minutes. Remove the pieces from the oven as they finish cooking, and place on a plate lined with paper towels. Just before serving, grind fresh pepper over top and sprinkle lightly with sea salt.

SUPER BOWL BONUS

And speaking of the Super Bowl…If you need some ideas for how to prep for your couch or wherever you are headed, you might want to consider Crock Pot Chicken Taco Chili (so easy and feeds a crowd), Peoples Choice Corn Bread (not so easy but so worth it. You WILL be the halftime star). Game Day Wings, because, WINGS, Buffalo Chicken Meatballs because HOT SAUCE and potato bites because TATERZZZ! For some healthy snacking get your Hail Mary Coconut, your Nootch Popcorn and your Party Time Hummus on. Have a great weekend all!

Cauliflower and Pear Soup


My Dad’s favorite soup was vichyssoise, which is French for a cream, leek and mashed potatoes milkshake. While vichyssoise is delicious, I always feel a little guilty having a day’s worth of calories in a cup. It’s also traditionally served cold, which makes it a tough sell in winter. This soup, from Food52, reminds me of Vichyssoise in its creamy texture and in its potato/leek provenance. It is, however, downright healthy and served hot—key features for all food in January.

The addition of pears here is all upside, especially if you need a way to use up any Christmas pears. By the way, if you happen to have that problem, I’ll be right over! It also cooks in one pot. And that’s not all…it can easily be Veganized by replacing the butter with your fat of choice, and using vegetable broth instead of chicken broth. Swirl in some cream if you need a hug.

Cauliflower and Pear Soup
Serves 4 to 6

Ingredients

  • 1 T olive oil
  • 2 T butter
  • 1 large leek, white and light green parts, chopped
  • 1 small shallot, chopped
  • 1 head cauliflower, green leaves and trunk removed, florets chopped
  • 2 small yukon gold potatoes, peeled and chopped
  • 1 large or 2 small pears, peeled, cored, and chopped
  • 5 leaves fresh sage (or about 2 tsp chopped), plus more for garnish, if desired
  • 1 T chopped fresh thyme leaves
  • 5 to 6 cups chicken stock
  • kosher salt + freshly ground black pepper
  • 2 to 3 tsp sherry vinegar, or to taste (champagne vinegar also works well)
  • 2-3 Tbsp maple syrup (optional)

For Serving:

Method:

  1. Heat the oil and butter in a soup pot over medium heat. Add the leek and shallot, and cook until they are soft, stirring occasionally, about 5 minutes.
  2. Add the cauliflower, potato, pear, sage, and thyme, stirring to thoroughly coat them with the oil and butter. Season with salt and pepper. Cook until lightly browned, stirring frequently, another 8 to 10 minutes. (if your pot is pretty full it may take quite a bit longer. Be loose and go with your instincts here). You’re aiming for a little caramelization around the edges for depth of flavor.
  3. Add 5 cups chicken stock. Season to taste with salt and pepper. Bring to a simmer, lower heat to just maintain the simmer, and cook until all of the ingredients are very tender, about 30 minutes.
  4. With an immersion blender or regular blender, puree the soup until it’s smooth. If using a blender, you may need to do this step in batches, then return to pot. You’re looking for a smooth, velvety texture, so take your time to blend thoroughly. Thin with more chicken stock, if needed, until you reach desired consistency.
  5. Season to taste with vinegar, maple syrup if desired (when would it not be?) and salt and pepper. Serve in heated bowls, with garnish of choice

The experts say you should serve this with a gooey grilled cheese sandwich. Who am I to argue? And in case you wondered, it’s darned good cold as well. Buck would approve!

Winter’s back. Stay warm out there!

Salted Peanut Butter Cookies: Gluten-Free and Mini-Mart Sourced

Gluten-free, marmot approved.

Gluten-free, marmot approved

Here’s a hypothetical situation. It’s Christmas Eve, you gave away all your homemade cookies (if you happen to have made them in the first place), and you just found out Santa (or a guest) is gluten-free. There’s no way you’re going to the grocery store for special ingredients but you may be able to pull off a mini mart run. What if all that happened? What would you do?

You would make these cookies.  These are barely adapted from Smitten Kitchen who got them from the Ovenly cookbook. It’s the gift that keeps on giving. Here’s hoping you don’t need these tonight, and you stay clear of mini marts, but in case of emergency, you’re covered. Have a good one all, enjoy your people, and see you on the other side!

Salted Peanut Butter Cookies

Yield 26 to 28 cookies with a 1 2/3 tablespoon or #40 scoop.

  • 1 3/4 cups (335 grams) packed light brown sugar
  • 2 large eggs, at room temperature
  • 1/2 teaspoon vanilla extract
  • 1 3/4 cups (450 grams) smooth peanut butter (see note at end)
  • 1 cup (or so) of your favorite chocolate chips (optional)
  • Coarse-grained sea salt, to finish

Preheat the oven to 350°F. Line a rimmed baking sheet with parchment paper.

In a medium bowl, whisk together the light brown sugar and eggs until smooth. Whisk in the vanilla extract, then the peanut butter until smooth and completely incorporated; you shouldn’t be able to see any ribbons of peanut butter. Stir in chocolate chips, if desired.

Scoop or spoon the dough into balls — from a heaping Tablespoon to monster 1/4 cup sized. Place on prepared pan. For the tallest final shape, place the tray in the freezer for 15 minutes before baking.

Sprinkle the dough balls lightly with coarse-grained sea salt just before baking. Bake smaller cookies for 14 to 15 minutes and larger for 18 to 20. When finished, cookies should be golden at edges. They’ll need to set on the sheet for a minute or two before they can be lifted intact to a cooling sheet. With any luck Santa hits your house late enough to let them cool completely so the crispy outside/soft inside thing can really happen. 

Do ahead: You can make the dough in advance and either refrigerate it for a couple days or scoop out the cookies, freeze them, then bake them right from the freezer.

About chilling the dough: You can scoop and bake the cookies right away, but they keep their shape better if you chill them in the freezer for 15 minutes first.

rosemary walnuts

Spicy Rosemary Maple Nuts

It’s here people. Crunch time. This is your week to bake or cook your way out of small gift madness.  Let’s review some options: We have, of course, the standby Crackle, and the more grown up Guinness and dark chocolate version. We have easy as pie (crust) cookies and jars of salted caramel cholliesauce or honey thyme walnuts. And speaking of nuts…we now also have an updated riff on sweet and savory roasted nuts.

Sadly, I have no kill switch when it comes to sweet and spicy roasted nuts. Until now the men in my house have allowed me to make them, give them and sample (hoard) them with no interference. This year, however, when I made these for Thanksgiving they disappeared before they were cool enough to hide. Either the locals’ tastes have evolved or this recipe is just that good.  It calls for fresh rosemary, maple syrup and cayenne—standard issue stuff amongst us nut fans. What takes them over the edge is the amount of rosemary (lots) added both before and after baking. Oh, and flaky sea salt. No secrets here.

They’re sweet but not too sweet, and have enough heat to get your attention but not in a scary way. Best of all, there are no egg whites or other fussy things involved. Yes, those are angels singing. You’ve got to get fresh rosemary—I’m not letting you off the hook there—but you can use a mix of whatever raw nuts strike your fancy. Pictured is the full walnut monty, but a mix with pecans, almonds and/or cashews is divine. Love the one you’re with, baby.

Make a lot so you don’t have to be stingy with your family. It’s so close to Christmas and all.

Spicy Rosemary Maple Nuts

From Kitchen Konfidence

Ingredients

  • 1 pound unsalted mixed nuts (cashews, walnuts and almonds are delish)
  • 1 tablespoon melted butter
  • 1 tablespoon maple syrup
  • 2 tablespoons + 1 teaspoon chopped fresh rosemary, divided
  • 1 tablespoon dark brown sugar
  • ½ teaspoon cayenne pepper
  • 2 teaspoons flaky sea salt or kosher salt, plus more to taste

Method

  1. Preheat oven to 350°F. In a large bowl, toss mixed nuts with melted butter and maple syrup. Add 2 tablespoons chopped rosemary, dark brown sugar, cayenne pepper and 2 teaspoons flaky sea salt, mixing until the nuts are well coated . Spread nuts out onto a rimmed baking sheet lined with parchment paper. Bake until glazed and golden (about 18 – 20 minutes), stirring twice during the cooking process.*
  2. As soon as the nuts come out of the oven, season with an additional 1 teaspoon chopped fresh rosemary, and flaky sea salt to taste (I added an additional 3/4 teaspoon). Serve warm immediately or store in an airtight container at room temperature for up to 5 days.

Notes

  • Set the timer and If your oven runs hot, be sure to check the nuts a bit early. Nuts can turn on you and go from golden to bitter if you ignore them.

Up next: What if you find out Santa is gluten free….and you only have access to a mini mart? Got ya covered.

nuts-n-stuff


Slippery Slope Ginger Beer Margaritas

Watch your step. Holiday season snuck right up on us again. Just as we stood up from prying the squirrel-nibbled pumpkins off the patio, the holidays were staring us straight in the face. From here on it’s a slippery slope of parties, visitors, events and hastily concocted reasons to gather right through January 2. Are you ready? Do you need a drink? This could help.

Let’s ease into this transition by taking a summer standby and winterizing it. Meet the ginger beer margarita. I stumbled across this while going down the Internet rabbit hole in pursuit of butternut squash tacos. Did I mention the slippery slope? After some exhaustive testing of ginger beers, following the comments on Minimalist Baker, I can definitely recommend the lighter ones like Fever Tree. It IS a margarita after all.

These are the easiest drinks in the world to make. You can get fancy and line the rim with lime juice and salt, or you can a just make the darned drinks. You can stir the ingredients together in a cocktail shaker with ice and strain, as directed, or you can just stir them up up in a pitcher, and pour over ice in each glass giving each drink another good stir. Just save yourself the anxiety and the outfit change and DO NOT shake them in a cocktail shaker. Remember the volcano experiment in 2nd grade? Yep.

A quick brush up on simple syrup: Combine equal parts sugar and water. Stir to dissolve sugar, heat to boiling, and let cool. Keep some stored in your fridge at all times, in case of emergency.

The best part about this drink, from a social perspective, is that you can easily bring the parts and assemble on site, AND the ginger beer makes a festive non-alcoholic drink as well (see top picture). For more ideas you can always revisit these fine drinks from last year.

The contenders. It wasn’t really exhaustive, but it was a Wednesday

Ginger Beer Margaritas

From Minimalist Baker, and adapted for high volume

Ingredients

Single serving version

  • 1.5 ounces (3 Tablespoons) 100% agave tequila
  • 1 ounce (2 Tbsp) fresh lime juice
  • 3 ounces (6 Tbsp) ginger beer (Fever Tree regular or light are awesome)
  • .5 ounce (1 Tbsp) simple syrup
  • Coarse salt for lining rim (also optional and fancy)

Team player version, for four

  • ¾ cup tequila
  • ½ cup fresh lime juice
  • 1 ½ cups ginger beer
  • 4 Tbsp simple syrup
  • coarse salt

Method

  1. If you’re feeling fancy, Line a small serving glass with fresh lime juice and dip in coarse salt
  2. Add tequila, simple syrup, ginger beer and lime juice to a large glass (single serve) or cocktail shaker (let’s not drink alone) with lots of ice and stir vigorously. Don’t shake with a lid on!
  3. Pour liquid (reserving ice) into serving glass with a few ice cubes Garnish with a lime wedge and serve immediately. Repeat for more drinks, or double/triple the amounts for more people.

What to do with your leftover ginger beer, once you have settled in on “the one.” Here’s an idea. Pour it over these cranberry rosemary ice cubes that you made for Cran-rosemary prosecco punch, which is basically equal parts prosecco and white cranberry juice, a splash of bitters and these fancy ice cubes.  The fancy ice cubes also winterize the flavored seltzer you can’t help from buying on every trip to the store. Did I mention it’s a slippery slope?