When Life Gives You Lemons, Say Thank You!

It’s a dreary Sunday here in the east, with the promise of rain to take what’s left of our precious snow. As if in anticipation of this day, a heavy Priority Mail box from California recently arrived. Cousin D, in a race to save her California hillside of citrus from a cold snap, did a mass harvest and shared some of it with me. As a former Vermonter, D knows the mixed blessing of March in New England–winter’s easing its grip, but…the mud!–and the curative power of Meyer lemons. On top of that, she’s just darned thoughtful!

Rather than reinvent the citrus wheel, I’m going to revisit some favorites from Lemonpalooza 1, (Lemon simple syrup, and roasted lemon shallot vinaigrette for an off the hook chicken bread salad) and from the sequel, Lemonpalooza 2 (lemon pudding cake, preserved lemons and the lemon blueberry sunshine loaf that I discovered the last time Cousin D bestowed her citrus bounty on me.)

For breakie, squeeze some on top of the classic Dutch Bunny to put a big smiley face on your day, orrrr nothing says “I love you” and also “Don’t mess with me” like Sassy Sansa Lemon Ginger scones. If you really want to jumpstart summer, make up a Lemon Beach Pie.

Of course, there’s nothing wrong with plowing through your lemons as straight up lemon juice in and on everything. Tea? Smoothies? Sprtizers? Cocktails? Yes please!

If you’ve already embarked on spring training, squeeze them up for some minty snap pea salad, lemony shrimp and bulgur salad, lemon cauliflower couscous or pretty much anything that could use some fresh zip.

Wherever you are on this spring day I hope you find some brightness and warmth.

PS. We’re taking votes for your favorite lemon recipes. First vote is by Aunt D for lemon posset, in Lemonpalooza 1. Solid choice!


Maple Creemee Pie

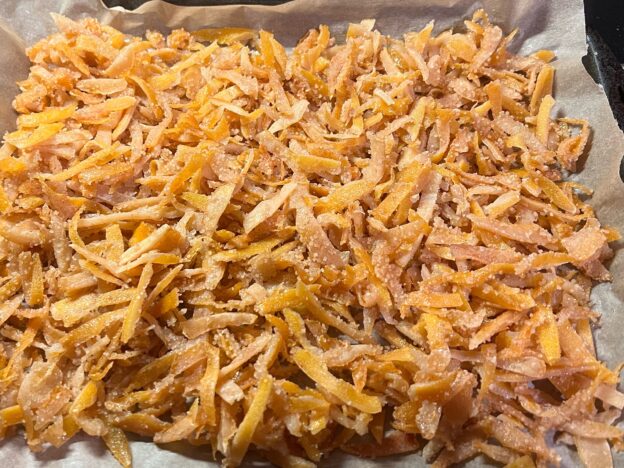
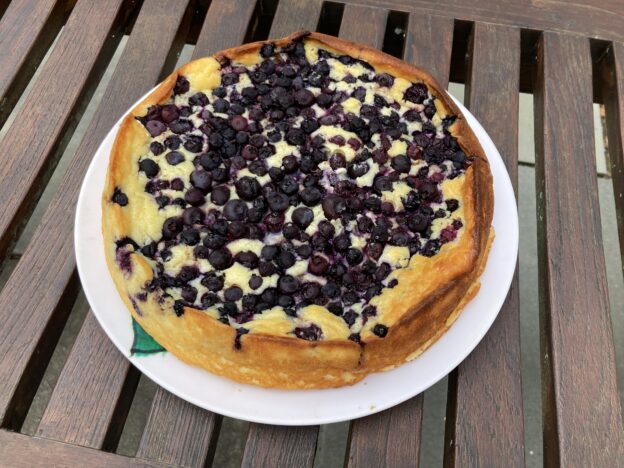
The saddest day of the year for me is the day they stop serving maple creemees in my hood. That was on the last weekend of October, when Mac’s Maple closed. It wasn’t a real ice cream day, but to honor the occasion I secured two of their maple creemee pies. I figured they would be my step-down program, and perhaps inspiration for my own recipe for the same. Rigorous testing ensued.

The first test was between the purchased version—the control pie— and my own creation, a riff of Nina’s Margarita Pie. Scouring the Internet for ingredients of legit maple creemees had confirmed that this was a good master recipe to use as a starting point. Immediately, my group of testers confirmed that the control pie’s waffle cone crust was, as one tester indelicately put it “f’ed up.” It was indeed far inferior to the pretzel crust of Margarita Pie.

Still, it needed some tweaks. My first creation tasted good but, as another tactless tester (this one related to me) noted, “you need an axe to get through it.” Here’s where the science came in. I realized that margarita pie contains alcohol, which keeps it from freezing up like a brick. Adding more whipped cream could also help the pie retain a softer, more utensil-friendly, consistency.

I’ll spare you the details to the entire process, but a stalwart tester, when confronted with the two latest versions, said he felt a bit like Chuck Yeager. He was not far off. When Thanksgiving is this close, every pie matters! We needed something as good as Joni Mitchell Apple Pie, Knock Out Vegan Pumpkin Pie and Pilgrim Pie. And, this being a new player amongst traditional faves, we needed perfection.

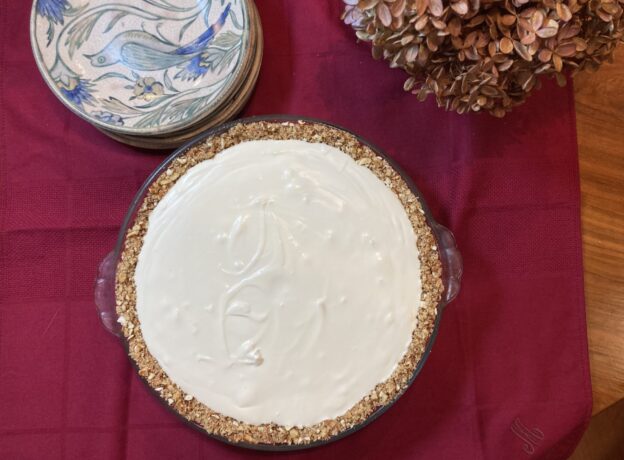
Friends, my testers unanimously confirm, we now have it. I offer here maple creemee pie perfection, the clear winner, and a non-alcoholic version as well which is a worthy silver medalist. The use of alcohol, I assure you, is not gratuitous—it’s where good science meets good taste. That said, you can save yourself a trip to the liquor store, use a little more maple syrup and a touch of vanilla, and still have yourself a darned good maple creemee pie.

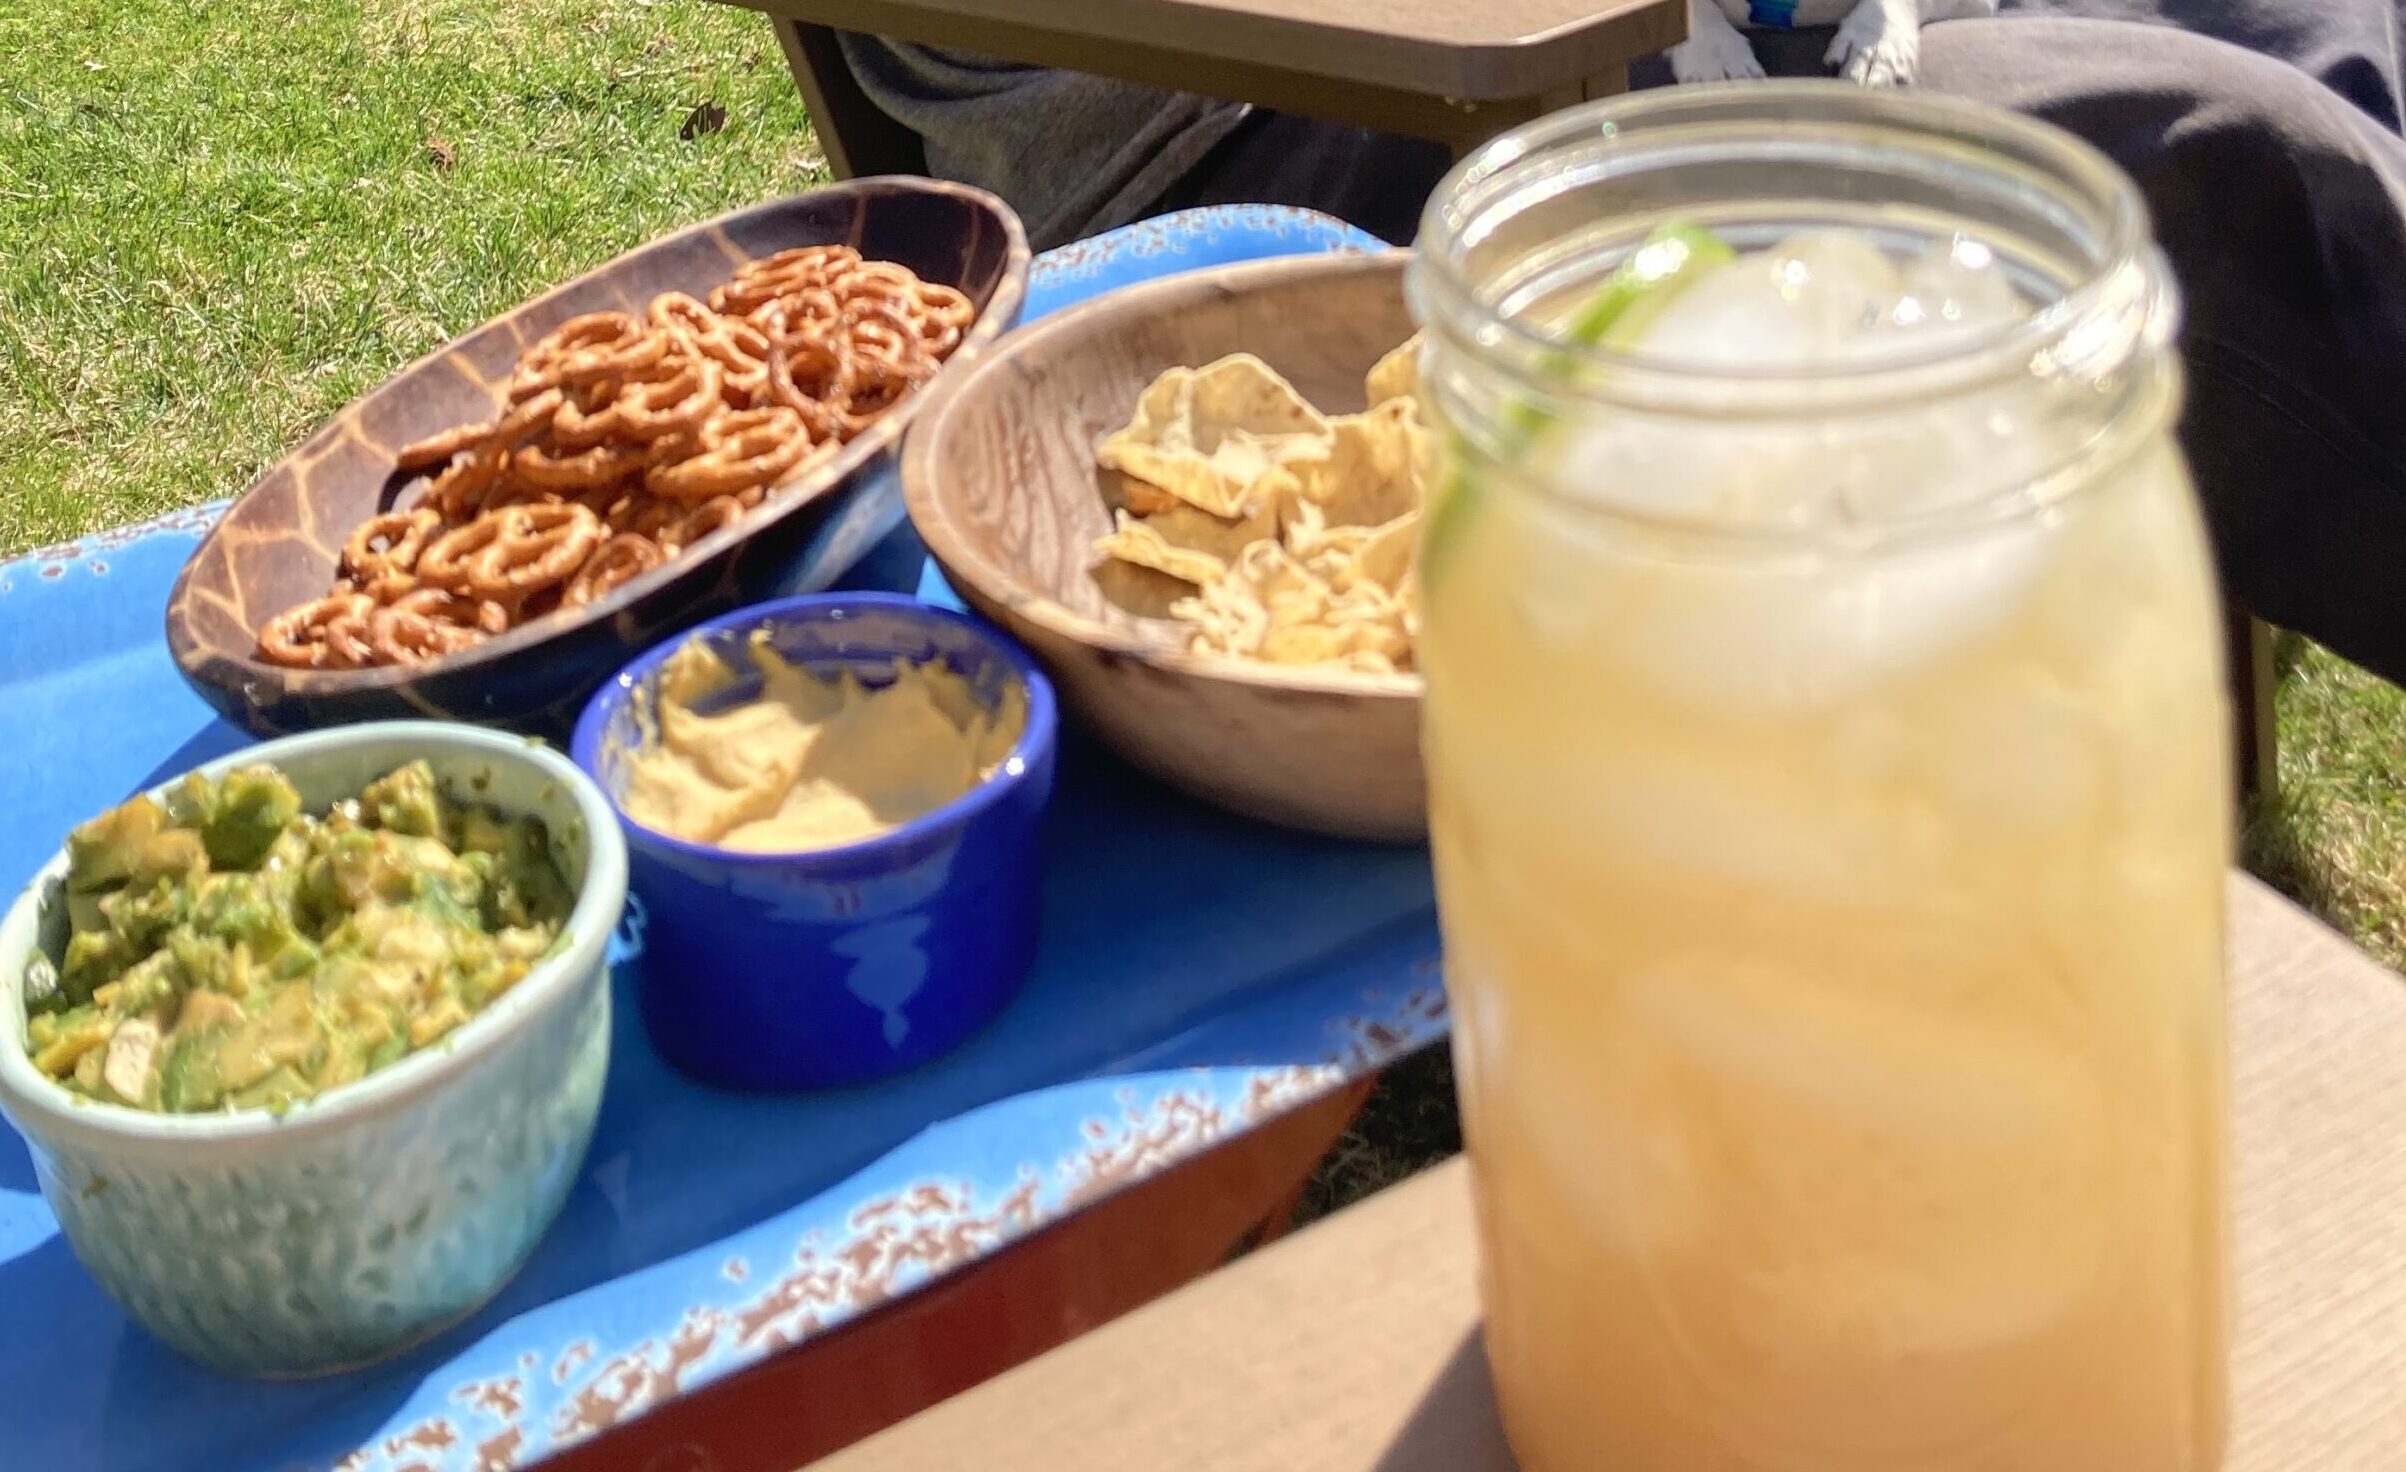
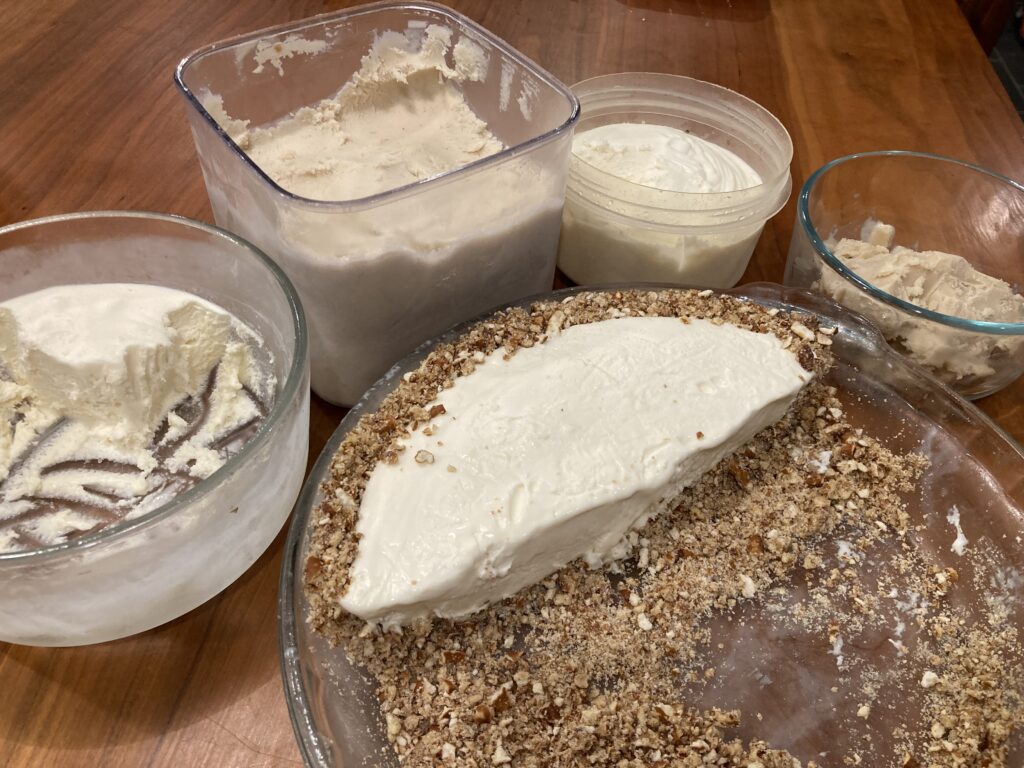
The constants in both versions: The crust is the bomb! It is equally excellent with regular and gluten-free pretzels. The cream is your structural integrity, so whip it good, until it has very stiff (even jagged) peaks, yet hasn’t turned the corner to butter.

Finally, to my Vegan friends. I failed you on this round. I tried two oat milk fillings, this one with nut butter and this one with cashews. I know there are pros out there who can work their sweet magic with such ingredients (looking at you, Sister A), but not me, not yet. I have not given up, but I need a rest. Sometimes, a girl’s gotta not eat.

One happy side note, is that after all this testing, and knowing that I can get my fix anytime, I really am ok with waiting six plus months for my next maple creemee. But you out there? You’ve got a lot more creemee pie capacity in you. I hope you enjoy this and every other deliciousness on your Thanksgiving table. Holidays, here we come!

Maple Creemee Pie

Prep time: 15mins, plus at least 4 hours freezing time.

Makes 1 yummy pie, or up to 20 mini pies

Ingredients (updated August 2022)

  • 12 cup margarine or butter
  • 14 cup sugar
  • 3 cups pretzels (to equal about 1 14 cups crushed)
  • 1 (14 ounce) can sweetened condensed milk
  • 3 Tbsp maple syrup*
  • ¼ cup maple liqueur* (mine was 30% alc/60 proof)
  • 1 ½-2 cups heavy cream**
  • Optional: Maple sugar candies crumbled on as topping***

*For non alcoholic version, omit liqueur, and adjust to use 1/4 cup maple syrup, or to taste,  plus 1/2 tsp vanilla (optional-Chuck Yeager opts out of it).

** I like the full 2 cups of cream. If you don’t use the liqueur, and boost the maple flavor with more syrup, extra cream is the right call.

*** These are way optional. Veteran testers say leave it alone as is, but one rogue tester notes that the pro pies featured these, and he was enamored by the flourish.

Method

Make Pie Crust:
Melt margarine or butter and combine with sugar and pretzel pieces. Press into buttered 9” pie pan. For the mini versions, line 20 regular sized muffin tins with cupcake liners. Spoon the crust mixture into the cups until it is all used up, then use an empty liner to press the crust in place firmly. Refrigerate or freeze to cool while you make the filling.

Filling: Combine condensed milk, maple syrup and maple liqueur and whisk until it is well incorporated.

Whip the cream until it is very thick and stiff. Fold in the whipped cream as gently as you can until it is fully incorporated. Pour into pie crust and freeze for at least four hours, more to be safe.

Bringing it:

Warm weather travel with this is not recommended, but if you are celebrating away from home, and have the time and space for it to freeze, it is easily assembled on site. Just prep the pretzels first and put them in a Ziploc bag. Portion out the booze and syrup, grab a pie plate and fill a bag with the rest of the ingredients— cream, a stick of butter and that can of sweetened condensed milk that expires sometime this decade. Make the pie right away so it has max time to freeze, and you have max time to put your feet up and prepare to be worshipped.

We can’t all be winners


Mushroom (It’s Not About the Meatballs) Meatballs

This is my second post ever about meatballs. And like the first one, it really isn’t about meatballs. This time, it doesn’t even involve meat.

This post does include a delicious recipe that I have been meaning to share for a long time, but it’s more about friends and family and remembering and gathering. It is a loving shout-out to my Aunt Judith, who we honored last weekend. Judith was one of the most colorful people on the planet, quite literally. You’d be hard pressed to find any picture of her dressed in earth tones. It was her colorful personality, however, that shone through: the conspiratorial belly laugh that, together with the twinkling eyes, invited you into the underlying mischief of the moment. As my mother’s younger sister, she took it as her duty to show us that it was ok—even preferable—to color outside the lines.  

Judith would have appreciated the happy gathering orchestrated by her daughter, the fabulous  Pamina, resplendent in chartreuse and fire-engine red. The tribe came together, decked out in a full spectrum of colors on a brilliant November day, where the strangely persistent yellow foliage boldly defied the bleakness of stick season; and where Cousin Danielle’s Rolling Stones  tribute cheerfully defied church convention. It was perfect.

In addition to the colors, laughter, music and stories, it also seems fitting to remember Judith with food, of which she was a fan. Some of her favorite dishes were comfort food classics, like Italian fare and meatloaf. She also strove towards healthy eating, though the striving and the reality didn’t always match. These meatless meatballs seem like a fitting compromise between her desires and her aspirations.

They are mushroom-based and, like Judith, can accommodate all guests. As written, they include eggs and a small amount of cheese, but for Vegans making the appropriate substitutions is child’s play. These also involve some planning to accommodate chill time, forming and baking, but once you’ve done the drill they are quite easy. Crank up “That’s Amore” and get into it. They are delicious, which is all that really matters.

The only real downside is that color—Judith’s hallmark—is not well-represented here. Aside from that, these have everything you need for a tasty meal, and with enough sauce you’ve got color too. So, here’s to you Aunt Judith. You got us all together once more, in full color, and we love you to la luna and back.

Lots of taste, not so much color

Chef John’s Meatless Meatballs (of Internet fame)

Ingredients

  • 1 Tbs. Olive Oil
  • 1 lb. fresh white mushrooms, finely chopped
  • 1 pinch, and 1 tsp. pink salt
  • 1 Tbs. Butter
  • ½ C. finely chopped onion
  • 4 cloves, garlic, minced
  • ½ C. quick-cooking oats
  • 1 oz. very finely shredded Parmigiano-Reggiano Cheese
  • ½ C. Breadcrumbs
  • ¼ C. Flat-leaf (Italian) parsley, chopped, packed
  • 2 Eggs, divided
  • Freshly ground black pepper to taste
  • 1 pinch cayenne pepper
  • 1 pinch dried oregano
  • 3 C. Pasta Sauce
  • 1 Tbs. finely chopped flat-leaf Italian Parsley
  • 1 Tbs. very finely shredded Parmigiano-Reggiano Cheese

Method:

Heat olive oil in a skillet over medium-high heat. Add mushrooms to the hot oil, sprinkle with salt, and cook and stir until liquid from mushrooms has evaporated. Stir butter into mushrooms, reduce heat to medium, and cook and stir mushrooms until golden brown, about 5 minutes.

Stir onion into mushrooms and cook, stirring often, until onion is translucent, 5 minutes. Remove skillet from heat and stir garlic into mushroom mixture until fragrant, about 1 minute. Transfer mixture to a mixing bowl.

Mix oats into mushroom mixture until thoroughly combined. Gently stir 1 ounce Parmigiano-Reggiano cheese into the mixture. Add breadcrumbs, 1/4 cup parsley, and 1 egg, season with salt, black pepper, cayenne pepper, and oregano. Mix with a fork until crumbly. Stir in the remaining 1 egg. The mixture should hold together when pressed.

Cover the bowl with plastic wrap and refrigerate for at least 4 hours. For best flavor and texture, refrigerate overnight.

Preheat oven to 450 degrees F (230 degrees C). Line a baking sheet with a silicone baking mat or parchment paper.

Form mixture into small meatballs using a 2-tablespoon scoop. Roll meatballs lightly between your hands until smooth, if desired; arrange meatballs on a prepared baking sheet.

Bake in the preheated oven until meatballs are lightly golden brown, 12 to 15 minutes.

Bring pasta sauce to a boil in a large saucepan; reduce heat to low. Gently stir meatballs into sauce until coated. Simmer meatballs in the sauce until cooked through, 45 minutes to 1 hour. Transfer to a serving bowl and garnish with 1 tablespoon Parmigiano-Reggiano cheese and 1 tablespoon parsley.

Cousins Pamina and Beatie, in color

Sisters Judith and Nina, smiling as they did.


Pumpkin Soup, hold the spice

Alternative title: Miso over pumpkin spice. It may really be just me, but I am sick to death of pumpkin spice. I love pumpkin and all its winter squash cousins but the pumpkin spice conspiracy to assault your senses all fall is just too much. And so, while I want to want to savor pumpkin muffins and PSL’s, I really don’t want to, because they make me feel like I am eating or sipping a horribly misappropriated Yankee Candle.

Enough already. I prefer pumpkins and their cousins to taste like, well, the pumpkin family. If you don’t believe me, check out these pumpkin all stars. (There’s even a mighty fine pumpkin muffin in there that tastes nothing like a Yankee candle.) ‘Tis the season for orange goodness, and, unlike me, my family can only take so much Sugar and Spice Squash Soup. I needed another comfort soup in the repertoire and I think I’ve found it. This comes from My New Roots, home of the ever brilliant “Dirt Bread” that is the stuff of lusty Hippie dreams.

The original version of this soup uses red pumpkin also known as Kuri or red kabocha. I used cooked kabocha (AKA buttercup) squash because I had it at the ready and because it is mighty dense and creamy. I did not use the gnarly green peel. Butternut squash would also be fab. Or, hey, even an actual pie pumpkin would work (though they are more watery and less sweet and the skin is not for prime time).

This soup is also a fine way to work through the vat of miso that seemed like a good idea when I bought it, which was a while back. Miso adds the funk, or umami if you must, and the variety of toppings lets you totally riff in whatever direction you please. I used some fried shallots (that I bought at the same store where I made my excessive miso purchase), toasted pepitas and chopped pistachios to be X-tra klassy. We had this as just a soup, without the noodles, and it was tremendous, though noodles would be bulk it up into a fab fall dinner. If you want a similar recipe, with mushrooms right in the soup, check out this similar, though non-pureed one here.

Get your pumpkin on, and hold the spice. If you feel cheated you can always light a candle.

Pumpkin Miso Broth with Soba
From My New Roots. Serves 4 as a main, 6 as a side

Ingredients:

  • 1 Tbsp. coconut oil (olive oil is fine too)
  • 2 medium yellow onion
  • ¾ tsp. fine grain sea salt
  • 3 cloves garlic
  • 1 medium, 2 lb / 1kg Hokkaido pumpkin (or other favorite hard winter squash)
  • 3 – 4 cups / 750ml – 1 liter water
  • 3 – 4 Tbsp. white or light miso (3 was way plenty and I am a salt fiend)
  • 1 Tbsp. minced fresh ginger
  • 175g / 6oz. soba noodles (100% buckwheat)

Toppings:

  • spring onion
  • sesame seeds
  • sautéed shiitake mushrooms
  • seaweed (optional)
  • Other options: fried shallots, chile crisp, diced avocado, toasted pepitas, and so much more

Directions:

1. Roughly chop onions, mince garlic. Wash the pumpkin well (as you’ll be eating the skin), and chop into chunks. (I used kabocha without the peel. Look at your squash, know your audience and use your judgement here)

2. In a large stockpot, melt the coconut oil. Add the onions and salt, stir to coat and cook for about 10 minutes until the onions are just starting to caramelize. Add garlic and cook for about a minute until fragrant.

3. Add the pumpkin and stir to coat. Add 3 cups / 750ml of water, cover, bring to a boil, and reduce to simmer for about 15 minutes, until the pumpkin is tender.

4. While the soup is cooking, prepare the toppings: Bring a pot of salted water to the boil. Cook soba noodles according to package directions, drain and lightly rinse. Slice spring onion, lightly toast sesame seeds in a dry skillet over medium heat, about 2-3 minutes. Sauté mushrooms in a lightly oiled skillet over high heat for 5-7 minutes.

5.Transfer the soup to a blender and blend on high until completely smooth. Add more water if necessary – you’re looking for a creamy consistency, but it should not be thick like a paste. I like the soup to be on the thinner side for this dish. Add the miso, ginger and blend again until smooth. Taste and adjust seasoning as desired. Transfer soup back to the pot and keep warm (reheat if necessary, but try not to boil–miso does not appreciate that).

6. Ladle soup into bowls, top with soba, spring onion, sesame seeds, mushrooms and crumble the seaweed over top. Serve immediately and enjoy.

Many thanks to cousin D for this sign of the season


Hot Chicks: Let’s get the party started!

Got your attention right? If so, we’re halfway there to you having an excellent, healthy go to appetizer to add to your arsenal of fall food and tailgate all-stars (looking at you, Funitella Bruschetta). Furthermore, we have surmounted the hurdle that has, until now, prevented this deliciousness from breaching the confines of the Vegan recipe domain.

Elsewhere on the Internet, this recipe (technically chickpea panisse) is known as “chickpea fries.” As one who deeply resents food impostering, I get why calling these fries is a turnoff. Those two words do not belong together. So, rather than calling this creation fries, think of it as a snackified polenta—comfort food goodness that you can pick up and eat with your hands. It’s sounding better already.

The magic here, however, is not cornmeal. It’s chickpea flour, or besan, which is now one of my kitchen staples. In case you missed it, there is actually a cookbook out called, “Chickpea Flour Does It All.” (Christmas is coming people). This I learned from “Hey Nutrition Lady” who is a big fan of it, and featured this recipe on her site as proof.

The process here is very easy to do and to remember once you’ve done it. Bring a pot ofwater to a boil, and gradually whisk in the chickpea flour (using a 2:1 ratio of water to flour). Once the mixture is thickened, add some olive oil, fresh chopped herbs, salt and pepper. Pour that into a baking dish and let it chill in the fridge. Later (even days later), you can cut your slab into whatever shapes you like and call them whatever you like: “Fries” “Burgers” “Sliders” etc…or ditch the air quotes and just call them hot chicks. Spray or brush them with olive oil, bake ‘em up, give a shake of salt and you’re good to go.

Creamy on the inside, crispy and salty on the outside and eminently dippable…what’s not to love? I have served these many times now, to a variety of company, ranging from full Vegan to righteously carnivorous, and everyone in between. All have come back for more. Leftovers also make an excellent component of the next day’s lunch. 

For a full expose on the bennies of chickpea flour and very thorough coverage of chickpea panisse, check out the full post here.

In the meantime get on out there for a bag of besan and you’ll never be stumped for an appetizer again.

Ingredients

  • 6 cups water
  • 3 cups chickpea flour
  • 1 teaspoon each salt and freshly ground black pepper
  • 3 tablespoon olive oil
  • 2 tablespoon parsley finely minced
  • 2 tablespoon oregano finely minced (rosemary and/or thyme are excellent as well)

Method:

Make the Chicks

  1. Generously butter or oil a 9 x 11 baking sheet and set aside.
  2. In a large pot, bring the water to the boil over medium-high heat.
  3. Once the water is boiling, reduce the heat to medium and whisk in the chickpea flour a little bit at a time.
  4. Continue whisking for about 10 minutes, until the mixture is thick and smooth (I find that a few lumps are unavoidable, but you won’t notice them later).
  5. Stir in the olive oil, herbs, and a bit of salt and pepper to taste.
  6. Pour the chickpea mixture into the greased baking sheet and spread out into an even layer. Once it has cooled slightly, cover with plastic wrap and refrigerate for at least 1 hour, or overnight (slackers, this can be a few days as well).

Bake the Chicks

  1. Pre-heat your oven to 400°F / 200°C (this is a good place for your convection fan, if you’ve got one).
  2. Line a large baking sheet with parchment paper or a silpat. Slice the firm batter into sticks for chickpea fries, or rounds for burgers, etc.
  3. Line them up on the baking sheet, and brush or spray with a bit of olive oil.
  4. Bake for 10 minutes, then turn to the other side, brush again, and replace in the oven to bake for another 10 minutes. They should be slightly golden and crispy on the outside.
  5. Remove from the oven, salt generously, and serve with dip* of choice (think anything that goes with burgers and fries, or perhaps some liquid gold) and a glass of whatever makes you happy.

*Extra credit for serving Hot Chicks with this homemade version of “Bitchin’ Sauce”  Vegan dip Nirvana that makes a fine accompaniment to Hot Chicks. We’ll make it here later, I promise. And my spicy friends, let’s not forget to invite chile crisp to this party!)


Blueberry Breakfast Cake

And, an entire summer later, we’re back in the blogosphere. Long story short, there has been plenty of cooking and feeding going on, but not a ton of uploading and chronicling. Thanks to some kind friends I’ve gotten back to using real, hard copy cookbooks, and the Internet has been as relentless as ever serving up delicious wins and epic fails. Now, it’s time to revisit these favorite recipes so I, a: remember where they are, and b: can share them with my peeps!

We’re going to start back nice and easy. Then we’re going to get a little weird. I promise it’s all good stuff, but weird nonetheless. For now, we have Blueberry Breakfast Cake that I made more times than I can remember last summer. It’s like a delicious collision of a Dutch Bunny a blueberry muffin and a cheesecake.

This comes straight from King Arthur Flour, and it is foolproof. My only additional note is to use a cookie sheet on the rack below if you are using a springform pan, so you don’t bake any blueberry goodness onto your oven floor. Yes, I learned that the hard way.

Other than that, this is bombproof, and perfect for those late harvest blueberries or the ones in your freezer. I hope you love it!

Blueberry Breakfast Cake

Ingredients:

  • 3 large eggs
  • 1/2 cup + 2 tablespoons (124g) granulated sugar
  • 6 tablespoons (85g) melted unsalted butter
  • 1 cup (227g) ricotta cheese
  • 1 cup (227g) sour cream
  • 1 teaspoon vanilla extract
  • 1 cup (120g) King Arthur Unbleached All-Purpose Flour
  • 1/2 teaspoon salt
  • 1 1/4 teaspoons baking powder
  • 1 1/2 cups (255g) blueberries, fresh or frozen
  • cinnamon or confectioners’ sugar, for serving (optional)

Method:

  1. Preheat the oven to 350°F. Lightly grease an 8″ round cake or springform pan that’s at least 2″ deep. 
  2. In a large mixing bowl, using a whisk attachment (or by hand Laura Ingalls Wilder style), beat together the eggs and sugar until thick and lighter in color. Add the butter, ricotta, sour cream, and vanilla.
  3. Add the flour, salt, and baking powder, mixing until combined.
  4. Pour the batter into the pan and scatter the berries evenly over the top.
  5. Bake the cake for 45 to 50 minutes if using fresh berries (55 to 65 minutes for frozen), until the edges of the cake are lightly browned. The cake should be set throughout, although it will still jiggle when gently shaken.
  6. Remove from the oven and let rest at room temperature for 30 minutes to firm up. Serve warm with cinnamon or confectioners’ sugar (if desired).
  7. Store leftovers in the fridge for up to 5 days.


The Resta the Fiesta

Cinco de Mayo is coming at us like a Hump Day freight train. This year, we’ve got masks, we’ve got shots for the most part. We’re ready! Let’s review. We’re all set with triple spicy margs, and salsa verde, and today we’re adding one new non-recipe app to get the party started.

But first, we’re visiting to the archives for some basics:

For the apps, there must be guac. Lots of guac. I know full well you do not need a recipe for it, but in case you want to go a little off the reservation, there’s this crazy one with apples, pecans and tequila. For a more mainstream option try this Mango jicama guacamole or just add some chopped jicama to your guac for a refreshing crunch. Score points for doing (slightly) more than using your can opener with some easy and delish balsamic black beans. They can be an app or go on/into tacos, burritos enchiladas, quesadillas, tostadas, etc.

For the sides? Bust out the Hero Slaw. Full stop. It’s right for any party but especially for a fiesta because it’s fresh, crunchy, spicy, make-aheadable and feeds a crowd. It’s got it all, and neighborhood lore to boot. So, do that. For a more tropical totally refreshing salad Hot Cha Cha Pineapple Avocado Salad is a strong move. There’s got to be a corn course somewhere in there, and for some reason I have no go-to corn salsa recipe. Not to worry! This Mexican street corn inspired corn salad will do quite nicely.

As for the main event, let’s give ourselves the gift of simplicity. That could be: Baked tacos; quesadillas spiced up with Chile crisp, or not; a batch of Chicken taco chili all made easy in the crockpot; summer simmer chicken or some baked salsa verde chicken made with your salsa verde reserves.

Dessert, if you choose to eat it, has got to be Nina’s Margarita Pie. It just does. That said, nobody will complain if you bust out cholliesauce, call it dulce de leche and pour it on anything.

And now, for the non recipe pictured above. These Spicy Shrimp Bites, passed down through a friend chain, are deLISH and so basic. I hope they kick off many fun fiestas to come!

Spicy Shrimp Bites

Ingredients:

Tostitos scoops corn chips
Guacamole of choice (no shame in store-bought for this)
Smallish raw shrimp* (nekkid-no shells or tails)
Touch of oil for cooking
Taco seasoning

Method:

Cook up the shrimp in a skillet with a bit of oil until just done (a few minutes each side). As they are cooking, sprinkle them with taco seasoning on each side, and give them all a little stir together when they’re done.

Fill each chip with a bit of guac and top with a shrimp. Ta-da and Olé!

*Shrimp sizing on the package is a little like jean sizing. Not reliable. Your best bet is to eyeball the shrimp and imagine the Tostito boat it’s going in. I’m thinking 51/60 is a good zone, but if you find your shrimp are too big just cut them in half.

Bringing it:

If your trip is relatively tame, bring these pre-assembled, covered on a rimmed dish. Otherwise, these are easy and quick to put together on site. Just make sure you are kind to your Tostitos so there are enough intact to build your bites.

Triple Spicy Margaritas

No Acepte Imitaciones

We all have those friends who don’t F around, who cut to the chase and know just what you need, when you need it. I am blessed to have a fleet of them. A battalion? Whichever is bigger, and armed with more badassery and love. Most of the time they simply make life fun. When you face challenges, they make life So. Much. Better.

Exhibit A, is German Jules, gold-hearted truth-teller and purveyor of the giant triple spicy margarita. I did promise a review of Bring It Fiesta basics, but, because Monday is the new Friday, we’re jumping ahead to the crown jewel of our Cinco de Mayo prep. It’s the right thing to do, because if you’re going to bring your Fiesta A game, you might need to practice.

This recipe (as seen in the proper volume below) comes straight from the source (above), with guidance from the bottle of Ancho Reyes, a little treat that apparently has been around since 1927. Close to 100 years later I am on it! And because I am a rule follower, I will from here forward obey the label: “No Acepte Imitaciones.”

The spice come from ancho chiles in the liqueur, ginger in the ginger beer and, if you dare, jalapeños in the infused vodka. You can dial down the heat by using regular tequila, and the strength by using more ginger beer. You know you, so adjust accordingly. And…Olé!

Triple Spicy Margaritas

Ingredients:

  • 1 part jalapeño-infused tequila* (or regular)
  • 1 part Ancho Reyes liqueur (non-negotiable)
  • 1 part, or less, fresh (or as good as you’ve got) lime juice
  • Splash, to taste ** agave or maple syrup (Yankees, do the right thing!)
  • Ginger beer (the good, spicy stuff)

Method:

Combine everything but the ginger beer, and shake with ice. Pour over ice and top with ginger beer. Dial the ginger beer up or down to get the desired effect. Pro Tip: Pour a ginormous one in a huge vessel over tons of ice. Take your time—say an afternoon—pouring more ginger beer over the top to refresh and slow your roll.

*Make your own jalapeño infused tequila by slicing up some jalapenos into a mason jar, filling with tequila and letting it sit for a few days. Strain and enjoy. Here’s an actual recipe for it.

** Technically, the recipe on the bottle calls for 1/2 part sweetener, but Jules goes with a splash Do what you will for you or your crowd.

Go big or go bigger

Return to Fiesta Salsa Verde

The thing about getting through this pandemic with any sort of grace, is having hope. For me, that hope has now come down to Cinco de Mayo and the prospect of a great excuse to drink margs and eat an irresponsible amount of avocados. Maybe I misplaced the irresponsible in this sentence, but regardless, this is an occasion worthy of preparation.  Let’s venture back to last Cinco de Mayo, which was on a Saturday and coincided with what was supposed to be Derby Day. Instead, it became a a sad early milepost to all the celebrations we would lose.

But this Cinco de Mayo will be different. It marks us clawing back at a social life.

Granted, it’s on a Wednesday which is kind of fitting, because long ago my inner circle determined Wednesday is the new Friday.

So let’s spend the rest of our month planning for it shall we?

First up, salsa verde. This is a super easy recipe that involves roasting tomatillos, onions and jalapenos then pulverizing them with a mass of cilantro (Nothing to see here, Sister B). The original recipe calls for olive oil, which tastes great but gives it a weird texture if you refrigerate it. I say bag the oil, but the recipe Gods say you’ve got the option.

I never ventured into tomatillos before, because the husks seem intimidating. They seem to say, “These are for other, more skilled people.” But it turns out, tomatillos are for this person! They’re tangy and kind of citrusy, so they’re even good raw, but amazeballs when roasted and salsified.

I came across this recipe after making an awesome and awesomely easy crock pot recipe of salsa verde chicken, that basically involved chicken and a jar of salsa verde. My friend loved it and wanted to make it for his mom who is on a low sodium diet, so we looked at the label on the jar and…no bueno!

Making salsa verde was the pro move here, and luckily it is totally easy. Easy seems like a great place to start for our Cinco de Mayo prep, so get yourself some tomatillos and let’s get this party started!

Fiesta Salsa Verde

Ingredients:

12 oz. tomatillos, husked, washed, and halved
1 small white onion, quartered
2 jalapeños, seeded and sliced in half
2 tbsp.vegetable oil
Kosher salt
Freshly ground black pepper
2 c. cilantro leaves and tender stems (chopped up if your blender is not top notch)
1-3 tbsp. lime juice (depending on taste)
1/4 c. extra-virgin olive oil (totally optional)

Method:

  1. Preheat oven to 450°. Toss tomatillos, white onion, and jalapeños with vegetable oil on a sheet tray, and season with salt and pepper. 
  2. Roast until softened and charred in spots, about 20 minutes. Let cool.
  3. Transfer roasted vegetables, cilantro, and lime juice to a blender and blend while streaming in olive oil, until mostly smooth. Season with salt and pepper. 
  4. Serve with tortilla chips.

Serve with chips alongside quick easy cheap salsa or…. bake up a batch of baked salsa verde chicken (thinking it would work with tofu as well) or… press the big fat easy button and use it to smother chicken in a crockpot.

Next up…a review of our Bring It Fiesta basics. And yes, we’re starting with Hero Slaw!

Lemon Blueberry Sunshine Loaf

Some days we need a little sunshine. Heck, some years we need it. This would be one of those days in one of those years. This recipe is one I have been meaning to post since the day, in the depths of winter, a glorious box of Meyer lemons arrived from Cousin D in California. As if the lemons weren’t treat enough, they concealed some vintage lederhosen, which of course EVERYONE needs.

Similarly, everyone needs a bit if sunshine, and this loaf (easily Veganized) serves it up.  It comes straight from Cookie and Kate, and was the answer to many questions, like:

What can I make that uses every part of these luscious lemons?
What can I make that is easy and delish?
What can pass off as a homemade dessert when we have visitors, or a satisfying snack or breakfast when we don’t?
What’s going to hit the above and have some redeeming nutritional qualities?

This is the answer to all that! I hope you like it, and that it brings a little sunshine to your day. After seeing what lemon zest does to sugar you will never let your lemons go unzested again.

Lemon Blueberry Sunshine Loaf

Ingredients

  • 1 ½ cups white whole wheat flour or regular whole wheat flour, plus more for dusting
  • 2 teaspoons baking powder
  • ½ teaspoon fine grain sea salt
  • 2 medium lemons, preferably organic, to be zested and juiced
  • 1 cup sugar (organic cane sugar if you’re fancy)
  • ¾ cup plain whole-milk (full fat) yogurt or Greek yogurt
  • 3 extra-large eggs (aquafaba works great too)
  • ½ teaspoon pure vanilla extract
  • ½ cup extra-virgin olive oil
  • 1 cup fresh or frozen blueberries (if frozen, do not defrost!)
  • 2 teaspoons honey
  • Optional accompaniments: coconut whipped cream or regular whipped cream or vanilla ice cream

Method

  1. Preheat the oven to 350 degrees Fahrenheit. Generously butter and flour a 8½ by 4¼ by 2½-inch loaf pan.
  2. In a medium mixing bowl, whisk together the flour, baking powder, and salt.
  3. Pour the sugar into a separate medium-sized mixing bowl. Grate all the zest from the lemons. Rub the zest into the sugar until the sugar is yellow and fragrant. Add the yogurt, eggs and vanilla to the sugar mixture. Whisk well, until the ingredients are combined.
  4. When the mixture is well blended, gently whisk in the dry ingredients, just until incorporated. Switch to a spatula and fold in the oil, making sure it’s all incorporated. The batter will be shiny. In a separate bowl, toss the blueberries with about one teaspoon flour (this will help prevent them from sinking while the cake bakes.) Gently fold the blueberries into the batter.
  5. Pour the batter into the prepared loaf pan and smooth the top. Bake the cake for 50 to 55 minutes, or until the top is golden and the sides just start to pull away from the sides of the pan. A toothpick inserted into the center should come out clean.
  6. Let the cake cool in the pan for 30 minutes. Meanwhile, warm 2 tablespoons lemon juice and two teaspoons honey just long enough for you to whisk the honey into the juice. You can do this in your smallest saucepan over medium-low heat or in brief bursts in the microwave. Once the honey is mixed in, taste it—it should be pleasantly tart. If it’s too sour, mix in more honey. Using a pastry brush, brush the lemon-honey glaze on top of the warm cake. Repeat until you have no more liquid left.
  7. Run a knife between the cake and the sides of the pan to loosen. Unmold the cake by placing a large plate or cutting board upside down over the loaf pan and carefully turning it over. Turn the cake back onto a flat surface to cool completely. Then slice and serve!

Bringing it:

This is the PERFECT offering to bring anywhere anytime. It’s portable, sturdy and easy to eat at any venue. Bring it on!