Category Archives: Veggie Delight

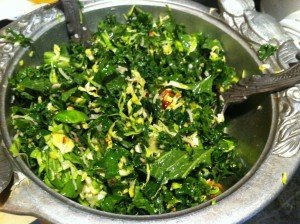
Salad Fix: A Healthyish Addiction

Maple creemees, Halyard ginger beer, Meyer lemons, chile crisp, Wordle. I don’t have many addictions, but the ones I have are strong. None of us go looking for more addictions, but they are wily. They sneak up and find you in places you’d least expect. Like, in your salad.

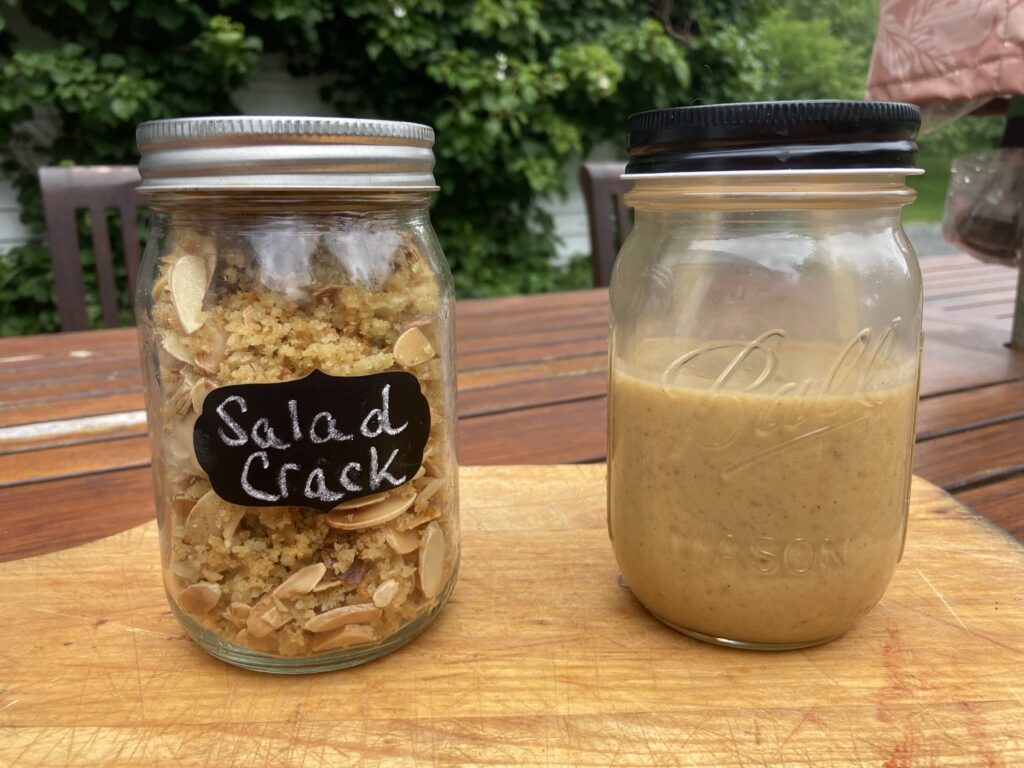
What we have here is a double header addiction—a sweet, creamy dressing and a salty crunchy topping that can be used on their own or together, on salad or on pretty much any veggie or side that needs a little cha-cha.

This particular addiction two-fer came from my young friend and culinary adventurer Mason McNulty. Mason moved to New York a few years back, and added foodie to her adulting repertoire. She recently started sending out a weekly newsletter with recipes she’s developed as a young professional with boundless energy, enthusiasm and creativity for cooking, but limited time, space and budget.

Mason’s recipes come with detailed instructions and touches that take new cooks by the hand and say, “get it together people–you can do this!” She separates out pantry, fridge and specialty ingredients; she lists necessary equipment; she includes the ingredient amounts measured in multiple ways, and those amounts in the ingredients as well as in the steps. She is the anti-slacker.

So, as one would expect, when I fell in love with her latest recipe combo, I slackered them right up (or down) to my capabilities. I am delivering them to you, BUT I am also attaching Mason’s original instructions and pictures so you can choose your adventure. Get the bare bones version here, and then click on Mason’s step by step version with pretty pictures. But wait there’s more! If you want to get Mason’s recipe newsletters, along with a little vicarious whiff of NYC living, just email her at [email protected]

This recipe combo of Creamy Date and Shallot Dressing + Toasty, Crispy, Nutty Topping was entititled: “How to Make Any Salad or Vegetable Taste Great.” That says it all. The dressing is surprisingly simple and ridiculously good. As I was pondering what to use as an excuse for more dressing Mason suggested “a stick from the backyard” and I swear it would work. So there’s that.

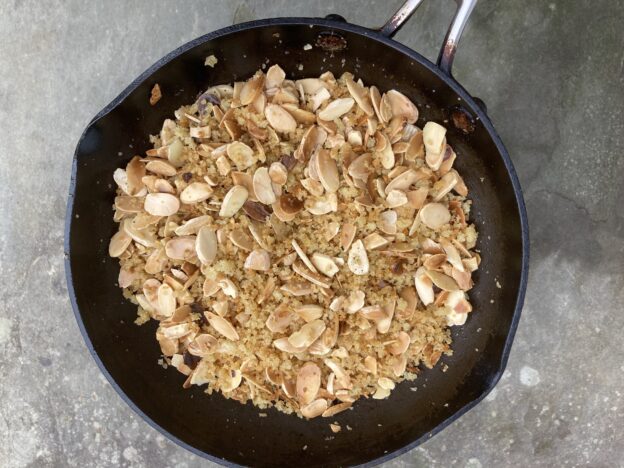
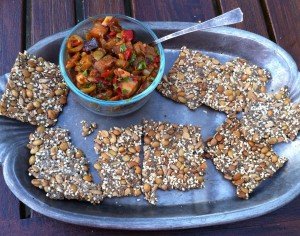
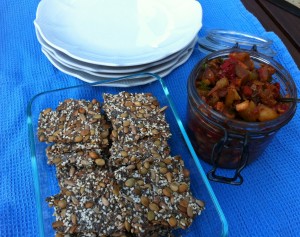
And then comes the topping, which is like almond brittle and homemade croutons got into a brawl and ended in a shattered heap, as BFFs. It has it all—crunchy, salty, sweet, a touch of citrus, optional heat and herbs with juuuuuust enough grease to feel indulgent but not irresponsible. It’s Smartfood vs Cheetos, but way better than either. Mason shows it as a topping for roasted asparagus. I’ve used it to add crunch to everything from caprese salad to egg salad, and I’m seeing it on pretty much every soup in my future.

So here you go. Happy 4th, because apparently the 1st is the new 4th and we’re in it! Don’t forget to click on Mason’s instructions for better pics and the full experience.

Part 1: Creamy Date and Shallot Dressing

Yields 1.5 – 2 cups dressing

Ingredients

  • 1 tablespoon dijon mustard
  • 2 ounces dried dates, measured without pits (~ scant ½ cup, loosely packed)
  • 1 small shallot (~1/4 cup)
  • 1⁄2 cup apple cider vinegar
  • 1⁄3 cup +1 tablespoon olive oil
  • Salt and pepper

Method

  1. Prep the ingredients: Pit the dates and roughly chop. Finely chop the shallot.
  2. Complete the initial blend: combine the chopped dates and shallots, the dijon (1 tablespoon), and the apple cider vinegar (1⁄2 cup) in a blender (a bullet blender works really well for this if you have one). Blend until well combined but still somewhat chunky
  3. Complete second blend: Add the olive oil (1⁄3 cup + one tablespoon), plus a big pinch of salt and a few cranks of pepper and blend until very smooth and emulsified. It will look like tahini! Taste and adjust seasonings as necessary
  4. Store: This dressing thicken in the fridge, but you can re-warm it by running warm water on the sides and shaking the container.

The killer combo

Toasty, Crispy, Nutty Topping AKA Salad Granola AKA Salad Crack

Yields ~1 cup (Pro tip: no shame in doubling it)

Ingredients

  • 1⁄2 cup (generous) sliced almonds*
  • 1⁄3 cup (generous) panko
  • 2 tablespoons olive oil
  • Salt
  • ¾ tsp (or more, packed) lemon zest
  • 1 tsp (generous) honey
  • 1/2 clove garlic* grated or finely chopped
  • optional: Red pepper flakes, fresh or dried herbs, lemon juice

Method

  1. Prep the ingredients:  Zest 1 teaspoon of the lemon (should be a packed 1 teaspoon); Grate or chop garlic clove *(add the other half if you like extra garlic!
  2. Fry the almonds: Add the olive oil (2 tablespoons) to a small frying pan over medium heat. Add the sliced almonds (heavy 1⁄2 cup) and cook until golden brown, stirring every so often with a rubber spatula (or whatever tool you want). This will take 5-8 minutes, depending on your stove. You will hear the nuts crackling and popping during the cooking process.

*Edie’s note here- I burned my first batch, so trust your eyes and nose more than the clock). Also, super slackers can start with Trader Joe’s sliced toasted almonds and get them hot before adding the panko.

  1. Add the panko: Still over medium heat, add the panko (heavy 1⁄3 cup) and mix. Cook until golden brown, an additional 45 seconds – 1 minute
  2. Optional: Add the garlic: Still over medium heat, add in the garlic (1⁄2 clove, now grated) and cook for just 45 seconds. Turn off the stove and remove the pan from the heat. Let cool for 5 minutes. Taste and feel free to add the other half of the clove if that’s your jam.
  3. Season the topping: In the same frying pan add in salt (a generous 3 finger pinch, or to taste), lemon zest (3⁄4 teaspoon, or more to taste), and honey (generous 1 teaspoon). Mix together thoroughly and add another pinch of salt if desired. Make this your own by adding red pepper flakes, fresh or dried herbs, lemon juice, etc.
  4. Store: Let the topping cool and then store in a room-temperature location. If you are a monk or have carb discipline it will last 3-5 days. Add however much you want on whatever dish you are serving it with. Some grated parmesan is delish too.

Did I mention the original recipe? Just testing you.  Get it here. To get on her list say hey to Mason at [email protected]

Picnic Perfection Broccoli, and Grated Carrots Ooh La La

This is it. The Super Bowl of summer gatherings is here. The sun is hot, the timing is loose, the fridge is likely full and the setting is outdoors. What we have here is a picnic situation, and I’ve got you covered with some no-fuss potluck faves.

I could also call these McFaves, because they both came into my life from my favorite foodie McFamily. You know who you are!

Each of these are a little miraculous in the way they transform a humble vegetable and a few basic ingredients into something addictive. Both recipes originated from the New York Times, which means they come with lots of commentary. I have distilled the extensive kvetching to the finer points.

These sides are easy to make, healthy, great at room temp and smashing as leftovers. They also travel like champs. There is no downside here people!

Make them. Share them, or not. They will bring you joy and serious roughage. Happy 4th to all!

In the lunch rotation. Every….darned….day

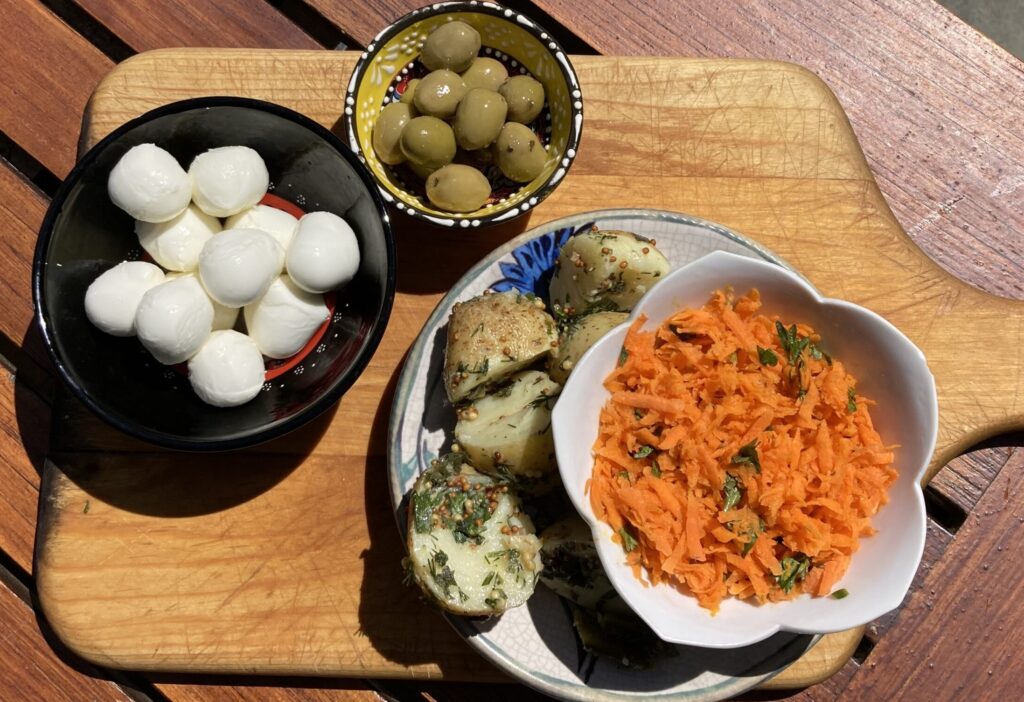
French Grated Carrot Salad
By Martha Rose Shulman and the NY Times

Ingredients:

  • 6 tablespoons extra-virgin olive oil or canola oil (or a mix of the two), or use 2 tablespoons plain low-fat yogurt or buttermilk and 4 tablespoons oil
  • 1 tablespoon freshly squeezed lemon juice
  • 1 tablespoon sherry vinegar or white-wine vinegar
  • 1 teaspoon Dijon mustard
  • Salt and black pepper
  • 1 pound carrots, peeled and grated
  • ¼ cup finely chopped flat-leaf parsley

Preparation

  1. Whisk together the oil, lemon juice, vinegar, and mustard in a large bowl; season with salt and pepper. Add the carrots and parsley and toss to coat. Season to taste with salt and pepper. Refrigerate before serving (I recommend making this 30 minutes to 1 hour ahead, then tossing again).

Notes: Not a one. This is straight up perfection.

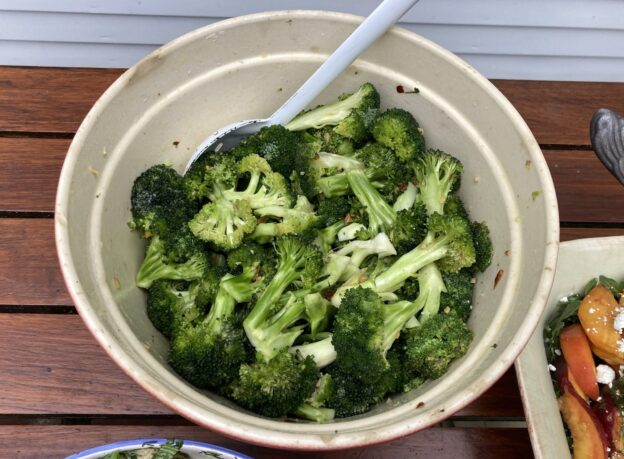
Picnic Perfect Broccoli
by Melissa Clark and the NY Times

Ingredients

  • 1 ½ teaspoons red wine vinegar (I say 1 Tbsp)
  • 1 teaspoon kosher salt, more to taste (kosher is key…science, man)
  • 2 heads broccoli, 1 pound each, cut into bite-size florets
  • ¾ cup extra virgin olive oil
  • 4 fat garlic cloves, minced
  • 2 teaspoons cumin seeds (ground cumin works in a pinch)
  • 2 teaspoons roasted (Asian) sesame oil
  • Large pinch crushed red pepper flakes.

Preparation

  1. In a large bowl, stir together the vinegar and salt. Add broccoli and toss to combine.
  2. In a large skillet, heat olive oil until hot, but not smoking. Add garlic and cumin and cook until fragrant, about 1 minute. Stir in sesame oil and pepper flakes. Pour mixture over broccoli and toss well. Let sit for at least 1 hour at room temperature, and up to 48 (chill it if you want to keep it for more than 2 hours). Adjust seasonings (it may need more salt) and serve.

Notes:

2 lbs of broccoli— deconstructed into florets — is a LOT of broccoli. You can easily scale it down, but don’t skimp on the vinegar. I boost up the vinegar to 1 Tbsp for the full recipe because it seems like the right thing to do.

There is much hand-wringing about all the oil, but remember, it’s a lot of broccoli. I’ve used 2/3 cup oil and that worked just fine. Some say 1/3 cup is enough. That said, don’t fly too close to the sun like the guy who brought it down to 2 Tbsp, and definitely don’t EVER put him on dessert duty.  

Finally, pay attention to the timing and make it far enough ahead so the broccoli has a chance to soften and take on the flavors.

Pumpkin Soup, hold the spice

Alternative title: Miso over pumpkin spice. It may really be just me, but I am sick to death of pumpkin spice. I love pumpkin and all its winter squash cousins but the pumpkin spice conspiracy to assault your senses all fall is just too much. And so, while I want to want to savor pumpkin muffins and PSL’s, I really don’t want to, because they make me feel like I am eating or sipping a horribly misappropriated Yankee Candle.

Enough already. I prefer pumpkins and their cousins to taste like, well, the pumpkin family. If you don’t believe me, check out these pumpkin all stars. (There’s even a mighty fine pumpkin muffin in there that tastes nothing like a Yankee candle.) ‘Tis the season for orange goodness, and, unlike me, my family can only take so much Sugar and Spice Squash Soup. I needed another comfort soup in the repertoire and I think I’ve found it. This comes from My New Roots, home of the ever brilliant “Dirt Bread” that is the stuff of lusty Hippie dreams.

The original version of this soup uses red pumpkin also known as Kuri or red kabocha. I used cooked kabocha (AKA buttercup) squash because I had it at the ready and because it is mighty dense and creamy. I did not use the gnarly green peel. Butternut squash would also be fab. Or, hey, even an actual pie pumpkin would work (though they are more watery and less sweet and the skin is not for prime time).

This soup is also a fine way to work through the vat of miso that seemed like a good idea when I bought it, which was a while back. Miso adds the funk, or umami if you must, and the variety of toppings lets you totally riff in whatever direction you please. I used some fried shallots (that I bought at the same store where I made my excessive miso purchase), toasted pepitas and chopped pistachios to be X-tra klassy. We had this as just a soup, without the noodles, and it was tremendous, though noodles would be bulk it up into a fab fall dinner. If you want a similar recipe, with mushrooms right in the soup, check out this similar, though non-pureed one here.

Get your pumpkin on, and hold the spice. If you feel cheated you can always light a candle.

Pumpkin Miso Broth with Soba
From My New Roots. Serves 4 as a main, 6 as a side

Ingredients:

  • 1 Tbsp. coconut oil (olive oil is fine too)
  • 2 medium yellow onion
  • ¾ tsp. fine grain sea salt
  • 3 cloves garlic
  • 1 medium, 2 lb / 1kg Hokkaido pumpkin (or other favorite hard winter squash)
  • 3 – 4 cups / 750ml – 1 liter water
  • 3 – 4 Tbsp. white or light miso (3 was way plenty and I am a salt fiend)
  • 1 Tbsp. minced fresh ginger
  • 175g / 6oz. soba noodles (100% buckwheat)

Toppings:

  • spring onion
  • sesame seeds
  • sautéed shiitake mushrooms
  • seaweed (optional)
  • Other options: fried shallots, chile crisp, diced avocado, toasted pepitas, and so much more

Directions:

1. Roughly chop onions, mince garlic. Wash the pumpkin well (as you’ll be eating the skin), and chop into chunks. (I used kabocha without the peel. Look at your squash, know your audience and use your judgement here)

2. In a large stockpot, melt the coconut oil. Add the onions and salt, stir to coat and cook for about 10 minutes until the onions are just starting to caramelize. Add garlic and cook for about a minute until fragrant.

3. Add the pumpkin and stir to coat. Add 3 cups / 750ml of water, cover, bring to a boil, and reduce to simmer for about 15 minutes, until the pumpkin is tender.

4. While the soup is cooking, prepare the toppings: Bring a pot of salted water to the boil. Cook soba noodles according to package directions, drain and lightly rinse. Slice spring onion, lightly toast sesame seeds in a dry skillet over medium heat, about 2-3 minutes. Sauté mushrooms in a lightly oiled skillet over high heat for 5-7 minutes.

5.Transfer the soup to a blender and blend on high until completely smooth. Add more water if necessary – you’re looking for a creamy consistency, but it should not be thick like a paste. I like the soup to be on the thinner side for this dish. Add the miso, ginger and blend again until smooth. Taste and adjust seasoning as desired. Transfer soup back to the pot and keep warm (reheat if necessary, but try not to boil–miso does not appreciate that).

6. Ladle soup into bowls, top with soba, spring onion, sesame seeds, mushrooms and crumble the seaweed over top. Serve immediately and enjoy.

Many thanks to cousin D for this sign of the season


Return to Fiesta Salsa Verde

The thing about getting through this pandemic with any sort of grace, is having hope. For me, that hope has now come down to Cinco de Mayo and the prospect of a great excuse to drink margs and eat an irresponsible amount of avocados. Maybe I misplaced the irresponsible in this sentence, but regardless, this is an occasion worthy of preparation.  Let’s venture back to last Cinco de Mayo, which was on a Saturday and coincided with what was supposed to be Derby Day. Instead, it became a a sad early milepost to all the celebrations we would lose.

But this Cinco de Mayo will be different. It marks us clawing back at a social life.

Granted, it’s on a Wednesday which is kind of fitting, because long ago my inner circle determined Wednesday is the new Friday.

So let’s spend the rest of our month planning for it shall we?

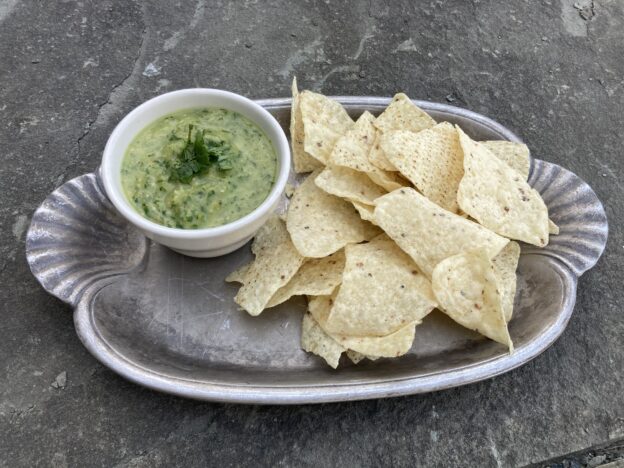
First up, salsa verde. This is a super easy recipe that involves roasting tomatillos, onions and jalapenos then pulverizing them with a mass of cilantro (Nothing to see here, Sister B). The original recipe calls for olive oil, which tastes great but gives it a weird texture if you refrigerate it. I say bag the oil, but the recipe Gods say you’ve got the option.

I never ventured into tomatillos before, because the husks seem intimidating. They seem to say, “These are for other, more skilled people.” But it turns out, tomatillos are for this person! They’re tangy and kind of citrusy, so they’re even good raw, but amazeballs when roasted and salsified.

I came across this recipe after making an awesome and awesomely easy crock pot recipe of salsa verde chicken, that basically involved chicken and a jar of salsa verde. My friend loved it and wanted to make it for his mom who is on a low sodium diet, so we looked at the label on the jar and…no bueno!

Making salsa verde was the pro move here, and luckily it is totally easy. Easy seems like a great place to start for our Cinco de Mayo prep, so get yourself some tomatillos and let’s get this party started!

Fiesta Salsa Verde

Ingredients:

12 oz. tomatillos, husked, washed, and halved
1 small white onion, quartered
2 jalapeños, seeded and sliced in half
2 tbsp.vegetable oil
Kosher salt
Freshly ground black pepper
2 c. cilantro leaves and tender stems (chopped up if your blender is not top notch)
1-3 tbsp. lime juice (depending on taste)
1/4 c. extra-virgin olive oil (totally optional)

Method:

  1. Preheat oven to 450°. Toss tomatillos, white onion, and jalapeños with vegetable oil on a sheet tray, and season with salt and pepper. 
  2. Roast until softened and charred in spots, about 20 minutes. Let cool.
  3. Transfer roasted vegetables, cilantro, and lime juice to a blender and blend while streaming in olive oil, until mostly smooth. Season with salt and pepper. 
  4. Serve with tortilla chips.

Serve with chips alongside quick easy cheap salsa or…. bake up a batch of baked salsa verde chicken (thinking it would work with tofu as well) or… press the big fat easy button and use it to smother chicken in a crockpot.

Next up…a review of our Bring It Fiesta basics. And yes, we’re starting with Hero Slaw!

Late Summer Zucchini Tian

The summer veggies are hanging in there, but we’re definitely bridging into squash and apple season. I’m looking to you, potatoes, to help us across that divide, by adding a little heft to the rest of the zukes and tomatoes.

Behold the tian, which is basically a whole lot of veggies layered over each other in sequence, each layer blessed with a drizzle of olive oil and a sprinkle of salt. The whole shebang is then topped with cherry or grape tomatoes and breadcrumbs and then melded together in the oven. It’s pretty brilliant in its simplicity and humble (until I bragged about it) elegance. 

This recipe has the clever touch of being assembled over a low burner so the potato base layers get a little head start cooking. I’m including the whole recipe—as written by Chef Gabrielle Hamilton of Prune fame—but also giving you the Cliffs Notes, because this is more technique than exact recipe.

You’re melting the butter in the bottom of a big pan, making a base of two layers of sliced potatoes, then covering that with successive concentric layers of onions, zukes, potatoes, onions, zukes and finally all the tomatoes and a sprinkling on breadcrumbs. Each veggie layer  gets its own drizzle of oil and a sprinkle of salt, and cooks along as you keep slicing away.

You can futz with amounts, but there are some key points to follow, starting with the your slicing. To get an A+ tian your potatoes, onions and zucchinis all need to be sliced thinly, hence the mandoline. If you don’t have one, I highly recommend springing for it. My $12 beauty is admittedly bare bones but it does the job and I still have all my fingers, so there’s that. On that note, do pay attention and use the protective pusher when you get anywhere near the end of your veggies. Those blades are sharp!

Also, the stove-top steaming step is key to cooking the potatoes. I got lazy and made a second  tian by layering everything in my baking dish (some of us only own 1 cast iron pan) then putting it in the oven. It was good, but not great, mostly because the potatoes were not as perfectly cooked. If you go that route, cover your vessel with foil for the first half hour of cooking and leave it in for an extra 15 minutes, uncovered.

I also distilled the comments from the New York Times version of this recipe, which are many. They separate into two camps, both pretty indignant. The “How can you possibly not include garlic and fresh herbs in this?” camp and the “Keep it simple and let the fresh ingredients sing” camp. The latter crowd reminds us that the dish originated from a nonna in Puglia, and Pugliese hate garlic. Who knew? Thankfully, pretty much everybody agrees that blanching the tomatoes is only for teacher’s pets, and quite unnecessary.

Anyway, the bottom line is that both camps like this dish a whole lot, and with a long potato season in our future, it seems like a good time to get comfy making tian.

Ingredients:

  • 2 tablespoons unsalted butter
  • 3 medium Yukon Gold potatoes (about 12 ounces)
  •  Kosher salt and freshly ground black pepper
  • ¼ cup extra-virgin olive oil
  • 1 large yellow onion (about 12 ounces)
  • 2 zucchini (about 12 ounces), washed and wiped free of any clinging grit
  • 1 pint yellow Sungold cherry tomatoes
  • ⅓ cup coarse bread crumbs

Method

  1. In a pot, boil 2 inches of water for blanching tomatoes (OR NOT). Place an 8- or 9-inch cast-iron skillet on a burner over low heat, and add butter to melt.
  2. Peel the potatoes, and slice on a Japanese mandoline into 1/4-inch-thick disks, then arrange in a single layer circle covering the bottom of the cast-iron skillet with its melted butter, keeping the skillet on the burner and leaving the heat on while you start to build the tian.
  3. Add a second layer of potato slices, and season with salt and pepper, add a drizzle of olive oil and cover with a lid to slightly steam while you slice the yellow onion.
  4. Peel the onion, then slice into even ¼-inch or thinner rounds. The Japanese mandoline is sometimes too narrow to use for this, so you may have to use a sharp knife and do it manually.
  5. Layer abundantly half the onion rings evenly around the pan on top of the steamed potatoes, season with salt and pepper and a drizzle of olive oil, and recover the pan with a lid while you slice the zucchini.
  6. Slice the zucchini into ¼-inch-thick rounds, and layer half of them in concentric, just-overlapping shingled circles over the onions to create a neat layer. Season with salt and pepper, drizzle with oil and recover with the lid while you blanch the tomatoes.
  7. (FOR OVERACHIEVERS ONLY) Season the now-boiling water with a few good pinches of salt, and drop the tomatoes into the boiling water. As soon as their skins split — about 30 seconds — retrieve the tomatoes and run under cold water to quickly cool enough to handle; set aside.
  8. Build another ring of potato around the tian on top of the now-steaming zucchini, this time just a single layer. Drizzle with oil, season with salt and pepper and recover with the lid to steam a bit while you slip the skins off the tomatoes (IF YOU MUST).
  9. Layer the other half of the onions as before, season and drizzle and replace the lid as before, while you split the tomatoes in half horizontally with a small sharp knife.
  10. Add final layer of zucchini to the tian, and season with salt and pepper and a drizzle of olive oil. Cover, and let steam while you heat the oven to 375 degrees.
  11. Place the tomatoes around the top of the tian evenly, and sprinkle the bread crumbs over the top evenly. Drizzle with oil, season with salt and pepper and place in the oven to bake for 30 minutes.* (If your skillet threatens to bubble over, slip a sheet pan underneath to prevent any burned wreckage in the bottom of your oven.)
  12. With a spoon, baste, and drizzle the pan juices that accumulate in the tian over the top when you remove it from the oven at the end. Allow the tian to cool, settle and kind of meld for an hour before eating.

*I’m pretty sure this is meant to go in uncovered though none of the bazillion comments actually answered this. Mine goes in uncovered, and it’s darned good.


Coolest Cucumber Soup

Labor Day be damned summer is NOT over yet. Well, not totally. Sadly, I was skunked at two corn suppliers yesterday, so that ship is quickly sailing. But cukes and zukes are still going strong. I’ve got a pretty epic zucchini creation coming soon (I was so busy marveling at it that I forgot to take a picture), but while we’re waiting, here’s a cool way to use up some of the many cucumbers you may be experiencing.

I discovered while searching for a soup that involved zero cooking or warming of any kind, and could all be made in the blender. Slackers delight!

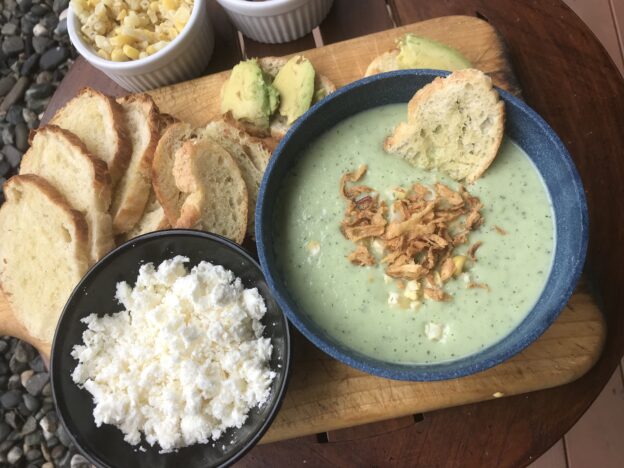
This one goes out to you Californians and westerners who are feeling the heat, and the smoke, and the earthquakes. As a bonus, it involves an avocado. The original recipe calls for the avocado on the soup, but this is not my first soup rodeo. Adding the avocado to the blender adds heft and creaminess without actual cream.

I hope this soup helps you soak up every last bit of summer, and frees up some space in your fridge.

Coolest Cucumber Soup

 Adapted from The New York Times

Ingredients

  • 1 pound cucumbers, peeled, halved lengthwise and seeded
  • 2 cups buttermilk (or use 1 1/2 cups plain yogurt plus 1/4 cup water) *
  • 1 large garlic clove, peeled and smashed
  • 2 anchovy fillets (optional) **
  • 2 small whole scallions, trimmed
  • ½ jalapeño, seeded and chopped
  • ½ cup packed mixed fresh herbs (like mint, parsley, dill, tarragon, basil and cilantro)
  • ½ teaspoon sherry or white wine vinegar, more to taste ***
  • ¾ teaspoon kosher sea salt, plus more to taste (omit if using miso, then add if needed)
  • ½ avocado ****

All The Options

  • 4 slices toast of choice
  • ½ avocado, pitted, peeled and thinly sliced
  • ½ lemon
  • 2 tablespoons crumbled feta cheese
  • Extra-virgin olive oil, for serving
  • Freshly ground black pepper
  • 1 ear of corn, shucked, kernels sliced off
  • Fresh dill, for serving
  • Fried shallots or onions (if you’ve got ’em, why not?)

* Vegans, you have your milks. Use them here, soured with vinegar or lemon juice
**I used 2 tsp miso paste instead, for saltiness and funk, or what one might call “umami,”
*** I used 1 Tbsp lime juice (half a lime)
**** I threw the avocado intended as a topping right into the blender. Save the other half for toast…or throw it in as well. Did anyone ever complain about too much avocado? Ok, except for my husband?

Method

  1. In the bowl of a blender or food processor, combine cucumber, buttermilk, garlic, anchovy, scallions, jalapeño, fresh herbs, sherry vinegar and salt. Blend until smooth and adjust seasoning as needed.
  2. Smash avocado slices on the toasted bread. Sprinkle with crumbled feta, squeeze the juice of the lemon half over the top and finish each with a drizzle of olive oil and some pepper. Transfer to a plate and set aside.
  3. Distribute soup between 4 bowls and garnish with raw corn kernels and a drizzle of olive oil. Serve avocado toast on the side.


Corn Star: A One Ingredient Summer Fantasy

We’re hanging on to summer here, even if it was the weirdest summer ever, with the haziest boundary on either end. We’re not sure when it started but it is definitely ending. I know this because it is corn season.

Cooking inspiration has been lacking in this household, thanks to the general laziness that goes along with hot days. For a recipe to get me back in the game and try something new it has to be really good or really weird. When it is both…Hallefreakinlujah!

First, some context on why this recipe is so perfect right now. I mentioned corn season, and my people take it very seriously. More nights than not, we’re having fresh corn. Our compost pile, with its layers of corn husks and watermelon rinds, pretty much tells the story. That means we have plenty of opportunity for corn experimentation.

This recipe came via Sister A, purveyor of all things Vegan, who knows I appreciate weirdness. It is a little bit of food magic and alchemy that turns corn first into milk and then into butter. Basically, you’re cutting corn off the cob, pulverizing it, straining it,  then cooking the resulting “corn milk” for just a few minutes until it thickens up into creamy deliciousness.

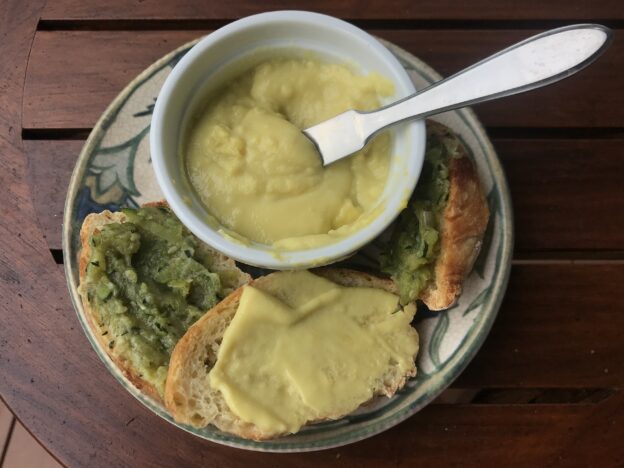
The result is a summer fantasy—the essence of fresh corn in a luscious spread. It does not taste like butter, but it looks like it, spreads like silk and is simply delish.  It has the added bonus of being Vegan, which you can either use as a selling point or keep to yourself. 

Slacker note: Now that I’m on to it, I’ve read versions of this recipe using canned corn, and that don’t even call for straining the corn. I will likely try that come November when fresh corn is a distant memory. But for now, I’m sticking with this version, which is a bit labor intensive but sublime.

If corn on the cob is your jive, there’s no shame in that. But if you’re looking for other ways to enjoy the bounty of the season, I highly suggest giving this a whirl. It pairs well with zucchini “butter,” another brilliant recipe that will use up the August veggie filling your fridge.  

Sweet Corn Butter

From Whitney Wright via Food52

Ingredients

  • 8 ears fresh sweet corn (or less), shucked
  • Salt and butter, to taste (optional)

Method

  1. Cut off kernels: Use a chef’s knife to cut the kernels from each ear. 8 ears of corn will yield 4 to 5 cups of kernels (I got way more). If you’re a go-getter, you can also scrape the back of your knife along the cob to get the juice.
  2. Blend: Put the kernels in a blender or food processor and buzz them up like crazy—let the blender run on the highest speed for about 2 minutes. Once the kernels are blended into a smooth puree, pass the puree through a strainer with a rubber spatula. Ta-da! Corn juice.
  3. Whisk and cook: Here’s where the magic happens. Pour the juice into a medium saucepan. Heat the juice over medium heat, whisking constantly. Continue whisking until the mixture begins to thicken and the frothy bubbles begin to disappear, about 4 minutes. When the mixture is thick and bubbling, whisk and cook for about 30 seconds more. Remove from the heat.
  4. Season (optional): Taste it—and look for sweet, smooth, earthy, and buttery. If you want, add a few pinches of salt and pats of butter (defeats the purpose of this exercise I’m thinking, but do what you must). The corn butter will keep for about 3 to 5 days in the fridge.

How do you use it? The original author, a fancy pants chef, suggests these ways, to which I added:

  • Slather onto cornbread, a muffin, toast or fresh bread instead of butter
  • Use it on sandwiches instead of mayonnaise
  • Put it in quesadillas or omelets
  • Fold it into sautéed spinach with onions, and finish with just a touch of cream for killer creamed spinach
  • Dribble it onto a hot dog for a DIY corn dog
  • Stir it into risotto and finish with Parmesan
  • Blend it with vanilla ice cream for a crazy delicious milkshake
  • Top tacos or fajitas with it. Or…pizza anyone???
  • Mix it with shredded cheese, a little sour cream, and a jar of drained jalapeños, bake and serve as a LIFE ALTERING (and so not Vegan) dip for tortilla chips
  • Layer it on zucchini or tomato anything

Pure buttahhhh


Stay-In Sesame Noodles 

It’s not you, it’s me. Or maybe it’s you, too. As we’re entering month four of a full house, I’m just tired of coming up with new things to make and serve, so I’ve been relying on my tried and true. It’s not the worst thing to get reacquainted with these no fail recipes that are easy to prepare and even easy to learn by heart.  

Best of all, these recipes can fill the local army with homemade fare without breaking the bank, or spending all day cooking.  I’m talking about Easiest French Bread Ever, Maple Oat Breakfast Bread and Everyday Granola in the morning, a constant supply of blender salsa and chile crisp, plus a big bowl of broccoli salad whenever I need a no cook veggie fix, which is pretty much always. It’s also the perfect time to fill your freezer with a Tupperware of Frosecco or any other frozen concoction. The slurpee mothership is kind of like your sourdough starter of cocktails. Just keep scooping it out, and adding more as needed. Is that a problem? Do I care?

Now that we’re getting out a little, I am running in to people who have been spending more time cooking while in quarantine. They have been making some Bring It all stars, which are also excellent for entertaining. Things like Funitella Bruschetta (recently updated!) and, of course, Hero Slaw. And for dessert, Loosey Goosey Strawberry Rhubarb Crisp and Beach Pie because, ‘tis the season!  

Along the lines of no-fail fare, I give you my new favorite go-to recipe, which already feels like an old fave. Add this to your repertoire, and buy yourself some time to think about something other than “what’s for dinner?”  

Takeout (or Stay-In) Noodles 

From the New York Times

 Ingredients 

  • 1 pound noodles, frozen or (preferably) fresh 
  • 2 tablespoons sesame oil, plus a splash 
  • 3 ½ tablespoons soy sauce 
  • 2 tablespoons Chinese rice vinegar 
  • 2 tablespoons Chinese sesame paste (or tahini; see notes)
  • 1 tablespoon smooth peanut butter 
  • 1 tablespoon granulated sugar 
  • 1 tablespoon finely grated ginger 
  • 2 teaspoons minced garlic 
  • 2 teaspoons chile-garlic paste, chile crisp or chile oil, or to taste 
  • Half a cucumber, peeled, seeded and cut into 1/8-inch by 1/8-inch by 2-inch sticks 
  • ¼ cup chopped roasted peanuts  

Preparation 

  • Bring a large pot of water to a boil. Add noodles and cook until barely tender, about 5 minutes (or recommended amt if using dried). They should retain a hint of chewiness. Drain, rinse with cold water, drain again and toss with a splash of sesame oil. 
  • In a medium bowl, whisk together the remaining 2 tablespoons sesame oil, the soy sauce, rice vinegar, sesame paste, peanut butter, sugar, ginger, garlic and chili-garlic paste. (You can also use an immersion blender or regular blender)
  • Just before serving, pour the sauce over the noodles and toss. Transfer to a serving bowl, and garnish with cucumber and peanuts. 

Notes:  

These are infinitely adaptable, and for suggestions, scroll through the many comments on the original NY Times post here. I hit the high points and recommendations here, in case you are sharing your paltry Internet connection with many young, curious, ever- streaming tenants. 

The Chinese toasted sesame paste called for here is not the same as tahini, the Middle Eastern paste made of raw, untoasted sesame. You can use tahini in a pinch, adding a little toasted sesame oil to compensate for flavor, or make your own from scratch with toasted sesame seeds and olive oil.  

To prevent dry noodles, serve immediately, or hold the sauce. I usually multiply the sauce recipe many times (I use a stick blender), and add a fairly minimal amount of the sauce to the noodles when they’re still warm. Chill the undersauced noodles until you are ready to serve, and then mix in as much extra sauce as you need 

Mind your noodles. The recipe says fresh or frozen, meaning egg noodles. It’s totally ok to use dried, as in regular spaghetti (my fave) or linguini, but 1.5 or double the sauce for a full pound of dried noodles.  

This is serious picnic fare, and can accommodate Vegans and carnivores alike with a variety of toppings like: shredded duck or chicken, tofu, cucumber, sweet red pepper, hot pepper, scallion, jicama, carrots, etc, all cut to roughly the same size.  


It’s the weekend— Have a ball!

Props to the McNultys of Hanover, for coming up with the idea of theme dinners to turn these Saturday nights in quarantine into something a little less, uh, quarantiny (as in, the state of restriction vs the popular cocktail). Last weekend they kicked it off with an après ski theme featuring Bring It’s own Guinness Fondue.

Their outdoor firepit version was not only inspiring, but also an excellent choice considering our fine spring weather. With the polar air expected this weekend, fondue is a solid option.  

Or….might I suggest, balls! Meatballs and “meat” balls are very versatile, can be made ahead and can accommodate many dietary needs. We’ve got Buffalo Chicken Meatballs, these quite excellent gingery sheet pan meatballs that I have made many times and never managed to capture on camera, the vaunted Ikea meatballs (secret recipe just revealed) and, featured here today, the shockingly tasty and “meaty” meatless meatballs.

This is a great recipe to have in your arsenal especially now that the shortage du jour is meat of all kinds. Whether you are trying to eat less or no meat, or you just can’t get your hands on the stuff, you need a good vegetarian meatball recipe, and here it is friends.

They take a bit of elapsed time, because you have to cook the water out of the mushrooms and let the whole shebang sit in the fridge for a spell, but they’re totally easy. And hey…we’ve got time! You can even show off  your domestic skills, make a double batch and stock your freezer.

As a bonus this recipe comes with a soundtrack suggestion suitable for any stage of creating or eating your Saturday night special. Crank yourself up some Queen because, well, we’re having such a good time, we’re having a ball.

Where’s the picture? Have you ever tried to get an appetizing picture of meatballs? Enough said…but how about another pic of fondue night? Happy weekend all!

 Ooh la la! Just another typical night around the fire pit.

Chef John’s Meatless Meatballs                                                                      

Barely adapted from AllRecipes

Ingredients
Makes 20 meatballs

1 tablespoon olive oil
1 lb / 453 gr white mushrooms, finely chopped (use the food processor to save time)
1 tablespoon butter*
½ cup finely chopped onion
2 garlic cloves, minced
½ cup quick cooking oats
4 to 5 tablespoons grated Parmesan cheese*
½ cup breadcrumbs
4 tablespoons fresh chopped parsley
2 eggs, divided*
1 teaspoon salt
¼ teaspoon ground black pepper
¼ teaspoon dried oregano
Pinch cayenne pepper

3 cups of your favorite tomato sauce
½ cup shredded mozzarella cheese (or any other cheese you prefer, or no cheese at all).*

*Vegans and Vegan dabblers you’ve totally got this. I’ve made these with Vegan butter, your favorite cashew parm, aquafaba and no cheese on top and they were delicioso.

Directions

Heat olive oil in a large skillet over medium-high heat. Add mushrooms, sprinkle with one pinch of salt and cook, stirring every so often until the liquid from the mushrooms has evaporated, about 10 minutes.

Stir in the butter, and cook on medium for about 5 minutes, or until golden brown.
Add onions and sauté for 5 further minutes, until translucent. Add garlic and sauté for 1 further minute, until fragrant.

Transfer mushroom mixture to a large mixing bowl.

Stir in oats and mix until thoroughly combined. Add Parmesan cheese, breadcrumbs, parsley, 1 egg, salt, pepper, oregano, and cayenne pepper (if using).

Mix together with a fork until crumbly. Stir in remaining egg and mix to combine.
The mixture should hold together when pressed.

Cover and refrigerate for at least 2 hours (overnight best).

When ready to cook, preheat oven to 450°F (230°C). Line a baking sheet with parchment paper.
Scoop 1 heaping tablespoon of mixture, and with dampened hands roll into meatballs.

Arrange on the lined baking sheet.

Bake until golden brown, about 15 to 20 minutes. Remove from the oven and let cool completely.

At this point you can refrigerate or freeze the meatballs until ready to use, or use immediately.
Bring tomato sauce to a boil in a large skillet (or saucepan), lower to a simmer, and gently stir meatballs into the sauce until coated.

Simmer meatballs in sauce for about 30 to 45 minutes. Sprinkle with mozzarella cheese, cover with a lid and let the cheese melt (about 4 to 5 minutes).

Sprinkle with chopped fresh parsley and serve over spaghetti, zoodles, spaghetti squash, in a meatball sub or just plain nekkid.

PS. Can’t get enough Vegan balls? Got more cans of black beans than you know what to do with? Try these from Minimalist Baker, who never steers you wrong.

           Eat UP people!

Easiest Tomato Soup: Beating the lunch curve

Red alert! This recipe was updated and simplified Feb 11, 2024 after intensive field trials and consumer research. The only effort required for any batch size is opening cans, quartering onions and running an immersion blender. You’ve got this!

Gluten has made a serious comeback in our house, mostly out of desperation. Baking, once a rarity, is now a daily or twice daily thing, as the little darlings (read locusts) can work through two loaves of Easiest French Bread Ever in a day. To keep everyone fed, I’m turning to old favorites I can crank out with minimal effort. I’d love to try new recipes, but now is not the time to gamble precious ingredients—especially flour, the new toilet paper—on anything that might not work out.

I’m also trying to make mornings more pleasant by getting ahead of the breakfast curve the night before: making granola; mixing up batter for popovers, blueberry muffins, victory bran muffins; or stirring together the dough for Maple Oat Breakfast Bread.  

All those freshly baked goods may earn you some peace and joy in the morning, but by lunchtime—just when the coffee is worn off—it turns out you also need something to go with the carbs.

A lot of favorite recipes are labeled as “best” and “easiest,” tall claims that make it hard to choose what to try first: Best, easiest, best, easiest. It will surprise nobody that I opted for the one, from cousin Michelle, entitled “Easiest Tomato Soup.”

A quick look at the ingredient list confirmed that this would satisfy the recipe trifecta, by being: easy, cheap and requiring no trip to the store. I’ve been burned by minimalist recipes that taste like they are missing ingredients and steps, so I wanted to see just how good this was, exactly as written. I resisted every urge to add a little bit of this or that, things like: Maple syrup; a glug of sherry; a squeeze of basil from those yummy herb tubes; a splash of cream.

For a serial recipe tweaker this abstinence was tough, but I did it. I am so glad I did, because I can now attest that this soup over delivers on its promise. Maybe the simplicity is why it is so good, though it must also have to do with cooking time. Don’t cheat on the 45 minute simmer—that’s where the magic happens. Confession: It was not until writing that line that I realized this is essentially a pureed version of Marcella Hazan’s pasta sauce but with broth. Mystery solved. Of course it’s good!

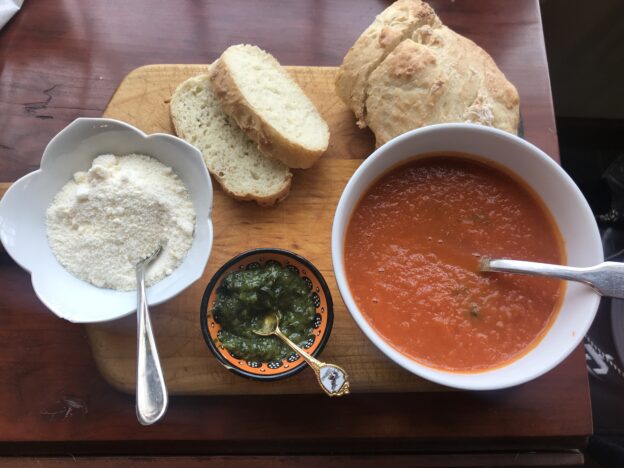
As further endorsement, I barely had time to stage a photo of this before my family ate the shot and then the entire batch. The next day, I doubled it, amortizing the minimal effort over even more servings.

Enjoy a bowl of this with a grilled cheese, or any of the aforementioned carbs, and consider yourself comforted…at least until dinner.

Really Truly Easiest Tomato Soup

Serves 3-4

Ingredients:

  • 4 Tbsp (1/2 stick) butter
  • 1/2 large white onion
  • 1 28 oz can tomatoes (preferably whole, but pureed or diced works too. Extra credit for San Marzano tomatoes)
  • 1 1/2 cup chicken broth or broth of choice
  • 1/2 tsp fine salt and some pepper

Method:

  1. Cut the half onion in half
  2. Melt butter in large pot. Add onion, canned tomatoes and stock to pot
  3. Bring to a boil then turn down heat and simmer uncovered for ~40 minutes
  4. When done cooking, pour soup into blender and blend until smooth. Better yet, use an immersion blender right in the pot.
  5. Add salt and pepper to taste
  6. That’s it!

*Edie’s note here. Don’t tell my family (God knows they will never ever read a food blog), but I used fake butter and veggie “Better than Bouillon.” So, yes it can be Veganized if you like, and the carnivores won’t even notice. Also, feel free to add some minced garlic in with the onion if that is your jam. I usually don’t bother.

Bringing It

This has become a college carnival classic because it is very lodge-friendly and is a welcome warm up on a chilly day. Make a triple batch, heat it up in the morning and pour it into a gallon Thermos container. Pour into paper cups and enjoy with a slice of Easiest French Bread Ever