Maple creemees, Halyard ginger beer, Meyer lemons, chile crisp, Wordle. I don’t have many addictions, but the ones I have are strong. None of us go looking for more addictions, but they are wily. They sneak up and find you in places you’d least expect. Like, in your salad.
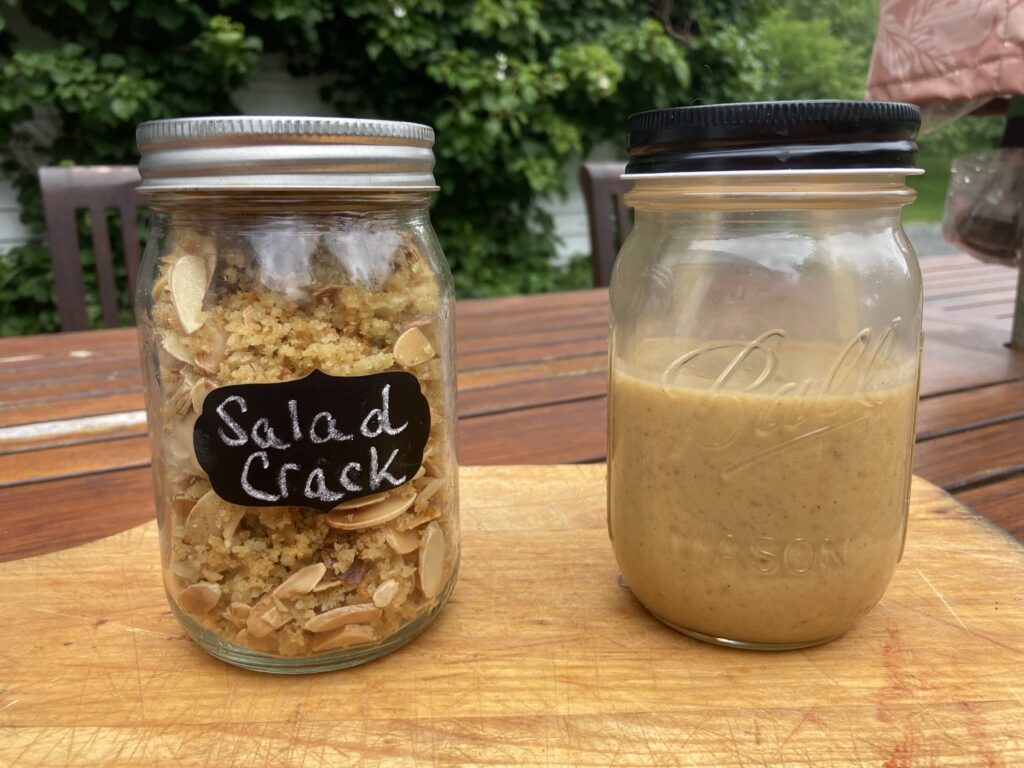
What we have here is a double header addiction—a sweet, creamy dressing and a salty crunchy topping that can be used on their own or together, on salad or on pretty much any veggie or side that needs a little cha-cha.
This particular addiction two-fer came from my young friend and culinary adventurer Mason McNulty. Mason moved to New York a few years back, and added foodie to her adulting repertoire. She recently started sending out a weekly newsletter with recipes she’s developed as a young professional with boundless energy, enthusiasm and creativity for cooking, but limited time, space and budget.
Mason’s recipes come with detailed instructions and touches that take new cooks by the hand and say, “get it together people–you can do this!” She separates out pantry, fridge and specialty ingredients; she lists necessary equipment; she includes the ingredient amounts measured in multiple ways, and those amounts in the ingredients as well as in the steps. She is the anti-slacker.
So, as one would expect, when I fell in love with her latest recipe combo, I slackered them right up (or down) to my capabilities. I am delivering them to you, BUT I am also attaching Mason’s original instructions and pictures so you can choose your adventure. Get the bare bones version here, and then click on Mason’s step by step version with pretty pictures. But wait there’s more! If you want to get Mason’s recipe newsletters, along with a little vicarious whiff of NYC living, just email her at lillianmasonmcnulty@gmail.com
This recipe combo of Creamy Date and Shallot Dressing + Toasty, Crispy, Nutty Topping was entititled: “How to Make Any Salad or Vegetable Taste Great.” That says it all. The dressing is surprisingly simple and ridiculously good. As I was pondering what to use as an excuse for more dressing Mason suggested “a stick from the backyard” and I swear it would work. So there’s that.
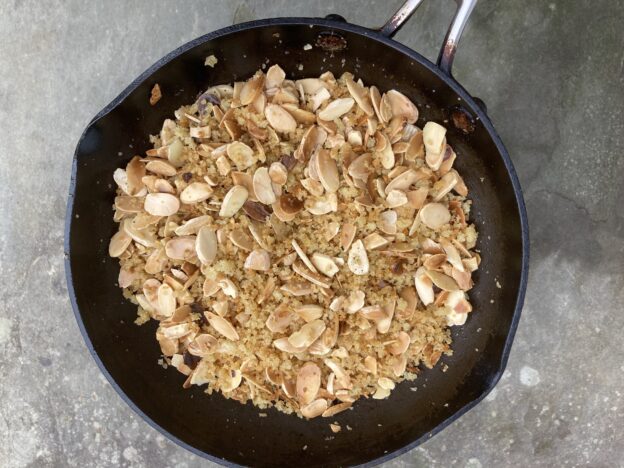
And then comes the topping, which is like almond brittle and homemade croutons got into a brawl and ended in a shattered heap, as BFFs. It has it all—crunchy, salty, sweet, a touch of citrus, optional heat and herbs with juuuuuust enough grease to feel indulgent but not irresponsible. It’s Smartfood vs Cheetos, but way better than either. Mason shows it as a topping for roasted asparagus. I’ve used it to add crunch to everything from caprese salad to egg salad, and I’m seeing it on pretty much every soup in my future.
So here you go. Happy 4th, because apparently the 1st is the new 4th and we’re in it! Don’t forget to click on Mason’s instructions for better pics and the full experience.
Part 1: Creamy Date and Shallot Dressing
Yields 1.5 – 2 cups dressing
Ingredients
- 1 tablespoon dijon mustard
- 2 ounces dried dates, measured without pits (~ scant ½ cup, loosely packed)
- 1 small shallot (~1/4 cup)
- 1⁄2 cup apple cider vinegar
- 1⁄3 cup +1 tablespoon olive oil
- Salt and pepper
Method
- Prep the ingredients: Pit the dates and roughly chop. Finely chop the shallot.
- Complete the initial blend: combine the chopped dates and shallots, the dijon (1 tablespoon), and the apple cider vinegar (1⁄2 cup) in a blender (a bullet blender works really well for this if you have one). Blend until well combined but still somewhat chunky
- Complete second blend: Add the olive oil (1⁄3 cup + one tablespoon), plus a big pinch of salt and a few cranks of pepper and blend until very smooth and emulsified. It will look like tahini! Taste and adjust seasonings as necessary
- Store: This dressing thicken in the fridge, but you can re-warm it by running warm water on the sides and shaking the container.
Toasty, Crispy, Nutty Topping AKA Salad Granola AKA Salad Crack
Yields ~1 cup (Pro tip: no shame in doubling it)
Ingredients
- 1⁄2 cup (generous) sliced almonds*
- 1⁄3 cup (generous) panko
- 2 tablespoons olive oil
- Salt
- ¾ tsp (or more, packed) lemon zest
- 1 tsp (generous) honey
- 1/2 clove garlic* grated or finely chopped
- optional: Red pepper flakes, fresh or dried herbs, lemon juice
Method
- Prep the ingredients: Zest 1 teaspoon of the lemon (should be a packed 1 teaspoon); Grate or chop garlic clove *(add the other half if you like extra garlic!
- Fry the almonds: Add the olive oil (2 tablespoons) to a small frying pan over medium heat. Add the sliced almonds (heavy 1⁄2 cup) and cook until golden brown, stirring every so often with a rubber spatula (or whatever tool you want). This will take 5-8 minutes, depending on your stove. You will hear the nuts crackling and popping during the cooking process.
*Edie’s note here- I burned my first batch, so trust your eyes and nose more than the clock). Also, super slackers can start with Trader Joe’s sliced toasted almonds and get them hot before adding the panko.
- Add the panko: Still over medium heat, add the panko (heavy 1⁄3 cup) and mix. Cook until golden brown, an additional 45 seconds – 1 minute
- Optional: Add the garlic: Still over medium heat, add in the garlic (1⁄2 clove, now grated) and cook for just 45 seconds. Turn off the stove and remove the pan from the heat. Let cool for 5 minutes. Taste and feel free to add the other half of the clove if that’s your jam.
- Season the topping: In the same frying pan add in salt (a generous 3 finger pinch, or to taste), lemon zest (3⁄4 teaspoon, or more to taste), and honey (generous 1 teaspoon). Mix together thoroughly and add another pinch of salt if desired. Make this your own by adding red pepper flakes, fresh or dried herbs, lemon juice, etc.
- Store: Let the topping cool and then store in a room-temperature location. If you are a monk or have carb discipline it will last 3-5 days. Add however much you want on whatever dish you are serving it with. Some grated parmesan is delish too.
Did I mention the original recipe? Just testing you. Get it here. To get on her list say hey to Mason at lillianmasonmcnulty@gmail.com


