Category Archives: Uncategorized

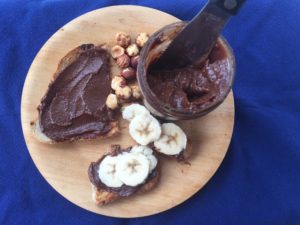
No Guilt Nutella: Chocolate for Breakfast Goes Legit

You say Nutella, I say…ain’t happening for breakfast in this house.

I grew up in a pre Nutella-For-Breakfast world. We had plenty of heinously unhealthy food, like pop tarts and cocoa puffs. But putting frosting on toast and calling it breakfast wasn’t a thing. Even if it happened (looking at you, chocolate Easter bunnies), it wasn’t sanctioned, let alone encouraged.

My kids grew up in a post NFB world, thanks to brilliant marketing from the Italians, who needed a real game-changer to dress up their melba toast and give their people a reason to get up for breakfast. Still, I did not serve Nutella to my kids. That may help explain why they so easily, dare I say eagerly, transitioned to sleepovers, camp and really any opportunity to leave home. There’s no need to get into my reasoning unless you really want a buzz-kill. I think we can all agree that commercial Nutella is not a solid foundation for the most important meal of the day.

But WHAT IF Nutella was made with no added sweeteners, fat or scary ingredients? What if it was made with the holy trinity of healthy treat ingredients—dates, nuts and cocoa—and nothing much else? Now that would be something I could get behind. And don’tcha know, I have. It’s not just for breakfast of course—it’s for any time you damn well please.

No Guilt Nutella soars past the teenage boy test, the teenage girl test, the man test and the “gimme that spoon I just need a chocolate fix ” test. If you are a Nutella connoisseur you will not be fooled by this, but the concept of a chocolate spread you can eat by the spoonful without a shred of guilt or secrecy may win you over nonetheless. Vegans, Paleos and Gluten-free peeps? Yeah, this is your jive too.

As with last week’s treats, your food processor earns its keep making these. It’s pretty foolproof though, as long as you make an honest attempt to skin the hazelnuts* and then process those babies until they really turn to butter. Be patient. It will happen.

No Guilt Nutella

Ingredients

  • 1 cup hazelnuts (or a mix of hazelnuts and almonds)
  • 1 packed cup medjool dates, pitted (or more, see notes)
  • 2 Tbsp water
  • 3 Tbsp unsweetened cocoa powder
  • ½ tsp vanilla extract
  • 1 Tbsp flavorless oil
  • ¼ tsp salt
  • ½ cup almond milk

Method:

  1. Roast hazelnuts at 350 degrees for 20 minutes. Transfer onto a kitchen towel and roll with your hands to remove skins. (no need to remove skins on almonds, if using)
  2. Puree hazelnuts in a food processor for 8 to 10 minutes until a butter forms. Take the time to do it right! You’ll know when you’ve crossed from ground nuts to butter.
  3. Remove hazelnut butter, and scrape out food processor as best you can. Add dates and water. Puree until smooth and creamy.
  4. Add hazelnuts to date paste and pulse a few times.
  5. Add cocoa, vanilla, oil, and salt and blend. 
  6. With food processor running, slowly pour in almond milk. Scrape down the sides and pulse a few times to blend into creamy goodness.
  7.  

Notes

*To completely remove hazelnut skins (for the smoothest possible spread), boil nuts in a pot of water with few tablespoons of baking soda for 4 minutes. Immediately strain and place nuts in ice water for a minute or so, until the skins peel off easily. You still need to roast the nuts to loosen up all the oils and bring out the flavor. Google will not corroborate this, but I find this process takes a little mojo out of the nuts. I prefer the less perfect/more flavorful roasting and rolling technique. You will stain the dishtowel, but such are the sacrifices we make. See here for a THOROUGH demo.

If your dates are hard, or you are using Deglet dates, soak them in warm water for an hour or two before pureeing.

…and furthermore, depending on the sweetness of your dates and the strength of your cocoa, you may need to add more dates at the end to find your sweet spot. 

I swear the notes are done.

Store leftovers in the fridge, and put your guilt in the rear view mirror!
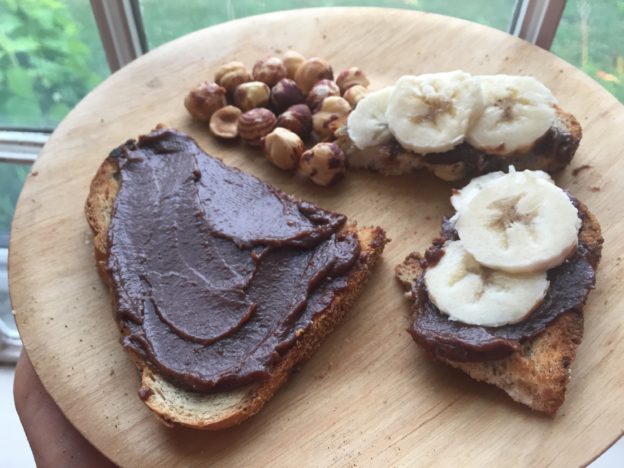
Breakfast in America, reimagined.

The real thing, at the breakfast table, on the dreaded melba toast, in its homeland.

The Aperol Spritz: Ciao Bella!

In case we missed the memo last week, summer has arrived, in all its sweaty glory. This does not bring out my A-Game, because I’m more St. Bernard than Whippet, more Clydesdale than Thoroughbred, more Thelma than Daphne. 

I also tend to gain weight in the summer, which—with all that necessarily exposed flesh—is just…plain…awesome. I’m ok with it, really, but that doesn’t make it any easier to bear the peak heat and humidity of an eastern summer.

So what do we do? We get out of the kitchen and onto the patio. And we help each other by sharing our favorite patio fare. Stay tuned this week for some simple easy classics to have on hand that will help you stay cool in every way.   

Today’s feature: The Aperol Spritz. These first caught my eye on a recent trip to Europe, where every sidewalk café featured what appeared to be glasses of orange wine, complete with little floating orange slices. For a moment, I thought Europe was a few years late on the orange wine trend 2015, the one that never breached the NH border.  But then I remembered where I was: European sidewalk cafes don’t do trends. They do classics.

Rigorous research enlightened me to the Aperol Spritz. Aperol is an Italian aperitif (that’s fancy talk for dry not sweet) made of oranges, roots, herbs and—let’s be honest here—some serious food coloring.

All you need for a classic, refreshing, “I’m- for-sure-as-cool-as-any-of-you” summer drink is to fill a glass with ice and layer in three parts prosecco, two parts Aperol and one part seltzer…in that order.  Toss in your little slice of orange and…Salute! Cin cin! Oooh baby!

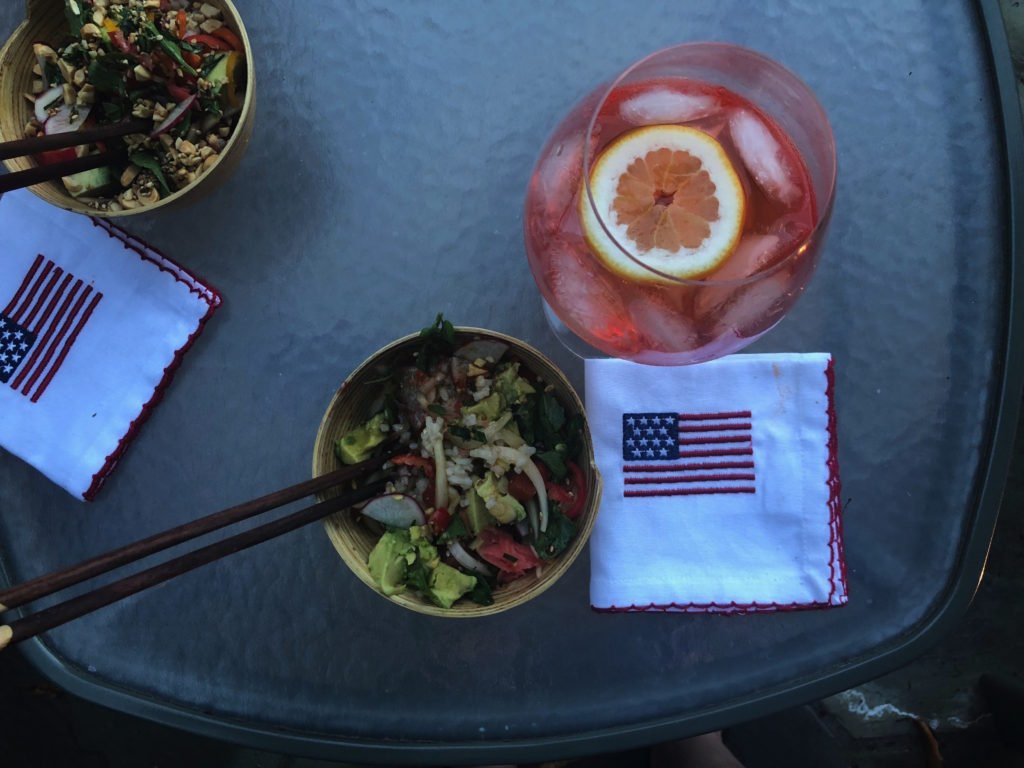
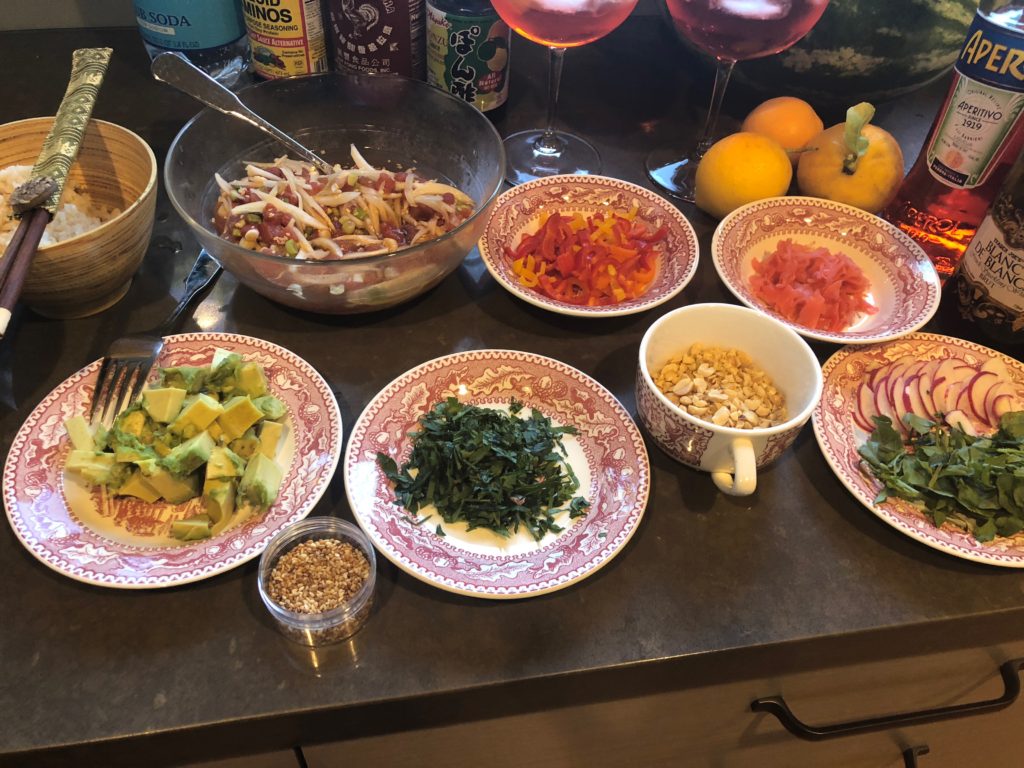
For a no heat dinner, enjoy your spritz California style like Sister A and Cousin D did with this fine feast. Fully- loaded watermelon poke bowls? Alfresco dining? Avocados, pickled ginger, chopped peanuts? Check, check, check, check, check!

Bring It Summer All Stars

Summer is here my friends. Just in time, the good people of the webhosting universe have fixed my site so subscribers will actually get posts. What a great idea? Thank you Bring It loyals for your patience. And now, on to the weekend!

Before you head out for the Memorial Day shop with the rest of humanity, I picked out some all star classics that will help you slay this weekend. With a little prep you can head into summer looking like the master entertainer you are at heart.

First and foremost…

Bring on The Slaw:
If you have never made Hero Slaw, just trust me on this. It will make you famous. Go ahead and claim it as your own if it helps. Prep it, bag it, put it in the fridge and you can take on any invite that comes your way. Or just enjoy it yourself for a few days. If nothing else, make up the dressing to have on hand and turn kale into something the family might actually eat.

Have Some Balls:
Buffalo chicken meatballs are back on my regular rotation (thank you Neely for reminding me!) until I master the perfect veggie balls. Stay tuned for that. Until then, make up a lot of these (ahead if needed) and know they will disappear fast.

Brush up on Your Bruschetta Fixin’s:
You will never be sorry to have a Funitella bruschetta stashed in the fridge. With the miracle that is petite diced canned tomatoes it take all of about 5 minutes. If you want to get more ideas, take a gander at bruschetta deconstructed, and the consider toppings like pickled fig, creamy cheese and crunchy nut crostini, strawberries and goat cheese, and Sicilian caponata.

Get Your Guac On:
You’ve got to have it, and it hardly requires a recipe. BUT if you want to go the extra distance this crazy one with apples and tequila is my new fave. Mango jicama guacamole is another solid contender. Both add crunch and assert that this is not your first guac fiesta.

Think (of drinking) Ahead:
You know you’re a pro when…You’ve got your Frosé and Sandy’s daquiris in the freezer, and fixins for some fancy lemonades. You bridge into genius status when you also have watermelon juice at the ready to whip up watermelonade, spicy watermelon margaritas and watermelon sangria.

Watermelon Sangria. Summer in a glass.

Watermelon Up:
While we’re on the topic of watermelon, cut up some watermelon and prep it for watermelon poke bowls and you are set for fresh weekend lunches for Vegans and non Vegans alike. If you double up on the feta you get for Funitella Bruschetta, and make summer perfection watermelon feta salad, I promise you won’t be sorry.

Sweet Endings:
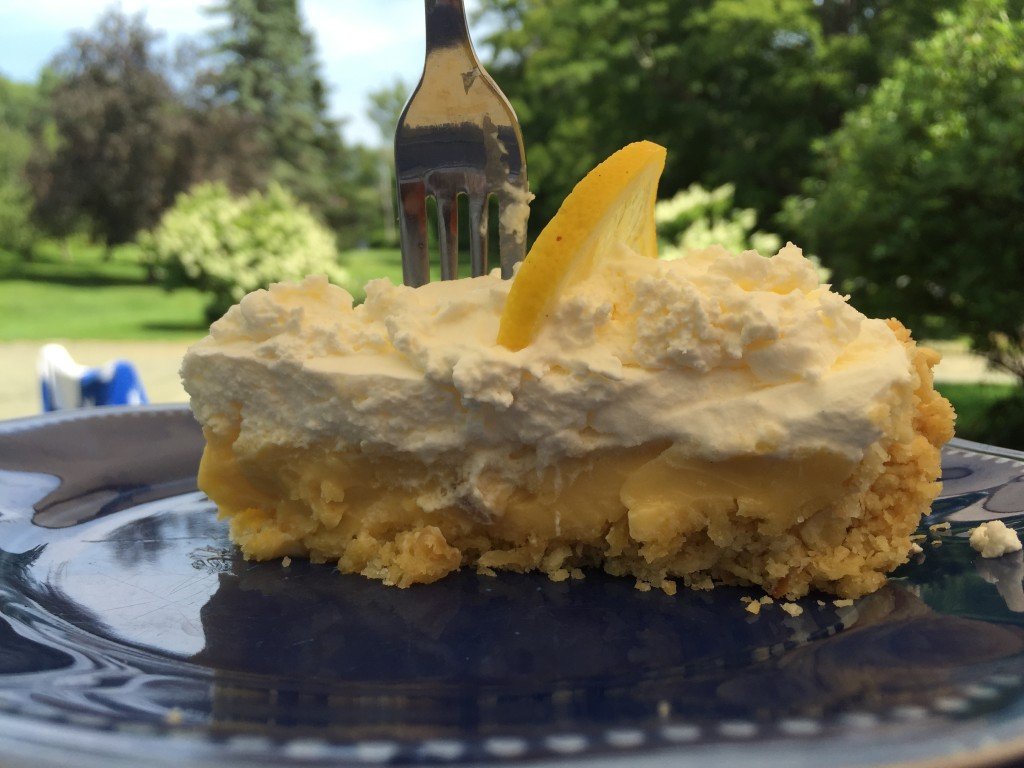
Oh where do we begin on these? Well, summery Lemon Beach Pie, a whole mess of Rubble or Loosey Brucey Rhubarb crisp are a good place to start. As Bruce would say, nobody ever complained about to many good recipe ideas.

New recipes next time, but of now let’s go with what we know and get this summer party started.

Must…eat…more…pie. Sweet, salty, sweet, salty, and oh yeah—creamy, crunchy, cool and tart.

Double Down Derby Day Guacamole

Some days we have difficult choices. Saturday will be one such day. Do you wear a fine hat and celebrate the first Saturday in May according to Kentucky tradition, or do you scarf down some tacos and join the Cinco de Mayo party?

Or, do you do the sensible thing and celebrate both? Well duh! I do not normally do this, but I am posting two untried recipes. Whyyyyyy? Because it’s important! Because it’s Kentucky Derby Day and Cinco de Mayo AND its almost summer. That means it’s high time to get your guac on.

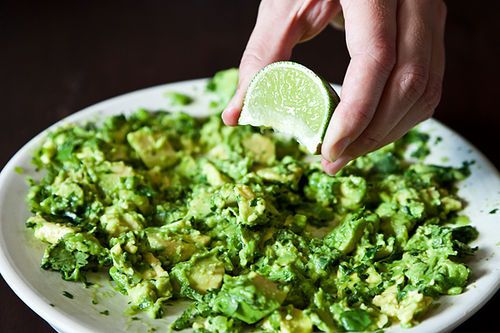
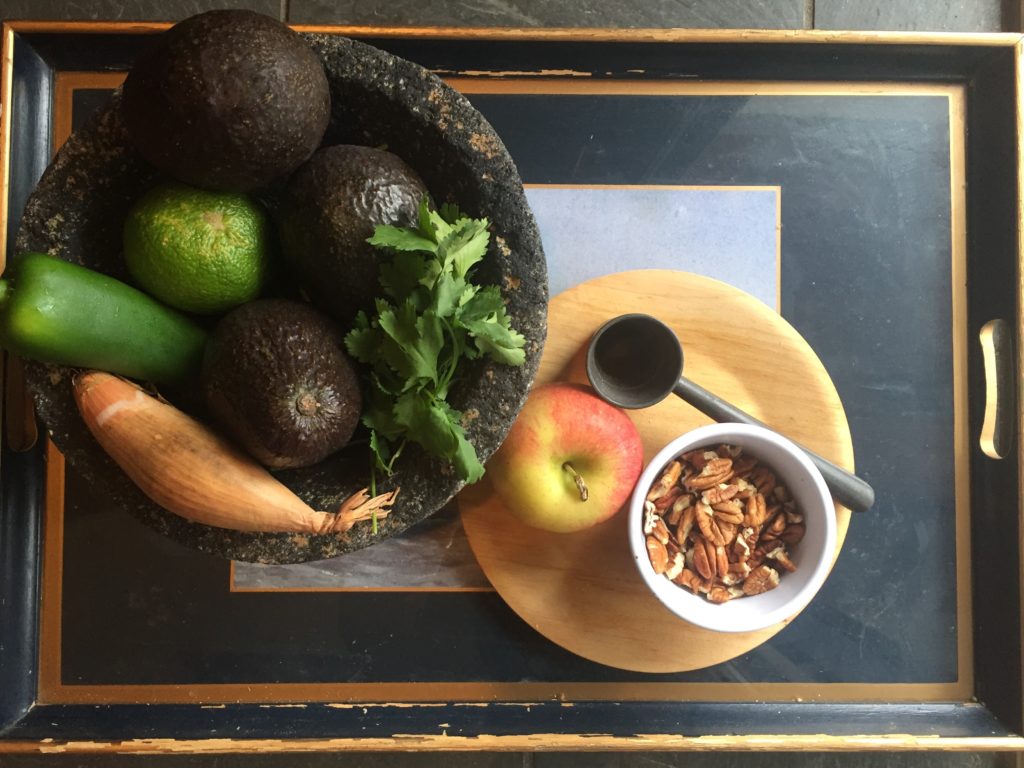
I am a wing it kind of guac maker. As a Californian that is my birthright. That said, you can always improve. These two new takes on guac are both from Mexican food jefe Roberto Santibañez by way of Food52.  The first is unique in approach but features totally classic ingredients. It hits all the must haves and nothing more: lime, cilantro, jalapeño, onion are all pulverized FIRST then added to avocados. As Santibañez says, “There is a very important textural thing to guacamole — we never really mush up the avocado.” I knew I liked this guy. I really felt the love though when I read about his second creation, which is totally wacky. It involves a splash of tequila (he had me there), apples (hello New England) and pecans (a nod to the America south and more weirdness). My awesome neighbor just came back from Georgia bearing two bags of pecans that she harvested and shelled herself. Fate. Kismet. Weird guacamole.

Anyway, here are the recipes. I will be making and testing them both on Saturday, celebrating both occasions of course.  If you do the same please tell me what you think and we can discuss. Whatever you choose to celebrate, have a fantabulous weekend!

P.S. Post time is 6:12. For the worst odds and the best name I’m taking Patrona Margarita, with 50-1.

Numero Uno:

Roberto Santibañez Classic Guacamole

Adapted slightly from Truly Mexican (Wiley, 2011)

Makes: about 1 3/4 cups

  • 2 tablespoons finely chopped white onion
  • 1 tablespoon minced fresh serrano or jalapeno chile, including seeds, or more to taste
  • 1/2 teaspoon kosher salt, or 1/4 teaspoon fine salt (or to taste)
  • 1/4 cup chopped cilantro, divided
  • 1 large or 2 small ripe Mexican Hass avocados, halved and pitted
  • A squeeze of lime, if desired
  1. Mash the onion, chile, salt (the coarseness of kosher salt helps you make the paste), and half of the cilantro to a paste in a molcajete or other mortar. You can also mince and mash the ingredients together on a cutting board with a large knife or a fork, and then transfer the paste to a bowl.
  2. Score the flesh in the avocado halves in a crosshatch pattern (not through the skin) with a knife and then scoop it with a spoon into the mortar or bowl. Toss well (it should be like salad properly dressed in vinaigrette), then add the rest of the cilantro and mash very coarsely with a pestle or a fork. Season to taste with lime juice (if you’d like) and additional chile and salt.
  3. Guac Uno, as made beautiful on Food52

Numero Dos:

Roberto Santibañez’ Guacamole with Tequila & Apples

Author Notes: Roberto says:” The apple needs to be sweet and crunchy (not Granny Smith-tart) and diced not too fine, to contrast just vocally enough with the guac’s salty heat and richness. The pecans should be tossed in butter after toasting, not before, so you get fresh, unbrowned butter flavor, too. Adapted slightly from Truly Mexican (Houghton Mifflin Harcourt, 2011).

Makes: 2 cups
For the apples & pecans

  • 1 large crisp, sweet apple, such as Gala or Macintosh, peeled, cored, and finely diced
  • 1 tablespoon silver (blanco) tequila
  • 1 tablespoons freshly squeezed lime juice
  • 1/4 cup pecan halves, sliced crosswise or coarsely chopped
  • 1 teaspoon butter
  • 1/8 teaspoon fine salt, or 1/4 teaspoon kosher salt (or to taste)

For the guacamole

  • 1 fresh serrano or jalapeño chile, stemmed
  • 2 tablespoons finely chopped white onion
  • 1 teaspoon coarse salt, or 1/2 teaspoon fine salt (or to taste)
  • 3 tablespoons chopped cilantro, divided
  • 1 large or 2 small ripe Mexican Hass avocados, halved and pitted
  1. Toss the apple with the tequila and lime juice in a bowl and let the mixture stand for 30 minutes to 1 hour.
  2. Heat the oven or toaster oven to 350° F. Spread the pecans on a small baking pan and bake until golden and fragrant, 7 to 8 minutes. Add the butter to the pan and toss to melt the butter and coat the pecans. Sprinkle with salt, tossing to coat.
  3. Heat a comal, griddle, or heavy skillet over medium-low heat and roast the chile, turning it over with tongs once or twice, until tender, blistered all over, and blackened in spots, 10 to 15 minutes. Once cool enough to handle, remove the skin from the chile (you might have to use a paring knife).
  4. Mash the chile, onion, salt (the coarseness of the kosher salt will help you make the paste), and 2 tablespoons of the cilantro to a paste in a molcajete or other mortar. You can also mince and mash the ingredients together on a cutting board with a large knife, and then transfer the paste to a bowl.
  5. Score the flesh in the avocado halves in a crosshatch pattern (not through the skin) with a knife and then scoop it with the spoon into the mortar or bowl. Toss well, mashing the avocado coarsely with a pestle or fork, taking care to keep the avocado chunky.
  6. Gently stir in the apple mixture and most of the pecans just until it holds together. Garnish with the remaining pecans and cilantro. Serve right away with tortilla chips.


Lamb Meatballs: a twist on the Easter feast

 
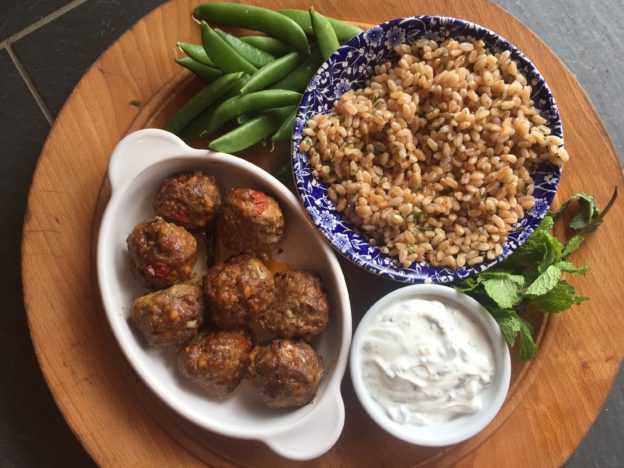
Yes, the day before Easter is a little late to be making menu decisions, not to mention those that definitely require a trip to the grocery store. That said, you might want to live on the edge and make that store run because these are just plain tremendous.
 
Lamb and mint are familiar players at the Easter table, but not in meatball form. When you
taste these, however, you’ll wonder, “Why the hell not?” Even better than being delicious, these are beyond easy, requiring only one semi weird ingredient. I’m talking about you, harissa. Much as I love you, however, you can be replaced. The only change I made to the original recipe was to scale it up slightly. I also made them easier and healthier (you’re welcome) by baking them instead of frying them. This technique comes straight from our favorite buffalo chicken meatball recipe. 
 
There’s not much else to say about these. If you can’t make them for Easter I strongly suggest making them for some other occasion. I suspect they will go very well with leftover Easter candy.

Lamb Meatballs with Yogurt Sauce

Adapted from Matt Jennings Homegrown
 

Ingredients:

For the yogurt sauce:
  • 2 cups plain whole-milk yogurt 
  • 2 garlic cloves, finely minced 
  • 3 tablespoons finely chopped fresh dill 
  • 2 tablespoons finely chopped fresh mint 
  • Salt and freshly ground black pepper 
For the meatballs:
  • 2 pounds ground lamb 
  • 2 eggs, lightly beaten 
  • 3/4 cup fine fresh bread crumbs 
  • 1 large shallot, minced 
  • 1 1/2 tablespoon harissa (or sambal oelek, siracha or another red chile paste) 
  • 1 teaspoon kosher salt 
  • 1 teaspoon cumin seeds (or ground cumin)
  • ¼ teaspoon freshly ground black pepper 
 For garnish (totally extra credit but totally worth it):
  • Toasted sunflower seeds
  • Pickled chiles, homemade or store-bought

Method:

Preheat oven to 400.

Make the yogurt sauce: In a medium bowl, whisk together the yogurt, garlic, 2 tablespoons of the dill, and 1 tablespoon of the mint. Season to taste with salt and pepper and set aside.

Make the meatballs: In a large bowl, combine the lamb, egg, bread crumbs, shallot, harissa, salt, cumin, and pepper and mix well with your hands. Shape into golf ball sized meatballs, dipping your hands in cold water as needed to keep the mixture from sticking.

Assemble meatballs snugly in a lightly-oiled  13″ x 9″ baking dish (or any other combo of baking  dishes that work) so they touch each other. 

Bake for 20-25 minutes until they look yummy and done.

Spoon some yogurt sauce into the bottom of four bowls. Top with a few meatballs, and garnish with the remaining dill and mint, the sunflower seeds, and a few pickled chiles.

Serves 6 as a main course, our 4 with lotsa leftovers.

Splash of Sunshine: Citrus Roasted Fennel and Red Onion

Roasted winter vegetables cheer right up with citrus cha cha.

This recipe is a shout-out to my Auntie Tina, who lives high on a hill in Marin County, surrounded by her beautiful garden. When I think of her, I think of sunshine and a warm smile. That’s what this dish does for me on a gray winter day, or, as is now the case, a gray spring day. The fact that I used clementines for this (her full name is Clementina) makes the dedication feel all the more appropriate.

Citrus is a sign of hope and cheer. Roasted citrus is not for everyone. You love it or you don’t, and you know who you are. I love it (chicken or broccoli roasted with Meyer lemons? Yeah baby!) After being served  this amazing roasted chicken with clementines, originally from the Jerusalem cookbook,  I took a brief tour of the interwebs and found a salad featuring a similar combo.

Molly Stevens’ creation has inspired many subtle riffs and tweaks. My favorites include: adding pomegranate arils before serving; swapping navel oranges for Satsuma or blood oranges; adding fresh, peeled rounds of said oranges after roasting; and adding some zap with a splash of a sherry vinegar before serving. Do what you like, and enjoy this bit of roasted sunshine. Serve it with love and a smile, just like Auntie Tina would.


The pre-roasted look

Citrus Roasted Fennel and Red Onion

Serves 4

  • 1 large or 2 small fennel bulbs (about 1 pound untrimmed)
  • 1 medium red onion
  • 3 clementines (or 1 large navel orange), scrubbed.
  • 2 tablespoons extra-virgin olive oil, plus more for drizzling
  • Kosher salt and freshly ground pepper
  1. Position a rack in the center of the oven and heat to 400 degrees F (375 degrees convection). Line a heavy-duty rimmed baking sheet with parchment paper (this prevents the oranges from sticking to the pan).
  2. Trim the fronds from the fennel. Stand a bulb on its base on the cutting board and cut it in half lengthwise, cutting from the core end to the stem end. (If the bulb is more oblong than round, as some are, you will create two halves that are thinner and flatter rather than thicker and bulbous.) Use a paring knife to remove most of the core from each half (no need to get it all out). Lay each half flat on the cutting surface and cut crosswise into 1/4-inch-thick crescent-shaped slices. Toss onto the baking sheet and repeat with the second fennel bulb if you have two.
  3. Cut the onion in half, cutting from root to stem end. Peel and remove the root end from both halves. Slice the onion halves crosswise into 1/4-inch-thick half-moons and add to the fennel.
  4. Next, slice 2 clementines into ¼ inch rounds. (If using large orange, first cut off the ends and use them for juicing at the end of the recipe.)
  5. Add sliced clementines to the fennel and onion. Drizzle the olive oil on top and season well with salt and plenty of pepper. Toss to coat and arrange in an even(ish) layer on the baking sheet.
  6. Roast, stirring with a spatula after 15 minutes to ensure even cooking and again every 10 minutes or so. The vegetables close to the edge of the pan will brown more quickly than those in the center, so stirring and then shaking the pan to restore an even layer helps everything cook at the same rate. Continue roasting until the vegetables and orange are tender and the outer edges are beginning to caramelize, 25 to 45 minutes.
  7. Transfer to a serving dish, ideally a wide, shallow bowl. Let cool for at least 15 minutes or to room temperature. Cut remaining clementine in half. Squeeze the juice of one half over the salad and taste. If it tastes a little flat, add a pinch of salt and squeeze the other half clementine over it. *Drizzle with a little of your best olive oil and serve warm or at room temperature.

* if you want to fancy it up with a vinaigrette, squeeze the orange ends or halved clementine for 1 Tbsp juice. Whisk with 1 tsp sherry vinegar and a pinch of sea salt. Slowly whisk in 2 tablespoons olive oil. Drizzle away!


Seed Bark Granola

Nutty, grainy, and way better tasting than bark. I promise!

January is not for sissies. In looking back on January posts just for this blog, there are some common themes: soups, breads…and a lot of complaining about the general bleakness all around. I’m not going to entirely break with tradition—I’ve had a perpetual pot of soup (any variation of Sugar and Spice Squash Soup is my fave) and have ditched all pretense of gluten-free living because, a girl’s gottta dunk something! But, I’ll skip the bellyaching this time.

This year’s January challenges come with an ongoing healthy eating quest, fueled by eating advice that ranges from confusing to Draconian. As discussed in November, when trying to eat for maximum brain and heart health there is a lot of conflicting info to navigate. As part of this mission, I’ve made things that look like dirt and some that taste like dirt. I’ve crammed way more vegetables into every meal but also “jumped the shark,” by putting kale in dishes where it has no business, thereby ruining my kale cred. I brought a peanut dip to a party that was pretty delicious but looked like baby poop, which turns out to be a significant enough deterrent.

At a certain point, you have to do the best you can, in a way that will be sustainable. As I forge though January I’ll post the best of what I find. Every recipe won’t meet everyone’s standards of “healthy” or “clean” eating. But my promise to you is that they will all be good enough to bring outside your home, and give with pride.

This granola/topping/snack comes straight from Engine 2 cookbook, which is a fantastic resource to have around. The Esselstyn tribe are Vegan, oil-free wizards. This granola reminds me of my beloved Bread of Life “Dirt” Bread, as well as the PITA lifechanging crackers. The good news here is that it’s a whole lot easier to make than either of them, and with no grains whatsoever it comes close to satisfying all versions of clean eating. The only debatable ingredient is maple syrup, but it doesn’t call for much and c’mon people—live a little!

Seed Bark Granola

From The Engine 2 Cookbook, with some pro tips

Ingredients

1 ½ c raw pumpkin seeds
½ cup raw sunflower seeds
¼ cup raw sesame seeds
¼ cup flaxseed meal
2 Tbsp chia seeds
2-3 Tbsp maple syrup (2 Tbsp was perfect for me)

Method:

Preheat 350. Line a baking sheet with parchment paper.

Combine all ingredients in a bowl, ending with the syrup. Mix it up well. Pour it all on the baking sheet and press it out to 1/4 -1/3 inch thick (no thicker than an almond). Pro tip: To make this easier and more uniform lay another sheet of parchment paper on top of the mixture and press down hard on it with another baking sheet.

Bake 18 minutes until fragrant and lightly browned on top. Rotate the pan halfway through if you are inspired and watch to be sure it does not burn.

Remove from oven and leave it to cool. As it cools, it will speak to you by crackling. It’s saying, “Leave me alone–I’m getting crispy, baby!” After at least 20 minutes, you can be dramatic and lift the cookie sheet a few inches then drop it. Or, break it up it yourself into whatever sized bits you want.

When completely cool, store it in an airtight container. It lasts 10 days or so they say. I would not know. I do know it is delicious, and is a healthy gift to anyone you love.

Bark, ready to bite

Sabering champagne

Holiday Favorites: Stay Sane, Go Nuts, Be Happy!

Fluff up your marmots and break out all things sparkly, the holidays are here. This is the season for many things: fake fur, sequins, fizzy drinks, warm everything. This is not the season for experimentation. We’re keeping our heads above water here, which means sticking with what we know. tried and true meals that make us happy, and treats to give that make others happy.

Maple oat breakfast bread

With that in mind, in my own kitchen I’m revisiting whole lot of Bring It tried and trues. That means soups like Thai Coconut Corn Soup, or Sugar and Spice Squash Soup. And yep, that means a crock pot full of Chicken Taco Chili that feeds a crowd with about 6 minutes of prep. All of the above, of course, beg for People’s Choice Cornbread or No Knead Challah or a honkin’ slice of Maple Oat Breakfast Bread to dunk in there. That is, UNLESS dirt bread is your thing…you know who you are, you little hemp seed eating chia pets. I’m with you there.

You might be needing some holiday entertaining staples like pomegranate everything (along with a genius pomegranate wrangling technique). What’s winter without fondue, and the easiest in the world Guinness Fondue at that? And what’s “How the Grinch Stole Christmas” without snacks? I highly recommend a batch of Nootch Popcorn or a bowl of Hail Mary Coconut.

As far as gifting and hostess offerings, you will never go wrong with crackle and its intriguing, slightly sophisticated dark cousin, pretzel and beer Crackle 2.0. And cookies? Yeah we’ve got those, basics like my faves—champion chip cookies—as well as totally slacker kiss my crust cookies, made from refrigerated pie crust and whatever chocolates you have around. If you need to scare up a snowstorm, or a reason to start a sweet family tradition make up a snow ghost pie.

Snow Ghost pie ad

And lest this be a pure re-hash of deliciousness we have an actual new recipe. I realize this blog has a somewhat extensive nut treatment, including honey thyme walnuts, spicy rosemary maple walnuts and an entire holiday nut anthology. But it turns out you really do need one more way to make roasted almonds. These are very similar to ginger glazed almonds (see anthology above), but without the ginger and with a coating of sesame seeds. You can choose a mix of sweeteners for your preferred flavor dimension (honey and sesame were pretty much born for each other), but for the best texture and glaze use at least some brown sugar.  

We’re talking nuts here, not rocket science, so be bold and mess around with flavorings, spices, herbs, types of nuts etc. Above all, enjoy the madness of the season and, like James says, remember “Shower the people you love with love.”

Sesame Almonds

Makes 3 1/2 cups almonds

Ingredients:

  • 3 tablespoons packed light brown sugar (or sub out up to 2 tablespoons with honey or maple syrup)
  • 1 tablespoon coconut oil (or your healthy oil of choice)
  • 1 teaspoon kosher salt
  • 1 teaspoon paprika
  • 1 teaspoon rice vinegar
  • 1 pound raw almonds (a scant 3 ½ cups)
  • 2 tablespoons (or more) white sesame seeds

Method:

Arrange a rack in the middle of the oven and heat to 350°F. Line a rimmed baking sheet and 2 wire cooling racks with parchment paper and set aside.

Pour the almonds into a mixing bowl. (If you keep your nuts in the freezer, warm them up in the oven for a few minutes first). In the microwave or on the stovetop stir together the brown sugar/honey/syrup, oil, salt, paprika, and vinegar over low heat. Pour mixture over the almonds and toss until the almonds are thoroughly coated. Transfer the almonds to the prepared baking sheet and spread into an even layer.

Bake, stirring every 5 minutes, until the almonds are brown and fragrant, 12 to 15 minutes total. They should be a rich brown color and just start to smell toasted as you open the oven door.

Sprinkle the sesame seeds over the hot almonds and stir to evenly distribute the seeds. This is where I go a little overboard, and try to get as many sesame seeds as possible to coat the almonds. Divide the nuts between the 2 prepared cooling racks and use a spatula to spread the nuts out so they do not touch. Cool completely, about 30 minutes.

Break apart any nut clusters that are stuck together if needed.

Bringing It:

Pour these babies into a treat bag, jar, tin or a cardboard takeout container lined with festive tissue paper, and store them in the fridge until you are ready to give them or devour them.


Heart of Darkness Chocolate Cups

Come to the dark side, for the good of your heart and soul.

I hit the food stash jackpot, when Sister A rolled into town with a carry-on full of Trader Joes nuts. I already had a decent stash of raw walnuts and almonds, but she brought in the exotics: pecans, pistachios, pepitas, cashews, macadamias. My pre-holiday ship had come in!

This happy event coincided with the other fortunate circumstance of having a lot of really good dark chocolate on hand. It’s not a huge leap to imagine what happened next. Yes my friends, I had a Reese’s ah-ha moment. Maybe I could make a slightly more mainstream yet totally healthy version of Reese’s Redemption Cups.

The revelation here is homemade nut butter, ever-so-gently spiced up, but not sweetened…and dark chocolate…and a pixie dust sprinkling of flaky salt, but only if you dare. Dark chocolate is just plain better for you than a whole lot of un-fun things, and when the health police serve up an opening like this you run through it!

The below list of directions is daunting, but basically you are doing this: Making nut butter by roasting raw nuts and whirring them in a food processor with cocoa, cinnamon, vanilla and salt. Then you are melting chocolate, pouring a bit in the bottom of lined mini muffin cups, adding a blob of nut butter then spooning more chocolate on top of the whole shebang. With that vision, read on bravely, and know that you will end up with something delicious no matter what it looks like.

Don’t over think this one. Just make up a bunch when you’re feeling it, and enjoy them as needed. You will not regret having this stash on hand.

Heart of Darkness Chocolate Cups

Adapted from betterwithcake

Makes 14-16 mini cups of joy

First, you’ve got to make your nut butter. See below. From there it’s just a matter of melting chocolate. Again, whatever darned chocolate you feel like. The darker the chocolate, the higher percentage the cocoa, so the slower it will melt and the more temperamental it will be to work with. If you’re going way dark, add some coconut oil. You can also use vegetable oil, but it will thin the chocolate more and you will have fallen off the superfood wagon. Don’t worry. You won’t be lonely there.

Ingredients

  • 1/2 cup or so of homemade, chocolate hazelnut almond butter (or store bought chocolate hazelnut butter if you must. The texture will be gooier)
  • 1 bag (10-12 oz) good quality dark-as-you-dare chocolate chips, Vegan if needed.
  • 2-3 tsp coconut oil (optional, but it makes your life easier)
  • Flaky sea salt
  • Optional toppings of choice: toasted shredded coconut, finely chopped toasted nuts, dried fruit, crushed peppermints, leftover candy corn, etc, etc, etc. 

Method:

Line a mini muffin tin with 16 paper or silicone liners.

Melt chocolate, with coconut if you are using, by your preferred method. I do mine in a small, retro double boiler over simmering water. If you are among the tens of millions of people with a working microwave, you can try that method.

Use a teaspoon to drizzle some melted chocolate into each the muffin liner. Don’t use all your chocolate; save at least 1/3 of it to spread on top once your chocolate cups are filled. Adjust the number of cups you make accordingly.

(At this point, if you are making big cups (not mini), or if you going for perfection, put them into the freezer for a few minutes to set up. If using mini ones, you’re good to keep going.)

Drop a very scant (ideally a slightly flattened oval) teaspoonful of your nut butter into each cup (if you went pro and froze the first layer then go ahead and press down on the nut butter to level it).

Once all your cups are filled with the nut butter, use your designated chocolate spoon to cover the filling with the rest of the melted chocolate. Give the cups a sprinkle of salt and/or your garnish of choice and place them into the fridge to set, or the freezer to store longer term. They will keep in the fridge for several weeks and in the freezer for 3-6 months. Riiiiiiight.

Chocolate Hazelnut Almond Butter

The not very perfect but oh so delicious cross-section

~Vegan, Dairy Free, Paleo Friendly, Shazaam!

The beauty of this nut butter is that it’s easy, and the spices add cha-cha without any sweeteners. I go with cocoa and cinnamon but you can do a chai spiced one with cardamom, or a chile spiced one. Get creative and dream big here people. Once you’ve got the nut butter made you are totally set up for success.
Makes approx 2 cups of pretty darned healthy chocolate-hazelnut almond butter. This is way more than you need for a bag of melted chocolate chips, so you’ll be enjoying this on apples and toast, in smoothies and sandwiches, etc.

Ingredients –

  • 1 cup of raw almonds
  • 1 cup of raw skinless hazelnuts* (or use all almonds or sub hazelnuts with raw cashews or macadamias)
  • 1 Tablespoon of vanilla bean extract
  • 1 Tablespoon of cocoa (or cacao if you’re fancy)
  • 1/2 teaspoon of salt flakes

Method:

Preheat your oven to 350

Line a large baking sheet with baking/parchment paper (or a non stick silpat mat) and pour your raw nuts on, making sure they are spread evenly and not crowded.

Roast your nuts for 10 mins, until lightly roasted and slightly golden.

If you are unable to get skinless hazelnuts you’ve got an extra step here. roast them on a separate tray and once they are roasted, place on a clean dry hand towel and fold it in half. Rub it gently between your hands and the skins should come loose. Once the hazelnuts have shed their skins, discard the skins and proceed with the recipe as normal.

Pour your roasted almonds and hazelnuts into the bowl of your food processor or blender and process until smooth and creamy (or your desired consistency). It takes a minute or two to transform from ground nuts to creamy butter. Stop and scrape down the sides of the bowl occasionally as you go.

Once you’ve gotten the desired consistency, add the salt, cocoa (or cacao, whatev) and vanilla then process until combined.

Taste and adjust flavors accordingly – this is where you make you’re personal statement, adding extra salt or vanilla or maple syrup or whatever floats your boat. You can also lube it with a bit of coconut oil if you like.

Scrape that deliciousness into an air-tight jar and keep it in the
fridge for several weeks.

Bringing it:

My suggestion here is to keep a stash of this nut butter at the ready, and then, whenever you have a window of time and some extra chocolate lying around, make up some of these. With a stash of them in the freezer you are never without a healthy dessert, a peace offering, a hostess gift or just a little love bomb of chocolate.


Bringing It With Heart: Peacemaking Pepitas

Bringing on the love, and healthy debate.

You can’t please all the people all the time. This is true when it comes to food, and especially when it comes to what people consider “healthy” food. For various reasons, I’ve been flirting lately with both Vegan and Whole 30 ways of eating.

For those of you oblivious to food trends, Vegans avoid all food that comes from something with a face—meat, fish and all dairy, including eggs. The most vigilant Vegans also avoid honey, to protest the enslavement of bees. Whole 30 basically lines up with the Paleos, who embrace “high quality” protein, and especially animal protein. They make the sign of the cross to all grains, beans, processed foods and soy, which means tofu, tempeh, seitan and the like. Paleos blame life’s ills on inflammation, which come from the body trying to deal with sugar, a whole lot of which comes from grains. Vegans embrace grains and beans because without all that Verboten animal protein they get darned hungry.

Vegans are among the most creative eaters, making cheese from nuts, milk from hemp and mayo from chickpeas. The paleos get crafty points too, making pancakes without flour, oatmeal without oats and pizza crust from cauliflower. Martha points for all! Vegans get smug when the topics of obesity and high cholesterol come up; Paleos get smug when the Vegans look wan and tired; and the topic of bacon will polarize a mixed crowd faster than you can say Trump. All of this explains the popularity of the Mediterranean diet, which cuts right down the middle. Mediterranean eaters sit back and watch the show, enjoying a little bit of everything. They snack on olives, guiltlessly savor their dark chocolate and red wine and think, “Ah, yes. Life is moderately good!”

We had a recent health scare in our house, which prompted a close look at nutrition. People showed up bearing delicious, heart-healthy meals, as well as plenty of dark chocolate. It reminded me of how much I love our community and inspired me to tweak Bring It towards the healthier end of the spectrum. Like many of our friends, we lead pretty healthy lives, but there’s always room for improvement.

As discussed above, “healthy” means different things to different people; but, we’ve all got to try to get along in this world, especially at the table, and especially while we striving towards our own healthy, realistic, sustainable way of eating. Most of us just want good, healthy food that won’t break the bank, or take all day and an advance culinary degree to prepare. Fortunately, there are a few things on which all zealots agree, and I like to picture them as overlapping areas of a Venn diagram. The overlapping area of foods to avoid or seriously limit includes sugar, processed foods and, sadly, cheese. The overlapping area of acceptable foods includes greens, colorful veggies and roots, nuts, avocados, fruit (more or less) and coconut in its many forms. So we’ve got a starting point for common ground.

Of course, there will be many things that are beyond the universal overlap of all “healthy” diets. There are also times when you just have to go off the reservation. I’ll point you to those recipes with gusto, even if I’m not making them myself for a while. Case in point are these bronzies that a friend brought over recently. They totally raise the dessert bar, and WILL make you MVG (Most Valuable Guest).

For today, we’re keeping it simple and healthy: Pepitas roasted with sweet/salty coconut aminos. Coconut aminos are soy- and wheat-free, and while they are still a form of sodium, it’s less than straight up salt (a Tablespoon of coconut aminos has 300 mg sodium, the same as in 1/8 tsp salt). Even better, the Paleos turn a blind eye to the main ingredient, coconut sap, which sure sounds like a form of sugar to me. Shhhh! Let’s just enjoy this.

These pepitas are great sprinkled on salad, soup (like this one!) or roasted vegetables or as a snack any time of day.

Peacemaking Pepitas

Tweak the amounts up and down, but for best results don’t crowd your baking sheet. 1½ cups of nuts at a time per sheet is about the max.

Ingredients:

  • 1 cup raw pepitas
  • 1 Tbsp coconut aminos (or more if you’re feeling it)
  • ½ -1 tsp chili powder (optional)

Method:

Preheat oven to 350. Line a baking sheet with parchment paper.

Pour pepitas on the parchment lined sheet, drizzle with aminos and stir them around to coat. Sprinkle with chili powder if using.

Bake for 10 minutes. Stir and check them for doneness. Return to over for 5 more minutes.

Let cool on baking sheet. Store in an airtight container (they get soggy otherwise).

Bringing it:

Warp ’em up! These make an excellent hostess gift or contribution to any feast.