Category Archives: Uncategorized

A Box Full of Sunshine for Mother’s Day

Happy Mother’s Day! My gift came a day early, from California. My amazing Auntie Tina, who knows how much I covet her Meyer Lemon tree, sent a surprise care package straight from her tree and her kitchen.  It was the very best thing in the world to open on a snowy, windy May morning in New Hampshire. Money may not buy you happiness, but fresh lemon marmalade on toast sure will.

Tina makes me think of great moms and of the way they make you feel special on every day. My Nina was all that, and I’m really happy and excited that she’s getting some airtime in today’s New York Times. I hope you get a chance to read this, and that it brings a little peace to people who need it on Mother’s Day, or any day.

For kids out there, of any age, wondering if you can pull off making breakfast for your Mom, you CAN! And you can probably do it with what you have on hand. Might I suggest Dutch Bunny, Blueberry Dutch Bunny, Popovers or 3-3/2-2 crepes, all of which benefit from a squeeze of fresh lemon. Whatever you come up with, you know she’ll appreciate the effort, so here’s the only part of the recipe you truly need to follow: Serve it up with a whole lotta love!

Whether or not cooking is happening, let’s give it up for our mom’s today. And when life gives you lemons, say “Thank you!” 

 Thank you for the sunshine Tina!

Easiest Tomato Soup: Beating the lunch curve

Red alert! This recipe was updated and simplified Feb 11, 2024 after intensive field trials and consumer research. The only effort required for any batch size is opening cans, quartering onions and running an immersion blender. You’ve got this!

Gluten has made a serious comeback in our house, mostly out of desperation. Baking, once a rarity, is now a daily or twice daily thing, as the little darlings (read locusts) can work through two loaves of Easiest French Bread Ever in a day. To keep everyone fed, I’m turning to old favorites I can crank out with minimal effort. I’d love to try new recipes, but now is not the time to gamble precious ingredients—especially flour, the new toilet paper—on anything that might not work out.

I’m also trying to make mornings more pleasant by getting ahead of the breakfast curve the night before: making granola; mixing up batter for popovers, blueberry muffins, victory bran muffins; or stirring together the dough for Maple Oat Breakfast Bread.  

All those freshly baked goods may earn you some peace and joy in the morning, but by lunchtime—just when the coffee is worn off—it turns out you also need something to go with the carbs.

A lot of favorite recipes are labeled as “best” and “easiest,” tall claims that make it hard to choose what to try first: Best, easiest, best, easiest. It will surprise nobody that I opted for the one, from cousin Michelle, entitled “Easiest Tomato Soup.”

A quick look at the ingredient list confirmed that this would satisfy the recipe trifecta, by being: easy, cheap and requiring no trip to the store. I’ve been burned by minimalist recipes that taste like they are missing ingredients and steps, so I wanted to see just how good this was, exactly as written. I resisted every urge to add a little bit of this or that, things like: Maple syrup; a glug of sherry; a squeeze of basil from those yummy herb tubes; a splash of cream.

For a serial recipe tweaker this abstinence was tough, but I did it. I am so glad I did, because I can now attest that this soup over delivers on its promise. Maybe the simplicity is why it is so good, though it must also have to do with cooking time. Don’t cheat on the 45 minute simmer—that’s where the magic happens. Confession: It was not until writing that line that I realized this is essentially a pureed version of Marcella Hazan’s pasta sauce but with broth. Mystery solved. Of course it’s good!

As further endorsement, I barely had time to stage a photo of this before my family ate the shot and then the entire batch. The next day, I doubled it, amortizing the minimal effort over even more servings.

Enjoy a bowl of this with a grilled cheese, or any of the aforementioned carbs, and consider yourself comforted…at least until dinner.

Really Truly Easiest Tomato Soup

Serves 3-4

Ingredients:

  • 4 Tbsp (1/2 stick) butter
  • 1/2 large white onion
  • 1 28 oz can tomatoes (preferably whole, but pureed or diced works too. Extra credit for San Marzano tomatoes)
  • 1 1/2 cup chicken broth or broth of choice
  • 1/2 tsp fine salt and some pepper

Method:

  1. Cut the half onion in half
  2. Melt butter in large pot. Add onion, canned tomatoes and stock to pot
  3. Bring to a boil then turn down heat and simmer uncovered for ~40 minutes
  4. When done cooking, pour soup into blender and blend until smooth. Better yet, use an immersion blender right in the pot.
  5. Add salt and pepper to taste
  6. That’s it!

*Edie’s note here. Don’t tell my family (God knows they will never ever read a food blog), but I used fake butter and veggie “Better than Bouillon.” So, yes it can be Veganized if you like, and the carnivores won’t even notice. Also, feel free to add some minced garlic in with the onion if that is your jam. I usually don’t bother.

Bringing It

This has become a college carnival classic because it is very lodge-friendly and is a welcome warm up on a chilly day. Make a triple batch, heat it up in the morning and pour it into a gallon Thermos container. Pour into paper cups and enjoy with a slice of Easiest French Bread Ever

Italian Breakfast Biscotti

Well hello! What say we spend a quiet weekend at home with family? I know, bad joke. But really, at any other point in time that probably sounded like a comforting luxury, so let’s enjoy it. And, how better to enjoy it than with cookies? But, wait, it gets better. How about breakfast cookies? NOW we’re talking.

This recipe come from “A Blissful Feast” the book I mentioned a couple of posts ago, after going to a reading at the Norwich Book Store. The author, the supremely talented Teresa Lust, is my neighbor in bustling Hanover Center, and the reading happened to be that last social event before we all scurried into our holes for the duration. Teresa’s first book, Pass the Polenta got a shout-out from none other than Julia Child, so I knew this chronicle of her culinary journey—through Italian culture, history and family—would be entertaining, informative and well written. As a bonus, it’s full of unfussy recipes that I wanted to try pronto!

Part history, part story and all great recipes

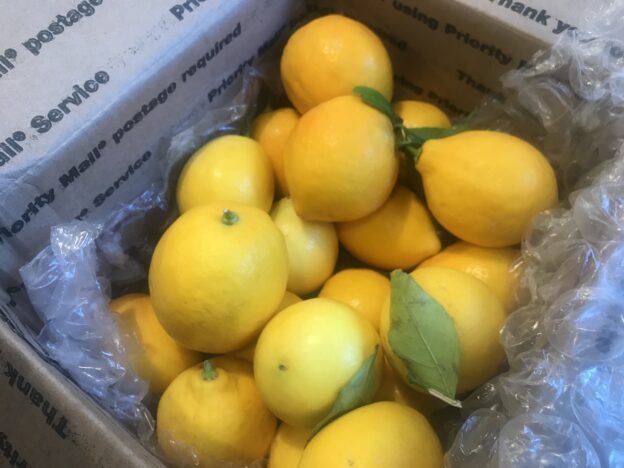
This was the first recipe I wanted to make, and it did not disappoint. I love that these call for olive oil instead of butter, which helps when cooking with heart health in mind, and means you don’t have to soften butter. I also love that they use lemon zest because the only things I have hoarded are Meyer lemons. And I love that I now have a new creation that impresses my kids and makes everyone happy at any time of day. When Teresa graciously encouraged me to share the recipe here, she warned me that it was possible to eat half the batch in one sitting. She was not wrong.

As I prepare to make them again, I need to time production so I have some left for tomorrow’s Easter festivities which include…cookies for breakfast and not much else. I’m saving A Blissful Feast for bedtime reading, going through it slowly, imagining a trip to Italy and enjoying it like a long family meal. 

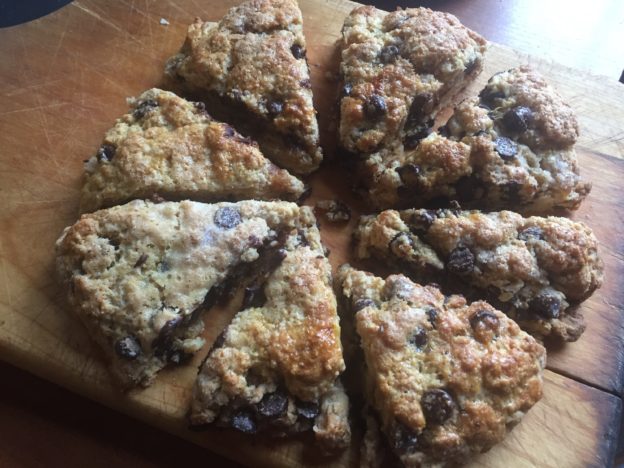
A few notes: This is the recipe exactly as it is written in the book, but with a few *notes where Teresa provided some extra guidance and assurance for the baking impaired (like me). I suspected these would be great with other fruit/nut combos, and Teresa gives that a big thumbs up, especially dried cherries or cranberries and almonds, pistachios. or hazelnuts. I say any combo that speaks to you (ideally from your pantry).

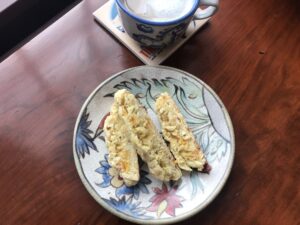
Cantucci: Breakfast Biscotti

Makes about 4 dozen

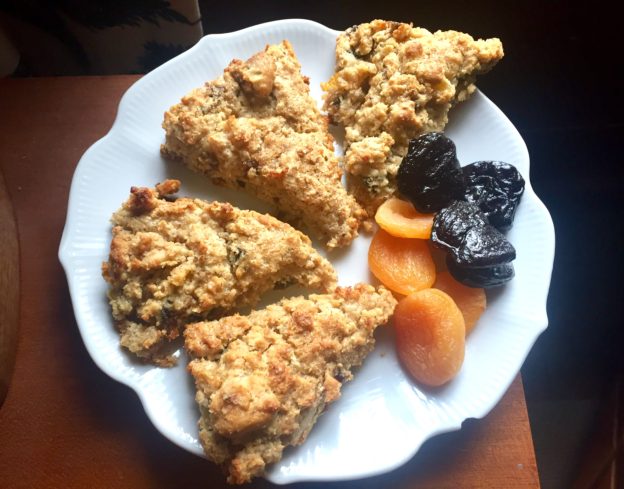
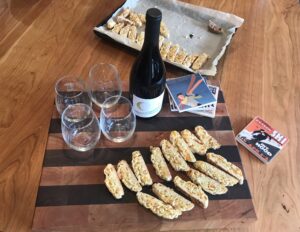
These twice baked cookies are traditionally served with a sweet dessert wine at the end of the meal. The addition of dried apricots, almonds and oats gives them all the ingredients you need for breakfast, too, served with an espresso or steaming cup of caffelatte.

Ingredients:

  • 2 cups flour, plus 1 Tbsp for tossing with apricot pieces
  • 1 tsp baking powder
  • ½ tsp salt
  • 1 cup sugar
  • 2 large eggs
  • ¼ cup olive oil
  • zest of a lemon
  • 1 tsp vanilla extract
  • ½ tsp almond extract
  • 1 cup dried apricots, chopped
  • 1 cup blanched almonds, (whole or slivered)
  • ½ cup old fashioned oats (not instant)

Combine 2 cups flour, baking powder and salt in a small bowl and set aside.

Place sugar, eggs and olive oil in the bowl of a stand mixer with the paddle attachment and mix on low speed until smooth. Add lemon zest, vanilla and almond extract, and continue mixing, until combined.

In a small bowl, toss remaining tablespoon of flour with dried apricots to keep the pieces from sticking and set aside.

Add flour mixture to wet ingredients, stirring just until blended and make sure to scrape bottom and sides of bowl with a spatula to thoroughly incorporate dough.

Stir in chopped apricots, almonds, and oats. Covered though and refrigerate 30 minutes (or up to several hours or overnight).

Preheat oven to 350°. Grease a baking sheet or lined with parchment paper. Divide dough in half, roll into logs (about 12 x 2 inches) and place on baking sheet a few inches apart.*

Flatten the logs into loaves about 1 inch high. Bake until golden brown, about 30 minutes, rotating pan halfway through.

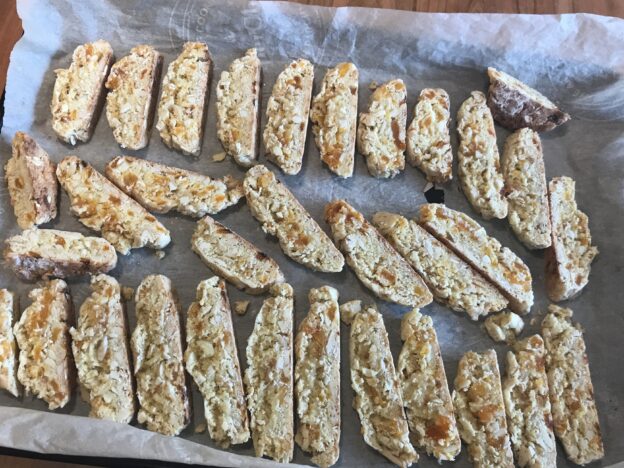
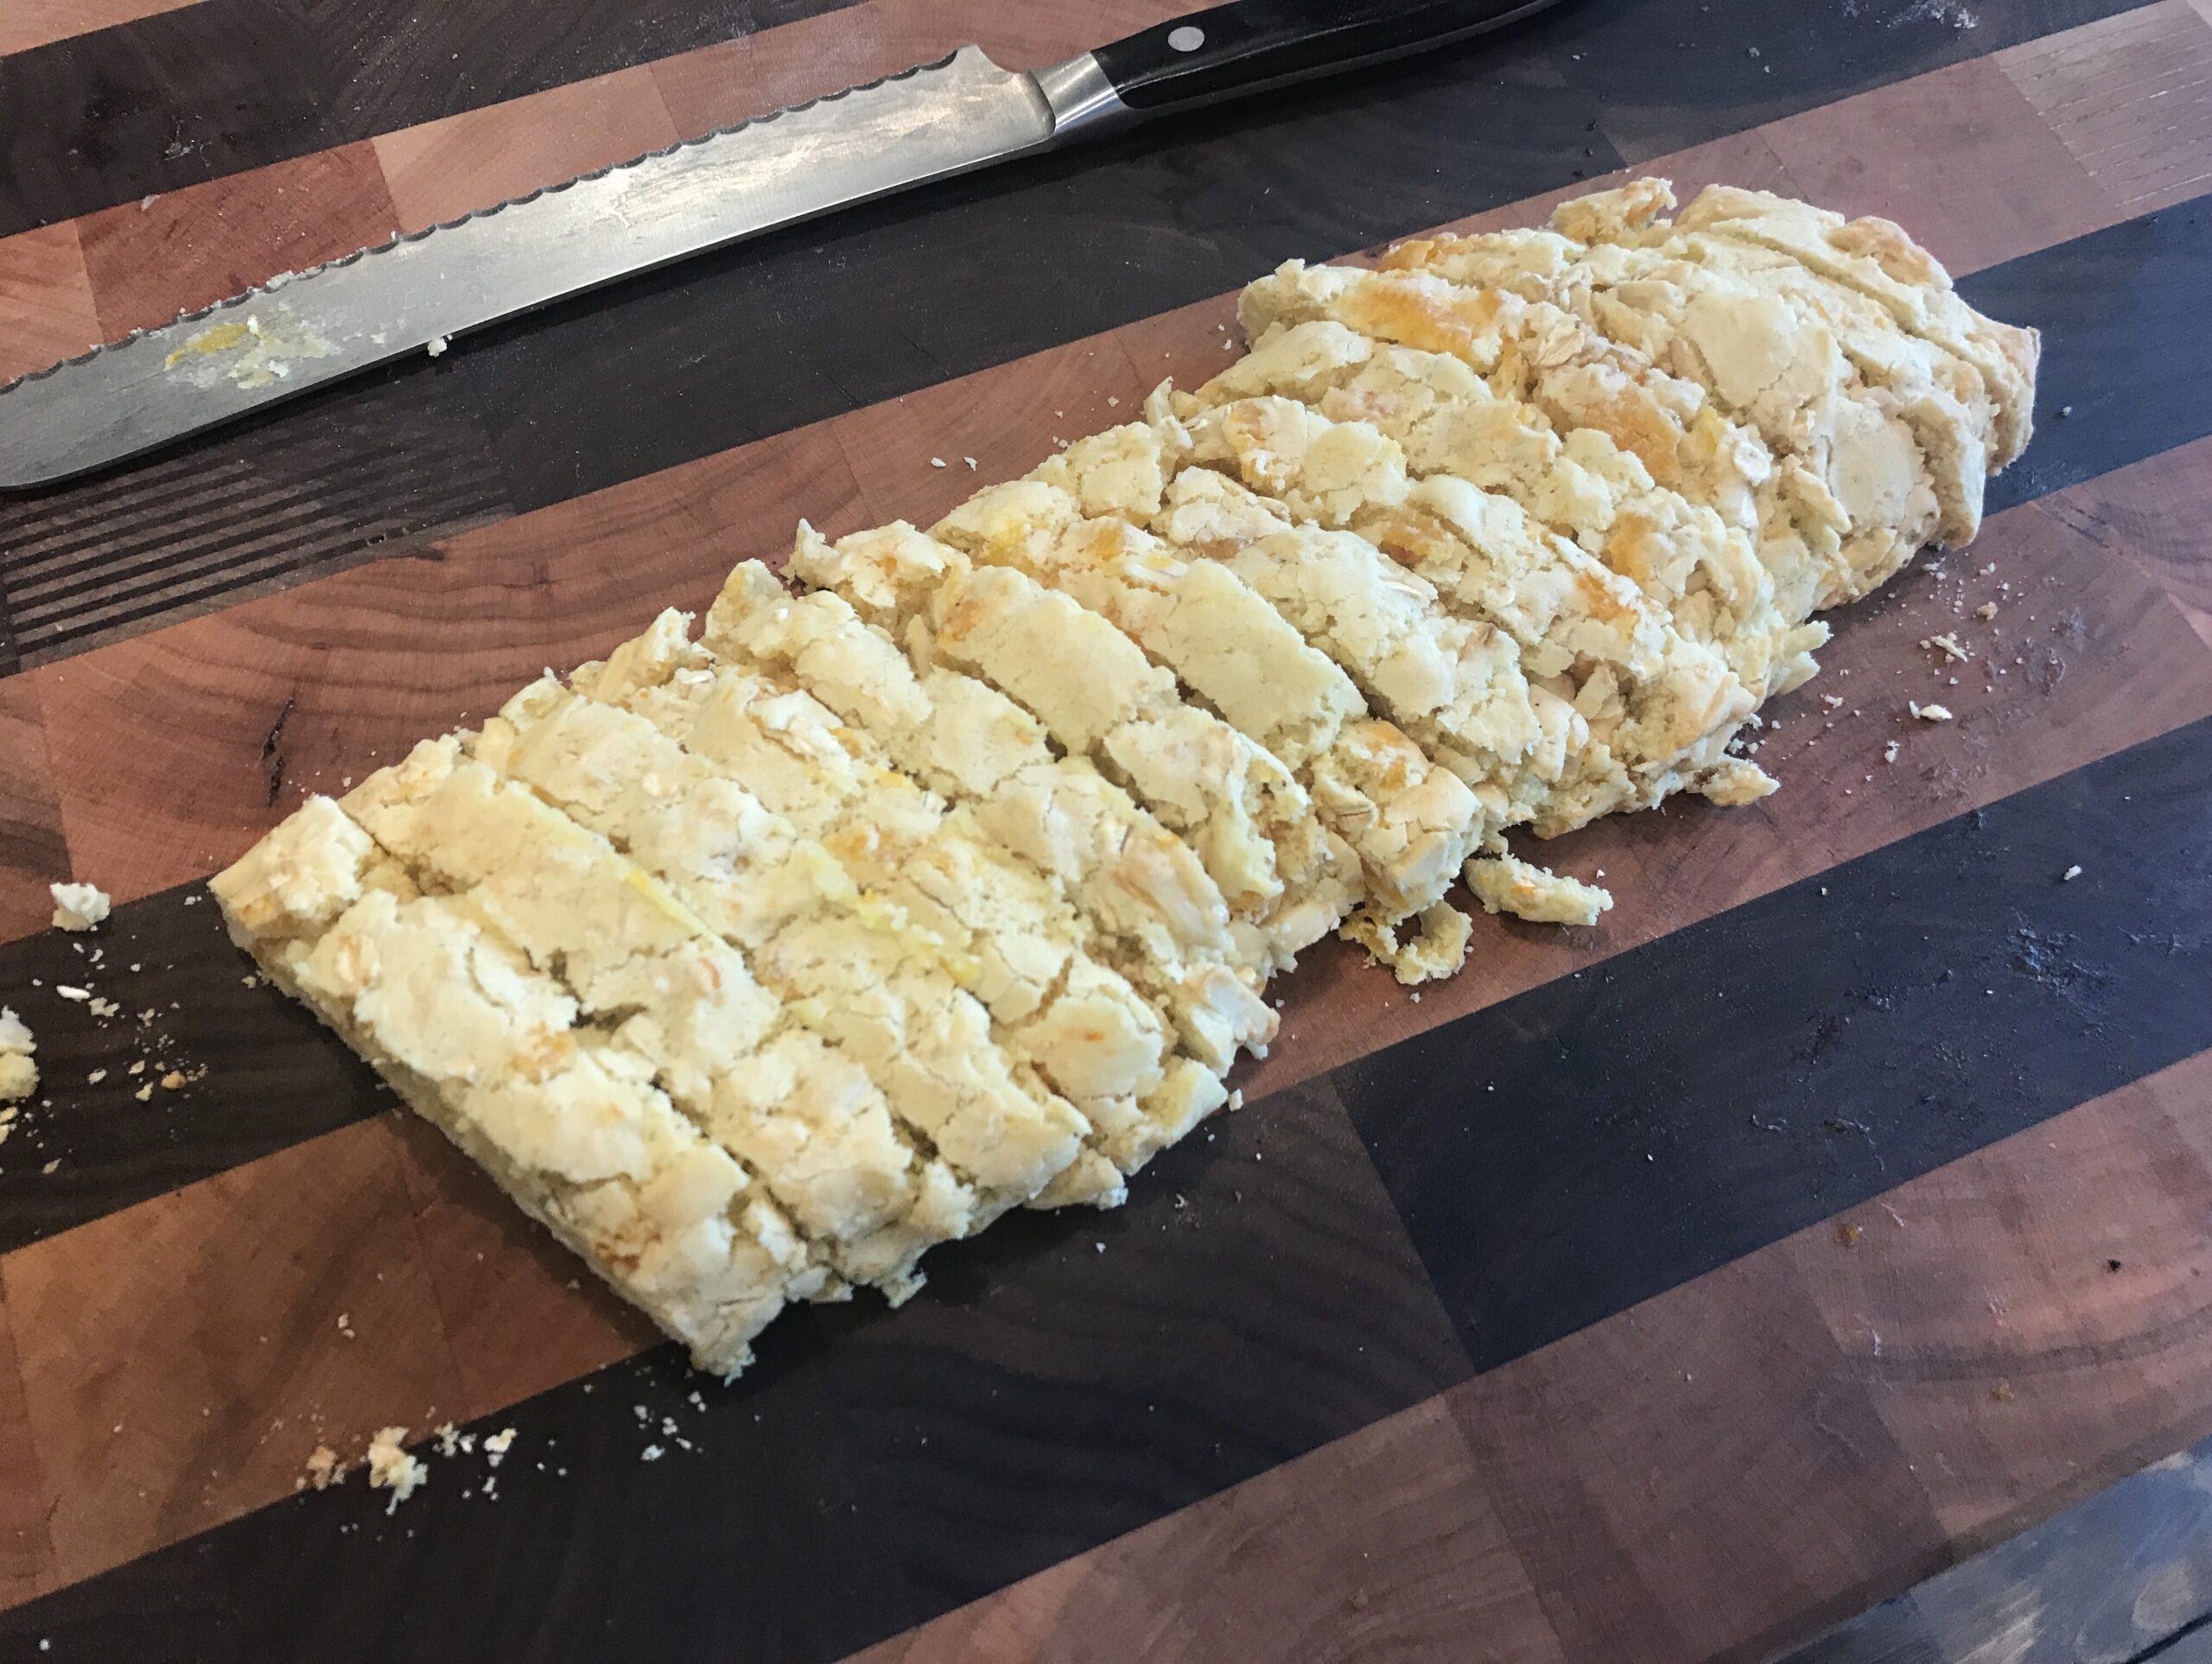
Reduce oven temperature to 300°F. Let loaves cool slightly, then cut into 1/2 inch slices.** Arrange cut side down on baking sheet and return to oven until biscotti start to harden and turn golden (they’ll still feel a bit soft, but will continue to harden as they cool), 15 to 20 minutes.

Teresa’s guidance:

*I roll them out on the counter—I don’t dust the counter with flour, but if they are sticky you could do that. (There’s a lot of variation in different types/brands of flour, also humidity and freshness of flour can affect things.) Then I transfer them  to a baking sheet.

**I cut them on a cutting board, while they are still warm, but cool enough to handle, I’ve used both a chef’s knife and a serrated bread knife, which works better if you’ve forgotten about them and let them cool down all the way.

Partially baked, sliced and ready for the final act.

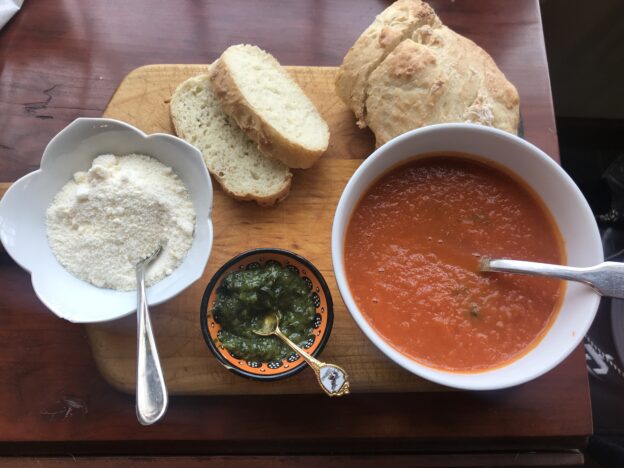
and then there’s this option

New Year’s Resolution Vegetables with Pomegranate Cha-Cha

Hey! You there by the last swig of eggnog. This is your year. It’s your year to be the one who brings vegetables to the party with your head held high, and your hand held up for a high five. This recipe is your first mission. 

It comes to us from Here and Now’s resident chef Kathy Gunst.  I first made it for this past Thanksgiving. Since then, it’s made a lot of appearances, thanks in large part to the pomegranate de-seeding savvy that can be yours in one quick video tutorial.

As Kathy notes this is a mix and match dish. There is no magic formula, so clean out the veggie drawer, grab the rogue pomegranate that is still hanging in the fruit bowl looking for a purpose, and prepare to impress. The main things to remember here are:

  • Roast vs steam the vegetables. As in, give them their space, and…
  • Group them by type so you can remove veggies that roast quicker and let the others get their due.

Other than that, this recipe is pretty loose, though I’d say Brussels sprouts, some kind of winter squash and red onion are kind of key. This recipe makes tons of dressing, so go ahead and overdo the vegetables if that’s your thing, or just be psyched to have extra pomegranate vinaigrette in your arsenal.

And as if this healthy, beautiful, tasty dish needed another bonus, the veggies can be roasted earlier in the day and the vinaigrette can be made a day ahead of time. Assemble it all just before serving, hot or at room temperature.

Roasted Vegetables with Pomegranate Cha-Cha

Ingredients

  • 8 new potatoes, scrubbed and left whole (if large, cut in half or into quarters)
  • 1 medium sweet potato, scrubbed, and cut into 1/2-inch thick pieces
  • 1 small Acorn or Carousel winter squash, peeled, cut in half, deribbed, deseeded and cut into 1/2-inch pieces
  • 1/2 to 1 pound Brussels sprouts, ends trimmed and outer leaves removed, left whole
  • 1 large sweet red pepper, cut into 3/4-inch wide strips
  • 1 whole garlic, 1/4-inch sliced off top and left whole
  • 1 medium red onion, peeled and cut in quarters
  • 1 sweet white Vidalia onion, peeled and cut into quarters
  • 1 cup baby turnips, ends trimmed and left whole (if turnips are bigger than a golf ball, cut in half or into quarters)
  • 8 ounces carrots — about 8 small carrots or 3 to 4 larger ones — peeled, trimmed and cut into 1/2-inch long pieces
  • About 1/4 cup olive oil
  • Salt and freshly ground black pepper
  • 1/3 cup balsamic vinegar

The Pomegranate Vinaigrette

  • 1 cup pomegranate seeds and 1/3 cup of pomegranate juice (from 2 fresh pomegranates, or use 1 cups preseeded pomegranate seeds plus 1/3 cup bottled pomegranate juice)
  • Salt and freshly ground black pepper
  • 3/4 cup olive oil
  • 1/3 cup balsamic or white or red wine vinegar

Instructions

  1. Heat the oven to 425 degrees.
  2. Prepare all the vegetables as described above. Place the vegetables a row at a time (keeping all the carrots together, all the onions together in row, etc.) on a large sheet pan or two pans or a shallow roasting pan. You don’t want to use a pan with high sides or it will steam the vegetables rather than let them roast and turn golden brown. Drizzle the olive oil on top and season liberally with salt and pepper. Roast for 20 minutes.
  3. Remove from oven and drizzle vinegar on Brussels sprouts. Flip vegetables over and then return the pan(s) to oven for 20 minutes. Check to see if vegetables are done by piercing with a small sharp knife. Remove any vegetables that are tender and continue cooking the others until softened, about 5 to 10 minutes. The vegetables can be roasted a day ahead of time; cover and refrigerate.
  4. Make the vinaigrette: In a small bowl or Mason jar, mix half the pomegranate seeds and juice (if using), salt, pepper, oil and vinegar. Taste for seasoning. The dressing can be made a day or two ahead of time.
  5. If you made the vegetables a day ahead of time, remove from the refrigerator. After you remove the turkey from the oven, place the vegetables in a 300-degree oven for about 10 minutes or until warmed through.
  6. Arrange the vegetables on a serving platter and drizzle with a few tablespoons of the vinaigrette and the remaining 1/2 cup of pomegranate seeds. Serve remaining vinaigrette on the side.

California Dreamin’ Persimmon and Pomegranate Salad

Sister B served me this salad on my last trip to CA, and I loved everything about it. It’s beautiful, interesting in taste and texture, healthy, and—most of all—it looked totally, easily replicable. We grew up with a persimmon tree in our backyard, but they were the acorn-shaped ones that turn your mouth to cotton when they are even slightly firm, and only become edible when they are the texture of ectoplasm. Suffice to say, I was not a fan.

In the intervening years, “Fuyu” persimmons—smaller, squat looking numbers that are delicious when eaten in their firm state—became readily available.

When my sister dug up this recipe, she did it as if playing a casual game of Google darts because in California (where every ingredient in this salad is something you might encounter underfoot on a sidewalk), needing a recipe for this salad is like needing a recipe for avocado toast. In the Yankee wilds, however, it qualifies as a fancy feast.

I approached this salad in the casual way one approaches non-toxic events, assuming that whatever persimmon I tracked down in NH would be the edible kind. Surely that old variety, if it appeared at all, would be sold with something akin to a skull and crossbones sign.

WRONG! One bite of my first-acquired persimmon brought back so many memories, none of them good. And so I returned to our groovy Coop and found the precious little Fuyus, which should have been sold in a velvet case. While I was paying $8 for my two small persimmons the cashier chuckled, having grown up in N. Carolina’s persimmon belt, where $8 would have gotten me the persimmons and, say, dinner.

Anyway, I got the goods, and armed with the pomegranate liberating technique in Pomegranates Unplugged, I was good to go. You’re basically tossing arugula with a bright, simple dressing, then laying on the goods—thinly sliced persimmons, avocado slices and pomegranate seeds. I hope you can find your Fuyu persimmons and try this yourself. I’ll try my best to get you some more Thanksgiving inspiration before T-Day. In the meantime, enjoy the season!

Callifornia Dreamin’ Persimmon and Pomegranate Salad

From Crumb, a food blog

Feel free to riff on this, with your own favorite dressing, baby spinach and blood oranges or grapefruit if you can’t find persimmons. Love the one you’re with, baby.

Ingredients

Dressing

  • 3 tbsp olive oil
  • 1 tbsp white wine vinegar
  • 1 tbsp white balsamic vinegar
  • 1 tsp Dijon mustard
  • Salt and pepper to taste

Salad

  • 8 cups baby arugula
  • 1 firm-ripe Fuyu persimmon, quartered and thinly sliced
  • 1 large avocado, cut into wedges
  • 1/2 cup fresh pomegranate aril
  • Handful of toasted pistachios or nuts of choice (optional)

Instructions

Prepare the Dressing:

  1. In a small bowl, whisk together olive oil, vinegars and mustard until combined. Season to taste with salt and pepper.

Assemble the Salad:

  1. In a large mixing bowl, toss arugula with dressing until well coated. Distribute between four individual salad bowls, or transfer to a single large salad bowl.
  2. Arrange persimmon and avocado slices on the arugula, then scatter with pomegranate and pistachios (if using). Serve immediately.

Bringing It:

In addition to being healthy, beautiful and delicious, this is very easy to bring to a group feast. Slice up the persimmons, prep your pomegranates and dressing and jar them each up separately. Bring the arugula and the whole avocado and assemble on site. Then take a victory lap in your fancy pants.


Trickless Treats: Quick and Clean Chocolate Mousse

Halloween used to be so easy. You scurried around all night, gorged on candy, felt not a twinge of guilt and moved on. Now, it’s more complicated. Candy is not so dandy the morning after. But still, we all want to walk on the wild side on Halloween. Enter healthy treats, for which we turn to our crafty Vegan friends.

Vegan cuisine is rife with creativity. That said, I have no patience for food creations that are called something they’re not. Cashews with nutritional yeast, while it can be tasty, is not queso.  And as my husband sternly pointed out, chickpeas mashed with tahini is NOT tuna salad (though I do love this one).

Along those lines, when it comes to healthy treats, don’t tell me that date paste rolled in peanuts is just like a Pay Day because it’s not. It’s just not. And tofu blended with chocolate chips taste just like, drumroll please…tofu blended with chocolate chips.

But then sometimes you find legit healthy alternatives for your treat fix. For Exhibit A I call up cocoa nutty balls; And Exhibit B: Heart of Darkness cups made here with pumpkin seed butter (because who doesn’t have some of that laying around) which gets extra Halloween points for ghoulish green insides.

This chocolate mousse/pudding is another win. It was borne of too many ripe avocados, an upcoming trip and that Yankee streak that hates to waste even one bit of a perfectly good fresh produce.

The sheer ease and speed of making it (hello food processor) would be enough to make this a win, but it’s also delish and not one bit bad for you. After all, healthy fats are a thing and maple syrup, in responsible amounts, is like mainlining nature.

If you do want to witness dates and peanuts trying their hardest to be a PayDay, check this out from Minimalist Baker:  

Go ahead—have a treat, or two, and feel damn good about it. Happy Halloween!

Quick and Clean Chocolate Mousse

Total Time: 5 minutes (you’ve got that don’t you?)

Makes 4 servings

From Chocolate Covered Katie

Ingredients

  • flesh of 2 ripe avocados (240g)
  • 1/4 cup regular cocoa powder
  • 1/4 cup melted chocolate chips
  • 3-4 tbsp milk of choice
  • 1/2 tsp pure vanilla extract
  • 1/8 tsp salt
  • 1/4 cup pure maple syrup

Method

Combine all ingredients in a blender or food processor until completely smooth. Pour in four little bowls or one big one, and refrigerate it if you want it thicken up. Dress up if you must and feel 100 percent totally good about yourself.


Just Peachy Caprese Salad

I figured it was over…summer, patio nights, ice cream stands—the whole thing. But when I walked in the store earlier this week I saw them—peaches. In fact, we officially have a few more days of summer. So, hold your apples and squash. We’ll get to those soon enough. For now, we have, well, not really recipes, but inspiration for how to fully exploit the last of the summer produce. I’m looking at you, peaches. And corn, you’re next.

Wayyy earlier this summer a very stylish friend introduced me to the most gorgeous take on a caprese salad, substituting ripe peaches, nectarines and plums for tomatoes. Brilliant! It was so good and so perfect (so long ago) I figured I’d missed the peach train. But she was wily that friend, and must have had some inside track on perfect pre season peaches. Flash forward to a few weeks later in California, when another friend brought massive, juicy white peaches to the party. Still later back in the northeast another friend gave me a bag of the most insanely sweet pluots. I vowed, a: to keep these friends close, and b: to buy peaches, plums and related stone fruits like it was my job until they were gone.

If they weren’t ripe I shoved them into a paper bag and waited until they were. If they were ripe they were lucky to get home before getting cut up immediately. I made peach salsa, a simple concoction of peaches and all the usual salsa suspects: jalapeno, lime, red onion, cilantro. That morphed easily into a peach bruschetta by spooning it atop toasts spread with mascarpone cheese. I even made a sugarless, no oil or fat added super virtuous peach tart which was delicious but was also the least photogenic thing on the planet. I urge you to try it, and focus on its inner beauty. Then, there was the brilliant blogger who suggested freezing leftover white wine (what’s that anyway?) and blending it up with fresh peaches for an instant Happy Hour Slurpee.

So there we have it—a few ways to enjoy your peaches and stone fruits, even though they are perfect as is. If you need an actual recipe, here is one from Real Life Delicious (which never disappoints). If you’re good with freelancing it, here is a loose guide for making Peach Caprese Salad. If you are so moved to add a sprinkling of fresh corn, you might start a trend.

Just Peachy Caprese Salad

Ingredients:

  • Greens of choice
  • Ripe peaches, nectarines, plums or pluots in any combo
  • Fresh Burrata or Mozzarella or a bit of both
  • Avocado (optional, but kind of not optional for Vegans)
  • Pesto or torn basil leaves
  • Olive oil
  • Balsamic glaze or good balsamic vinegar (extra credit to mix the vinegar with some maple syrup if you don’t have the glaze)
  • Salt and pepper

Method:

Arrange greens in a layer on a platter.

Top with fruit slices.

Cover with slices or shreds of cheese, and/or slices of avocado.

Drizzle with pesto or scatter basil leaves on top.

Drizzle with just enough olive oil so all your ingredients feel a little love.

Drizzle (because you are so good at it now) with balsamic glaze, balsamic vinegar or balsamic/maple concoction.

Give the whole shebang a shake of salt and pepper.

Bringing it:

This is a total make on site thing. Bust out the fresh produce and get your friends to help, or let them drink their peach slurpees and watch you create the masterpiece. It’s all good.


Stupid Easy Strawberry Buttermilk Ice Cream

Ok, so here’s a little summer quiz: What did we learn last week, other than the fact that 3-day work weeks rock? Well, careful readers, we learned that this year’s strawberry season was late to arrive but is awesome. We are, in mid-July, only halfway through the heart of strawberry season, which means we will have zero downtime before it’s blueberry season. And all this is overlapping with the greater “ice cream season” (a subset of maple creemee season, which  some people believe should last all year.)

Let me connect the dots here. It’s time to bust out the ice cream maker in your basement. This recipe came to me via Sister B, who lives amidst California’s produce  bonanza. It is, as promised, ridiculously easy, and kind of healthy, or at least not that unhealthy thanks to the buttermilk. It is for sure best with organic strawberries, buttermilk and cream, but also awesome with items from the standard fare at the air-conditioned Nirvana of your grocery store. No need to pre-make and pre-chill the mix, and, if you are feeling very Laura Ingalls, it can be made without an ice cream maker.

It’s summer—no need to prolong this. There are places to go, things to eat. Have a great weekend!

Stupid Easy Strawberry Buttermilk Ice Cream

This recipe is adapted from How To Eat A Peach, by Diana Henry. Our friends like Diana, in Mother England, know a thing or two about strawberries and cream.

Ingredients

  • 18 oz strawberries
  • 1 cup superfine sugar, divided
  • 1 vanilla pod, split lengthways, or 1/2 tsp vanilla
  • 1 3/4 cups buttermilk
  • ½ cup sour cream
  • 1 pinch sea salt flakes

Method

  1. Hull and slice the strawberries. Put them into a bowl with half the sugar and the seeds from the vanilla pod (scrape out the seeds using the tip of a knife. or…dump in the vanilla.
  2. Leave this to sit for about 30 minutes. The strawberries will become soft and exude some juice.
  3. Transfer the fruit with all the juice and the rest of the sugar to a food processor and whizz (God I love the Brits) to a purée.
  4. Push the purée through a nylon sieve (or whatever you’ve got) to get rid of the seeds. Mix with the buttermilk, sour cream and salt.
  5. Churn in an ice cream machine, or transfer to a shallow container and put in the freezer.
  6. If you’re using the manual method, take the ice cream out and churn it – either using electric beaters or by putting the mixture in a food processor – 3 times during the freezing process. Do this first after about 1 hour, when the mixture is setting round the edges, then at 2-hour intervals. (Extra points for wearing a gingham dress during this escapade). Cover with a lid, or with cling film or greaseproof paper, between each churning, and when you store it. Freeze for around 8 hours or until completely firm.
  7. Take the ice cream out of the freezer about 10 minutes before you want to serve it, to allow it to soften slightly.

Strawberries, blueberries, ice cream. What is wrong with this picture? Nothing!


If you need something else cold, refreshing and summery to bring to the party might I suggest:

watermelon gazpacho

watermelon sangria

Frose or Frosecco

Lemon Beach Pie


Game of Scones: The Loving Lannisters Gluten Free Apricot Almond Scone

OnSome things just should not go together, like siblings and sex. Similarly, the terms gluten free and scones really do not belong in the same sentence. And yet, just as Jaime and Cersei somehow seem to work as the couple you love to hate, it turns out that gluten free scones are darned tasty.

As we come in to Episode 5, let’s review our cast. We have the White Hot Jalapeno Cheddar Jon Snow (AKA, the true hot king) Scone, the Sassy Sansa Lemon Ginger Scone and the Bittersweet Tyrion Whole Wheat Mini Scone. But now, just in time for Mother’s Day we head south to warmer climes and the Mad Queen, Mother of the Year, evil twin Cersei

For these scones I used Pamela’s gluten free baking mix, as recommended by Santa Cruz Susan. Susan is kind of an angel on earth, which is to say, the opposite of Cersei. Susan apologized that using a mix is sort of cheating, which happens to be appropriate for this particular scone, because nobody cheats more than Cersei, and gets away with it.

The Loving Lannister scone features apricots, prunes and almonds, all members of the prunus family. Not coincidentally, prunus siblings have a bitter cyanide compound in the seed that makes them poisonous (kind of like kisses from Spain). Toxic combos that are related to each other? Could there be a more perfect scone to honor the first family of King’s Landing? And sure, you don’t expect to get black-hearted prunes and golden apricots in one bite, but social norms never stopped a Lannister. And who doesn’t like a little plot twist?

Cooking notes: For this scone, I defied the recipe and tried to make them into the traditional round mound, cut into wedges. It required a lot of back alley repair, which nobody needs to see or repeat. Give yourself a pardon and make them as drop scones, as directed. They are unexpectedly delicious!

Oh beHAVE you two!

Gluten Free Apricot Almond Scones

INGREDIENTS:

  • 2-1/3 cups Pamela’s Baking & Pancake Mix
  • 1/3 cup sugar (preferably coconut or demerera sugar), plus 1 Tbsp for sprinkling
  • 1 tsp baking powder
  • 1/2 cup dried apricots and dried prunes (in any proportion), roughly chopped
  • 1/3 cup almonds, roughly chopped or painfully slivered
  • 4 tbsp butter (as cold as Cersei’s heart, which is to say frozen if possible)
  • 1 egg, beaten (ruthlessly)
  • 2/3 cup milk or cream

DIRECTIONS:

For scone newbies, see Queen Bee’s Kitchen’s short course in sconeology here for some excellent guidance. Feel free to substitute any dried fruit or nuts of choice, even if they are “just friends” and unrelated to each other.

Preheat oven to 375.
Mix the dry ingredients (through almonds) together. Cut in the butter using two knives (or make it easy on yourself and grate it in). Add the milk and beaten egg. Mix together with a fork. Dough will be thick. Drop large, tall dollops of dough (scones will spread when baking) onto lightly greased or parchment-lined baking sheet. Sprinkle lightly with remaining coconut sugar. Bake for 15-17 minutes or until they look dangerously irresistible.


Game of Scones: Bittersweet Tyrion Chocolate Chip Mini Scone


Let’s talk about Tyrion. He’s been on the sidelines so far this season, but I trust his day is coming.  We love that little guy. He’s quite rugged and harbors his share of bitterness (about the whole ‘least favored bastard’ thing among other issues). He’s also soft and quite sweet on the inside. (Dude, we saw you looking at Sansa in the crypt!)

With all that in mind, it’s time for Tyrion — like White Hot Jon Snow and Sassy Sansa to have his very own scone. For Tyrion we have a mini scone made with whole wheat flour for some grit, and studded with bittersweet chocolate chips. The original recipe from Baker By Nature  calls for semi sweet mini chocolate chips, but there is nothing small about the chips Tyrion bears on his shoulders, so I opted for bigger, more bitter chips.    

Just as Tyrion has become my favorite character, this might be my favorite scone so far. Scones can feel like such a commitment, but mini scones feel much more doable. Plus, whole wheat flour gives them a wholesome heft that eases the guilt factor of eating so much butter in each bite.

As emphasized in this scone tutorial, make sure your butter is cold, even frozen if you are going to grate it. Making mini scones is just a matter of dividing the dough and making two mounds instead of one, and then cutting each into eight wedges. I pegged the slacker meter by shaping the scone mounds directly on the baking sheet.  And yes, they turned out just fine. They may not look perfect, but as with Tyrion, the beauty of these scones lies in their imperfections.

He’s little, gritty, and a little bitter, but sweet on the inside.

Bittersweet Tyrion Whole Wheat Chocolate Chip Mini Scones

Prep 10 mins
Cook 20 mins
Total 30 mins
Yield 16 scones

Ingredients

  • 1 cup whole wheat flour (preferably white whole wheat).
  • 1 and 1/2 cups all-purpose flour
  • 1/2 teaspoon salt
  • 1 tablespoon baking powder
  • 1/2 teaspoon baking soda
  • 1/3 cup light brown sugar, packed
  • 1 stick (4 ounces) unsalted butter, VERY cold and cut into tiny pieces, or grated on a box grater
  • 1 large egg, beaten
  • 1 teaspoon vanilla extract
  • 1/2 cup full-fat sour cream
  • 3 tablespoons milk
  • 1 cup bittersweet chocolate chips

For the egg wash:

  • 1 large egg, beaten1 teaspoon milk or water
  • 2 tablespoons turbinado sugar (or regular sugar if that’s all you’ve got), for sprinkling.

Instructions

  1. Preheat oven to 400°(F). Line a large baking sheet with parchment paper; set aside. In a large bowl mix together flour, salt, baking powder, baking soda and sugar.
  2. Cut the butter into small cubes (or, even better, grate it on a box grater) then quickly work it into the mixture (using your fingers, or just two forks if you grated the butter) until it resembles a coarse meal.
  3. In a small bowl, whisk together the egg, vanilla, sour cream, and milk, then add to flour and butter mixture. Use a fork to stir everything together until just moistened.
  4. Add in the chocolate chips and gently fold them into dough with a spatula.
  5. Pour the shaggy dough out onto a clean, floured work surface. Divide it into two equal portions  and shape the dough into a 6ish-inch circle. Cut the dough into 8 wedges and carefully transfer to the prepared sheet. (alternatively, dump the whole shebang directly onto the parchment lined sheet and form into two mounds
  6. Lightly brush each scones with the egg wash, then sprinkle the top of each scone with sugar. This is key. White sugar is ok if it is all you’ve got. Turbinado, demerera or coconut sugar gets you bonus points.
  7. Bake for 16-20 minutes, or until the tops are lightly golden brown.