Category Archives: Uncategorized

Drunken Fig Jam: Where fresh figs go to party

Fig Jamming New England style, with cheddar of course

How did I make it through life this far without ever canning? Why did I start now? Two fine questions. My two fine answers are fresh figs and fresh corn. They’re only around for a bit and they are so darned good.

Let’s start with figs. This recipe come from Treas, out in Cali, head chef at Granite Chief Command Central. Her recipe, which she shared with me after two years of my passive yet unremitting coersion, says that fig season is only in August. This handy guide to all things fig, gives us a larger window. According to google, there is a short season in early summer and then a longer season in late summer/fall. Either way, fresh figs are not around forever, and once you buy them you’ve got to use them fast. We should have a few more weeks at least, and cognac is always in season, so we’re good there. 

A little heads up to you non-canners out there. You need a big pot, you need to know that when you fill it too full with water and then put your jars in, your stove may have a hazardous overflow situation. You can only use canning lids once, which is why that whole mysterious section of parts in the grocery store exists. I guess that’s about it. I was going to get into racks for the bottom of your pot, but this recipe doesn’t call for one, so let’s run with the “ignorance is bliss” theory.

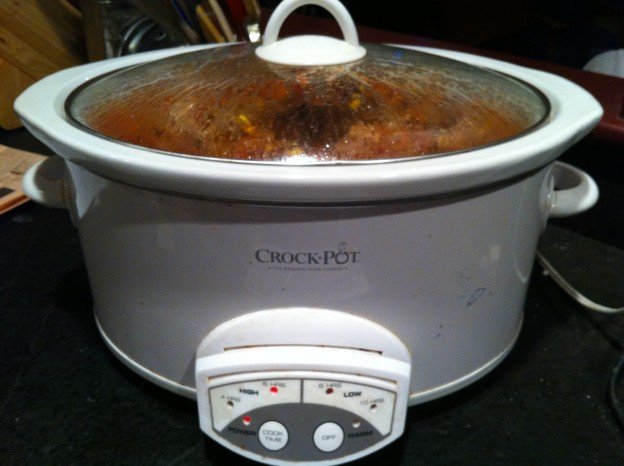
Another small cautionary note: When you are heading out to book group for three hours it’s best to turn the burner under your boiling fig jam OFF.  Next up? Corn relish to give Stonewall Kitchen a run for their money…and a new stockpot.

Fancying up a fall salad
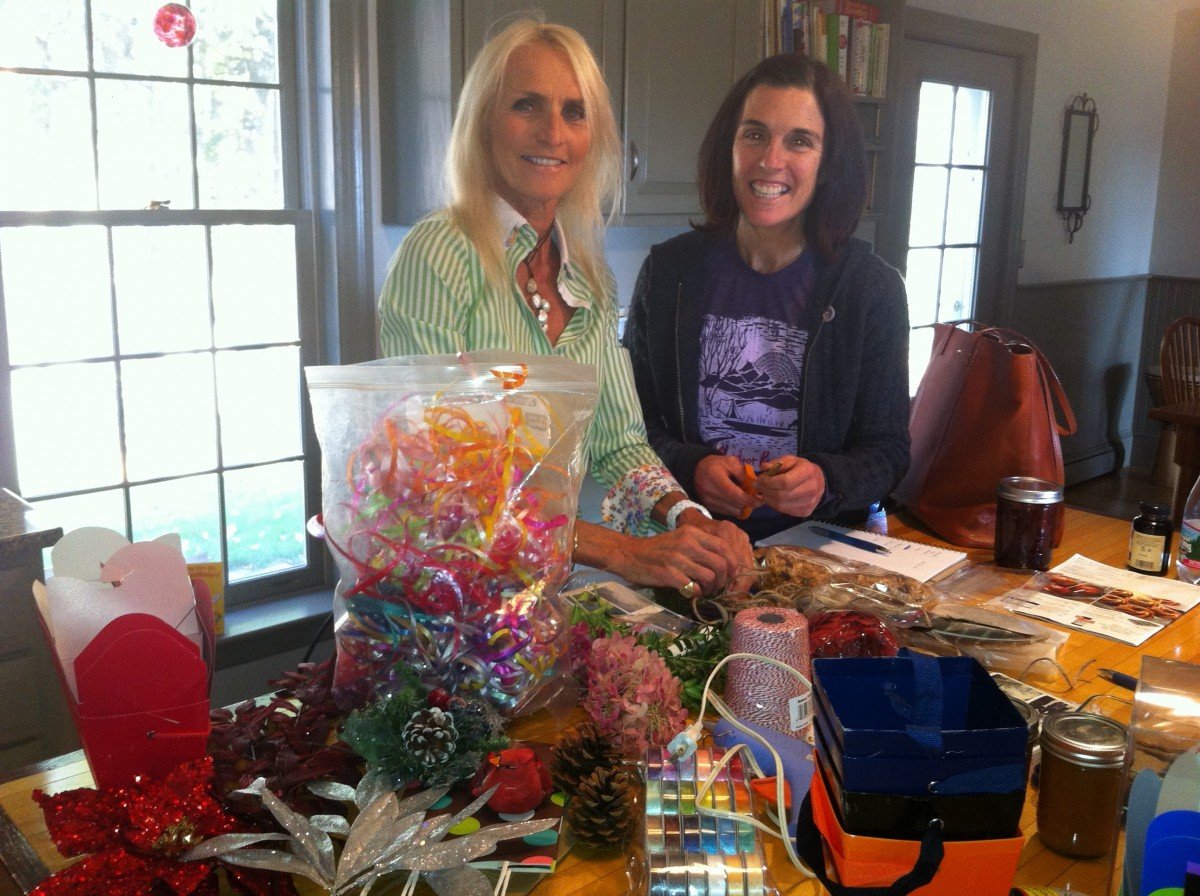
Drunken Fig Jam

Recipe and action shots from Treas Manning
Makes 6 1/2 pint jars

Ingredients

• 2 lemons
• 4 pounds ripe fresh figs (preferably black), stemmed,
cut into 1/2-inch pieces (use food scale for accuracy)
• 4 cups sugar
• 3/4 cup brandy or Cognac
• 1/2 teaspoon coarse kosher salt

Method:

Using a vegetable peeler, slice peel from lemons (try to avoid as much as the white part as possible) in long strips. Cut peel into matchstick-size strips. Combine lemon peel, figs, sugar, brandy, and 1/2 teaspoon coarse salt in heavy large deep saucepan; let stand at room temperature 1 hour, stirring occasionally.

Bring fig mixture to a boil over medium-high heat, stirring until sugar dissolves. Reduce heat to medium; continue to boil until jam thickens (30 to 35 minutes), and is reduced to 6 cups, stirring frequently and occasionally use a hand blender to puree the mixture. It’s fine if there are small bits of lemon peel and fig, but I do like the bits to be minimal. Remove from heat.

Ladle mixture into 6 hot clean 1/2-pint glass canning jars, leaving 1/4-inch space at top of jars. Remove any air bubbles. Wipe jar threads and rims with clean damp cloth. Cover with hot lids; apply screw bands. Process jars in pot of boiling water 10 minutes. Cool jars completely. Store in cool dark place up to 1 year.

Notes: At high altitude over 5500 feet, process the jars for 15 minutes.

Drunken Fig Jam is yummy:

  • on a toasted baguette with a slice of melted Irish Cheddar, and a walnut on top.
  • on crusty bread with fresh burratta or mozzarella
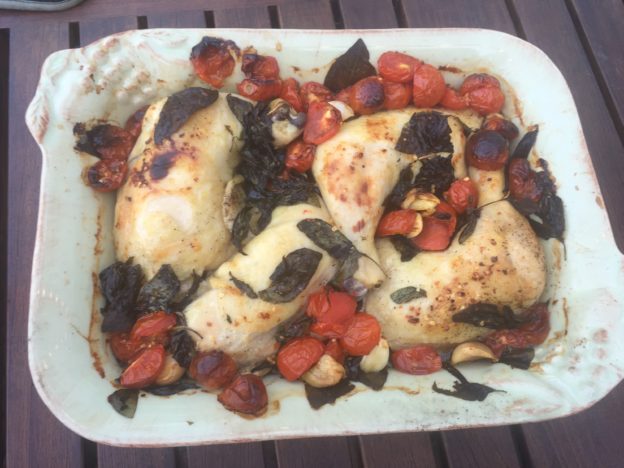
  • on a grilled bone in pork chop, or on slices of pork tenderloin
  • on whole wheat toast topped with a strip of bacon for breakfast.
  • with cheese, sliced pears and walnuts on a groovy pizza

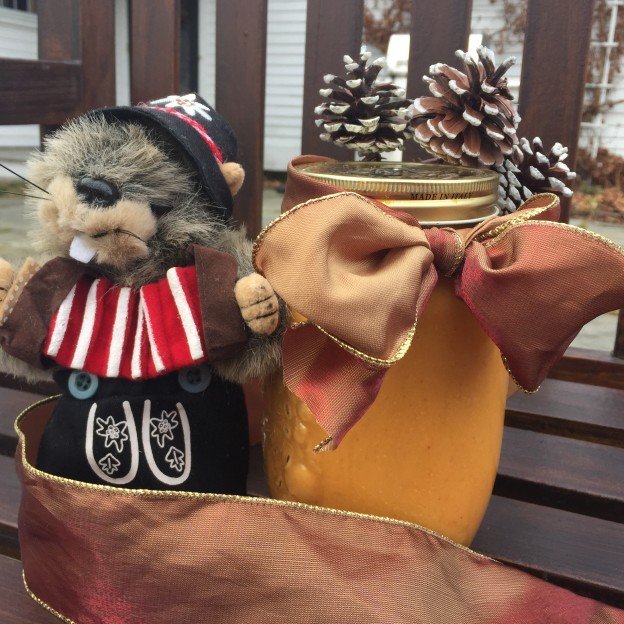
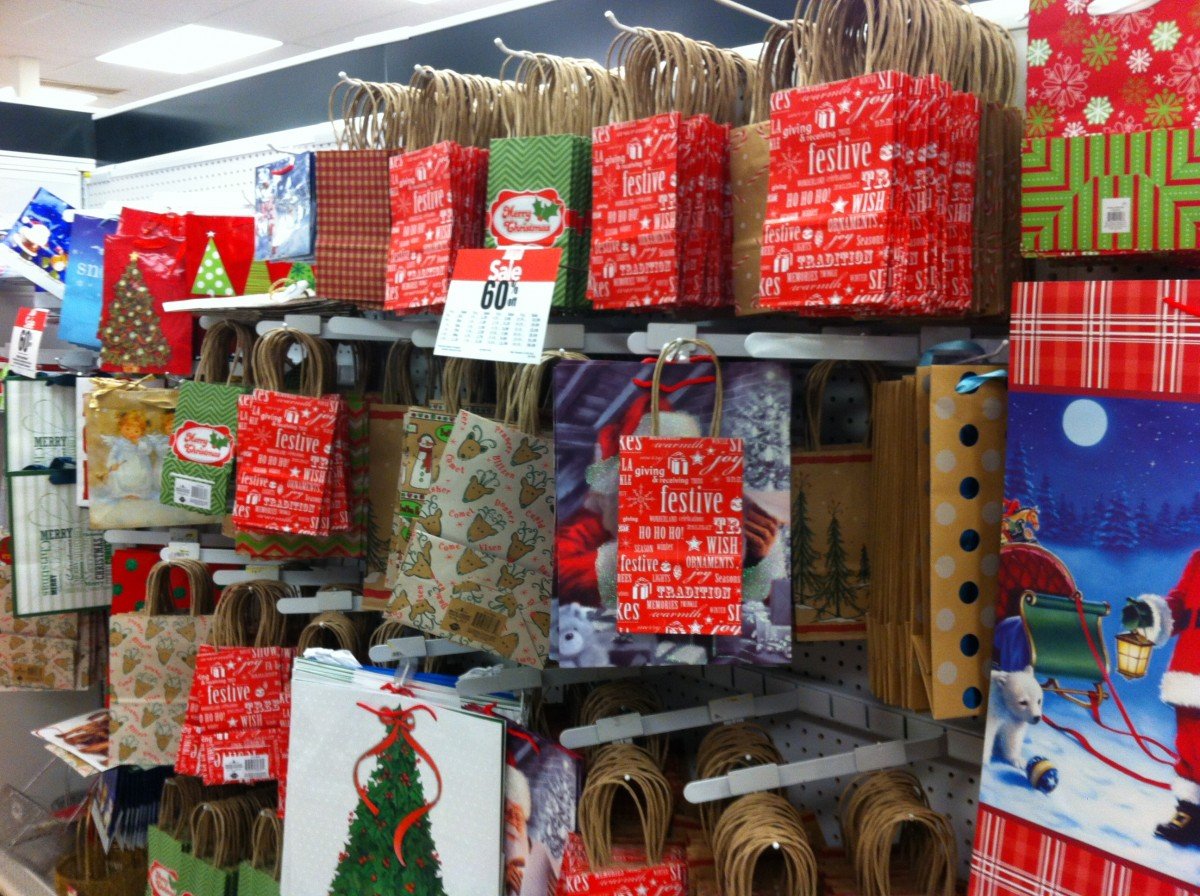
Bringing It and Giving It:

Makes a darned nice Christmas gift, especially canned in a Ball and Mason squatty wide mouth jar


ZUKES! Zucchini Bruschetta and More Green Ideas

Summer’s Surplus, all fancied up and ready for company.

It’s that time of year when it’s perfectly ok to eat fresh corn every day, tomatoes appear at every meal, and zucchini magically appear on your doorstep. I’m NOT complaining about the zucchini bounty, especially now that I have my “as seen on TV” spiralizer (a brilliant gizmo everyone should own), but using it up does present a challenge.

You could go the zucchini bread route, but if you’re not in the baking mood or you’re not in to cranking up that oven on a hot summer day, here are some alternatives. First, is a brilliant zucchini bruschetta. I have long suspected that Martha Stewart cuts her recipes to fit the page, leaving out a step or an ingredient here and there. On the positive side, it cuts out the micromanaging of how to make your toasts. If you need a bruschetta clinic, I’ve got you covered. And if you need other ideas on what to put on them, try Funitella Bruschetta, Sicilian Caponata , this creamy crunchy pickled fig extravaganza or sooooo many more things. As for missing ingredients, the only thing Martha missed in this case was a squeeze of fresh lemon. The fact that she left off the fancy fresh herb chiffonades is just a pure gift to humanity.

Zucchini Bruschetta

Ever so gently adapted from Martha Stewart Living, July/August 2015. It’s a good thing, Martha. I promise. 

Pro move of the day: salting the zucchini before cooking it draws out water, eliminating sogginess.

Ingredients

  • 2 medium zucchini
  • Coarse salt and freshly ground pepper
  • 3 tablespoons unsalted butter 
  • 1/4 cup minced shallot
  • 1/4 teaspoon red-pepper flakes
  • a healthy squeeze of fresh lemon juice (not sure how Martha missed this!)
  • Toasted baguette slices
  • Extra-virgin olive oil, for serving (optional)
  • thinly sliced or grated cheddar cheese (optional)

Method

  1. Shred zucchini on the large holes of a box grater. (You should have about 4 cups.) Toss with 1/2 teaspoon salt in a colander set over a bowl. Let stand 10 minutes. Squeeze out excess moisture with your hands.
  2. Melt butter in a large skillet over medium-high. Add shallot; cook 1 minute. Add zucchini; cook until tender and golden, 5 minutes. Stir in red-pepper flakes; Squeeze fresh lemon over the whole shebang and season with salt and pepper. Serve atop baguette slices, drizzled with olive oil, if you must.

Double Zuke Roll-Ups

For the adventuresome (and truly zucchini laden) among you…Out of desperation for a suitable appetizer, I fell upon a brilliant way to put zucchini inside of zucchini. It seems a little cannibalistic, or like a vegetarian version of a turducken. But it all works and it’s tasty. It also uses pesto—preferably with fresh mint thrown in—to address other surpluses in your fridge or garden. Garnish with tomatoes because, well, August tomatoes. I am quite sure this would taste fabulous with some fresh corn stirred in. Yes go ahead try that! Blueberries? Easy now, let’s draw the line right there.

There are no amounts here because we’re using what we’ve got, right? Any leftovers are going into the spiralizer for a zoodle future.

Ingredients:

  • Whole zucchini, preferably on the larger side
  • Your favorite pesto. This Vegan one was darned good, but pick your fave and sub or add some mint for bonus points
  • Zucchini from zucchini bruschetta (see above)
  • Balsamic glaze (if you’re fancy, and I know you are)

Method:

Chop off the end of the zucchini and thinly slice into strips. Use either a mandoline (easiest), or bear down hard with a vegetable peeler. Spread some pesto on each strip, and then layer on some of the shredded zucchini mixture. Leave a little space at the end of each strip for a tidy closure. Roll up that bad boy and secure it with a toothpick. When you have all your roll ups on the plate, drizzle with balsamic glaze, if using, just before serving. You can also drizzle some oil on these and bake them to serve with the main meal. 

Do you have a favorite zucchini recipe? Or ten? Please let me know!

This picture right here is why you use balsamic GLAZE vs straight balsamic. Live and learn…


Best of Summer Simmer Chicken

Let’s be honest here about grilling and entertaining. Food that is hot off the grill is fantastic for everyone but the host, who is typically tied to said grill. If you really want to relax, it’s all about food that can be cooked long and slow with minimal effort and is very, very hard to mess up. Bonus points if it is good as leftovers. Some dishes that come to mind are crock pot pulled pork or carnitas and the king daddy of all picnic food: Chicken Marbella.

Ok, so maybe not pretty. But pretty tasty, which counts.

In case you have never met Chicken Marbella trust me when I say it is magical. It’s a Mediterranean classic, that even the most Mediterranean-averse eaters still love. That’s the magic. The only downside of Chicken Marbella is the long marinating time, and the longish list of ingredients.

With that in mind, this recipe is darned near perfect. It involves chicken that falls off the bone, and as much fresh basil tomatoes as you can handle. Even better, it takes easy to an impressively idiot-proof level. Any recipe that includes “throw” and “chuck” in the instructions has a place in my heart. With this recipe, and the supply of fresh corn coming your way, you’ve got summer dinners for any size crowd handled. While you’re figuring out what to do with your spare time, whir up a batch of ABC Summer Sauce to have on hand for the leftover chicken, veggies, pizzas, sandwiches, etc. I can’t count the number of times I’ve made it this summer, and it always gets raves.

Special slacker note: In three tries I have been foiled by bad pictures with this dish, but that hasn’t stopped me before. Honestly, though, a dish that makes even raw chicken looks somewhat pretty deserves some respect. Here’s hoping you get to step away from the grill and enjoy your summer evenings while they last!

Summer Simmer Chicken

AKA Jamie Oliver’s Tender and Sweet Chicken Legs with Sweet Basil and Tomatoes

From  Food52

Serves 4

Ingredients

  • 4 higher-welfare chicken leg quarters
  • Sea salt & freshly ground black pepper
  • 1 big bunch fresh basil, leaves picked, stalks finely chopped
  • 2 big handfuls red and yellow cherry or grape tomatoes and ripe plum or beefsteak tomatoes, cherry tomatoes halved, plum tomatoes quartered
  • 1 whole bulb garlic, broken into cloves (less works too)
  • 1 fresh red chile, finely chopped, or a big pinch of dried chile flakes
  • Olive oil
  • One 14.5-ounce/410 g can cannelini beans, drained and rinsed (optional)*
  • 2 handfuls new potatoes, scrubbed (optional)*

* I’m all for keeping it simple without the beans and potatoes, but if you need to extend the feeding power this is a great way to do it.

Method:

  1. Heat your oven to 350°F (180°C). Season your chicken pieces all over with salt and pepper and put them into a snug-fitting pan in one layer, skin side up. Throw in all the basil leaves and stalks, then chuck in your tomatoes. Scatter the garlic cloves into the pan with the chopped chile and drizzle over some olive oil. Mix around a bit, pushing the tomatoes underneath. Place in the oven, uncovered, for 1 1/2 hours, turning any of the exposed tomatoes halfway through, until the chicken skin is crisp and the meat is falling off the bone. If after an hour or so the skin isn’t crisping to your liking, you can turn up the heat and switch to convection, or just blast it under the broiler for a bit at the end, rotating the pan occasionally and watching closely, until you get the skin as brown as you like. Just don’t let the sauce simmer too vigorously or the meat might toughen up.
  2. If you fancy, you can add some drained cannelini beans or some sliced new potatoes to the pan along with the chicken. Or you can serve the chicken with some simple mashed potato. Squeeze the garlic out of the skins before serving. You could even make it part of a pasta dish—remove the chicken meat from the bone and shred it, then toss into a bowl of linguini or spaghetti and serve at once.


Okey Poke: Watermelon Poke Bowls

All the Fixin’s for a Poke Feast

At about this time, in the height of summer, we might as well throw up our hands and say, “It’s all about watermelon!” Seriously, between watermelon rosemary lemonade, watermelon salad, watermelon gazpacho and the soon-to-be shared watermelon jalapeño margaritas, I am hard pressed to get really excited about any other ingredient. But, like mama said, you must eat your veggies. And your protein. And your condiments (summer is condiment season after all).

This brings me to the poke bowl (say po-kay unless you want to horrify foodies and make Californians smirk). Poke originated as a thing in Hawaii, where fisherman needed a tasty way to use the trimmed scraps of freshly caught tuna. Bonus points for being able to serve it all out of a cooler. They did this by marinating it, putting it over sticky rice and then dressing it up with whatever condiments felt right. Intrigued by the sheer magnitude of food combining possibilities in one dish, I set out in search of my perfect poke match. I’m a huge fan of fresh raw tuna, as long as it is procured, prepared and paid for by someone else. When I saw watermelon poke taking over the Internet, I knew I’d met my destiny.

Watermelon poke, where watermelon stands in for tuna, is often made with raw watermelon which is quickly marinated. It is fine but bears little resemblance in taste or texture to tuna, and the perkiness drains right out of the watermelon after serving time. This version, adapted from Bon Appetit—in which the watermelon is marinated, cooked, then chilled until ready to be used—produces watermelon that is strangely similar in taste, texture and appearance to tuna. This not only gives you an easy, storable for days, cheap alternative to tuna, but it also makes the Vegans (not to mention the tuna) happy. Ba-da-bing! We have a winner!

As with any new type of food, the process can seem daunting at first. I promise, however, that it is low skill and effort/ high return. Here is what you’re doing:

  • Dicing the watermelon, and putting it in a simple marinade, ideally overnight.
  • Cooking that entire mixture down for 30 minutes then chilling it. At this point, or after the next step, it can chill in the fridge for up to a few days.
  • Tossing the cooked, cooled watermelon with sliced sweet and green onions, sesame seeds and soy sauce. Chill until needed (see above)
  • Cooking up a batch of sushi rice with some honey and vinegar. This can be served hot or made ahead and served cold.
  • Assembling your universe of your favorite fresh toppings, sauces and condiments.

Poke bowls are built around the upside of prep. Set up your basic elements and you can throw them together anytime, anywhere. They use what you have, what you love and what is fresh and available. They are the perfect cultural marriage of all your favorite things and a fully customizable feast.

With so many topping choices it is hard to decide what actual recipes to include here in your watermelon poke primer. For me, and for my very satisfied (and patient) extended family, the key components are the watermelon, the sushi rice and a few key condiments. The toppings are where you make this your own, and change it up based on mood, dietary constraints, availability, etc. My must haves among these are: pickled ginger for zing, avocado for creaminess, toasted peanuts or sesame seeds for crunch; scallions, chives or some such representative from the onion family to keep your taste buds honest.  

Sauces? Homemade are awesome, but sometimes enough is enough. Store bought faves can be as good or better.

And now, for the main event. Make a batch of the watermelon poke and store it in the fridge for poke bowls as needed. Bring it chilled, along with your cooked rice and an array of condiments to make a poke bowl bar for a party or picnic. This right here, my friends, will rocket you straight to the Bring It All Star Zone.

Watermelon Poke Bowl with a creamy sesame sriracha sauce.

Watermelon Poke Bowls

Mostly from justthefood.com 

  • Watermelon Poke (recipe below)
  • Sweet sushi rice (recipe below)
  • Diced cubed fresh vegetables
  • Savory sauces, crunchy toppings and condiments

The Watermelon Poke

Don’t fear cooking the watermelon. It will not disintegrate, but will assume the look and texture of raw tuna. Trust the process that will transform your watermelon from sweet to savory and into a weirdly awesome, Vegan-friendly science project.

For the marinated watermelon

Ingredients:

  • ¼ cup rice vinegar
  • 2 tablespoons sesame oil
  • 2 tablespoons Tamari or soy sauce
  • 1 tablespoon balsamic vinegar
  • 2 pounds cubed red seedless watermelon (about 6 cups), cut it into small cubes no larger than ½-inch. The consistent, smallish dice is key.

Method:

Mix together marinade in a shallow dish with a lid, or a re-sealable plastic bag.
Add watermelon and refrigerate for at least one hour, but it’s even better if you can do it overnight. Transfer marinated watermelon to a pan with a lid.
Cook covered on medium high heat for about 20 minutes, stirring occasionally.
Remove the lid and continue cooking for about 10 minutes more, or until deep red and translucent and most of the liquid has been absorbed. If you have a really juicy watermelon, you can drain off any excess liquid.
 Chill until ready to serve.

For the Poke

  • 1 recipe marinated watermelon
  • 1 cup julienne cut Maui Onions
  • 1 cup chopped green onion
  • 1 tablespoon sesame seeds
  • 2 teaspoons soy sauce

Add all ingredients to a bowl and toss to coat. Keep chilled until ready to serve.

The Sweet Sticky Rice

This sweet rice makes a perfect base to serve under your Poke. Use an Ice Cream Scoop for perfectly shaped balls of rice.

Ingredients:

  • 2 cups short grain arborio or sushi rice, rinsed
  • 3 1/2 cups water
  • 2 tablespoons honey or agave
  • 1 tablespoon rice wine vinegar
  • 1/2 teaspoon salt

Method:

Mix all ingredients together in the bowl of your rice cooker and follow the directions on your rice cooker. If you do not have a rice cooker, bring salt and water to a boil in a pot with a tight fitting lid. Stir in remaining ingredients. Return to a low simmer, cover and simmer for about 20 minutes, or until water has been absorbed. 

The Condiments

Here’s a list of options to get you started:

  • Pickled ginger
  • Cubed avocado
  • Cubed mango
  • Cubed cucumber
  • Thinly sliced radishes
  • Thinly sliced scallions
  • Chopped chives
  • Fried shallots
  • Dry roasted peanuts, roughly chopped
  • Toasted sesame seeds
  • sprouts and/or seeds
  • Cilantro or mint
  • Ponzu or shoyu sauce
  • Furikake (now that you’ve got it from your popcorn adventure)

Assembling the Poke Bowls

Mound a scoop of rice in a bowl (not on an plate—that’s just the way it’s got to be).

Top with a scoop of watermelon poke. Top it off with your favorite condiments, then add a drizzle of your favorite sauce(s). You know what to do!


Mochanut Granola

When I first ran across a recipe for mocha granola, it was an a-ha moment. Coffee, chocolate and breakfast all in one bite? Brilliant! It sounded like the perfect offering for a weekend away, a camping trip, a hike, etc. And so, the experimenting and recipe sampling began.

Granola making is neither rocket science nor an exact science. It involves mixing oats with all your favorite tastes and textures, lubing it up some fat and sweetener, and baking it in the oven until it is crisp but not burnt. How much fat and sweetener is where granola can go from pretty healthy to totally decadent. One swishy LA café’s mocha granola recipe involves two sticks of butter. Well, duh. Of course it tastes good. So does a cheesecake, but it doesn’t really get your day off to a healthy start. Some recipes call for only ground coffee, which can get gritty and  others for only brewed coffee which can be kind of wimpy. I needed to slay this beast.

In my excitement I misread the first recipe, and by measuring ground coffee vs brewed coffee ended up using a solid 8 times the intended amount of coffee. That first batch could have been named “True Grit.” Still, I didn’t want to back off that much on the coffee flavor, which happens if you use only brewed coffee. The extra liquid also means your granola takes longer to bake and crisp. I settled on using a combo of finely ground coffee, in the dry ingredients, along with brewed coffee mixed in with the oil and maple syrup.

The flavor profile of this reminded me of my youth, when Jamocha Almond Fudge ice cream turned my world upside down. I am pretty sure that in 6th grade I worked the flu for an extra day to stay home with this particular flavor. This recipe bridges the territory of breakfast and treat. It’s got a double dose of coffee— liquid and ground—which is balanced by a fair yet not indecent amount of sweetener, mostly in the form of maple syrup. I also added unsweetened flaked coconut, because when coconut rolls around and gets toasty with maple syrup it assumes bacon-like decadence.

You can sub butter or another oil for the coconut oil, and mess around with the type and quantity of sweetener you like (or have). Again, this is on the less sweet side for granolas. Play around with it, and when you walk back inside your house and it smells like coffee, chocolate and roasted nuts…you’re welcome!

Mochanut Granola

Ingredients:

  • 2 ½ cups rolled oats
  • 1 cup almonds (or nut of choice)
  • 1 cup unsweetened flakes coconut (1 ½ cups is the addict dose. Use your judgment)
  • 1 Tbsp cocoa
  • 1 tsp kosher salt
  • 1 Tbsp finely ground coffee
  • 2 Tbsp brown sugar
  • 3 Tbsp coconut oil
  • 3 Tbsp maple syrup
  • ½ tsp or more vanilla (optional, but why not?)
  • 5 oz strong brewed coffee

Method:

Preheat oven to 325. Line one or two baking sheets with parchment paper. (It will cook up and crisp faster in two.)

In a large bowl combine oats, almonds, coconut, cocoa,salt brown sugar and ground coffee.

In a small saucepan melt oil and stir it together with syrup and brewed coffee until combined.

Pour liquid mixture over oats and combine well. Spread granola evenly in pan(s).  

Bake, stirring and checking every 10 minutes, for ~30 minutes, until desired dryness. Don’t skip the stirring, especially if it’s all on one pan. And don’t be fooled by the dark color (thanks to the coffee and cocoa). Test it out to make sure it is done to your liking. The granola will crisp up more as it cools. Cool completely before storing.

Roasty and toasty, straight from the oven.

Bringing it:

Curl up that parchment paper and funnel this goodness straight into a mason jar. Bring it anywhere you want to be a morning hero.

Snow Day Lemon Mousse

Light and fresh, like the snow we dream about!

This comes straight outta Steamboat, from Rocky Mountain Tania, who describes this lemon mousse as, “Amazing. Easy, light and such a counter balance to heavy winter food.”  Tania says she’s  embarrassed how much she makes this, but who in the world would be embarrassed by this thing of beauty?

The coolest thing about it is that it involves fresh snow. I just got back a trip west, where there is plenty of that, and I have high hopes that the return of cold temps to the east this week will bring some of the white stuff here as well. To all of you who are wishing for the opposite…C’mon man! Just give us one more month. Then we can all feel good about the meltdown.

Chilled Lemon Mousse

Adapted from Cook’s Magazine, with full photo, recipe and commentary credit to food and photo sensei Tania Coffey.

You will need:
A one quart soufflé dish (or any 1-1½ qt serving bowl)
A Kitchenaid with whipping attachment (or this recipe could be a real pain)
snow (or a good ice-maker) to put in a big bowl for chilling custard quickly

Ingredients:

  • Juice from 3 lemons (1/2 cup)
  • Zest from one lemon (3 tsps)
  • 1 packet (1/4 oz) gelatin
  • 1 cup whole milk
  • 3/4 cup sugar divided*
  • 2 large egg yolks (3 small) plus 5 large egg whites at room temperature
  • 1/4 tsp cornstarch
  • pinch cream of tarter
  • 3/4 cup heavy cream chilled
  • mint, raspberries or finely chopped pistachios for garnish

Method:

Leave eggs out for a couple of hours to bring to room temperature.
Zest one lemon
Add zest to the 1/2 cup of lemon juice and sprinkle pack of gelatin over juice.  Stir and set aside to soften.

Heat milk and 1/2 cup of sugar in a medium saucepan over medium-low heat.
stir occasionally until the sugar dissolves (5 min)
Meanwhile, whisk together the yolks, 2 Tablespoons sugar and the cornstarch in a medium-large bowl until pale yellow and thickened.
Whisking constantly slowly add the hot milk to the yolks (a rubber bottomed bowl is so great here so it doesn’t move while you are whisking and pouring).
Return the egg yolk-milk mixture to the pan and cook over medium low heat, stirring constantly until the foam dissipates to a thin layer and the mixture thickens to the consistency of heavy cream (185 on an instant read thermometer).  About 4 minutes. Do not over cook here or it will get lumpy or worse.

Pour the mixture into a medium-large bowl (I use the already dirty one) and add the lemon/gelatin mixture and stir.

Chilling’ in the snow. Sooooo cool!

Set the bowl in a larger bowl of snow (sorry, if you don’t have fresh snow ice water works well).  Stir occasionally to cool.

While the custard is chilling crank up the Kitchenaid with the whipping attachment.
Beat the egg whites and cream of tarter at medium speed until foamy (1 minute)
Increase speed to medium high.
*Add 2 Tablespoons of sugar (I usually skip this addition because I like the mousse super tangy not sweet) and beat until glossy and the whites hold soft peaks.
Don’t over beat.

Remove custard from snow/ice bath.
Gently whisk in one third of the egg whites.
Then fold in the remaining whites with a rubber spatula.

In the same mixer bowl (don’t bother cleaning it) beat the cream on medium high speed until soft peaks form when whisk is lifted (2-3 minutes).
Fold the cream into the custard/egg white mixture until no white streaks remain.

Pour into a 1 quart soufflé dish (or any 1 1/2 quart serving bowl).  Refrigerate.

For best texture chill for 1-2 hours

Garnish as desired. PS. This recipe makes you look like a pro—try it quickly!

Squaw Valley USA, a looooong way from meltdown.

Cauliflower and Pear Soup


My Dad’s favorite soup was vichyssoise, which is French for a cream, leek and mashed potatoes milkshake. While vichyssoise is delicious, I always feel a little guilty having a day’s worth of calories in a cup. It’s also traditionally served cold, which makes it a tough sell in winter. This soup, from Food52, reminds me of Vichyssoise in its creamy texture and in its potato/leek provenance. It is, however, downright healthy and served hot—key features for all food in January.

The addition of pears here is all upside, especially if you need a way to use up any Christmas pears. By the way, if you happen to have that problem, I’ll be right over! It also cooks in one pot. And that’s not all…it can easily be Veganized by replacing the butter with your fat of choice, and using vegetable broth instead of chicken broth. Swirl in some cream if you need a hug.

Cauliflower and Pear Soup
Serves 4 to 6

Ingredients

  • 1 T olive oil
  • 2 T butter
  • 1 large leek, white and light green parts, chopped
  • 1 small shallot, chopped
  • 1 head cauliflower, green leaves and trunk removed, florets chopped
  • 2 small yukon gold potatoes, peeled and chopped
  • 1 large or 2 small pears, peeled, cored, and chopped
  • 5 leaves fresh sage (or about 2 tsp chopped), plus more for garnish, if desired
  • 1 T chopped fresh thyme leaves
  • 5 to 6 cups chicken stock
  • kosher salt + freshly ground black pepper
  • 2 to 3 tsp sherry vinegar, or to taste (champagne vinegar also works well)
  • 2-3 Tbsp maple syrup (optional)

For Serving:

Method:

  1. Heat the oil and butter in a soup pot over medium heat. Add the leek and shallot, and cook until they are soft, stirring occasionally, about 5 minutes.
  2. Add the cauliflower, potato, pear, sage, and thyme, stirring to thoroughly coat them with the oil and butter. Season with salt and pepper. Cook until lightly browned, stirring frequently, another 8 to 10 minutes. (if your pot is pretty full it may take quite a bit longer. Be loose and go with your instincts here). You’re aiming for a little caramelization around the edges for depth of flavor.
  3. Add 5 cups chicken stock. Season to taste with salt and pepper. Bring to a simmer, lower heat to just maintain the simmer, and cook until all of the ingredients are very tender, about 30 minutes.
  4. With an immersion blender or regular blender, puree the soup until it’s smooth. If using a blender, you may need to do this step in batches, then return to pot. You’re looking for a smooth, velvety texture, so take your time to blend thoroughly. Thin with more chicken stock, if needed, until you reach desired consistency.
  5. Season to taste with vinegar, maple syrup if desired (when would it not be?) and salt and pepper. Serve in heated bowls, with garnish of choice

The experts say you should serve this with a gooey grilled cheese sandwich. Who am I to argue? And in case you wondered, it’s darned good cold as well. Buck would approve!

Winter’s back. Stay warm out there!

Salted Peanut Butter Cookies: Gluten-Free and Mini-Mart Sourced

Gluten-free, marmot approved.

Gluten-free, marmot approved

Here’s a hypothetical situation. It’s Christmas Eve, you gave away all your homemade cookies (if you happen to have made them in the first place), and you just found out Santa (or a guest) is gluten-free. There’s no way you’re going to the grocery store for special ingredients but you may be able to pull off a mini mart run. What if all that happened? What would you do?

You would make these cookies.  These are barely adapted from Smitten Kitchen who got them from the Ovenly cookbook. It’s the gift that keeps on giving. Here’s hoping you don’t need these tonight, and you stay clear of mini marts, but in case of emergency, you’re covered. Have a good one all, enjoy your people, and see you on the other side!

Salted Peanut Butter Cookies

Yield 26 to 28 cookies with a 1 2/3 tablespoon or #40 scoop.

  • 1 3/4 cups (335 grams) packed light brown sugar
  • 2 large eggs, at room temperature
  • 1/2 teaspoon vanilla extract
  • 1 3/4 cups (450 grams) smooth peanut butter (see note at end)
  • 1 cup (or so) of your favorite chocolate chips (optional)
  • Coarse-grained sea salt, to finish

Preheat the oven to 350°F. Line a rimmed baking sheet with parchment paper.

In a medium bowl, whisk together the light brown sugar and eggs until smooth. Whisk in the vanilla extract, then the peanut butter until smooth and completely incorporated; you shouldn’t be able to see any ribbons of peanut butter. Stir in chocolate chips, if desired.

Scoop or spoon the dough into balls — from a heaping Tablespoon to monster 1/4 cup sized. Place on prepared pan. For the tallest final shape, place the tray in the freezer for 15 minutes before baking.

Sprinkle the dough balls lightly with coarse-grained sea salt just before baking. Bake smaller cookies for 14 to 15 minutes and larger for 18 to 20. When finished, cookies should be golden at edges. They’ll need to set on the sheet for a minute or two before they can be lifted intact to a cooling sheet. With any luck Santa hits your house late enough to let them cool completely so the crispy outside/soft inside thing can really happen. 

Do ahead: You can make the dough in advance and either refrigerate it for a couple days or scoop out the cookies, freeze them, then bake them right from the freezer.

About chilling the dough: You can scoop and bake the cookies right away, but they keep their shape better if you chill them in the freezer for 15 minutes first.

Slippery Slope Ginger Beer Margaritas

Watch your step. Holiday season snuck right up on us again. Just as we stood up from prying the squirrel-nibbled pumpkins off the patio, the holidays were staring us straight in the face. From here on it’s a slippery slope of parties, visitors, events and hastily concocted reasons to gather right through January 2. Are you ready? Do you need a drink? This could help.

Let’s ease into this transition by taking a summer standby and winterizing it. Meet the ginger beer margarita. I stumbled across this while going down the Internet rabbit hole in pursuit of butternut squash tacos. Did I mention the slippery slope? After some exhaustive testing of ginger beers, following the comments on Minimalist Baker, I can definitely recommend the lighter ones like Fever Tree. It IS a margarita after all.

These are the easiest drinks in the world to make. You can get fancy and line the rim with lime juice and salt, or you can a just make the darned drinks. You can stir the ingredients together in a cocktail shaker with ice and strain, as directed, or you can just stir them up up in a pitcher, and pour over ice in each glass giving each drink another good stir. Just save yourself the anxiety and the outfit change and DO NOT shake them in a cocktail shaker. Remember the volcano experiment in 2nd grade? Yep.

A quick brush up on simple syrup: Combine equal parts sugar and water. Stir to dissolve sugar, heat to boiling, and let cool. Keep some stored in your fridge at all times, in case of emergency.

The best part about this drink, from a social perspective, is that you can easily bring the parts and assemble on site, AND the ginger beer makes a festive non-alcoholic drink as well (see top picture). For more ideas you can always revisit these fine drinks from last year.

The contenders. It wasn’t really exhaustive, but it was a Wednesday

Ginger Beer Margaritas

From Minimalist Baker, and adapted for high volume

Ingredients

Single serving version

  • 1.5 ounces (3 Tablespoons) 100% agave tequila
  • 1 ounce (2 Tbsp) fresh lime juice
  • 3 ounces (6 Tbsp) ginger beer (Fever Tree regular or light are awesome)
  • .5 ounce (1 Tbsp) simple syrup
  • Coarse salt for lining rim (also optional and fancy)

Team player version, for four

  • ¾ cup tequila
  • ½ cup fresh lime juice
  • 1 ½ cups ginger beer
  • 4 Tbsp simple syrup
  • coarse salt

Method

  1. If you’re feeling fancy, Line a small serving glass with fresh lime juice and dip in coarse salt
  2. Add tequila, simple syrup, ginger beer and lime juice to a large glass (single serve) or cocktail shaker (let’s not drink alone) with lots of ice and stir vigorously. Don’t shake with a lid on!
  3. Pour liquid (reserving ice) into serving glass with a few ice cubes Garnish with a lime wedge and serve immediately. Repeat for more drinks, or double/triple the amounts for more people.

What to do with your leftover ginger beer, once you have settled in on “the one.” Here’s an idea. Pour it over these cranberry rosemary ice cubes that you made for Cran-rosemary prosecco punch, which is basically equal parts prosecco and white cranberry juice, a splash of bitters and these fancy ice cubes.  The fancy ice cubes also winterize the flavored seltzer you can’t help from buying on every trip to the store. Did I mention it’s a slippery slope?

ABC Summer Sauce

Green goodness with a kick

Green goodness with a kick

Summer. It gets away from you. As in, we’re halfway through July ?!?! and #$%^&*! Recipe-wise, I don’t have a whole lot to show for summer so far, but I have been doing some background work, like: ongoing watermelon rind experiments, which will save you from some pretty scary concoctions; exploring Vegan frontiers with the mysterious magical Aquafaba; making rhubarb vanilla jam and rhubarb vinegar that I promise to post before the end of strawberry rhubarb season next year; mixing up all kinds of drinks and mocktails (ginger limeade, watermelon aqua fresca), even homemade grenadine, which it turns out is nothing more than pomegranate simple syrup. Who knew? I’ve also been brewing up herbal Sun Tea like it’s my job and adding fresh citrus and mint simple syrup.

This will all be tasty Intel for later summer lovin’. In the near term, I am steeling myself for an exhaustive test of the many frosé recipes (thank you Cousin D) now trying their best to break the Internet. We need a hot weekend, a boatload of rose and some thirsty volunteers. Who’s with me?

Mostly, I’ve been thinking about good people, and how they are the most important ingredient to summer fun. As it happened the US Ski Team announced their 2016/2017 team yesterday, and it includes some really, really fine young people, many of whom I’ve been fortunate to get to know. Sure, they are amazing athletes, but way more importantly they are stellar people who make their ski people proud.

AJ and Ollie

AJ Ginnis, building his fan base.

Pro move: Lila's got the tools of the trade—parchment paper and high tech oven mitts.

Lila Lapanja baking up some Champion Chip Cookies.


In honor of this moment we’re looking to Anna Marno (U.S. Ski Team member, National Super G Champ, healthy eater and cooker, part unicorn) for a summer recipe that is exactly what summer is about. This gorgeous cilantro-packed sauce is fresh, easy, delicious, and versatile enough to liven up most anything you feel like roasting, grilling or dipping.

It was photographed by Rocky Mtn Tania, who’s contributions seriously raise the Bring It! bar.

Says Tania: “This sauce is simply amazing on almost everything: as a side for street tacos, with chicken, fish or pasta even on crackers with cheese.  The ingredients work together so well, but the amounts can and should be adjusted to taste.”

Shall we just call this Anna’s Best Cilantro Sauce? Yes we shall!

Anna-ripping

Anna Marno…ripping!

ABC Summer Sauce

Ingredients:

  • 1 large bunch of cilantro
  • Juice from 2 limes
  • 1 jalapeno, seeded and chopped
  • 1/2 tsp sea salt
  • 1 clove garlic peeled and coarsely chopped
  • 1 tsp cumin
  • 5 oz plain greek yogurt *
  • 2-3 Tbsp agave sweetener
  • 1/3 cup olive oil

Method:

Put everything but the olive oil in a blender (a Vita Mix if you’re showing off, but a regular blender will do). You have to push the ingredients down to blend.  Slowly drizzle olive oil into blended ingredients while the blender is running to emulsify the sauce.  Make ahead of time so flavors come together.

*The beauty of this recipe is that you can omit the yogurt and you have an incredible vinaigrette for a salad.

Bringing it:
This travels well and is a wonderful hostess gift.

Lemonpalooza

On-pillows-light

California Dreamin’ on Such a Winter’s Day

Lemonpalooza: n. a celebration of all that is warm, bright and tangy; hope in the home stretch of winter; antidote to a common addiction amongst native Californians and Floridians; yum.

As I was packing a shoe box of Meyer lemons in to my checked baggage, my sister suggested: “You need lemon rehab.” A day earlier I had packed a flat rate priority mail box with lemons and had just returned from the home tree with another batch. Earlier she had bottled a batch of lemon syrup for me, and the lemon possets for dessert were cooling in the fridge. Gnawing on the peel of a juiced half lemon (dentists everywhere are recoiling) I nodded. “You might be right.”

But there is no kicking this addiction. As I boarded my plane back to NH I could not help but have a pang for every Meyer lemon left unpicked in the family tree and in the entire Bay Area megalopolis. I take solace in knowing I did my best.

Here’s a small sampling of how those lemons will be worshiped this week:

The first recipe comes from “The Lemon Cookbook” (of lemon cauliflower couscous fame) which I gave to my sister. The book’s chicken and toasted bread salad has been among their family’s Bring-It staples ever since. It’s sturdy, hearty, delicately and boldly flavored (can that be? Yes, oh yes!) with co-roasted lemons and shallots. And here’s the real kicker—it’s even better the next day.

The ease of rotisserie chicken notwithstanding, reading and re reading all the steps makes the entire recipe a pain in the butt to make the first time. That said, virtually all the labor (and flavor) is in the dressing. So we’re going to take just that element on now, and it will make for many happy salads with or without chicken and toasted bread. 

The other recipes are ridiculously easy: Meyer lemon simple syrup is a juice-intensive staple to brighten tea, seltzer, pancakes, vodka, etc; and lemon posset is a sweet, tart, creamy, perfectly textured pudding/custard with no eggs or special techniques involved.

As good as these recipes are, they are merely a gateway to all the transformational possibilities of Meyer lemons in winter. Roast them, juice them, preserve them (Pickled lemon chutney? I’m looking at you next!), and let them bring a little sunshine in to your life.

Roasted Lemon-Shallot VinaigretteLemon-salad

Ingredients:

  • 1 lemon, halved and seeded with the tip of a sharp knife
  • 8 oz shallots peeled and halved if large
  • 3 large cloves garlic unpeeled
  • ¾ cup extra virgin olive oil, divided
  • 4 sprigs fresh thyme, divided
  • 2 ½ tsp kosher salt, divided
  • juice of one lemon

Method:

Preheat oven to 400. Toss lemon, shallots, garlic and 2 sprigs thyme in 1/4 cup oil and 1 tsp salt. Spread in baking dish in one layer, with cut sides of lemon down. Cover with foil and bake 45-55 minutes or so, until shallots are caramelized and lemons are totally soft. Remove from oven and let cool.

When cool, remove lemon pulp from peel and put it (minus peel and any remaining seeds) into the blender. Add shallots, garlic insides (squeezed from skin), lemon juice, and any accumulated liquid to the blender. Process until smooth. Add remaining oil in a stream. Stir in thyme leaves from remaining sprigs and salt to taste.

Say tuned for a pro version of the chicken and toasted bread salad, pictured above, which is leftover roasted chicken tossed with arugula, plumped currants, rustic bread—torn, tossed with oil and oven-toasted— and this dressing.

This next recipe comes from Cooks Illustrated, so even though it is super simple of course it has some crazy essential step. In this case it is measuring the hot liquid until it is the proper volume. They have a workaround which is even more complicated, so let’s just stick to Plan A. It’s no big.

Lemon Possetposset

  • 2 cups heavy cream
  • 2/3 cup sugar
  • 1 Tbsp lemon zest
  • 6 Tbsp Meyer lemon juice
  • Fresh blueberries or raspberries

Combine cream, sugar and zest in a medium saucepan over medium heat and stir to combine. Heat, stirring as mixture boils. Boil, stirring frequently, for 8-12 minutes, until reduced to 2 cups (pour it off into pyrex measuring cup to check when it’s there). Remove from heat, stir in juice and let cool 20 minutes. Strain into bowl or directly into six individual ramekins/posset containers (see at right. who knew?). Discard strained zest, or eat it when nobody is looking. Chill possets uncovered until set, at least 3 hours. Wrap and store in refrigerator for up to two days. To serve, unwrap and let sit at room temperature 10 minutes. Garnish with berries.


Meyer Lemon Simple SyrupSyrup-tree

2 cups strained fresh Meyer lemon juice
2 cups granulated sugar
zest of 3 Meyer lemons

Wash and gently scrub lemons. Using a zester or vegetable peeler, remove strips of zest from fruit, being careful to remove only the yellow zest, none of the bitter white pith.

Combine sugar, zest and lemon juice in medium saucepan. Heat until simmering over medium heat, stirring to completely dissolve sugar. Increase heat and bring to a gentle boil. Remove saucepan from heat. Cover and set aside to steep 10 minutes. Strain into glass containers. Discard zest, or, you know what I’d do.

Makes 3 cups. The syrup will keep 1 week in the refrigerator, 6 months in the freezer.

granite-lemons

Southern Comfort in the Granite State


Cold Comfort Creamed Spinach and Such

January can get pretty dark, in every way. As it trudges along glacially, the time we do not spend pulling ourselves upright is spent talking our loved ones off a ledge. Particularly in the ski racing world—the world of my people—January gets harsh. Wind, cold, ice, wet socks and crowded  vans. Combine that with a stretch of injuries, illness and crashes (sometimes all three) and you’ve got your perfect storm of yuck.

We know it’s coming—post holiday blues, failed resolutions, short cold gray days, translucent skin, not-quite-right windshield wipers…and yet, it gets us every time. In the beginning our plan for January is all about kicking butt, but it ends up being more about getting by. Non skiers, I know you’re with me now.

Because my soft spot for underdogs is especially mushy in January, I’m marching through Food52’s best, yet most ignored recipes for 2015. These are things from odd and humble ingredients like burnt toast and lentils. I’m starting with everything on the list that’s green because, well, it’s January. See failed resolutions and cold gray days, above.

Up first, creamed spinach without the actual cream, a comfort food involving some vegetables and fiber and not a lot of work. Next on my list is a green soup suitable for Vegans, gluten-frees and paleos. But today, we’re all about easing into this gently with frozen spinach and just a few ingredients you probably already have plus a fresh green kick. I’m looking at you, jalapeño. Nothing fancy. Not even grating. We’re just getting through this together.

We all need a big hug in January. Here’s yours.

Cold Comfort Creamed Spinach (or Squash)

Barely tweaked from Laurie Colwin’s Creamed Spinach

Spinach-on-table

Overachievers Anonymous, here we come

Notes: I made this with cheddar because, well, I’m in New England. Must we discuss? For jalapeños I used fresh—half of one of those huge mutant ones you sometimes find in the grocery store. I was in my groove so I did the same thing with half a cooked butternut squash (here’s a clinic on that), using chicken broth instead of spinach liquid, the other half of the mutant jalapeno and the rest of the evaporated milk. I liked that even better. Let’s hear it for green AND orange.

Serves 6 to 8

  • 2 10-ounce packages frozen chopped spinach
  • 4 tablespoons butter
  • 2 tablespoons flour
  • 2 tablespoons chopped onion
  • 1 clove garlic, minced
  • 1/2 cup evaporated milk (or equivalent amount of cream and milk)
  • 1/2 teaspoon black pepper
  • 3/4 teaspoon celery salt, seasoned salt or plain old salt
  • 6 ounces Monterey Jack, Cheddar, Muenster, Gruyere or some such cheese, cubed
  • 1 or more jalapeño peppers (fresh or pickled)
  • Buttered bread crumbs (use 2 tablespoons melted butter for 1/2 cup breadcrumbs, making as much as it takes to make you happy)

Method:

Cook the spinach. Drain, reserving one cup of liquid, and chop fine if not chopped already.
Melt the butter in a saucepan and add the flour. Blend and cook a little. Do not brown.
Add onion and garlic.

Add one cup of spinach liquid slowly, then add evaporated milk, black pepper, celery salt, and cheese. Add one or more jalapeño peppers (know thyself and thy heat tolerance), and the spinach. Cook until all is blended.

Turn into a buttered casserole topped with buttered bread crumbs, and bake for about 45 minutes at 300° F until the top is crisp and golden. If you want to speed up the browning, toast under the broiler.

Cold Comfort Creamed Squash

Follow directions above, substituting cooked winter squash for spinach, and 1 cup chicken broth for the spinach liquid.

Bringing it:

This is the type of thing that begs to be put in a dish, covered snugly and carried elsewhere to someone who needs a little comfort.


Sugar and Spice Squash Soup

Tick Tick Tick. It’s happening, snow or no snow. A certain person in our house wore an elf suit for an entire weekend, the Christmas music on the radio is running 1:1 with Adele, and I’m pretty sure I’ve had at least some chocolate by 10 am for the past five days. Oh yeah…’tis the season.

This sweet, spicy, ginger squash soup is another fabulous contribution from Steamboat Tania, who holds the bar so much higher than me that I almost just posted this without trying it. Almost. But the whole candied ginger thing was intriguing, and I figured before descending into holiday carb overload I owed it to my people to produce one last healthy, unique, yet broadly appealing dish.

It’s a more sophisticated version of Halloween Soup, with creaminess from coconut milk, spice from red curry paste and sweet holiday sparkle from the candied ginger. (You know you were wondering how to use up the tub of candied ginger you got for fruitcake or ginger libations or various gingery creations.)

If I have not sold you on this soup yet, it’s also pretty hard to screw up. I didn’t have a full jar of red curry paste, used bouillon cubes instead of broth and misread the recipe, using only one butternut squash. It was still incredible, and an acorn squash out there lives for another day. Oh, and Tania’s tip on heating the squash in the oven first is sheer brilliance.

I urge you to make this, as a gift to yourself or to share with your holiday squad. Extra points if you enjoy it in your elf suit.

Ingredients:

  • 1 large acorn squash
  • 1 large butternut squash
  • 3 Tbsp olive oil (plus more to rub on squash)
  • 2 T butter
  • 1 large onion diced
  • 3 cloves garlic minced
  • 32 oz chicken stock
  • 1 jar red curry paste
  • 1 can coconut milk (Full fat tastes best. Hide the can if you must)
  • 1/3 cup candied ginger
  • salt and pepper

Method:

Preheat oven to 350.
Put uncut squash on baking tray while the oven is preheating (do this so the squash cuts easily and you don’t lose fingers), 10 minutes or so.
Cut squash in half, discard seeds, rub cut side with olive oil and place cut side down on baking sheet. Cook until soft, half an hour or so depending on size.
While squash is cooking warm 3T olive oil and butter in a large sauce pan. Add onion, cook until translucent. Add garlic and cook until fragrant.
Remove squash from oven and scoop flesh into onion/garlic mixture. Add chicken stock, curry paste, coconut milk and candied ginger. Stir over low-med heat until blended.

Ladle lumpy soup into vitamix/blender (or use an immersion blender). You will need two pots because this was 2 vitamix loads. Blend until smooth. Return to stovetop to warm. Add salt and pepper to taste. Warm and serve. (P.S. It’s also really good cold)


Knock-Out Vegan Pumpkin Pie

V stands for Very Tasty

V stands for Very Tasty

This pie was a revelation. The pie itself is fantastic, and is a stand-alone favorite, V or no V. It comes from the November issue of Self, the one with UFC star Ronda Rousey on the cover. That’s where the revelation comes in. I’ve been staring at that cover for a solid two weeks, flipping to the pie occasionally to remind myself of what ingredients not to forget this time I go to the store. Each time I flipped past the story on Ronda, looking at the pictures but not tempted to read a word of it (or to even google UFC. It’s Ultimate Fight Championship. Pretend you knew that—I won’t tell.

Then she got knocked out. Suddenly I heard her name pop up a lot. Even my husband commented on the great Ronda Rousey losing a match. Now, give me a loser and you have my interest. It’s not schadenfreude, but a strong aversion to packaged success stories…especially when they double as fashion spreads.

Anyway, I finally read the article (in which she is interviewed by a comedian) and it was hugely compelling: revealing, honest, unusual. She did talk about leaving a legacy as an undefeated champ. So much for that, but by losing she got at least one person who was only interested in pie to read her story and now care about her.  I am still not sure I could actually watch a UFC match—way too much blood, guaranteed—but go Ronda.

Now, on to pie. This is awesome. I made it with kabocha squash that I had baked. You could also use fresh pumpkin or butternut squash or the canned stuff. I can’t use the canned stuff, having recently been burned by a legacy can in the pantry. Oops.

With pumpkin pie the Vegan situation means no eggs, milk or cream in the pie and no butter in the crust. Coconut milk subs for the liquid and somehow enough squash just makes the egg factor go away. The crust—where you can really do some dietary damage with pies—is pretty darned healthy, and even easier to put together than a graham cracker crust. It’s a total win. Top it with whipped coconut cream for the full V experience, or with regular whipped cream from happy cows. It’s time to get your pomegranate game on, so you can get fancy and sprinkle some of those on top too. Either way, you’re going to wish you had room for seconds.

Vegan Pumpkin Pie

Ingredients:

  • 1  Pecan-Coconut Crust, frozen
  • 1 cup packed brown sugar
  • 3 tablespoons cornstarch
  • 3/4 teaspoons ground cinnamon
  • 1/2 teaspoon grated nutmeg
  • 3/4 teaspoon grated ginger
  • 1/2 teaspoon kosher salt
  • 1/2 teaspoon vanilla extract
  • 1 can (15 oz) pumpkin puree
  • 1 can (13 oz) coconut milk

Method:

Heat oven to 375°. In a bowl, whisk together sugar, cornstarch, cinnamon, nutmeg, ginger and salt. Add vanilla, pumpkin puree and coconut milk and mix until well combined. Place frozen shell on a baking sheet and slowly pour in filling. Bake on center rack of oven 25 minutes. Rotate 180 degrees and continue baking until filling is set and no longer looks wet at center, 20 to 30 minutes more. (Mine took longer. No eggs means it won’t set as firmly but it will set more as it cools.) Cool 2 to 3 hours. Serve lightly chilled.

Pecan Coconut Crust

Ingredients:

  • 1 cup pecan pieces
  • 1/2 cup shredded unsweetened coconut
  • 2 tablespoons sugar
  • 1/2 teaspoon kosher salt

Preparation:

In a medium skillet over medium heat, toast pecans until fragrant; set aside and cool. Reduce heat to medium-low and toast coconut, stirring, until golden, 2 to 3 minutes; cool. In a food processor, process pecans, coconut, sugar and salt until mixture is fine and sticks together slightly. Pour into an ungreased 9″ pie pan. Press into bottom and sides of pan. Freeze until solid. Makes 1 crust.

pumpkin-pie-rock


Classic Champion Chip Cookies

Honestly, do you really need another chocolate chip cookie recipe? Apparently, yes! These come to you from US Ski Team rising star Lila Lapanja, who contributed mightily to my condo survival guide in Ski Racing. Lila’s mom Margie is the baking legend behind Margie’s Cowboy Cookies and the author of four cookbooks that meld life and kitchen wisdom with soul-satisfying recipes. Margie is all about comfort food, so of course her chocolate chip cookies would be good.

I am not sure what makes these so fool-proof, but they are. Maybe it’s the combo of margarine and butter, or the nice round numbers that make the proportions easy to remember even if you cut the recipe in half or in quarters; or the way dough stays soft and easy to scoop even if it’s in the fridge for a while; or the way they cook evenly and stay just soft enough when cool. I’m not sure what the magic is, but it just is. The next time you’re making a care package (surely someone you know needs a boost!) try baking these and you won’t go wrong.

According to Margie and Lila, these cookies will bring you good luck if you eat them the night before your ski races or at lunch between runs.

Champion Chip Cookies

Ingredients:

  • 1 cup margarine, room temperature
  • 1 cup butter, room temperature
  • 2 cups brown sugar
  • 2 cups white sugar
  • 4 eggs
  • 2 teaspoons pure vanilla extract
  • 1 teaspoon salt
  • 2 teaspoons baking soda
  • 2 teaspoons baking powder
  • 6 cups unbleached flour
  • 4 cups chocolate chips*

(You can cut this recipe in half to make it more manageable. No calculator required!)

Method:

Preheat the oven to 350 degrees. In a large (at least 13-quart) mixing bowl, whip up margarine, butter, and sugars until fluffy with an electric mixer.  Add the eggs, vanilla, and salt and mix well. (Slackers note—if a fork is all you’ve got just make sure the butter and margarine are soft and whip it good!)

Blend the baking soda and baking powder into the flour and tap into the creamed mixture on low speed. Mix until it comes together. Stir in the chocolate chips with a strong wooden spoon.

Line a cookie sheet with baking parchment and scoop the dough with a small (1- to 2-ounce) ice cream scoop or with a large spoon. Bake for 9 to 11 minutes (depending on your stove…), until lightly golden in color with tiny cracks on top of the cookies. Note your baking time for the rest of the batch. Makes about 4 dozen 2-ounce (Mrs. Fields’-size) cookies.

* Yes, there is a secret to this recipe: the chocolate chips. My favorite baking chips are, have been, and will always be Hershey‘s…or Trader Joe’s. I like to use half semi-sweet and half milk chocolate. On festive occasions, try tossing in white chocolate chips, a few toffee chips, or mini-kisses.


Lemon Beach Pie

If you love your people—and I know you do—make this pie now. In the wilds of the Internet it is known as Bill Smith’s Atlantic Beach pie. Anything called Beach Pie gets my attention. When its maker also calls it the “easiest recipe in the world,” I’m all in. This pie is not a secret. In fact, way before Ms. Kardashian tried to break the Internet I think this pie came close. For some reason, however, it took me until recently to make it.

What pushed me over the edge was the entire stick of butter on my counter, barely maintaining its solid form on a sweltering summer day. “Mix me with Saltines and a touch of sugar, then turn me into the crust of a glorious pie,” it seemed to be saying.

Perhaps that was the heat. At any rate, I obeyed the voice. The aforementioned Bill Smith created this version of a pie that is served up at coastal seafood restaurants in the North Carolina. It tastes darned good far from the beach too, and if for some reason you don’t finish it, just pop it in the freezer and bust it out whenever you need a taste of the beach. 

Make One Beach Pie

For the crust:

  • 1 1/2 sleeves of saltine crackers
  • 1/3 to 1/2 cup softened unsalted butter
  • 3 tablespoons sugar

For the filling:

  • 1 can (14 ounces) sweetened condensed milk
  • 4 egg yolks
  • 1/2 cup lemon or lime juice or a mix of the two
  • Fresh whipped cream and coarse sea salt for garnish

Method:

Preheat oven to 350 degrees.

Crush the crackers finely, but not to dust. You can use a food processor or your hands. Add the sugar, then knead in the butter until the crumbs hold together like dough. Press into an 8 inch pie pan. (If you only have a 9-inch pan just top the pie with more whipped cream.)  Chill for 15 minutes, then bake for 18 minutes or until the crust colors a little.

While the crust is cooling (it doesn’t need to be cold), beat the egg yolks into the milk, then beat in the citrus juice. It is important to completely combine these ingredients. Pour into the shell and bake for 16 minutes until the filling has set. The pie needs to be completely cold to be sliced. Load it up with fresh whipped cream give it a sprinkling of sea salt.

Summer Lovin’ Raspberry Buttermilk Cake

Rocky Mountain Correspondent Tania Coffey strikes again with this really good and really easy cake which you should make really soon. Why? Because we have berries! And we probably have cream hanging out in the fridge, dying to be whipped. And we have hungry kids. And because cake is good!

I happen to have one cooling on the counter right now and will figure out where to hide it so it’s there after dinner. If the hiding place is discovered, all is not lost. Apart from the fresh berries you’ve probably got plenty of everything else you need (including time—it’s pretty quick!) to make another.

Now go and enjoy every bite of summer while it’s here!

Raspberry Buttermilk Cake

Adapted by Tania Coffey from Gourmet, June 2009

This cake is so much fancier than a crisp or a crumble or cookies.  Super easy but looks like you REALLY care a lot.

raspberry-cake-rawraspberry -cake

Ingredients:

  • 1 cup all-purpose flour—I have been substituting 1/4-1/3 cup course cornmeal for a little more texture lately.  As long as you have 1 cup total flour the cake has proven to be very flexible.
  • 1/2 teaspoon  baking powder
  • 1/2 teaspoon baking soda
  • 1/4 teaspoon salt
  • 1/2 stick  unsalted butter, softened
  • 2/3 cup sugar plus 1 1/2 T raw sugar for top of cake
  • 1/2 teaspoon pure vanilla extract
  • 1/2 teaspoon finely grated lemon zest
  • 1 large egg room temp.
  • 1/2 cup well-shaken buttermilk.  Just add a squeeze of lemon to your milk and stir it up to make buttermilk.
  • 1 cup fresh raspberries (I have substituted blueberries before with success, but don’t try strawberries because that was a disaster unless you like pink pudding cake)

Method:

Preheat oven to 400°F with rack in middle. Butter and flour a 9-inch round cake pan. Put the half stick of butter on top of oven to soften while oven warms. Get the egg out of the fridge.

Grate lemon zest then make buttermilk with a slice of lemon if you need to.  It needs to sit for a bit.

Whisk together flour, baking powder, baking soda, and salt and set aside. In a larger bowl, beat butter and 2/3 cup  sugar with an electric mixer at medium-high speed until pale and fluffy, then beat in vanilla and zest. Add egg and beat well.

At low speed, mix in flour mixture in three batches, alternating with buttermilk, beginning and ending with flour, and mixing until just combined.

Spoon batter into cake pan, smoothing top. Place raspberries evenly over top and sprinkle with remaining 1 1/2 tablespoons raw sugar.  For some reason the raspberries drown a little less if you place them so the hole is up.  They sink like stones the other way.

Bake until cake is golden and a wooden pick inserted into center comes out clean, 20 to 25 minutes. Watch it at 20 min, it cooks quickly. Cool in pan 10 minutes, then turn out onto a rack and cool to warm, 10 to 15 minutes more.

Invert onto a plate.  This is Gourmet’s idea.  I have never tried to invert the thing. This cake is actually better the next day for breakfast, but it rarely survives that long.

Victory Bran Muffins

It’s the weekend people. Regardless of our need to post more healthy, hearty fare and veggies, right now we need muffins. Why are these a victory? First, they come from my cousin Victoria, via King Arthur Flour, via Zella Lane who was the radio voice of Betty Crocker. So, yes, these have been fully vetted. Most importantly, these muffins are delish, whether made as mini muffins (Victoria’s favorite way—less commitment per muffin and way cuter) or as full-sized ones. I took them to a ski race recently and they were devoured by adults and teenagers alike. They are substantial enough to stand up to packing and travel, but still tender and awesome.

Perhaps the biggest bonus, however, is the fact that this batter can stay in your fridge, at the ready, for up to two weeks. They are a bit of a process to put together, only because they require three separate bowls, boiling water and a bit of cooling time. But none of it is difficult, and the reward for that time on the front end is being able to dole out muffin batter as and when needed, for fresh muffins anytime within a half hour. They will save your butt on a busy morning and make you look like a red-hot muffin-bearing kitchen goddess. That, my friends, is a victory.

Notes: Pay attention here to the bran cereal amounts. First, they depend on the type of bran cereal you are using, and second there are two places in the recipe where the cereal comes in, so make sure you have enough. Otherwise you might be subbing in whatever cereal you have in the pantry—doable for sure, but potentially risky (e.g. Raisin Bran vs. Capt’n Crunch). Coconut is an addition from Victoria that is totally good. If you are warming kids or bran-phobes up to these muffins, sweetened is the way to go. Unsweetened, while more virtuous, will dry out the batter more, so be more generous with your buttermilk. Finally, this makes a lot. You can easily halve the recipe if fridge space is at a premium.

 Ingredients:

  • 1 cup boiling water
  • 1 cup bran cereal (buds or twigs); or 1 3/4 cups bran flakes
  • 1/2 cup vegetable oil
  • 2 1/2 cups flour
  • 2 1/2 teaspoons baking soda
  • 1 teaspoon salt
  • 1 cup dried cranberries
  • 2/3 cup shredded coconut (Optional, sweetened or unsweetened).
  • 2/3 cup hemp hearts (Optional, but yummy in pretty much anything).
  • 2 large eggs
  • 2 cups buttermilk
  • 1 1/4 cups sugar (demerara or coconut sugar take these over the top)
  • 2 cups bran cereal (buds or twigs); or 3 1/2 cups bran flakes

 Method:

1) In a small mixing bowl, pour the boiling water over the 1 cup twigs (or 1 ¾ cups flakes) of cereal. Allow the mixture to cool to lukewarm, 30 minutes or so.

2) While the water/cereal mixture cools, blend together the flour, soda, and salt in a large mixing bowl. (Pro move here is to use a bowl with lid that can be used to store batter in the fridge). Stir in the cranberries, coconut and hemp hearts if using. Set it aside.

3) Stir the vegetable oil into the cooled water/cereal mixture. Set it aside.

4) Whisk together the eggs, buttermilk, and sugar. Combine this with the flour/raisin mixture.

5) Stir in the 2 cups twigs (or 3 ½ cup flakes) dry cereal.

6) Finally, add the water/bran/oil mixture, stirring till thoroughly combined. Cover the bowl and refrigerate overnight, or HOWEVER THE HECK LONG YOU WANT!

7) Preheat your oven to 375°F. Lightly grease your muffin pan of choice, or line with paper cups, and grease as many wells as you like.

8) Heap the thick batter in the muffin cups; a generous 1/4 cup batter works, but feel safe knowing these are not exploding muffins.

9) Bake the muffins for 20 to 25 minutes, till a cake tester inserted into the center of a muffin comes out clean.

10) Remove from the oven, and tip the muffins in the pan to prevent their bottoms steaming and becoming soggy. Serve warm; or transfer to a rack to cool completely.

11) To bake mini muffins, heap the batter in the muffin cups, and bake for about 15 minutes, till the muffins test done.

Yield: at least 18 standard muffins, or 45 mini muffins.

Bringing it:

These taste great out of the oven but also when cool, and even if baked the day before. They have saying power! Victoria suggests the following for a hostess gift: “present your hostess with a gift bag filled with a container of the refrigerated batter, a mini-muffin pan, and a card that includes the recipe. Alternatively, just show up with those things and commandeer the oven while everyone else is still sleeping in — the fragrance beats an alarm clock any day!”

Frosty the Snow Drink

Before we do anything else this fine morning, let’s take a moment to honor Michele Ferrero, the inventor of Nutella (which we can now make ourselves), who prophetically passed away on Valentine’s Day. There is some comfort in knowing that he lived a long life and died an extremely wealthy man.

And now, we move on to the weekend. I have been commissioned by an undisclosed publication to create snow cocktails for an upcoming issue. For this, dear Bringiteers, I need your help. This is far too mighty a task for one drinker, especially one battling a tenacious, fun-sucking, taste-bud-negating head cold (scroll below for therapy and recipe that just may get me to turn the corner). I am hoping some of you will be kind and daring enough to take this on with me, to tirelessly fill, pack and refill your glasses with snow, mixers and hootch in whatever ways please you.

Of course, I’m not going to leave you totally out in the cold. Here’s some inspiration: You might want to try some classics adapted for winter, like the Snowjito, the SnowBreeze or the Snowgarita. I can’t disclose the names or exact ingredients that may appear in the aforenonmentioned publication, but I am working on something that riffs on frozen hot chocolate, perhaps with some peppermint schnapps, as well as some hopped-up versions of every kid’s favorite snow day breakfast—orange juice on snow.

Hints of springtime have me contemplating a “Frozen Poma” (like an Arnold Poma, but colder), involving lemonade, iced tea, vodka and snow. The reality of many more ski races compels me to consider pouring any leftover Parent Whisperer from the Thermos on snow to create the “Frozen Parent.” And let’s not forget last year’s foray into Olympic Snow Drinking for some starting points.

As you set forth on this mission keep in mind that snow dilutes a cocktail necessitating it to be a bit sweeter and a bit stronger than the proportions you might usually use, to get the same effect. Also, I urge you to remember that snow drinking is rarely done alone (though there’s no shame in that), so you might want to consider things that can be made with simple ingredients, in volume, and possibly prepared by a bonfire. Of course, virgin versions are always appreciated and will be happily slurped by the younger or simply wiser set.

Ok, my intrepid testers. Go forth, create, and let me know what you come up with. Then, when the next storm hits (or when the first storm hits in CA) we can get celebrate by sampling the finalists. Happy Weekend to all and thanks for playing!

But waiiiiiiiit. This just in. My awesome friend in New York just sent me a cocktail recipe from the Wall St Journal (a killer cocktail source, FYI) for a drink called the Panacea, adapted from another drink called the Penicillin. It was a slow, congested afternoon and I had the fixin’s so I gave it a try. I may have to cancel the doc appt tomorrow. This stuff is GOOD. The honey ginger lemon syrup alone is worth committing to memory. Check out the full story on the Panacea, or just make it from the recipe below!

The Panacea—way better than Nyquil

Make honey-lemon-ginger syrup: In a small pot over medium heat, simmer 1 cup honey, 1 cup water and ½ cup minced ginger until mixture cooks down to a thick syrup, 10 minutes. Strain through a fine-mesh sieve, pressing on solids to extract liquid. Discard solids (or save them to put in tea later. Yum!) Add¾ cup fresh lemon juice to syrup and stir. Cover and chill.

In a tumbler half-filled with ice, stir together 2 ounces honey-lemon-ginger syrup and 2 ounces blended Scotch. Pour¼ ounce Islay single-malt Scotch over the back of a spoon so it floats on top of drink. Garnish with a slice of ginger and candied lemon peel (optional).


Lifechanging PITA crackers

Makes 2 baking sheets of crackers

  • 1 cup sunflower seeds
  • ½ cup flax seeds *
  • 1/3 cup pumpkin seeds
  • ¼ cup sesame seeds
  • 1 ½ cups 150g rolled oats
  • 2 Tbsp. chia seeds
  • 4 Tbsp. psyllium seed husks (3 Tbsp. if using psyllium husk powder)**
  • 1 ½ tsp. fine grain sea salt
  • 1 Tbsp. maple syrup
  • 3 Tbsp. melted coconut oil or ghee ***
  • 1 ½ cups water
  • 6 large dates or dried figs, chopped (optional but yummy)

Flavor variations: Go nutty here and mix in your choice of fresh or dried herbs and spices, like fresh rosemary + garlic powder, or lemon zest + thyme + cracked pepper, or paprika + chile powder + smoked sea salt or whatever!

* Once I ran out flax seeds so I used 1/4 cup hemp hearts and 1/4 cup ground flax. All good.

**I have seen a version without psyllium husks, so give it a whirl without if you don’t have them.

*** Butter works too as long the Vegans aren’t coming over

In a large bowl combine all dry ingredients and the dried fruit if using and stir well. Whisk maple syrup, oil and water together in a measuring cup. Add this to the dry ingredients and mix very well until everything is completely soaked and dough becomes very thick (if the dough is too thick to stir or looks too dry to hang together, add one or two teaspoons of water until the dough is manageable).

Divide the dough roughly in half, and set aside one half.

Place one half of the dough back into the bowl and add your flavorings of choice. Gather into a ball and place it between two sheets of baking paper, directly on your rolling surface (counter, table, whatever). Using a rolling pin, firmly roll out into a thin sheet, approximately the dimensions of your cookie sheet. Remove top layer of baking paper and using the tip of a knife, score the dough into shapes you like (rectangles, diamonds, squares). Repeat with remaining half of dough. Let both sheets sit out on the counter for at least 2 hours, or all day or overnight. Cat owners, plan appropriately.

Preheat oven to 350°. Using the baking paper, slide the dough onto a cookie sheet and bake for 20 minutes. Remove cookie sheet from oven, flip the whole cracker over (if it breaks a bit, don’t worry!) and peel the baking paper off of the back. (Honestly, this is where it gets a little complicated. My best system is to cover the baked crackers with the layer of parchment peeled off the top after the rolling out process. Then, cover that with a pizza peel or another baking sheet and flip the sheet over so the giant cracker is now on the pizza peel. Put the cookie sheet on the counter and slide the cracker off the pizza peel and back on to the cookie sheet. Peel off top layer of parchment and you should have a perfectly flipped cracker sheet). Return to oven to bake for another 10 minutes, until fully dry, crisp, and golden around the edges.

Let cool completely, then break crackers along their scored lines and store in an airtight container for up to 3 weeks.

These are great to snack on as is, or with any type of cheese or bruschetta toppings. Dip them in soup, hummus, fondue, nutella. You name it!


Nootch Popcorn: A short love story

The first time I went to Aspen I fell in love. I was 15, at a US Ski Team camp. In those days, US Ski Team camps were all expenses paid, which is to say, the skiing, lodging and group meals at the International Inn were covered. There was no stipend for shopping in Aspen. So, in my free time I wandered the side streets on the periphery of all the swishy boutiques and expensive restaurants. The two stores I frequented were Gracy’s Thrift Shop and the groovy health food store. After several visits, the only thing I got at Gracy’s was a $6 lavender cashmere sweater that I referred to as “The Lucky Sweater” for reasons totally unknown. But every time I visited the health food store I came away with a bag of the most deliciously savory popcorn I had ever tasted. It was the stuff that leads to obsessions, addictions and possibly health food store break-ins. As much as anything at the time, sadly, it was love.

Time went on, the lucky sweater lost its charm, but I never forgot that popcorn. In subsequent years of craving and searching I deduced that the addictive seasoning was nutritional yeast. And when I thought back to the dark spray bottle that lived next to the popcorn machine in the store, I figured it must have been filled with a tamari/soy sauce misting concoction.

When I was flipping through Thug Kitchen and saw the “Stovetop Herbed Popcorn” recipe, featuring “nootch” (what one calls Nutritional Yeast to make it sound way cooler than, say, Soilent Green), the craving came back all at once.

We’re heading into prime TV snacking season with the Oscars and the Super Bowl so you’ll want to be on your popcorn making A Game. Here’s what you’ll need to do.

Step 1: Make the popcorn. I know you. You have your own favorite way. Hopefully you have a method that does not involve a microwave because those packets add a lot of artificial ingredients and tastes to your popcorn. Some other options: Stovetop, using a heavy covered pot and high heat oil like peanut, grapeseed or coconut; Air pop if you must—it might even taste like something with all the good stuff on top; An actual popcorn maker, like the Mickey Mouse popcorn popper my son got for Christmas nearly ten years ago, around when our microwave broke for good; or do it like Alton Brown does here, in a foil topped metal mixing bowl, à la Jiffy Pop.

Just make a whole bunch. I use roughly 2 Tbsp oil to 2/3 cup corn in the Mickey Pop. Some go with 3 Tbsp oil to ½ cup corn. Whatevs.

Step 2: Make the topping. I love the recipe below, but don’t limit yourself. Spice it up, sweeten it up, toss in some garlic powder if you’re feeling it. It’s your night, baby. If you are using “nootch” for the first time, don’t confuse it with active forms of yeast, like the kind of yeasts bakers, winemakers and beer makers use. Nutritional yeast flakes or powder have a nutty-cheesy flavor and are packed with amino acids, protein and B vitamins. If it comes in a little packet or looks like tiny white pellets you’ve got the wrong stuff. If it’s yellow, flaky and looks alarmingly like goldfish food you’ve hit the jackpot.

Step 3: Do the drizzle. It can be melted butter or olive oil or even truffle oil if that’s your thing. This is what will make your topping stick to the popcorn. True pros infuse the oil with the herbs and hot peppers first. Slackers (ahem, like moi) do not. A spray bottle of Tamari with a little oil mixed in may have been the secret in Aspen. Someday I’ll get myself a mister and find out.

Step 4: Shake it baby. Pour your popped corn into a big paper bag or (less fun but totally ok) a huge bowl so you can add the topping and really mix it in.

Step 5: Grab the remote and enjoy!

The Popcorn

Alton Brown’s way, or use the same amounts in a heavy, covered pot. Makes about a gallon

Ingredients:

3 tablespoons peanut oil
3 ounces popcorn kernels, approximately 1/2 cup
1/2 teaspoon popcorn salt

Method:

Place the oil, popcorn and salt in a large, 6-quart, metal mixing bowl. Cover with heavy-duty aluminum foil and poke 10 slits in the top with a knife. (if using a covered pot leave a gap once the corn starts popping so the steam can escape.

Place the bowl over medium heat and shake constantly using a pair of tongs to hold the bowl. Continue shaking until the popcorn finishes popping, approximately 3 minutes.

Remove the bowl from the heat and carefully remove the foil. Stir in any salt that is on the side of the bowl.

The Topping:

  • 1-2 Tbsp olive oil or melted butter
  • 1 tablespoon dried oregano
  • 2 teaspoons dried dill
  • 1 teaspoon dried thyme
  • 1/2 teaspoon crushed red pepper flakes (or a pinch of cayenne)
  • 1/4 cup nutritional yeast (or substitute finely grated Parmigiano-Reggiano cheese)
  • Fine sea salt, popcorn salt or food processor pulsed kosher salt (all optional)

Method:

Mix herbs, spices and nootch in a small bowl or container.

Pour popped corn into a paper bag (or a big mixing bowl if that’s what you’ve got). While popcorn is still warm, drizzle the oil over it, close the bag and shake to coat the popcorn. Sprinkle on the topping mixture (use your judgment on how much), close the bag and shake to combine. Taste, and add salt if needed. If you have leftover topping store it airtight for the next batch. If not, make a whole bunch more.

Note: Get creative here. If all you manage is nutritional yeast and salt you’ll get the gist. If you can add some herbs and something with a little kick you’ll get the full effect. It’s all good. And I mean really good.


The Mickey Pop doing its thing.

The Mickey Pop doing its thing.

.


Vail trees

Bringing on the Holidays, and Cheddar Crisps

I am just reentering the real world after a trip to Vail, CO, where their trees look like this. One day they were just, you know, trees. And the next day we were living in a patriotic LED forest. In addition to designer trees I had three days of life in the VIP tent at the base of the race course, a fantasy world I hope everyone can experience at least once.

Here’s what goes down in the VIP tent:

Pretty women in puffy pink coats pass glasses of champagne filled at the outdoor bar, where Bloody Marys are also mixed to order. Next to the bar juicy burgers are grilled up, nestled into buttered buns and wrapped up so you can grab them if you’re the outdoorsy type. Inside, tables are laden with fruit, cheeses and nuts, fresh baked breads, a Veggie Nirvana of salads, a Carnivorama of roasted beasts, coconutted shrimp, and steamy soups topped with mini grilled cheeses. And then comes the dessert table which is completely off the hook. I never even made it to dessert because another roving server appeared with a tray of whipped cream-topped hot chocolate with vanilla vodka, which sort of ended the lunch conquest.

VIP-tent-2VIP tent-1


I’m not going in to such detail to be mean, but to establish the high bar going in to prime, party intensive, holiday season. If you need some ideas for what to bring to your next soiree, here are just a few ideas from the Bring It! repertoire.

Bringing the cheer:

Cut to the chase and get the party started by bringing a premixed, seasonal cocktail like these ones we had at Thanksgiving. If you are going to be outdoors bring a Thermos of hot cocoa or tea and the hootch to add. Dark rum is a solid go-to for hot drinks and, as noted above, apparently so is vodka. Fixin’s for a big batch of mint chocolate milk will build your snack cred with all ages.

Apps for a crowd?

You can’t go wrong with Sue’s marinated shrimp and artichoke number, or the ever-festive, ridiculously easy Funitella Bruschetta. Below see a basic recipe for the cheddar cheese rounds that make their way into every spiral-bound community cookbook for good reason. (Bonus feature: they can be made with ingredients procured at any mini mart.) Bacon wrapped dates? Yes, have some! And really, putting that fondue pot in a tote bag with a big bag of grated cheese, and firing up some Guinness fondue is always the right thing to do.

DIY Hostess Gifts/Party Fare:

Bottle up some ginger simple syrup that goes in our previously mentioned cocktails, or get creative with help from the full simple syrup tutorial here. Go Mediterranean with a jar of Sicilian Caponata, go healthy with a loaf of Life Bread (thinly slice it and toast it for a tasty snack foundation), sweeten the deal with Salted Caramel Cholliesauce orrrrrrr, get nutty with some sweet and spicy roasted nuts. Oh-so-sophisticated thyme honey walnuts are pure gold on some lusty soft cheese. If you’re shamelessly vying for a quick hit of popularity bust out the Crackle.

Wrapping it all up:

Remember wrap master Boot Camp Bonnie? ‘Tis the season to revisit her tips for packaging brilliance.

You’ve got the week to prep for this weekend’s shenanigans, and a whole lot of joy on the calendar, so let’s do this holiday thing!

Can’t Go Wrong Cheddar Crisps

Ingredients:

  • 1 stick butter, softened
  • 1 cup extra-sharp cheddar cheese, finely shredded
  • 1 cup flour
  • 1/8 teaspoon cayenne pepper (some curry powder is also good if that’s your thing)
  • 1/2 teaspoon salt
  • 1 cup Rice Krispies cereal

Method:

Preheat oven to 350 F. In a medium bowl, mix together the butter, cheese, flour, cayenne and salt until it forms a ball stuck lightly together. (Use your hands or a wooden spoon to fully incorporate all ingredients.) Gently fold the cereal into the dough. Pinch off nickel-size balls and roll tightly between your hands. Place them about an inch apart on an ungreased cookie or baking sheet. When all the balls are rolled, flatten each one with the tines of a fork. Bake 15 minutes.

Cool crisps 5 to 10 minutes before removing from the pan to serve. Leftovers may be stored in a tin up to 1 week. Makes about 4 dozen.

Note: Alternatively, you can roll the dough into a long log, wrap it in plastic or waxed paper chill. When ready to make them, slice log into ¼” (or so) rounds and bake as directed above. They’ll take a bit longer so just watch them. The whole make ahead, roll and chill (or freeze if needed) thing comes in handy and the end result looks pretty pro.

How About Them Apples?

Full disclosure. This post is really an excuse to put up my favorite video clip of the season. Behold the way one chef dealt with a huge order of tarte tatins.   

https://www.youtube.com/watch?v=nbzw6y0pF3U

If more men knew that this was a step in the process of making apple pie we’d have a whole lot more male pie bakers. And while we are on the subject of men and food prep, you might enjoy the exploits of our favorite Russian Food hacker  (the kiwi and the pomegranate hacks were news to me).

But power tools aside, this is also the right time to remind everyone of all the great things to do with apples. There are lots of them this year, though not really in our orchard, which is a mixed blessing. No hauling bushels and grain sacks full of apples to the cider maker, but no homegrown apple cider. There are, however, more apples than we can possibly use, and here are my favorite ways to approach the task.

For Snacks:

Best, of course, is just eating these crisp juicy apples, which are the ideal for taking on the road or the trail. But when you need something a little more interesting, get dipping. Peanut butter and almond butter are excellent, healthy options, as is vanilla yogurt or one of my faves, a mixture of ground flaxseed and cinnamon. If you really need to make the hard sell on apple slices serve them with Nutella or, even better, with homemade salted caramel Cholliesauce.

For Breakfast:

It’s time for apple cheddar scones. It just is. Trust me on this. For apple cheddar pancakes (thank you Doug Haney) thinly slice up some Granny Smith or Mac- like apples and cook them down. Slice up sharp cheddar. Add both to the pancake right after you pour it on the griddle and cook the cakes as usual. You know to top them with–only real stuff!

For Lunch:

Add thinly sliced apples to your sandwich, especially if it’s in turkey and cheddar or grilled cheese family. Make a frittata with chopped apples and cheddar. Make an apple/ butternut squash soup like this one , or my slacker no recipe version that I swear I will post soon.

For Dinner:

Dip them in Guinness Fondue. Serve up some pork tenderloin with homemade caramelized applesauce. See below.

For Dessert:

If you haven’t already made this Apple Cake, do it! If you don’t have the mojo to make the cake at least make the brown sugar frosting and just smear it on an apple and call it good. Really good. The frosting is totally easy and all-time delish. And, especially if your apples aren’t winning any beauty contests make a Joni Mitchell apple pie.

For Fun:

Finally, if you prefer to drink your apples, mix up some hard cider sangria and enjoy the season!

Caramelized Applesauce Plus

rosy applesauce

Rosy pink applesauce from tree to table with one little stop on the stove.

This came about as a total mistake, after I got distracted while making a batch of applesauce with the thin-skinned apples that come off my favorite tree.  It appeared to be yet another burned disaster, another charred pot headed to the graveyard, but it did smell pretty good. The happy result was Applesauce Plus, which is sweet without added sugar and prettily pink. It was an instant family fave.

Ingredients:

  • As many tart, unpeeled red-skinned apples as you want.
  • Squeeze (or more) of fresh lemon juice.

Method:

Cut the cores from the apples and put them in a pot, barely covered with water. Boil until the water is thick and bubbly and the pot smells a bit like caramel. This takes a while, so you’ll want to ignore them for a while, but not be so far away that all the water boils away and you ruin your pot.

When the apples are sticking to the bottom just a bit and the pot smells really good, turn off the stove and let the whole thing cool. Smash the apples through a sieve or a food mill like this one (which is totally worth having), and add a squeeze of lemon. Enjoy it as is or on pretty much anything.

Hakuna-Frittata

Hakuna Frittata


Stay with me here. This will all make sense. I promise. One of my favorite food sites is Food52, but sometimes I avoid clicking on their emails because it opens a time-sucking Pandora’s box of recipes and ideas. The whole concept of spending oodles of time looking for timesaving ideas is perverse and ends up making me angry, after much time is gone forever. BUT, all that anxiety aside, one of my go-to features on Food 52 is their “How to make X without a recipe.” Learning a method vs a recipe really sets you free because you never have to worry about having exact ingredients, exact amounts or an Internet connection.

One anytime meal for which I never ever use a recipe is a frittata. I can’t be 100 percent certain on this but I read (while looking for something else no doubt) that frittatas were actually invented to use up leftovers. If that’s not enough to make them the home cook’s best friend, consider these features: they use simple ingredients that are pretty universally loved and that you usually have on hand; they are infinitely tweakable for food issues (unless you are Vegan); they are cheap, quick, comforting and tasty. Yes folks, frittatas will indeed set you free.

When you are thinking of something simple yet substantial to serve for dinner or breakfast, or of something nutritious that you can eat hot or cold on the road, or of a quick, easy dish to bring to a pot luck, or of what you can make right now (when you are not busy), to eat later (when you are so busy you can’t take time to boil water)—in all these situations you can either starve, lament your inability to plan menus, buy $60 of takeout or…you can Hakuna Frittata.

That’s right. Go ahead and sing the rest of the verse, if only to pay back your kids for years of Lion King songs stuck in your head….It means don’t worry, as long as you have some eggs.

I went ahead and looked on Food52 and sure enough they beat me to it with How to Make Any Frittata in Five Steps. If you think you can resist the rabbit hole of fabulous recipes, pictures and ideas on Food 52 check theirs out. If, like me, you thrive within Internet boundaries, check out my version here. I have purposefully not included exact amounts, but rather loose guidelines which beg to be challenged:

Ingredients:

  • Onions etc: 1 cup or so of diced onions or something in the onion family, like leeks, shallots, scallions. You can use a combo of them as well.
  • Seasonings: salt, pepper, dried or fresh savory herbs of choice.
  • Vegetables: Any veggies you like or have on hand: Broccoli and cauliflower–good. Leftover roasted potatoes–so Spanish of you! Fresh corn and peppers–yum. Last night’s roasted root vegetables–yep. A whole lot of zucchini from the neighbor? Bring it on!
  • Meat option: Cooked meat like bacon, crumbled sausage, ham, cut up chicken or turkey.
  • Eggs: Start with about eight for a normal frying pan. You can work up or down from there depending on what you have.
  • Cheese: A handful or more of your favorite. Cheddar is king here, but dollops of soft goat or ricotta works well too. Go Gruyere to pretend you’re in the Alps. If you’re feeling a little mean or lactose intolerant or both you can skip the cheese.

 Method:

Saute the onions in some olive oil or butter or a mix of both. Sprinkle some salt on them as they cook. If you are cooking for someone on a low sodium diet make sure they are not looking during this step.

When softened add other veggies. Cook them up until all browned and yummy looking. Here is where to add fresh or dried herbs of choice and let them ramble around with the veggies at the end of cooking.

This is a good time to stir in the meat, if you are using it.

Whip up eggs with a fork or in a blender, and pour them into hot skillet. Lift up the edges a bit as the eggs cook so that the uncooked parts run onto the hot part of the skillet. A little omelet art is in order here.

When the eggs are getting near set, sprinkle on the cheese and put the whole shebang under the broiler until is it browned to your liking.

Serve it up hot or at room temp and enjoy realizing that there is only one pan to clean. Go you!


Hit the Trail Scones

Not just for tea time. These trail mix-y scones can go the distance.

Not just for tea time. These trail mix-y scones can go the distance.

Scones. They sound so proper, so fancy, so….much of a pain to make. I used to think scones were too labor intensive to consider for every day food. That was until early one morning I was confronted with the task of making something get-out-of-bed worthy and take-on-the-road worthy within an hour. Scones saved my butt.

Here’s why: They call for cold butter vs softened; they involve no eggs and therefore no separate mixing vessels; they require only one baking sheet vs muffin tins that must be greased or lined with the ever-elusive muffin liners. Scones vs muffins? No contest! And that’s before the short cuts.

I know the sermon—baking is a science, weigh vs measure, be exact, blah blah, blah. But in the real world short cuts are important. Sometimes knowing they are there, whether or not you use them, gives you the mojo you need to embark on creating something delicious. That is why I am including my own short cut version along with the legit directions.  

There’s nothing really trail-like about these scones, other than the fact that I made them as I was leaving on a long hike and wanted to bring something that was sturdy enough to travel but more enticing than trail mix. I needed a way to use up some cream and incorporate the chocolate chips and nuts that were just begging for the proper vehicle. Knowing that I could use a food processor, dump the whole shebang on a baking sheet and form the scones right on that same sheet made them a possibility. Out of this scenario, the Hit the Trail Scone, and it’s slightly healthier cousin, the Almond Joy scone, were born.

“Are they ok?” I asked my son who shies away from my more adventurous creations, particularly those involving nuts. “They’re ridiculous!” he said. “Don’t put them on the blog—keep them secret!” But you know how I feel about secret recipes, so here they are.

Please customize them to make them all yours!

Ingredients

2 cups (10 oz) all-purpose flour
1/4 cup (1 3/4 oz) granulated sugar
2 1/2 tsp baking powder
1/4 tsp salt
1 stick butter (4 oz) (cold, cut into pieces)
1 cup (8 oz) heavy cream (cold)
*1/2 – 3/4 c miniature chocolate chips (depending on preference)
*½ cup roasted almonds, coarsely chopped

* any combo of dried fruits, nuts and/or chips will work, so use what you love or what you have on hand. Think dried cranberries and walnuts, dried figs and almonds, white chocolate and macadamia nuts, butterscotch chips and walnuts for Ron Burgundy fans, peanut butter chips and crumbled bacon for Elvis fans, etc.

Topping
1 egg, lightly beaten (or more of that cream you need to use up)
2 Tbsp sanding sugar, granulated sugar or coconut sugar.

Official Method

Preheat over to 425 degrees

Mix together dry ingredients. Cut in butter with pastry blender, two knives or your  fingers.

Add chopped nuts, chocolate and cream to ingredients in the bowl and blend together quickly with a spatula. Do not overmix.

Turn dough on floured board and pat into a big square or round, 1-inch or so thick. Cut dough into shapes of roughly equal size. Move pieces to parchment or Silpat lined baking sheet.

Bake as directed below.

Short Cut Method

The short-cut method begs for artistic license.

The short-cut method begs for artistic license.

Mix together dry ingredients in bowl of food processor. Add butter to processor and pulse until the butter is in smallish bits. Do not over process!  (Butter bits give scones their flakiness. Without the bits, scones become not very excellent muffins.) Pour contents of food processor into a large bowl. Add nuts and chocolate chips to food processor and pulse several times until they are broken into bite-friendly bits.

Pour chocolate chips and almonds into bowl with other ingredients and stir until just mixed. Add cream and blend together quickly. Do not overmix.

Roughly divide dough into two equal mounds. Plop each mound onto it’s own side of one baking sheet and shape each into a round or square. Do not over handle the dough (body heat and scones do not mix! See above butter bits intel).

Score each circle deeply into 8 wedges (or cut all the way through and move pieces slightly apart to allow them to cook more quickly. If you go with the square, score or cut it into similarly sized shapes of your choice.

Baking for both methods

Brush with egg wash or with cream. Sprinkle with sugar, or coconut sugar if you want to take this tropical theme seriously.

Bake for 14-16 minutes (or more depending on size) until golden brown.

Almond Joy Scones

Make as above but substitute well-mixed, full-fat coconut milk for cream, and if you’re a real coconut freak like me mix in ½ cup toasted, unsweetened coconut flakes with the chocolate chips and almonds. These take a few minutes longer to bake.

Bring it

These grab and go babies travel well in the car, in a pack, in a picnic basket, on a boat or to any gathering anywhere.

Trader Joes bonanza- Guests Gone Wild

Guests Gone Wild


Here comes 4th of July and the smokin’ hot heart of summer. If you’re lucky enough to have scored an invitation to the lake or the beach or any other fabulous summer getaway, you’ll be needing some accordingly fabulous host/hostess gifts, both to show your gratitude and for the all important purpose of GETTING INVITED BACK. This is no time to show up empty-handed.

For some good ideas on what to bring, take a look at our Good Giving page, or pick your favorite recipe and bring it along with a related container or decoration that will remind your hosts of what a tremendous time they had with you.

In my mind you can’t really go overboard with non perishable gifts, especially with people who have a houseful. And I used to think I did a pretty good job of overachieving on that score. That was until my sister started swinging by Trader Joe’s before her visits.

Knowing how much I love Trader Joe’s, nutty grainy things, value and weird food in general she now shows up with several bags of Trader Joe’s Bounty. Now I have a stash of farro and pink Himalayan sea salt, grab and go trail mix packets, five kinds of nuts and enough chia seeds to make a petting zoo. Here are just some of the ways this gift is thoughtful:

  • We don’t have a Trader Joes, so these are things I don’t often get my hands on.
  • Most of it is non perishable, so I can use it at my leisure, and my leisure is a big thing in the summer.
  • Most of it is either a healthy pre-made snack or the whole ingredients to make healthy food.
  • Lots of it is ready to serve, so when she showed up the night I was hosting Book Group and I had no plan whatsoever, I was completely rescued.
  • Many of the things are ingredients for recipes she had told me about, or that she knew I wanted to try. (She gave me all the things for my favorite Life Bread, right down to the psylium husks.)
  • Instead of even suggesting that I should be more Paleo and less gluteny she simply stocks my pantry with lots of the Paleo staples that are expensive and hard to find in my neck of the woods, so now I have no excuse for not giving her recipes a whirl. Bonus: we’ll have something to bond about bicoastally.
  • And finally (this is nice in more ways than I can possibly list but I have to stop somewhere), she goes overboard on coconut. I have an unreasonable love for coconut and now I have coconut flour, coconut sugar, coconut milk and even coconut cashews. Actually, those last ones are so good they’re actually mean.

So, that’s one example of a guest gone wild in all the right ways. Another tactic is to bring one special something that is both meaningful and useful, for which I turn the spotlight on my cousin Tierney from California who brought me this all time favorite dishtowel.

California Dreaming on a dishtowel.

California Dreaming on a dishtowel.

This works because:

  • It is pretty
  • It took up little space in her luggage and now in my kitchen
  • It reminds me of my roots in California
  • It will remind me of my cousin every time I use it.
  • I can use it every day.

 So there you have it. Two examples of awesome hostess gifts. If you’re really in a jam you can never go wrong by going to the farmers market and getting a whole lot of whatever is in season, some shmancy sparkling beverages and the most killer ground coffee you can find.

Since I’m working the family angle here, I have to give a shout out to my cousin Danielle, a devoted Bring It! fan who just hosted family and friends at her amazing wedding in Mexico, and posted the best wedding dress picture ever.  It sort of makes me want to renew my vows, underwater, with lots of agave. Congratulations Danielle and Eric and way to make us all want a do-over!

Happily ever after...and wedding dress storage solved!

Happily ever after…and wedding dress storage solved!

 Now go out there and be the best guest on the block this summer!


Strawberry Mania

Summer's strawberry bounty

Summer’s strawberry bounty in its many forms.

Strawberry season is getting off to a slow start in our corner of the world, but now the big grocery stores are full of them and with a little sunshine the farmers markets will soon be exploding with the good stuff. Of course, you’re not going to go wrong by simply washing them and letting everyone inhale them by the pint, but let’s go over just a few easy, yummy ways to use them.

Ready? Here we go…

First, a word on hulling strawberries. The frugal among us get torqued at wasting half a strawberry because SOME PEOPLE grab the stem, take one big bite and leave the rest for the compost bin. So we the frugal rush to hull all the strawberries and thereby enable maximum use of the fruit. The best way to do this of course is with a strawberry huller, and if you have one you are my culinary niche tool hero. If you don’t, here are two solutions to maximize each berry:

First, the most basic and humble vegetable peeler has a built in “potato-eye remover” at the end, which can just as well take on strawberry stems. You will quickly discover that you can’t manhandle a strawberry like a potato, but get as close as you can to the stem, plunge the tip of the peeler right in and dig out the stem. It takes about three strawberries to master this.

If that still sounds too much labor go ahead and chop off the tops, then use them to make your own shmancy strawberry water that will make you the envy of any yoga class:

Strawberry Water

After rinsing your strawberries, slice off their tops and dump them into a large jar. Fill it with water, let it sit for an hour or so and… Voila! Strawberry infused water. Drink deeply. Feel beautiful. Namaste

Worlds Easiest Strawberry Dessert

Ingredients:

  • Strawberries
  • Sour cream
  • Brown sugar

Method:

Grab a strawberry. Dip it first in sour cream, then in brown sugar. Eat. Repeat.

Strawberry-Rhubarb Compote:

This comes from the Bitten Word with inspiration from farmer Carrie at their CSA It is certified easy, very quick, kid pleasing, totally portable AND a great way to use up the rhubarb that might be taking over your garden. The guys at BW advise us not to get hung up on the amounts listed in this recipe. Depending on the amount of rhubarb and strawberries you have, the method is easily adapted. 

Ingredients:

  • 1 1/2 cups rhubarb, sliced into half-inch pieces
  • 1 cup strawberries, capped and halved (if using larger strawberries, you can quarter them)
  • 1/4 cup sugar

Method:

Place rhubarb in a saucepan. Sprinkle with sugar. Cook over medium heat until rhubarb begins to soften and fall apart (20 minutes). In the last 5 minutes of cooking, toss in the strawberries. Add a little lemon zest at this point for extra credit.

Remove from heat and let cool. Store in an airtight container in the refrigerator. Serve over good vanilla ice cream or yogurt, top with whipped cream or just put it on a spoon.

 Some Savory and Sweet Goodness

Balsamic vinegar and strawberries are a classic Italian-inspired combination. They can be served as a dessert, like in Ina Garten’s recipe below, in a salad with goat cheese and peppery greens (pepper is key to the strawberry/balsamic alchemy) like arugula or as an appetizer like on the bruschetta further down. I’ve even seen them on a pizza with bacon, but we’re not going there today.

 Balsamic Strawberries à la Ina Garten

 As with the compote, no need to be too particular on quantities. Just aim to get the proportions close:

Ingredients:

  • 4 pints (8 cups) fresh strawberries, sliced thick
  • 5 tablespoons balsamic vinegar
  • 2 tablespoon sugar
  • 1/4 teaspoon freshly ground black pepper
  • 2 pints vanilla ice cream, for serving
  • Freshly grated lemon zest, for serving

Method:

Thirty minutes to an hour before serving, combine the strawberries, balsamic vinegar, sugar, and pepper in a bowl. Set aside at room temperature.

Place a serving of the strawberries in a bowl with a scoop of ice cream or dollop of whipped cream on top and dust lightly with lemon zest.

Strawberry Goat Cheese Bruschetta

These are gooooood, kid approved and somewhat impressive to guests. Substitute whipped cream cheese if you’re not a goat cheese fan, but do try the goat cheese on your picky eaters. You might be surprised. This recipe makes 12 big slices which can easily be cut in half for easier eating. Remember the napkins!

Ingredients:

  • 1/2 cup balsamic vinegar
  • 12 slices Italian bread
  • 1 tablespoon olive oil
  • 1 pound strawberries, washed and diced
  • 2 teaspoons fresh thyme leaves, plus more for serving
  • 1 cup goat cheese, room temperature
  • salt and freshly ground pepper to taste

 Method:

  1. Heat vinegar in a small skillet over medium-low heat. Simmer until reduced by about half, 8 to 10 minutes. Remove from heat and allow to cool to room temperature.
  2. Prepare a grill for high heat. Place bread slices on a foil-lined baking sheet and drizzle with olive oil. (alternatively, assemble bread in a baking sheet, brush slices with olive oil, sprinkle with salt and bake at 350 until toasted to your liking.)
  3. Combine strawberries and thyme in a small bowl and set aside. (If your strawberries aren’t farm fresh and super sweet sprinkle them with a little sugar when nobody is looking.)
  4. Grill bread on the preheated grill until browned, about 3 minutes per side.
  5. Spread goat cheese on toasted bread. Add black pepper, salt, and reduced vinegar to the strawberry mixture. Spoon over the goat cheese topped bruschetta. Garnish with additional thyme.

These are easy to bring if you pre-bake/toast the bread. Simply bring goat cheese, strawberry/balsamic mixture and bread in separate containers and assemble on site.

Now let’s hope the sun shines on those strawberry fields so the berry fest can begin!


Mango Jicama Guacamole

Mango jicama guacamole

Let the Sunset fantasy begin.

We’re past Memorial Day, so you can all bust out the linen togs and start working on your guacamole recipes. You know how it rolls from here on out: Casual parties start to happen. You want to bring something that you know will be appreciated and eaten, that is homemade but not terribly taxing and that can probably be pulled off without a recipe. As long as you can lay your hands on ripe avocados you simply can’t go wrong with a good guacamole.

And you can go really right with this guacamole, because it has jicama AND mangoes, both of which (along with avocados) make me fantasize that I am actually in a Sunset magazine photo shoot. You’ve got crisp, sweet and creamy mixed in with spicy, tangy and juicy. And then you add cilantro, which makes everyone but my sister happy. And since it’s almost her birthday we can all just go ahead and substitute fresh mint for the cilantro if we want. Because it’s guacamole…and the first rule of guacamole is to improvise at will! No adobo? No problemo! Just sprinkle in some chile powder. It’ll all work out, even without a drop of tequila.

To show bicoastal reverence of a good guacamole, this recipe comes from Meracadito Cantina in Manhattan via Food and Wine, and with many thanks to our friendly local Hannaford’s where jicama is a totally reasonable $1.99/lb and where they double your refund if it turns out to be no bueno (see note below).

Ingredients

3 Hass avocados, cut into 1/2-inch dice
1 medium plum tomato, seeded and cut into 1/4-inch dice
1/2 small onion, cut into 1/4-inch dice
3/4 cup finely diced ripe mango
1/2 cup finely diced peeled jicama
3 Tbsp finely chopped cilantro
1 medium chipotle in adobo, minced (1 tablespoon)
1 small jalapeño, seeded and minced
2 Tbsp fresh lemon juice
Kosher salt
Tortilla chips, for serving

Method

In a large bowl, gently stir the avocados with the tomato, onion, mango, jicama, cilantro, chipotle, jalapeño and lemon juice until well mixed but still slightly chunky. Season with salt and serve with tortilla chips. Olé!

Note: Whereas in California the jicama roots make a quick jaunt from Mexico, they travel much further to get to our stores in New England. You most often find them heavily waxed…Brazilian super model before the SI swimsuit shoot waxed. We’re talking a thick coat that can prevent you from seeing the jicama’s true self.  Look for jicama with no soft spots and no oozing juices (never an excellent sign of health on anything). It should be firm, crisp and mild tasting when peeled. You won’t need it all for this recipe so slice up the rest, add some lime juice and store it in the fridge for snacks… or the next party. 

Bread of Life, sliced

The Bread of Life, or “That’s Life” Bread

Elsewhere on the Internet (namely on My New Roots) this seedy, flourless, unleavened, barely sweet and totally nutrition-packed bread is called the “Lifechanging Loaf of Bread.” That is quite a claim and one that begs to be debunked, particularly by my own family, some of whom refer to this as my “dirt bread.”

What can I say? Haters gonna hate. That’s life; hence, the abbreviated name for this bread. But for the right person—and you know who you are—this is, if not lifechanging, at least addictive. It relies on oats, chia seeds and psylium husks to hang together and get its breadiness. Whole hazelnuts give it texture and a touch of maple syrup makes it all just right. Toast it, or not, and top it with butter, honey, cheese, caramelized onion, roasted veggies or pretty much anything and give yourself a big fat gold star for healthy eating. Go you!

I’ll leave it to Sara Britton to answer any questions about substitutions and how in the heck she came to experiment with psylium husks. I will tell you, however, to find them in CVS with the Metamucil. Be sure to get the unflavored variety, unless you want your bread to actually taste like Metamucil.

A few other notes: She uses coconut oil or ghee (which I can’t pronounce let alone find) but you can also use butter; I add chopped dates for some chewiness and sweetness; she uses a flexible loaf pan for both mixing and baking. I don’t have one of those so I just used a regular loaf pan and lined the bottom with parchment paper to ease the first turnout (totally worth the effort, unless you want a bonus botched loaf to snack on); finally, I lived large and mixed it all in a bowl, which took away the stress of mixing in tight spaces, which I hate.

And now, just to go on record, for me this is absolutely addictive and perhaps even lifechanging, on a slow day that is.

That’s Life Bread

From My New Roots
Makes 1 loaf

Ingredients

1 cup / 135g sunflower seeds (or 1/2 cup each pumpkin seeds and sunnies)
½ cup / 90g flax seeds
½ cup / 65g hazelnuts or almonds, roughly chopped or sliced*
**½ cup dried dates or dried fruit of choice, roughly chopped 
1 ½ cups / 145g rolled oats
2 Tbsp chia seeds
4 Tbsp psyllium seed husks (3 Tbsp. if using psyllium husk powder)
1 tsp fine grain sea salt (add ½ tsp. if using coarse salt)
1 Tbsp maple syrup
3 Tbsp melted coconut oil or ghee (or butter)
1 ½ cups / 350ml water

*update: sliced almonds are my go-to for ease of both prep and slicing
**next update: Dates or dried fruit are optional but now an essential part of my dirt bread experience.

Method

1. In a flexible, silicon loaf pan (or a parchment lined regular loaf pan), combine all dry ingredients, stirring well. Whisk maple syrup, oil and water together in a measuring cup. Add this to the dry ingredients and mix very well until everything is completely soaked and dough becomes very thick (if the dough is too thick to stir, add one or two teaspoons of water until the dough is manageable). Smooth out the top with the back of a spoon. Let sit out on the counter for at least 2 hours, or all day or overnight. To ensure the dough is ready, it should retain its shape even when you pull the sides of the loaf pan away from it it.
2. Preheat oven to 350°F / 175°C.
3. Place loaf pan in the oven on the middle rack, and bake for 20 minutes. Remove bread from loaf pan, place it upside down directly on the rack and bake for another 30-40 minutes. Bread is done when it sounds hollow when tapped. Let cool completely before slicing (difficult, but important).
4. Store bread in a tightly sealed container for up to five days. Freezes well too – slice before freezing for quick and easy toast!

Life Bread by the loaf

Living life bread, a slice at a time.

Bring It

As mentioned above, for the right person this is the perfect host/hostess gift. If you’re bringing it to a mixed crowd you can always cover your bases (and maximize fans) by adding a loaf of easiest french bread ever or maple oat breakfast bread

Olympic Snow Drinking. Let the Games Begin!

Stronger, colder, yummier

Stronger, colder, yummier. The Olympic credo of cocktails.

From Russia with Love…and Vodka.

The following were created in honor of the 2014 Olympics and thirsty spectators everywhere. But they are really just launching pads for your own winter-coping creations. This winter thing is serious stuff. You can either complain about it or embrace it. Being outdoor people, we of course choose the latter, though often we embrace with one hand while holding a frosty cold drink in the other. Really, when you gather round a bonfire with friends and pour something sweet and boozy over snow what can possibly go wrong?

For all the following drinks the set-up is the same:

Fill and pack your desired vehicle with clean snow (or finely crushed/pulverized ice). Mix all liquid ingredients in a separate container (*or mix and store in a lidded container for transport. All these individual recipes can be made in higher volumes, something strongly encouraged on a cold winter night). Pour carefully and evenly over snow. Stir, enjoy, repeat as necessary.

The Snowchi

(A Moscow Mule on snow. The unofficial off-site drink of the 2014 Games)

The Vehicle: For individual drinks, a small soup Thermos (It stays cold and if they think it is borscht you may be able to sneak it through security.) For high volume a sap bucket with the super long straws used in scary communal Scorpion Bowls.

  • ¾ ounce ginger simple syrup (you know you are wondering how to use yours up)
  • ½ ounce lime juice
  • 2 ounce vodka

The twist: No ginger syrup? Make it with 2 parts ginger beer, one part vodka and a splash of lime juice. It will be more liquidy but will do the trick. Feel more aligned with Team Bermuda than Mother Russia? Sub dark rum for vodka. to make it a dark and stormy night.

Snowchis

Snowchis in formation, awarded to the worthy (or thirsty).

Booze-free snow drinks

Our 12-year-old server confirms these are quite versatile. Try straight OJ, or the Polar Vortex sans vodka.

The Polar Vortex

As comfort to all who are freezing their butts off this winter, this elixir is white as snow with a sweet whisper of the tropics.

The vehicle: something clear to show off the frigid Polar whiteness of it all.

  • ¼ cup light coconut milk
  • ½ ounce Maple syrup
  • 1½ ounce vodka

The twist: If you are trying to bulk up for your luge run use half and half or cream for the coconut milk. If you’re in training for your figure skating frock sub Coconut Dream or Almond milk for the coconut milk. It’ll be more slurpee-like than creamy but still effective. Aesthetics of clean white not an issue? Then give dark rum a shot, because we all know that dark rum goes with coconut like brooms go with curling, like Jamaicans go with bobsleds, like Russian judges go with cold hard cash.

*Coconut milk needs some serious shaking to mix evenly, so go with a lidded container and shake vigorously. Small caper bottles (see photo below) are perfect individual to-go containers.

The Alpen Pro

As a nod to après skiers everywhere, a classic rendezvous of bubbly Italian chic and sophisticated elderberry liqueur distilled in the heart of the French Alps.

The vehicle: A plastic champagne glass or something similarly shmancy. Individual servings only, unless you are drinking straight from the bottle.  Above all, keep it classy!

  • 4 ounce Prosecco
  • ½ ounce St. Germain

The twist: Champagne is of course an option here as well, and sabering the bottle will earn you extra points among your bonfire mates.

This whole enterprise might need some exhaustive research to fine tune, but come on— it’s Olympic season and we have nearly three weeks to peak. I know you can all rise to the challenge.

set up for polar vortex drinks

The Set-Up. Some of the fixings, plus a couple of race ready Polar Vortexes to-go.


slow cooker chicken chili

Fi-Fi to the Rescue (with chicken taco chili)

I have a friend (and you know who you are) who refers to her slow cooker as FiFi, short for “Fix It and Fugget It.” Of course, she is on her second slow cooker because she forgot about FiFi for three months while it was filled with leftover Chicken Marbella. But let’s fuggedabout that image right now, and focus on dinner….tonight…with zero effort. This recipe comes from Amy, who I am calling right out because she deserves credit on at least two fronts.

First, Amy appreciates the vast the difference between crockpot cookery and crockpot warmery, an issue discussed in the Fast and Slow Lasagna post. Other than chopping up one onion (and some cilantro unless you are a slacker like me and blew it right off), the only effort involved here is opening cans, and FiFi is the only dish called into service.

Second, Amy offered up a recipe that is as delish as it is easy. With a whole lot of cold winter nights and aprés ski opportunities in the forecast, and with the Super Bowl right around the corner this comes just in time. We ate this for dinner, for lunch the next two days and were not the least bit relieved when it was gone.

Ingredients

Makes 10 servings

1 onion, chopped
1 16-oz can black beans
1 16-oz can kidney beans
1 16-oz can of cannelli beans (use whatever combo of beans you have)
1 8-oz can tomato sauce
10 oz package frozen corn kernels (canned works too)
2 14.5-oz cans diced tomatoes
1 packet taco seasoning
1 Tbsp cumin
1 Tbsp chili powder
4 boneless skinless chicken breasts (or equivalent weight boneless, skinless thighs)
chopped fresh cilantro (for overachievers)

Method

Combine beans, onion, corn, tomato sauce, cumin, chili powder and taco seasoning in a slow cooker. Place chicken on top and cover. Cook on low for 10 hours or on high for 6 hours. Half an hour before serving, remove chicken and shred. Return chicken to slow cooker and stir in. Top with fresh cilantro. Dig deep and serve with cheese and sour cream to show you care.

OK we're ready. Bring on FiFi's finest chicken chili!

OK we’re ready. Bring on FiFi’s finest chicken chili!

Lunch, Deconstructed

Deconstructed lunch

Deconstructed lunch elements, waiting to meet each other.

Lunch can take me down, especially in winter. When we are scrambling to get out the door to training or a race, the idea of preparing lunch, after making breakfast, cleaning up and gathering/loading gear is a major buzz kill. But the penalty for not making lunch is hunger or French Fries. Lots of French Fries. NOT that I have anything against French Fries, and particularly the ones at the Dartmouth Skiway that must be double fried because they are so good. But we all know, the sad, cumulative consequence of too many French Fries.

My solution is (to try at least) to have a fridge full or delicious and healthy lunch fixings, ready to be combined the night before, or easily enough in the morning. Below are basic recipes for some essential elements, along with suggestions for the makings of the best darned lunch you can cram into a takeout container.  The recipes for the beets, lentils and onions come from Stone Soup. Build an arsenal of sauces from Get Saucy With Me to have on hand and you’re good to go, to the Skiway and beyond.

Skiway Deconstructed Lunch Basics:

  • Baked Sweet Potatoes
  • Roasted Beets
  • Massaged Kale
  • Parisian Lentils
  • Balsamic Onions

A few suggestions for other awesome things to have on hand:

  • Roasted nuts and seeds
  • Avocado
  • Roasted vegetables
  • Cooked grains like brown rice, quinoa and millet
  • Hummus
  • Hard boiled eggs
  • Chopped olives or tapenade
  • Cooked BACON, chicken and other protein. Did I say bacon?
Salads for two, in brilliant take out containers. Dressing in a repurposed caper bottle.

Salads for two, in brilliant take out containers. Dressing in a repurposed caper bottle.

Sweet Potatoes

Ingredients

  • However many sweet potatoes you want to cook in your hot oven.

Method

Turn oven on to 400.

Wash potatoes and dry them with a paper towel. Prick all over with a fork. (One exploded potato will cure you from ever forgetting this step.) Put potatoes on a cookie sheet to catch the goo that escapes from the holes. Line the sheet with foil if you want zero cleanup.

Bake potatoes for about an hour, squeezing them to test for doneness starting at about 45 minutes. I like mine to have some structural integrity for slicing later.

When done, let potatoes cool. They can be easily peeled by hand if desired. Store covered in the fridge.

Massaged Kale

There are many methods for this so don’t worry too much about the ingredient measurements or timing. Some recipes only call for salt in the massaging, others only for oil, others for oil, lemon juice and salt and still others for the entire dressing. The point is just to break down the kale a bit so it is still raw but friendly and makes a worthy bed for all kinds of other good stuff.

Ingredients

  • One or two bunches kale, washed, spun dry, stemmed and shredded or torn. *
  • Olive oil, salt, lemon juice

*(You can easily stem kale with a big sharp knife by holding it vertically from the stem end and running the knife down the stem. Or you can go rogue and use your fingers. Grip the stem between thumb and forefinger and zip down the stem.)

Method

Put kale into a big bowl. Drizzle with a Tablespoon or more of olive oil, a splash of lemon juice and a good sprinkling of salt. Massage kale with your hands until it softens a bit and is a shinier, dark green. Store covered in the fridge until  ready to use.

Roasted Beets

These keep a week or more in the fridge, so I generally make enough to fill up a large 9 x13 baking dish.

Ingredients

  • 1-2 bunches beets, or a few large ones.
  • Balsamic vinegar
  • Olive oil

Method

Preheat oven to 400.

Remove stalks from beets and scrub them well. Chop into wedges – either quarters, sixths or eighths. The smaller you chop, the faster they will cook. I like big wedges because I have more slicing and dicing options later

Splash with a few tablespoons of balsamic vinegar and the same of olive oil. Sprinkle with kosher salt.

Cover tightly with foil and roast for 45 minutes to 1 hour or until beets are tender. Season to taste. When cooled you can easily peel them by hand or with a knife, or just eat them with the peels.

Parisian Lentils

I love these any time of day, even for breakfast with an egg on top. Full disclosure: I never measure these. I just boil a bunch of lentils and add equal splashes of the seasonings at the end. And if I don’t have sherry vinegar I cut to the chase with a splash of straight sherry. Saves you the trouble of having a separate glass of wine with dinner (or breakfast in some cases). The recipe calls for topping these with fresh ricotta and parsley, which sounds awesome.

Ingredients

  • 7 oz French style green lentils (aka puy lentils)
  • 2 tablespoons sherry vinegar
  • 2 tablespoons soy sauce

Method

Place lentils in a medium saucepan and cover generously with water. Cover and bring to the boil.

Remove lid and simmer for 10-15 minutes or until the lentils are tender.

Drain lentils and return to the pan. Season with vinegar, soy and 2 tablespoons extra virgin olive oil. Taste and add salt as needed.

Balsamic Onions

I wasn’t going to include these but they are so good on pizza, sandwiches, salads and soups that they need to  be in. If you’re over the taste of balsamic at this point just use a combo of olive oil and butter and sprinkle generously with salt. This clearly makes a ton, but they keep for a long time and are addictive so a ton is a good thing. Feel free to halve of quarter, but don’t complain when you are out of them so soon!

Ingredients

  • 8 onions
  • 1/2 cup olive oil
  • 1/2 cup balsamic vinegar

(No need to use your best olive oil and balsamic)

Method

Heat oil in a large heavy based saucepan over a medium heat.

Halve onions, lengthwise, then remove the skins and slice into half moons. Adding chopped onions to the oil as you go.

Cover and cook on a medium low heat, stirring occasionally for about 1/2 hour or until onions are very soft but not browned.

Remove cover and add balsamic. Bring to a simmer and cook, again stirring from time to time for about 20 minutes or until the sauce has reduced a little and the onions are slightly brown.

Bringing it in Style: Boot Camp Bonnie


Bonnie and Sue with just a smattering of supplies.

Bonnie and Sue with just a smattering of supplies.

The best defense is a good offense. I’m not talking football here— I’m talking about the holidays. All that giving and sharing and jolly spirit is a whole lot easier if you are prepared. We’re pretty good on the cooking end of it, but when it comes to presentation we went to a pro. We went to Bonnie, AKA Boot Camp Bonnie (because of her dedication to early morning sweating).

Bonnie is not only incredibly generous, but also creative, which is a killer combo this time of year. She doesn’t just show up with cookies for the group—she shows up with a candy-striped hat box brimming with individually wrapped packages of peppermint meringues. Starting with a paper bag she ends up with something that could grace the cover of Martha Stewart magazine (if Martha ever shared the stage, that is). Bonnie was kind enough to share some of her tricks, and the arsenal of staples she keeps on hand to turn humble mason jars, paper bags and boxes into gift-worthy pieces of art. Everything can be found at party stores, craft stores, department stores, pharmacies and even grocery stores. Bonnie looks out for deals year round and stocks up when the getting is good. Here are some things to look out for:

Gift bags

Daunting, yes, but your friendly neighborhood craft or dollar store has plenty to offer.

The Basics: Containers in a variety of shapes and sizes–these can range from cardboard boxes, wire-handled takeout containers, fancy embellished boxes and hat boxes to coffee mugs, decorative bowls, paper bags and metal pails or buckets; lots of ribbon, bows, raffia and raffia wrap; festive plastic bags and twist ties; washed and repurposed bottles or jars and the never fail mason jars.

 Accent materials: Sparkly stuff like leaves, stars and snowflakes; silk flowers and greenery; fancy ribbon like moss ribbon, textured or stretchy ribbon; stray jewels, bling and beads.

Natural materials: Boxwood and evergreen sprigs; hardy fresh herbs like rosemary and bay leaves; flowers in season like hydrangeas and sunflowers; dried flowers; shells and sand dollars; feathers; pinecones, acorns, seeds, pods and whole nuts; whole spices like cinnamon sticks and star anise.

Ornaments and decorations: miniature bells, toys, figures, props; clip on birds and mini stuffed animals; seasonal cookie cutters or small kitchen novelties.

One word--Clearance!

One word–Clearance!

Stamps (rubber and stick-on), seals and stickers: These are great to close up takeout containers or to write gift messages on. Get them at stationery and sundry stores.

Tools: If you have but one tool, make it the small but mighty glue gun. Use it to affix or join ribbons, put pine cones and shells on packaging. Gold and silver metallic sharpies in wide and fine tips. Scissors and both single side and double stick tape.

Gift tags and labels: You can never have enough! If you keep them on the plain side you can use them year round.

Wrapping and Tissue Paper: Again, be an opportunist and keep a good supply, especially of tissue paper which does everything from adding a decorative touch to a gift bag to protecting a stack of fresh baked cookies. Also, keep a stash of heavy duty paper for the good stuff and for gifts that need to stand up to transport.

This is just a partial list. As Bonnie reminds us, the main thing is to be creative and have fun with it. If you need a little inspiration on what to wrap here’s the recipe for some killer Christmas cookies, courtesy Bonnie our Good Gifting Goddess.