Category Archives: Apres Anything

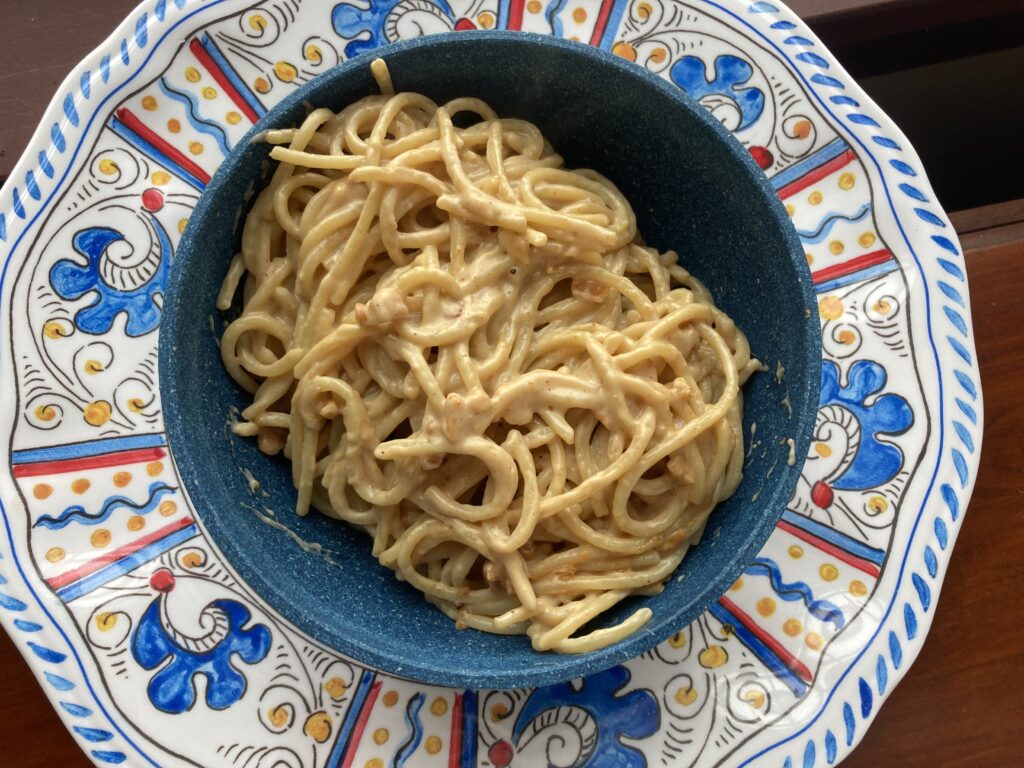
Happy Day Noodles

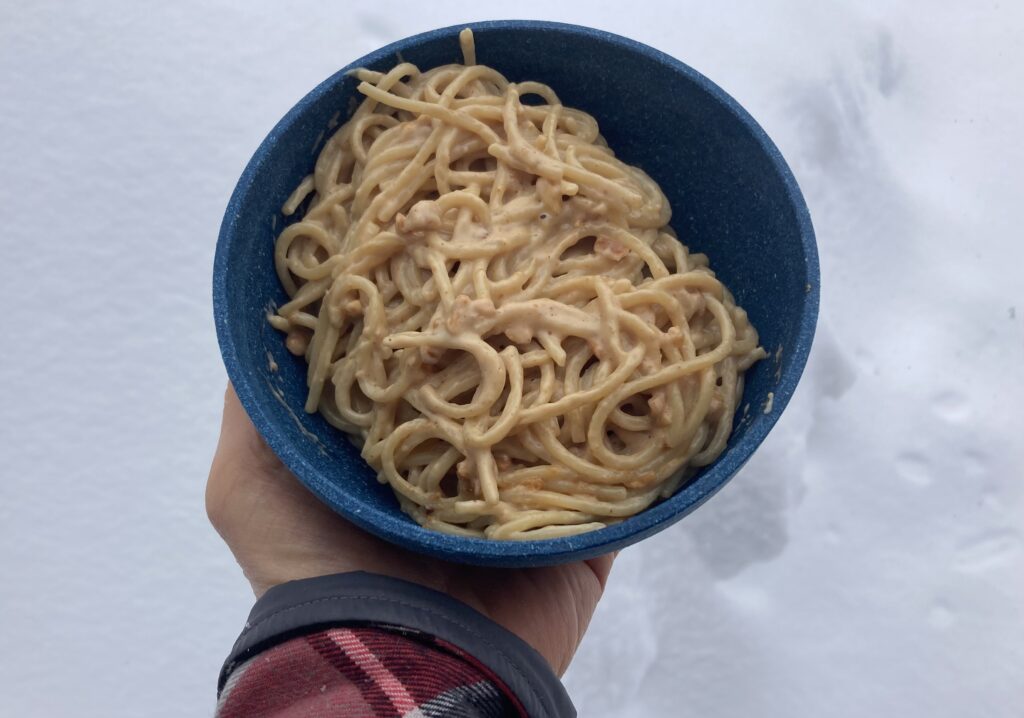
This started out yesterday as a sad pathetic post about life and lemons and fresh starts, a post that was killing my will to live as I wrote it. And then today…it snowed! The instant mood shift makes me realize how closely snow is connected to my psyche. I suspect everyone has a natural Prozac. Snow is mine.

I grew up loving March because it meant sun and snow and spring skiing and friends. It was the cap-off to a good winter or a bad winter but a winter in any case. This year, by the time March rolled around in these parts, it felt like winter never really started and then decided to throw in the towel early. I did the same, giving up on winter entirely in the beginning of March. Just looking at my weather app made everything feel so wrong, so sad, so hopeless. So I stopped.

But then, this snow storm comes out of nowhere, entirely burying cars (unheard of in this hood), and delivering a proper snow day—one that stops everything and everyone from doing whatever they were doing and going wherever they were going.

It took me back to the “Storm of 82” which featured a whopper late March snowstorm that coincided with my 16th birthday amidst a houseful of older ski racers. By then we’d been snowbound for nearly a week, so supplies were running low while boredom was peaking. When someone put peppermint schnapps in his hot chocolate at breakfast, it just made sense.

This recipe pays homage to great snow days, that are all about hunkering in with whoever you’re with, and eating whatever you’ve got. It requires ingredients that are likely to persist in even the leanest, picked-over kitchen.

Officially, they are known as Eric Kim’s peanut butter noodles, and also midnight noodles, for reasons that will be obvious to anyone stumbling home late and hungry.

There are so many things I like about this recipe:

  • First, it hits the trifecta of being easy, cheap and tasty.
  • It uses ingredients most people would have in their kitchen at any given time.
  • You can dress it up or dress it down. Did I stir in some chile crisp? Hell yes! Would it welcome a protein or veggies? Hell yes again! It is also just right nekkid, as is.  
  • It’s versatile. It works with ramen and spaghetti and I’ll wager with any pasta type thing you can scare up in your pantry. Vegan or gluten-free adaptations? Child’s play!
  • Finally, I love that it is deemed a single serving, so if you do manage to plow through the whole bowl, which would be impressive, you can take some comfort in knowing it was pre-ordained.

I’m here to tell you that you need not wait until a late night or a snow day to make this. Make this whenever the heck you need something quick and tasty and satisfying. Here’s hoping you enjoy your Sunday, or Snow Day or whatever day you’ve got.

Happy Day Noodles

AKA Eric Kim’s Peanut Butter Noodles
Makes 1 very generous serving

Ingredients:

  • Salt
  • 4 ounces spaghetti or 1 individual package instant ramen (seasoning packet saved for another use)
  • 2 tablespoons creamy peanut butter (low-budget recommended, but I used the chunky good stuff and it was just fine)
  • 1 tablespoon unsalted butter
  • 1 tablespoon finely grated Parmesan, plus more for serving
  • 1 teaspoon soy sauce

Method:

  1. Bring a pot of water to a boil (and salt it, if using spaghetti). Cook the noodles according to package instructions. Reserve 1/2 cup of the cooking water, then drain the noodles and return to the pot. Turn off the heat.
  2. Add the peanut butter, butter, Parmesan and soy sauce. Vigorously stir the noodles for a minute, adding some reserved cooking water, a tablespoon or two at a time, until the sauce is glossy and clings to the noodles. Season to taste with salt.
  3. Top with more cheese, if you’d like, and serve immediately

Note: I made this for the first time and it got six thumbs up (from three people). Two more unexpected visitors arrived later that day and I made another batch, earning it four more thumbs up. So, that’s two batches and seven thumbs up, with no extra ingredients. It does the job!

Everyone Crackers: Because Special Orders Don’t Upset Us

“Hold the pickles hold the lettuce….” If you had a heartbeat in the 70’s you know what comes next (and if not, there’s this https://youtu.be/pprTvtHnnTo)

Cutting to the chase of the Burger King jingle, special orders don’t upset us in this house. Granted, as a mother of bottomless pit boys, I love it when people eat everything with glee; but,  I also enjoy the challenge of the hunt when finding recipes to accommodate the “specials” — the gluten frees, the vegetarians, the paleos, the nut-frees, the dairy-frees, the garlic and cilantro haters, the Vegans and any “special combo” of the above. 

Regularly catering to a Paleo, Gluten-free, Vegan “special combo” might put me over the edge. But then again, I’d just make a LOT of these crackers. Everyone Crackers are the reverse concept of Everything seasoning, in that they have few main ingredients and tons of flavor options so they can accommodate everyone. Even the sesame averse have an easy workaround (see recipe notes at the end). 

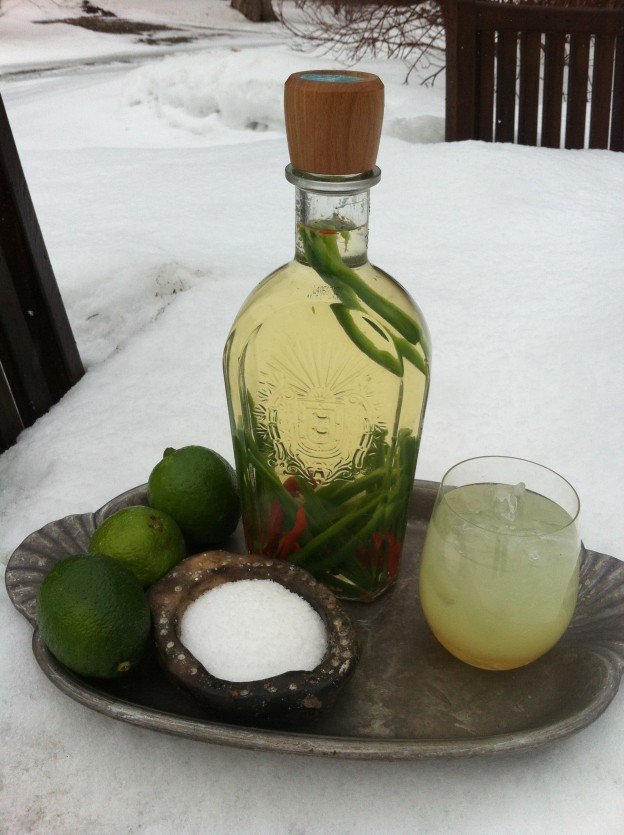
These goes out to Jules, who also brought us the triple spicy margarita. For that alone she is worth any amount of extra effort. Jules is a “special combo” of gluten free and nut free. That last part is especially tough for someone like me who tries to slip nuts into everything. It’s also difficult because so many gluten free baked goods depend on the heft and flavor of nut flour. 

Say hello to cassava flour, the longtime secret weapon of the gluten-averse paleo crowd. Even for people with no dietary restrictions, these crackers that come straight from the Bojon Gourmet (kinda my food hero) are solid gold. They make a fine addition to any app spread and a vehicle for anything (well hello again, chile crisp!)

Full disclosure, making crackers is a bit of a pain. Within the cracker-making realm, however, these are as easy as it gets: One bowl, few ingredients and no chopping, pre-bake scoring, flipping, or resting time on the counter. The only real skill involved is getting them to a uniform thickness, and if you’ve done any time with Play-doh you’ve got this.  

You will need parchment paper and ideally two baking sheets without rims. Other than that, no special equipment. The ingredients, once you have them, last a good long time so you’ll be set for several batches.

Besides being substantial and delicious, these crackers allow for plenty of room to riff with seasonings in the mix or on top. I left the recipe exactly as written with my notes in italics. Stay tuned for another partner recipe from Bojon Gourmet–this one a crazy-good Vegan “paté”  that has only one wacky ingredient and stands on its own with meat eaters. It does have nuts so, sorry Jules…you’ll have to double down on the crackers!


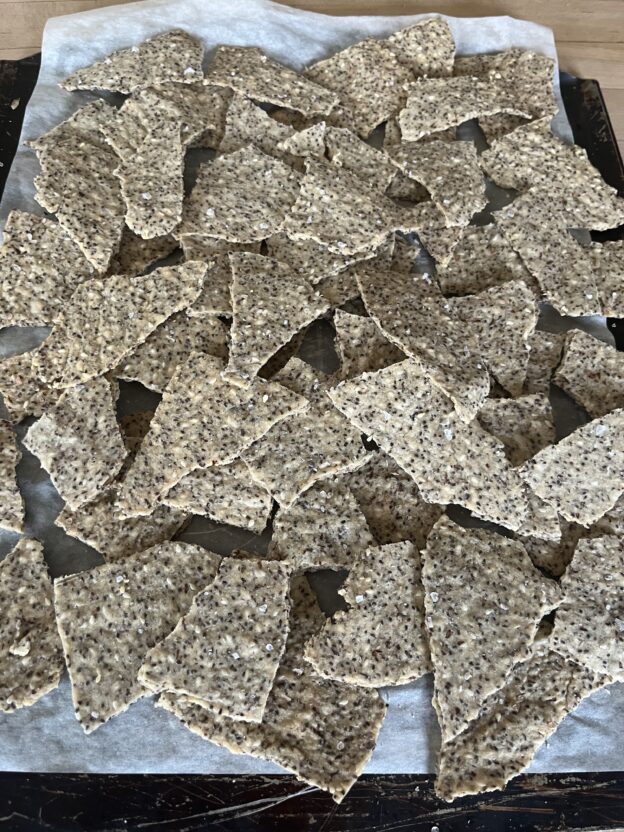
Crackers, pre-breakup

…and after the bust

Everyone Crackers

From Alanna Taylor-Tobin AKA the Bojon Gourmet
Prep Time: 30 minutes minutes
Cook Time: 50 minutes minutes
Total: 1 hour hour 20 minutes minutes
Servings: 40ish crackers

Ingredients

  • 1 cup (160 g) cassava flour*
  • ½ cup (85 g) flax seeds (ground flax seeds will also work in a pinch)
  • ½ cup (70 g) sesame seeds
  • ½ cup (60 g) sunflower seeds
  • ½ teaspoon fine sea salt
  • 1 cup + 2 tablespoons (265 ml) boiling water*
  • ¼ cup (55 g) olive oil, plus 2 tablespoons for brushing (I often forget to add the oil until after everything is mixed. It still works out, but aim higher than me here and add the oil with the water)
  • flaky salt, for sprinkling

Method

  • Position racks in the upper and lower thirds of the oven and preheat to 300ºF.
  • Stir together the flour, seeds, and salt in a large bowl.
  • Add the olive oil and water, stir to combine. Let sit 10 minutes, then knead with your hands in the bowl into a smooth ball. Divide in two.
  • Roll one piece of dough between two pieces of parchment paper into a large, thin sheet that’s about the size of a baking sheet. If the dough cracks or tears, just squish it back together. You can trim away the wonky edges, stick them into the corners, and continue rolling to make a rectangle. Repeat with the other piece of dough.
  • Brush the dough all over with olive oil and sprinkle with flaky salt.
  • Bake the crackers until light golden, about 40-50 minutes (check at 15 minutes if using a different flour as some bake much faster than others).
  • Let the crackers cool, then break them into 2 to 3-inch pieces. If the crackers aren’t crisp enough after cooling, just return them to the oven for another 10 minutes or so.
  • Store the crackers airtight for up to a week or two… if you can make them last that long!

Notes and substitution suggestions:

For a non-paleo version, try these with buckwheat or corn flour. Or for a more traditional gluten-ful version, use rye flour or spelt flour. Decrease the water to 1 cup if using a flour other than cassava. 

Feel free to play fast and loose with the seeds, using any combination you like. You can try adding hemp, poppy, chia, and/or pumpkin seeds. See why I love this woman???

Seasoning suggestions (add to the dough or on top of the crackers):-minced fresh rosemary-everything bagel seasoning-1 teaspoon cumin or fennel seed-oregano-garlic and/or onion powder-nigella seed-flavorful oil, such as walnut or toasted sesame-chile flakes, Aleppo pepper, or togarashi-nutritional yeast. This is where you can really customize these, which I do differently every time. I often add lemon zest to the dough but my latest batch has Oaktown Spice Vadovan (fancy curry powder) in the mix. The endless array of seasonings from Trader Joe’s make great toppers. 


Party Time Smashed Potatoes

Let’s just say, hypothetically….you’re heading into Memorial Day without a real plan for what to bring to the various cookouts; or, that you knew your house was filling up but hadn’t really planned out how to feed everyone; or, you cannot face going into the fancy grocery store looking for obscure ingredients ONE MORE TIME. I’ve got you covered!

Memorial Day weekend is no time for being fussy or experimental. It is about the basics and the classics, things that taste even better when you’re eating them outdoors in flip flops. Enter, the potato. Specifically, the smashed potato.

I’ve seen these many times but finally made them and am now a little but addicted.

Cutting to the chase: You are boiling whole small potatoes (those small ones in the mesh bags are perfect for this), then smashing them into disks/pucks, then salting them, slicking them up with oil and baking them at a high temp until they are crispy. You flip them halfway through because you know that crispy is everything.

Honestly, no need to follow the recipe if you do these things, because this is more method than recipe, more arts ‘n crafts than science. Which is to say, you can do this! And I hate being bossy but I really think you should. You can also make these in stages as you have time (and without taking up fridge space), making them perfect for the weekend.

There are a bazillion recipes for these on the interwebs, but I am running with this one from Cook the Vineyard because they had some pro tips (like using a high smoke point oil vs olive oil) That said, I included my own comments (in italics) that cut down on labor and laundry.

But that’s not all! As a bonus I’ve included the simple limey dipping sauce which is perfect on these and remarkably versatile at snazzing up leftovers, sandwiches, tacos, bowls and veggies, whatever. Any sauce that strikes your fancy will do here, and there’s never any shame in straight up ketchup.

And should you need tried and true ideas for the rest of the feast you can’t go wrong with the OG hits: Funitella, Hero Slaw, Oven fried chicken, Watermelon Tomato Salad, Panzanella…you know.

Crispy Smashed Potatoes

Recipe mostly from Cook the Vineyard

Serves 4, or more as an appetizer

Ingredients

  • 16 baby red potatoes, consistently sized (the little bagged ones, red or yellow, are perfect)
  • Kosher salt (lots, and other seasonings as you like)
  • 1/2 cup grapeseed oil or other vegetable oil I don’t think I’ve ever used that much oil. See recipe note.
  • Limey Drizzling Sauce (optional)

Method

  • Preheat the oven to 475°F. Line a heavy-duty rimmed baking sheet with aluminum foil. Put a piece of parchment paper on top. You can also go this with just parchment paper or straight on a baking sheet. Arrange a double-layer of dishtowels on a large cutting board or your kitchen counter. (No need for dishtowels I’ve found. Just mind any wandering taters)
  • Put the potatoes in a Dutch oven or other medium-large pot and cover with at least 1 1/2 inches of water. Add 2 teaspoons kosher salt, cover loosely, bring the water to a boil, and reduce to a simmer. Uncover and cook until the potatoes are tender all the way through, but not falling apart, about 18 to 22 minutes. (Check with a paring knife.)
  • Drain and transfer the potatoes to the dishtowels. (I bag the dishtowels, pour out most of the water then use tongs or a slotted spoon to lift the potatoes out of the water onto the parchment. You’re just trying to get the water off and smash them) Arrange the potatoes a few inches apart, and let them cool for a few minutes. Using another folded dishtowel (or piece of parchment or just a big spatula), gently press down on each potato to flatten it into a patty about 1/2 inch thick (or up to 3/4-inch). Let the patties cool for a few minutes more, transfer them to the baking sheet, and let them cool for 10 to 15 minutes longer. (Or, at this point, you can hold the potatoes in the fridge for up to 24 hours and on the counter for hours, covered with plastic or that top piece of parchment. Bring to room temp before roasting.)
  • Season the top of the potatoes with salt and pour the oil over them. Carefully flip the potatoes over and gently rub them in the oil so they are well coated. Season the top side with more salt. Roast for about 15 minutes, carefully slip the potatoes over with a spatula, and continue roasting another 10 to 15 minutes (a total of about 28 to 30 minutes) or until they turn a deep orange brown color and are crisp around the edges.
  • Serve warm (seasoned with more salt if necessary) with Limey Drizzling Sauce (optional) or with salad greens.

All smashed up and ready to party

Bringing It:

These are ideal warm from the oven, but I have yet to meet the person who turns one down at room temp. For extra credit you can bring them on their baking sheet, pop them in the oven for a few minutes and transfer them to a serving platter. If you are besties with the host bring them over pre-smashed and bake them up on site.

Limey Dipping Sauce

Also from Cook the Vineyard\

Ingredients:

  • 1/3 cup mayonnaise
  • 1/3 cup Greek yogurt
  • 2 tablespoons fresh lime juice
  • 1 teaspoon freshly grated lime zest
  • Kosher salt

Method:

Whisk together all the ingredients, including a pinch of salt, until well-mixed. Refrigerate until serving time.


Hot Chicks: Let’s get the party started!

Got your attention right? If so, we’re halfway there to you having an excellent, healthy go to appetizer to add to your arsenal of fall food and tailgate all-stars (looking at you, Funitella Bruschetta). Furthermore, we have surmounted the hurdle that has, until now, prevented this deliciousness from breaching the confines of the Vegan recipe domain.

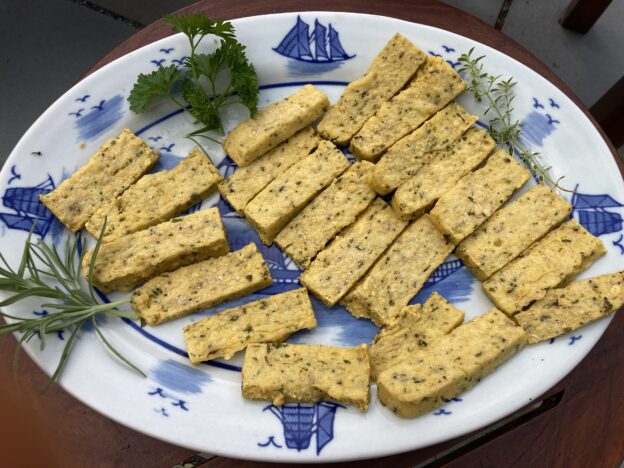
Elsewhere on the Internet, this recipe (technically chickpea panisse) is known as “chickpea fries.” As one who deeply resents food impostering, I get why calling these fries is a turnoff. Those two words do not belong together. So, rather than calling this creation fries, think of it as a snackified polenta—comfort food goodness that you can pick up and eat with your hands. It’s sounding better already.

The magic here, however, is not cornmeal. It’s chickpea flour, or besan, which is now one of my kitchen staples. In case you missed it, there is actually a cookbook out called, “Chickpea Flour Does It All.” (Christmas is coming people). This I learned from “Hey Nutrition Lady” who is a big fan of it, and featured this recipe on her site as proof.

The process here is very easy to do and to remember once you’ve done it. Bring a pot ofwater to a boil, and gradually whisk in the chickpea flour (using a 2:1 ratio of water to flour). Once the mixture is thickened, add some olive oil, fresh chopped herbs, salt and pepper. Pour that into a baking dish and let it chill in the fridge. Later (even days later), you can cut your slab into whatever shapes you like and call them whatever you like: “Fries” “Burgers” “Sliders” etc…or ditch the air quotes and just call them hot chicks. Spray or brush them with olive oil, bake ‘em up, give a shake of salt and you’re good to go.

Creamy on the inside, crispy and salty on the outside and eminently dippable…what’s not to love? I have served these many times now, to a variety of company, ranging from full Vegan to righteously carnivorous, and everyone in between. All have come back for more. Leftovers also make an excellent component of the next day’s lunch. 

For a full expose on the bennies of chickpea flour and very thorough coverage of chickpea panisse, check out the full post here.

In the meantime get on out there for a bag of besan and you’ll never be stumped for an appetizer again.

Ingredients

  • 6 cups water
  • 3 cups chickpea flour
  • 1 teaspoon each salt and freshly ground black pepper
  • 3 tablespoon olive oil
  • 2 tablespoon parsley finely minced
  • 2 tablespoon oregano finely minced (rosemary and/or thyme are excellent as well)

Method:

Make the Chicks

  1. Generously butter or oil a 9 x 11 baking sheet and set aside.
  2. In a large pot, bring the water to the boil over medium-high heat.
  3. Once the water is boiling, reduce the heat to medium and whisk in the chickpea flour a little bit at a time.
  4. Continue whisking for about 10 minutes, until the mixture is thick and smooth (I find that a few lumps are unavoidable, but you won’t notice them later).
  5. Stir in the olive oil, herbs, and a bit of salt and pepper to taste.
  6. Pour the chickpea mixture into the greased baking sheet and spread out into an even layer. Once it has cooled slightly, cover with plastic wrap and refrigerate for at least 1 hour, or overnight (slackers, this can be a few days as well).

Bake the Chicks

  1. Pre-heat your oven to 400°F / 200°C (this is a good place for your convection fan, if you’ve got one).
  2. Line a large baking sheet with parchment paper or a silpat. Slice the firm batter into sticks for chickpea fries, or rounds for burgers, etc.
  3. Line them up on the baking sheet, and brush or spray with a bit of olive oil.
  4. Bake for 10 minutes, then turn to the other side, brush again, and replace in the oven to bake for another 10 minutes. They should be slightly golden and crispy on the outside.
  5. Remove from the oven, salt generously, and serve with dip* of choice (think anything that goes with burgers and fries, or perhaps some liquid gold) and a glass of whatever makes you happy.

*Extra credit for serving Hot Chicks with this homemade version of “Bitchin’ Sauce”  Vegan dip Nirvana that makes a fine accompaniment to Hot Chicks. We’ll make it here later, I promise. And my spicy friends, let’s not forget to invite chile crisp to this party!)


The Resta the Fiesta

Cinco de Mayo is coming at us like a Hump Day freight train. This year, we’ve got masks, we’ve got shots for the most part. We’re ready! Let’s review. We’re all set with triple spicy margs, and salsa verde, and today we’re adding one new non-recipe app to get the party started.

But first, we’re visiting to the archives for some basics:

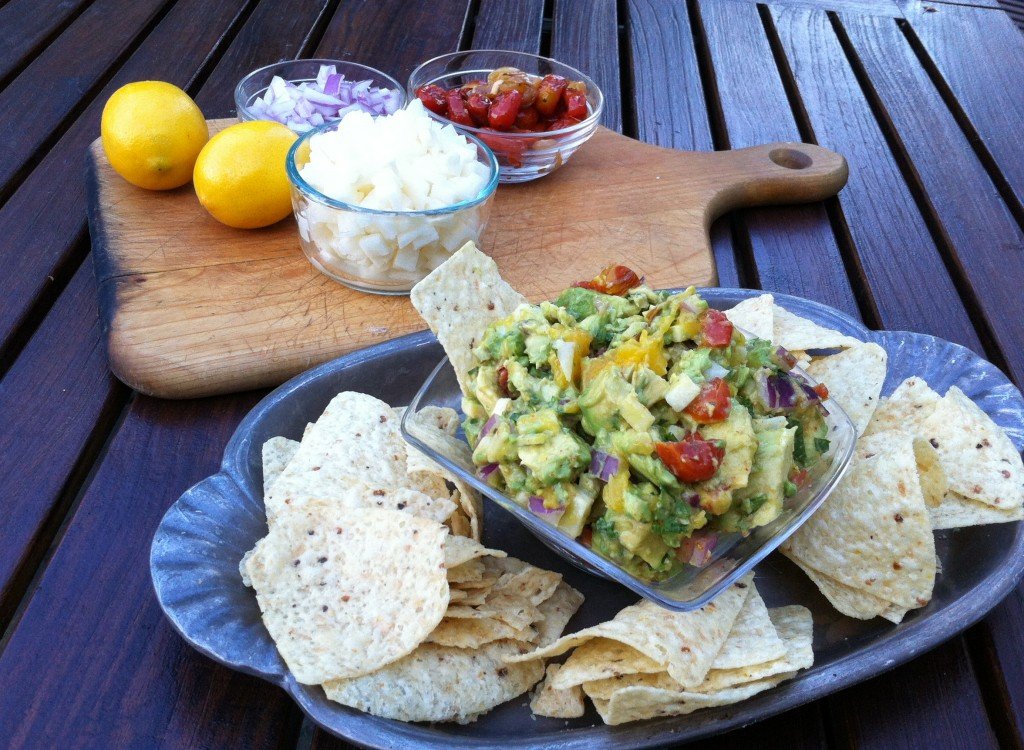
For the apps, there must be guac. Lots of guac. I know full well you do not need a recipe for it, but in case you want to go a little off the reservation, there’s this crazy one with apples, pecans and tequila. For a more mainstream option try this Mango jicama guacamole or just add some chopped jicama to your guac for a refreshing crunch. Score points for doing (slightly) more than using your can opener with some easy and delish balsamic black beans. They can be an app or go on/into tacos, burritos enchiladas, quesadillas, tostadas, etc.

For the sides? Bust out the Hero Slaw. Full stop. It’s right for any party but especially for a fiesta because it’s fresh, crunchy, spicy, make-aheadable and feeds a crowd. It’s got it all, and neighborhood lore to boot. So, do that. For a more tropical totally refreshing salad Hot Cha Cha Pineapple Avocado Salad is a strong move. There’s got to be a corn course somewhere in there, and for some reason I have no go-to corn salsa recipe. Not to worry! This Mexican street corn inspired corn salad will do quite nicely.

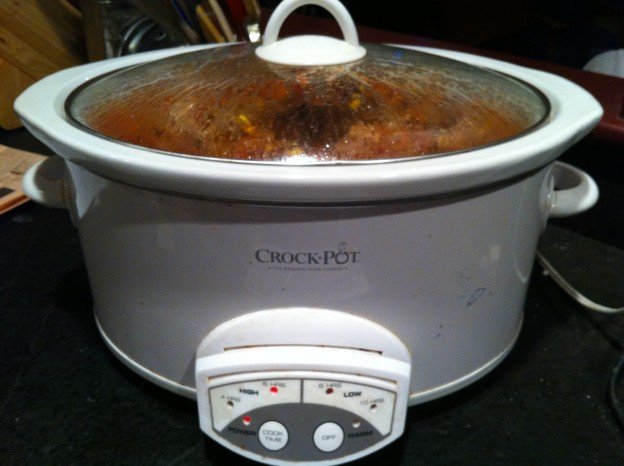
As for the main event, let’s give ourselves the gift of simplicity. That could be: Baked tacos; quesadillas spiced up with Chile crisp, or not; a batch of Chicken taco chili all made easy in the crockpot; summer simmer chicken or some baked salsa verde chicken made with your salsa verde reserves.

Dessert, if you choose to eat it, has got to be Nina’s Margarita Pie. It just does. That said, nobody will complain if you bust out cholliesauce, call it dulce de leche and pour it on anything.

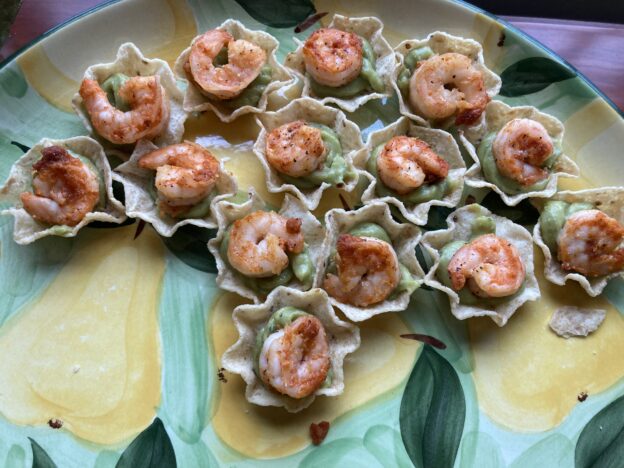
And now, for the non recipe pictured above. These Spicy Shrimp Bites, passed down through a friend chain, are deLISH and so basic. I hope they kick off many fun fiestas to come!

Spicy Shrimp Bites

Ingredients:

Tostitos scoops corn chips
Guacamole of choice (no shame in store-bought for this)
Smallish raw shrimp* (nekkid-no shells or tails)
Touch of oil for cooking
Taco seasoning

Method:

Cook up the shrimp in a skillet with a bit of oil until just done (a few minutes each side). As they are cooking, sprinkle them with taco seasoning on each side, and give them all a little stir together when they’re done.

Fill each chip with a bit of guac and top with a shrimp. Ta-da and Olé!

*Shrimp sizing on the package is a little like jean sizing. Not reliable. Your best bet is to eyeball the shrimp and imagine the Tostito boat it’s going in. I’m thinking 51/60 is a good zone, but if you find your shrimp are too big just cut them in half.

Bringing it:

If your trip is relatively tame, bring these pre-assembled, covered on a rimmed dish. Otherwise, these are easy and quick to put together on site. Just make sure you are kind to your Tostitos so there are enough intact to build your bites.

Return to Fiesta Salsa Verde

The thing about getting through this pandemic with any sort of grace, is having hope. For me, that hope has now come down to Cinco de Mayo and the prospect of a great excuse to drink margs and eat an irresponsible amount of avocados. Maybe I misplaced the irresponsible in this sentence, but regardless, this is an occasion worthy of preparation.  Let’s venture back to last Cinco de Mayo, which was on a Saturday and coincided with what was supposed to be Derby Day. Instead, it became a a sad early milepost to all the celebrations we would lose.

But this Cinco de Mayo will be different. It marks us clawing back at a social life.

Granted, it’s on a Wednesday which is kind of fitting, because long ago my inner circle determined Wednesday is the new Friday.

So let’s spend the rest of our month planning for it shall we?

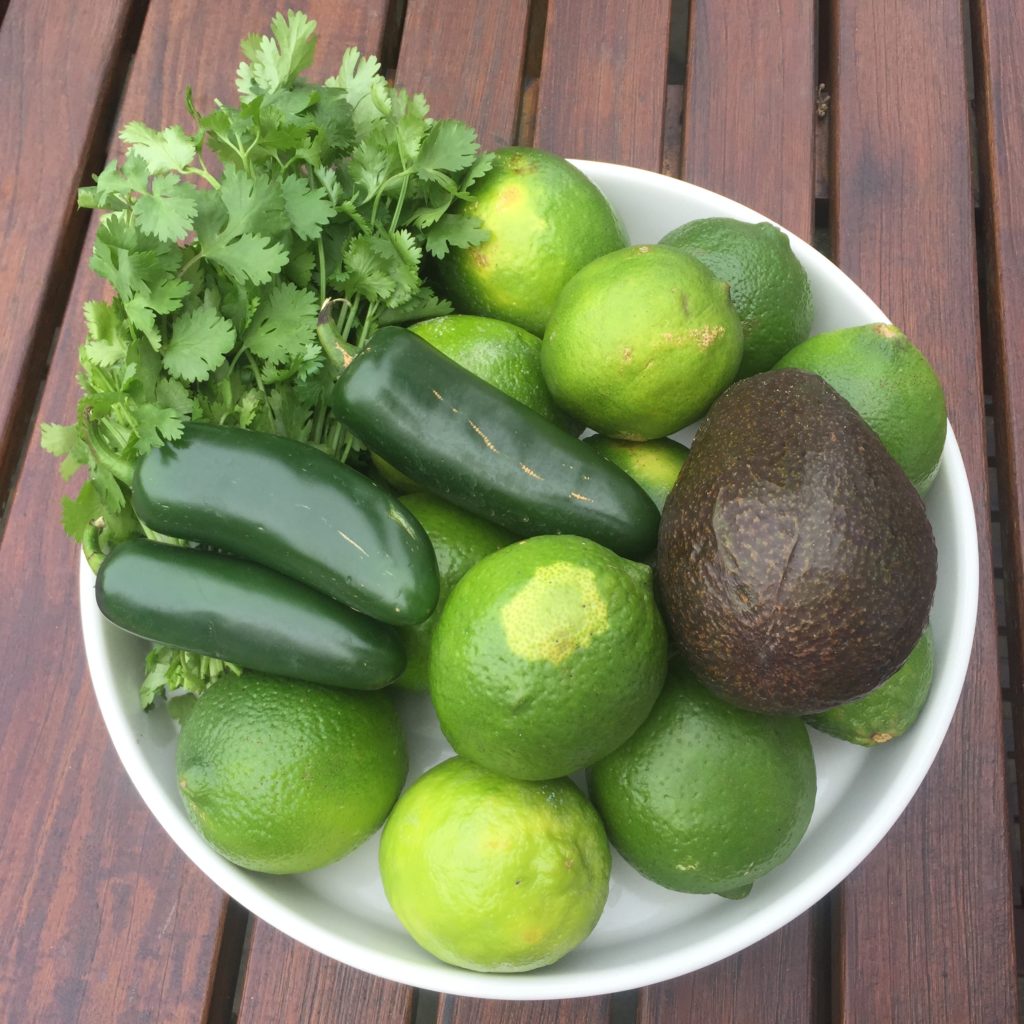
First up, salsa verde. This is a super easy recipe that involves roasting tomatillos, onions and jalapenos then pulverizing them with a mass of cilantro (Nothing to see here, Sister B). The original recipe calls for olive oil, which tastes great but gives it a weird texture if you refrigerate it. I say bag the oil, but the recipe Gods say you’ve got the option.

I never ventured into tomatillos before, because the husks seem intimidating. They seem to say, “These are for other, more skilled people.” But it turns out, tomatillos are for this person! They’re tangy and kind of citrusy, so they’re even good raw, but amazeballs when roasted and salsified.

I came across this recipe after making an awesome and awesomely easy crock pot recipe of salsa verde chicken, that basically involved chicken and a jar of salsa verde. My friend loved it and wanted to make it for his mom who is on a low sodium diet, so we looked at the label on the jar and…no bueno!

Making salsa verde was the pro move here, and luckily it is totally easy. Easy seems like a great place to start for our Cinco de Mayo prep, so get yourself some tomatillos and let’s get this party started!

Fiesta Salsa Verde

Ingredients:

12 oz. tomatillos, husked, washed, and halved
1 small white onion, quartered
2 jalapeños, seeded and sliced in half
2 tbsp.vegetable oil
Kosher salt
Freshly ground black pepper
2 c. cilantro leaves and tender stems (chopped up if your blender is not top notch)
1-3 tbsp. lime juice (depending on taste)
1/4 c. extra-virgin olive oil (totally optional)

Method:

  1. Preheat oven to 450°. Toss tomatillos, white onion, and jalapeños with vegetable oil on a sheet tray, and season with salt and pepper. 
  2. Roast until softened and charred in spots, about 20 minutes. Let cool.
  3. Transfer roasted vegetables, cilantro, and lime juice to a blender and blend while streaming in olive oil, until mostly smooth. Season with salt and pepper. 
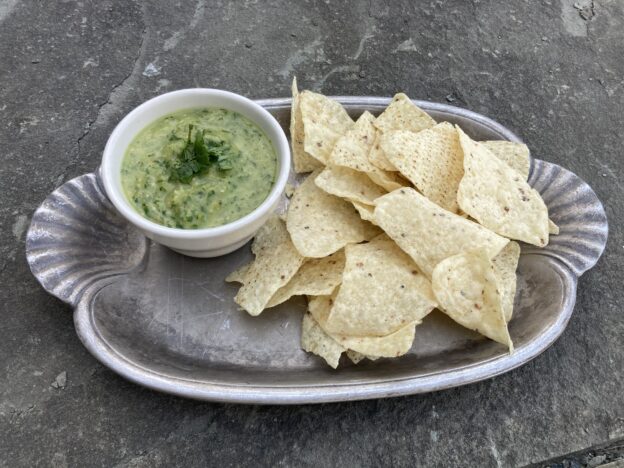
  4. Serve with tortilla chips.

Serve with chips alongside quick easy cheap salsa or…. bake up a batch of baked salsa verde chicken (thinking it would work with tofu as well) or… press the big fat easy button and use it to smother chicken in a crockpot.

Next up…a review of our Bring It Fiesta basics. And yes, we’re starting with Hero Slaw!

It’s the weekend— Have a ball!

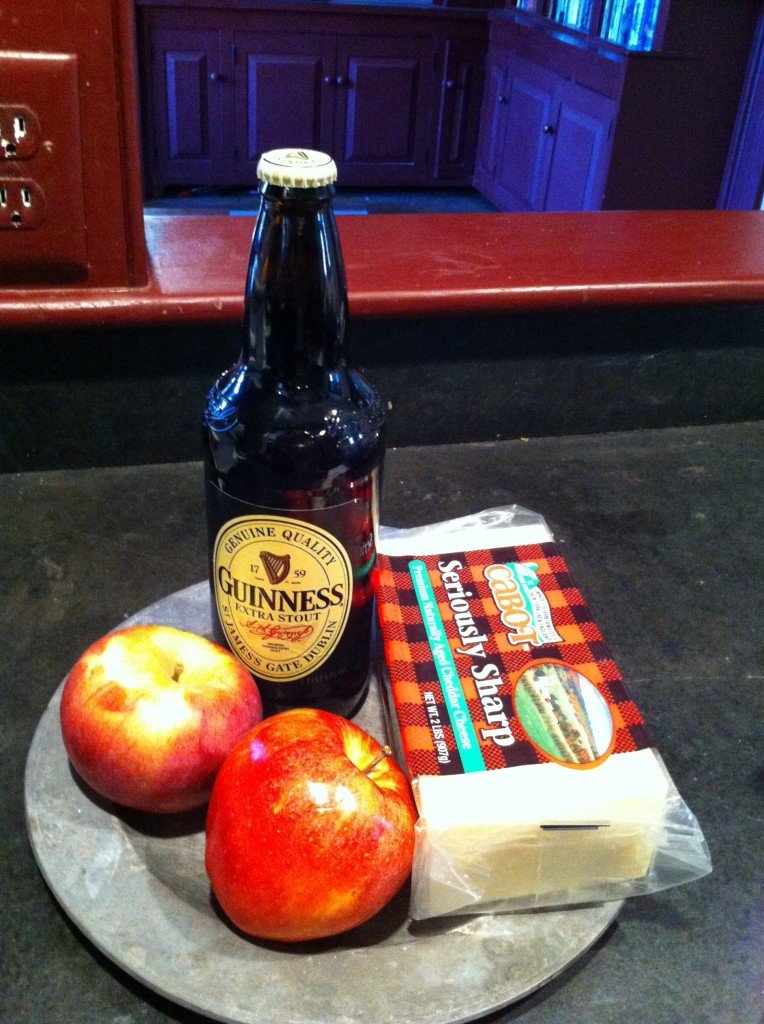
Props to the McNultys of Hanover, for coming up with the idea of theme dinners to turn these Saturday nights in quarantine into something a little less, uh, quarantiny (as in, the state of restriction vs the popular cocktail). Last weekend they kicked it off with an après ski theme featuring Bring It’s own Guinness Fondue.

Their outdoor firepit version was not only inspiring, but also an excellent choice considering our fine spring weather. With the polar air expected this weekend, fondue is a solid option.  

Or….might I suggest, balls! Meatballs and “meat” balls are very versatile, can be made ahead and can accommodate many dietary needs. We’ve got Buffalo Chicken Meatballs, these quite excellent gingery sheet pan meatballs that I have made many times and never managed to capture on camera, the vaunted Ikea meatballs (secret recipe just revealed) and, featured here today, the shockingly tasty and “meaty” meatless meatballs.

This is a great recipe to have in your arsenal especially now that the shortage du jour is meat of all kinds. Whether you are trying to eat less or no meat, or you just can’t get your hands on the stuff, you need a good vegetarian meatball recipe, and here it is friends.

They take a bit of elapsed time, because you have to cook the water out of the mushrooms and let the whole shebang sit in the fridge for a spell, but they’re totally easy. And hey…we’ve got time! You can even show off  your domestic skills, make a double batch and stock your freezer.

As a bonus this recipe comes with a soundtrack suggestion suitable for any stage of creating or eating your Saturday night special. Crank yourself up some Queen because, well, we’re having such a good time, we’re having a ball.

Where’s the picture? Have you ever tried to get an appetizing picture of meatballs? Enough said…but how about another pic of fondue night? Happy weekend all!

 Ooh la la! Just another typical night around the fire pit.

Chef John’s Meatless Meatballs                                                                      

Barely adapted from AllRecipes

Ingredients
Makes 20 meatballs

1 tablespoon olive oil
1 lb / 453 gr white mushrooms, finely chopped (use the food processor to save time)
1 tablespoon butter*
½ cup finely chopped onion
2 garlic cloves, minced
½ cup quick cooking oats
4 to 5 tablespoons grated Parmesan cheese*
½ cup breadcrumbs
4 tablespoons fresh chopped parsley
2 eggs, divided*
1 teaspoon salt
¼ teaspoon ground black pepper
¼ teaspoon dried oregano
Pinch cayenne pepper

3 cups of your favorite tomato sauce
½ cup shredded mozzarella cheese (or any other cheese you prefer, or no cheese at all).*

*Vegans and Vegan dabblers you’ve totally got this. I’ve made these with Vegan butter, your favorite cashew parm, aquafaba and no cheese on top and they were delicioso.

Directions

Heat olive oil in a large skillet over medium-high heat. Add mushrooms, sprinkle with one pinch of salt and cook, stirring every so often until the liquid from the mushrooms has evaporated, about 10 minutes.

Stir in the butter, and cook on medium for about 5 minutes, or until golden brown.
Add onions and sauté for 5 further minutes, until translucent. Add garlic and sauté for 1 further minute, until fragrant.

Transfer mushroom mixture to a large mixing bowl.

Stir in oats and mix until thoroughly combined. Add Parmesan cheese, breadcrumbs, parsley, 1 egg, salt, pepper, oregano, and cayenne pepper (if using).

Mix together with a fork until crumbly. Stir in remaining egg and mix to combine.
The mixture should hold together when pressed.

Cover and refrigerate for at least 2 hours (overnight best).

When ready to cook, preheat oven to 450°F (230°C). Line a baking sheet with parchment paper.
Scoop 1 heaping tablespoon of mixture, and with dampened hands roll into meatballs.

Arrange on the lined baking sheet.

Bake until golden brown, about 15 to 20 minutes. Remove from the oven and let cool completely.

At this point you can refrigerate or freeze the meatballs until ready to use, or use immediately.
Bring tomato sauce to a boil in a large skillet (or saucepan), lower to a simmer, and gently stir meatballs into the sauce until coated.

Simmer meatballs in sauce for about 30 to 45 minutes. Sprinkle with mozzarella cheese, cover with a lid and let the cheese melt (about 4 to 5 minutes).

Sprinkle with chopped fresh parsley and serve over spaghetti, zoodles, spaghetti squash, in a meatball sub or just plain nekkid.

PS. Can’t get enough Vegan balls? Got more cans of black beans than you know what to do with? Try these from Minimalist Baker, who never steers you wrong.

           Eat UP people!

Raising the Potato Bar

Are you ready for the world’s easiest recipe? You’re in luck, because the world’s second easiest recipe—baked potatoes in a crock pot—wasn’t seamless. They were ok, but when we’re faced with the whole day to contemplate lunch and dinner ideas, and the whole Internet to peruse them, “just ok” doesn’t cut it.

This little miracle of low work/high reward cooking hacks comes to you from your crockpot or, in fancy talk, your slow cooker. Ever since discovering that you can cook beets by simply washing them and chucking them in a crockpot (than you Auntie Tina!), I’ve had new four season respect for my crockpot.

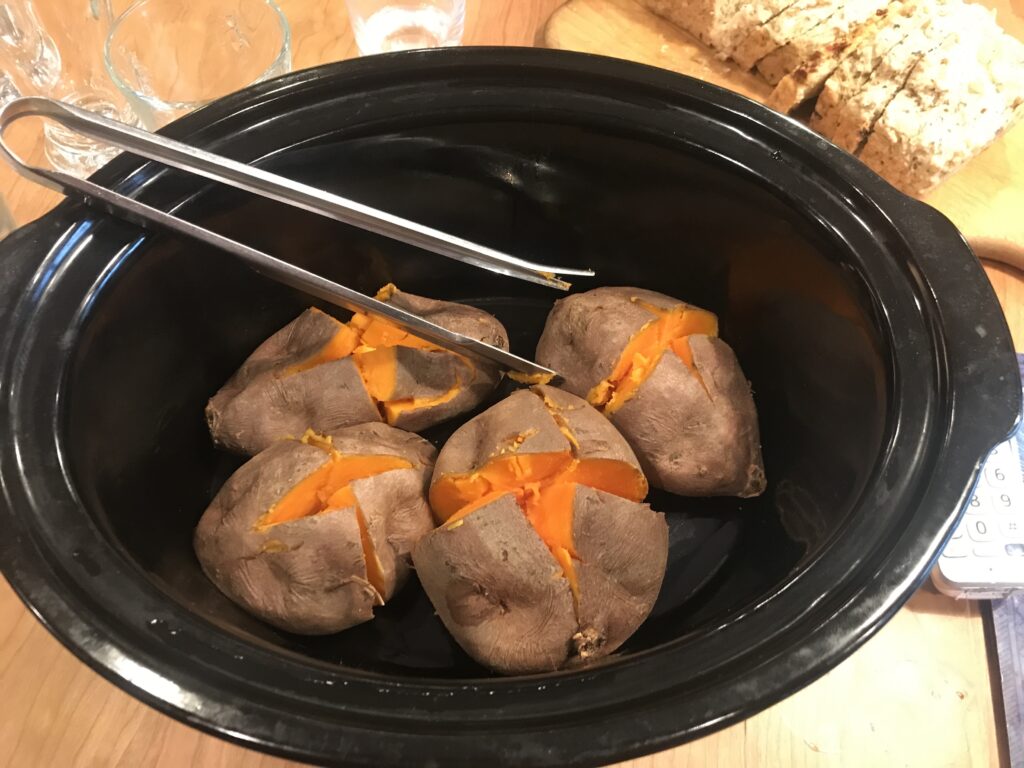
Sweet potatoes are just as easy as that, but provide a much wider range of options for a wider range of tastes. These come out perfectly cooked and even crisp on the outside.

Best yet, however, is that all you do is wash them, and load them in the pot. Here’s where they have it on straight up russet potatoes, which need to be pricked, oiled, salted and wrapped in foil before they go into the crock pot. Granted, that is far from difficult, but the russets also didn’t have the same texture as potatoes baked in the oven. I’m not giving up on them, but I’m also not ready to rave about them.

Crispy on the outside, creamy on the inside crockpot sweet potatoes, however, are now my jam. I hope they solve many of your, “What am I going to feed these people today???” moments, or just make YOU happy one lunch at a time.

Slow Cooker Sweet Potatoes

Ingredients:

Sweet Potatoes to fill up the bottom of your crockpot (I’ve done up to 5)

Method:

Wash sweet potatoes and fit them into the crockpot in one layer. (You can probably stack them but I’ve never needed that many)

Cook on low for 8 hours or on high for 4 hours. Crockpots all vary, especially ones that are 20 years old. My potatoes were totally good at 3 hours on high and 7 hours on low.

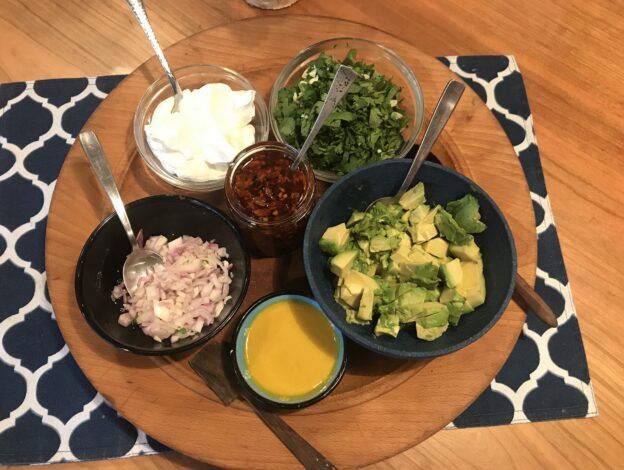
Top with standard baked potato toppings, or whatever makes you happy. A few of my go tos, if you’re feeling saucy: liquid gold sauce, chile crisp, balsamic black beans, as easy peanut sauce and of course any salsa or guacamole.


New Year’s Resolution Vegetables with Pomegranate Cha-Cha

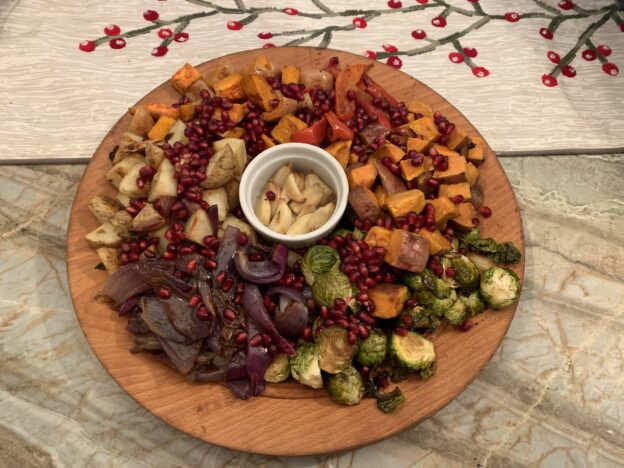
Hey! You there by the last swig of eggnog. This is your year. It’s your year to be the one who brings vegetables to the party with your head held high, and your hand held up for a high five. This recipe is your first mission. 

It comes to us from Here and Now’s resident chef Kathy Gunst.  I first made it for this past Thanksgiving. Since then, it’s made a lot of appearances, thanks in large part to the pomegranate de-seeding savvy that can be yours in one quick video tutorial.

As Kathy notes this is a mix and match dish. There is no magic formula, so clean out the veggie drawer, grab the rogue pomegranate that is still hanging in the fruit bowl looking for a purpose, and prepare to impress. The main things to remember here are:

  • Roast vs steam the vegetables. As in, give them their space, and…
  • Group them by type so you can remove veggies that roast quicker and let the others get their due.

Other than that, this recipe is pretty loose, though I’d say Brussels sprouts, some kind of winter squash and red onion are kind of key. This recipe makes tons of dressing, so go ahead and overdo the vegetables if that’s your thing, or just be psyched to have extra pomegranate vinaigrette in your arsenal.

And as if this healthy, beautiful, tasty dish needed another bonus, the veggies can be roasted earlier in the day and the vinaigrette can be made a day ahead of time. Assemble it all just before serving, hot or at room temperature.

Roasted Vegetables with Pomegranate Cha-Cha

Ingredients

  • 8 new potatoes, scrubbed and left whole (if large, cut in half or into quarters)
  • 1 medium sweet potato, scrubbed, and cut into 1/2-inch thick pieces
  • 1 small Acorn or Carousel winter squash, peeled, cut in half, deribbed, deseeded and cut into 1/2-inch pieces
  • 1/2 to 1 pound Brussels sprouts, ends trimmed and outer leaves removed, left whole
  • 1 large sweet red pepper, cut into 3/4-inch wide strips
  • 1 whole garlic, 1/4-inch sliced off top and left whole
  • 1 medium red onion, peeled and cut in quarters
  • 1 sweet white Vidalia onion, peeled and cut into quarters
  • 1 cup baby turnips, ends trimmed and left whole (if turnips are bigger than a golf ball, cut in half or into quarters)
  • 8 ounces carrots — about 8 small carrots or 3 to 4 larger ones — peeled, trimmed and cut into 1/2-inch long pieces
  • About 1/4 cup olive oil
  • Salt and freshly ground black pepper
  • 1/3 cup balsamic vinegar

The Pomegranate Vinaigrette

  • 1 cup pomegranate seeds and 1/3 cup of pomegranate juice (from 2 fresh pomegranates, or use 1 cups preseeded pomegranate seeds plus 1/3 cup bottled pomegranate juice)
  • Salt and freshly ground black pepper
  • 3/4 cup olive oil
  • 1/3 cup balsamic or white or red wine vinegar

Instructions

  1. Heat the oven to 425 degrees.
  2. Prepare all the vegetables as described above. Place the vegetables a row at a time (keeping all the carrots together, all the onions together in row, etc.) on a large sheet pan or two pans or a shallow roasting pan. You don’t want to use a pan with high sides or it will steam the vegetables rather than let them roast and turn golden brown. Drizzle the olive oil on top and season liberally with salt and pepper. Roast for 20 minutes.
  3. Remove from oven and drizzle vinegar on Brussels sprouts. Flip vegetables over and then return the pan(s) to oven for 20 minutes. Check to see if vegetables are done by piercing with a small sharp knife. Remove any vegetables that are tender and continue cooking the others until softened, about 5 to 10 minutes. The vegetables can be roasted a day ahead of time; cover and refrigerate.
  4. Make the vinaigrette: In a small bowl or Mason jar, mix half the pomegranate seeds and juice (if using), salt, pepper, oil and vinegar. Taste for seasoning. The dressing can be made a day or two ahead of time.
  5. If you made the vegetables a day ahead of time, remove from the refrigerator. After you remove the turkey from the oven, place the vegetables in a 300-degree oven for about 10 minutes or until warmed through.
  6. Arrange the vegetables on a serving platter and drizzle with a few tablespoons of the vinaigrette and the remaining 1/2 cup of pomegranate seeds. Serve remaining vinaigrette on the side.

Chile Crisp, Condiment of the Year

And now, in time for your Labor Day entertaining, I present the third of three condiments, and by far the best. I discovered this recipe way back in early summer, nestled in the margin of “The Simple Issue”  of Bon Appetit. Within a week the page was permanently folded back, stained and a little greasy, and since then my fridge has never NOT had a jar of chile crisp in residence.

The catch on this spicy, sassy, savory creation is that it takes some effort to make. You can cut yourself some slack by buying pre-peeled garlic cloves. Even with those, you’re still going to have to do a lot of thin slicing. Soooo, dig deep! It’s the last weekend of summer, people. Get yourself a sharp knife and a good playlist and get going. There’s still time to make yourself the MVP by bringing this to the party, or spicing up your own patio fare.

But first, a couple of things: I’ve now made this several times , and each time I’ve overdone it on the volume of shallots. Only once did they really crisp up—which was tremendous and worth cranking up the heat a bit and then babysitting the pot until they were evenly brown. That said, it was pretty tremendous all the other times too. Just make sure you brown the shallots and garlic without burning them. I now use a bigger pot than seems necessary, which allows the shallots to really relax in their hot oil bath.

It’s worth going to the original Bon Appetit recipe and reading the comments. I think “off the hook” is the best reader description. We’ve put it on burgers, quesadillas, sandwiches, pizza, baked sweet potatoes and eggs; into salads and on bruschetta and burratta and toast. It’s so going to get stirred into soups this fall. I may draw the line at using it as an ice cream topper, but…no promises.

Finally, there is apparently an excellent version of this at Trader Joe’s called chile onion crunch. Add that to the pain of not having a TJ’s near me. For now, I chop.

PS This one goes out to Sister B, who hates bread and butter pickles and cilantro (see quick, easy, cheap salsa), but hung in there for this. Three’s the charm, baby.

Chile Crisp

Ingredients

  • 4 small shallots, thinly sliced (I end up with 1 1/2 cups or so, which is probably wayyyy too much, but I’m greedy and my shallots are apparently jumbo)
  • 2 heads of garlic (HEADS, not cloves), separated into cloves, sliced. (Google says that’s about 24 cloves)
  • 1½ cups vegetable oil
  • 2 3″ cinnamon sticks
  • 6 star anise pods
  • 1 2″ piece ginger, peeled, very finely chopped
  • ¼ cup crushed red pepper flakes
  • 2 Tbsp. soy sauce
  • 2 tsp. sugar

Method:

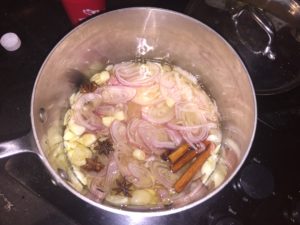
  • Bring shallots, garlic, oil, cinnamon, and star anise to a simmer in a medium saucepan over medium heat. Cook, reducing heat as needed to maintain a gentle simmer and swirling pot occasionally, until garlic and shallots are browned and crisp, 20–25 minutes.

    Shallots prepping for the spa

    (Take your time—you want to drive all the moisture out before they brown.)

  • Mix ginger, red pepper, soy sauce, and sugar in a medium bowl. Strain shallot mixture through a fine-mesh sieve set over ginger mixture. Let garlic and shallot cool in sieve (this will allow them to crisp further) before stirring back into chile oil. This is the time to take out the cinnamon and star anise too.
  • Do Ahead: Crisp can be made 1 month ahead. Cover and chill.

Bringing It:

Divide the goods into one big jar or smaller jars that you can fit a spoon into. Put the lids on tight and prepare to make a lot of friends. If you pour off a bunch of the oil you can then use it to make a sassy version of aquafaba mayo.

A shortcut worth every penny

Quick, Easy, Cheap Salsa

I know, it’s summer and we should be all about fresh tomatoes (and corn of course). That said, when it comes to salsa, you can really never have enough. So, when there is a quick, easy and cheap way to make a boatload of salsa yourself, bring on the can opener. (For further proof of canned tomato greatness, see Funitella Bruschetta.)

No need to belabor the intro here. I love a chunky fresh salsa with all kinds or weirdness in it: beans, corn, mango, etc. I also love a straight up tomato salsa with fresh jalapeno, lime and cilantro. This is that salsa, AKA Pioneer Woman’s Restaurant Salsa (she even gives you a video in case pushing buttons is a challenge). It makes a TON, so get a few jars ready, fire up your food processor and be ready for the weekend.

Coming up next: The third of three must-have condiments. Get a playlist and a sharp knife and prepare for some chopping. I promise it’s worth it!

Quick, Easy, Cheap Salsa

Ingredients

Two 10-ounce cans diced tomatoes and green chiles, such as Rotel
One 28-ounce can whole tomatoes with juice 
1/2 cup fresh cilantro leaves (or more to taste)
1/4 cup chopped onion
1 clove garlic, minced
1 whole jalapeno, quartered and sliced thin, with seeds and membrane (2 is perfectly reasonable)
1/4 teaspoon ground cumin
1/4 teaspoon salt
1/4 teaspoon sugar
1/2 whole lime, juiced

Method

This is a very large batch. you’re totally safe with a 12-cup food processor, or you can process the ingredients in batches and then mix everything together in a large mixing bowl.

  • Combine the cilantro, onions, garlic and jalapeno in a blender or food processor and pulse a few times to get them in the same zone size wise, not too pulverized. (If you do this step you can be a little lazier with your chopping). Add the diced tomatoes, whole tomatoes, cumin, salt, sugar and lime juice.
  • Pulse until you get the salsa to the consistency you’d like. I do about 10 to 15 pulses. Test seasonings with a tortilla chip and adjust as needed. 
  • Refrigerate the salsa for at least an hour before serving.

Bringing it:

Divide the batch into as many jars as you like and you are ready to take your show on the road. This is NOT shelf stable, so keep it in the fridge.


Tomato Overload

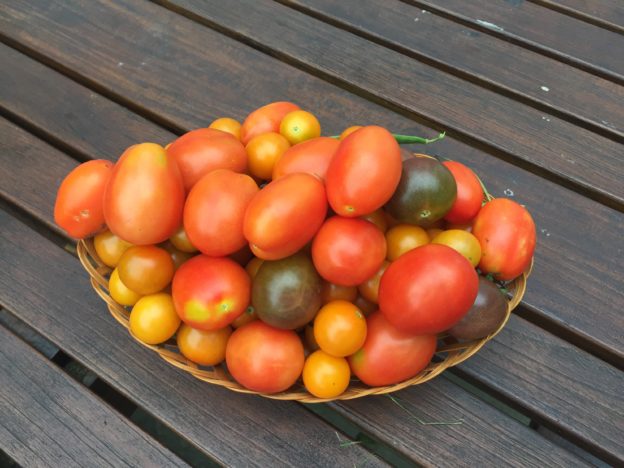
Guess what didn’t take Labor Day off? The tomatoes in your garden. It’s hard to keep up with the crop, though I’m trying my darndest, and probably headed for whatever toxic event occurs from too many tomatoes. I swear those suckers ripen by the hour. It’s all good though, except that there’s this one doctor out there on the interwebs who gets really bad on tomatoes. I just have to ignore his advice for the next couple of weeks. Same with the corn haters. Now is NOT the time.

Rather than reinvent the wheel, let’s just revisit some of our all-time tomato season favorites. Purists of course will go no further than the white bread and mayo tomato sandwich. Solid. But it uses exactly one tomato. Not helpful. When you’re looking for mass consumption of the bounty, I suggest a batch or two of sweet and spicy tomato jam. For the easiest dinner on the planet, totally appropriate for hands off entertaining, go for Best of Summer Simmer Chicken. If your job is to bring a side, embrace the heat with Summer Perfection Watermelon Tomato Feta Salad, or just go straight for Most Popular with THE Panzanella.

If those don’t use up your tomato backlog, here is an easy way to give your tomatoes (and the taste of summer) a little more staying power.

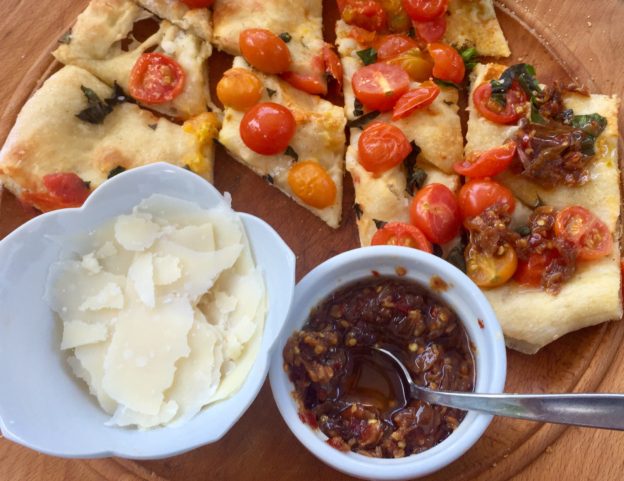
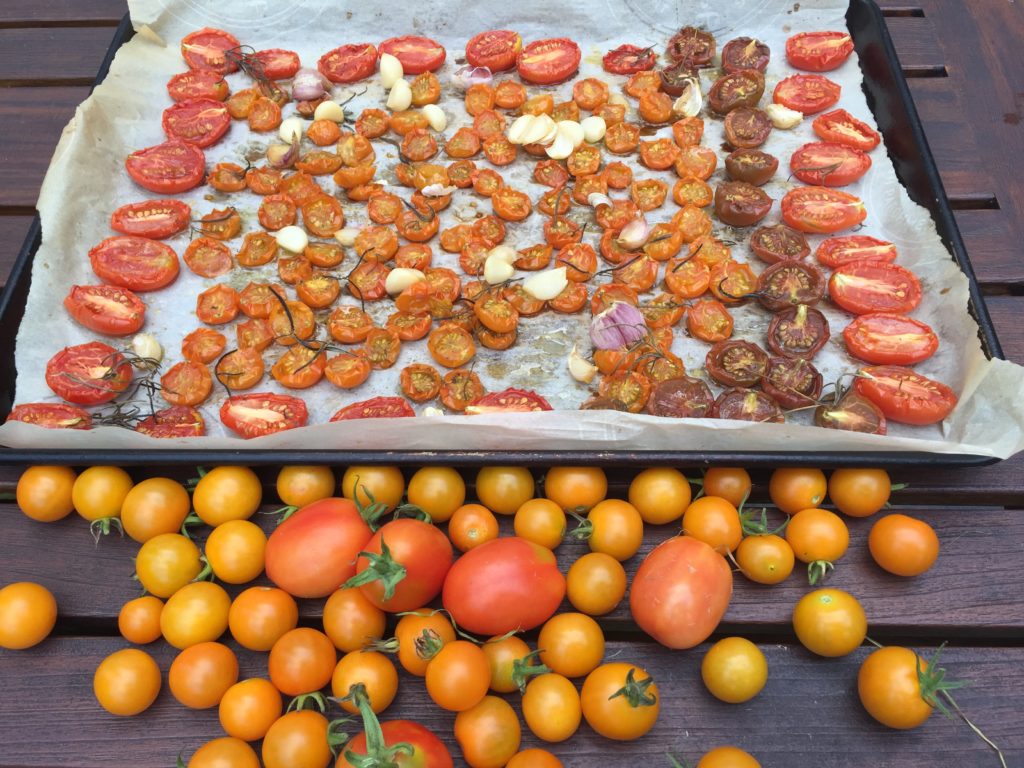
If nothing else you should go to Smitten Kitchen just to look at the picture of the pre-roasting tomato rainbow. Impressive. Mine do not look like that. BUT I assure you they taste darned good, and they are perfect to throw on a pizza, spoon on bruschetta, toss into a salad, smoosh on bread, mix in pasta, etc. You get the picture.

Slow roasted tomatoes, just hanging with the fresh crowd.

Slow Roasted Tomatoes

From Smitten Kitchen

Ingredients

  • Cherry, grape or small Roma tomatoes
  • Whole gloves of garlic, unpeeled
  • Olive oil
  • Herbs such as thyme or rosemary (optional)

Method

Preheat oven to 225°F. Halve each cherry or grape tomato crosswise, or Roma tomato lengthwise and arrange on a parchment-lined baking sheet along with the cloves of garlic. Drizzle with olive oil, just enough to make the tomatoes glisten. Sprinkle herbs on, if you are using them, and salt and pepper, though go easily on these because the finished product will be so flavorful you’ll need very little to help it along.

Bake the tomatoes in the oven for about 3 hours. You want the tomatoes to be shriveled and dry, but with a little juice left inside–this could take more or less time depending on the size of your tomatoes. When they are done, you can remove the cloves of garlic and save them for another use. They’re a delish side bennie.

Use the tomatoes right away or let them cool, cover them with some extra olive oil and keep them in the fridge for the best summer condiment, ever.

Double Down Derby Day Guacamole

Some days we have difficult choices. Saturday will be one such day. Do you wear a fine hat and celebrate the first Saturday in May according to Kentucky tradition, or do you scarf down some tacos and join the Cinco de Mayo party?

Or, do you do the sensible thing and celebrate both? Well duh! I do not normally do this, but I am posting two untried recipes. Whyyyyyy? Because it’s important! Because it’s Kentucky Derby Day and Cinco de Mayo AND its almost summer. That means it’s high time to get your guac on.

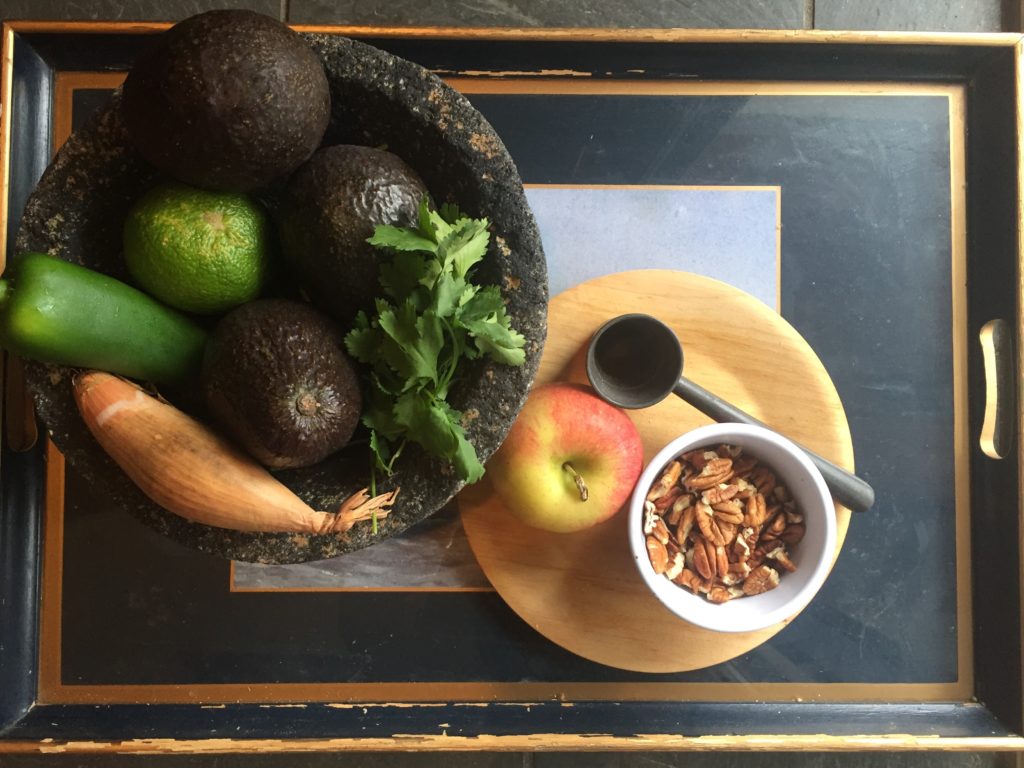
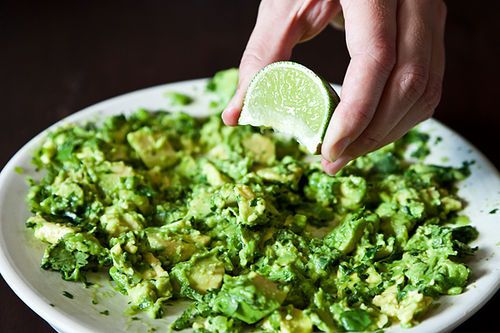
I am a wing it kind of guac maker. As a Californian that is my birthright. That said, you can always improve. These two new takes on guac are both from Mexican food jefe Roberto Santibañez by way of Food52.  The first is unique in approach but features totally classic ingredients. It hits all the must haves and nothing more: lime, cilantro, jalapeño, onion are all pulverized FIRST then added to avocados. As Santibañez says, “There is a very important textural thing to guacamole — we never really mush up the avocado.” I knew I liked this guy. I really felt the love though when I read about his second creation, which is totally wacky. It involves a splash of tequila (he had me there), apples (hello New England) and pecans (a nod to the America south and more weirdness). My awesome neighbor just came back from Georgia bearing two bags of pecans that she harvested and shelled herself. Fate. Kismet. Weird guacamole.

Anyway, here are the recipes. I will be making and testing them both on Saturday, celebrating both occasions of course.  If you do the same please tell me what you think and we can discuss. Whatever you choose to celebrate, have a fantabulous weekend!

P.S. Post time is 6:12. For the worst odds and the best name I’m taking Patrona Margarita, with 50-1.

Numero Uno:

Roberto Santibañez Classic Guacamole

Adapted slightly from Truly Mexican (Wiley, 2011)

Makes: about 1 3/4 cups

  • 2 tablespoons finely chopped white onion
  • 1 tablespoon minced fresh serrano or jalapeno chile, including seeds, or more to taste
  • 1/2 teaspoon kosher salt, or 1/4 teaspoon fine salt (or to taste)
  • 1/4 cup chopped cilantro, divided
  • 1 large or 2 small ripe Mexican Hass avocados, halved and pitted
  • A squeeze of lime, if desired
  1. Mash the onion, chile, salt (the coarseness of kosher salt helps you make the paste), and half of the cilantro to a paste in a molcajete or other mortar. You can also mince and mash the ingredients together on a cutting board with a large knife or a fork, and then transfer the paste to a bowl.
  2. Score the flesh in the avocado halves in a crosshatch pattern (not through the skin) with a knife and then scoop it with a spoon into the mortar or bowl. Toss well (it should be like salad properly dressed in vinaigrette), then add the rest of the cilantro and mash very coarsely with a pestle or a fork. Season to taste with lime juice (if you’d like) and additional chile and salt.
  3. Guac Uno, as made beautiful on Food52

Numero Dos:

Roberto Santibañez’ Guacamole with Tequila & Apples

Author Notes: Roberto says:” The apple needs to be sweet and crunchy (not Granny Smith-tart) and diced not too fine, to contrast just vocally enough with the guac’s salty heat and richness. The pecans should be tossed in butter after toasting, not before, so you get fresh, unbrowned butter flavor, too. Adapted slightly from Truly Mexican (Houghton Mifflin Harcourt, 2011).

Makes: 2 cups
For the apples & pecans

  • 1 large crisp, sweet apple, such as Gala or Macintosh, peeled, cored, and finely diced
  • 1 tablespoon silver (blanco) tequila
  • 1 tablespoons freshly squeezed lime juice
  • 1/4 cup pecan halves, sliced crosswise or coarsely chopped
  • 1 teaspoon butter
  • 1/8 teaspoon fine salt, or 1/4 teaspoon kosher salt (or to taste)

For the guacamole

  • 1 fresh serrano or jalapeño chile, stemmed
  • 2 tablespoons finely chopped white onion
  • 1 teaspoon coarse salt, or 1/2 teaspoon fine salt (or to taste)
  • 3 tablespoons chopped cilantro, divided
  • 1 large or 2 small ripe Mexican Hass avocados, halved and pitted
  1. Toss the apple with the tequila and lime juice in a bowl and let the mixture stand for 30 minutes to 1 hour.
  2. Heat the oven or toaster oven to 350° F. Spread the pecans on a small baking pan and bake until golden and fragrant, 7 to 8 minutes. Add the butter to the pan and toss to melt the butter and coat the pecans. Sprinkle with salt, tossing to coat.
  3. Heat a comal, griddle, or heavy skillet over medium-low heat and roast the chile, turning it over with tongs once or twice, until tender, blistered all over, and blackened in spots, 10 to 15 minutes. Once cool enough to handle, remove the skin from the chile (you might have to use a paring knife).
  4. Mash the chile, onion, salt (the coarseness of the kosher salt will help you make the paste), and 2 tablespoons of the cilantro to a paste in a molcajete or other mortar. You can also mince and mash the ingredients together on a cutting board with a large knife, and then transfer the paste to a bowl.
  5. Score the flesh in the avocado halves in a crosshatch pattern (not through the skin) with a knife and then scoop it with the spoon into the mortar or bowl. Toss well, mashing the avocado coarsely with a pestle or fork, taking care to keep the avocado chunky.
  6. Gently stir in the apple mixture and most of the pecans just until it holds together. Garnish with the remaining pecans and cilantro. Serve right away with tortilla chips.


Spring Chicken Soup


This recipe is straight outta Steamboat from Tania, Bring It’s Rocky Mountain correspondent. Along with her husband, she invented this by merging three Thai recipes. As Tania  says,  “It can be tweaked anyway you want, but it is pretty amazing as written.” She also admits it’s a pain in the butt to make, but it’s really nothing more than a a few rounds of chopping sautéing and stirring. 

What I love about this soup, beyond it’s sheer freshness, is the way it builds in the pot, kind of like stone soup. I guess this is how Stone Soup would evolve in a community with really well stocked veggie drawers. It features a lot of greens, and can handle a lot of flexibility. That said, the first time I made it I was missing key ingredients—fish sauce, mint, red peppers—and used the wrong mushrooms and imposter jalapeños. (It’s New Hampshire. It happens).The result was ok but underwhelming. The next time I made it, with the right stuff, it got the kind of unsolicited rave reviews I NEVER get from soup.

There are no amounts listed for the fresh herbs, but be generous with them, according to your taste. If you want to freelance, I suggest doing it on the amount of oil and butter used at each phase, using whatever amount looks and feels right to you. It makes a lot, so as you reheat it during the week, give it fresh cha-cha  by adding more ginger, garlic and lime. 

Spring Chicken Soup

Courtesy of Chuck and Tania Coffey

Ingredients:

  • 8 cups of chicken stock
  • *olive oil
  • *butter
  • 1 ½ lb boneless/skinless chicken breasts
  • 6 cloves garlic minced
  • 3” ginger root peeled and minced
  • 2 red peppers sliced thinly
  • ¾ lb shitake mushrooms sliced
  • 3 limes (skin from one lime)
  • ¼ c fish sauce
  • fresh basil
  • fresh mint
  • fresh cilantro (leaves and stems)
  • 3 jalapenos diced
  • 2 fresnos cut in rings (easterners, you are forgiven if you can’t track these downw)
  • 2 cans coconut milk
  • 1 1/2 T brown sugar
  • red pepper flakes to taste
  • 11 oz  baby spinach (1 entire plastic coffin)
  • i package straight cut rice noodles

Method:

Pour all the stock into a big pot and heat on medium high.

Grill chicken (or cook up however works for you) 8-10 minutes per side. The breasts are undercooked because they are going in the soup.  When cool enough to cut, cube into 1” pieces and add to soup.

In a nonstick pan heat 1 T butter and 1T olive oil and cook garlic and ginger until fragrant.  Pour into pot.

In a large nonstick pan heat 2 T butter and 1T olive oil (I used less here) and cook mushrooms until fragrant and starting to brown. Add a half cup or so water to the cooking mushrooms if they seem dry.  Add to soup.

Add 1-2 T butter to pan and cook red peppers until slightly soft. Add to soup. You’re done with that pan now.

Grate the skin of a lime into soup. Add juice of 3 limes and the fish sauce to soup.Cut stems of cilantro into ½” pieces and add to soup.
Slice fresnos and mince jalapenos and add to soup.
Add coconut milk, red pepper flakes to taste and  brown sugar.
Chop basil, cilantro and mint leaves and add to soup with all of the spinach (you really have to use a big spoon to get it all in there).
Cover soup partially and cook until the spinach wilts (this happens fast).
In another pot bring water to boil and cook rice noodles according to directions. (alternatively serve this over jasmine rice)
To serve put noodles in a bowl and cover with soup.  Add red pepper flakes to taste.
The soup gets better the next day especially if you add a bit more garlic, ginger and jalapeno.

Looking for other fresh spring recipes? How about minty snap pea salad, or of course Marcharitas. And because it’s the confluence of soup season and sugaring season—what we lack in peppers around here, we make up for in maple—don’t forget maple oat breakfast bread.


Sabering champagne

Holiday Favorites: Stay Sane, Go Nuts, Be Happy!

Fluff up your marmots and break out all things sparkly, the holidays are here. This is the season for many things: fake fur, sequins, fizzy drinks, warm everything. This is not the season for experimentation. We’re keeping our heads above water here, which means sticking with what we know. tried and true meals that make us happy, and treats to give that make others happy.

Maple oat breakfast bread

With that in mind, in my own kitchen I’m revisiting whole lot of Bring It tried and trues. That means soups like Thai Coconut Corn Soup, or Sugar and Spice Squash Soup. And yep, that means a crock pot full of Chicken Taco Chili that feeds a crowd with about 6 minutes of prep. All of the above, of course, beg for People’s Choice Cornbread or No Knead Challah or a honkin’ slice of Maple Oat Breakfast Bread to dunk in there. That is, UNLESS dirt bread is your thing…you know who you are, you little hemp seed eating chia pets. I’m with you there.

You might be needing some holiday entertaining staples like pomegranate everything (along with a genius pomegranate wrangling technique). What’s winter without fondue, and the easiest in the world Guinness Fondue at that? And what’s “How the Grinch Stole Christmas” without snacks? I highly recommend a batch of Nootch Popcorn or a bowl of Hail Mary Coconut.

As far as gifting and hostess offerings, you will never go wrong with crackle and its intriguing, slightly sophisticated dark cousin, pretzel and beer Crackle 2.0. And cookies? Yeah we’ve got those, basics like my faves—champion chip cookies—as well as totally slacker kiss my crust cookies, made from refrigerated pie crust and whatever chocolates you have around. If you need to scare up a snowstorm, or a reason to start a sweet family tradition make up a snow ghost pie.

Snow Ghost pie ad

And lest this be a pure re-hash of deliciousness we have an actual new recipe. I realize this blog has a somewhat extensive nut treatment, including honey thyme walnuts, spicy rosemary maple walnuts and an entire holiday nut anthology. But it turns out you really do need one more way to make roasted almonds. These are very similar to ginger glazed almonds (see anthology above), but without the ginger and with a coating of sesame seeds. You can choose a mix of sweeteners for your preferred flavor dimension (honey and sesame were pretty much born for each other), but for the best texture and glaze use at least some brown sugar.  

We’re talking nuts here, not rocket science, so be bold and mess around with flavorings, spices, herbs, types of nuts etc. Above all, enjoy the madness of the season and, like James says, remember “Shower the people you love with love.”

Sesame Almonds

Makes 3 1/2 cups almonds

Ingredients:

  • 3 tablespoons packed light brown sugar (or sub out up to 2 tablespoons with honey or maple syrup)
  • 1 tablespoon coconut oil (or your healthy oil of choice)
  • 1 teaspoon kosher salt
  • 1 teaspoon paprika
  • 1 teaspoon rice vinegar
  • 1 pound raw almonds (a scant 3 ½ cups)
  • 2 tablespoons (or more) white sesame seeds

Method:

Arrange a rack in the middle of the oven and heat to 350°F. Line a rimmed baking sheet and 2 wire cooling racks with parchment paper and set aside.

Pour the almonds into a mixing bowl. (If you keep your nuts in the freezer, warm them up in the oven for a few minutes first). In the microwave or on the stovetop stir together the brown sugar/honey/syrup, oil, salt, paprika, and vinegar over low heat. Pour mixture over the almonds and toss until the almonds are thoroughly coated. Transfer the almonds to the prepared baking sheet and spread into an even layer.

Bake, stirring every 5 minutes, until the almonds are brown and fragrant, 12 to 15 minutes total. They should be a rich brown color and just start to smell toasted as you open the oven door.

Sprinkle the sesame seeds over the hot almonds and stir to evenly distribute the seeds. This is where I go a little overboard, and try to get as many sesame seeds as possible to coat the almonds. Divide the nuts between the 2 prepared cooling racks and use a spatula to spread the nuts out so they do not touch. Cool completely, about 30 minutes.

Break apart any nut clusters that are stuck together if needed.

Bringing It:

Pour these babies into a treat bag, jar, tin or a cardboard takeout container lined with festive tissue paper, and store them in the fridge until you are ready to give them or devour them.


Of Empty Nests and Butternut Squash


You might be an empty nester if:

  • You no longer park near the cart collection stands at the grocery store.
  • You buy milk in half gallons, then quarts, and still wonder if it’s gone bad.
  • You put everything you can imagine needing into your cart and it still costs less than $50.
  • Your ice cream has freezer burn.
  • You actually pay attention to special diets, and try to accommodate them.

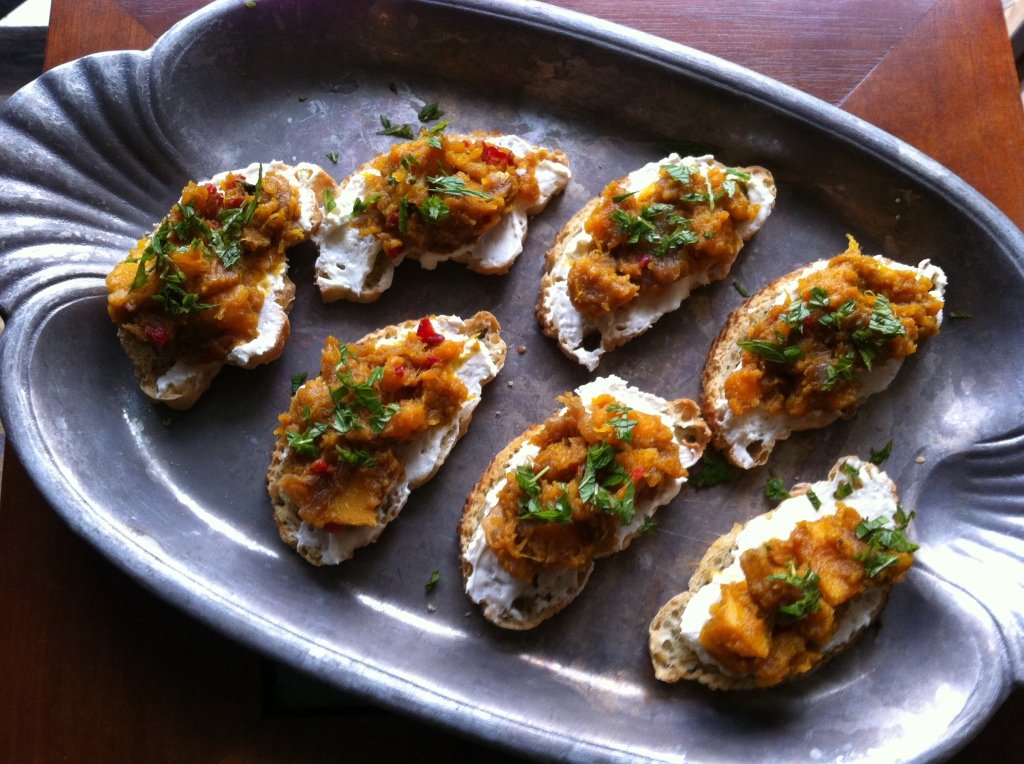
This last point is what today’s post is about. Well, that and butternut squash, my food champion of fall. (Let’s remember squash on toast, sugar and spice soup and Halloween Soup and on and on in the butternut/kabocha hall of fame.) The empty nest is suddenly available for visitors, which is awesome, and they bring with them special diets. At one point recently three guests joked that one was gluten free, one was sugar free and one was calorie free. Guest Number 4 was Vegan. This all worked because a: They all had a sense of humor and adventure, and b: I had time to care (see above).

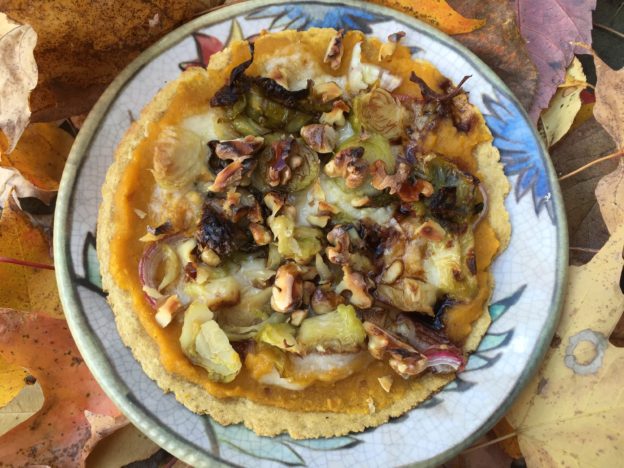
In my quest as a Vegan sympathizer I’ve tried a lot of things recently. I’ve tried to make both cheese and pizza crust out of cauliflower. No and no. I’ve made Reuben sandwiches out of seitan, a thousand times NO. I’ve also found some reasonably good stuff like grain-free carrot bread, and mayonnaise made with chickpeas. And, with much inspiration from Minimalist Baker and other sites, I’ve made some unbelievable stuff, like butternut squash pizza, the key ingredients of which I share below.

It’s been a fun experiment, and I like being able to find things that can broaden my own food horizons and make people on special diets happy. That said, life is about finding the right balance. When I asked my husband if he was game to try black bean sweet potato burgers for dinner, he merely went to the freezer, removed a steak and thunked it on the counter. Know your audience, people, and enjoy whoever is in your nest.

Butternut Squash Sauce

From the Minimalist Baker, with amounts adjusted

butt-pizza2

Also makes a mean pizzadilla, on a corn tortilla procured by the Vegan for the gluten-free girl.

Ingredients

For every cup of cubed butternut squash you will need:

  • 2 tsp olive oil ( 1 tsp oil for roasting and another tsp for adding to the sauce)
  • 1 garlic clove, whole, skin removed
  • 1 tsp maple syrup
  • a pinch of salt and pepper.

Keep in mind 1 Tbsp is 3 tsp. Sooooo, math whiz that I am, for 3 cups squash you will need 1 Tbsp of oil for roasting, and another Tbsp oil to add to the sauce, and 1 Tbsp maple syrup. A baking sheet easily holds 4 cups, so amp up ingredients if you’ve got the squash.

Method:

Preheat oven to 400 degrees F and position a rack in the middle of the oven.

Add cubed butternut squash and peeled garlic cloves to a baking sheet and drizzle with half total olive oil and a pinch each salt and pepper. Toss to combine.

Bake for 15-20 minutes, or until all squash is fork tender.

Transfer squash and garlic to a blender or food processor with remaining olive oil and maple syrup. Purée until creamy and smooth, adding more olive oil or a touch of water if it’s too thick. The consistency should be creamy and spreadable (not pourable). Taste and adjust seasonings as needed.

Use sauce as you would pizza sauce, topping it with your desired cheese and toppings and baking the pizza at 425. Make a great Pizzadilla as well, as evidenced on the fine corn tortilla pictured above.

fall-food

Old fall favorites and some new ones

Vegan Parmesan Cheese

Also from Minimalist Baker

This is surprisingly good. As with any imposters, better to think of it as its own thing. (I’m looking at you, black bean “brownies”). It’s sort of a weird craving now. Like I needed another.

Ingredients

  • 3/4 cup (90 g) raw cashews (try raw slivered almonds or brazil nuts too)
  • 3 Tbsp (9 g) nutritional yeast
  • 3/4 tsp sea salt
  • 1/4 tsp garlic powder

Method

Add all ingredients to a food processor and mix/pulse until a fine meal is achieved. Store in the refrigerator to keep fresh. Lasts for several weeks.

But that’s not all! Some bonus fall accessories:

Tahini Miso Sauce

If you don’t have miso in your fridge, do yourself a favor and get some. Merely figuring out how to use it up you will take you on a flavor adventure. Toss this sauce with pretty much anything roasted, but especially cauliflower, brussels sprouts, butternut squash, sweet potatoes, etc, etc.

Ingredients:

  • 2 Tbsp. tahini
  • 1 Tbsp. white miso
  • 2 tsp. red wine vinegar
  • 1 tsp maple syrup
  • optional: grated fresh ginger, pinch of red pepper flakes, splash of Tamari. Do experiment here!

Whisk or stir all ingredients, adding enough water, a spoonful at a time, to make a smooth sauce.

Fried Sage Leaves

Put them on anything for fall goodness

Ingredients:

  • Olive oil
  • Fresh sage leaves, twice as much as you think you want
  • Coarse salt

Method:

Heat oil in a pan. Fry sage leaves 6 or so at a time until crisp. Remove to a paper towel with slotted spoon and sprinkle with salt. Repeat until you have enough to actually share with others.

sage-coffee

Fried sage next to the very best Vitamin C!


California Dreamin’: Pickled Grapes and other Weird Things

Well hello fall! I’m not sure how we got from frosé season to apple season so fast, but here we are. Have we all fit an unreasonable amount of fresh corn and tomatoes into our diets these past few weeks? And rescued every last watermelon from the cardboard bins? If so, good job. If not, there’s still time…but barely!

I’m just back from a long trip to Cali, and it of course involved lots of weird food. Why even go to California if you’re not going to dive all in? My weird food fest got rolling at Jack London Square in Oakland, first at a vegetarian restaurant with a mushroom pecan pate that still haunts me in the best way, and then at an event called Eat Real. Very groovy indeed. Super tart, super strong Red Branch hard cherry cider kicked it off. Fabulous street eats ensued, including sesame peanut zucchini salad with furikake…Damn! So good and so fun to say. The miso sesame muffin from Berkeley’s own Sam’s Patisserie wrapped it all up with an oddly addictive bow.

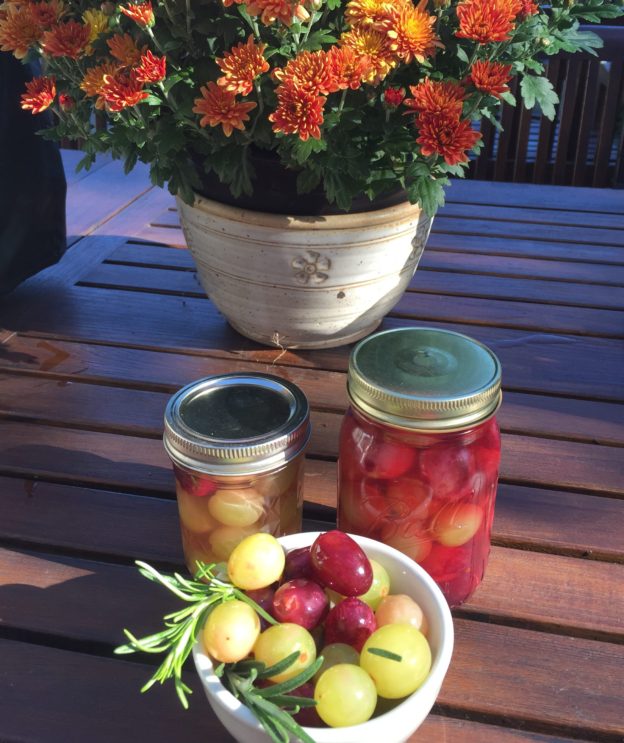
From there I went south, for pink pepperberry gin and tonics in Santa Monica, Tuna poke and tamales in Pasadena, and then—because you’ve got to be on your A game of weirdness in Topanga—rosemary-brined grapes and basil pickled cantaloupe.

Today, I’m bringing you the grapes, because they are stupid easy and crazy good. Plus, they are red and green and would be a perfect offering for any holiday feast. Make them now, try them in a week or so, and if you like them you’ll have plenty of time to go into production. So, let’s not be sad as we let summer and linen and the quest for perfect toenail color drift away. There are apples to be eaten, pies to be baked and ciders of all potencies to be quaffed.

This comes straight from the Wall St. Journal food section, which is awesome. Read the article for other pickled fruit recipes, including cantaloupe. And if there’s a deal on grapes just make a ton. As the article instructs, their flavors improve after about a week, and they’ll keep in the fridge for months… unless I come over.

Pickled Grapes

Adapted from “The Lee Bros. Simple Fresh Southern” by Ted and Matt Lee

Active time: 15 minutes Total time: 45 minutes Makes: 1 pint

  • 2 cups seedless red and/or green grapes (about 10 ounces)
  • ¾ cup distilled white or white wine vinegar
  • ¾ cup water
  • 1 teaspoon kosher salt, plus more to taste
  • 1 teaspoon sugar
  • 2 small cloves garlic, peeled and crushed
  • Leaves from 1 (2-inch) sprig rosemary
  • ⅛ teaspoon dried red chili flakes
  1. Pack grapes into a glass jar or airtight plastic container. Pour vinegar and water into a saucepan over medium-high heat. Add salt, sugar, garlic, rosemary and chili flakes. Bring to a simmer and cook 1 minute.
  2. Remove pan from heat and pour brine over grapes to fill container. Strain remaining brine into a measuring cup (you should have a little less than ½ cup left over) and reserve for making butter lettuce salad with pickled grapes, toasted pecans and soft goat cheese (recipe below). Transfer any garlic, rosemary and chili flakes remaining in strainer to container with grapes.
  3. Cover container tightly, shake to distribute seasonings, uncover and let cool to room temperature, about 30 minutes. Cover again, and transfer container to refrigerator to chill further, about 15 minutes more.


Cold Comfort Creamed Spinach and Such

January can get pretty dark, in every way. As it trudges along glacially, the time we do not spend pulling ourselves upright is spent talking our loved ones off a ledge. Particularly in the ski racing world—the world of my people—January gets harsh. Wind, cold, ice, wet socks and crowded  vans. Combine that with a stretch of injuries, illness and crashes (sometimes all three) and you’ve got your perfect storm of yuck.

We know it’s coming—post holiday blues, failed resolutions, short cold gray days, translucent skin, not-quite-right windshield wipers…and yet, it gets us every time. In the beginning our plan for January is all about kicking butt, but it ends up being more about getting by. Non skiers, I know you’re with me now.

Because my soft spot for underdogs is especially mushy in January, I’m marching through Food52’s best, yet most ignored recipes for 2015. These are things from odd and humble ingredients like burnt toast and lentils. I’m starting with everything on the list that’s green because, well, it’s January. See failed resolutions and cold gray days, above.

Up first, creamed spinach without the actual cream, a comfort food involving some vegetables and fiber and not a lot of work. Next on my list is a green soup suitable for Vegans, gluten-frees and paleos. But today, we’re all about easing into this gently with frozen spinach and just a few ingredients you probably already have plus a fresh green kick. I’m looking at you, jalapeño. Nothing fancy. Not even grating. We’re just getting through this together.

We all need a big hug in January. Here’s yours.

Cold Comfort Creamed Spinach (or Squash)

Barely tweaked from Laurie Colwin’s Creamed Spinach

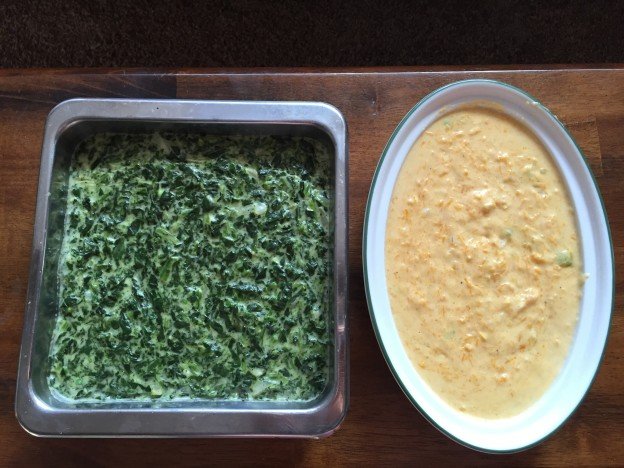
Spinach-on-table

Overachievers Anonymous, here we come

Notes: I made this with cheddar because, well, I’m in New England. Must we discuss? For jalapeños I used fresh—half of one of those huge mutant ones you sometimes find in the grocery store. I was in my groove so I did the same thing with half a cooked butternut squash (here’s a clinic on that), using chicken broth instead of spinach liquid, the other half of the mutant jalapeno and the rest of the evaporated milk. I liked that even better. Let’s hear it for green AND orange.

Serves 6 to 8

  • 2 10-ounce packages frozen chopped spinach
  • 4 tablespoons butter
  • 2 tablespoons flour
  • 2 tablespoons chopped onion
  • 1 clove garlic, minced
  • 1/2 cup evaporated milk (or equivalent amount of cream and milk)
  • 1/2 teaspoon black pepper
  • 3/4 teaspoon celery salt, seasoned salt or plain old salt
  • 6 ounces Monterey Jack, Cheddar, Muenster, Gruyere or some such cheese, cubed
  • 1 or more jalapeño peppers (fresh or pickled)
  • Buttered bread crumbs (use 2 tablespoons melted butter for 1/2 cup breadcrumbs, making as much as it takes to make you happy)

Method:

Cook the spinach. Drain, reserving one cup of liquid, and chop fine if not chopped already.
Melt the butter in a saucepan and add the flour. Blend and cook a little. Do not brown.
Add onion and garlic.

Add one cup of spinach liquid slowly, then add evaporated milk, black pepper, celery salt, and cheese. Add one or more jalapeño peppers (know thyself and thy heat tolerance), and the spinach. Cook until all is blended.

Turn into a buttered casserole topped with buttered bread crumbs, and bake for about 45 minutes at 300° F until the top is crisp and golden. If you want to speed up the browning, toast under the broiler.

Cold Comfort Creamed Squash

Follow directions above, substituting cooked winter squash for spinach, and 1 cup chicken broth for the spinach liquid.

Bringing it:

This is the type of thing that begs to be put in a dish, covered snugly and carried elsewhere to someone who needs a little comfort.


Crackle 2.0—Toffee meets dark chocolate pretzels and beer


crackle2

Just when you thought you had covered everyone on your list…surprise! That’s why it makes darned good sense to cook up obscene quantities food gifts, put them in jars and cute boxes and have them at the ready.

My faves are salted caramel Cholliesauce, roasted and glazed nuts and of course, a constantly replenished stash of crackle. We’ve learned to love Crackle over the years, but it’s time to shake it up a little. It’s time to go to the Dark Side. Behold Crackle 2.0, a more grown up version of decadence from a favorite site: thebeeroness.com.

I love the idea of cooking with beer, and the whole consequence of recipes only calling for half a can (at most) of some shmancy beer, making it perfectly ok—even responsible—to finish the rest. There are lots of things I love about this, including of course the taste, which really isn’t beer-like or even alcoholic after all that boiling.

This recipe lets you decide on the thickness of both the toffee and the chocolate layers. Also, it does not require oven time, leaving your oven free for baking things like these and these and these. No baking means also no urgency between steps, which is nice. You can make the toffee part and then come back to slay the rest.

crackle3

Extra points if you make the edible peppermint plate.

Finally, the dark chocolate is a more sophisticated touch (even if you hedge and add some milk chocolate chips when you run out of the good stuff).

I have made this with Guinness and most recently with Lagunitas Little Sumpin ale, subscribing once again to the “love the one you’re with” method of ingredient selection. Do keep it to craft beer or something more complex than Bud. If you want to really experiment, read up on the Beeroness wisdom. Alternatively, just wing it, and try a new beer with each batch. Oh, and for presentation points, make this edible plate out of peppermint candies. You’re soooo Martha!

Chocolate Pretzel Beer Toffee

Adapted from The Beeroness

Ingredients:

Toffee:

1 Cup Sugar
1 Cup Butter (2 sticks)
1/2 Cup Amber Ale

Topping:

2 Cups Pretzels, Smashed
2 Cups Dark Chocolate Chips (60% cacao content)
1/4 Cup Amber Ale or Chocolate Stout
1 Tbsp or so coconut oil (optional but it gives the chocolate a nice gloss)

Method:

In a large pot over high heat add the sugar, butter and 1/2 cup amber ale, it will triple in volume during the cooking process so make sure to use a large pot. Stir until the mixture starts to boil. Allow to boil untouched until the mixture starts to darken and thicken at about 230 degrees. Stir continuously until it turns a very dark amber and hits 290 degrees. (Use the color as your guide. Too light means less caramel flavor. Be patient but vigilant!) This process will take between 15 and 20 minutes from start to finish. Pour onto a baking sheet covered with parchment paper or a Silpat. Immediately spread to desired thickness before it starts to harden. Allow to cool.

Add the chocolate to a large bowl. Heat the beer until hot but not boiling. You can heat it on a pot on the stove or microwave it in a microwave safe bowl. If you use the microwave, know that the beer will foam up once it reaches it’s boiling point. Pour the hot beer over the chocolate chips and stir until well combined and melted. (Alternatively, and preferably to SOME, do the whole shebang in a double boiler. See Edie notes below.)

Pour the chocolate over the toffee and smooth out in an even layer. Sprinkle the crushed pretzels over the chocolate and chill until the chocolate has set. Cut into pieces.

Beeroness Notes: If you use a chocolate with less than 60% cocoa content, it will have higher levels of milk solids, because of this it will have a more difficult time hardening once the beer is added. Try to find 60% and chill it to set.

Edie Notes: In my microwave-deprived house I made this as directed a few times but could not get the chocolate to be as glossy as I wanted. I had better results melting the chocolate and beer over water in a double boiler, and adding a bit of coconut oil. For chocolate I used a combo of 2 Ghirardelli Intense Dark 72 % Cacao bars, and enough milk chocolate chips to get to the right amount.

Crackle1

Why are you looking at this? Aren’t you at the store yet?


Sugar and Spice Squash Soup

Tick Tick Tick. It’s happening, snow or no snow. A certain person in our house wore an elf suit for an entire weekend, the Christmas music on the radio is running 1:1 with Adele, and I’m pretty sure I’ve had at least some chocolate by 10 am for the past five days. Oh yeah…’tis the season.

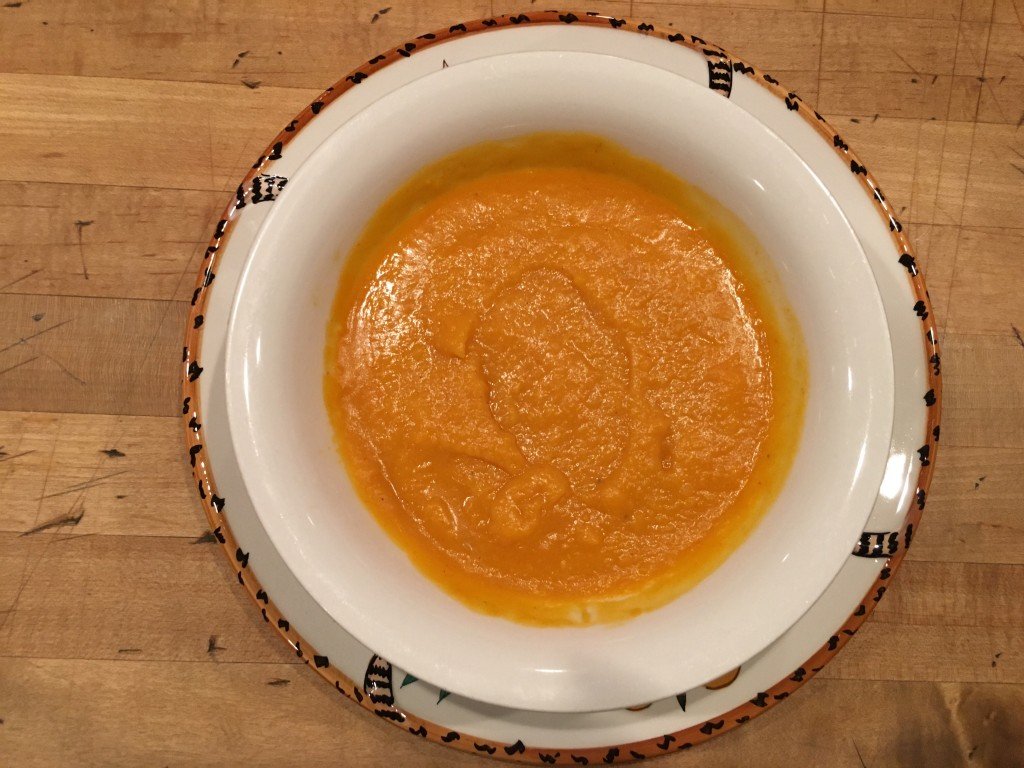
This sweet, spicy, ginger squash soup is another fabulous contribution from Steamboat Tania, who holds the bar so much higher than me that I almost just posted this without trying it. Almost. But the whole candied ginger thing was intriguing, and I figured before descending into holiday carb overload I owed it to my people to produce one last healthy, unique, yet broadly appealing dish.

It’s a more sophisticated version of Halloween Soup, with creaminess from coconut milk, spice from red curry paste and sweet holiday sparkle from the candied ginger. (You know you were wondering how to use up the tub of candied ginger you got for fruitcake or ginger libations or various gingery creations.)

If I have not sold you on this soup yet, it’s also pretty hard to screw up. I didn’t have a full jar of red curry paste, used bouillon cubes instead of broth and misread the recipe, using only one butternut squash. It was still incredible, and an acorn squash out there lives for another day. Oh, and Tania’s tip on heating the squash in the oven first is sheer brilliance.

I urge you to make this, as a gift to yourself or to share with your holiday squad. Extra points if you enjoy it in your elf suit.

Ingredients:

  • 1 large acorn squash
  • 1 large butternut squash
  • 3 Tbsp olive oil (plus more to rub on squash)
  • 2 T butter
  • 1 large onion diced
  • 3 cloves garlic minced
  • 32 oz chicken stock
  • 1 jar red curry paste
  • 1 can coconut milk (Full fat tastes best. Hide the can if you must)
  • 1/3 cup candied ginger
  • salt and pepper

Method:

Preheat oven to 350.
Put uncut squash on baking tray while the oven is preheating (do this so the squash cuts easily and you don’t lose fingers), 10 minutes or so.
Cut squash in half, discard seeds, rub cut side with olive oil and place cut side down on baking sheet. Cook until soft, half an hour or so depending on size.
While squash is cooking warm 3T olive oil and butter in a large sauce pan. Add onion, cook until translucent. Add garlic and cook until fragrant.
Remove squash from oven and scoop flesh into onion/garlic mixture. Add chicken stock, curry paste, coconut milk and candied ginger. Stir over low-med heat until blended.

Ladle lumpy soup into vitamix/blender (or use an immersion blender). You will need two pots because this was 2 vitamix loads. Blend until smooth. Return to stovetop to warm. Add salt and pepper to taste. Warm and serve. (P.S. It’s also really good cold)


Marcharitas

I held this post until after St Patty’s Day out of respect for beer and cabbage, of which I have none to offer. OK. That is a bold face lie. I held it because I am quite far behind on life at the moment. That, for me, is March. And that is why margaritas come in to play right about now. They’re green. They’re full of the promise of spring. I am including three different recipes, from three friends in the ski world who fully appreciate the filthy car, fast food, too-many-hotel-room frenzy that is March.

A brief history on each:

Speedy is the mayor of Mt Hood in the summer, and a Lake Placid transplant in the winter. He is a constant in the ski world, the ultimate connector and a friend to every struggling ski racer who “will work for training space.” His rocks marg is a western classic—tart with a touch of citrus and, of course, Patron.

Tania, my Rocky Mountain correspondent and fellow ski mom, is the master of turning a ski lodge into your favorite diner and saloon. A spicy westerner, she never met a jalapeno she did not like, and for this margarita she thinks ahead and infuses tequila with hot peppers of happiness. It is seriously worth the extra step and time!

PK has the only pool in the neighborhood, so he is always prepared to entertain. Inside fridge, outside fridge, fridge entirely devoted to seltzer, stand alone ice machine…he does not mess around. He always has something on hand to please every age and taste, as well as lots of towels. His frozen margaritas are as easy as it gets, and always perfectly refreshing.

So here you go—trés margaritas to get your spring off to a good start and head scurvy off at the pass. Arriba, abajo, al centro, pa’ dentro!

Speedy’s Organic Margarita Mixer

Ingredients:

  • 1/4 cup fresh lime juice
  • 1/4 cup water
  • 1 squirt of agave
  • 1/8 cup organic orange mango juice
  • 1 shot Patron tequila
  • 1 squirt of orange liqueur

Method:

Stir up first 4 ingredients and shake.
Fill short cocktail glass with crushed ice.
Add Patron.
Add orange liqueur.
Stir well.
Toast Speedy and enjoy!

Tania’s Burning Hell Margarita

Takes a week, and worth every moment

Ingredients:

  • TequilaFill a big jar (like a mason jar) with good quality (but not fancy fancy) silver tequila.  Try Camarena Silver.
    Add 4 jalapeños, seeded and cut into strips.
    Add one Habenero also seeded (wear gloves!)
    Add strips of seeded red peppers for color if desired.
    Leave jar alone for a week.  After a few days (and well after breakfast), sample it to see if you have made it spicy enough. If it’s too spicy, add more tequila. If you’re feeling brave add jalapeños halfway through the hang-out stage. Strain to remove peppers.
  • Simple syrup:1 cup of sugar
    1 cup of water
    Boil until sugar dissolves.
    Cool
  • Lemon/Lime JuiceSqueeze all the fresh lemons and limes you have.  At least 6 of each (fight scurvy—use the real stuff). Mix the fresh juice with enough simple syrup to balance the sour. Add a little water to be humane.
  • Triple Sec

Method:

In a big glass filled with ice add two shots of tequila, one shot of triple sec and the juice/sugar mixture to taste. It’s good policy to warn your guests that this has the chance to be very spicy.  But it’s also pretty funny not to, especially if you doubled up on the habanero.

PK’s Frozen Margarita

We’re dealing with proportions here, not absolutes. Amounts are based on what size can of limeade you start with.

Ingredients:

  • 1 can limeade
  • 1 can tequila
  • 1 can Bud Light or other light beer
  • Ice

Method:

Combine first three ingredients in a blender, refilling limeade can with tequila then beer. Fill blender with ice. Process until slurpeelicious. Find a spot by the pool. Sip. Repeat.

The Parent Whisperer

If you have kids in a winter sport, this is the time of year when things can start getting a little squirrely. Not totally nutty (that comes in March) but just a little tense. The competition ramps up with qualifiers and championships on the horizon. Ski racers, hockey players, basketball players—you know what I’m talking about.

As parents this is when, against all impulses, it’s time to chill out. If we can’t keep our own blood pressure down how can we expect our kids to keep calm and carry on?

With this goal in mind I present to you, the Parent Whisperer, inspired by my article of the same name. It is an ideal slopeside, rinkside, bone-warming, parent-wrangling concoction. Call it glug or grog or gluhwein or whatever. We’re talking red wine with some hootch and some spices, all brewed together with very few instructions or limitations. This one comes from Julie G (I’m not going to out you, but you know who you are!), whose ample testing has proven that drinking it calms nerves, brightens moods, and elevates humor on cold winter days.

This particular recipe uses apple cider as the only sweetener, so it’s more business-like than dessert-like. If you want something that is more soothing than bracing, add some maple syrup or honey. Sliced oranges wouldn’t be a bad call either. Pomegranate seeds or apples? Ja Wohl! Above all, shhhhhhh and relaaaaax. Enjoy the fresh air, the company of hardy souls and the notion that every day is getting just a little longer.

The Parent Whisperer

Ingredients

1 cup red wine
1 cup apple cider
4 shots bourbon
1/2 tsp nutmeg
cloves, cinnamon, ginger and cardamon to taste (whole or powdered spices are both fine, but whole spices can be easily strained out for a clearer drink, if you care.)

Very Loose Method

Heat wine, cider and spices, letting them simmer and brew until you smell the spices (but fergawdssakes don’t boil away any of that power). Add bourbon and and let it all heat through a few minutes. Strain whole spices if using. Pour the whole shebang into a Thermos and enjoy on the hill before, during and after the race!

Note: There is no mention about how many this serves, which of course is because it depends on the situation. But let’s see…a cup of wine and 4 shots of bourbon…that calculates roughly to serve:

  • 1 parent who needs to be sedated.
  • 2 parents who really need to take it down a notch.
  • 3 parents who are hoping for a peaceful and pleasant ride home.
  • 4 parents who just need a little shot of warmth in their bellies.


Vail trees

Bringing on the Holidays, and Cheddar Crisps

I am just reentering the real world after a trip to Vail, CO, where their trees look like this. One day they were just, you know, trees. And the next day we were living in a patriotic LED forest. In addition to designer trees I had three days of life in the VIP tent at the base of the race course, a fantasy world I hope everyone can experience at least once.

Here’s what goes down in the VIP tent:

Pretty women in puffy pink coats pass glasses of champagne filled at the outdoor bar, where Bloody Marys are also mixed to order. Next to the bar juicy burgers are grilled up, nestled into buttered buns and wrapped up so you can grab them if you’re the outdoorsy type. Inside, tables are laden with fruit, cheeses and nuts, fresh baked breads, a Veggie Nirvana of salads, a Carnivorama of roasted beasts, coconutted shrimp, and steamy soups topped with mini grilled cheeses. And then comes the dessert table which is completely off the hook. I never even made it to dessert because another roving server appeared with a tray of whipped cream-topped hot chocolate with vanilla vodka, which sort of ended the lunch conquest.

VIP-tent-2VIP tent-1


I’m not going in to such detail to be mean, but to establish the high bar going in to prime, party intensive, holiday season. If you need some ideas for what to bring to your next soiree, here are just a few ideas from the Bring It! repertoire.

Bringing the cheer:

Cut to the chase and get the party started by bringing a premixed, seasonal cocktail like these ones we had at Thanksgiving. If you are going to be outdoors bring a Thermos of hot cocoa or tea and the hootch to add. Dark rum is a solid go-to for hot drinks and, as noted above, apparently so is vodka. Fixin’s for a big batch of mint chocolate milk will build your snack cred with all ages.

Apps for a crowd?

You can’t go wrong with Sue’s marinated shrimp and artichoke number, or the ever-festive, ridiculously easy Funitella Bruschetta. Below see a basic recipe for the cheddar cheese rounds that make their way into every spiral-bound community cookbook for good reason. (Bonus feature: they can be made with ingredients procured at any mini mart.) Bacon wrapped dates? Yes, have some! And really, putting that fondue pot in a tote bag with a big bag of grated cheese, and firing up some Guinness fondue is always the right thing to do.

DIY Hostess Gifts/Party Fare:

Bottle up some ginger simple syrup that goes in our previously mentioned cocktails, or get creative with help from the full simple syrup tutorial here. Go Mediterranean with a jar of Sicilian Caponata, go healthy with a loaf of Life Bread (thinly slice it and toast it for a tasty snack foundation), sweeten the deal with Salted Caramel Cholliesauce orrrrrrr, get nutty with some sweet and spicy roasted nuts. Oh-so-sophisticated thyme honey walnuts are pure gold on some lusty soft cheese. If you’re shamelessly vying for a quick hit of popularity bust out the Crackle.

Wrapping it all up:

Remember wrap master Boot Camp Bonnie? ‘Tis the season to revisit her tips for packaging brilliance.

You’ve got the week to prep for this weekend’s shenanigans, and a whole lot of joy on the calendar, so let’s do this holiday thing!

Can’t Go Wrong Cheddar Crisps

Ingredients:

  • 1 stick butter, softened
  • 1 cup extra-sharp cheddar cheese, finely shredded
  • 1 cup flour
  • 1/8 teaspoon cayenne pepper (some curry powder is also good if that’s your thing)
  • 1/2 teaspoon salt
  • 1 cup Rice Krispies cereal

Method:

Preheat oven to 350 F. In a medium bowl, mix together the butter, cheese, flour, cayenne and salt until it forms a ball stuck lightly together. (Use your hands or a wooden spoon to fully incorporate all ingredients.) Gently fold the cereal into the dough. Pinch off nickel-size balls and roll tightly between your hands. Place them about an inch apart on an ungreased cookie or baking sheet. When all the balls are rolled, flatten each one with the tines of a fork. Bake 15 minutes.

Cool crisps 5 to 10 minutes before removing from the pan to serve. Leftovers may be stored in a tin up to 1 week. Makes about 4 dozen.

Note: Alternatively, you can roll the dough into a long log, wrap it in plastic or waxed paper chill. When ready to make them, slice log into ¼” (or so) rounds and bake as directed above. They’ll take a bit longer so just watch them. The whole make ahead, roll and chill (or freeze if needed) thing comes in handy and the end result looks pretty pro.

Squash On!… on toast that is


Fall all over squash on toast

Fall all over yourself for these apps. Yep, they’re that good.

Foodwise, fall is my dream come true. First come the apples, and we’ve been through my apple addiction. They give us good excuses to make things like salted caramel cholliesauce and Joni Mitchell Apple Pie. Then comes Halloween season (it’s really not just a day you know) and all those excuses to make things like Crackle and Salty Malty Rice Krispy Treats with whatever Whoppers you didn’t polish off. And of course you’ve got the crock pot bubbling in the background with goodness like no-fuss chicken taco chili. Honestly though, what I love most are the fall veggies—the squash, brussels sprouts, beets and various roots all begging for their turn to get roasted in the oven.

In my fall food frenzy I’ve gone a little nutty on the winter squash, and now I find I’ll have to pace myself  because I have so many orange recipes to post. I’m starting with an appetizer, because it is the one that surprised me the most with its popularity and because party season is upon us!

Here, courtesy of  Jean Georges Vongerichten via NYT Minimalist Mark Bittman is the elegantly named “Squash on Toast.” I knew I’d like it well enough, because you know, the weirder the better. And onions caramelized into jam with maple syrup and apple cider vinegar? Come on! The mainstream was just as smitten. The first time I made these I brought them to a party and they were devoured. Crazy good.

Here we go with my disclosures. I used a kabocha squash, hollowed, filled with water and cooked whole in the oven. For cheese I used a spreadable brie because that’s what I had. Whipped cream cheese is also excellent. I adhered to directions and included the fresh mint which got high praise from all, so play by the rules here. For the bread I brushed thin slices of Easiest French Bread Ever with olive oil and toasted them in the oven. Make a lot of toasts so you don’t have to be mean and hide them from your family before party time.

Ok, squash on!

Ingredients

1 2 1/2- to 3-pound kabocha or butternut squash, peeled, seeded and cut into pieces 1/8- to 1/4-inch thick
3/4 cup extra-virgin olive oil
1/2 tsp dried chile flakes, more to taste
3 tsp kosher salt
1 yellow onion, peeled and thinly sliced
1/4 cup apple cider vinegar
1/4 cup maple syrup (or agave)
4 slices country bread, 1-inch thick
1/2 cup ricotta, goat cheese, feta or mascarpone
Coarse salt
4 Tbsp chopped mint

Preparation

1. Heat the oven to 450. Combine the squash, 1/4 cup olive oil, chile flakes and 2 teaspoons of salt in a bowl and toss well. Transfer the mixture to a parchment-lined baking sheet and cook, stirring every few minutes, until tender and slightly colored, about 15 minutes or a little longer. Remove from the oven.
 2. Meanwhile, heat another 1/4 cup olive oil over medium-high heat, add the onions and remaining teaspoon salt and cook, stirring frequently, until the onions are well softened and darkening, at least 15 minutes. Add the vinegar and syrup, stir and reduce until syrupy and broken down, again at least 15 minutes or so; the mixture should be jammy.
3. Combine squash and onions in a bowl and smash with a fork until combined. Taste for seasoning.
4. Add the remaining oil to a skillet over medium-high heat. Working in batches if necessary, add bread and cook until just golden on both sides, less than 10 minutes total; drain on paper towels. Spread cheese on toasts, then top with the squash-onion mixture. Sprinkle with coarse salt and garnish with mint.

Bring It

Deconstructed is the only way to transport, and remember to bring the right sized platter and a spreading knife. When you get to your destination have a fine little chat while assembling the toasts (and try to keep up with production as they are eaten off the platter).

Mango Jicama Guacamole

Mango jicama guacamole

Let the Sunset fantasy begin.

We’re past Memorial Day, so you can all bust out the linen togs and start working on your guacamole recipes. You know how it rolls from here on out: Casual parties start to happen. You want to bring something that you know will be appreciated and eaten, that is homemade but not terribly taxing and that can probably be pulled off without a recipe. As long as you can lay your hands on ripe avocados you simply can’t go wrong with a good guacamole.

And you can go really right with this guacamole, because it has jicama AND mangoes, both of which (along with avocados) make me fantasize that I am actually in a Sunset magazine photo shoot. You’ve got crisp, sweet and creamy mixed in with spicy, tangy and juicy. And then you add cilantro, which makes everyone but my sister happy. And since it’s almost her birthday we can all just go ahead and substitute fresh mint for the cilantro if we want. Because it’s guacamole…and the first rule of guacamole is to improvise at will! No adobo? No problemo! Just sprinkle in some chile powder. It’ll all work out, even without a drop of tequila.

To show bicoastal reverence of a good guacamole, this recipe comes from Meracadito Cantina in Manhattan via Food and Wine, and with many thanks to our friendly local Hannaford’s where jicama is a totally reasonable $1.99/lb and where they double your refund if it turns out to be no bueno (see note below).

Ingredients

3 Hass avocados, cut into 1/2-inch dice
1 medium plum tomato, seeded and cut into 1/4-inch dice
1/2 small onion, cut into 1/4-inch dice
3/4 cup finely diced ripe mango
1/2 cup finely diced peeled jicama
3 Tbsp finely chopped cilantro
1 medium chipotle in adobo, minced (1 tablespoon)
1 small jalapeño, seeded and minced
2 Tbsp fresh lemon juice
Kosher salt
Tortilla chips, for serving

Method

In a large bowl, gently stir the avocados with the tomato, onion, mango, jicama, cilantro, chipotle, jalapeño and lemon juice until well mixed but still slightly chunky. Season with salt and serve with tortilla chips. Olé!

Note: Whereas in California the jicama roots make a quick jaunt from Mexico, they travel much further to get to our stores in New England. You most often find them heavily waxed…Brazilian super model before the SI swimsuit shoot waxed. We’re talking a thick coat that can prevent you from seeing the jicama’s true self.  Look for jicama with no soft spots and no oozing juices (never an excellent sign of health on anything). It should be firm, crisp and mild tasting when peeled. You won’t need it all for this recipe so slice up the rest, add some lime juice and store it in the fridge for snacks… or the next party. 

Balsamic Black Beans

Balsamic black beans

Fiesta- It’s always the right thing to do. And frijoles Italiano are the right thing to bring.

Let’s be honest. It is never too early to prepare for Cinco de Mayo. If you haven’t perfected your margs, your guac, your mango salsa, your chicken enchiladas there’s still some time. But you’ve got to get on it! I’m going to take on the black bean situation for you and solve it the easy way.

Buy yourself a can of Pastene black beans (playing it incognito in the Italian section), turn the can around, and make the recipe that’s always been right there. It’s easy, fresh and the balsamic gives it a zing that makes these beans more abondanza than just plain bueno. Ok, I have no idea if abondanza is even a word, but they used it in an Olive Garden commercial so I’m going with it.

These beans are great as a dip for chips or sturdy veggies, as a filling for quesadillas, as a component of lunch deconstructed, as a topping for huevos or as something to put on your spoon as you stand in front of the fridge craving protein. By the way if you see limes on sale, go long! I hear they are in short supply in Mexico and you’ll be needing lots of those tangy babies in the weeks ahead.

 Ingredients

1 15.5 oz. can black beans
3 Tbsp olive oil
1 medium onion
1Tbsp balsamic vinegar
1/2 jar (7 oz. size) roasted red peppers, diced
1/4 cup (or more) chopped celery
salt and pepper to taste
dash of oregano
splash of maple syrup (optional, unless you are in New England, then mandatory)

Method

Saute onion and celery in olive oil until clear. Add roasted peppers and cook for a very short time. Add beans (with liquid), vinegar and seasonings. Simmer for 5-10 minutes.

Pastene black beans

Not so secret Pastene family recipe

Pastene black beans

Black Beauties


Love and Lagunitas

Love and Lagunitas

How do we feel about Lagunitas? Here’s a clue!

In honor of Valentine’s Day and the Olympics, we want to give a gold medal shout out to a really cool sport and the really cool company that helps keep them flying. The sport is ski jumping. This year ski jumping is especially exciting because for the first time ever (a mere 90 years after the men started), women ski jumpers are allowed to compete in the Olympics.

In Europe top ski jumpers have rock star status. In this country ski jumpers are rarely featured between Olympics. The sport struggles to find funding for the training needed to fly, oh, a football field plus, nearly straight downhill. That’s where Lagunitas, a groovy craft beer company from Northern California, comes in. As sponsor of the US Ski Jumping Team Lagunitas has become more like family than funder. Since they are in Sochi, cheering on the team, we figure we can do our part by cheering from home, while drinking Lagunitas of course. Today happens to be a snow day here, and a Friday, and Valentine’s Day, and the day the men take to the “large” (read crazy) hill, so it seems like a good time to start.

Let’s be real. Valentine’s Day can be amateur night, sort of like New Years Eve, with a lot of undeliverable hype and expectation. What we need are options that maximize togetherness and minimize contrived, awkward and complicated situations.

Here’s a low investment/high return plan. Grab a six pack of the good stuff (might we suggest Lagunitas, which happens to be extra strength) and anything that looks good for dipping. This can be pretzels, apples, dried fruit, veggies, nuts, crackers, bread, cookies—really anything that you like at the store or have on hand. At home, open one of the beers. Make a super easy beer and cheese sauce. While that is warming up make an even easier chocolate dipping sauce.

At your final destination, or when your guest arrives, assemble the remaining five beers into Olympic ring formation. Get psyched. Arrange dips and dippers in easy reach. Turn on TV. Get cozy on the couch and let the Games—whatever they may be—begin.

Lagunitas IPA Olympic Rings

Take a cold one for the team!

I Love You More Than Beer (and cheese) Sauce

From the “The Beeroness” (Don’t you just love her sight unseen?)

Ingredients

2 Tbsp butter, softened (or melted
2 Tbsp flour
1 Tbsp cornstarch
1 cup beer (use Lagunitas IPA for highest score from judges)
2 cup shredded Cheddar and/or Gouda, do not use pre shredded
1 cup whole milk
Salt and pepper, paprika optional (and tasty).

Method

Add all ingredients to a blender or food processor. Process on high until very well blended, about 5-8 minutes. Transfer contents to a saucepan over medium high heat. Whisk rapidly and continuously until thickened, about 5 minutes. Salt and pepper to taste. Serve warm.

Lagunitas cheese dip

Go ahead and get cheesy. It’s all good.

Dip it Good Chocolate Sauce

From Joy the Baker

Ingredients

1/2 cup dark chocolate chunks (ore more)
scant 1 cup heavy cream
pinch of salt
1/2 tsp espresso powder (optional)

Method

Place chocolate chunks, pinch of salt, and espresso powder (if using) in a medium bowl.  In a small saucepan, bring the heavy cream to a boil.  Pour the heavy cream over the chocolate pieces.  Let rest for 1 minute before whisking.  Whisk until chocolate is completely melted.  They say to serve it warm but it’s good at any temp. This sauce is pretty thin, so it also pours easily over fruit and ice cream.

Chocolate dip

Chocolate dip fantasia. Of course, cookies and ice cream work too.

Note: The potential for extra points abounds here. You can make your own Easiest French Bread Ever to bring to the party, add a round of Snowchis to the mix, or whip up some Cholliesauce for more dipping pleasure. And of course, nobody’s going to object to that box of chocolates that was Plan A!

Moveable Feasts

    A fine spread for between runs, or really any old time.

A fine spread for between runs, or really any old time.

We apologize for the slight delay in Bring It posts, but due to THE FREAKING OLYMPICS, our nighttime blogging hours are seriously limited. Amidst all the TV watching, however, life, and eating, goes on. We are, in fact, at the height of Bring It season with all the shoveling, snowshoeing, skiing, aprés skiing and general warming up from the cold that’s going on here in the heart of the Polar Vortex.

As mentioned in Lunch Deconstructed, prepping and toting the midday meal can take me down. But a fresh new philosophy has come to my rescue. With apologies to past presidents it goes something like this: “Ask not what you can make and bring for lunch. Ask what lunch you can make from what you bring.” Or, more simply, instead of letting lunch prep bring you down, pack all your favorite food into a bag and figure out what to do with it when you get there. This is a win all the way around. First, you minimize chafe in the morning. Second, you have lots of options for picky eaters and changing moods/appetites. Third, aforementioned picky eaters learn the essential life skill of making their own lunches.

Bringing all of the elements and prep tools sounds complicated, but as I learned recently from Bring It master (and fellow ski racer parent) Pennie Rand, it’s not that tough. You just have to have a kit. Hers is a canvas bag stuffed with a Thermos, jars, loaves, cheese, veggies, fruit and little containers of bonus quelque chose as well as cutting boards, cloth napkins, and stylish wooden knives that make her look like a Scandinavian picnic goddess. She’s like the sport version Ina Garten, who knows that part of the fun of a meal is making it a social activity.

At a recent ski race, when Pennie handed my cold, hungry parents a hearty cracker topped with brie and baby spinach (vs. the bag of day old muffins I had grabbed at Shaw’s on the way to the race), they accepted and nearly teared up. When she followed up with a slice of whole grain bread smeared with peanut butter and Nutella, I’m pretty sure they wanted to trade me in.

This past weekend I got a glimpse of real Bring It pros in the ski lodge during Dartmouth Winter Carnival. By 8 am “Carnie” parents were trouping in with plastic storage bins full of food, and assembling an armada of crock pots on cloth-clad tables. Ski lodges, when they turn a blind eye to such large scale picnicking, are a venue more suited to crock pot warmery than crock pot cookery. Things like meatballs, chili’s and stews, are staples.

When lodges forbid profit-stealing crockpots you have to be a bit more creative. One dedicated ski parent stands hot dogs in a wide mouth Thermos then fills it with boiling water. She fills another Thermos with chili and brings a baggie of shredded cheese. At lunchtime each kid fishes out a dog, puts it in a bun from her kit, tops it with chili and cheese then finishes it off with foraged ski lodge condiments.

It is with no particular fondness or pride that I recall the free saltine/ketchup/relish ski lodge condiment sandwiches from my youth. Comparatively the DIY chili dogs would have been quite a feast. But so would some salami and cheese, a few slices of turkey, avocado and salsa wrapped in a tortilla or pretty much anything dipped in Nutella. As winter wears on, get fresh, be creative and for goodness sake invite everyone to the make-your-own-darned lunch party.

Ski lift lunch

Bringing it, extreme version. The chairlift lunch.

Olympic Snow Drinking. Let the Games Begin!

Stronger, colder, yummier

Stronger, colder, yummier. The Olympic credo of cocktails.

From Russia with Love…and Vodka.

The following were created in honor of the 2014 Olympics and thirsty spectators everywhere. But they are really just launching pads for your own winter-coping creations. This winter thing is serious stuff. You can either complain about it or embrace it. Being outdoor people, we of course choose the latter, though often we embrace with one hand while holding a frosty cold drink in the other. Really, when you gather round a bonfire with friends and pour something sweet and boozy over snow what can possibly go wrong?

For all the following drinks the set-up is the same:

Fill and pack your desired vehicle with clean snow (or finely crushed/pulverized ice). Mix all liquid ingredients in a separate container (*or mix and store in a lidded container for transport. All these individual recipes can be made in higher volumes, something strongly encouraged on a cold winter night). Pour carefully and evenly over snow. Stir, enjoy, repeat as necessary.

The Snowchi

(A Moscow Mule on snow. The unofficial off-site drink of the 2014 Games)

The Vehicle: For individual drinks, a small soup Thermos (It stays cold and if they think it is borscht you may be able to sneak it through security.) For high volume a sap bucket with the super long straws used in scary communal Scorpion Bowls.

  • ¾ ounce ginger simple syrup (you know you are wondering how to use yours up)
  • ½ ounce lime juice
  • 2 ounce vodka

The twist: No ginger syrup? Make it with 2 parts ginger beer, one part vodka and a splash of lime juice. It will be more liquidy but will do the trick. Feel more aligned with Team Bermuda than Mother Russia? Sub dark rum for vodka. to make it a dark and stormy night.

Snowchis

Snowchis in formation, awarded to the worthy (or thirsty).

Booze-free snow drinks

Our 12-year-old server confirms these are quite versatile. Try straight OJ, or the Polar Vortex sans vodka.

The Polar Vortex

As comfort to all who are freezing their butts off this winter, this elixir is white as snow with a sweet whisper of the tropics.

The vehicle: something clear to show off the frigid Polar whiteness of it all.

  • ¼ cup light coconut milk
  • ½ ounce Maple syrup
  • 1½ ounce vodka

The twist: If you are trying to bulk up for your luge run use half and half or cream for the coconut milk. If you’re in training for your figure skating frock sub Coconut Dream or Almond milk for the coconut milk. It’ll be more slurpee-like than creamy but still effective. Aesthetics of clean white not an issue? Then give dark rum a shot, because we all know that dark rum goes with coconut like brooms go with curling, like Jamaicans go with bobsleds, like Russian judges go with cold hard cash.

*Coconut milk needs some serious shaking to mix evenly, so go with a lidded container and shake vigorously. Small caper bottles (see photo below) are perfect individual to-go containers.

The Alpen Pro

As a nod to après skiers everywhere, a classic rendezvous of bubbly Italian chic and sophisticated elderberry liqueur distilled in the heart of the French Alps.

The vehicle: A plastic champagne glass or something similarly shmancy. Individual servings only, unless you are drinking straight from the bottle.  Above all, keep it classy!

  • 4 ounce Prosecco
  • ½ ounce St. Germain

The twist: Champagne is of course an option here as well, and sabering the bottle will earn you extra points among your bonfire mates.

This whole enterprise might need some exhaustive research to fine tune, but come on— it’s Olympic season and we have nearly three weeks to peak. I know you can all rise to the challenge.

set up for polar vortex drinks

The Set-Up. Some of the fixings, plus a couple of race ready Polar Vortexes to-go.


slow cooker chicken chili

Fi-Fi to the Rescue (with chicken taco chili)

I have a friend (and you know who you are) who refers to her slow cooker as FiFi, short for “Fix It and Fugget It.” Of course, she is on her second slow cooker because she forgot about FiFi for three months while it was filled with leftover Chicken Marbella. But let’s fuggedabout that image right now, and focus on dinner….tonight…with zero effort. This recipe comes from Amy, who I am calling right out because she deserves credit on at least two fronts.

First, Amy appreciates the vast the difference between crockpot cookery and crockpot warmery, an issue discussed in the Fast and Slow Lasagna post. Other than chopping up one onion (and some cilantro unless you are a slacker like me and blew it right off), the only effort involved here is opening cans, and FiFi is the only dish called into service.

Second, Amy offered up a recipe that is as delish as it is easy. With a whole lot of cold winter nights and aprés ski opportunities in the forecast, and with the Super Bowl right around the corner this comes just in time. We ate this for dinner, for lunch the next two days and were not the least bit relieved when it was gone.

Ingredients

Makes 10 servings

1 onion, chopped
1 16-oz can black beans
1 16-oz can kidney beans
1 16-oz can of cannelli beans (use whatever combo of beans you have)
1 8-oz can tomato sauce
10 oz package frozen corn kernels (canned works too)
2 14.5-oz cans diced tomatoes
1 packet taco seasoning
1 Tbsp cumin
1 Tbsp chili powder
4 boneless skinless chicken breasts (or equivalent weight boneless, skinless thighs)
chopped fresh cilantro (for overachievers)

Method

Combine beans, onion, corn, tomato sauce, cumin, chili powder and taco seasoning in a slow cooker. Place chicken on top and cover. Cook on low for 10 hours or on high for 6 hours. Half an hour before serving, remove chicken and shred. Return chicken to slow cooker and stir in. Top with fresh cilantro. Dig deep and serve with cheese and sour cream to show you care.

OK we're ready. Bring on FiFi's finest chicken chili!

OK we’re ready. Bring on FiFi’s finest chicken chili!

Guinness Fondue

Fondue Fixin's

Because we cannot live on bread alone, we have fondue.

Beer and cheese—it’s what’s for dinner. I realize I am pushing the season a bit with après ski fare, but we get really excited about the arrival of winter in this household. It’s also Friday, and in keeping with a tradition started by our dearly loved and sorely missed neighbors (come back from Sarajevo already you guys!), it’s the day of the week we collectively throw up our hands and say “Uncle!” to dinner planning. Friday is the day for take-out, appetizers, creative leftovers and raiding the Etna store on the way home. When it happens to be a chilly Friday It’s also a perfect night for fondue.

This came from an über healthy, fit mom who I never would have suspected loved beer and cheese so much. It made me like her immediately. Using a dark beer instead of wine is a different taste, and often more appealing to kids who don’t like the wine smell and taste. A little sweeter than traditional fondue, this is great with apples, grapes, potatoes, veggies, of course bread and quite possibly even cardboard. And it’s totally easy.

Ingredients

1 1/2 lb. Cabot cheddar (as sharp as you like it), grated
1 Tbsp flour
1 sprig fresh parsley
1 pinch garlic powder
1 tsp paprika
1 Tbsp butter
2 Tbsp green onion
1 cup Guinness beer- flat
2 tsp lemon juice
3 tsp worcestershire sauce

 Method

Open the beer today and let it get flat…

Combine flour, parsley, garlic powder and paprika.  Toss with cheese, set aside.

Saute butter & onion until soft – set aside

Warm, but do not boil beer, add lemon juice.  Slowly add cheese mixture, stirring constantly.  Do NOT let cheese come to a boil. Allow cheese to melt before adding more.

Add butter/ onion mixture when cheese is melted, turn up heat so cheese will thicken. Stir in worcestershire sauce. Transfer to fondue pot.

Bring It

Someone somewhere has to open a can of Guinness in the morning. Pre-grate and bag the cheese with garlic powder, flour, paprika and parsley. The rest of the chopping and prepping can be done with the group, by the group. You can be a really nice guest and do it all beforehand and arrived with pre-cut bags of veggies, bread, fruit etc. But that might make people envious of your organizational prowess. Your call.