Category Archives: Main Dishes

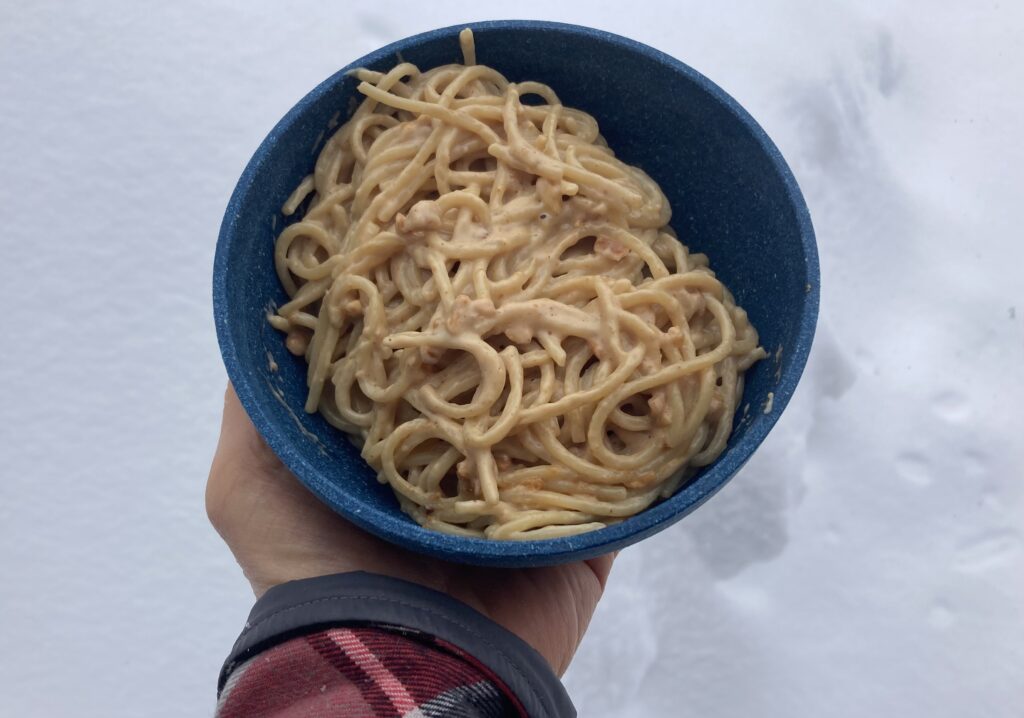
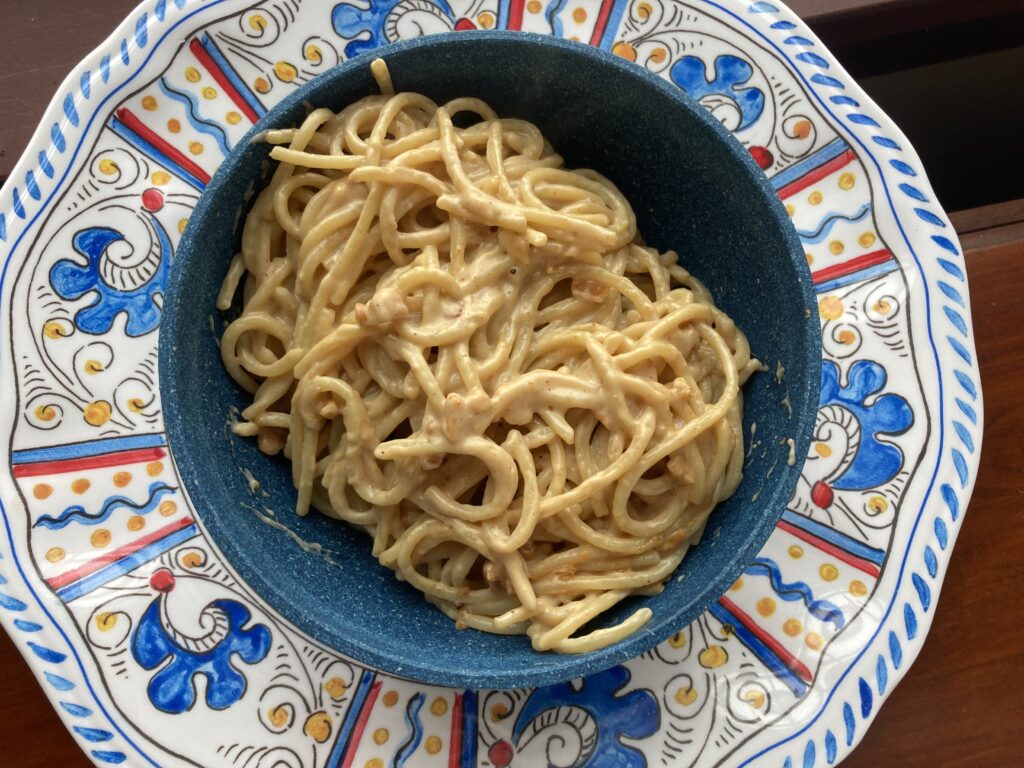
Happy Day Noodles

This started out yesterday as a sad pathetic post about life and lemons and fresh starts, a post that was killing my will to live as I wrote it. And then today…it snowed! The instant mood shift makes me realize how closely snow is connected to my psyche. I suspect everyone has a natural Prozac. Snow is mine.

I grew up loving March because it meant sun and snow and spring skiing and friends. It was the cap-off to a good winter or a bad winter but a winter in any case. This year, by the time March rolled around in these parts, it felt like winter never really started and then decided to throw in the towel early. I did the same, giving up on winter entirely in the beginning of March. Just looking at my weather app made everything feel so wrong, so sad, so hopeless. So I stopped.

But then, this snow storm comes out of nowhere, entirely burying cars (unheard of in this hood), and delivering a proper snow day—one that stops everything and everyone from doing whatever they were doing and going wherever they were going.

It took me back to the “Storm of 82” which featured a whopper late March snowstorm that coincided with my 16th birthday amidst a houseful of older ski racers. By then we’d been snowbound for nearly a week, so supplies were running low while boredom was peaking. When someone put peppermint schnapps in his hot chocolate at breakfast, it just made sense.

This recipe pays homage to great snow days, that are all about hunkering in with whoever you’re with, and eating whatever you’ve got. It requires ingredients that are likely to persist in even the leanest, picked-over kitchen.

Officially, they are known as Eric Kim’s peanut butter noodles, and also midnight noodles, for reasons that will be obvious to anyone stumbling home late and hungry.

There are so many things I like about this recipe:

  • First, it hits the trifecta of being easy, cheap and tasty.
  • It uses ingredients most people would have in their kitchen at any given time.
  • You can dress it up or dress it down. Did I stir in some chile crisp? Hell yes! Would it welcome a protein or veggies? Hell yes again! It is also just right nekkid, as is.  
  • It’s versatile. It works with ramen and spaghetti and I’ll wager with any pasta type thing you can scare up in your pantry. Vegan or gluten-free adaptations? Child’s play!
  • Finally, I love that it is deemed a single serving, so if you do manage to plow through the whole bowl, which would be impressive, you can take some comfort in knowing it was pre-ordained.

I’m here to tell you that you need not wait until a late night or a snow day to make this. Make this whenever the heck you need something quick and tasty and satisfying. Here’s hoping you enjoy your Sunday, or Snow Day or whatever day you’ve got.

Happy Day Noodles

AKA Eric Kim’s Peanut Butter Noodles
Makes 1 very generous serving

Ingredients:

  • Salt
  • 4 ounces spaghetti or 1 individual package instant ramen (seasoning packet saved for another use)
  • 2 tablespoons creamy peanut butter (low-budget recommended, but I used the chunky good stuff and it was just fine)
  • 1 tablespoon unsalted butter
  • 1 tablespoon finely grated Parmesan, plus more for serving
  • 1 teaspoon soy sauce

Method:

  1. Bring a pot of water to a boil (and salt it, if using spaghetti). Cook the noodles according to package instructions. Reserve 1/2 cup of the cooking water, then drain the noodles and return to the pot. Turn off the heat.
  2. Add the peanut butter, butter, Parmesan and soy sauce. Vigorously stir the noodles for a minute, adding some reserved cooking water, a tablespoon or two at a time, until the sauce is glossy and clings to the noodles. Season to taste with salt.
  3. Top with more cheese, if you’d like, and serve immediately

Note: I made this for the first time and it got six thumbs up (from three people). Two more unexpected visitors arrived later that day and I made another batch, earning it four more thumbs up. So, that’s two batches and seven thumbs up, with no extra ingredients. It does the job!

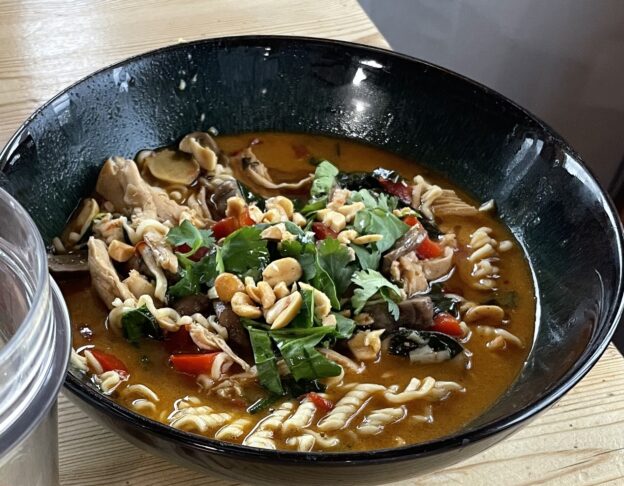
Save your A$$ Chicken Peanut Ramen

Who knew soup season would butt right up to Cinco de Mayo season and Kentucky Derby season? It’s been one of those springs in New Hampshire. The upside is that there is still time to post the recipe from Half Baked Harvest that I made more than any other (including spicy margaritas) this past winter.

It first came to my attention in November, when Pat the Great in Colorado had it ready to serve us upon arrival. Conservatively, I’ve made this 20 times since then. It was an extraordinary winter of feeding people, and without this recipe many of them would have gone hungry. Each time I thought I’d made it for the last time, there would be another chilly day with no meal plan, and out from the cupboard the stained hard copy of this recipe would come.

The recipe is classic Pat, because she only passes things along that are truly great in some way. That could mean interesting, informative, funny or delicious. In this case it means both delicious and easy.

My minor obsession with it was recently reconfirmed by Suzi the Great, who posted it on Instagram after making it an embarrassing number of times in succession. Suzi also gave me the cookbook that first introduced me to Tieghan Gerard’s Half Baked Harvest, not to mention the picture for this post, so, triple points to Suzi.

My goal at Bring It is to only share the recipes you will come back to time and again. They have to be great, not “Just OK,” and in the binary judgement by which many things can be simply appraised, absolutely “Worth It.”  Admittedly, a few times I’ve wavered, passing on a so-so recipe because it had a great story, but I’ve recommitted to the “Worth It” standard so please trust me on this one. If you like these flavors you will make this again and again, and never have to worry about how to feed hungry people in a hurry.  

Save You’re A$$ Thai Ramen

(AKA Half Baked Harvest’s 30 minute Thai Peanut Ramen)

One pot, quick and easy healthy, meal that’s creamy, spicy and delicious.

Prep Time 15 mins
Cook Time 15 mins
Total Time 30 mins

Ingredients

  • 4 cups low sodium chicken broth
  • 1 can (14 ounce) coconut milk
  • 1/4 cup low sodium soy sauce
  • 2 tablespoons fish sauce
  • 2 tablespoons honey
  • 1/3 cup creamy peanut butter
  • 1/4 cup Thai red curry paste
  • 3/4 pound boneless, skinless chicken breasts (or protein of choice)
  • 8 ounces cremini mushrooms, sliced
  • 2 red bell peppers, chopped
  • 1 inch fresh ginger, grated
  • 1 clove garlic, minced or grated
  • 2-4 squares ramen noodles
  • juice of 1 lime
  • 3 cups fresh baby spinach
  • 1/3 cup fresh basil or cilantro, roughly chopped, plus more for serving
  • chopped peanuts and toasted sesame oil, for serving

Ingredient notes:

  • You can riff on veggies here, adding more of whatever you like or whatever you have. I typically cook up the mushrooms in a skillet first with some onions because my people are not into mushrooms and that helps disguise them.  
  • I have also on occasion added a ton of thinly shredded cabbage instead of or in addition to the ramen.
  •  For “ramen” I have used fancy organic gluten free rice ramen, clear rice noodles, straight up spaghetti, 25 cent college student ramen, fresh and dried soba and udon noodles, etc. Anything goes so use what you have and what you like.
  • Pat and I both prefer to cook up the chicken before adding it to the pot (use the skillet you used for the mushrooms after you cook them up, if you go that route). It’s also a great use for leftover cooked chicken.

Method

Stove Top

  1. In a large soup pot, combine the chicken broth, coconut milk, soy sauce, fish sauce, honey, peanut butter, and curry paste. Add the chicken, cremini mushrooms, red peppers, ginger, and garlic. Set over medium heat on the stove and bring to a simmer, reduce the heat to medium-low and simmer 15 minutes or until the chicken is cooked through and shreds easily.
  2. Once done cooking, shred the chicken.
  3. Bring the soup to a boil over high heat. Stir in the noodles, lime juice, spinach, and cilantro. Let sit 5 minutes or until the noodles are soft.
  4. Ladle the soup into bowls and top with peanuts and toasted sesame oil. Enjoy!


Instant Pot*

  1. In the bowl of the instant pot, combine the chicken broth, coconut milk, soy sauce, fish sauce, honey, peanut butter, and curry paste. Add the chicken, cremini mushrooms, red peppers, ginger, and garlic. Cover and cook on high pressure for 10 minutes.
  2. Once done cooking, use the natural or quick release and release the steam. 
  3. Set the Instant pot to sauté. Shred the chicken, it should fall apart. Stir in the noodles, lime juice, spinach, and cilantro. Let sit 5 minutes or until the noodles are soft.
  4. Ladle the soup into bowls and top with peanuts and toasted sesame oil. Enjoy!

*(I know nothing of Instant Pots, so this is taken on faith)

Notes

Half baked harvest recommends storing the soup and noodles separately, then adding the noodles just before serving because otherwise the noodles will soak up all the broth and become very mushy. Here at Bring It Central we hoover down the leftovers that have been stored altogether for days noooooo problem.


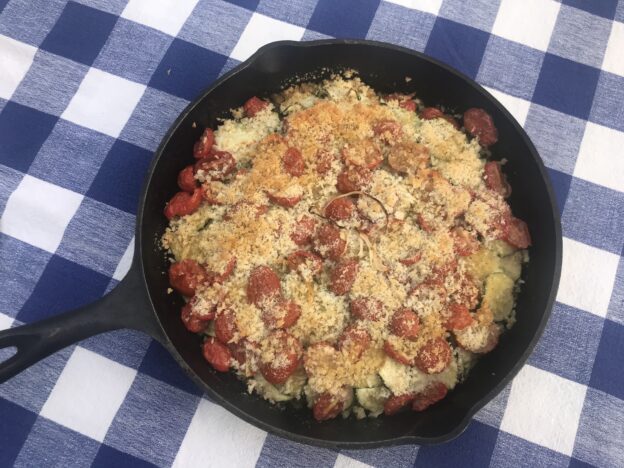
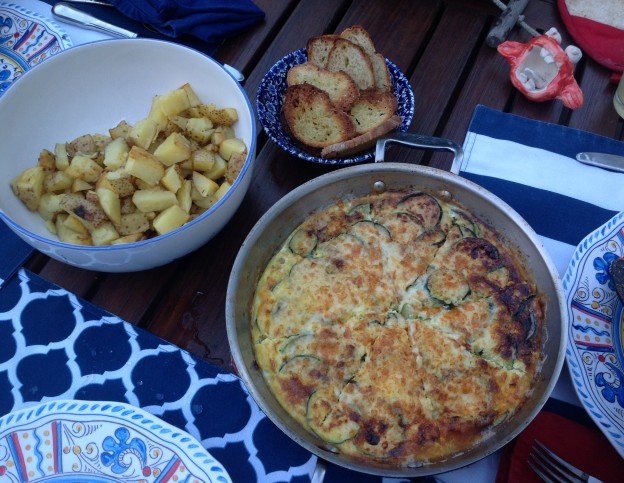
Late Summer Zucchini Tian

The summer veggies are hanging in there, but we’re definitely bridging into squash and apple season. I’m looking to you, potatoes, to help us across that divide, by adding a little heft to the rest of the zukes and tomatoes.

Behold the tian, which is basically a whole lot of veggies layered over each other in sequence, each layer blessed with a drizzle of olive oil and a sprinkle of salt. The whole shebang is then topped with cherry or grape tomatoes and breadcrumbs and then melded together in the oven. It’s pretty brilliant in its simplicity and humble (until I bragged about it) elegance. 

This recipe has the clever touch of being assembled over a low burner so the potato base layers get a little head start cooking. I’m including the whole recipe—as written by Chef Gabrielle Hamilton of Prune fame—but also giving you the Cliffs Notes, because this is more technique than exact recipe.

You’re melting the butter in the bottom of a big pan, making a base of two layers of sliced potatoes, then covering that with successive concentric layers of onions, zukes, potatoes, onions, zukes and finally all the tomatoes and a sprinkling on breadcrumbs. Each veggie layer  gets its own drizzle of oil and a sprinkle of salt, and cooks along as you keep slicing away.

You can futz with amounts, but there are some key points to follow, starting with the your slicing. To get an A+ tian your potatoes, onions and zucchinis all need to be sliced thinly, hence the mandoline. If you don’t have one, I highly recommend springing for it. My $12 beauty is admittedly bare bones but it does the job and I still have all my fingers, so there’s that. On that note, do pay attention and use the protective pusher when you get anywhere near the end of your veggies. Those blades are sharp!

Also, the stove-top steaming step is key to cooking the potatoes. I got lazy and made a second  tian by layering everything in my baking dish (some of us only own 1 cast iron pan) then putting it in the oven. It was good, but not great, mostly because the potatoes were not as perfectly cooked. If you go that route, cover your vessel with foil for the first half hour of cooking and leave it in for an extra 15 minutes, uncovered.

I also distilled the comments from the New York Times version of this recipe, which are many. They separate into two camps, both pretty indignant. The “How can you possibly not include garlic and fresh herbs in this?” camp and the “Keep it simple and let the fresh ingredients sing” camp. The latter crowd reminds us that the dish originated from a nonna in Puglia, and Pugliese hate garlic. Who knew? Thankfully, pretty much everybody agrees that blanching the tomatoes is only for teacher’s pets, and quite unnecessary.

Anyway, the bottom line is that both camps like this dish a whole lot, and with a long potato season in our future, it seems like a good time to get comfy making tian.

Ingredients:

  • 2 tablespoons unsalted butter
  • 3 medium Yukon Gold potatoes (about 12 ounces)
  •  Kosher salt and freshly ground black pepper
  • ¼ cup extra-virgin olive oil
  • 1 large yellow onion (about 12 ounces)
  • 2 zucchini (about 12 ounces), washed and wiped free of any clinging grit
  • 1 pint yellow Sungold cherry tomatoes
  • ⅓ cup coarse bread crumbs

Method

  1. In a pot, boil 2 inches of water for blanching tomatoes (OR NOT). Place an 8- or 9-inch cast-iron skillet on a burner over low heat, and add butter to melt.
  2. Peel the potatoes, and slice on a Japanese mandoline into 1/4-inch-thick disks, then arrange in a single layer circle covering the bottom of the cast-iron skillet with its melted butter, keeping the skillet on the burner and leaving the heat on while you start to build the tian.
  3. Add a second layer of potato slices, and season with salt and pepper, add a drizzle of olive oil and cover with a lid to slightly steam while you slice the yellow onion.
  4. Peel the onion, then slice into even ¼-inch or thinner rounds. The Japanese mandoline is sometimes too narrow to use for this, so you may have to use a sharp knife and do it manually.
  5. Layer abundantly half the onion rings evenly around the pan on top of the steamed potatoes, season with salt and pepper and a drizzle of olive oil, and recover the pan with a lid while you slice the zucchini.
  6. Slice the zucchini into ¼-inch-thick rounds, and layer half of them in concentric, just-overlapping shingled circles over the onions to create a neat layer. Season with salt and pepper, drizzle with oil and recover with the lid while you blanch the tomatoes.
  7. (FOR OVERACHIEVERS ONLY) Season the now-boiling water with a few good pinches of salt, and drop the tomatoes into the boiling water. As soon as their skins split — about 30 seconds — retrieve the tomatoes and run under cold water to quickly cool enough to handle; set aside.
  8. Build another ring of potato around the tian on top of the now-steaming zucchini, this time just a single layer. Drizzle with oil, season with salt and pepper and recover with the lid to steam a bit while you slip the skins off the tomatoes (IF YOU MUST).
  9. Layer the other half of the onions as before, season and drizzle and replace the lid as before, while you split the tomatoes in half horizontally with a small sharp knife.
  10. Add final layer of zucchini to the tian, and season with salt and pepper and a drizzle of olive oil. Cover, and let steam while you heat the oven to 375 degrees.
  11. Place the tomatoes around the top of the tian evenly, and sprinkle the bread crumbs over the top evenly. Drizzle with oil, season with salt and pepper and place in the oven to bake for 30 minutes.* (If your skillet threatens to bubble over, slip a sheet pan underneath to prevent any burned wreckage in the bottom of your oven.)
  12. With a spoon, baste, and drizzle the pan juices that accumulate in the tian over the top when you remove it from the oven at the end. Allow the tian to cool, settle and kind of meld for an hour before eating.

*I’m pretty sure this is meant to go in uncovered though none of the bazillion comments actually answered this. Mine goes in uncovered, and it’s darned good.


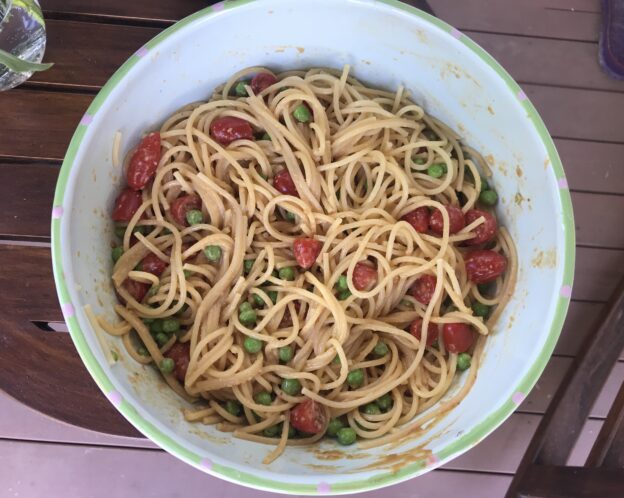
Stay-In Sesame Noodles 

It’s not you, it’s me. Or maybe it’s you, too. As we’re entering month four of a full house, I’m just tired of coming up with new things to make and serve, so I’ve been relying on my tried and true. It’s not the worst thing to get reacquainted with these no fail recipes that are easy to prepare and even easy to learn by heart.  

Best of all, these recipes can fill the local army with homemade fare without breaking the bank, or spending all day cooking.  I’m talking about Easiest French Bread Ever, Maple Oat Breakfast Bread and Everyday Granola in the morning, a constant supply of blender salsa and chile crisp, plus a big bowl of broccoli salad whenever I need a no cook veggie fix, which is pretty much always. It’s also the perfect time to fill your freezer with a Tupperware of Frosecco or any other frozen concoction. The slurpee mothership is kind of like your sourdough starter of cocktails. Just keep scooping it out, and adding more as needed. Is that a problem? Do I care?

Now that we’re getting out a little, I am running in to people who have been spending more time cooking while in quarantine. They have been making some Bring It all stars, which are also excellent for entertaining. Things like Funitella Bruschetta (recently updated!) and, of course, Hero Slaw. And for dessert, Loosey Goosey Strawberry Rhubarb Crisp and Beach Pie because, ‘tis the season!  

Along the lines of no-fail fare, I give you my new favorite go-to recipe, which already feels like an old fave. Add this to your repertoire, and buy yourself some time to think about something other than “what’s for dinner?”  

Takeout (or Stay-In) Noodles 

From the New York Times

 Ingredients 

  • 1 pound noodles, frozen or (preferably) fresh 
  • 2 tablespoons sesame oil, plus a splash 
  • 3 ½ tablespoons soy sauce 
  • 2 tablespoons Chinese rice vinegar 
  • 2 tablespoons Chinese sesame paste (or tahini; see notes)
  • 1 tablespoon smooth peanut butter 
  • 1 tablespoon granulated sugar 
  • 1 tablespoon finely grated ginger 
  • 2 teaspoons minced garlic 
  • 2 teaspoons chile-garlic paste, chile crisp or chile oil, or to taste 
  • Half a cucumber, peeled, seeded and cut into 1/8-inch by 1/8-inch by 2-inch sticks 
  • ¼ cup chopped roasted peanuts  

Preparation 

  • Bring a large pot of water to a boil. Add noodles and cook until barely tender, about 5 minutes (or recommended amt if using dried). They should retain a hint of chewiness. Drain, rinse with cold water, drain again and toss with a splash of sesame oil. 
  • In a medium bowl, whisk together the remaining 2 tablespoons sesame oil, the soy sauce, rice vinegar, sesame paste, peanut butter, sugar, ginger, garlic and chili-garlic paste. (You can also use an immersion blender or regular blender)
  • Just before serving, pour the sauce over the noodles and toss. Transfer to a serving bowl, and garnish with cucumber and peanuts. 

Notes:  

These are infinitely adaptable, and for suggestions, scroll through the many comments on the original NY Times post here. I hit the high points and recommendations here, in case you are sharing your paltry Internet connection with many young, curious, ever- streaming tenants. 

The Chinese toasted sesame paste called for here is not the same as tahini, the Middle Eastern paste made of raw, untoasted sesame. You can use tahini in a pinch, adding a little toasted sesame oil to compensate for flavor, or make your own from scratch with toasted sesame seeds and olive oil.  

To prevent dry noodles, serve immediately, or hold the sauce. I usually multiply the sauce recipe many times (I use a stick blender), and add a fairly minimal amount of the sauce to the noodles when they’re still warm. Chill the undersauced noodles until you are ready to serve, and then mix in as much extra sauce as you need 

Mind your noodles. The recipe says fresh or frozen, meaning egg noodles. It’s totally ok to use dried, as in regular spaghetti (my fave) or linguini, but 1.5 or double the sauce for a full pound of dried noodles.  

This is serious picnic fare, and can accommodate Vegans and carnivores alike with a variety of toppings like: shredded duck or chicken, tofu, cucumber, sweet red pepper, hot pepper, scallion, jicama, carrots, etc, all cut to roughly the same size.  


It’s the weekend— Have a ball!

Props to the McNultys of Hanover, for coming up with the idea of theme dinners to turn these Saturday nights in quarantine into something a little less, uh, quarantiny (as in, the state of restriction vs the popular cocktail). Last weekend they kicked it off with an après ski theme featuring Bring It’s own Guinness Fondue.

Their outdoor firepit version was not only inspiring, but also an excellent choice considering our fine spring weather. With the polar air expected this weekend, fondue is a solid option.  

Or….might I suggest, balls! Meatballs and “meat” balls are very versatile, can be made ahead and can accommodate many dietary needs. We’ve got Buffalo Chicken Meatballs, these quite excellent gingery sheet pan meatballs that I have made many times and never managed to capture on camera, the vaunted Ikea meatballs (secret recipe just revealed) and, featured here today, the shockingly tasty and “meaty” meatless meatballs.

This is a great recipe to have in your arsenal especially now that the shortage du jour is meat of all kinds. Whether you are trying to eat less or no meat, or you just can’t get your hands on the stuff, you need a good vegetarian meatball recipe, and here it is friends.

They take a bit of elapsed time, because you have to cook the water out of the mushrooms and let the whole shebang sit in the fridge for a spell, but they’re totally easy. And hey…we’ve got time! You can even show off  your domestic skills, make a double batch and stock your freezer.

As a bonus this recipe comes with a soundtrack suggestion suitable for any stage of creating or eating your Saturday night special. Crank yourself up some Queen because, well, we’re having such a good time, we’re having a ball.

Where’s the picture? Have you ever tried to get an appetizing picture of meatballs? Enough said…but how about another pic of fondue night? Happy weekend all!

 Ooh la la! Just another typical night around the fire pit.

Chef John’s Meatless Meatballs                                                                      

Barely adapted from AllRecipes

Ingredients
Makes 20 meatballs

1 tablespoon olive oil
1 lb / 453 gr white mushrooms, finely chopped (use the food processor to save time)
1 tablespoon butter*
½ cup finely chopped onion
2 garlic cloves, minced
½ cup quick cooking oats
4 to 5 tablespoons grated Parmesan cheese*
½ cup breadcrumbs
4 tablespoons fresh chopped parsley
2 eggs, divided*
1 teaspoon salt
¼ teaspoon ground black pepper
¼ teaspoon dried oregano
Pinch cayenne pepper

3 cups of your favorite tomato sauce
½ cup shredded mozzarella cheese (or any other cheese you prefer, or no cheese at all).*

*Vegans and Vegan dabblers you’ve totally got this. I’ve made these with Vegan butter, your favorite cashew parm, aquafaba and no cheese on top and they were delicioso.

Directions

Heat olive oil in a large skillet over medium-high heat. Add mushrooms, sprinkle with one pinch of salt and cook, stirring every so often until the liquid from the mushrooms has evaporated, about 10 minutes.

Stir in the butter, and cook on medium for about 5 minutes, or until golden brown.
Add onions and sauté for 5 further minutes, until translucent. Add garlic and sauté for 1 further minute, until fragrant.

Transfer mushroom mixture to a large mixing bowl.

Stir in oats and mix until thoroughly combined. Add Parmesan cheese, breadcrumbs, parsley, 1 egg, salt, pepper, oregano, and cayenne pepper (if using).

Mix together with a fork until crumbly. Stir in remaining egg and mix to combine.
The mixture should hold together when pressed.

Cover and refrigerate for at least 2 hours (overnight best).

When ready to cook, preheat oven to 450°F (230°C). Line a baking sheet with parchment paper.
Scoop 1 heaping tablespoon of mixture, and with dampened hands roll into meatballs.

Arrange on the lined baking sheet.

Bake until golden brown, about 15 to 20 minutes. Remove from the oven and let cool completely.

At this point you can refrigerate or freeze the meatballs until ready to use, or use immediately.
Bring tomato sauce to a boil in a large skillet (or saucepan), lower to a simmer, and gently stir meatballs into the sauce until coated.

Simmer meatballs in sauce for about 30 to 45 minutes. Sprinkle with mozzarella cheese, cover with a lid and let the cheese melt (about 4 to 5 minutes).

Sprinkle with chopped fresh parsley and serve over spaghetti, zoodles, spaghetti squash, in a meatball sub or just plain nekkid.

PS. Can’t get enough Vegan balls? Got more cans of black beans than you know what to do with? Try these from Minimalist Baker, who never steers you wrong.

           Eat UP people!

Puppies, Squat Racks and Three Ingredient Pasta Sauce

I had you at puppies, right? Apparently, now that the toilet paper hoarding issue is getting sorted out, the two things where demand is grossly exceeding supply is in puppies and home exercise equipment. Some people were prepared for the apocalypse, and had put in their puppy orders and built their proper home gyms. For the rest of us, I have this pasta sauce. Small consolation, but it’s something, and it comes from the master of Italian cooking, Marcella Hazan*.

This sauce can be made with any canned tomatoes you have in your pantry (San Marzanos if you are fancy), plus an onion and butter. Five Tbsp of butter sounds excessive, but if we’re being entirely honest about the effect on our diet of all this time indoors, it is probably a drop in the bucket. There are more irresponsible uses of butter that are far less tasty.

So, with no further ado, and before I embark on a grocery mission which involves many russet potatoes (hint hint on what’s coming), I give you the easiest, tastiest darned pasta sauce you’ll ever make. Stay safe and healthy and well-fed!

Marcella Hazan’s Pasta Sauce

Ingredients:

  • 2 cups tomatoes, in addition to their juices (for example, a 28-ounce can of San Marzano whole peeled tomatoes)
  • 5 tablespoons butter
  • 1 onion, peeled and cut in half
  • Salt

Method

  1. Combine the tomatoes, their juices, the butter and the onion halves in a saucepan. Add a pinch or two of salt.
  2. Place over medium heat and bring to a simmer. Cook, uncovered, for about 45 minutes. Stir occasionally, mashing any large pieces of tomato with a spoon. Add salt as needed.
  3. Discard the onion before tossing the sauce with pasta. This recipe makes enough sauce for a pound of pasta.


*Etna, NH, has its own master of Italian cooking, Teresa Lust. She read from her new book, a Blissful Feast, at the Norwich Bookstore, earlier in March, on what feels like the last time anyone could gather anywhere. I’m getting the goods to make her breakfast biscotti in the hopes that she will let me share them with you here. In the meantime, you can support the Norwich bookstore and Teresa by buying her book, which is a fun, interesting and delicious read about a part of Italy that is suffering hard right now. Have I mentioned puppies? Pet them if you’ve got them, while the rest of us visualize.


Best of Summer Simmer Chicken

Let’s be honest here about grilling and entertaining. Food that is hot off the grill is fantastic for everyone but the host, who is typically tied to said grill. If you really want to relax, it’s all about food that can be cooked long and slow with minimal effort and is very, very hard to mess up. Bonus points if it is good as leftovers. Some dishes that come to mind are crock pot pulled pork or carnitas and the king daddy of all picnic food: Chicken Marbella.

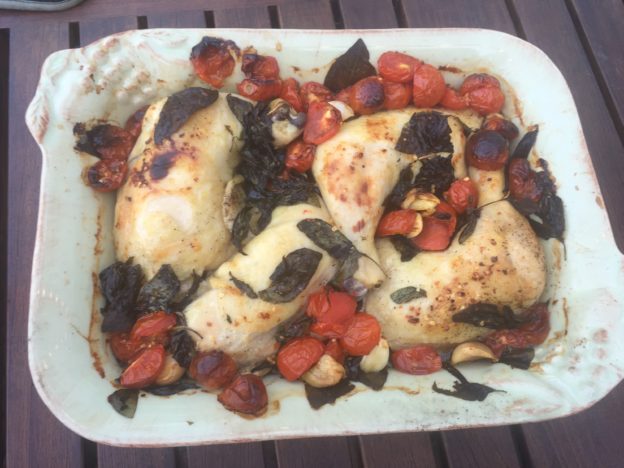
Ok, so maybe not pretty. But pretty tasty, which counts.

In case you have never met Chicken Marbella trust me when I say it is magical. It’s a Mediterranean classic, that even the most Mediterranean-averse eaters still love. That’s the magic. The only downside of Chicken Marbella is the long marinating time, and the longish list of ingredients.

With that in mind, this recipe is darned near perfect. It involves chicken that falls off the bone, and as much fresh basil tomatoes as you can handle. Even better, it takes easy to an impressively idiot-proof level. Any recipe that includes “throw” and “chuck” in the instructions has a place in my heart. With this recipe, and the supply of fresh corn coming your way, you’ve got summer dinners for any size crowd handled. While you’re figuring out what to do with your spare time, whir up a batch of ABC Summer Sauce to have on hand for the leftover chicken, veggies, pizzas, sandwiches, etc. I can’t count the number of times I’ve made it this summer, and it always gets raves.

Special slacker note: In three tries I have been foiled by bad pictures with this dish, but that hasn’t stopped me before. Honestly, though, a dish that makes even raw chicken looks somewhat pretty deserves some respect. Here’s hoping you get to step away from the grill and enjoy your summer evenings while they last!

Summer Simmer Chicken

AKA Jamie Oliver’s Tender and Sweet Chicken Legs with Sweet Basil and Tomatoes

From  Food52

Serves 4

Ingredients

  • 4 higher-welfare chicken leg quarters
  • Sea salt & freshly ground black pepper
  • 1 big bunch fresh basil, leaves picked, stalks finely chopped
  • 2 big handfuls red and yellow cherry or grape tomatoes and ripe plum or beefsteak tomatoes, cherry tomatoes halved, plum tomatoes quartered
  • 1 whole bulb garlic, broken into cloves (less works too)
  • 1 fresh red chile, finely chopped, or a big pinch of dried chile flakes
  • Olive oil
  • One 14.5-ounce/410 g can cannelini beans, drained and rinsed (optional)*
  • 2 handfuls new potatoes, scrubbed (optional)*

* I’m all for keeping it simple without the beans and potatoes, but if you need to extend the feeding power this is a great way to do it.

Method:

  1. Heat your oven to 350°F (180°C). Season your chicken pieces all over with salt and pepper and put them into a snug-fitting pan in one layer, skin side up. Throw in all the basil leaves and stalks, then chuck in your tomatoes. Scatter the garlic cloves into the pan with the chopped chile and drizzle over some olive oil. Mix around a bit, pushing the tomatoes underneath. Place in the oven, uncovered, for 1 1/2 hours, turning any of the exposed tomatoes halfway through, until the chicken skin is crisp and the meat is falling off the bone. If after an hour or so the skin isn’t crisping to your liking, you can turn up the heat and switch to convection, or just blast it under the broiler for a bit at the end, rotating the pan occasionally and watching closely, until you get the skin as brown as you like. Just don’t let the sauce simmer too vigorously or the meat might toughen up.
  2. If you fancy, you can add some drained cannelini beans or some sliced new potatoes to the pan along with the chicken. Or you can serve the chicken with some simple mashed potato. Squeeze the garlic out of the skins before serving. You could even make it part of a pasta dish—remove the chicken meat from the bone and shred it, then toss into a bowl of linguini or spaghetti and serve at once.


Okey Poke: Watermelon Poke Bowls

All the Fixin’s for a Poke Feast

At about this time, in the height of summer, we might as well throw up our hands and say, “It’s all about watermelon!” Seriously, between watermelon rosemary lemonade, watermelon salad, watermelon gazpacho and the soon-to-be shared watermelon jalapeño margaritas, I am hard pressed to get really excited about any other ingredient. But, like mama said, you must eat your veggies. And your protein. And your condiments (summer is condiment season after all).

This brings me to the poke bowl (say po-kay unless you want to horrify foodies and make Californians smirk). Poke originated as a thing in Hawaii, where fisherman needed a tasty way to use the trimmed scraps of freshly caught tuna. Bonus points for being able to serve it all out of a cooler. They did this by marinating it, putting it over sticky rice and then dressing it up with whatever condiments felt right. Intrigued by the sheer magnitude of food combining possibilities in one dish, I set out in search of my perfect poke match. I’m a huge fan of fresh raw tuna, as long as it is procured, prepared and paid for by someone else. When I saw watermelon poke taking over the Internet, I knew I’d met my destiny.

Watermelon poke, where watermelon stands in for tuna, is often made with raw watermelon which is quickly marinated. It is fine but bears little resemblance in taste or texture to tuna, and the perkiness drains right out of the watermelon after serving time. This version, adapted from Bon Appetit—in which the watermelon is marinated, cooked, then chilled until ready to be used—produces watermelon that is strangely similar in taste, texture and appearance to tuna. This not only gives you an easy, storable for days, cheap alternative to tuna, but it also makes the Vegans (not to mention the tuna) happy. Ba-da-bing! We have a winner!

As with any new type of food, the process can seem daunting at first. I promise, however, that it is low skill and effort/ high return. Here is what you’re doing:

  • Dicing the watermelon, and putting it in a simple marinade, ideally overnight.
  • Cooking that entire mixture down for 30 minutes then chilling it. At this point, or after the next step, it can chill in the fridge for up to a few days.
  • Tossing the cooked, cooled watermelon with sliced sweet and green onions, sesame seeds and soy sauce. Chill until needed (see above)
  • Cooking up a batch of sushi rice with some honey and vinegar. This can be served hot or made ahead and served cold.
  • Assembling your universe of your favorite fresh toppings, sauces and condiments.

Poke bowls are built around the upside of prep. Set up your basic elements and you can throw them together anytime, anywhere. They use what you have, what you love and what is fresh and available. They are the perfect cultural marriage of all your favorite things and a fully customizable feast.

With so many topping choices it is hard to decide what actual recipes to include here in your watermelon poke primer. For me, and for my very satisfied (and patient) extended family, the key components are the watermelon, the sushi rice and a few key condiments. The toppings are where you make this your own, and change it up based on mood, dietary constraints, availability, etc. My must haves among these are: pickled ginger for zing, avocado for creaminess, toasted peanuts or sesame seeds for crunch; scallions, chives or some such representative from the onion family to keep your taste buds honest.  

Sauces? Homemade are awesome, but sometimes enough is enough. Store bought faves can be as good or better.

And now, for the main event. Make a batch of the watermelon poke and store it in the fridge for poke bowls as needed. Bring it chilled, along with your cooked rice and an array of condiments to make a poke bowl bar for a party or picnic. This right here, my friends, will rocket you straight to the Bring It All Star Zone.

Watermelon Poke Bowl with a creamy sesame sriracha sauce.

Watermelon Poke Bowls

Mostly from justthefood.com 

  • Watermelon Poke (recipe below)
  • Sweet sushi rice (recipe below)
  • Diced cubed fresh vegetables
  • Savory sauces, crunchy toppings and condiments

The Watermelon Poke

Don’t fear cooking the watermelon. It will not disintegrate, but will assume the look and texture of raw tuna. Trust the process that will transform your watermelon from sweet to savory and into a weirdly awesome, Vegan-friendly science project.

For the marinated watermelon

Ingredients:

  • ¼ cup rice vinegar
  • 2 tablespoons sesame oil
  • 2 tablespoons Tamari or soy sauce
  • 1 tablespoon balsamic vinegar
  • 2 pounds cubed red seedless watermelon (about 6 cups), cut it into small cubes no larger than ½-inch. The consistent, smallish dice is key.

Method:

Mix together marinade in a shallow dish with a lid, or a re-sealable plastic bag.
Add watermelon and refrigerate for at least one hour, but it’s even better if you can do it overnight. Transfer marinated watermelon to a pan with a lid.
Cook covered on medium high heat for about 20 minutes, stirring occasionally.
Remove the lid and continue cooking for about 10 minutes more, or until deep red and translucent and most of the liquid has been absorbed. If you have a really juicy watermelon, you can drain off any excess liquid.
 Chill until ready to serve.

For the Poke

  • 1 recipe marinated watermelon
  • 1 cup julienne cut Maui Onions
  • 1 cup chopped green onion
  • 1 tablespoon sesame seeds
  • 2 teaspoons soy sauce

Add all ingredients to a bowl and toss to coat. Keep chilled until ready to serve.

The Sweet Sticky Rice

This sweet rice makes a perfect base to serve under your Poke. Use an Ice Cream Scoop for perfectly shaped balls of rice.

Ingredients:

  • 2 cups short grain arborio or sushi rice, rinsed
  • 3 1/2 cups water
  • 2 tablespoons honey or agave
  • 1 tablespoon rice wine vinegar
  • 1/2 teaspoon salt

Method:

Mix all ingredients together in the bowl of your rice cooker and follow the directions on your rice cooker. If you do not have a rice cooker, bring salt and water to a boil in a pot with a tight fitting lid. Stir in remaining ingredients. Return to a low simmer, cover and simmer for about 20 minutes, or until water has been absorbed. 

The Condiments

Here’s a list of options to get you started:

  • Pickled ginger
  • Cubed avocado
  • Cubed mango
  • Cubed cucumber
  • Thinly sliced radishes
  • Thinly sliced scallions
  • Chopped chives
  • Fried shallots
  • Dry roasted peanuts, roughly chopped
  • Toasted sesame seeds
  • sprouts and/or seeds
  • Cilantro or mint
  • Ponzu or shoyu sauce
  • Furikake (now that you’ve got it from your popcorn adventure)

Assembling the Poke Bowls

Mound a scoop of rice in a bowl (not on an plate—that’s just the way it’s got to be).

Top with a scoop of watermelon poke. Top it off with your favorite condiments, then add a drizzle of your favorite sauce(s). You know what to do!


Inner Beauty Oven Fried Chicken

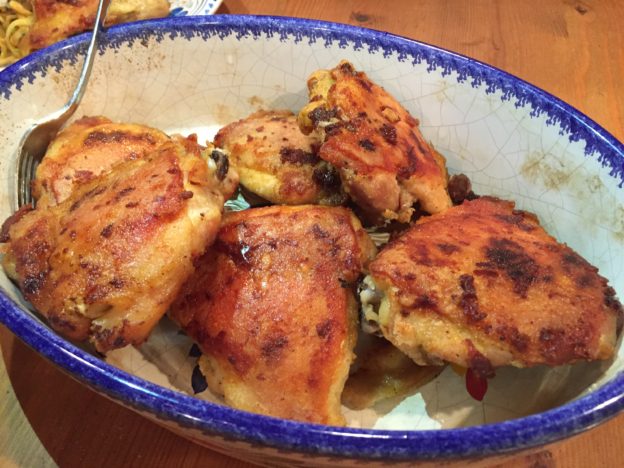
Confession: I’ve been wanting to share this recipe for a long time, but it wasn’t pretty enough. Just try to make fried chicken look appealing without a food stylist and studio lighting. If you succeed, let me know!

Let’s not let looks get in the way of substance because this, my friends, is a recipe you need to know…especially with Super Bowl, ski lodge lunch and après ski snack season upon us. (It will be equally useful for summer picnics, but we’re staying on message. And PS, see some Super Bowl recipe ideas way below.)

This recipe, by way of Food52, takes totally simple ingredients, and only asks that you adhere to an equally simple but all-important method:

 You brine it, you pat it, you coat it, you shake it hard and you bake it…in a hot oven on a hot roasting pan glistening with just enough melted butter. Oh, and you flip it. Because, you know, “chestnut golden brown” on only one side is just mean.

 My chicken took longer than 40 minutes for the first side to brown up, so use your good judgment on that. AND for max browning and crispiness be sure to use a metal roasting pan or rimmed baking sheet that gives each piece of chicken its space. I did some test pieces in a ceramic baking dish and they were not A-Team material.

 This totally passed the man test, the boy test, the boy-man test, the leftover test, the hot from the oven and cold from the fridge test, and the straight outta Tupperware in the lodge test. Be beautiful inside and out: Make this chicken!

Serves 4, or 3 big eaters

Provenance: From Food52 and Judy Hesser, whose daughter Amanda included it in her book Cooking for Mr Latte .

Ingredients:

  • 3 tablespoons sea salt (divided, plus more for serving)
  • 8 bone-in, skin-on chicken thighs (as good as you can get)
  • 2 tablespoons unsalted butter
  • 1/2 cup all-purpose flour
  • 1 teaspoon coarsely ground black pepper (plus more for serving)
  • Optional: grated Parmesan cheese and grated fresh lemon zest (I have not yet tried this variation but it looks awesome)

Method:

  1. In the morning, combine 2 tablespoons salt and about a cup of warm water in a large bowl or container. Stir to dissolve the salt. Trim the chicken of excess skin and fat. Add the chicken to the bowl. Cover with very cold water and add a tray of ice cubes. Swish around with your hand to disperse them. Chill in the refrigerator until dinner time.
  2. Preheat your oven to 400°F (200°C). Remove the chicken from the fridge and pat dry completely with paper towels (you can lay them on a clean dish towel to get off a lot of the moisture). Put the butter in a roasting pan large enough to fit the chicken in one layer (if you crowd them, they will stew vs. crisp). Place the pan in the oven. In a 1-gallon freezer bag, pour in the flour, remaining 1 tablespoon salt and pepper (along with the parm and lemon zest if you are using.) Give it a good shake. Add the chicken pieces two at a time and shake them until thoroughly coated. As you lift them out of the bag, shake them off vigorously. This is vital. You do not want a gummy coating. Line them up on a plate, and repeat with the rest.
  3. Lay the chicken pieces in the roasting pan, skin side down, and oven-fry until a chestnut brown and crisp on the bottom, about 40 minutes (sometimes it takes as long as an hour). Don’t flip them until this happens. Use a thin spatula to scrape them up off the pan and turn them; cook the other side until the bottom is browned, which will take less time, around 20 minutes. Remove the pieces from the oven as they finish cooking, and place on a plate lined with paper towels. Just before serving, grind fresh pepper over top and sprinkle lightly with sea salt.

SUPER BOWL BONUS

And speaking of the Super Bowl…If you need some ideas for how to prep for your couch or wherever you are headed, you might want to consider Crock Pot Chicken Taco Chili (so easy and feeds a crowd), Peoples Choice Corn Bread (not so easy but so worth it. You WILL be the halftime star). Game Day Wings, because, WINGS, Buffalo Chicken Meatballs because HOT SAUCE and potato bites because TATERZZZ! For some healthy snacking get your Hail Mary Coconut, your Nootch Popcorn and your Party Time Hummus on. Have a great weekend all!

Colorado Summer Corn Souper Chowder

Cowgirl and cook Tania Coffey is back on the cooking range, this time helping us figure out more ways to enjoy summers sweetest fresh corn. This recipe is adapted from a vegetarian version created by Aaron Bennett, a chef at the Aspen Ritz Carlton. It was created as an appetizer to showcase Colorado’s produce, in particular Olathe corn.

Tania says: “This soup is so much of a pain to make that after many efforts we decided to grill a chicken breast, shred it, toss it in with the soup, rename it chowder and not cook another thing for dinner.  That said, it is so good that in August we make it over and over until we are sick of it and can wait another year for fresh corn.”

So there’s your motivation. Armed with Tania’s disclaimer I made this soup, with my own set of preconditions. First, I only had four ears of corn so I had to cut it in thirds which challenged my math skills. Second, in New England my pepper selection is limited, so I had to go with jalapenos and a couple of canned chipotles in adobo. (Update: as anticipated, Tania politely points out in first comment below that cans have no place in this recipe. So let’s all just pretend I never used those chipotles). Third, I had no chicken, so I reverted to a soup more like the original. The good news is that you now have our guarantee that it is delicious with or without chicken.

Before you embark, I will soften the prep warning a bit by summing up the procedure. You are cutting fresh corn off the cob, and boiling the cobs in milk and broth. You are roasting corn kernels in the oven. You are sautéeing diced onions and peppers in butter. Then you are throwing it all together and pureeing part of it. When it’s done it is really truly NOT pretty. But as Tania notes, “it is incredible when the corn is sweet.” So let’s get over appearances shall we?

You will need two big stock pots and a hearty blender (or an immersion blender along with the good sense to keep it deep in the pot while blending).

Colorado Summer Corn Chowder

Adapted from chef Aaron Bennett via Tania Coffey

Makes: A lot; 10-12 servings at least, or more if it’s eaten by the mug vs the bowl.

Ingredients:

  • 12 ears fresh sweet corn
  • 1 1/2 sweet onion diced
  • 3 poblano peppers diced (If you can find roasted poblanos use them for a totally different— and fabulous—taste).
  • 3 jalapeños ribs and seeds removed minced
  • 2 red bell peppers
  • 2 T garlic minced
  • 4T butter
  • 2 quarts chicken stock
  • 2 quarts whole milk
  • 2 T olive oil
  • salt and pepper
  • 1 lb chicken breast grilled and shredded with 2 forks.

Method:

Seatbelts on. Preheat oven to 350
Preheat grill for chicken (or bake chicken with corn)

Peel corn. Cut kernels from cobs.  Save cobs.
Put cobs in one stock pot with chicken stock and milk and bring to a boil, reduce heat to medium and simmer gently for 45 minutes.

Grill the chicken breast.  Don’t over cook it as it is going in the hot soup.  Remember, this step makes the soup a meal but is not mandatory!  The chicken is added after the soup is completely made so you can live dangerously and decide then.

Toss corn kernels with olive oil, season with salt and pepper. Put kernels on baking sheet and roast for 15-25 minutes until lightly browned. (You’ll need at least two baking sheets if making the full recipe).

In an 8 quart stock pot melt butter and add all peppers, onion and garlic. Cook over medium heat stirring often until onion is translucent but not browned.  Add roasted corn and cook for another 2 minutes.

Remove cobs from stock and discard.

Pour broth over peppers and corn.  Bring to a simmer for 20 minutes.

Blend 3/4 of the soup in batches in a powerful blender until smooth.  The remaining 1/4 stays lumpy for texture.  Season with salt and pepper. Add shredded chicken.

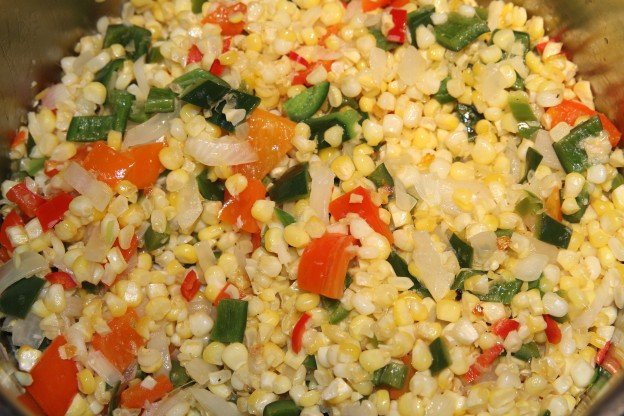
Told you it wasn't pretty. Not that you would judge on looks.

Told you it wasn’t pretty. Not that you would judge on looks.

This is how corn takes a bath.

This is how corn takes a bath.

THE Panzanella

PANZANELLA

It’s toasted bread! It’s veggies! It’s panzanella coming to the rescue!

First off, apologies all around for the technical difficulties last week, and to those of you who got a sad, gray, “Legacy IP DNS blah blah” message instead of a recipe for Watermelon Rosemary Lemonade. Thanks to a kind man named Piotr who desperately needs a vowel, we are back up and running. Now, on to this weekend.

Some recipes you just have to know. Ina Garten’s panzanella is one of them, especially in summer. In addition to being a way to use a whole lot of summer’s best produce, it’s easy to prep, easy to bring, easy to assemble and it’s DELISH. Plus, it’s a way to eat crispy bread and call it dinner (or breakfast if you can’t help yourself the morning after). Ina (AKA The Barefoot Contessa, and the goddess of bringing it) has many panzanellas in her repertoire, including an awesome greek version, but if you only master this one (and you will on your first try) the Kingdom of Picnic Greatness is yours. 

As I mentioned in the recipe for Asparagus Panzanella, you can use your imagination, your cravings and the contents of your produce bin to tweak panzanella in all kinds of ways. It’s a tasty go-to on some seriously hot days. And by the way, if you live in the Upper Valley and are looking for some places to cool off check out this post on Swimming Holes and Soft Serve.

Ok peeps, stay cool out there!

Ina’s Panzanella

Serves 12

INGREDIENTS

For the Salad:

  • 3 tablespoons good olive oil
  • 1 small French bread or boule, cut into 1-inch cubes (6 cups)
  • 1 teaspoon kosher salt
  • 2 large, ripe tomatoes, cut into 1-inch cubes (I have used halved cherry or grape tomatoes as well.)
  • 1 hothouse cucumber, unpeeled, seeded, and sliced 1/2 inch thick
  • 1 red bell pepper, seeded and cut into 1-inch cubes
  • 1 yellow bell pepper, seeded and cut into 1-inch cubes
  • 1/2 red onion, cut in half and thinly sliced
  • 20 large basil leaves, coarsely chopped
  • 3 tablespoons capers, drained

For the vinaigrette:

  • 1 teaspoon finely minced garlic
  • 1/2 teaspoon Dijon mustard
  • 3 tablespoons champagne vinegar
  • 1/2 cup good olive oil
  • 1/2 teaspoon kosher salt
  • 1/4 teaspoon freshly ground black pepper

Method:

Heat the oil in a large sauté pan. Add the bread and salt; cook over low to medium heat, tossing frequently, for 10 minutes, or until nicely browned. Add more oil as needed.

For the vinaigrette, whisk together the ingredients.

In a large bowl, mix the tomatoes, cucumber, red pepper, yellow pepper, red onion, basil, and capers. Add the bread cubes and toss with the vinaigrette. Season liberally with salt and pepper. Serve, or allow the salad to sit for about half an hour for the flavors to blend.

Bringing it:

You can prep the bread, veggies and vinaigrette in advance and store in their own containers. Mix it all up on site a half hour before serving.

Spicy Salmon on a Stick

Fish on! Pure goodness on the grill…and a pro photo by Tania. The single skewer technique is for risk takers. Two skewers per kebab makes the grilling and flipping easier.

I know. It’s the 4th so you’re thinking burgers and dogs on the grill. It’s All American, it’s easy and it’s good. But one of many happy consequences of having the 4th fall on a Saturday is that it makes for a really long weekend. And that means more opportunities to get your grill game on. It is the perfect time to try something new. For me, that was salmon kebabs. I’m slightly intimidated by cooking fish on the grill in the first place, but cubed fish? With little lemon slices? This was a leap.

It was so worth it. This recipe came to me from my Rocky Mountain Correspondent Tania, purveyor of all things spicy and delicious. She also happens to be a fantastic photographer (of fast ski racers and food). She advised me to get the salmon skinned at the store which I did. My fish mongress tried to boss me otherwise (it was from a loving not lazy place, because she likes the skin) but I persevered and am so glad I did. Who wants bits of salmon skin at clean up time? Correct—not me.

I was nervous that the fish would fall apart, or be a pain to skewer or just not be that good, but it was pretty easy and very tasty. One slacker note: I wanted to skewer these a few hours ahead of time, so I did this before prepping the salmon with the oil and spices. Just before grilling I brushed them with oil and rolled them in the spice mixture which I had spread on a baking sheet. Second slacker note: I could not wade into the garden to find my fresh oregano so I used dried. Again, it was really good, but I know in my heart it could have been even better. These are the sacrifices we make.

Spiced Salmon on Skewers

By guest cook Tania Coffey via Bon Appetit

Ingredients

Servings: 4

  • 2 tablespoons chopped fresh oregano
  • 2 teaspoons sesame seeds
  • 1 teaspoon ground cumin
  • 1 teaspoon kosher salt
  • 1/4 teaspoon crushed red pepper flakes
  • 1 1/2 pounds skinless salmon fillet (preferably wild), cut into 1-inch pieces
  • 2 lemons, very thinly sliced into rounds
  • 2 tablespoons olive oil
  • 16 bamboo skewers soaked in water 1 hour

Method:

prep: 25 min total: 25 min

  • Prepare grill for medium heat. Mix oregano, sesame seeds, cumin, salt, and red pepper flakes in a small bowl to combine; set spice mixture aside.
  • Beginning and ending with salmon, thread salmon and folded lemon slices onto 8 pairs of parallel skewers to make 8 kebabs total. The parallel skewers are pretty key in keeping the fish stable. Brush with oil and season with reserved spice mixture (or brush and roll entire kebab as described above).
  • Grill, turning occasionally, until fish is opaque throughout, 5–8 minutes.

Serve these with lemon cauliflower couscous, a green salad with everything from your CSA and maybe even some watermelon sangria. Save the burgers for your next bbq—it’s right around the corner. Happy 4th to all!

Love, and a Side of Buffalo Chicken Meatballs

 a few of the best friends in the world. Way better looking than meatballs in the sun.

A few of the best friends in the world. Way better looking than meatballs.

This is about meatballs, but it’s not really about meatballs. It’s about friends and family and communities and about the times that remind you how much you love all of the above. Those times are called parties.

I’m on spring break, which is why we’ve sort of lost touch (It’s not you, it’s me.) The anchor of the trip was the party (see happy purple people above) to honor my awesome mama. The whole process of throwing a party in your hometown—especially when you have no definitive vision or time or really any business thinking you can pull it off—is confirmation that Dorothy and her sparkly red shoes really had it right. There’s no place like home.

Friends appeared at just the right time to help me shop, delivered fondue pots, brought drinks and favorite dishes, ship-shaped the house, helped prep, cook, clean and tend each other throughout, took pictures and showed up with their rally caps on. They asked “how can I help?” and when I hesitated they just jumped in and did. The timeliness of the help was downright freaky, as when I was lamenting that I’d failed to order a cake and the phone rang: “Could I prepare a signature dessert to honor your mom?” I’m talking crazy good.

Like I said, this isn’t much about meatballs. BUT for this occasion I needed something easy I could make ahead and then pop in the oven, something that would not require any utensil beyond a toothpick, and something that was worthy of the best friends and family a girl could ever have. These mighty meatballs (poached from Epicurious) delivered in all areas. As a bonus, the leftovers were good the next day, cold and reheated.

Make these and have a party to remind yourself of all the good stuff and good people in your life.

Ingredients:

  • 2 tablespoons vegetable oil
  • 4 tablespoons (1/2 stick) unsalted butter
  • 1/3 cup Frank’s Red Hot Sauce or any other favorite hot sauce
  • 1 pound ground chicken, preferably thigh meat (turkey works too)
  • 1 large egg
  • 1/2 celery stalk, minced
  • 3/4 cup bread crumbs
  • 1 teaspoon salt
  • Some kind of Blue cheese dip or dressing

Method:

Preheat the oven to 450°F. Drizzle the vegetable oil into a 9×13-inch baking dish and use your hand to evenly coat the entire surface. Set aside.

Combine the butter and hot sauce in a small saucepan, and cook over low heat, whisking until the butter is melted and fully incorporated. Remove from the heat and allow the mixture to cool for 10 minutes.

Combine the hot sauce mixture, ground chicken, egg, celery, bread crumbs, and salt in a large mixing bowl and mix by hand until thoroughly incorporated.

Roll the mixture into round, 3/4 -inch balls, making sure to pack the meat firmly. Place the balls in the prepared baking dish, being careful to line them up snugly and in even rows vertically and horizontally to form a grid. The meatballs should be touching one another.

Roast for 15 to 20 minutes, or until the meatballs are firm and cooked through. A meat thermometer inserted into the center of a meatball should read 165°F.

Allow the meatballs to cool for 5 minutes in the baking dish before serving.

Serve with blue cheese dip for the real buffalo experience

 See? I told you. But don’t judge. Just make them. Trust me on this.

See? I told you meatballs aren’t as pretty as friends. But as with friends, don’t judge. Just make them, love them  and be happy.

Taco Tuesday Solved

Yay—taco night! It sounds so easy, so crowd pleasing, so autopilot for a busy weeknight. It is easy if you and your people prefer soft shell tacos. But let’s talk about hard shell tacos. The opening is too narrow and the shells are too brittle, so if you do end up creating your masterpiece in one piece, it explodes on the first bite. No bueno.

Even less bueno are the proposed solutions, helpful techniques like grabbing each taco with tongs and frying it in oil. Honestly, I’d rather sort rogue socks from the laundry than fry individual tacos. However you say “not happenin’” in Spanish is how I’m dealing with those tacos.

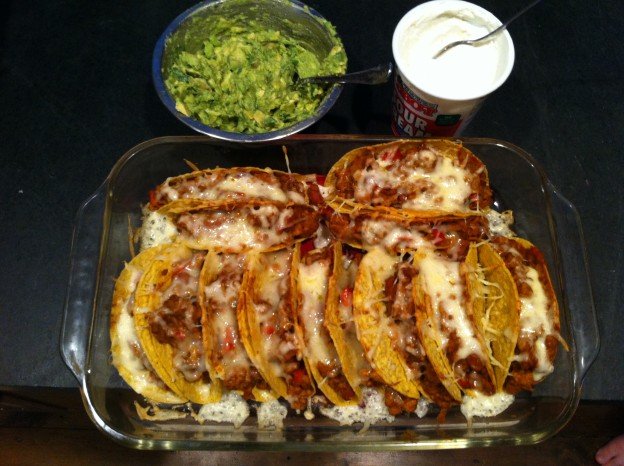
Bevin Wallace out in Colorado has solved this for us on her Real life Delicious blog. The key is filling the shells, standing them against each other in a baking dish, covering them with a loving sprinkle of cheese and then baking them. You get slightly softened hard shell tacos that are totally easy to eat without losing half the filling on the plate.

Bevin is super healthy and organic and fills her with elk meat or grass fed ground beef. The slacker (my) version is to take out the word organic everywhere, and use what you’ve got, which in my case most recently was ground turkey. Non meat eaters can use whatever non meat feels right. Other keys to the recipe are the veggies (they keep us honest on taco night) and the refried beans in the filling mixture that sort of hold it all together. And oh yeah, you can make them ahead and bring the dish over to pop in the oven. It’s all good stuff. Try these, and go sort socks with all your spare time.

Baked Tacos

à la Real Life Delicious
Makes 10-12 tacos

Ingredients:

  • 1 lb. lean ground meat (I use ground elk, but grass-fed beef, bison, or pasture-raised turkey are also good)
  • 1 tbsp. taco seasoning (Slackers, open that yellow Ortega packet)
  • 1 tsp. salt (omit if you are using the package)
  • 1 13.5 box organic refried beans, or 1 can refried beans
  • 1 small onion, chopped
  • 1 small red bell pepper, chopped (try to buy organic because peppers are on the Dirty Dozen)
  • 1 package organic taco shells
  • 1/2 cup shredded pepper Jack (or sharp cheddar) cheese

Method:

Preheat the oven to 350 degrees. Put the meat in a large skillet, add the taco seasoning and salt, and brown over medium-high heat. When the meat is almost done, add the chopped vegetables and cook until soft. Stir in the beans and heat through. Make sure the meat, veggies, and beans are well incorporated. Bring a large rectangular baking dish and the taco shells over next to the stove and spoon the meat mixture into the taco shells (about 3/4 full). Stand the tacos in the baking dish as you fill them. They will want to fall over until they are all lined up in there fairly tightly. After you’ve filled the tacos, sprinkle the cheese over them and bake for 10 min.

Bringing it:

Stack those bad boys, cover the dish with foil and proceed to the party where you will be greeted with mucho gusto.


Hakuna-Frittata

Hakuna Frittata


Stay with me here. This will all make sense. I promise. One of my favorite food sites is Food52, but sometimes I avoid clicking on their emails because it opens a time-sucking Pandora’s box of recipes and ideas. The whole concept of spending oodles of time looking for timesaving ideas is perverse and ends up making me angry, after much time is gone forever. BUT, all that anxiety aside, one of my go-to features on Food 52 is their “How to make X without a recipe.” Learning a method vs a recipe really sets you free because you never have to worry about having exact ingredients, exact amounts or an Internet connection.

One anytime meal for which I never ever use a recipe is a frittata. I can’t be 100 percent certain on this but I read (while looking for something else no doubt) that frittatas were actually invented to use up leftovers. If that’s not enough to make them the home cook’s best friend, consider these features: they use simple ingredients that are pretty universally loved and that you usually have on hand; they are infinitely tweakable for food issues (unless you are Vegan); they are cheap, quick, comforting and tasty. Yes folks, frittatas will indeed set you free.

When you are thinking of something simple yet substantial to serve for dinner or breakfast, or of something nutritious that you can eat hot or cold on the road, or of a quick, easy dish to bring to a pot luck, or of what you can make right now (when you are not busy), to eat later (when you are so busy you can’t take time to boil water)—in all these situations you can either starve, lament your inability to plan menus, buy $60 of takeout or…you can Hakuna Frittata.

That’s right. Go ahead and sing the rest of the verse, if only to pay back your kids for years of Lion King songs stuck in your head….It means don’t worry, as long as you have some eggs.

I went ahead and looked on Food52 and sure enough they beat me to it with How to Make Any Frittata in Five Steps. If you think you can resist the rabbit hole of fabulous recipes, pictures and ideas on Food 52 check theirs out. If, like me, you thrive within Internet boundaries, check out my version here. I have purposefully not included exact amounts, but rather loose guidelines which beg to be challenged:

Ingredients:

  • Onions etc: 1 cup or so of diced onions or something in the onion family, like leeks, shallots, scallions. You can use a combo of them as well.
  • Seasonings: salt, pepper, dried or fresh savory herbs of choice.
  • Vegetables: Any veggies you like or have on hand: Broccoli and cauliflower–good. Leftover roasted potatoes–so Spanish of you! Fresh corn and peppers–yum. Last night’s roasted root vegetables–yep. A whole lot of zucchini from the neighbor? Bring it on!
  • Meat option: Cooked meat like bacon, crumbled sausage, ham, cut up chicken or turkey.
  • Eggs: Start with about eight for a normal frying pan. You can work up or down from there depending on what you have.
  • Cheese: A handful or more of your favorite. Cheddar is king here, but dollops of soft goat or ricotta works well too. Go Gruyere to pretend you’re in the Alps. If you’re feeling a little mean or lactose intolerant or both you can skip the cheese.

 Method:

Saute the onions in some olive oil or butter or a mix of both. Sprinkle some salt on them as they cook. If you are cooking for someone on a low sodium diet make sure they are not looking during this step.

When softened add other veggies. Cook them up until all browned and yummy looking. Here is where to add fresh or dried herbs of choice and let them ramble around with the veggies at the end of cooking.

This is a good time to stir in the meat, if you are using it.

Whip up eggs with a fork or in a blender, and pour them into hot skillet. Lift up the edges a bit as the eggs cook so that the uncooked parts run onto the hot part of the skillet. A little omelet art is in order here.

When the eggs are getting near set, sprinkle on the cheese and put the whole shebang under the broiler until is it browned to your liking.

Serve it up hot or at room temp and enjoy realizing that there is only one pan to clean. Go you!


Asparagus Panzanella

Spring fever in Doug and Kelley's asparagus patch.

Spring fever in Doug and Kelley’s asparagus patch. Arm yourself with a sharp knife and a healthy appetite.

As we come up on the one year anniversary of Bring It! we’re shaking it up a little (just a little, I promise) with the Ingredient of the Month. We pick something seasonal and feature it in a few posts that month. It’s not rocket science, but it’s progress. May’s ingredient is asparagus. We’re already getting to the end of the month but the tenacious winter kept those spears in hiding for quite some time. Now they’re out and those lucky enough (and smart enough) to have their own asparagus patch quite literally have their hands full.

Doug and Kelley Lewis are among the lucky/smart ones. Doug affirms that asparagus is indeed hard to start/plant, “but after two years of waiting for the roots to properly build, the harvests every spring are awesome. We got over 100 stalks just today!!!” Their typical spring dinner is grilled asparagus (preferably a bit scorched and black) with rice and cut veggies or grilled sweet potatoes as sides. Preferred cooking method is to lightly oil the spears with olive oil and a sprinkling of salt and throw them naked on the grill. “Steaming is easy, fast and inside,” says Doug. “Just sprinkle with a bit of salt and/or a squeeze of lemon. And they are yummy in scrambled eggs.”

Too much asparagus is a good problem to have, especially when you know about Asparagus Panzanella. Panzanella is one of those genius dishes that almost makes you feels like you’re cheating by calling it a meal—like eating cereal for dinner but way better. It’s basically a salad of toasted bread and whatever combination of fresh herbs and vegetables makes you happy. Pharrell Williams dancing-in-the-kitchen happy.

Naked Guns—pure, clean asparagus ready to grill.

Naked Guns—pure, clean asparagus ready to grill.

The Holy Grail of Panzanella’s is Ina Garten’s classic, so I used her method for toasting up the bread. Whereas hers uses cucumbers, tomatoes and basil, this one uses asparagus,  ricotta salata and spicy greens. You can go peas, mint and parm, or cilantro, corn and avocados. You get the picture.  

Taste-wise ricotta salata is sort of a mild feta with good structural integrity. Look at this as a way not only to eat bread for dinner but also to use whatever fresh stuff you have on hand. You can boil, roast or grill the asparagus.

Asparagus Panzanella

Adapted from Food and Wine

Ingredients

Asparagus Panzanella

The Food and Wine version of this feast. Let’s just double the bread shall we? Now we’re talking!

4 large eggs
2 pounds fat asparagus, peeled (if using thinner asparagus just trim or snap off the tough ends)
3 Tbsp good olive oil
1 small French bread or boule, cut into 1-inch cubes (6 cups)
1 tsp kosher salt
2 cups packed young mustard greens or chicory (or arugula)
1/2 small red onion, thinly sliced
1/4 lb ricotta salata, thinly sliced or crumbled
1 watermelon radish or 2 large red radishes, very thinly sliced

For the Vinaigrette

1 Garlic clove (minced)
1 tsp Dijon Mustard
3 Tbsp Sherry Vinegar
1/2 cup Olive Oil
Salt and Pepper to taste

Method

Put the eggs in a saucepan of water and bring to a simmer over moderately high heat. Simmer for 6 minutes. Drain the saucepan and fill it with cold water. Crack the eggs all over and let stand in the water for 1 minute. Peel and thickly slice the eggs; the yolks will be barely cooked but not runny.

Heat the oil in a large saute pan. Add the bread and salt; cook over low to medium heat, tossing frequently, for 10 minutes, or until nicely browned. Add more oil as needed. (Bread cubes can be toasted earlier in the day and left a room temp, and covered for God’s sake so nobody scarfs them down.)

Bring a medium saucepan of salted water to a boil; prepare an ice bath. Cook asparagus until bright green and just tender, 2 to 3 minutes. Transfer immediately to ice bath. Drain; place on a clean kitchen towel. (alternatively toss asparagus in olive oil and grill or roast). Cut stalks into fork-friendly pieces.

In a small bowl, whisk all vinaigrette ingredients together.
In a large bowl, toss the asparagus, toasted bread, greens, onion and cheese. Drizzle with the dressing, toss, taste, and adjust to desired dressy-ness. Let sit a few minutes for bread to absorb dressing. Garnish with the eggs and radish and serve.

Bring It!

This is a genius option to bring to a friend’s house, a picnic or a Drive-In. All the elements—toasted bread, veggies, dressing and cheese—can be prepped in advance, packaged separately and assembled on site.

Please do note that this is more method than recipe. Experiment with combinations that you like in other dishes or whatever fresh veggies and cheese you like and have on hand. Again, it’s toasted garlic bread for dinner. Don’t fight this. It’s all good!

Jerk Ribs

What a way to kick off the grilling season!

What a way to kick off the grilling season!

Okay, not the post you would expect from a vegetarian, but my meat-eating boys love these ribs.  They ask for them repeatedly.  And every time I serve to guests or bring anywhere, I get asked for the recipe.  These puppies are good (so I’ve been told!).  Plus, what is easier than mixing some spices in a jar, rubbing it onto the meat, and throwing the whole mess in the oven or onto the grill. It really doesn’t get any easier than that.  You can prep these ribs in about 5 minutes and that is it.

So, this post is about as quick and easy as the recipe – enjoy!

Ingredients

2  lbs pork loin back ribs
1 Tbsp dried minced onion
1 1/2 tsp onion powder
2 tsp thyme
1 tsp salt
1 tsp allspice
1/4 tsp nutmeg
1/4 tsp cinnamon
1 1/2 tsp sugar
1 tsp black pepper
1/2 tsp cayenne

Method

Preheat oven to 350 degrees or preheat grill to medium low. In small jar with tight fitting lid, shake together all dry ingredients until well mixed.  Rub dry mixture onto all surfaces of ribs.  Make a container for ribs by taking double layer of heavy duty foil just large enough to hold ribs; crimp edges to make 1” sides. Place ribs on shallow baking pan with rack and bake for 1 1/4 to 1 1/2 hours. Or place on grill for same amount of time. Cut into 1 rib portions. Serve!

Bombproof Mac and Cheese

Bombproof mac and cheese

Still chili? A little cranky even? Crunchy-topped mac and cheese to the rescue!

Here it is, the end of March, and we’re still in search of comfort food. Well, I for one will take depressing rain at the end of March over depressing rain in February any day! All well and good, but it leaves us with depressing rain. Which leaves us with a need for mac and cheese. My kids would argue that this need is equally urgent in any season. Their gold standard for homemade mac and cheese involves the crunchy breadcrumbs on top and absolutely no green of any kind. Boys, as long as we hold the parsley your ship has come in.

This recipe comes straight from a fellow ski racer Mom in Colorado who frequently finds herself with a houseful of hungry teenagers. As she says, “The true beauty of this is that two ski race dads dumped the whole casserole in a crock pot at Winter Park and served it for lunch with a ladle into plastic cups—genius!” Dads in a ski lodge dishing out hot food into plastic cups? I am so in! Thank you Tania (who clearly knows that parsley can be a deal killer) and I hope you are seeing some sun out in Colorado.

 And now, we bring you…

Bombproof No-Boil Mac and Cheese   

From Bon Appetit, by way of our Rocky Mtn correspondent Tania

Makes 8 servings

Ingredients

1/2 cup butter divided
1/4 flour
3 cup whole milk
3 cups water
1 Tbsp kosher salt
1 tsp pepper
1 lb elbow mac (or bigger tubes like rigatoni, medium shells, etc)
2 cups shredded cheddar divided
2 cloves garlic chopped
1 cup panko
2 Tbsp chopped flat leaf parsley (never used it)

Method

Preheat oven to 400.

Melt 1/4 c butter in a large saucepan over med-high heat. Add flour whisking constantly for 1 min. Whisk in milk and 3 c water and bring to a boil. Reduce to a simmer, cook, whisking often, for 10 min.  It should be a thin glossy sauce. Add salt and pepper. Remove sauce from heat.

Toss pasta and 1 1/2 cups of cheese in a 3 quart baking dish.  Pour sauce over pasta.  It should be submerged.  Don’t stir.  Cover with foil and bake 20 min.

Meanwhile, melt 1/4 c butter in large skillet over med heat.  Add garlic, panko and parsley and toss to combine. Season with salt and pepper.

Remove foil from dish.  Sprinkle with remaining cheese.  Cover with panko mixture.
Bake, uncovered, for 10 more minutes or until pasta is tender, edges are bubbling and top is golden brown.

Mexican Lasagna

Crowd pleasing for sure!

Crowd pleasing for sure!

I love Mexican food!  Well, everything except for the Chimichanga – why you’d fry all that wonderful food is a mystery to me. But other than that, Mexican is way at the top of my list.  This recipe for Mexican lasagna is great and super easy.  Tortillas replace the normal lasagna noodle, salsa replaces the normal red sauce, and jack cheese replaces the normal mozzarella.  You can add anything from ground beef to lots of veggies (that’s me!) to many different kind of Tex Mex sides….think black beans, corn, chili peppers, and lots of cilantro.  Plus you can make this to bring anywhere.   Don’t forget to bring a small bottle of hot sauce for those that want to ramp up the spice.  I eat this lasagna with a bottle of chipotle Cholula hot sauce in one hand and a fork in the other.  Bueno!

Ingredients

1 cup fresh cilantro
4 scalllions, coarsely chopped
10 oz fresh baby spinach
 8 corn tortillas (6 inch)
1 can (15.5 oz) black beans, drained and rinsed
2 cup of your favorite salsa (Green Mountain Gringo Medium is the only kind I buy!)
2 cups pepper jack cheese 

Method

1) Preheat oven to 425 degrees.   

2) Coat bottom of baking pan with oil or cooking spray.

3) Spread 1/2 cup of salsa on the bottom of the pan and cover with tortillas (they will overlap).

4) Layer with cilantro, scallions, spinach, beans, cheese, salsa.  Try to divide the fillings so that you have enough for 2 layers plus some cheese to sprinkle on top. Once you’ve put down one layer, start your second layer with tortillas and then add the fillings. End with cheese on top.

5) Cover with foil and bake 25-30 minutes; remove foil and continue baking until golden 15-20 minutes more. Cool 5 minutes before serving if your crowd can wait!

slow cooker chicken chili

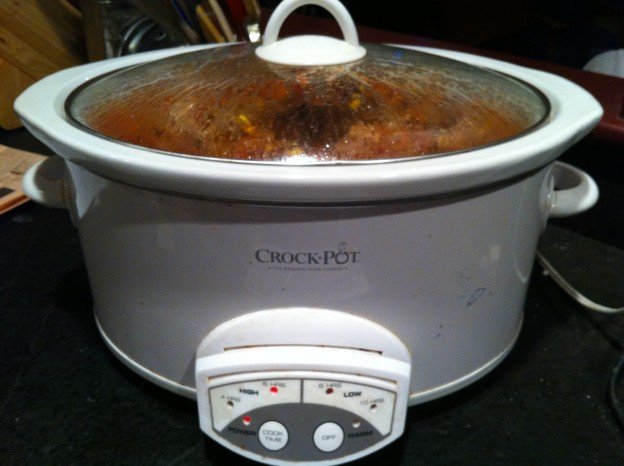
Fi-Fi to the Rescue (with chicken taco chili)

I have a friend (and you know who you are) who refers to her slow cooker as FiFi, short for “Fix It and Fugget It.” Of course, she is on her second slow cooker because she forgot about FiFi for three months while it was filled with leftover Chicken Marbella. But let’s fuggedabout that image right now, and focus on dinner….tonight…with zero effort. This recipe comes from Amy, who I am calling right out because she deserves credit on at least two fronts.

First, Amy appreciates the vast the difference between crockpot cookery and crockpot warmery, an issue discussed in the Fast and Slow Lasagna post. Other than chopping up one onion (and some cilantro unless you are a slacker like me and blew it right off), the only effort involved here is opening cans, and FiFi is the only dish called into service.

Second, Amy offered up a recipe that is as delish as it is easy. With a whole lot of cold winter nights and aprés ski opportunities in the forecast, and with the Super Bowl right around the corner this comes just in time. We ate this for dinner, for lunch the next two days and were not the least bit relieved when it was gone.

Ingredients

Makes 10 servings

1 onion, chopped
1 16-oz can black beans
1 16-oz can kidney beans
1 16-oz can of cannelli beans (use whatever combo of beans you have)
1 8-oz can tomato sauce
10 oz package frozen corn kernels (canned works too)
2 14.5-oz cans diced tomatoes
1 packet taco seasoning
1 Tbsp cumin
1 Tbsp chili powder
4 boneless skinless chicken breasts (or equivalent weight boneless, skinless thighs)
chopped fresh cilantro (for overachievers)

Method

Combine beans, onion, corn, tomato sauce, cumin, chili powder and taco seasoning in a slow cooker. Place chicken on top and cover. Cook on low for 10 hours or on high for 6 hours. Half an hour before serving, remove chicken and shred. Return chicken to slow cooker and stir in. Top with fresh cilantro. Dig deep and serve with cheese and sour cream to show you care.

OK we're ready. Bring on FiFi's finest chicken chili!

OK we’re ready. Bring on FiFi’s finest chicken chili!

Lunch, Deconstructed

Deconstructed lunch

Deconstructed lunch elements, waiting to meet each other.

Lunch can take me down, especially in winter. When we are scrambling to get out the door to training or a race, the idea of preparing lunch, after making breakfast, cleaning up and gathering/loading gear is a major buzz kill. But the penalty for not making lunch is hunger or French Fries. Lots of French Fries. NOT that I have anything against French Fries, and particularly the ones at the Dartmouth Skiway that must be double fried because they are so good. But we all know, the sad, cumulative consequence of too many French Fries.

My solution is (to try at least) to have a fridge full or delicious and healthy lunch fixings, ready to be combined the night before, or easily enough in the morning. Below are basic recipes for some essential elements, along with suggestions for the makings of the best darned lunch you can cram into a takeout container.  The recipes for the beets, lentils and onions come from Stone Soup. Build an arsenal of sauces from Get Saucy With Me to have on hand and you’re good to go, to the Skiway and beyond.

Skiway Deconstructed Lunch Basics:

  • Baked Sweet Potatoes
  • Roasted Beets
  • Massaged Kale
  • Parisian Lentils
  • Balsamic Onions

A few suggestions for other awesome things to have on hand:

  • Roasted nuts and seeds
  • Avocado
  • Roasted vegetables
  • Cooked grains like brown rice, quinoa and millet
  • Hummus
  • Hard boiled eggs
  • Chopped olives or tapenade
  • Cooked BACON, chicken and other protein. Did I say bacon?
Salads for two, in brilliant take out containers. Dressing in a repurposed caper bottle.

Salads for two, in brilliant take out containers. Dressing in a repurposed caper bottle.

Sweet Potatoes

Ingredients

  • However many sweet potatoes you want to cook in your hot oven.

Method

Turn oven on to 400.

Wash potatoes and dry them with a paper towel. Prick all over with a fork. (One exploded potato will cure you from ever forgetting this step.) Put potatoes on a cookie sheet to catch the goo that escapes from the holes. Line the sheet with foil if you want zero cleanup.

Bake potatoes for about an hour, squeezing them to test for doneness starting at about 45 minutes. I like mine to have some structural integrity for slicing later.

When done, let potatoes cool. They can be easily peeled by hand if desired. Store covered in the fridge.

Massaged Kale

There are many methods for this so don’t worry too much about the ingredient measurements or timing. Some recipes only call for salt in the massaging, others only for oil, others for oil, lemon juice and salt and still others for the entire dressing. The point is just to break down the kale a bit so it is still raw but friendly and makes a worthy bed for all kinds of other good stuff.

Ingredients

  • One or two bunches kale, washed, spun dry, stemmed and shredded or torn. *
  • Olive oil, salt, lemon juice

*(You can easily stem kale with a big sharp knife by holding it vertically from the stem end and running the knife down the stem. Or you can go rogue and use your fingers. Grip the stem between thumb and forefinger and zip down the stem.)

Method

Put kale into a big bowl. Drizzle with a Tablespoon or more of olive oil, a splash of lemon juice and a good sprinkling of salt. Massage kale with your hands until it softens a bit and is a shinier, dark green. Store covered in the fridge until  ready to use.

Roasted Beets

These keep a week or more in the fridge, so I generally make enough to fill up a large 9 x13 baking dish.

Ingredients

  • 1-2 bunches beets, or a few large ones.
  • Balsamic vinegar
  • Olive oil

Method

Preheat oven to 400.

Remove stalks from beets and scrub them well. Chop into wedges – either quarters, sixths or eighths. The smaller you chop, the faster they will cook. I like big wedges because I have more slicing and dicing options later

Splash with a few tablespoons of balsamic vinegar and the same of olive oil. Sprinkle with kosher salt.

Cover tightly with foil and roast for 45 minutes to 1 hour or until beets are tender. Season to taste. When cooled you can easily peel them by hand or with a knife, or just eat them with the peels.

Parisian Lentils

I love these any time of day, even for breakfast with an egg on top. Full disclosure: I never measure these. I just boil a bunch of lentils and add equal splashes of the seasonings at the end. And if I don’t have sherry vinegar I cut to the chase with a splash of straight sherry. Saves you the trouble of having a separate glass of wine with dinner (or breakfast in some cases). The recipe calls for topping these with fresh ricotta and parsley, which sounds awesome.

Ingredients

  • 7 oz French style green lentils (aka puy lentils)
  • 2 tablespoons sherry vinegar
  • 2 tablespoons soy sauce

Method

Place lentils in a medium saucepan and cover generously with water. Cover and bring to the boil.

Remove lid and simmer for 10-15 minutes or until the lentils are tender.

Drain lentils and return to the pan. Season with vinegar, soy and 2 tablespoons extra virgin olive oil. Taste and add salt as needed.

Balsamic Onions

I wasn’t going to include these but they are so good on pizza, sandwiches, salads and soups that they need to  be in. If you’re over the taste of balsamic at this point just use a combo of olive oil and butter and sprinkle generously with salt. This clearly makes a ton, but they keep for a long time and are addictive so a ton is a good thing. Feel free to halve of quarter, but don’t complain when you are out of them so soon!

Ingredients

  • 8 onions
  • 1/2 cup olive oil
  • 1/2 cup balsamic vinegar

(No need to use your best olive oil and balsamic)

Method

Heat oil in a large heavy based saucepan over a medium heat.

Halve onions, lengthwise, then remove the skins and slice into half moons. Adding chopped onions to the oil as you go.

Cover and cook on a medium low heat, stirring occasionally for about 1/2 hour or until onions are very soft but not browned.

Remove cover and add balsamic. Bring to a simmer and cook, again stirring from time to time for about 20 minutes or until the sauce has reduced a little and the onions are slightly brown.

Fast and Slow Lasagna


Snowy day for lasgna making

It’s a great day to be slaving away making lasagna…NOT!

I have a thing about crock-pots. Ok, a few things. First, I love them, so that’s a thing. They allow for  Bringing It on an entirely different level which is another thing. But then, I have a thing that bugs me. I hate it when crock-pot recipes involve multiple steps and pots and pans, that take us from the realm of crock pot cookery to the realm of  crock-pot warmery. So technically this recipe, which involved browning the meat before putting it in the crock, goes against my principles.  However, it gives you lasagna that is ready when you walk in the door vs. lasagna an hour plus later. This can be life changing on a weeknight.

This is really more of a method than a recipe. It turns out a darned good lasagna, not a transcendent meal. We are feeding our families here people. Some days it doesn’t need to be art–it just has to happen.

On another note, everyone says lasagna is “so easy.” Sure, cooking and serving it may be easy, but making it is not. It’s kind of a pain, involving multiple steps and multiple vessels. That’s why I really like this one. You need your crock-pot and one pan to brown the meat and make the sauce. That’s it. And rather than follow an involved process you simply keep layering the same stuff until it’s all gone.

This recipe is adapted from the “Make it Fast, Cook it Slow” cookbook, by crock-pot aficionado Stephanie O’Dea. I made it this morning before we headed out a day on the slopes and it was in my crock, ready to get cooking in 30 minutes. Much of that time was browning the meat, so during that half hour I unloaded the dishwasher and made breakfast and lunch for the family (all of whom are old enough to make their own meals, but I wanted to prove a point on efficiency.)

So here it is. Mix it up with different meats and veggies, totally meatless versions or whatever. Celebrate your awesomeness by serving it with Easiest French Bread Ever.

Ingredients

1 lb ground beef, turkey or sausage browned and drained
1 (25 -ounce) jar pasta sauce
10 dry lasagna noodles (traditional, not the no-cook kind)
1 (15- ounce) container ricotta cheese
Sliced mushrooms, chopped onion, a few handfuls of spinach, sliced carrots and/or and any other veggies you want to sneak in.
2 1/2 cups grated Mozzarella cheese
3/4 cup grated Parmesan or Italian cheese
1/2 cup water

Method

1. Use a 6-quart slow cooker. Brown the ground meat with mushrooms or other veggies in a pan on the stovetop. Drain well. Add the jar of pasta sauce to the meat. Save the jar, you’ll need it later.
2. Spoon some of the meat and sauce mixture into the bottom of your slow cooker. Cover with a layer of uncooked lasagna noodles, breaking them as necessary to fit as a single layer. Smear some ricotta cheese on the noodles. Sprinkle a handful of mozzarella on top, and 1/3 or so of the Parmesan cheese. Add another spoonful of the meat and sauce mixture, and repeat the layers until you run out of ingredients, or the crock is full. Mine makes 3 layers but probably could fit four. Adjust proportions according to how many layers you think can fit.
3. Put the water into the empty pasta jar and shake. Pour the contents over the assembled ingredients. Cover and cook on low for 6 hours or on high for 3 to 4 hours. Crock-pots vary a lot on their cooking times so this is not an exact science. Check about an hour before serving, and push down the top noodles into the liquid, if they are getting too brown and crispy. The lasagna is done with the pasta has reached the desired tenderness and the cheese has melted completely and has begun to brown on the edges.

All great things start with a step...and often cheese.

All great things start with a step…and often cheese.

Halfway there. Not a lot of precise measuring going on here.

Halfway there. Not a lot of precise measuring going on here.


Fast and Slow Lasagna done

Lasagna Finito!


Guinness Fondue

Fondue Fixin's

Because we cannot live on bread alone, we have fondue.

Beer and cheese—it’s what’s for dinner. I realize I am pushing the season a bit with après ski fare, but we get really excited about the arrival of winter in this household. It’s also Friday, and in keeping with a tradition started by our dearly loved and sorely missed neighbors (come back from Sarajevo already you guys!), it’s the day of the week we collectively throw up our hands and say “Uncle!” to dinner planning. Friday is the day for take-out, appetizers, creative leftovers and raiding the Etna store on the way home. When it happens to be a chilly Friday It’s also a perfect night for fondue.

This came from an über healthy, fit mom who I never would have suspected loved beer and cheese so much. It made me like her immediately. Using a dark beer instead of wine is a different taste, and often more appealing to kids who don’t like the wine smell and taste. A little sweeter than traditional fondue, this is great with apples, grapes, potatoes, veggies, of course bread and quite possibly even cardboard. And it’s totally easy.

Ingredients

1 1/2 lb. Cabot cheddar (as sharp as you like it), grated
1 Tbsp flour
1 sprig fresh parsley
1 pinch garlic powder
1 tsp paprika
1 Tbsp butter
2 Tbsp green onion
1 cup Guinness beer- flat
2 tsp lemon juice
3 tsp worcestershire sauce

 Method

Open the beer today and let it get flat…

Combine flour, parsley, garlic powder and paprika.  Toss with cheese, set aside.

Saute butter & onion until soft – set aside

Warm, but do not boil beer, add lemon juice.  Slowly add cheese mixture, stirring constantly.  Do NOT let cheese come to a boil. Allow cheese to melt before adding more.

Add butter/ onion mixture when cheese is melted, turn up heat so cheese will thicken. Stir in worcestershire sauce. Transfer to fondue pot.

Bring It

Someone somewhere has to open a can of Guinness in the morning. Pre-grate and bag the cheese with garlic powder, flour, paprika and parsley. The rest of the chopping and prepping can be done with the group, by the group. You can be a really nice guest and do it all beforehand and arrived with pre-cut bags of veggies, bread, fruit etc. But that might make people envious of your organizational prowess. Your call.


Game Day Pulled Pork

Game-day-pulled-pork

In honor of the first day of the World Series, and the official beginning of crock pot season, I present you with the only pulled pork recipe you will ever need. Known elsewhere as “Ultimate Cheater Pulled Pork” via the Splendid Table this recipe is, needless to say, easy. Ridiculously easy. And if you ask the butcher to cut your large hunk of pork into pieces (don’t mention that is it for pulled pork or he/she will try to dissuade you) you won’t have to mess up your pristine (right?) workspace, or even a  knife.

It’s so darned easy that I rebelled against the effort of making the barbecue sauce, opting instead for any of the dazzling array of bottled sauces. But don’t you know we had nary a capful of bbq sauce in the house tonight so I made the sauce and I think even monkeys could do it. If they were really jonesing for pulled pork, that is. At any rate, it’s good to at least know how to make bbq sauce so I recommended at least trying it once. Oh, if you want to make even more friends serve this with Easiest French Bread Ever or Peoples Choice Cornbread and Hero Slaw.

Ok, get the couch ready and find that remote. Here we go!

Game Day Pulled Pork As heard on the Splendid Table podcast, and further poached from The Bitten Word. If you want a picture of it look at theirs, because for the life of me I could not get a decent picture of pork.
Continue reading