Category Archives: Uncategorized

Sugar and Spice Squash Soup

Tick Tick Tick. It’s happening, snow or no snow. A certain person in our house wore an elf suit for an entire weekend, the Christmas music on the radio is running 1:1 with Adele, and I’m pretty sure I’ve had at least some chocolate by 10 am for the past five days. Oh yeah…’tis the season.

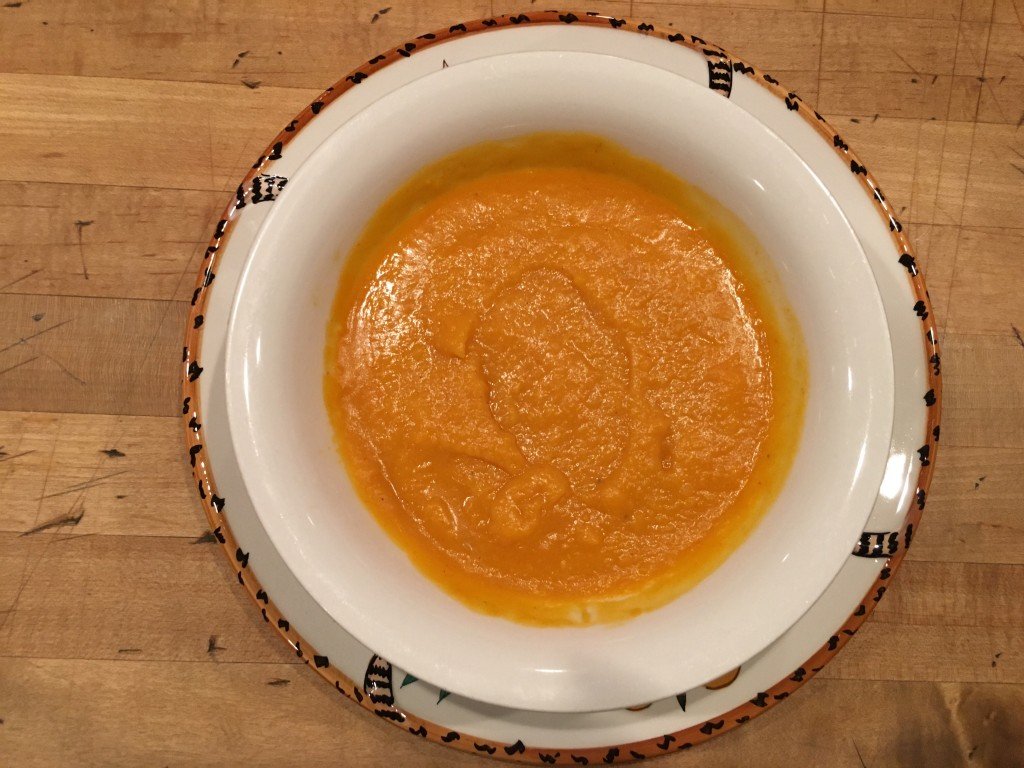
This sweet, spicy, ginger squash soup is another fabulous contribution from Steamboat Tania, who holds the bar so much higher than me that I almost just posted this without trying it. Almost. But the whole candied ginger thing was intriguing, and I figured before descending into holiday carb overload I owed it to my people to produce one last healthy, unique, yet broadly appealing dish.

It’s a more sophisticated version of Halloween Soup, with creaminess from coconut milk, spice from red curry paste and sweet holiday sparkle from the candied ginger. (You know you were wondering how to use up the tub of candied ginger you got for fruitcake or ginger libations or various gingery creations.)

If I have not sold you on this soup yet, it’s also pretty hard to screw up. I didn’t have a full jar of red curry paste, used bouillon cubes instead of broth and misread the recipe, using only one butternut squash. It was still incredible, and an acorn squash out there lives for another day. Oh, and Tania’s tip on heating the squash in the oven first is sheer brilliance.

I urge you to make this, as a gift to yourself or to share with your holiday squad. Extra points if you enjoy it in your elf suit.

Ingredients:

  • 1 large acorn squash
  • 1 large butternut squash
  • 3 Tbsp olive oil (plus more to rub on squash)
  • 2 T butter
  • 1 large onion diced
  • 3 cloves garlic minced
  • 32 oz chicken stock
  • 1 jar red curry paste
  • 1 can coconut milk (Full fat tastes best. Hide the can if you must)
  • 1/3 cup candied ginger
  • salt and pepper

Method:

Preheat oven to 350.
Put uncut squash on baking tray while the oven is preheating (do this so the squash cuts easily and you don’t lose fingers), 10 minutes or so.
Cut squash in half, discard seeds, rub cut side with olive oil and place cut side down on baking sheet. Cook until soft, half an hour or so depending on size.
While squash is cooking warm 3T olive oil and butter in a large sauce pan. Add onion, cook until translucent. Add garlic and cook until fragrant.
Remove squash from oven and scoop flesh into onion/garlic mixture. Add chicken stock, curry paste, coconut milk and candied ginger. Stir over low-med heat until blended.

Ladle lumpy soup into vitamix/blender (or use an immersion blender). You will need two pots because this was 2 vitamix loads. Blend until smooth. Return to stovetop to warm. Add salt and pepper to taste. Warm and serve. (P.S. It’s also really good cold)



Knock-Out Vegan Pumpkin Pie

V stands for Very Tasty

V stands for Very Tasty

This pie was a revelation. The pie itself is fantastic, and is a stand-alone favorite, V or no V. It comes from the November issue of Self, the one with UFC star Ronda Rousey on the cover. That’s where the revelation comes in. I’ve been staring at that cover for a solid two weeks, flipping to the pie occasionally to remind myself of what ingredients not to forget this time I go to the store. Each time I flipped past the story on Ronda, looking at the pictures but not tempted to read a word of it (or to even google UFC. It’s Ultimate Fight Championship. Pretend you knew that—I won’t tell.

Then she got knocked out. Suddenly I heard her name pop up a lot. Even my husband commented on the great Ronda Rousey losing a match. Now, give me a loser and you have my interest. It’s not schadenfreude, but a strong aversion to packaged success stories…especially when they double as fashion spreads.

Anyway, I finally read the article (in which she is interviewed by a comedian) and it was hugely compelling: revealing, honest, unusual. She did talk about leaving a legacy as an undefeated champ. So much for that, but by losing she got at least one person who was only interested in pie to read her story and now care about her.  I am still not sure I could actually watch a UFC match—way too much blood, guaranteed—but go Ronda.

Now, on to pie. This is awesome. I made it with kabocha squash that I had baked. You could also use fresh pumpkin or butternut squash or the canned stuff. I can’t use the canned stuff, having recently been burned by a legacy can in the pantry. Oops.

With pumpkin pie the Vegan situation means no eggs, milk or cream in the pie and no butter in the crust. Coconut milk subs for the liquid and somehow enough squash just makes the egg factor go away. The crust—where you can really do some dietary damage with pies—is pretty darned healthy, and even easier to put together than a graham cracker crust. It’s a total win. Top it with whipped coconut cream for the full V experience, or with regular whipped cream from happy cows. It’s time to get your pomegranate game on, so you can get fancy and sprinkle some of those on top too. Either way, you’re going to wish you had room for seconds.

Vegan Pumpkin Pie

Ingredients:

  • 1  Pecan-Coconut Crust, frozen
  • 1 cup packed brown sugar
  • 3 tablespoons cornstarch
  • 3/4 teaspoons ground cinnamon
  • 1/2 teaspoon grated nutmeg
  • 3/4 teaspoon grated ginger
  • 1/2 teaspoon kosher salt
  • 1/2 teaspoon vanilla extract
  • 1 can (15 oz) pumpkin puree
  • 1 can (13 oz) coconut milk

Method:

Heat oven to 375°. In a bowl, whisk together sugar, cornstarch, cinnamon, nutmeg, ginger and salt. Add vanilla, pumpkin puree and coconut milk and mix until well combined. Place frozen shell on a baking sheet and slowly pour in filling. Bake on center rack of oven 25 minutes. Rotate 180 degrees and continue baking until filling is set and no longer looks wet at center, 20 to 30 minutes more. (Mine took longer. No eggs means it won’t set as firmly but it will set more as it cools.) Cool 2 to 3 hours. Serve lightly chilled.

Pecan Coconut Crust

Ingredients:

  • 1 cup pecan pieces
  • 1/2 cup shredded unsweetened coconut
  • 2 tablespoons sugar
  • 1/2 teaspoon kosher salt

Preparation:

In a medium skillet over medium heat, toast pecans until fragrant; set aside and cool. Reduce heat to medium-low and toast coconut, stirring, until golden, 2 to 3 minutes; cool. In a food processor, process pecans, coconut, sugar and salt until mixture is fine and sticks together slightly. Pour into an ungreased 9″ pie pan. Press into bottom and sides of pan. Freeze until solid. Makes 1 crust.

pumpkin-pie-rock


Classic Champion Chip Cookies

Pro move: Lila's got the tools of the trade—parchment paper and high tech oven mitts.

Pro move: Lila’s got the tools of the trade—parchment paper and high tech oven mitts.

Honestly, do you really need another chocolate chip cookie recipe? Apparently, yes! These come to you from US Ski Team rising star Lila Lapanja, who contributed mightily to my condo survival guide in Ski Racing. Lila’s mom Margie is the baking legend behind Margie’s Cowboy Cookies and the author of four cookbooks that meld life and kitchen wisdom with soul-satisfying recipes. Margie is all about comfort food, so of course her chocolate chip cookies would be good.

I am not sure what makes these so fool-proof, but they are. Maybe it’s the combo of margarine and butter, or the nice round numbers that make the proportions easy to remember even if you cut the recipe in half or in quarters; or the way dough stays soft and easy to scoop even if it’s in the fridge for a while; or the way they cook evenly and stay just soft enough when cool. I’m not sure what the magic is, but it just is. The next time you’re making a care package (surely someone you know needs a boost!) try baking these and you won’t go wrong.

According to Margie and Lila, these cookies will bring you good luck if you eat them the night before your ski races or at lunch between runs.

Champion Chip Cookies

Ingredients:

  • 1 cup margarine, room temperature
  • 1 cup butter, room temperature
  • 2 cups brown sugar
  • 2 cups white sugar
  • 4 eggs
  • 2 teaspoons pure vanilla extract
  • 1 teaspoon salt
  • 2 teaspoons baking soda
  • 2 teaspoons baking powder
  • 6 cups unbleached flour
  • 4 cups chocolate chips*

(You can cut this recipe in half to make it more manageable. No calculator required!)

Method:

Preheat the oven to 350 degrees. In a large (at least 13-quart) mixing bowl, whip up margarine, butter, and sugars until fluffy with an electric mixer.  Add the eggs, vanilla, and salt and mix well. (Slackers note—if a fork is all you’ve got just make sure the butter and margarine are soft and whip it good!)

Blend the baking soda and baking powder into the flour and tap into the creamed mixture on low speed. Mix until it comes together. Stir in the chocolate chips with a strong wooden spoon.

Line a cookie sheet with baking parchment and scoop the dough with a small (1- to 2-ounce) ice cream scoop or with a large spoon. Bake for 9 to 11 minutes (depending on your stove…), until lightly golden in color with tiny cracks on top of the cookies. Note your baking time for the rest of the batch. Makes about 4 dozen 2-ounce (Mrs. Fields’-size) cookies.

* Yes, there is a secret to this recipe: the chocolate chips. My favorite baking chips are, have been, and will always be Hershey‘s…or Trader Joe’s. I like to use half semi-sweet and half milk chocolate. On festive occasions, try tossing in white chocolate chips, a few toffee chips, or mini-kisses.


Lemon Beach Pie

Must...eat...more...pie. Sweet, salty, sweet, salty, and oh yeah—creamy, crunchy, cool and tart.

Must…eat…more…pie. Sweet, salty, sweet, salty, and oh yeah—creamy, crunchy, cool and tart.

If you love your people—and I know you do—make this pie now. In the wilds of the Internet it is known as Bill Smith’s Atlantic Beach pie. Anything called Beach Pie gets my attention. When its maker also calls it the “easiest recipe in the world,” I’m all in. This pie is not a secret. In fact, way before Ms. Kardashian tried to break the Internet I think this pie came close. For some reason, however, it took me until recently to make it.

What pushed me over the edge was the entire stick of butter on my counter, barely maintaining its solid form on a sweltering summer day. “Mix me with Saltines and a touch of sugar, then turn me into the crust of a glorious pie,” it seemed to be saying.

Perhaps that was the heat. At any rate, I obeyed the voice. The aforementioned Bill Smith created this version of a pie that is served up at coastal seafood restaurants in the North Carolina. It tastes darned good far from the beach too, and if for some reason you don’t finish it, just pop it in the freezer and bust it out whenever you need a taste of the beach. 

Make One Beach Pie

For the crust:

  • 1 1/2 sleeves of saltine crackers
  • 1/3 to 1/2 cup softened unsalted butter
  • 3 tablespoons sugar

For the filling:

  • 1 can (14 ounces) sweetened condensed milk
  • 4 egg yolks
  • 1/2 cup lemon or lime juice or a mix of the two
  • Fresh whipped cream and coarse sea salt for garnish

Method:

Preheat oven to 350 degrees.

Crush the crackers finely, but not to dust. You can use a food processor or your hands. Add the sugar, then knead in the butter until the crumbs hold together like dough. Press into an 8 inch pie pan. (If you only have a 9-inch pan just top the pie with more whipped cream.)  Chill for 15 minutes, then bake for 18 minutes or until the crust colors a little.

While the crust is cooling (it doesn’t need to be cold), beat the egg yolks into the milk, then beat in the citrus juice. It is important to completely combine these ingredients. Pour into the shell and bake for 16 minutes until the filling has set. The pie needs to be completely cold to be sliced. Load it up with fresh whipped cream give it a sprinkling of sea salt.

Summer Lovin’ Raspberry Buttermilk Cake

Oh yeah, it's berry season—get 'em while you can!

Oh yeah, it’s berry season—get ’em while you can!

Rocky Mountain Correspondent Tania Coffey strikes again with this really good and really easy cake which you should make really soon. Why? Because we have berries! And we probably have cream hanging out in the fridge, dying to be whipped. And we have hungry kids. And because cake is good!

I happen to have one cooling on the counter right now and will figure out where to hide it so it’s there after dinner. If the hiding place is discovered, all is not lost. Apart from the fresh berries you’ve probably got plenty of everything else you need (including time—it’s pretty quick!) to make another.

Now go and enjoy every bite of summer while it’s here!

Raspberry Buttermilk Cake

Adapted by Tania Coffey from Gourmet, June 2009

This cake is so much fancier than a crisp or a crumble or cookies.  Super easy but looks like you REALLY care a lot.

raspberry-cake-rawraspberry -cake

Ingredients:

  • 1 cup all-purpose flour—I have been substituting 1/4-1/3 cup course cornmeal for a little more texture lately.  As long as you have 1 cup total flour the cake has proven to be very flexible.
  • 1/2 teaspoon  baking powder
  • 1/2 teaspoon baking soda
  • 1/4 teaspoon salt
  • 1/2 stick  unsalted butter, softened
  • 2/3 cup sugar plus 1 1/2 T raw sugar for top of cake
  • 1/2 teaspoon pure vanilla extract
  • 1/2 teaspoon finely grated lemon zest
  • 1 large egg room temp.
  • 1/2 cup well-shaken buttermilk.  Just add a squeeze of lemon to your milk and stir it up to make buttermilk.
  • 1 cup fresh raspberries (I have substituted blueberries before with success, but don’t try strawberries because that was a disaster unless you like pink pudding cake)

Method:

Preheat oven to 400°F with rack in middle. Butter and flour a 9-inch round cake pan. Put the half stick of butter on top of oven to soften while oven warms. Get the egg out of the fridge.

Grate lemon zest then make buttermilk with a slice of lemon if you need to.  It needs to sit for a bit.

Whisk together flour, baking powder, baking soda, and salt and set aside. In a larger bowl, beat butter and 2/3 cup  sugar with an electric mixer at medium-high speed until pale and fluffy, then beat in vanilla and zest. Add egg and beat well.

At low speed, mix in flour mixture in three batches, alternating with buttermilk, beginning and ending with flour, and mixing until just combined.

Spoon batter into cake pan, smoothing top. Place raspberries evenly over top and sprinkle with remaining 1 1/2 tablespoons raw sugar.  For some reason the raspberries drown a little less if you place them so the hole is up.  They sink like stones the other way.

Bake until cake is golden and a wooden pick inserted into center comes out clean, 20 to 25 minutes. Watch it at 20 min, it cooks quickly. Cool in pan 10 minutes, then turn out onto a rack and cool to warm, 10 to 15 minutes more.

Invert onto a plate.  This is Gourmet’s idea.  I have never tried to invert the thing. This cake is actually better the next day for breakfast, but it rarely survives that long.

Spring Chickens, and Lots of Eggs

Spring is trying to poke through. At least the chickens are feeling it.

Spring is trying to poke through. At least the chickens are feeling it.

If you have neighbors with chickens you might be getting a lot of eggs right now. And really, it makes sense. If I were a northeastern chicken I would not be giving up the goods until just about now. We had quite a winter. And now that it’s relaxing its grip, we’ve got eggs.

This is a good thing, because as it turns out, the aforementioned salad week is actually going to have to be salad month. The past week has reminded me of all the great salads out there, like edamame avocado citrus, shaved asparagus, massaged kale, as well as all the delicious ways to create a deconstructed lunch. It leads me to think, why wasn’t I doing this all along? But that would take away the springtime angst I depend on for balance.

Today, we’re talking about salad toppers. One staple in our house is coconut “bacon.” I did a little blind taste test with my peeps (who are admittedly a bit gun-shy of my experiments after discovering black beans in their brownies and shredded cauliflower in their mac and cheese. Poor dears.) Anyway, like real New Englanders they again gave two thumbs most enthusiastically up to the maple syrup versions that I tried, so I’m sticking to those.

I tend to go a bit overboard on food combining, especially when it comes to toppers. But nothing gives mealtime heft to a salad like the ordinary and incredible egg. Furthermore, fully self contained eggs are the ultimate portable food so they are a natural for Bring It!

Hard boiling eggs ought to be easy, but still every time I do it I have to refer to a grimy index card tucked behind my stove that tells me exactly how many minutes to boil them, let them sit covered and then rinse in cold water. Here are two awesome methods—baking and steaming—both of which will set you free from the grimy index card. The first lets you cook a heap load of eggs—as many as you can fit on your over rack. The second takes slightly less time and the resulting eggs are slightly easier to peel. At any rate, if egg peeling challenges you watch this video (spoiler alert: run them under cold water while peeling.)

So here you go, you future queens and kings of deviled egg overabundance. Chickens, get on your marks!

Method 1, from Alton Brown.

Position an oven rack in the middle of your oven. Thoroughly dampen a kitchen towel and lay it over the rack. Load that rack up with as many eggs as you like, as long as they don’t touch. Turn your oven on to 320° F and let your eggs bake for 30 minutes. Then, pull the rack out and grab the four corners of the towel to create a little cradle for the eggs. Carry the towel with the eggs out of the oven and transfer the eggs to an ice bath. Let them chill out until you can handle them. Dry them off if you’re making Easter eggs, or peel them if you plan to eat them.

  • Pros: Volume volume volume! Yes of course you need two dozen!
  • Cons: Takes more total time (but it’s brainless time)
High and dry--the perfectly easy way to cook your eggs.

High and dry–the perfectly easy way to cook your eggs.

And Method 2, from Ali Slagle

In a big pot with a metal steamer inside, bring 1 inch of water to a boil. Add your eggs directly from the fridge to the steamer—6 fit without overcrowding. Cover the pot and let the eggs cook for 12 minutes (6 minutes for soft boiled). If you plan to eat them cold, transfer the eggs to an ice bath and let them chill out until you can handle them, then peel them.

  • Pros: Quick—you’re boiling an inch of water, not an entire pot; you can easily make them soft boiled too.
  • Cons: You can’t go for mass production as with the oven method.


Victory Bran Muffins

Fresh muffins, yogurt, toasted coconut. What's wrong with this picture? Yeah, nothing!

Fresh muffins, yogurt, toasted coconut. What’s wrong with this picture? Yeah, nothing!

It’s the weekend people. Regardless of our need to post more healthy, hearty fare and veggies, right now we need muffins. Why are these a victory? First, they come from my cousin Victoria, via King Arthur Flour, via Zella Lane who was the radio voice of Betty Crocker. So, yes, these have been fully vetted. Most importantly, these muffins are delish, whether made as mini muffins (Victoria’s favorite way—less commitment per muffin and way cuter) or as full-sized ones. I took them to a ski race recently and they were devoured by adults and teenagers alike. They are substantial enough to stand up to packing and travel, but still tender and awesome.

Perhaps the biggest bonus, however, is the fact that this batter can stay in your fridge, at the ready, for up to two weeks. They are a bit of a process to put together, only because they require three separate bowls, boiling water and a bit of cooling time. But none of it is difficult, and the reward for that time on the front end is being able to dole out muffin batter as and when needed, for fresh muffins anytime within a half hour. They will save your butt on a busy morning and make you look like a red-hot muffin-bearing kitchen goddess. That, my friends, is a victory.

Notes: Pay attention here to the bran cereal amounts. First, they depend on the type of bran cereal you are using, and second there are two places in the recipe where the cereal comes in, so make sure you have enough. Otherwise you might be subbing in whatever cereal you have in the pantry—doable for sure, but potentially risky (e.g. Raisin Bran vs. Capt’n Crunch). Coconut is an addition from Victoria that is totally good. If you are warming kids or bran-phobes up to these muffins, sweetened is the way to go. Unsweetened, while more virtuous, will dry out the batter more, so be more generous with your buttermilk. Finally, this makes a lot. You can easily halve the recipe if fridge space is at a premium.

 Ingredients:

  • 1 cup boiling water
  • 1 cup bran cereal (buds or twigs); or 1 3/4 cups bran flakes
  • 1/2 cup vegetable oil
  • 2 1/2 cups flour
  • 2 1/2 teaspoons baking soda
  • 1 teaspoon salt
  • 1 cup dried cranberries
  • 2/3 cup shredded coconut (Optional, sweetened or unsweetened).
  • 2/3 cup hemp hearts (Optional, but yummy in pretty much anything).
  • 2 large eggs
  • 2 cups buttermilk
  • 1 1/4 cups sugar (demerara or coconut sugar take these over the top)
  • 2 cups bran cereal (buds or twigs); or 3 1/2 cups bran flakes

 Method:

1) In a small mixing bowl, pour the boiling water over the 1 cup twigs (or 1 ¾ cups flakes) of cereal. Allow the mixture to cool to lukewarm, 30 minutes or so.

2) While the water/cereal mixture cools, blend together the flour, soda, and salt in a large mixing bowl. (Pro move here is to use a bowl with lid that can be used to store batter in the fridge). Stir in the cranberries, coconut and hemp hearts if using. Set it aside.

3) Stir the vegetable oil into the cooled water/cereal mixture. Set it aside.

4) Whisk together the eggs, buttermilk, and sugar. Combine this with the flour/raisin mixture.

5) Stir in the 2 cups twigs (or 3 ½ cup flakes) dry cereal.

6) Finally, add the water/bran/oil mixture, stirring till thoroughly combined. Cover the bowl and refrigerate overnight, or HOWEVER THE HECK LONG YOU WANT!

7) Preheat your oven to 375°F. Lightly grease your muffin pan of choice, or line with paper cups, and grease as many wells as you like.

8) Heap the thick batter in the muffin cups; a generous 1/4 cup batter works, but feel safe knowing these are not exploding muffins.

9) Bake the muffins for 20 to 25 minutes, till a cake tester inserted into the center of a muffin comes out clean.

10) Remove from the oven, and tip the muffins in the pan to prevent their bottoms steaming and becoming soggy. Serve warm; or transfer to a rack to cool completely.

11) To bake mini muffins, heap the batter in the muffin cups, and bake for about 15 minutes, till the muffins test done.

Yield: at least 18 standard muffins, or 45 mini muffins.

Bringing it:

These taste great out of the oven but also when cool, and even if baked the day before. They have saying power! Victoria suggests the following for a hostess gift: “present your hostess with a gift bag filled with a container of the refrigerated batter, a mini-muffin pan, and a card that includes the recipe. Alternatively, just show up with those things and commandeer the oven while everyone else is still sleeping in — the fragrance beats an alarm clock any day!”

Frosty the Snow Drink

Winter—if you can't beat it, put it in a cup and drink it!

Winter—if you can’t beat it, put it in a cup and drink it!

Before we do anything else this fine morning, let’s take a moment to honor Michele Ferrero, the inventor of Nutella (which we can now make ourselves), who prophetically passed away on Valentine’s Day. There is some comfort in knowing that he lived a long life and died an extremely wealthy man.

And now, we move on to the weekend. I have been commissioned by an undisclosed publication to create snow cocktails for an upcoming issue. For this, dear Bringiteers, I need your help. This is far too mighty a task for one drinker, especially one battling a tenacious, fun-sucking, taste-bud-negating head cold (scroll below for therapy and recipe that just may get me to turn the corner). I am hoping some of you will be kind and daring enough to take this on with me, to tirelessly fill, pack and refill your glasses with snow, mixers and hootch in whatever ways please you.

Of course, I’m not going to leave you totally out in the cold. Here’s some inspiration: You might want to try some classics adapted for winter, like the Snowjito, the SnowBreeze or the Snowgarita. I can’t disclose the names or exact ingredients that may appear in the aforenonmentioned publication, but I am working on something that riffs on frozen hot chocolate, perhaps with some peppermint schnapps, as well as some hopped-up versions of every kid’s favorite snow day breakfast—orange juice on snow.

Hints of springtime have me contemplating a “Frozen Poma” (like an Arnold Poma, but colder), involving lemonade, iced tea, vodka and snow. The reality of many more ski races compels me to consider pouring any leftover Parent Whisperer from the Thermos on snow to create the “Frozen Parent.” And let’s not forget last year’s foray into Olympic Snow Drinking for some starting points.

As you set forth on this mission keep in mind that snow dilutes a cocktail necessitating it to be a bit sweeter and a bit stronger than the proportions you might usually use, to get the same effect. Also, I urge you to remember that snow drinking is rarely done alone (though there’s no shame in that), so you might want to consider things that can be made with simple ingredients, in volume, and possibly prepared by a bonfire. Of course, virgin versions are always appreciated and will be happily slurped by the younger or simply wiser set.

Ok, my intrepid testers. Go forth, create, and let me know what you come up with. Then, when the next storm hits (or when the first storm hits in CA) we can get celebrate by sampling the finalists. Happy Weekend to all and thanks for playing!

But waiiiiiiiit. This just in. My awesome friend in New York just sent me a cocktail recipe from the Wall St Journal (a killer cocktail source, FYI) for a drink called the Panacea, adapted from another drink called the Penicillin. It was a slow, congested afternoon and I had the fixin’s so I gave it a try. I may have to cancel the doc appt tomorrow. This stuff is GOOD. The honey ginger lemon syrup alone is worth committing to memory. Check out the full story on the Panacea, or just make it from the recipe below!

The Panacea—way better than Nyquil

Make honey-lemon-ginger syrup: In a small pot over medium heat, simmer 1 cup honey, 1 cup water and ½ cup minced ginger until mixture cooks down to a thick syrup, 10 minutes. Strain through a fine-mesh sieve, pressing on solids to extract liquid. Discard solids (or save them to put in tea later. Yum!) Add¾ cup fresh lemon juice to syrup and stir. Cover and chill.

In a tumbler half-filled with ice, stir together 2 ounces honey-lemon-ginger syrup and 2 ounces blended Scotch. Pour¼ ounce Islay single-malt Scotch over the back of a spoon so it floats on top of drink. Garnish with a slice of ginger and candied lemon peel (optional).