Category Archives: Positive Snacks

Simply Sue’s Energy Bars

You will think you are eating a fudge brownie - swear to god!

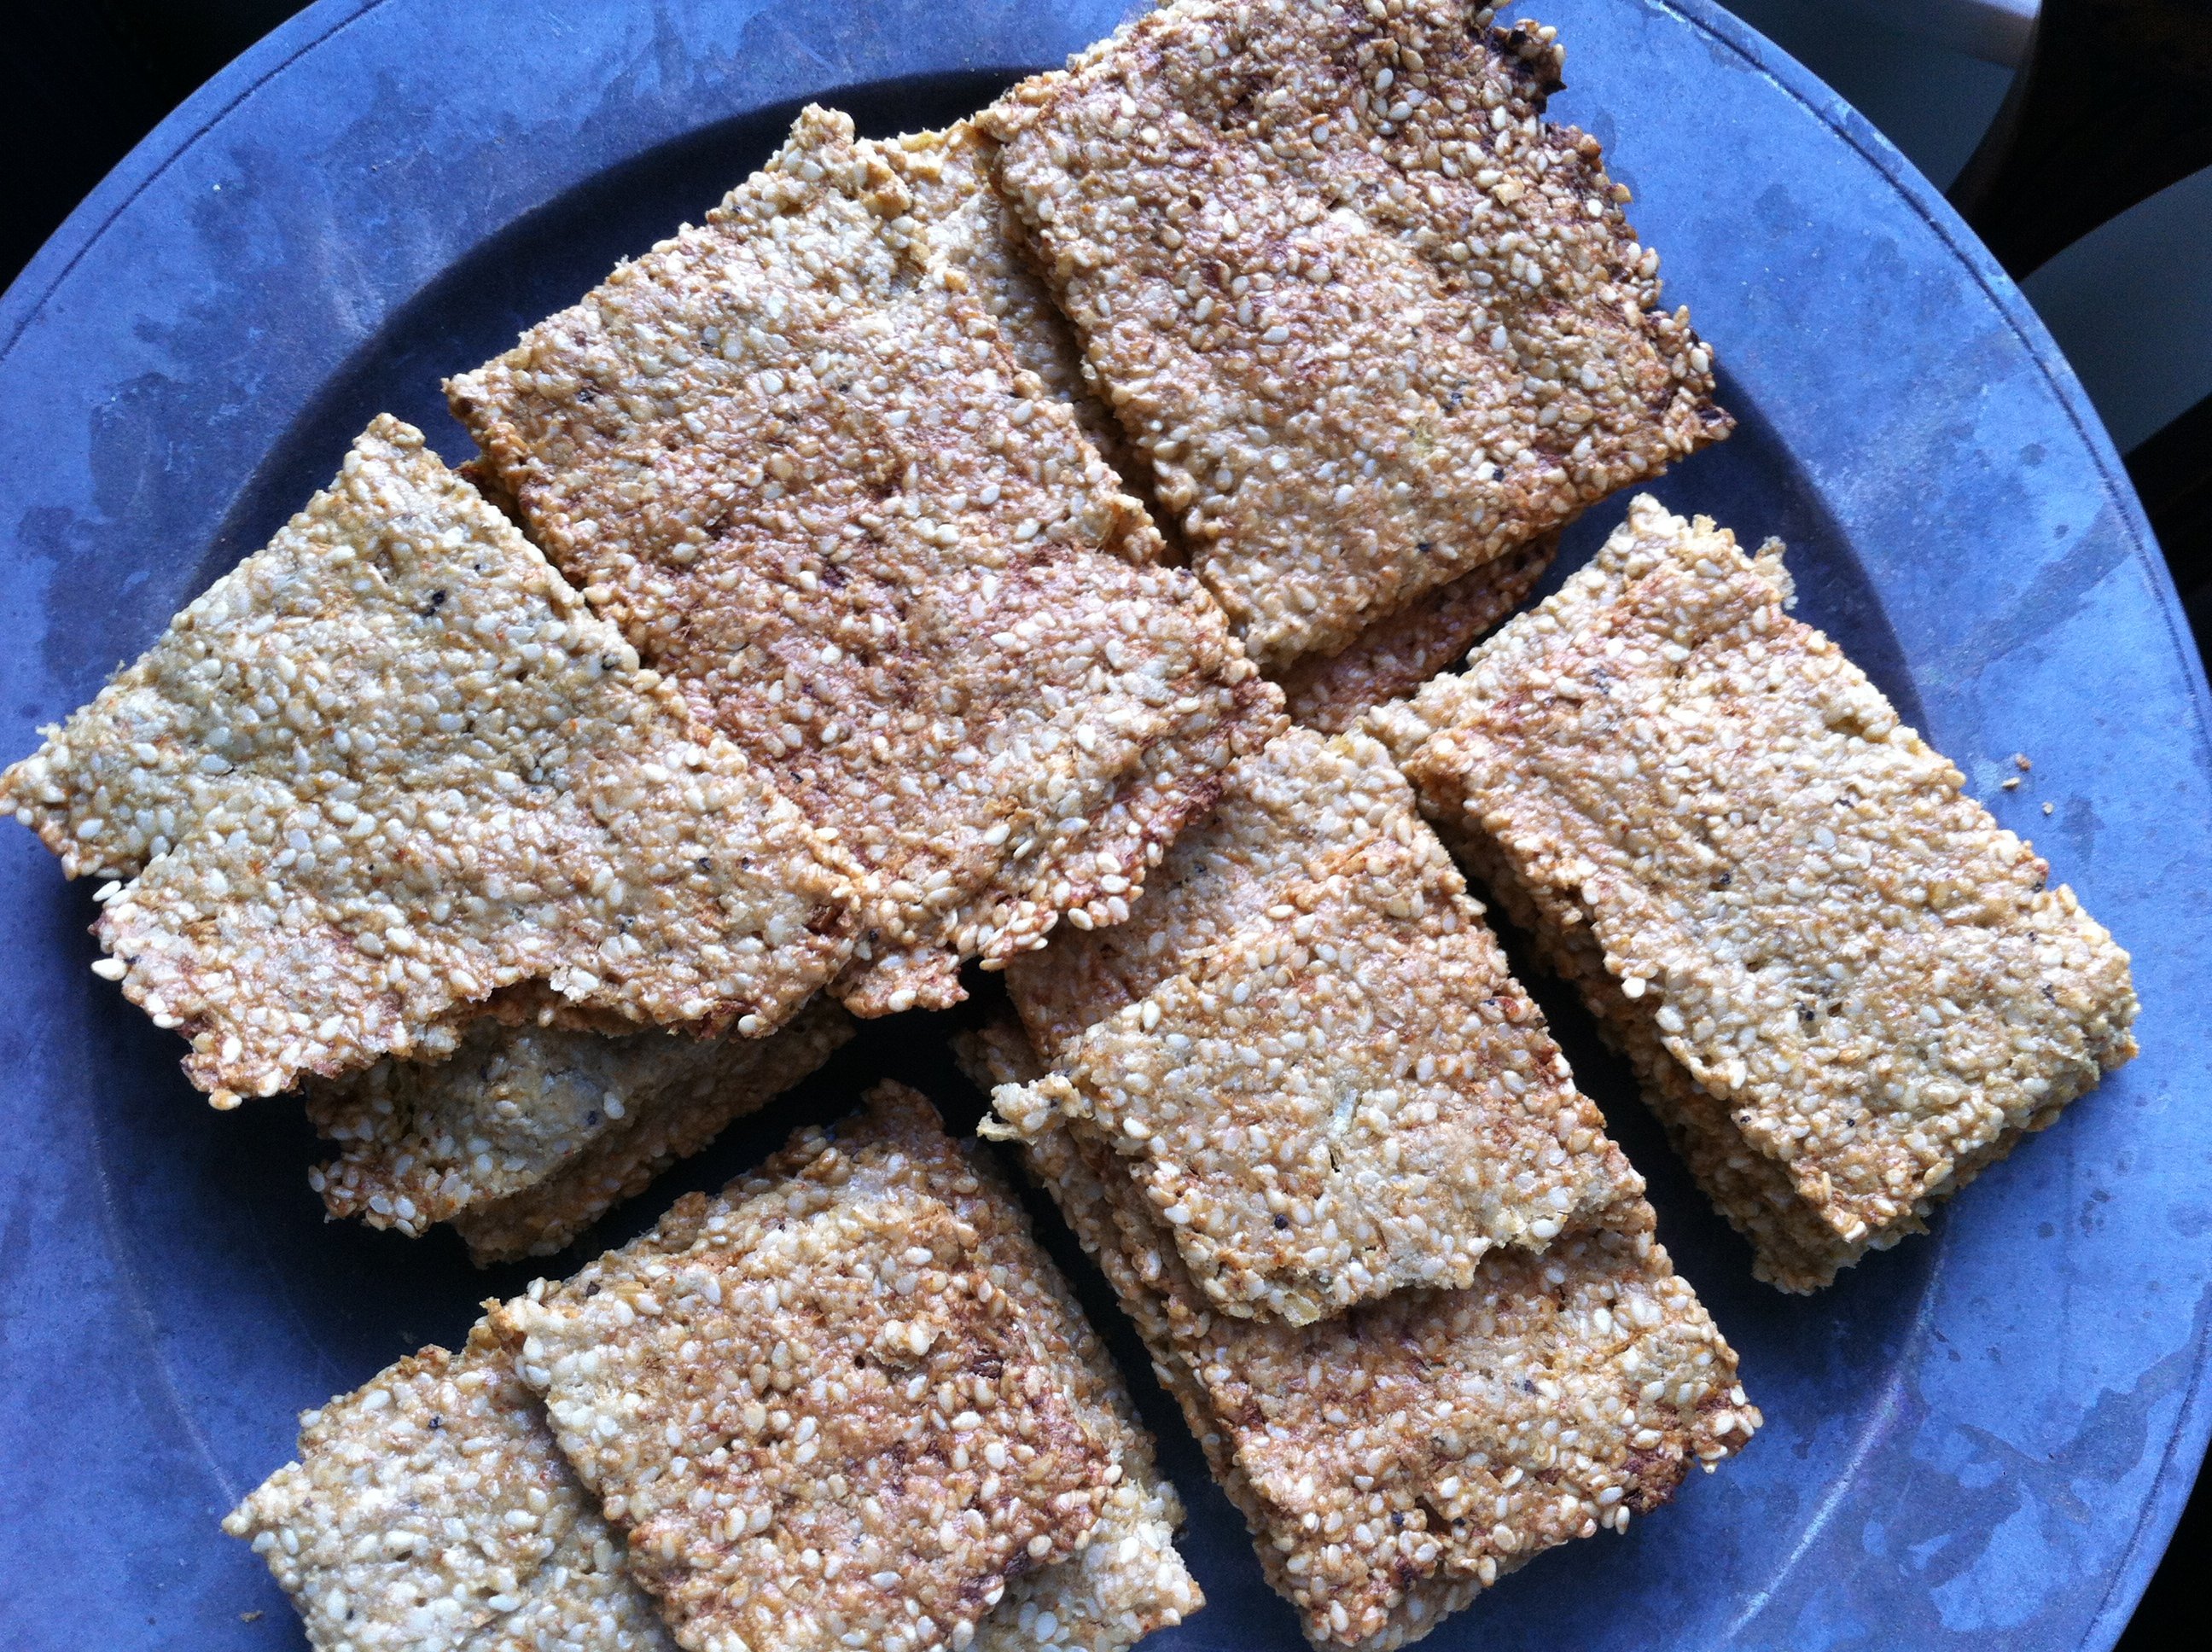
You will think you are eating a fudge brownie – swear to god!

The fun and festive highball post is a tough one to follow, but I am very excited about this energy bar post….so here goes… (and the highball post isn’t going anywhere except a little further down on the page).

I’ve been working on creating the perfect energy bar for some time now. I’ve sorted through dozens of recipes and experimented on my own. I’ve made bars that are too chalky, too crumbly, too sticky, and too blah… until this past weekend that is! These bars are decadent tasting, healthy, and (the kicker) I made them in like 5 minutes. 

These bars mimic the infamous Lara Bar that you see in the “bar” aisle of the grocery store.  If you are like me you stand in that aisle, staring at the enormous selection, completely overwhelmed, and walk out with nothing.  That aisle can be daunting. There are so many choices, not to mention the price of some of those puppies (a bar for $2.50 -really?).  This recipe promises to free you of the “bar” aisle all together.  You will smugly walk past that aisle, knowing your homemade bars are far superior and far less expensive than anything they can possible stock at the grocery store.

This recipe is essentially walnuts and dates – that’s it.  The add ins make it fun and you can modify based on what you have on hand. I listed many options below. Bring extra for friends as they will quickly become a hot commodity.

Ingredients

1 cup walnuts
1 1/2 cups pitted dates
1 tsp pure vanilla
4 Tbsp Dutch oven cocoa powder
Pinch of salt
Optional: chocolate chips, unsweetened coconut

Method

Blend all ingredients except any optional ingredients, in a food processor. Form into bars (I pressed into 8×8 inch square pan in order to get them to form and then cut into rectangles). If the bars are too crumbly coming out of the food processor, add a few more dates. Okay, how easy is that?

Basic Formula

1 cup nuts
1 1/2 cups dried fruit (dates work best in my opinion)
1 tsp flavoring
Pinch of salt
1 cup optional add ins

Flavor Options

Apple Pie (almonds, walnuts, dates, dried raisins and apples, cinnamon)
Banana Bread (almonds, dates, dried bananas)
Cappuccino (almonds, cashews, dates, coffee beans, scraped vanilla bean)
Coconut Cream (almonds, cashews, dates, shredded coconut, 2 Tbsp coconut oil)
Ginger Snap (almonds, pecans, dates, 2 Tbsp fresh ginger, 1 Tbsp mixed cinnamon and cloves)
Lemon (almonds, cashews, dates, zest and juice of 1 lemon)
Peanut Butter & Jelly (peanuts, dates, dried cherries)
Peanut Butter Chocolate Chip (peanuts, dates, chocolate chips)

Bring It!

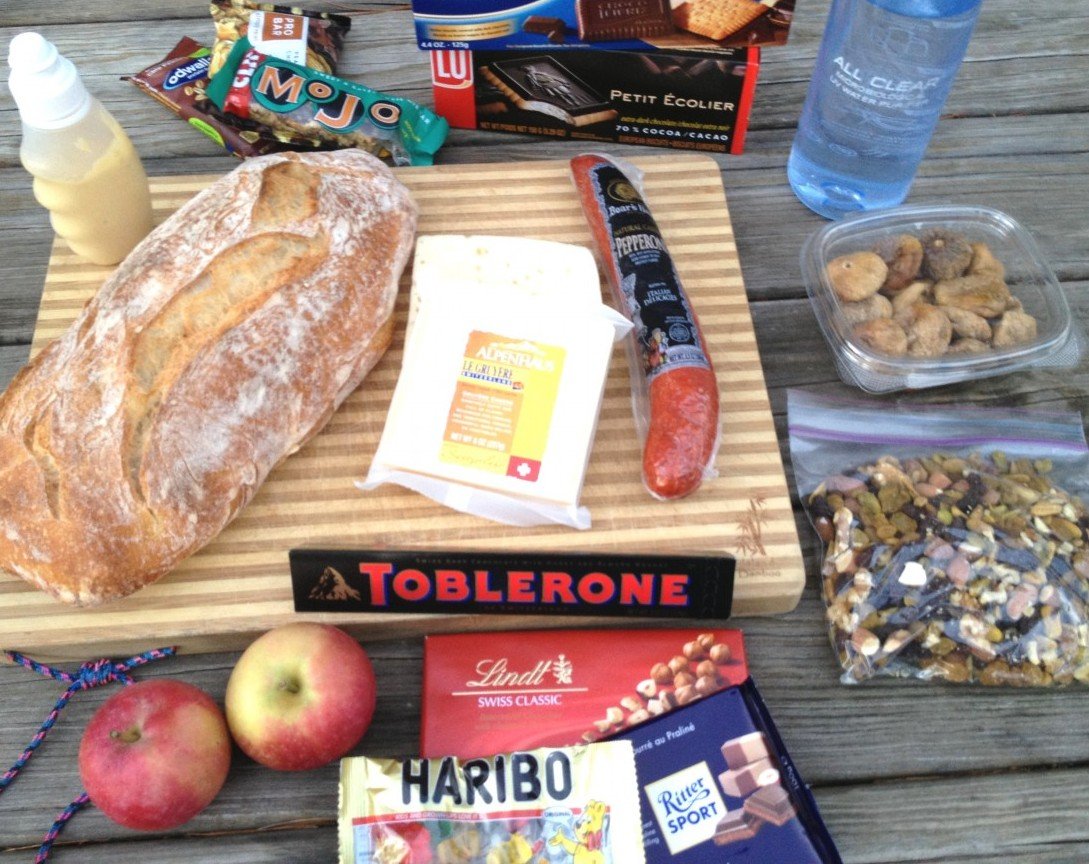
Wrap in plastic wrap and throw them in your backpack for any outdoor activity you are planning. Or, throw them in the refrigerator for whenever you need to grab something quick.

Garam Masala Roasted Chickpeas

garam masala roasted chickpeas

It’s chickpeas. It’s feta. It’s olives. It’s a Mediterranean feast!

This is mean. I probably shouldn’t admit it, but this was supposed to be a fun post about highballs. The drinks, that is. All was going swimmingly until my research detected a procedural discrepancy on the shaken vs. stirred question (which has little place in a discussion of highballs, but nonetheless opened up a gushing artery of doubt). On top of that my R&D was a little challenging so early in the week. So the good news is, there is a fabulous highball post in your near future (perhaps in time for Derby Day). The even better new is….

We’ve got chickpeas! Oh yeah baby, hold me back. Honestly, I have been experimenting with roasted chickpea recipes off and on for several years. My quest for the perfect, crunchy chickpea snack started in a crockpot, moved to a pot of oil and then settled on a roasting pan. The results were always ok, but texturally not quite right. Too moist and underdone, or dryly overdone. Nevertheless, my kids ate them by the handful whenever I did make them so I was inspired to continue.

Then yesterday, just when my highball mission seemed irretrievably stymied, I came across this recipe that I had torn out of Sunset magazine way back and never tried. It turns out the secret lies in—here’s a shocker—plenty of olive oil. These are the closest I have gotten to chickpea perfection and they make your house smell really good. And they’re easy. And cheap. And if you make them now you’ll have something healthy to go with your highballs this weekend.

Roasted Chickpeas with Garam Masala

From Sunset Magazine

Makes 3 cups

Ingredients

4 cans (15 oz. each) chickpeas (garbanzos), rinsed and drained well
6 Tbsp olive oil
2 tsp garam masala
About 1 tsp fine sea salt

Method

1. Preheat oven to 350°. Gently roll chickpeas in batches between clean kitchen towels to blot dry and slough off papery skins; discard skins. (Edie note: rubbing off the skins is good, and dries the chickpeas, but if you don’t feel like picking through for the skins just roast them up too.) Divide chickpeas between 2 rimmed baking sheets. To each pan, add 3 tbsp. oil, 1 tsp. garam masala, and 1/2 tsp. salt and mix well to coat. Spread in an even layer.

2. Bake, stirring occasionally, until chickpeas are crisp all the way through, 75 to 80 minutes. Add more salt to taste if you like. Serve warm or at room temperature.

Note: These are also great on salads or as a component of lunch deconstructed.

Bring It 

Store up to 1 week, chilled airtight. (Edie here again. Chill shmill. Just put them in a Tupperware and leave them within easy reach of your kids.)


Bread of Life, sliced

The Bread of Life, or “That’s Life” Bread

Elsewhere on the Internet (namely on My New Roots) this seedy, flourless, unleavened, barely sweet and totally nutrition-packed bread is called the “Lifechanging Loaf of Bread.” That is quite a claim and one that begs to be debunked, particularly by my own family, some of whom refer to this as my “dirt bread.”

What can I say? Haters gonna hate. That’s life; hence, the abbreviated name for this bread. But for the right person—and you know who you are—this is, if not lifechanging, at least addictive. It relies on oats, chia seeds and psylium husks to hang together and get its breadiness. Whole hazelnuts give it texture and a touch of maple syrup makes it all just right. Toast it, or not, and top it with butter, honey, cheese, caramelized onion, roasted veggies or pretty much anything and give yourself a big fat gold star for healthy eating. Go you!

I’ll leave it to Sara Britton to answer any questions about substitutions and how in the heck she came to experiment with psylium husks. I will tell you, however, to find them in CVS with the Metamucil. Be sure to get the unflavored variety, unless you want your bread to actually taste like Metamucil.

A few other notes: She uses coconut oil or ghee (which I can’t pronounce let alone find) but you can also use butter; I add chopped dates for some chewiness and sweetness; she uses a flexible loaf pan for both mixing and baking. I don’t have one of those so I just used a regular loaf pan and lined the bottom with parchment paper to ease the first turnout (totally worth the effort, unless you want a bonus botched loaf to snack on); finally, I lived large and mixed it all in a bowl, which took away the stress of mixing in tight spaces, which I hate.

And now, just to go on record, for me this is absolutely addictive and perhaps even lifechanging, on a slow day that is.

That’s Life Bread

From My New Roots
Makes 1 loaf

Ingredients

1 cup / 135g sunflower seeds (or 1/2 cup each pumpkin seeds and sunnies)
½ cup / 90g flax seeds
½ cup / 65g hazelnuts or almonds, roughly chopped or sliced*
**½ cup dried dates or dried fruit of choice, roughly chopped 
1 ½ cups / 145g rolled oats
2 Tbsp chia seeds
4 Tbsp psyllium seed husks (3 Tbsp. if using psyllium husk powder)
1 tsp fine grain sea salt (add ½ tsp. if using coarse salt)
1 Tbsp maple syrup
3 Tbsp melted coconut oil or ghee (or butter)
1 ½ cups / 350ml water

*update: sliced almonds are my go-to for ease of both prep and slicing
**next update: Dates or dried fruit are optional but now an essential part of my dirt bread experience.

Method

1. In a flexible, silicon loaf pan (or a parchment lined regular loaf pan), combine all dry ingredients, stirring well. Whisk maple syrup, oil and water together in a measuring cup. Add this to the dry ingredients and mix very well until everything is completely soaked and dough becomes very thick (if the dough is too thick to stir, add one or two teaspoons of water until the dough is manageable). Smooth out the top with the back of a spoon. Let sit out on the counter for at least 2 hours, or all day or overnight. To ensure the dough is ready, it should retain its shape even when you pull the sides of the loaf pan away from it it.
2. Preheat oven to 350°F / 175°C.
3. Place loaf pan in the oven on the middle rack, and bake for 20 minutes. Remove bread from loaf pan, place it upside down directly on the rack and bake for another 30-40 minutes. Bread is done when it sounds hollow when tapped. Let cool completely before slicing (difficult, but important).
4. Store bread in a tightly sealed container for up to five days. Freezes well too – slice before freezing for quick and easy toast!

Life Bread by the loaf

Living life bread, a slice at a time.

Bring It

As mentioned above, for the right person this is the perfect host/hostess gift. If you’re bringing it to a mixed crowd you can always cover your bases (and maximize fans) by adding a loaf of easiest french bread ever or maple oat breakfast bread

Honey thyme walnuts

It’s honey thyme…with walnuts.

Honey. Doesn’t the thought of it just make you feel calm? We need a bit of calm right now, and that’s why I’m here. Sit on down with a mug of tea, or just take a deep breath, and read this post because first I’m going to give you an awesomely easy recipe and then I’m going to remind you of all the delicious things you can make as gifts that will be much more appreciated than whatever you’re going to wrestle from the stores in a last minute frenzy. It’s time to look to your cupboards for sanity now.  Breathe in, breathe out. ‘Tis the season to give everyone a break, including yourself.

This recipe came from Bon Appetit a while back. They say to “drizzle this fragrant honey over your favorite cheese, or use it as a condiment on prosciutto panini.” I say it is also amazing with cambozola or any brie like cheese, makes a mean pizza or bruschetta topping and turns the humble grilled cheese into something you might refuse to share.

Ingredients

1 cup walnut pieces (or pecans)
3/4 cup orange blossom honey (or whatever you’ve got)
1/2 cup walnut oil or extra-virgin olive oil
Kosher salt, freshly ground pepper
1 tablespoon fresh thyme or rosemary leaves plus 2 sprigs
1/4 teaspoon finely grated lemon zest
4 whole dried chiles de árbol*

*I used Japones peppers, cut into thirds, because that’s all I could find. You can also use dried pepper flakes for more cha-cha throughout.

Method

Preheat oven to 325°F. Spread the walnuts on a rimmed baking sheet. Bake, stirring occasionally, until lightly browned and fragrant, about 15 minutes. Let cool. Coarsely chop; set aside.

Whisk honey and oil in a medium bowl to blend. (It may seem obvious, but measure the oil first so the honey will slide right out of the cup). Season to taste with salt and pepper (I am not shy with either). Fold in walnuts, thyme, and lemon zest. Add chiles. Divide between four “take me to a party” 4-ounce jars or two “I really love you”  8-ounce jars. Cover and chill.

Can be made 1 month ahead. Keep chilled. Bring to room temperature and stir before using.

More yum…

And now, here are some other great DIY food gifts to consider. Of all the things I make and give, the most requested/addictive is crackle, which breaks up nicely into treat bags.  Cholliesauce is another winner, and you may have all the ingredients in your kitchen right now. Peppermint or chocolate chip meringues are festive, tasty and pretty darned easy. And of course you can’t go wrong with roasted nuts. For savory Mediterranean types give a jar of sicilian caponata with some nice store bought crackers or (for the uber healthy friends, endurance crackers.  If you’re kicking around the house it takes time but next to no effort to mix up a batch of easiest French bread ever, and you’ll have two loaves to give. Package it with a dish towel and a French bread pan and BOOM you’ve made someone a baker.

And if you don’t feel like making a darned thing that’s fine too. Just remember to relax, breathe and have some good laughs with your friends. There’s always time for that!

An arsenal of holiday cheer. Ho-ho-ho baby!

An arsenal of holiday cheer. Ho-ho-ho baby!


Ginger glazed almonds pre-baking

Nuts!

Nuts! What’s not to love about them? Ok, unless you have nut allergies, in which case you’ll want to skip right past this post and continue online shopping for yodeling marmots because one really can’t have enough of those this time of year. Roasted nuts are a perfect Bring It staple, because they do double duty as a host/hostess gift and a yummy contribution to any party or gathering. They beat myrrh and frankincense hands down. Also, nuts are the perfect candidates for showcasing your packaging savvy gleaned from Bringing It in Style.

Below are three favorite takes on three favorite nuts. All are easy to prepare (no beaten egg whites or fussy preparation) and all will disappear so fast you won’t  need to worry about a shelf life. That said, they include butter, so those of you with a measure of restraint will want to store them in the fridge. Oh yeah, and clean up is instant if you line your baking sheets with parchment paper.

Ginger Glazed Almonds

Makes 2 1/2 cups. Active time: 10 min Start to finish: 40 min

 Ingredients

2 Tbsp unsalted butter
3 Tbsp packed brown sugar
2 Tbsp water
1 Tbsp finely grated peeled fresh ginger
1 1/4 tsp kosher salt
1/4 tsp ground ginger
1/4 tsp cayenne
2 1/2 cups whole almonds with skins (9 oz)

Method

Preheat oven to 300°F. Melt butter in a 12-inch nonstick skillet over moderate heat. Add remaining ingredients except almonds and cook, stirring, until sugar is dissolved. Remove from heat, then add almonds and stir until coated.

Spread almonds in a lightly oiled or parchment-lined shallow baking pan and bake, stirring occasionally, until insides of nuts are golden (cut one to test), about 25 minutes. Cool completely.

Ginger glazed almonds pre-baking

GInger glazed almonds, pre baking

GInger glazed almonds

and apres baking.

Rosemary Walnuts

Adapted from Martha Stewart. Beyond the fresh rosemary you can use any combo of spices (or none at all) to suit your tastes. I went for chile powder and paprika, but many recipes call for the cha-cha of cayenne. Be bold. Be creative. Make Martha proud.

Ingredients

2 1/2 Tbsp unsalted butter
3 cups walnuts
1/2 tsp (or more) coarse salt
1 Tbsp chopped fresh rosemary
1/2 tsp chile powder
1/2 tsp paprika
2 Tbsp light-brown sugar
1 Tbsp water
1 Tbsp Worcestershire sauce

Method

Melt butter in a large skillet over medium heat. Add rosemary and chile powder. Cook, stirring, 15 seconds. Add walnuts, salt, sugar, water, and Worcestershire sauce. Stir to coat. Pour nuts on parchment lined baking sheet and bake 10-15 minutes, testing for doneness. Cool completely.

Note: If you don’t want to do the baking step you can keep stirring and cooking the mixture stovetop for 4-5 minutes until “glossy and fragrant” then spread nuts on the baking sheet to cool. I prefer the fully roasted flavor you get from baking.

Sea Salt Roasted Pecans

Honestly, you can’t improve much on a plain toasted pecan, and at a certain point in the holiday season your body will high-five you for anything in its natural state. But if you want to give your pecans that little black dress of specialness try this simple recipe.

Ingredients

2 cups pecan halves
3 Tbsp unsalted butter, melted
1 1/4 tsp fine sea salt

Method

Preheat oven to 325°F. Toss pecans and melted butter in medium bowl to coat. Add sea salt and toss. Spread pecans in single layer on rimmed baking sheet. Bake until fragrant and slightly darkened in color, about 15 minutes. Cool pecans on baking sheet.

The official word is that these roasted pecans keep 2 days if stored airtight at room temperature. That seems mighty conservative to me and they keep way longer in the fridge.

party time nuts


Crackle Bars

To balance all those healthy paleo and endurance crackers, I present to you a very unhealthy form of crack…er. This is ridiculously yummy and easy. Healthy? Not so much. Somebody brought a batch of this to book group and warned of its addictiveness. I started giving it as a neighborhood holiday gift and it quickly became an all-season, all-occasion favorite. It makes excellent bake sale material (which puts it in the Positive Snacks category), is darned good on a hike (add it to Better in a Backpack) and is a huge hit with hungry, sports-playing teenagers, who inspired the current batch.

Crackle-love

Child Labor–Happy and ready to spread.

And on the topic of kids, they can help you out here. They love the process of making it, especially spreading the melted chocolate chips (Hello bake sales!). It’s equally good with saltines or graham crackers, so use what you prefer or what is in your cupboard. These were introduced to me as “4th of July Bars” but the name did not stick. You do need to crack them to break them into pieces. And they’re made with crackers. The fact that they are as frighteningly addictive as something with a similar name is purely coincidental.

Ingredients

1 cup light brown sugar
1 cup butter
Saltines or graham crackers
12 oz milk chocolate chips (ultra cheapo brands do not always melt as well)
Chopped nuts, roasted and salted (your choice–I love tamari almonds but my kids prefer peanuts which are easy and cheap so I don’t argue.)

Method

Have ready a 13 x 9 pan: foil lined and lightly greased. Preheat oven to 400 degrees.

Line the pan with a single layer of crackers. (saltines fit perfectly)

Combine sugar and butter in saucepan.  Bring to a boil and boil for 4 minutes exactly – no more.

Pour boiled mixture over the crackers. Bake for 5 minutes – no longer!

Remove from oven and while very hot scatter the chocolate chips on the surface. Spread chips out evenly as they melt and soften.

Scatter with chopped nuts. Refrigerate until hardened.  Then cut or break into pieces.

Makes a bunch.

crack-cooling

The cool down phase.

crack-smooth

The smoothing phase.


Bring It!

Store in a gallon-sized ready to tote ziploc bag in the fridge, or in individual plastic baggies that you can dole out as necessary. Make it fancy with tissue paper and a ribbon.

Better in a Backpack

Hiking a ridge in Ticino Switzerland

Hiking a ridge in Ticino Switzerland

What beats hiking in New England in the fall?  My recent trip to Switzerland gave it a pretty good run for its money!  I mostly hike in the White and Green Mountains of New Hampshire and Vermont. But this fall my husband, son, and I decided to take a trip to Switzerland to go hiking in the Alps.  To say it was stupendous is an understatement.  The Swiss have hiking dialed.  The trails are perfectly marked and maintained.  The views at the top are ridiculous. And the huts along the way are über charming, clean, and well stocked with food, beer, wine, and soda pop. This is a hiker’s paradise. All I had to think about each day was the food that would go in my backpack for snacks and lunch. Being that we were in Switzerland, the obvious choices were bread, cheese, and chocolate.  But many other great snacks and hiking food found their way into my pack each day.  Below are some of these ideas and I’m sure you have many more. Feel free to share with Bring It!  We love your ideas!  Oh, and these snacks are not just for hiking. They can be packed for long drives, a lunchbox, or anytime you are on the go.

Selection of meats.  Salami, pepperoni, and other hard sticks of meat are great for hearty fillers.  Harder sticks of meat (including beef jerky) have great staying power on the trail. Don’t forget a utility knife so you can cut the meat into slices. Or just take “hauls” off the stick and pass them around (this is what my husband and son prefer).

Spicy mustard. In Switzerland the mustard comes in a tube (like toothpaste).  This was a great way to carry small amounts of mustard and make it easy to pack and store while hiking.  Unfortunately, I couldn’t find this type of packaging here in the US, so I use a small plastic container like the one in the photo below.  You can find these type of containers at EMS or REI.  Long distance athletes generally fill them with honey or a sweet GU like energy snack and squeeze as they go. 

GORP and Granola Bars – I’m sure you all have your favorites so just add them to your pack and you are ready at all times.

Dried and fresh fruit. If you go with fresh fruit, make sure it is a sturdy selection. Apples are always my first choice.  If apples aren’t available, pick the hardest piece of fruit from the fruit bowl. 

Small thermos with tea or hot chocolate.  This really depends in the temps, but if it’s cold outside or likely to be chilly at the top , nothing beats a thermos filled with a hot beverage.  Pass it around for others that did not have the forethought to pack this heart-warming treat.  It will be a real crowd pleaser.

Peanut Butter and Jelly Sandwich.  For everyone who knows me, you know peanut butter is my all-time favorite food…..making the peanut butter and jelly sandwich an obvious choice.  It packs well, does not need to be refrigerated, and always tastes great, even if smushed. (Another great way to pack PBJ is to spread it on a tortilla or wrap, roll it up, then pre-slice the “log” into individual PBJ spirals.)

Gummi Bears, Swedish Fish, or Jelly Beans.  I pretty much don’t leave the house without them.  Find your favorite and Bring It!!

Sawyer rounding the bend on the Jegihorn, Saas Grund

Sawyer rounding the bend on the Jegihorn, Saas Grund

View from a mountain hut

View from a mountain hut

Nice perch above the clouds

Nice perch above the clouds

Snacks in a pack!

Snacks in a pack!

Endurance Crackers

Caponata with Endurance crackers fresh from the cooler.

Caponata with Endurance crackers fresh from the cooler.

Because it is fall, and traditionally (for me) a time to cleanse (curse you watermelon sangria!), I was planning to do a cleans-y post. Mostly I needed a break from apple mania and an excuse to share the Endurance Crackers that I started making this summer and that, it turns out, are something of an Internet sensation. As far as I know they originally came from an excellent vegan site called Oh She Glows. I am very un-vegan but I love vegany things so naturally these seedy babies looked right up my alley. I made them a bunch this summer, and shared them around to universal approval from kids and adults, vegans and carnivores.  They are full of good stuff and free of all the usual perps—gluten, nuts, grains, sugar.

For a fleeting moment I even thought they would pass the paleo test.  But noooooooooo. Apparently chia seeds—like my beloved chickpeas and black beans—don’t make the cut. The little wonder food, secret pellets of the Incas, bearer of magical running power has a husk and therefore it’s a no-go with the cave man clan. But chia seeds are key to the whole gig because they have this crazy power of gelling things together which gives the simple mix a way to morph into a legit cracker.

Long intro. Here is the recipe, with advice and tweaks from myself and other cybercrackerphiles. There is even a sweet variation below (thank you Rowdy Baker) that is pretty tasty.  And paleo peeps, I have failed you again… unless…maybe…click here and see.

Original Endurance Crackers from Oh She Glows

Yields about 22-24 large crackers

Ingredients

½ cup chia seeds
½ cup sunflower seeds
½ cup pepita/pumpkin seeds
½ cup sesame seeds
1 cup water
1 large garlic clove, finely grated (I just used my garlic press.)
1 tsp grated sweet onion
¼ tsp. kosher salt (Crazy salt is darned good too.)
Olive oil for brushing, if desired

Optional: Herbamare, kelp granules and your choice of additional spices and fresh herbs to taste. (I’ve never jumped on the kelp wagon but have tried cumin, paprika and curry as well as chopped fresh rosemary, dried oregano, cracked pepper. You get the picture. One person adds a puree of six or so dates and cinnamon for a sweet version.)

Method

Preheat oven to 325° and line a large baking sheet with parchment paper.

In a large bowl, mix the seeds together. In a separate small bowl, mix the water, grated garlic and grated onion. Whisk well.

Add the water mixture to the seed mixture; stir until thick and combined. Season with salt and optional spices/fresh herbs.

Spread the mixture onto the prepared baking sheet with the back of a spoon (or your hands) until it’s less than ¼” thick.* It may be little runny, but just keep smoothing. If it becomes too thin in parts, just patch them up.  Bake for 30 minutes. Remove from oven. Loosen with a long flat spatula or pizza peel, cover with another greased or parchment lined cookie sheet, and invert. Alternatively cut into smaller squares and flip. Don’t worry if it breaks in a few places. They’re crackers, right?

At this point, you can deeply score the surface into whatever size crackers you like (diamonds are shmancy. Rectangles and squares are perfectly fine.) This is also when you can go pro and brush the surface lightly with oil to make them nice and crispy.

Bake for another 30 minutes, watching closely after about 25 minutes. The bottoms with be lightly golden in color. Allow to cool completely on the pan and break into pieces. Store in a covered container. They freeze well too.

*Newbie cracker maker? Make it even easier on yourself by using two baking sheets and forming smaller, easier to flip rectangles.

Sweet Version, care of The Rowdy Baker

½ cup raw sunflower seeds
½ cup raw sesame seeds
½ cup raw pumpkin seeds
½ cup raw chia seeds
1 tsp kosher salt
1 cup water
5 ounces dark (at least 70% cocoa) chocolate, finely chopped
1 cup raisins (optional)

Method

Prepare as above through final cooking and then:

Remove from oven and sprinkle evenly with the chopped chocolate. Wait a few minutes and then spread with a flat spatula. Sprinkle with raisins if desired.

When the chocolate has hardened (you may refrigerate it if you wish, to hurry it along) break into pieces and store in an airtight container.


Paleo Crack…ers

Plate of possibly paleo,  definitely delicious crackers

Plate of possibly paleo, definitely delicious crackers

And then it happened. Just when I thought I would never find a decent snack that would pass the paleo test (note: I do not have the discipline to be a paleo eater, but in case I find it someday I want to be sure I could eat something other than bacon, cauliflower and coconut oil), I found these crackers. Even better than how good they are, is the fact that they contain no exotic or expensive ingredients—sorta what you would expect from a site called “brokeassgourmet.”  Gabi, the aforementioned gourmet, describes her Simple Seed Crackers crackers as “shortbready” which I thought was odd, but after my 8th cracker or so I must say I agree. I suspect the sesame seeds may be in a gray area with paleos (they have a husk and all—see chia seed reality check in Endurance Crackers), but I’m going to enjoy these for a few days before I ask.

Paleo Crack AKA Simple Seed Crackers straight from brokeassgourmet.com

 Ingredients

1 cup unsalted roasted dry, shelled sunflower seeds (you could also use salted ones, but then make sure to use a bit less salt when you mix the dough)
1 cup sesame seeds
1/4 medium onion, minced
1/2 tsp salt, plus more for sprinkling
1/2 tsp pepper
2 Tbsp water (or more as needed)
extra virgin olive oil, for brushing
(FYI: Total Cost of Ingredients –$3.50)

Method

Preheat oven to 350 degrees. Place sunflower seeds in a food processor and process for about 2 minutes, until smooth (the mixture will resemble a dry peanut butter). Add onion, sesame seeds, salt, pepper and water and pulse or stir, just until a thick, paste-like dough comes together.

Uniform thickness is key.

Uniform thickness is key.

Place the dough on a piece of parchment paper and shape into a thick rectangle or square, to guide the dough’s shape while you roll it. Place a second piece of parchment paper over the dough and roll with a rolling pin until the dough is about 1/8” thick.

Remove the top piece of parchment paper and use a sharp knife or pizza cutter to lightly score (but not cut all the way through) the dough into squares (any size will work—mine were 2 1/2” squares). Slide the parchment paper with the dough on it onto a baking sheet and bake for 17-20 minutes, or until golden-brown (be careful not to let the crackers get too dark—burned sesame seeds have a foul flavor).

Let cool for 10 minutes, then gently break apart along the scored lines (don’t worry if they’re imperfect—they’ll still be delicious).

Makes 24-32 crackers, depending on size.


Eliteam Healthy Go-Go Donuts

Baked-donutsAnd now for another episode of Positive Snacks, courtesy of Doug Lewis and the Eliteam campers. Doug is in the midst of his fourth eliteam session of the summer, and he’s kept the kids on the go, made them sweat a whole lot and taught them a ton about sports psychology, sports physiology and sports nutrition. Read more about Doug, Eliteam and Positive Snacks here, or just keep reading for another great recipe that will get kids psyched to be in the kitchen. And, ahem kiddos, the eliteam cooking experience includes clean-up as well.

Here’s what Doug says about his recent donut making experience:

“This is a great recipe that is healthy with the squash and pumpkin puree—PLUS they are donuts! They’re packed full of good nutrients and baked, not fried, which makes them healthier. Also, it requires an egg white and separating an egg is always a fun activity to try with the kids.

We invested a few dollars in the donut pans. Be sure not to overfill them before baking or else the donuts will become muffins with holes in the bottoms. We made 120 donuts for the 50 kids and they were gone in seconds!!!”
Here is the recipe, which came from “Deceptively Delicious” by Jessica Seinfeld

Go-Go Donuts (Full disclosure: I added the Go-Go, because these kids never, ever stop.)

Ingredients

Nonstick cooking spray
½ cup firmly packed light or dark brown sugar
½ cup canned pumpkin puree
½ cup sweet potato puree
½ cup nonfat (skim) milk, or lowfat (1%) buttermilk
1 large egg white
1 tablespoon trans-fat-free soft tub margarine spread, melted
1 teaspoon pure vanilla extract
1 cup all-purpose flour, or whole-wheat pastry flour
1 teaspoon baking soda
½ teaspoon baking powder
½ teaspoon cinnamon or pumpkin pie spice

Method

Preheat the oven to 350 degrees F. Coat a doughnut mold or 12 cup mini-muffin tin with cooking spray.

In a large bowl, beat together the sugar, pumpkin and sweet potato purees, milk, egg white, margarine, and vanilla. Add the flour, baking soda, baking powder, and spice, and mix until completely incorporated.

Pour the batter into a gallon-sized plastic bag ( or pastry bag if you have one) and cut the bottom tip off of one side of the bag. Squeeze the batter through, into the donut mold. Bake until the tops are lightly browned and a toothpick comes out clean when inserted, 20-25 minutes. Turn the doughnuts out onto a rack to cool. When cool, dust with confectioners’ sugar.

Store in an airtight container at room temperature for up to 2 days, or freeze for up to 1 month.

donut-batter boys-mixing-donuts