Category Archives: Gifts

Coo Coo for Koulourakia

Today I am getting my Greek on. I have exactly zero Mediterranean blood in my veins, but I have some in my heart. This thanks to my favorite Greek friends, who are warm and sometimes fiery; they are generous in spirit, passionate in their beliefs and above all FUN.

One of my faves recently enlisted my son in making a mega batch of traditional Greek cookies, Koulourakia. Seeing them in the kitchen together via Facetime, working on the cookie-production line, made me smile. It reminded me of being in the kitchen with my own mom.

As we have documented here on this blog, Nina was not invested in cooking unless the cooking was collateral necessity for some messy crafting or shenanigans that brought together kids or grandkids. Despite her own holiday baking ennui, she encouraged us to pursue our own culinary itches, which were usually things that bore little resemblance to the magazine pictures that had inspired us. Cases in point: rock-hard pretzels from ZOOM (the show not the app), a gloppy soft cheese “pine cone” flavored with bacon bits and studded with almonds, dentally challenging popcorn balls, and so, so many more.  

My point is….Nina had her priorities straight. Our holiday kitchen experiments brought us together in one place. The only really important part about the holidays are the people—the family you are born into and the family you grow into. If you’re living a rich life, that family ends up being big and varied and sprinkled all over the country, if not the globe.

That is why seeing the kitchen production half a country away inspired me to try out the Koulourakia recipe I’ve been eyeing (and trying to pronounce) for quite a while. The cookies did not disappoint and will be a holiday staple here. They are sturdy, keep well, travel well and as a bonus are both nut-free and Vegan. They’re low-key addictive—not quite as sweet as a cookie, and less of a commitment than a muffin, making them the perfect late morning or mid-afternoon accompaniment to a cup of something comforting. Book group? Cookie exchange? Hostess gift? Holiday snack arsenal for unexpected guests? Yes and yes on down the line.

There are admittedly many versions of Koulourakia, using seasonal flavors and sweeteners, or butter vs olive oil. I went with Mina Stone’s favorite orange- and cinnamon-flavored version, from her book Lemon, Love and Olive Oil, (purchased at the always magical Woody’s Mercantile). She does the pro option of brushing the tops with honey water and pressing the cookies in sesame seeds. Other versions skip the honey wash and simply roll the rope in sesame seeds before forming the cookies into a circle. You do you, preferably in a messy kitchen with good company and an excellent playlist!

       Koulourakia, Colorado version

Koulourakia

From Lemon, Love and Olive Oil

 Ingredients

The Wet Ingredients:

  • 1/2 cup (120 ml) light olive oil or vegetable oil
  • 1/2 cup tahini (120 ml)
  • 1 cup (240 ml) orange juice
  • 1 cup (200g) granulated sugar

The Dry Ingredients:

  • 4 cups (480g) all-purpose flour
  • 1 teaspoons baking powder
  • 1 teaspoons baking soda
  • 2 teaspoons kosher salt
  • 4 teaspoons ground cinnamon

Topping:

  • 1 Tbsp honey
  • ½ cup water
  • ½  cup sesame seeds

Method

Preheat the oven to 350 °F, 180 °C

Line 2-3 baking trays with parchment paper.

Make the Cookie Dough:

  • Combine all of the dry ingredients in a bowl and whisk them together.
  • Combine all of the wet ingredients in a large bowl and whisk them together. Add the dry ingredients in 2-3 batches and whisk together. Switch to a spatula and mix until a smooth soft dough, adding another spoonful of flour if it’s too sticky. Cover loosely with a towel and set aside to rest for 20 minutes.

Make the Cookies:

  • Take about a tablespoon of dough and roll it into a ball. Roll the ball into a 5-inch (12-13 cm) long rope. Shape it into an S or into a circle.
  • Dissolve 1 Tbsp honey in 1 cup water. Form the cookies on the baking tray, brush tops with honey/water mixture then press each cookie into sesame seeds and replace on sheet. Alternatively, roll the rope in the sesame and then place on the prepared baking pan. 
  • Bake the cookies 13-15 minutes, until golden brown on the bottom and lightly toasted on top). Cool on rack.
  • Transfer the cookies to cookie jars or to an airtight container and store at room temperature up to 2 weeks.

Serve with cozy bevvie of choice, or go full Greek and shake up a cold frappe. It’s totally a thing.
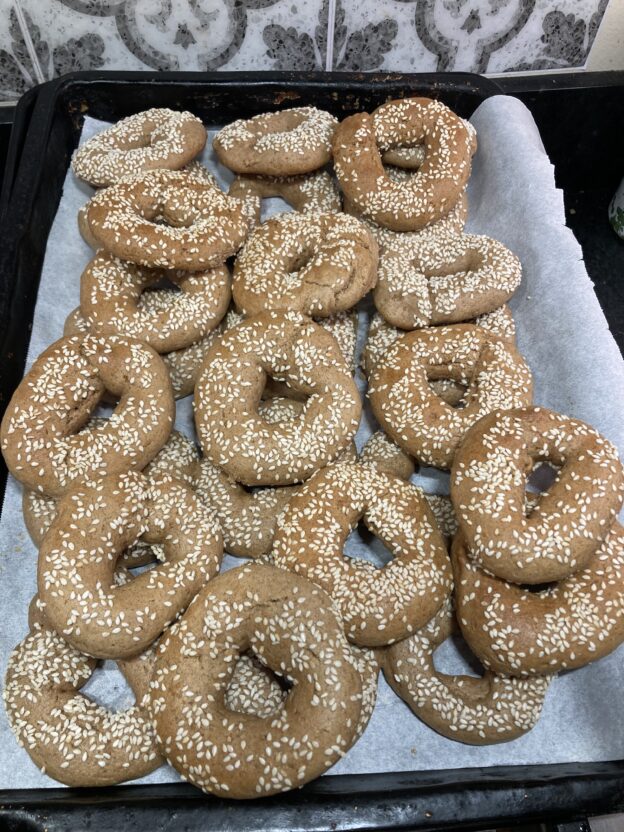
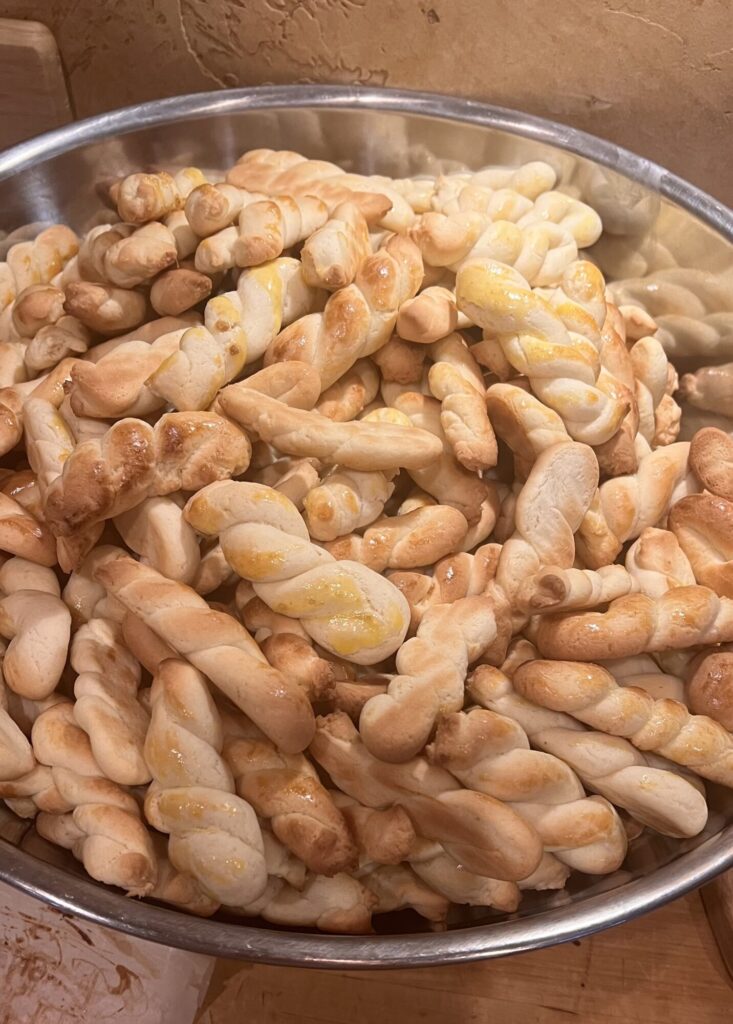
     Traditional yodeling marmots and Koulourakia unite!

Slacker Chile Crisp

I love Genevieve Ko. To be clear, I don’t know her, but when a stranger changes your life in a good way what’s not to love?

First, some background and context for this new crush. I am a huge fan of chile crisp, the reigning condiment of the year in our household. While I love the version that I first discovered, and shared here, it is a total pain in the arse to make. It involves lots of labor and time, at least one special ingredient you might not have on hand (star anise) and requires way too much focus with sharp knives. Furthermore, having undertaken the labor of love that is small-batch chile crisp production, it was always a gamble to give it to someone; if I later found out they didn’t love it, I kind of wanted to cry.

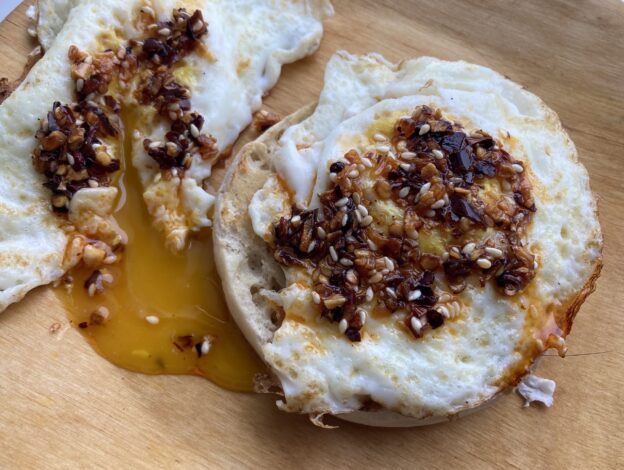
But then, I discovered Genevieve Ko’s version of chile crisp, or rather it discovered me, tenaciously popping up in my searches before the OG version. I hesitated to try it because it looked too easy to be good. Other than the Sichuan peppercorns (a bag of which will cost 2.99 and last you exactly forever) it involves no special ingredients. More importantly, it involves no chopping. And yet, it still has all the key elements of chile crisp: it’s crunchy, savory, spicy, salty and a just a tiny bit sweet.

This chile crisp is a slightly different animal than the classic—especially with the added twist of sesame seeds– but I think I like it even better. It’s hard to say because the ease of preparation makes me want to like it better. For sure it is on a different planet than Lao Gan Ma, the supposed King Daddy of commercially produced chili crisp. Sadly, I trusted the googleverse and bought a huge vat, which is still taking up space in the fridge. Trader Joe’s chile crisp is similar in texture but can’t hold a candle in taste. 

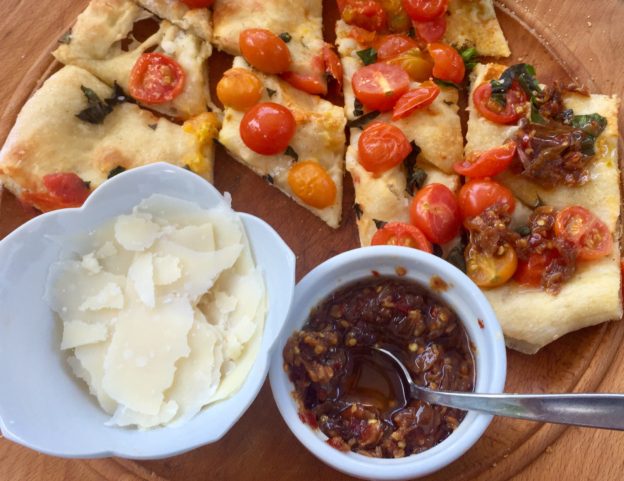
Make yourself up a batch, or better yet a double batch, because you’ll want this on eggs, pizza, sandwiches, quesadillas, fresh bread, etc. You may find yourself creating chile crisp “fry sauce” by stirring it into ketchup and mayo, and then stumble upon Ms. Ko’s chile crisp fettucine which will make you realize a double batch really doesn’t last all that long.

As with any recipe from the NYT, people have a LOT to say in the comments, and there are plenty of suggestions for how to tweak this to your tastes.

I hope you enjoy this chile crisp as much as my people do!

Slacker Chile Crisp

From Genevieve Ko via the New York Times

Ingredients

Yield: About 1¼ cups

  • ½ cup vegetable oil (or a bit more…there’s not a lot to spare here)
  • ¼ cup dried minced onion
  • 1 teaspoon granulated sugar
  • 1½teaspoons kosher salt (Diamond Crystal)
  • ⅓ cup finely crushed dried small red chiles or red-pepper flakes
  • 3 tablespoons sesame seeds
  • 1 teaspoon coarsely ground Sichuan peppercorns (optional…but Edie says not optional)

Method

Combine the oil, onion, ½ teaspoon sugar and ½ teaspoon salt in a small saucepan. Cook over medium heat, stirring occasionally, until the onion becomes evenly golden brown (careful not to overcook), 3 to 5 minutes.

Add the chiles, sesame seeds and Sichuan peppercorns, if using, and sizzle, stirring, for 1 minute, then stir in the remaining ½ teaspoon sugar and 1 teaspoon salt. Use immediately or refrigerate in an airtight container for up to 2 weeks. Spoon over everything. I mean everything. Maybe not chocolate cake but then again…


Crunch Time Tahini Granola

The internet is full of recipes that are made to look easy, but are a pain. This is especially true at the holidays where we are all looking for that holy grail food item—that thing to bring or give that is both delicious and memorable. Case in point, the Nutella puff pastry Christmas tree currently all over Instagram and so many other cleverly pieced-together videos. More often than not they lure you down the rabbit hole of something that may indeed be easy, but only after making it for a generation. And honey, we ain’t got no time for that during the holidays.

When I’ve tired of failed baking experiments I often go back to granola. In the pantheon of homemade treats—from this chocolate sauce that can be made in your sleep, to these GD chocolate dipped peanut butter balls (beware of anything that has to be rolled into individual balls! And/or dipped!)—granola is among the easiest. Not the cheapest, thanks to the precious nuts and honey/syrup, but the easiest. So, when I see easiest and granola together in one heading, I perk up.

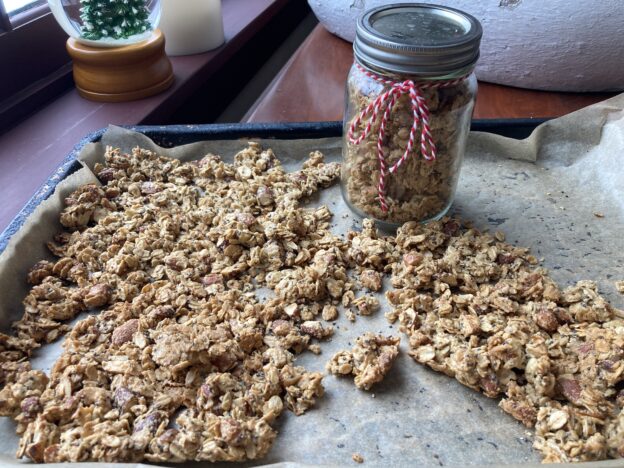
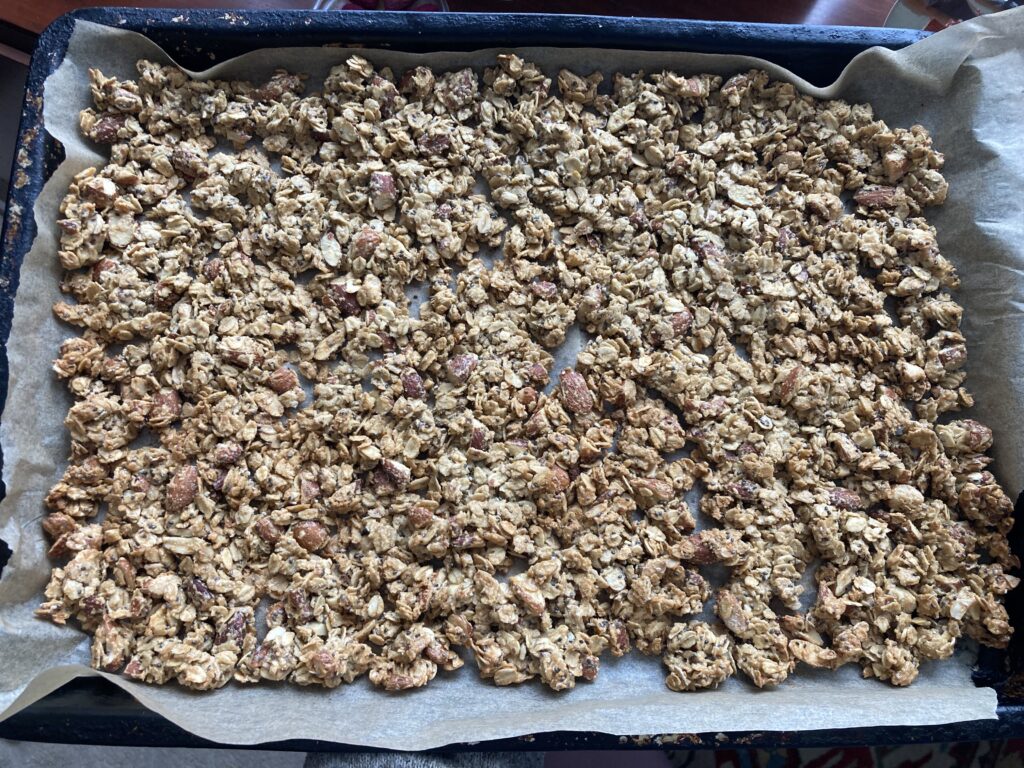
This recipe delivers on its claim. Of course the ease comes with a price. You’ll swap out some steps and ingredients by springing for the jar of tahini. And if you go with pistachios as written (I used roughly chopped almonds), they’re the priciest option. BUT, they also require zero chopping, bringing this recipe to Level 1 on the effort meter. You will be rewarded for your lack of work with a delicious, not-too-sweet, crunch-perfect granola and extra time on your hands.

As with every recipe there is a slight catch, something that keeps the trained monkeys from taking over production. The catch here is the step of spreading the thick granola mass evenly on the cookie sheet. I used little chopping motions with a rubber spatula. You do whatever it takes, and it does not need to be perfect—we’re just aiming for somewhat even thickness so the granola at the edges doesn’t burn up while the stuff in the center stays soft and cuddly.

I wish you success in all your experiments. No matter how they turn out you deserve a gold star and a chocolate kiss for trying.  

Easy Tahini Granola

From Jenné Claiborne via Food52 Genius Recipes

Prep time: 5 min
Cook time: 15 min

Ingredients

  • 1/2 cup (125g) well-stirred tahini
  • 1/3 cup (80ml) maple syrup
  • 1 teaspoon vanilla extract
  • 1/4 teaspoon fine sea salt
  • 2 cups (180g) old-fashioned rolled oats
  • 1/2 to 1 cup (60 to 120g) shelled raw pistachios (or another nut or pepitas)
  • 2 tablespoons chia seeds
  1. Stir everything together: Heat the oven to 350°F (175°C) with a rack in the center. Line a sheet pan with a silicone baking mat or parchment paper. In a large mixing bowl, stir together the tahini, maple syrup, vanilla, and salt with a silicone spatula until it’s smooth and evenly combined. Stir in the oats, pistachios, and chia seeds.
  2. Bake the granola: Spread the wet, sticky oats onto the sheet pan in a thin, even layer. Bake for 10 minutes, then, using oven mitts, take the pan out of the oven and stir the granola—this will help it finish baking evenly. Return the pan to the oven and bake until the granola is dry and golden brown, another 5 to 10 minutes. Keep a close eye toward the end to make sure it doesn’t start to burn at the edges.
  3. Eat, Store, Give: Let the granola cool completely to crisp up, about 20 minutes, before breaking it into clumps with your hands. Eat as one does with granola. Store in a sealed container at room temperature for a week or more if you are disciplined. Pack it up in mason jars or treat bags for giving.  

It’s crunch time!


Chile Crisp, Condiment of the Year

And now, in time for your Labor Day entertaining, I present the third of three condiments, and by far the best. I discovered this recipe way back in early summer, nestled in the margin of “The Simple Issue”  of Bon Appetit. Within a week the page was permanently folded back, stained and a little greasy, and since then my fridge has never NOT had a jar of chile crisp in residence.

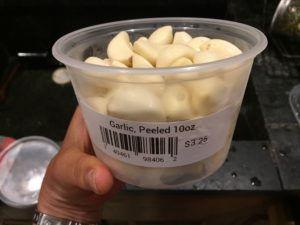
The catch on this spicy, sassy, savory creation is that it takes some effort to make. You can cut yourself some slack by buying pre-peeled garlic cloves. Even with those, you’re still going to have to do a lot of thin slicing. Soooo, dig deep! It’s the last weekend of summer, people. Get yourself a sharp knife and a good playlist and get going. There’s still time to make yourself the MVP by bringing this to the party, or spicing up your own patio fare.

But first, a couple of things: I’ve now made this several times , and each time I’ve overdone it on the volume of shallots. Only once did they really crisp up—which was tremendous and worth cranking up the heat a bit and then babysitting the pot until they were evenly brown. That said, it was pretty tremendous all the other times too. Just make sure you brown the shallots and garlic without burning them. I now use a bigger pot than seems necessary, which allows the shallots to really relax in their hot oil bath.

It’s worth going to the original Bon Appetit recipe and reading the comments. I think “off the hook” is the best reader description. We’ve put it on burgers, quesadillas, sandwiches, pizza, baked sweet potatoes and eggs; into salads and on bruschetta and burratta and toast. It’s so going to get stirred into soups this fall. I may draw the line at using it as an ice cream topper, but…no promises.

Finally, there is apparently an excellent version of this at Trader Joe’s called chile onion crunch. Add that to the pain of not having a TJ’s near me. For now, I chop.

PS This one goes out to Sister B, who hates bread and butter pickles and cilantro (see quick, easy, cheap salsa), but hung in there for this. Three’s the charm, baby.

Chile Crisp

Ingredients

  • 4 small shallots, thinly sliced (I end up with 1 1/2 cups or so, which is probably wayyyy too much, but I’m greedy and my shallots are apparently jumbo)
  • 2 heads of garlic (HEADS, not cloves), separated into cloves, sliced. (Google says that’s about 24 cloves)
  • 1½ cups vegetable oil
  • 2 3″ cinnamon sticks
  • 6 star anise pods
  • 1 2″ piece ginger, peeled, very finely chopped
  • ¼ cup crushed red pepper flakes
  • 2 Tbsp. soy sauce
  • 2 tsp. sugar

Method:

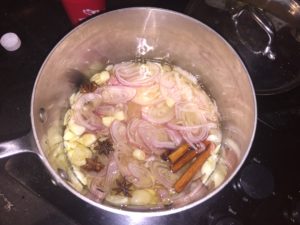
  • Bring shallots, garlic, oil, cinnamon, and star anise to a simmer in a medium saucepan over medium heat. Cook, reducing heat as needed to maintain a gentle simmer and swirling pot occasionally, until garlic and shallots are browned and crisp, 20–25 minutes.

    Shallots prepping for the spa

    (Take your time—you want to drive all the moisture out before they brown.)

  • Mix ginger, red pepper, soy sauce, and sugar in a medium bowl. Strain shallot mixture through a fine-mesh sieve set over ginger mixture. Let garlic and shallot cool in sieve (this will allow them to crisp further) before stirring back into chile oil. This is the time to take out the cinnamon and star anise too.
  • Do Ahead: Crisp can be made 1 month ahead. Cover and chill.

Bringing It:

Divide the goods into one big jar or smaller jars that you can fit a spoon into. Put the lids on tight and prepare to make a lot of friends. If you pour off a bunch of the oil you can then use it to make a sassy version of aquafaba mayo.

A shortcut worth every penny

Sabering champagne

Holiday Favorites: Stay Sane, Go Nuts, Be Happy!

Fluff up your marmots and break out all things sparkly, the holidays are here. This is the season for many things: fake fur, sequins, fizzy drinks, warm everything. This is not the season for experimentation. We’re keeping our heads above water here, which means sticking with what we know. tried and true meals that make us happy, and treats to give that make others happy.

Maple oat breakfast bread

With that in mind, in my own kitchen I’m revisiting whole lot of Bring It tried and trues. That means soups like Thai Coconut Corn Soup, or Sugar and Spice Squash Soup. And yep, that means a crock pot full of Chicken Taco Chili that feeds a crowd with about 6 minutes of prep. All of the above, of course, beg for People’s Choice Cornbread or No Knead Challah or a honkin’ slice of Maple Oat Breakfast Bread to dunk in there. That is, UNLESS dirt bread is your thing…you know who you are, you little hemp seed eating chia pets. I’m with you there.

You might be needing some holiday entertaining staples like pomegranate everything (along with a genius pomegranate wrangling technique). What’s winter without fondue, and the easiest in the world Guinness Fondue at that? And what’s “How the Grinch Stole Christmas” without snacks? I highly recommend a batch of Nootch Popcorn or a bowl of Hail Mary Coconut.

As far as gifting and hostess offerings, you will never go wrong with crackle and its intriguing, slightly sophisticated dark cousin, pretzel and beer Crackle 2.0. And cookies? Yeah we’ve got those, basics like my faves—champion chip cookies—as well as totally slacker kiss my crust cookies, made from refrigerated pie crust and whatever chocolates you have around. If you need to scare up a snowstorm, or a reason to start a sweet family tradition make up a snow ghost pie.

Snow Ghost pie ad

And lest this be a pure re-hash of deliciousness we have an actual new recipe. I realize this blog has a somewhat extensive nut treatment, including honey thyme walnuts, spicy rosemary maple walnuts and an entire holiday nut anthology. But it turns out you really do need one more way to make roasted almonds. These are very similar to ginger glazed almonds (see anthology above), but without the ginger and with a coating of sesame seeds. You can choose a mix of sweeteners for your preferred flavor dimension (honey and sesame were pretty much born for each other), but for the best texture and glaze use at least some brown sugar.  

We’re talking nuts here, not rocket science, so be bold and mess around with flavorings, spices, herbs, types of nuts etc. Above all, enjoy the madness of the season and, like James says, remember “Shower the people you love with love.”

Sesame Almonds

Makes 3 1/2 cups almonds

Ingredients:

  • 3 tablespoons packed light brown sugar (or sub out up to 2 tablespoons with honey or maple syrup)
  • 1 tablespoon coconut oil (or your healthy oil of choice)
  • 1 teaspoon kosher salt
  • 1 teaspoon paprika
  • 1 teaspoon rice vinegar
  • 1 pound raw almonds (a scant 3 ½ cups)
  • 2 tablespoons (or more) white sesame seeds

Method:

Arrange a rack in the middle of the oven and heat to 350°F. Line a rimmed baking sheet and 2 wire cooling racks with parchment paper and set aside.

Pour the almonds into a mixing bowl. (If you keep your nuts in the freezer, warm them up in the oven for a few minutes first). In the microwave or on the stovetop stir together the brown sugar/honey/syrup, oil, salt, paprika, and vinegar over low heat. Pour mixture over the almonds and toss until the almonds are thoroughly coated. Transfer the almonds to the prepared baking sheet and spread into an even layer.

Bake, stirring every 5 minutes, until the almonds are brown and fragrant, 12 to 15 minutes total. They should be a rich brown color and just start to smell toasted as you open the oven door.

Sprinkle the sesame seeds over the hot almonds and stir to evenly distribute the seeds. This is where I go a little overboard, and try to get as many sesame seeds as possible to coat the almonds. Divide the nuts between the 2 prepared cooling racks and use a spatula to spread the nuts out so they do not touch. Cool completely, about 30 minutes.

Break apart any nut clusters that are stuck together if needed.

Bringing It:

Pour these babies into a treat bag, jar, tin or a cardboard takeout container lined with festive tissue paper, and store them in the fridge until you are ready to give them or devour them.


Salted Peanut Butter Cookies: Gluten-Free and Mini-Mart Sourced

Gluten-free, marmot approved.

Gluten-free, marmot approved

Here’s a hypothetical situation. It’s Christmas Eve, you gave away all your homemade cookies (if you happen to have made them in the first place), and you just found out Santa (or a guest) is gluten-free. There’s no way you’re going to the grocery store for special ingredients but you may be able to pull off a mini mart run. What if all that happened? What would you do?

You would make these cookies.  These are barely adapted from Smitten Kitchen who got them from the Ovenly cookbook. It’s the gift that keeps on giving. Here’s hoping you don’t need these tonight, and you stay clear of mini marts, but in case of emergency, you’re covered. Have a good one all, enjoy your people, and see you on the other side!

Salted Peanut Butter Cookies

Yield 26 to 28 cookies with a 1 2/3 tablespoon or #40 scoop.

  • 1 3/4 cups (335 grams) packed light brown sugar
  • 2 large eggs, at room temperature
  • 1/2 teaspoon vanilla extract
  • 1 3/4 cups (450 grams) smooth peanut butter (see note at end)
  • 1 cup (or so) of your favorite chocolate chips (optional)
  • Coarse-grained sea salt, to finish

Preheat the oven to 350°F. Line a rimmed baking sheet with parchment paper.

In a medium bowl, whisk together the light brown sugar and eggs until smooth. Whisk in the vanilla extract, then the peanut butter until smooth and completely incorporated; you shouldn’t be able to see any ribbons of peanut butter. Stir in chocolate chips, if desired.

Scoop or spoon the dough into balls — from a heaping Tablespoon to monster 1/4 cup sized. Place on prepared pan. For the tallest final shape, place the tray in the freezer for 15 minutes before baking.

Sprinkle the dough balls lightly with coarse-grained sea salt just before baking. Bake smaller cookies for 14 to 15 minutes and larger for 18 to 20. When finished, cookies should be golden at edges. They’ll need to set on the sheet for a minute or two before they can be lifted intact to a cooling sheet. With any luck Santa hits your house late enough to let them cool completely so the crispy outside/soft inside thing can really happen. 

Do ahead: You can make the dough in advance and either refrigerate it for a couple days or scoop out the cookies, freeze them, then bake them right from the freezer.

About chilling the dough: You can scoop and bake the cookies right away, but they keep their shape better if you chill them in the freezer for 15 minutes first.

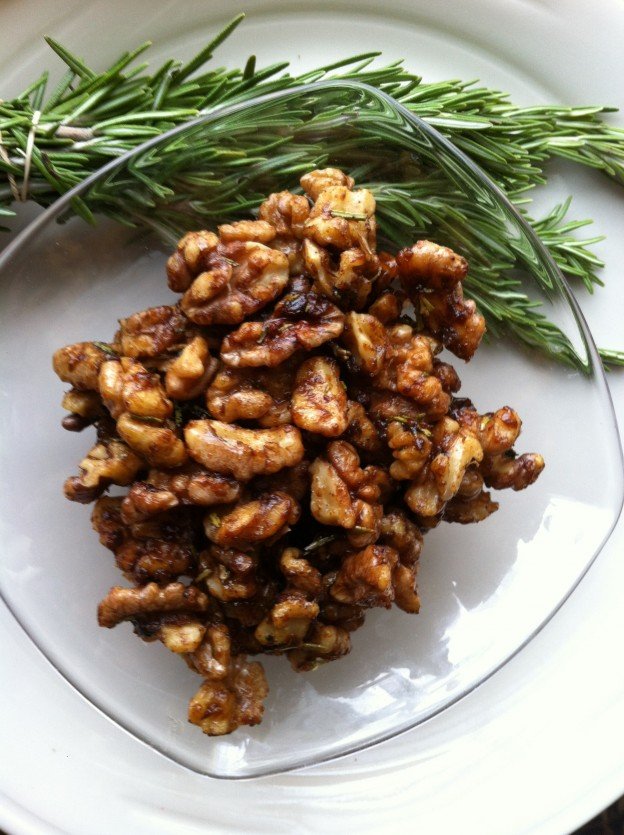
rosemary walnuts

Spicy Rosemary Maple Nuts

It’s here people. Crunch time. This is your week to bake or cook your way out of small gift madness.  Let’s review some options: We have, of course, the standby Crackle, and the more grown up Guinness and dark chocolate version. We have easy as pie (crust) cookies and jars of salted caramel cholliesauce or honey thyme walnuts. And speaking of nuts…we now also have an updated riff on sweet and savory roasted nuts.

Sadly, I have no kill switch when it comes to sweet and spicy roasted nuts. Until now the men in my house have allowed me to make them, give them and sample (hoard) them with no interference. This year, however, when I made these for Thanksgiving they disappeared before they were cool enough to hide. Either the locals’ tastes have evolved or this recipe is just that good.  It calls for fresh rosemary, maple syrup and cayenne—standard issue stuff amongst us nut fans. What takes them over the edge is the amount of rosemary (lots) added both before and after baking. Oh, and flaky sea salt. No secrets here.

They’re sweet but not too sweet, and have enough heat to get your attention but not in a scary way. Best of all, there are no egg whites or other fussy things involved. Yes, those are angels singing. You’ve got to get fresh rosemary—I’m not letting you off the hook there—but you can use a mix of whatever raw nuts strike your fancy. Pictured is the full walnut monty, but a mix with pecans, almonds and/or cashews is divine. Love the one you’re with, baby.

Make a lot so you don’t have to be stingy with your family. It’s so close to Christmas and all.

Spicy Rosemary Maple Nuts

From Kitchen Konfidence

Ingredients

  • 1 pound unsalted mixed nuts (cashews, walnuts and almonds are delish)
  • 1 tablespoon melted butter
  • 1 tablespoon maple syrup
  • 2 tablespoons + 1 teaspoon chopped fresh rosemary, divided
  • 1 tablespoon dark brown sugar
  • ½ teaspoon cayenne pepper
  • 2 teaspoons flaky sea salt or kosher salt, plus more to taste

Method

  1. Preheat oven to 350°F. In a large bowl, toss mixed nuts with melted butter and maple syrup. Add 2 tablespoons chopped rosemary, dark brown sugar, cayenne pepper and 2 teaspoons flaky sea salt, mixing until the nuts are well coated . Spread nuts out onto a rimmed baking sheet lined with parchment paper. Bake until glazed and golden (about 18 – 20 minutes), stirring twice during the cooking process.*
  2. As soon as the nuts come out of the oven, season with an additional 1 teaspoon chopped fresh rosemary, and flaky sea salt to taste (I added an additional 3/4 teaspoon). Serve warm immediately or store in an airtight container at room temperature for up to 5 days.

Notes

  • Set the timer and If your oven runs hot, be sure to check the nuts a bit early. Nuts can turn on you and go from golden to bitter if you ignore them.

Up next: What if you find out Santa is gluten free….and you only have access to a mini mart? Got ya covered.

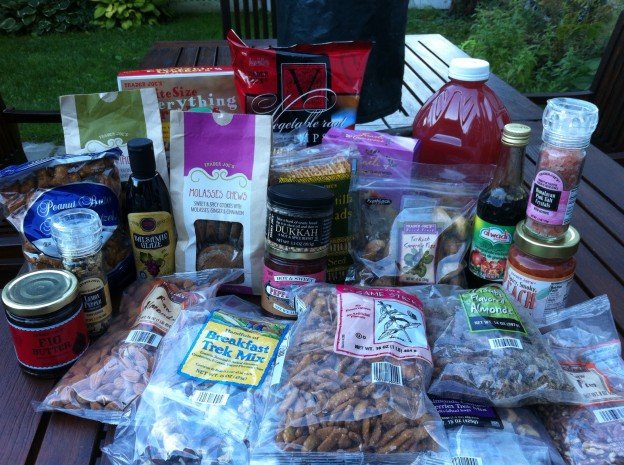
nuts-n-stuff


ABC Summer Sauce

Green goodness with a kick

Green goodness with a kick

Summer. It gets away from you. As in, we’re halfway through July ?!?! and #$%^&*! Recipe-wise, I don’t have a whole lot to show for summer so far, but I have been doing some background work, like: ongoing watermelon rind experiments, which will save you from some pretty scary concoctions; exploring Vegan frontiers with the mysterious magical Aquafaba; making rhubarb vanilla jam and rhubarb vinegar that I promise to post before the end of strawberry rhubarb season next year; mixing up all kinds of drinks and mocktails (ginger limeade, watermelon aqua fresca), even homemade grenadine, which it turns out is nothing more than pomegranate simple syrup. Who knew? I’ve also been brewing up herbal Sun Tea like it’s my job and adding fresh citrus and mint simple syrup.

This will all be tasty Intel for later summer lovin’. In the near term, I am steeling myself for an exhaustive test of the many frosé recipes (thank you Cousin D) now trying their best to break the Internet. We need a hot weekend, a boatload of rose and some thirsty volunteers. Who’s with me?

Mostly, I’ve been thinking about good people, and how they are the most important ingredient to summer fun. As it happened the US Ski Team announced their 2016/2017 team yesterday, and it includes some really, really fine young people, many of whom I’ve been fortunate to get to know. Sure, they are amazing athletes, but way more importantly they are stellar people who make their ski people proud.

AJ and Ollie

AJ Ginnis, building his fan base.

Pro move: Lila's got the tools of the trade—parchment paper and high tech oven mitts.

Lila Lapanja baking up some Champion Chip Cookies.


In honor of this moment we’re looking to Anna Marno (U.S. Ski Team member, National Super G Champ, healthy eater and cooker, part unicorn) for a summer recipe that is exactly what summer is about. This gorgeous cilantro-packed sauce is fresh, easy, delicious, and versatile enough to liven up most anything you feel like roasting, grilling or dipping.

It was photographed by Rocky Mtn Tania, who’s contributions seriously raise the Bring It! bar.

Says Tania: “This sauce is simply amazing on almost everything: as a side for street tacos, with chicken, fish or pasta even on crackers with cheese.  The ingredients work together so well, but the amounts can and should be adjusted to taste.”

Shall we just call this Anna’s Best Cilantro Sauce? Yes we shall!

Anna-ripping

Anna Marno…ripping!

ABC Summer Sauce

Ingredients:

  • 1 large bunch of cilantro
  • Juice from 2 limes
  • 1 jalapeno, seeded and chopped
  • 1/2 tsp sea salt
  • 1 clove garlic peeled and coarsely chopped
  • 1 tsp cumin
  • 5 oz plain greek yogurt *
  • 2-3 Tbsp agave sweetener
  • 1/3 cup olive oil

Method:

Put everything but the olive oil in a blender (a Vita Mix if you’re showing off, but a regular blender will do). You have to push the ingredients down to blend.  Slowly drizzle olive oil into blended ingredients while the blender is running to emulsify the sauce.  Make ahead of time so flavors come together.

*The beauty of this recipe is that you can omit the yogurt and you have an incredible vinaigrette for a salad.

Bringing it:
This travels well and is a wonderful hostess gift.

Pomegranates Unplugged

pomegranate

“Tis the season to overdo everything. So let’s overdo pomegranates!

It’s almost Christmas, and whether you celebrate it or not, I’ m giving you a gift. Pomegranates. Well, I’m not actually buying them for you, but I am unlocking their potential. For a long time we have heard about the amazing health benefits of pomegranates. They are rich in vitamins and antioxidants, low in calories, high in fiber, high in heart healthy phytochemicals (say that three times quickly then google it). They strengthen the immune system, regulate blood pressure, improve oral hygiene, reduce wrinkles and even give PMS the boot. 

All this, and yet I have ignored pomegranates entirely, for the simple reason that they are a pain in the butt. They are messy, labor intensive, not roastable in any way and obscenely expensive in their juiced or seeded form. Until recently nothing moved me to entertain an interest in the pomegranate or its derivatives other than as a splash in a martini.

But then I found myself living with a young friend who has a pomegranate-a-day habit. Fortuitously this coincided with running across a pomegranate hack that made seeding a pomegranate so easy that I had to try it. Bells rang, stars aligned, produce departments rejoiced. Now, my record for getting all the seeds out of a pomegranate is 1 minute 11 seconds, and it is a rare day in my household that does not involve this “super fruit.”

Incidentally, my young friend rejected the hack, even after we staged timed contests to prove hack efficiency. A traditionalist, he adheres to his old ways, enjoying his ritual of settling down on the couch, focusing on his pomegranate, a bowl and the mission. I respect. But I also have yet to find a primary food provider who is in search of labor intensive food prep rituals. So for the rest of you, here is your key to pomegranate freedom.

Though I adore the Russian Food hacker, his version (by his own admission) is a bit too bare bones: “Ve really need a bowl, not zeez cheap plastic plates from single guy apartment.” This guy  is a bit dry (and he could crack you in half like a pomegranate), but he is a pro.

And now, what to do with the bonanza of pomegranate seeds you have just unlocked? I’ve got you covered, with four festive ideas to let those seed brighten up your holiday.

#1 Pomegranate Bubbly

Pour anything bubbly—Prosecco, champagne, sparkling cider, birch beer, ginger ale etc—over pomegranate seeds and they will float up, be festive and give you something to chew on. Yum!

#2 Pomegranate Cheese Log

Ingredients

8 oz cream cheese (or 4 oz goat cheese and 4 oz cream cheese mixed)
1 cup pomegranate seeds
1/2 cup chopped chives
2 Tbsp finely minced fresh basil
Crackers, toasts or dipping vehicles of choice.

Method

Place cream cheese (or goat/cream cheese mix) on waxed paper and form into a log. Mix pomegranate seeds, chives and basil on another sheet of waxed paper. Roll cream cheese in seed/herb mixture, pressing lightly to stick. Serve with crackers.

# 3 Pomegranate Guacamole

Oh my! This brings me back to my very first pomegranate cocktail ever, the pomegranate margarita at Rosa Mexicano. This use for pomegranate seeds pretty much assures the pomegranate market in New Hampshire. Lest we forget, guacamole is not an exact science by any means. Shallots or green onion instead of red onion? Awesome. No fresh cilantro? No problemo. Roll with it– its Happy Hour fergawdssakes. If all you can muster is avocado, a shake of Adobo seasoning, a squirt of lemon and pomegranate seeds you are good to go.

Ingredients

2 medium ripe avocados
1/3 cup diced red onion
1/4 cup chopped cilantro
2 Tbsp freshly squeezed lime juice
1/2 tsp salt
1/4 tsp pepper
1/2 cup pomegranate seeds
Chips or assorted veggies for serving

Method

Halve and pit the avocados then scoop out the flesh into a large bowl.

Add the red onion, cilantro, lime juice, salt and pepper to the bowl, mashing the mixture together with two forks until it reaches your desired consistency.

Stir in the pomegranate seeds then serve the guacamole with chips or assorted dippers.

#4 Pomegranate Desserts

Fly, be free. Let’s not overthink this. Sprinkle them on vanilla ice cream or yogurt. Put them in a trifle or slip them in fruit pies. Mix them with ripe sliced pears, a squeeze of lemon and a dash of cinnamon. Or just eat them with a spoon or funnel them from the bowl right into your mouth. Um. Of course, nobody would do something like that.

Bonus points: Just to let you know, in addition to the above we have also sprinkled them on raclette, put them into quesadillas and on salads, tossed them with sliced steak, put them in crepes and on cereal and thrown them in smoothies. And no, I have not yet roasted them, but the holiday season is young.

skihats

Are you still with me? Are you intrigued by the above? My sister turned me on to this video and my captive son and I got a little obsessed with yarn/toilet paper roll pom-pom hats. I figure there are worse obsessions, and who doesn’t need another decorative totally useless bottle topper? Right?

Merry Christmas all!

Gingerbread Granola

Ginger Granola OneHere’s a thought.  How about an EASY holiday baking project? How about granola? Don’t get me wrong. I love to create festive holiday cookies and build gingerbread houses (structurally sound mind you— I’m married to an engineer), but every now and then I just want to throw everything in a pan, bake it at 350, and call it a show. Granola is easy peasy and this recipe has one of my all-time favorite ingredients, candied ginger! It’s medicinal, flavorful, and spicy. What more could you ask for in one ingredient. Plus, granola is a great holiday giveaway for friends and family.

I got this recipe from Cookie and Kate. Kate is a vegetarian food blogger extraordinaire, and Cookie is her cute little dog. You should check out her site. The photography is beautiful and she has a ton of great recipes. 

Have fun making batches of granola. And if you want to stick to the basics, you can also make my traditional Simply Sue’s granola.  Give it away, but make sure to save a generous bagful for yourself or you’ll have to make more.

Oh, and one more thing before we get started with the granola recipe….. when you are at the store, pick up some pomegranates because Edie has some quick and easy pomegranate intel coming at you this weekend.

Ingredients

4 cups old-fashioned rolled oats
1 1/2 cups raw pecans, walnuts, or both
1 tsp fine grain sea salt
1/2 tsp cinnamon
1/2 tsp ground ginger
1/2 cup melted coconut oil (or olive oil)
1/3 cup real maple syrup
1/4 cup molasses
3/4 tsp vanilla
1/2 cup coconut flakes
1/3 cup dried cranberries
1/3 cup chopped candied ginger

Method

Preheat oven to 350 degrees. 

In a large mixing bowl, combine oats, nuts, salt, cinnamon, and ground ginger. Stir to thoroughly combine.  In a separate bowl, stir together oil, maple syrup, molasses, and vanilla. Mix dry ingredients with wet ingredients. Turn granola out into baking pan and spread evenly. Bake for 20 minutes.

Remove granola from the oven and add coconut flakes. Mix in the coconut and return the pan to the oven for 10 more minutes. In the meantime, roughly chop the candied ginger.

When granola is done cooking, let it cool completely. Then add the cranberries and candied ginger.

Store for up to 2 weeks in an airtight container or store in freezer for up to 3 months.

Bring It!

There are a hundred ways to package granola to bring it as gifts to friends and family.  You can use mason jars, cellophane or paper bags, Chinese take out boxes, and much more.  For tips and tricks on wrapping, go to our Boot Camp Bonnie wrapping expert and you are sure to find something fun and festive.

Bonnie and Sue with just a smattering of supplies.

Bonnie and Sue with just a smattering of supplies.