Category Archives: Breakfasty

Game of Scones: Bittersweet Tyrion Chocolate Chip Mini Scone


Let’s talk about Tyrion. He’s been on the sidelines so far this season, but I trust his day is coming.  We love that little guy. He’s quite rugged and harbors his share of bitterness (about the whole ‘least favored bastard’ thing among other issues). He’s also soft and quite sweet on the inside. (Dude, we saw you looking at Sansa in the crypt!)

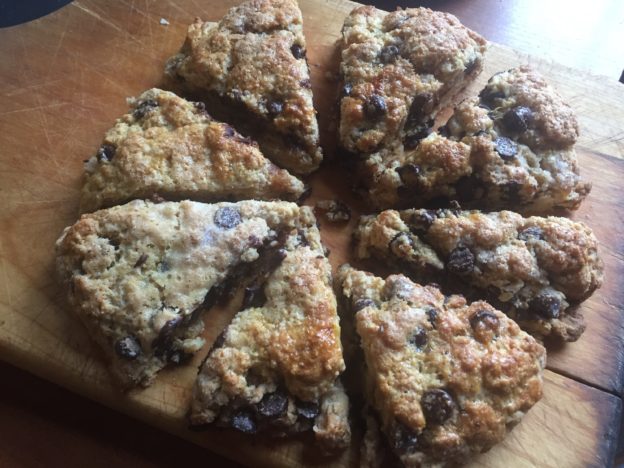
With all that in mind, it’s time for Tyrion — like White Hot Jon Snow and Sassy Sansa to have his very own scone. For Tyrion we have a mini scone made with whole wheat flour for some grit, and studded with bittersweet chocolate chips. The original recipe from Baker By Nature  calls for semi sweet mini chocolate chips, but there is nothing small about the chips Tyrion bears on his shoulders, so I opted for bigger, more bitter chips.    

Just as Tyrion has become my favorite character, this might be my favorite scone so far. Scones can feel like such a commitment, but mini scones feel much more doable. Plus, whole wheat flour gives them a wholesome heft that eases the guilt factor of eating so much butter in each bite.

As emphasized in this scone tutorial, make sure your butter is cold, even frozen if you are going to grate it. Making mini scones is just a matter of dividing the dough and making two mounds instead of one, and then cutting each into eight wedges. I pegged the slacker meter by shaping the scone mounds directly on the baking sheet.  And yes, they turned out just fine. They may not look perfect, but as with Tyrion, the beauty of these scones lies in their imperfections.

He’s little, gritty, and a little bitter, but sweet on the inside.

Bittersweet Tyrion Whole Wheat Chocolate Chip Mini Scones

Prep 10 mins
Cook 20 mins
Total 30 mins
Yield 16 scones

Ingredients

  • 1 cup whole wheat flour (preferably white whole wheat).
  • 1 and 1/2 cups all-purpose flour
  • 1/2 teaspoon salt
  • 1 tablespoon baking powder
  • 1/2 teaspoon baking soda
  • 1/3 cup light brown sugar, packed
  • 1 stick (4 ounces) unsalted butter, VERY cold and cut into tiny pieces, or grated on a box grater
  • 1 large egg, beaten
  • 1 teaspoon vanilla extract
  • 1/2 cup full-fat sour cream
  • 3 tablespoons milk
  • 1 cup bittersweet chocolate chips

For the egg wash:

  • 1 large egg, beaten1 teaspoon milk or water
  • 2 tablespoons turbinado sugar (or regular sugar if that’s all you’ve got), for sprinkling.

Instructions

  1. Preheat oven to 400°(F). Line a large baking sheet with parchment paper; set aside. In a large bowl mix together flour, salt, baking powder, baking soda and sugar.
  2. Cut the butter into small cubes (or, even better, grate it on a box grater) then quickly work it into the mixture (using your fingers, or just two forks if you grated the butter) until it resembles a coarse meal.
  3. In a small bowl, whisk together the egg, vanilla, sour cream, and milk, then add to flour and butter mixture. Use a fork to stir everything together until just moistened.
  4. Add in the chocolate chips and gently fold them into dough with a spatula.
  5. Pour the shaggy dough out onto a clean, floured work surface. Divide it into two equal portions  and shape the dough into a 6ish-inch circle. Cut the dough into 8 wedges and carefully transfer to the prepared sheet. (alternatively, dump the whole shebang directly onto the parchment lined sheet and form into two mounds
  6. Lightly brush each scones with the egg wash, then sprinkle the top of each scone with sugar. This is key. White sugar is ok if it is all you’ve got. Turbinado, demerera or coconut sugar gets you bonus points.
  7. Bake for 16-20 minutes, or until the tops are lightly golden brown.
Feel Good Zucchini Bread (and muffins)

It’s that time of year—time to figure out what to do with the zucchinis that have grown into something with the heft (and taste) of a Duraflame log. Enter zucchini bread, a brilliant use of the bounty. The only downside of zucchini bread and their muffin progeny, is that most of them also seem like a ploy to get rid of all the oil and white sugar in your house. Eat a piece of your standard zuke bread and your fingers look like you’ve just wrangled a basket of French fries. And the sugar that’s involved…oy!  

Quick breads and muffins exist on a taste/texture profile continuum from dirt to donuts.  Ever since hearing about the 800 calorie Costo muffin I’ve gravitated towards the dirt end of the spectrum. In fact I have a stalker-like attraction to the Earth Muffin at our local bakery, Lou’s. Upon studying the insanely lengthy and small fonted ingredient list I learned they are full of ground nuts, chopped nuts, seeds, dried fruit, maple syrup, grains, meals and every Vegan trick in the book. Even when Lou’s tries to pawn their day old Earth Muffins off as fresh (as if we dirt lovers can’t detect nuance), something about all that texture, heft and granular mystery still satisfies my need for weirdness. These muffins do feel like treats, but not irresponsibly so.

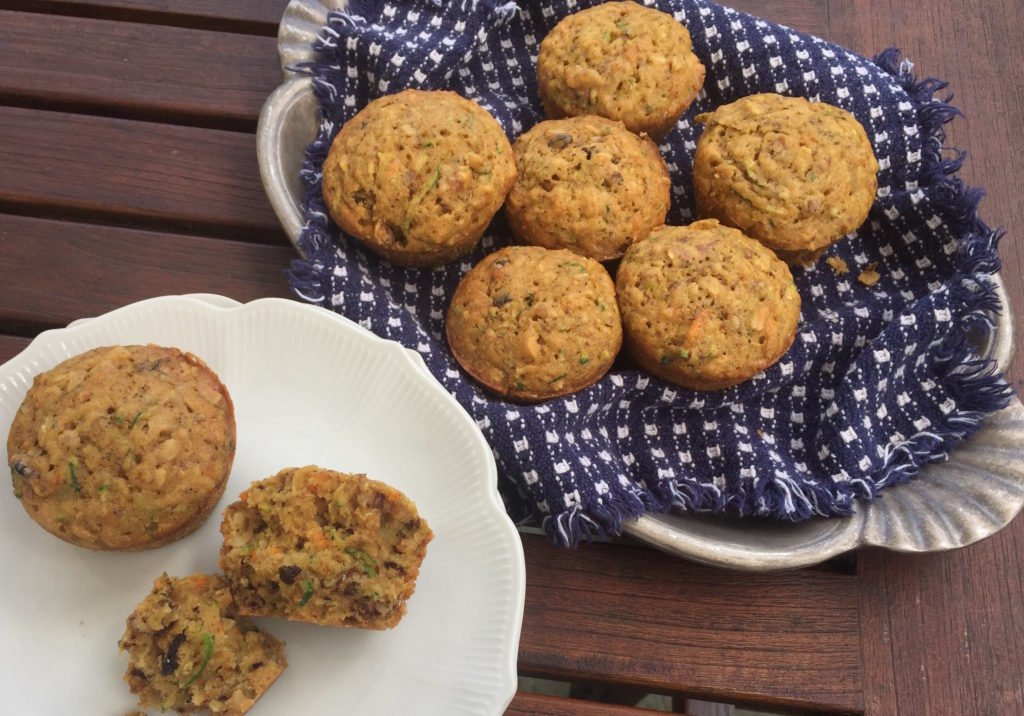
Feel Good Zucchini Muffins, with a whole lot of goodness

Perhaps you’re not up for the true grit experience in the morning, but you probably don’t fully enjoy walking away from breakfast knowing you’ve already used up your daily dessert quota. That’s where this recipe strikes the perfect balance, erring on the nutritious side of the muffin spectrum, but with enough sweetness and light to start your day with a smile. The recipe features white whole wheat flour, not a ton of sugar, a LOT of zucchini, and olive oil to make every heart beat a little faster. It’s a muffin/bread you can eat in the morning and feel good knowing that today, there’s still room for ice cream!

Feel Good Zucchini Bread

Poached with utmost respect from Food52, where there is also an excellent discussion on this topic.
Makes: 1 loaf or about 12 muffins

Ingredients

  • 2/3 cup olive oil (143 grams), plus more for the pan
  • 1 1/3 cups white whole-wheat flour (170 grams), plus more for the pa
  • 2 1/3 cups grated zucchini (from about 11 ounces zucchini)*
  • 1/3 cup sugar (67 grams)
  • 1/3 cup brown sugar (71 grams)
  • 2 large eggs (Vegans, grab your flax meal or aquafaba)
  • 1/2 teaspoon baking powder
  • 1/2 teaspoon baking soda
  • 3/4 teaspoon kosher salt
  • 2/3 cup walnuts (75 grams)
  • 1/3 cup golden raisins (53 grams)
  • 1/3 cup oats (33 grams), plus more for topping

*If you’re scant on the zukes, or just feel like a little more color, you can add in some grated carrot.

Method

  1. Preheat the oven to 350° F. Grease a 8 1/2- by 4 1/2-inch loaf pan (muffin pans if using) )with some oil. Add some flour and tap around to distribute evenly. Gather the zucchini in a kitchen linen or paper towel and squeeze over the sink to get rid of any excess moisture. This step is KEY!
  2. Combine the sugars, eggs, and oil in a large bowl. Whisk until smooth. Add the zucchini to the bowl and use a rubber spatula to combine. Add the baking powder, baking soda, and salt. Stir to combine. Add the flour, walnuts, raisins, and oats. Stir to combine.
  3. Pour the batter into prepared pan. Sprinkle oats on top. Bake for about 1 hour until a thin knife inserted in the center comes out clean. If making muffins, start checking them at 15 minutes and take them out when they are set and slightly browned.
  4. Let cool in the pan for 15 or so minutes before turning onto a wire rack. Cool completely before slicing and serving.

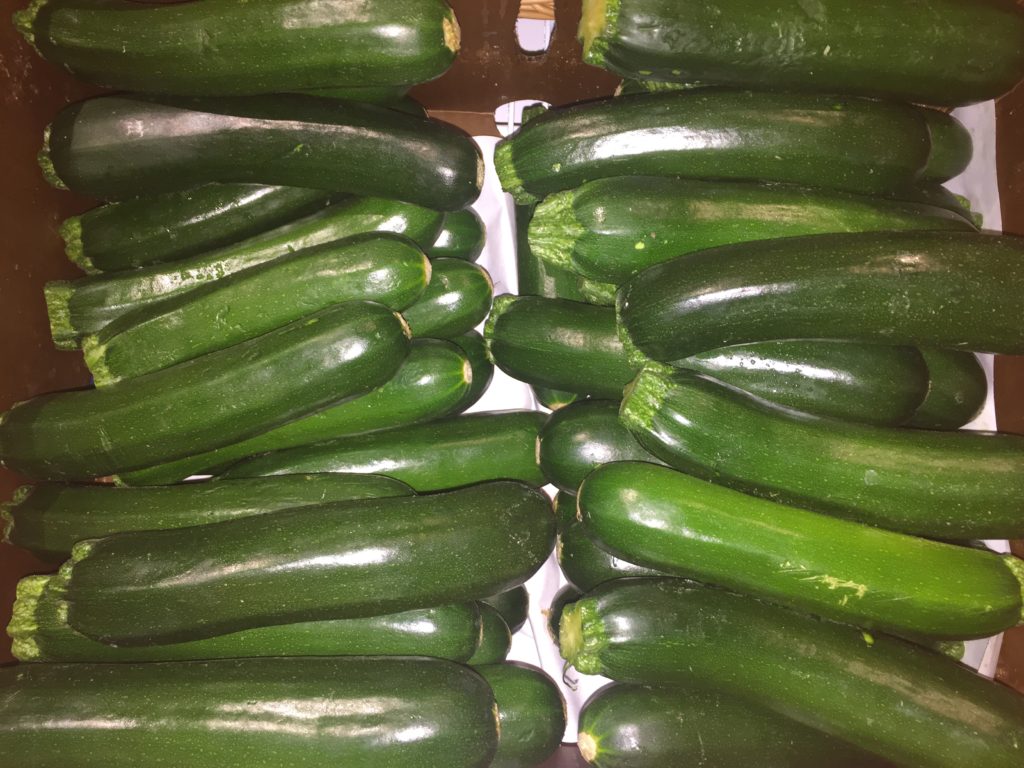
The zucchini army at rest

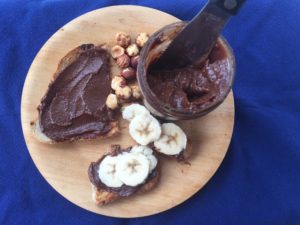
No Guilt Nutella: Chocolate for Breakfast Goes Legit

You say Nutella, I say…ain’t happening for breakfast in this house.

I grew up in a pre Nutella-For-Breakfast world. We had plenty of heinously unhealthy food, like pop tarts and cocoa puffs. But putting frosting on toast and calling it breakfast wasn’t a thing. Even if it happened (looking at you, chocolate Easter bunnies), it wasn’t sanctioned, let alone encouraged.

My kids grew up in a post NFB world, thanks to brilliant marketing from the Italians, who needed a real game-changer to dress up their melba toast and give their people a reason to get up for breakfast. Still, I did not serve Nutella to my kids. That may help explain why they so easily, dare I say eagerly, transitioned to sleepovers, camp and really any opportunity to leave home. There’s no need to get into my reasoning unless you really want a buzz-kill. I think we can all agree that commercial Nutella is not a solid foundation for the most important meal of the day.

But WHAT IF Nutella was made with no added sweeteners, fat or scary ingredients? What if it was made with the holy trinity of healthy treat ingredients—dates, nuts and cocoa—and nothing much else? Now that would be something I could get behind. And don’tcha know, I have. It’s not just for breakfast of course—it’s for any time you damn well please.

No Guilt Nutella soars past the teenage boy test, the teenage girl test, the man test and the “gimme that spoon I just need a chocolate fix ” test. If you are a Nutella connoisseur you will not be fooled by this, but the concept of a chocolate spread you can eat by the spoonful without a shred of guilt or secrecy may win you over nonetheless. Vegans, Paleos and Gluten-free peeps? Yeah, this is your jive too.

As with last week’s treats, your food processor earns its keep making these. It’s pretty foolproof though, as long as you make an honest attempt to skin the hazelnuts* and then process those babies until they really turn to butter. Be patient. It will happen.

No Guilt Nutella

Ingredients

  • 1 cup hazelnuts (or a mix of hazelnuts and almonds)
  • 1 packed cup medjool dates, pitted (or more, see notes)
  • 2 Tbsp water
  • 3 Tbsp unsweetened cocoa powder
  • ½ tsp vanilla extract
  • 1 Tbsp flavorless oil
  • ¼ tsp salt
  • ½ cup almond milk

Method:

  1. Roast hazelnuts at 350 degrees for 20 minutes. Transfer onto a kitchen towel and roll with your hands to remove skins. (no need to remove skins on almonds, if using)
  2. Puree hazelnuts in a food processor for 8 to 10 minutes until a butter forms. Take the time to do it right! You’ll know when you’ve crossed from ground nuts to butter.
  3. Remove hazelnut butter, and scrape out food processor as best you can. Add dates and water. Puree until smooth and creamy.
  4. Add hazelnuts to date paste and pulse a few times.
  5. Add cocoa, vanilla, oil, and salt and blend. 
  6. With food processor running, slowly pour in almond milk. Scrape down the sides and pulse a few times to blend into creamy goodness.
  7.  

Notes

*To completely remove hazelnut skins (for the smoothest possible spread), boil nuts in a pot of water with few tablespoons of baking soda for 4 minutes. Immediately strain and place nuts in ice water for a minute or so, until the skins peel off easily. You still need to roast the nuts to loosen up all the oils and bring out the flavor. Google will not corroborate this, but I find this process takes a little mojo out of the nuts. I prefer the less perfect/more flavorful roasting and rolling technique. You will stain the dishtowel, but such are the sacrifices we make. See here for a THOROUGH demo.

If your dates are hard, or you are using Deglet dates, soak them in warm water for an hour or two before pureeing.

…and furthermore, depending on the sweetness of your dates and the strength of your cocoa, you may need to add more dates at the end to find your sweet spot. 

I swear the notes are done.

Store leftovers in the fridge, and put your guilt in the rear view mirror!

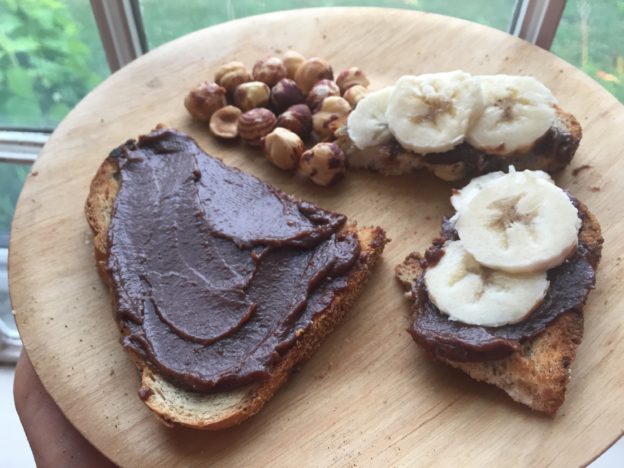
Breakfast in America, reimagined.

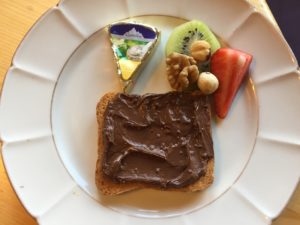
The real thing, at the breakfast table, on the dreaded melba toast, in its homeland.

Seed Bark Granola

Nutty, grainy, and way better tasting than bark. I promise!

January is not for sissies. In looking back on January posts just for this blog, there are some common themes: soups, breads…and a lot of complaining about the general bleakness all around. I’m not going to entirely break with tradition—I’ve had a perpetual pot of soup (any variation of Sugar and Spice Squash Soup is my fave) and have ditched all pretense of gluten-free living because, a girl’s gottta dunk something! But, I’ll skip the bellyaching this time.

This year’s January challenges come with an ongoing healthy eating quest, fueled by eating advice that ranges from confusing to Draconian. As discussed in November, when trying to eat for maximum brain and heart health there is a lot of conflicting info to navigate. As part of this mission, I’ve made things that look like dirt and some that taste like dirt. I’ve crammed way more vegetables into every meal but also “jumped the shark,” by putting kale in dishes where it has no business, thereby ruining my kale cred. I brought a peanut dip to a party that was pretty delicious but looked like baby poop, which turns out to be a significant enough deterrent.

At a certain point, you have to do the best you can, in a way that will be sustainable. As I forge though January I’ll post the best of what I find. Every recipe won’t meet everyone’s standards of “healthy” or “clean” eating. But my promise to you is that they will all be good enough to bring outside your home, and give with pride.

This granola/topping/snack comes straight from Engine 2 cookbook, which is a fantastic resource to have around. The Esselstyn tribe are Vegan, oil-free wizards. This granola reminds me of my beloved Bread of Life “Dirt” Bread, as well as the PITA lifechanging crackers. The good news here is that it’s a whole lot easier to make than either of them, and with no grains whatsoever it comes close to satisfying all versions of clean eating. The only debatable ingredient is maple syrup, but it doesn’t call for much and c’mon people—live a little!

Seed Bark Granola

From The Engine 2 Cookbook, with some pro tips

Ingredients

1 ½ c raw pumpkin seeds
½ cup raw sunflower seeds
¼ cup raw sesame seeds
¼ cup flaxseed meal
2 Tbsp chia seeds
2-3 Tbsp maple syrup (2 Tbsp was perfect for me)

Method:

Preheat 350. Line a baking sheet with parchment paper.

Combine all ingredients in a bowl, ending with the syrup. Mix it up well. Pour it all on the baking sheet and press it out to 1/4 -1/3 inch thick (no thicker than an almond). Pro tip: To make this easier and more uniform lay another sheet of parchment paper on top of the mixture and press down hard on it with another baking sheet.

Bake 18 minutes until fragrant and lightly browned on top. Rotate the pan halfway through if you are inspired and watch to be sure it does not burn.

Remove from oven and leave it to cool. As it cools, it will speak to you by crackling. It’s saying, “Leave me alone–I’m getting crispy, baby!” After at least 20 minutes, you can be dramatic and lift the cookie sheet a few inches then drop it. Or, break it up it yourself into whatever sized bits you want.

When completely cool, store it in an airtight container. It lasts 10 days or so they say. I would not know. I do know it is delicious, and is a healthy gift to anyone you love.

Bark, ready to bite

Drunken Fig Jam: Where fresh figs go to party

Fig Jamming New England style, with cheddar of course

How did I make it through life this far without ever canning? Why did I start now? Two fine questions. My two fine answers are fresh figs and fresh corn. They’re only around for a bit and they are so darned good.

Let’s start with figs. This recipe come from Treas, out in Cali, head chef at Granite Chief Command Central. Her recipe, which she shared with me after two years of my passive yet unremitting coersion, says that fig season is only in August. This handy guide to all things fig, gives us a larger window. According to google, there is a short season in early summer and then a longer season in late summer/fall. Either way, fresh figs are not around forever, and once you buy them you’ve got to use them fast. We should have a few more weeks at least, and cognac is always in season, so we’re good there. 

A little heads up to you non-canners out there. You need a big pot, you need to know that when you fill it too full with water and then put your jars in, your stove may have a hazardous overflow situation. You can only use canning lids once, which is why that whole mysterious section of parts in the grocery store exists. I guess that’s about it. I was going to get into racks for the bottom of your pot, but this recipe doesn’t call for one, so let’s run with the “ignorance is bliss” theory.

Another small cautionary note: When you are heading out to book group for three hours it’s best to turn the burner under your boiling fig jam OFF.  Next up? Corn relish to give Stonewall Kitchen a run for their money…and a new stockpot.

Fancying up a fall salad

Drunken Fig Jam

Recipe and action shots from Treas Manning
Makes 6 1/2 pint jars

Ingredients

• 2 lemons
• 4 pounds ripe fresh figs (preferably black), stemmed,
cut into 1/2-inch pieces (use food scale for accuracy)
• 4 cups sugar
• 3/4 cup brandy or Cognac
• 1/2 teaspoon coarse kosher salt

Method:

Using a vegetable peeler, slice peel from lemons (try to avoid as much as the white part as possible) in long strips. Cut peel into matchstick-size strips. Combine lemon peel, figs, sugar, brandy, and 1/2 teaspoon coarse salt in heavy large deep saucepan; let stand at room temperature 1 hour, stirring occasionally.

Bring fig mixture to a boil over medium-high heat, stirring until sugar dissolves. Reduce heat to medium; continue to boil until jam thickens (30 to 35 minutes), and is reduced to 6 cups, stirring frequently and occasionally use a hand blender to puree the mixture. It’s fine if there are small bits of lemon peel and fig, but I do like the bits to be minimal. Remove from heat.

Ladle mixture into 6 hot clean 1/2-pint glass canning jars, leaving 1/4-inch space at top of jars. Remove any air bubbles. Wipe jar threads and rims with clean damp cloth. Cover with hot lids; apply screw bands. Process jars in pot of boiling water 10 minutes. Cool jars completely. Store in cool dark place up to 1 year.

Notes: At high altitude over 5500 feet, process the jars for 15 minutes.

Drunken Fig Jam is yummy:

  • on a toasted baguette with a slice of melted Irish Cheddar, and a walnut on top.
  • on crusty bread with fresh burratta or mozzarella
  • on a grilled bone in pork chop, or on slices of pork tenderloin
  • on whole wheat toast topped with a strip of bacon for breakfast.
  • with cheese, sliced pears and walnuts on a groovy pizza

Bringing It and Giving It:

Makes a darned nice Christmas gift, especially canned in a Ball and Mason squatty wide mouth jar


Mochanut Granola

For all those times when you wish you could chew your coffee.

When I first ran across a recipe for mocha granola, it was an a-ha moment. Coffee, chocolate and breakfast all in one bite? Brilliant! It sounded like the perfect offering for a weekend away, a camping trip, a hike, etc. And so, the experimenting and recipe sampling began.

Granola making is neither rocket science nor an exact science. It involves mixing oats with all your favorite tastes and textures, lubing it up some fat and sweetener, and baking it in the oven until it is crisp but not burnt. How much fat and sweetener is where granola can go from pretty healthy to totally decadent. One swishy LA café’s mocha granola recipe involves two sticks of butter. Well, duh. Of course it tastes good. So does a cheesecake, but it doesn’t really get your day off to a healthy start. Some recipes call for only ground coffee, which can get gritty and  others for only brewed coffee which can be kind of wimpy. I needed to slay this beast.

In my excitement I misread the first recipe, and by measuring ground coffee vs brewed coffee ended up using a solid 8 times the intended amount of coffee. That first batch could have been named “True Grit.” Still, I didn’t want to back off that much on the coffee flavor, which happens if you use only brewed coffee. The extra liquid also means your granola takes longer to bake and crisp. I settled on using a combo of finely ground coffee, in the dry ingredients, along with brewed coffee mixed in with the oil and maple syrup.

The flavor profile of this reminded me of my youth, when Jamocha Almond Fudge ice cream turned my world upside down. I am pretty sure that in 6th grade I worked the flu for an extra day to stay home with this particular flavor. This recipe bridges the territory of breakfast and treat. It’s got a double dose of coffee— liquid and ground—which is balanced by

Roasty and toasty, straight from the oven.

a fair yet not indecent amount of sweetener, mostly in the form of maple syrup. I also added unsweetened flaked coconut, because when coconut rolls around and gets toasty with maple syrup it assumes bacon-like decadence.

You can sub butter or another oil for the coconut oil, and mess around with the type and quantity of sweetener you like (or have). Play around with it, and when you walk back inside your house and it smells like coffee, chocolate and roasted nuts…you’re welcome!

Mochanut Granola

Ingredients:

  • 2 ½ cups rolled oats
  • 1 cup almonds (or nut of choice)
  • 1 cup unsweetened flakes coconut (this is the addict dose. Use your judgment)
  • 1 Tbsp cocoa
  • 1 Tbsp finely ground coffee
  • 2 Tbsp brown sugar
  • 3 Tbsp coconut oil
  • 3 Tbsp maple syrup
  • ½ tsp or more vanilla (optional, but why not?)
  • 6 oz strong brewed coffee

Method:

Preheat oven to 325. Line one or two baking sheets with parchment paper. (It will cook up and crisp faster in two.)

In a large bowl combine oats, almonds, coconut, cocoa and ground coffee.

In a small saucepan melt oil and stir it together with syrup and brewed coffee until combined.

Pour liquid mixture over oats and combine well. Spread granola evenly in pan(s).  

Bake, stirring and checking every 10 minutes, for 30-40 minutes, until desired dryness. Don’t skip the stirring, especially if it’s all on one pan. The granola will crisp up more as it cools. Cool completely before storing.

Bringing it:

Curl up that parchment paper and funnel this goodness straight into a mason jar. Bring it anywhere you want to be a morning hero.

Blueberry Dutch Bunny

Blueberry Durch Bunny

Fresh from the field and hot from the oven.

Sometimes you just get lucky. Friday was my day. I took a flyer and called Super Acres in Lyme to see if they were open for blueberry picking and learned it was opening day. Hallelujah! If you’ve never been to this PYO paradise it’s an Upper Valley rite of summer, and well worth a trip up River Rd.

Blueberry pints

The fruits of your labors

I coerced a friend— Super Acres newbie— to make the trek and he was suitably impressed.  This is not tedious, back-breaking work in a scorching field (I’m looking at you, strawberries). These are grassy rows of high bushes laden with so much ripe fruit that you can pick them like grapes. Somehow you can always seem to find a shady spot. Sheer brilliance! In about a half hour we easily picked four lbs each, without even taking a rest in the Adirondack chairs. Berry picking is about digging deep.

Super Acres provides picking buckets and pint baskets, though the pros bring their own giant Tupperware to make their pies and fill their freezers at home. Despite my aspirations, the allure of fresh berries is too much to resist in our house, and I have yet to freeze a single blueberry.

As for what to make, I had been angling for an excuse to make a blueberry version of Dutch Bunny, inspired by a recipe in Yankee magazine. Dutch Bunny (known outside my household as Dutch Baby, Sunday Pancake and Swedish Pancake) is my go-to weekend breakfast when I’m aiming to win friends. (Lifelong friends have been made over the magical emergence of Dutch Bunny on a vacation morning. True story) It’s hard to imagine a dish that is easier, more impressive or more appreciated by a houseful of guests.  Baking fresh blueberries into the whole shebang takes it over the top.

This is simply my standard Dutch Bunny recipe with fresh blueberries added to the mix. I linked you up but this saves you the trouble of hunting. You need your strength for blueberry picking.

Yield: Serves 4, or one hungry teenager.

 Ingredients

  • 3  Tbsp butter
  • 3  large eggs
  • 3/4  cup  milk
  • 1/2  tsp vanilla
  • 1/2  cup  all-purpose flour
  • 2  Tbsp sugar
  • 1/8  tsp salt
  • 1/2-3/4 cup fresh blueberries
  • Powdered sugar and fresh lemon wedge for topping
  • Whipped cream for topping, optional

 Method

  1. Melt butter in a 10-inch ovenproof frying pan over low heat. Remove from heat.
  2. In a large bowl or blender, beat or whirl eggs until light and pale. Beat or blend in milk, vanilla, flour, sugar, and salt.
  3. Pour batter into prepared pan and sprinkle blueberries on top (they will plop and sink—it’s all good).
  4. Bake in a 425° oven until pancake is puffed and lightly browned, 15 to 20 minutes.
  5. Dust with powdered sugar and squeeze fresh lemon on top. Slice into wedges and serve immediately.

Top with more berries, and whipped cream is you’re feeling it.

If you’re in the Upper Valley and want to visit Super Acres, it is located at 722 River Rd, north of Lyme. For more info call the hotline at (603) 353-9807. Unsprayed and awesome blueberries are $3/lb at the self-serve slot. Do the right thing and round up if you’re belly hurts from all the sampling. Oh, and it wouldn’t be a crime to save some room for a little detour to Whippi Dip in Fairlee on your way home.

Thanks to Olivia the great for her awesome pictures!

Super acres-kisk

Weighin’ and payin’ on the honor system.


No Knead Challah

    C'mon. You know you want to at least try. Right?C’mon. You know you want to at least try. Right?

Stop right there. I know what you are thinking. NEXT! As in, I am not a bread baker, and even if I was I am surely not a bread braider and baker. But please, give me a chance here…unless you are gluten-free and/or Vegan. If that’s the case you may want to move on from this egg, honey and flour fantasia of a recipe. If you’re still with me, take a deep breath and say, “I can do this!”

The no-knead aspect of this 5-Fold Challah recipe drew me in, as did the memories of the first time I had challah while living with the classic Jewish mother, who worked all day teaching middle school English and still managed to turn out home cooked meals for 5 kids, three of whom were not even her own. Kaki, you opened your heart and your home and gave me many wonderful things, including a lifelong taste for chicken and onions, real bagels and challah. For this and so much more, thank you!

So, just to put this in context, the loaves pictured were made on my very first try at this recipe. And I am NOT a bread baker. The only bread I make consistently is Easiest French Bread Ever, which can be done in a coma, and Lifechanging “Dirt” Bread, which requires the entire contents of a birdfeeder but no yeast or skill. What I’m saying here is, I think you should try this. It would make a fine base for a chicken and onion sandwich. (To Kaki if you ever happen to read this: Sorry for all the run-on and fragmented sentences and YES, I am getting enough to eat!)

Notes: I have read you can replace the oil with melted unsalted butter. God only knows why I have not tried this yet. For non bread bakers this looks like a lot of work, but it’s tiny bits of effort (folding) with unattended time in between, and remedial braiding. Even more importantly, the timing is flexible and the challah is very accommodating to changes of (your) schedule. Finally, for all you over achievers, check out Jessica Fechtor’s full version on Food52 for all the possibilities of incorporating cinnamon sugar, raisins, etc.

No Knead Challah

From Jessica Fechtor and Food52
Makes 2 Loaves

Dry ingredients

  • 4 cups (500 grams) bread flour
  • 1 1/2 teaspoons instant dry yeast
  • 2 teaspoons fine sea salt

Wet ingredients + shaping

  • 2 large eggs plus 1 large egg yolk (save the extra white in a covered glass in the fridge for glazing later on)
  • 3/4 cup (190 grams) water
  • 1/3 cup (75 grams) olive oil
  • 1/4 cup (85 grams) honey
  • For sprinkling, before baking (optional): Sesame seeds, poppy seeds, flaxseeds, rolled oats, sunflower seeds, and/or pumpkin seeds

Method:

  1. Whisk together the dry ingredients in a large bowl, and the wet ingredients in a smaller bowl. Dump the wet ingredients into the dry ingredients and stir with a rubber spatula until a wet, sticky dough forms. Cover the bowl with plastic wrap and let sit for 10 minutes.
  2. Peel back the plastic. Grab an edge of the dough, lift it up, and fold it over itself to the center. Turn the bowl a bit and repeat around the entire lump of dough, grabbing an edge and folding it into the center, eight turns, grabs, and folds in all. Then flip the dough so that the folds and seams are on the bottom. Cover tightly again with the plastic, and let sit for 30 minutes.
  3. Repeat the all-around folding, flipping, covering, and resting four more times. (I keep track by drawing hash marks in permanent marker right on the plastic.) The dough flops more than it folds in the first round or two. Then, as the gluten develops, you’ll get proper folds. By the final fold, the dough will be wonderfully elastic, and you’ll be able to see and feel the small pockets of air within. Pull the plastic tight again over the bowl and refrigerate for 16 to 24 hours—any longer and you risk over-proofing.
  4. Cover a baking sheet with parchment paper and set aside. Transfer the dough to a lightly floured surface and divide into six equal pieces. Roll into six strands, each about a foot long and 3/4 inch in diameter, dusting sparingly with flour when necessary to prevent sticking. (You’ll want to add as little extra flour as possible.)
  5. Form two three-strand braids, and transfer the loaves to the prepared pan. Cover with plastic and let proof at room temperature for 2 to 3 hours, until the dough is noticeably swollen and puffed and bounces back very slowly, if at all, when you poke it lightly with your finger.
  6. Preheat the oven to 375° F. Remove the plastic wrap from the loaves and brush with the reserved egg white. If you’d like, sprinkle with seeds. Poppy and sesame seeds are traditional challah toppings. Fechtor typically co

    Challah1

    Not sure how that little orphan loaf worked in, but I’m sure it was well-loved.

    vers one with a combination of flaxseeds and rolled oats, and the other with sunflower seeds and pumpkin seeds, though lately she’s been opting for no seeds at all.

  7. Bake for about 20 minutes, until the bread is golden and gorgeous and a tester inserted into the center comes out clean. You can also check for doneness with a thermometer. The internal temperature of the loaves will be 190° F when fully baked.
  8. Transfer to racks and let cool.
  9. These loaves freeze very well: Wrap the cooled loaves in plastic wrap, then put them in zip-lock bags and freeze. Thaw directly in the bag on the counter, then remove the plastic and reheat in a warm oven. You won’t be able to tell it’s been frozen


Holiday Hybread: Pumpkin Gingerbread with Cream Cheese Filling

Banana-gingerbread

Two breads in one, with a tasty filling. C’mon, who’s better than you at this party?

Ok my pretties (and I know you are bringing your A-game tonight), this is going to be a quick one. Quick because I left posting this until New Year’s Eve on an airplane and quick because you have places to go, things to do and fun people to see! So, go ahead and read this recipe tomorrow when you are reclined on the couch. But before you go, please do three things for me:

  1. Review this party trick just in case. Your A Game, remember?
  2. If you happen to find yourself with leftover champagne (imagine?), SAVE IT! Here are 16 uses for leftover champagne and one of them surely will sound good tomorrow, even if it’s the ice cubes for your oj. If you can only manage to pour it into a mason jar, then do that and you’ll have awesome vinegar by Valentines Day.
  3. Get fancy and celebrate New Years however the heck you want, whether that means ditching champagne entirely or crawling into your new flannel jammies at 9.

Now, go have fun and be safe out there! When you come back…

Slacker bakers unite for Round 2. We’re in the home stretch. You’ve got one more weekend of planned and spontaneous get-togethers, of late nights and chocolate for breakfast, of “how-long-does-that-stuff-in-the-foil-keep?”  What you need here is something edible that is easy to throw together, widely appreciated, mostly homemade and somewhat more impressive than a regifted box of chocolates (not that there is one single thing wrong with that!)

You can get on your pomegranate game, and it never hurts to have fondue fixin’s at the ready, but if you’re still up for baking, here is a little slice of brilliance which involves boxed bread mixes. Now you’re with me, right? This comes from Sister B, who has made it more times than she can count in the past few weeks. The original version combines gingerbread with pumpkin bread, but she prefers it with banana bread (and includes a recipe for that below, so keep your scrolling skills up).banan-gingerbread-ingredients

This Holiday Hybread is nothing gourmet, but it’s yummy, and it can say a lot about you. Like… “I’ve still got some holiday swagger in me,” or, “I know exactly what to get at Trader Joe’s,” or “See what I can do with all that cream cheese I never used for the shrimp dip?” My only note is that this recipe calls for half boxes of both breads. My suggestion is to double it, make two loaves and do away your need for higher math.

And now, I turn it entirely over to sister B, AKA Beatie the Artiste, who took the edible peppermint plate to an entirely new level. More on that later.

Holiday Hybread: Pumpkin Gingerbread with Cream Cheese Filling

Easy, yummy, and  holiday-ish!  A crowd pleaser.

Note: If you don’t have a Trader Joe’s Betty Crocker mixes work too, but TJ’s (or an upscale boxed version) is way better.

Makes one loaf

Ingredients:

  • ½  package Trader Joe’s pumpkin bread mix plus what the box asks for (egg, water, oil)
  • ½ package Trader Joe’s gingerbread mix (plus, egg, water oil)   
  • 12-oz  cream cheese (1 ½  8 oz. packages)
  • 3/8 cup sugar
  • a few drops vanilla

Method:

Preheat oven to 350.

Grease the bottom of a 9” x 5” ish bread pan or spray with cooking spray.

Make your gingerbread and pumpkin bread batters, according to package directions.

Make cream cheese filling:  place cream cheese in microwave safe bowl and zap for
40 seconds.  Stir in sugar and few drops of vanilla until smooth.  Set aside.

SCRAPE pumpkin bread mixture into loaf pan.  Level it as best you can.

PLOP the cream cheese mixture all over the top of the pumpkin bread batter, covering it.  It may be lumpy and uneven…that’s ok, so are some of the best of us. If you care, level it carefully with a knife…but try to let it go.

Now TOP that with your gingerbread batter.  

Bake for about an hour…maybe a little more.  Check it with a toothpick to know for sure.  Cool on a wire rack and then remove from pan. Slice, impress and enjoy!

And now for Sister B’s sister recipe to the above. This was discovered by happy accident, some overripe bananas in the freezer and a WHAT IF inspiration. As in, WHAT IF I tried the same thing but with a layer or banana bread instead of pumpkin this time? Insane, right?  And yet, banana/gingerbread bumped pumpkin/gingerbread off the top of the podium and into the silver medal position.

This recipe uses a proper (and awesome) banana bread recipe from Cooks Illustrated. It’s not out of a box, but it’s already halved for your convenience.

Banana Gingerbread with Cream Cheese Filling

Proceed exactly as above, but for the pumpkin bread part substitute this:

Banana Bread (this is the half recipe. Double it for two loaves of Holiday Hybread or one loaf of straight banana bread)

Ingredients:

  • 1 cup flour
  • 3/8 cup sugar
  • 3/8 tsp baking soda
  • ¼ tsp salt
  • 2  very ripe bananas, mashed well (3/4 cup)
  • 1/8 cup plain yogurt
  • 1 egg, lightly beaten
  • 3 tablespoons unsalted butter, melted and cooled
  • ½ tsp vanilla

Method:

Whisk flour, sugar, baking soda, salt together in a large bowl and set aside.
Mix the mashed bananas, yogurt, eggs, butter, vanilla in a medium bowl.
Lightly fold banana mixture into the dry ingredients until just combined.

Pumping up Breakfast— no PSL required

Fall-leaf

The look of fall, without the latte.

Pumpkin, what have they done to you? They’ve made your name synonymous with every fall food creation, from the ubiquitous pumpkin spice latte (now known simply as PSL) to pumpkin spiced popcorn, bagels, pop-tarts, waffles, yogurt, truffles, ice cream and even Oreo’s. For the savory minded there are pumpkin spiced tortilla chips, crackers, cheese dip, hummus…and at the end of the day you can unwind with a pumpkin spiced ale or tea or stir up a martini made with pumpkin spiced vodka.

Enough already! All these processed pumpkin things make me crave food made with the earthy flavor and texture of actual pumpkin and butternut squash.

I looked no further than the Bring It! archives to satisfy my craving, and used the excuse to do some experimenting. First, there is the ridiculously easy—Halloween Soup, which you may want to make for sustenance tonight. For apps, my fall fave is squash on toast featuring spicy roasted squash and maple caramelized onion. Deconstructed, the elements of this make amazing pizzas, quesadillas, grilled cheeses and, with a little more tweaking, a rustic bread pudding (ready for prime time soon I hope). Until then, get your casserole fix with butternut squash casserole or commit to butternut squash lasagnePumpkin rosemary hummus has the flavors of fall without the cloying PSL signature, and by subbing pumpkin or squash for banana in buckwheat granola, you’ve got a new, weird classic.

But let’s revisit that PSL. Its popularity underscores our need for something a little more substantial in our cups and on our plates for breakfast this time of year. Wrangling a good breakfast—that can be portable, reheatable, and versatile—into the household every morning  can take you down! Crustless breakfast quiches to the rescue. They make a brilliant go-to for any meal or snack and can be made in mini or regular muffin tins (though  mini versions seem a little bit mean). The cornstarch keep the texture silky even through freezing and reheating, and the filling can be tweaked with whatever you have on hand (hello roasted butternut squash and caramelized onion!) I meant to stage a proper photo shoot with them, but in one of those ironies of food blogging, the best things disappear before they can be properly photographed. So just trust me—these are man-, boy- and mom-tested and approved. Girls? Please report!

fall-quiche-uncooked

Before. Add whatever filling makes you happy.

fall-quiches-cooked

After. Fully self contained–no utensils required.

Crustless Zucchini and Basil (or whatever) Mini-Quiches

Makes 48 mini quiches or 14 ish muffin sized quiches; adapted from Fine Cooking Magazine

Ingredients:

  • 1/4 cup cornstarch
  • 1 1/4 cup whole milk
  • 2 large eggs
  • 2 large egg yolks
  • 1 cup heavy cream (if no cream, a combo of milk and sour cream works too)
  • 3/4 teaspoon kosher salt
  • 1/8 teaspoon nutmeg
  • Oil, for the pan

Filling*

  • 1 tablespoon olive oil
  • 4 cloves garlic, minced
  • 2 shallots, minced
  • 2 small zucchini, grated (or chopped vegetable of choice)
  • 1/2 cup or more grated Gruyere or Parmesan cheese (it has to be a hard cheese to make a crust. You can add other cheese on top if desired)
  • Fresh basil, finely chopped (or herb of choice, all optional)

* filling can be adapted to use anything you like. Try chopped up ham and broccoli, apples and walnuts, sautéed corn and peppers, spinach and mushrooms, or of course roasted squash and caramelized onions.

Method:

Heat oven to 450°F.

Prepare Batter: Put the cornstarch in a medium bowl. Whisking steadily, slowly pour in 1/2 cup of the milk, mixing until quite smooth. Whisk in the whole eggs and egg yolks, mixing again until smooth, then gradually whisk in the rest of the milk, the cream, salt, and nutmeg. Use immediately or refrigerate, covered, for up to one day. If using the next day, be sure to re-whisk.

Prepare Zucchini/Veggie Mixture: In a nonstick pan, heat oil over medium heat. Add garlic and shallots and stir until fragrant, about 2 minutes. Add grated zucchini, and stir until just softened, another 3-4 minutes. Remove from heat. (This is where you can freelance with other vegetables, herbs, meat, dollops of soft cheese or whatever you like)

Oil mini muffin tins well. Put a pinch grated cheese into each muffin cup, a teaspoon of zucchini mixture, and pinch of chopped fresh basil. Pour 1 tablespoon of the batter into each muffin cup. (adjust amounts for regular muffin cups, making sure there is enough cheese to cover the bottom of the pan.)

Bake until the quiches puff and start to turn golden, 15-18 minutes (a bit longer for regular muffin cups) Let cool for 10 minutes and then carefully run a paring knife around the rim of each muffin cup. Carefully lift each quiche out of its cup.

Mini quiches freeze very well. Let cool, then freeze in a single layer in a covered container. Reheat on a cookie sheet in a 400 degree oven for about 5-10 minutes. They will also keep a few days in the fridge, to be reheated as needed.