Category Archives: Breads

Sun-baked Banana Bread

A small rappel into a beautiful canyon

A small rappel into a beautiful canyon

For those of you living in the northeast, I don’t have to tell you, it’s been COLD here since last October!   Although we are a gritty type and can normally take whatever weather comes our way, I don’t think I’m speaking out of turn when I say, we are ready for some warmth and sunny skies. Unfortunately, the cold weather is persisting, but the warm weather will eventually come our way. It always does.

In the meantime, many of us high-tailed it out of here for Spring break hoping to find weather to warm our hearts and souls. My family, and some fine friends, headed to the southern Utah for a week of canyoneering in the desert slots. We were looking forward to that blast of hot air that hits as you walk off the plane.  As it turned out, this was not the case. The weather was okay…..until it snowed. And then, as if the snow as not enough, we were greeted with mixed precip….hale, sleet, snow, rain, and wind….. which was a real treat!  We muddled through, as we always do; and fortunately, most days, the weather was fine and did not curtail our outdoor canyoneering activities. We had a lot of fun making our way through the canyons (see photo above) and the trip was amazing despite the slight chill (see photo below).

With that introduction, I move onto the topic at hand….. how to make the sun-baked banana bread….. that’s what you came here for after all…

My friend Tom, who is good at everything he does (his main strengths being all outdoor activities, Scrabble, and baking banana bread) made this amazing banana bread. When he pulled this out one chilly morning and we toasted it on the grill with a dab of butter, it was heart and soul warming (if the sun can’t warm us, the food can, right?). But, even better than this delicious bread was the way he baked it. He used a sun oven. This sun oven is mobile. He can place it in his back yard in the direction of the sun whenever he wants to bake on a sunny day (which is most days in southern Utah). There is a photo of the sun oven below and a link to get more information. This oven gets up to almost 300 degrees Fahrenheit and can cook a regular size banana bread in just about an hour.

Thanks Tom for the banana bread and the fun time in the slots. I’ll give you a Plus One for the effort!

Ingredients

1 stick of butter or 1/2 cup canola oil
1/2 cup sugar
2 eggs
2 overripe bananas
1.5 tsp vanilla
1.5 cups whole wheat flour
1 tsp baking soda
1 tsp baking powder
Pinch of salt
1/2 cup chopped walnuts, pecans, or hazelnuts (filberts, if you¹re from Oregon)
 1/2 cup chocolate chips (optional) 

Method

Mix butter and sugar until smooth. Add eggs and bananas one at a time into butter/sugar mixture. Then add vanilla and mix until blended.

Mix dry ingredients together (flour, baking soda, baking powder, and salt). Then add to wet ingredients slowly, being careful not to over mix. Add nuts and chocolate chips if using.

Fold into bread pan and bake at 325 for 50 minutes (or 1 hour at 275 in sun oven – if you are lucky enough to live where you can use one of these puppies).


Brrrr.....cold morning at camp

Brrrr…..cold morning at camp

Tom rounding the top

Tom rounding the top

For more information on sun ovens, check out this quick video

No need to turn on the oven on a hot day with the sun oven!

No need to turn on the oven on a hot day with the sun oven!

Victory Bran Muffins

Fresh muffins, yogurt, toasted coconut. What's wrong with this picture? Yeah, nothing!

Fresh muffins, yogurt, toasted coconut. What’s wrong with this picture? Yeah, nothing!

It’s the weekend people. Regardless of our need to post more healthy, hearty fare and veggies, right now we need muffins. Why are these a victory? First, they come from my cousin Victoria, via King Arthur Flour, via Zella Lane who was the radio voice of Betty Crocker. So, yes, these have been fully vetted. Most importantly, these muffins are delish, whether made as mini muffins (Victoria’s favorite way—less commitment per muffin and way cuter) or as full-sized ones. I took them to a ski race recently and they were devoured by adults and teenagers alike. They are substantial enough to stand up to packing and travel, but still tender and awesome.

Perhaps the biggest bonus, however, is the fact that this batter can stay in your fridge, at the ready, for up to two weeks. They are a bit of a process to put together, only because they require three separate bowls, boiling water and a bit of cooling time. But none of it is difficult, and the reward for that time on the front end is being able to dole out muffin batter as and when needed, for fresh muffins anytime within a half hour. They will save your butt on a busy morning and make you look like a red-hot muffin-bearing kitchen goddess. That, my friends, is a victory.

Notes: Pay attention here to the bran cereal amounts. First, they depend on the type of bran cereal you are using, and second there are two places in the recipe where the cereal comes in, so make sure you have enough. Otherwise you might be subbing in whatever cereal you have in the pantry—doable for sure, but potentially risky (e.g. Raisin Bran vs. Capt’n Crunch). Coconut is an addition from Victoria that is totally good. If you are warming kids or bran-phobes up to these muffins, sweetened is the way to go. Unsweetened, while more virtuous, will dry out the batter more, so be more generous with your buttermilk. Finally, this makes a lot. You can easily halve the recipe if fridge space is at a premium.

 Ingredients:

  • 1 cup boiling water
  • 1 cup bran cereal (buds or twigs); or 1 3/4 cups bran flakes
  • 1/2 cup vegetable oil
  • 2 1/2 cups flour
  • 2 1/2 teaspoons baking soda
  • 1 teaspoon salt
  • 1 cup dried cranberries
  • 2/3 cup shredded coconut (Optional, sweetened or unsweetened).
  • 2/3 cup hemp hearts (Optional, but yummy in pretty much anything).
  • 2 large eggs
  • 2 cups buttermilk
  • 1 1/4 cups sugar (demerara or coconut sugar take these over the top)
  • 2 cups bran cereal (buds or twigs); or 3 1/2 cups bran flakes

 Method:

1) In a small mixing bowl, pour the boiling water over the 1 cup twigs (or 1 ¾ cups flakes) of cereal. Allow the mixture to cool to lukewarm, 30 minutes or so.

2) While the water/cereal mixture cools, blend together the flour, soda, and salt in a large mixing bowl. (Pro move here is to use a bowl with lid that can be used to store batter in the fridge). Stir in the cranberries, coconut and hemp hearts if using. Set it aside.

3) Stir the vegetable oil into the cooled water/cereal mixture. Set it aside.

4) Whisk together the eggs, buttermilk, and sugar. Combine this with the flour/raisin mixture.

5) Stir in the 2 cups twigs (or 3 ½ cup flakes) dry cereal.

6) Finally, add the water/bran/oil mixture, stirring till thoroughly combined. Cover the bowl and refrigerate overnight, or HOWEVER THE HECK LONG YOU WANT!

7) Preheat your oven to 375°F. Lightly grease your muffin pan of choice, or line with paper cups, and grease as many wells as you like.

8) Heap the thick batter in the muffin cups; a generous 1/4 cup batter works, but feel safe knowing these are not exploding muffins.

9) Bake the muffins for 20 to 25 minutes, till a cake tester inserted into the center of a muffin comes out clean.

10) Remove from the oven, and tip the muffins in the pan to prevent their bottoms steaming and becoming soggy. Serve warm; or transfer to a rack to cool completely.

11) To bake mini muffins, heap the batter in the muffin cups, and bake for about 15 minutes, till the muffins test done.

Yield: at least 18 standard muffins, or 45 mini muffins.

Bringing it:

These taste great out of the oven but also when cool, and even if baked the day before. They have saying power! Victoria suggests the following for a hostess gift: “present your hostess with a gift bag filled with a container of the refrigerated batter, a mini-muffin pan, and a card that includes the recipe. Alternatively, just show up with those things and commandeer the oven while everyone else is still sleeping in — the fragrance beats an alarm clock any day!”

Biscookies

Biscookies

Hot, sweet, buttery. Let’s not worry about what to call them (or that this picture looks like a mug shot). Let’s eat!

Who loves ya baby? Your family. First, you gave them Dutch Bunny, and now you’re going to give them Sunday morning biscuits. Not just any biscuits but biscuits brushed with melted butter and sprinkled with kosher salt. Yeah, now we’re talking. These come from the basement of Del Posto restaurant via Bon Appetit. I love the story of Rosa, the “linen lady” who was transferred to pastry duty in desperation and now practically runs the place. Go Rosa! She makes these for the staff so you know they’re full of love and goodness (and butter).

As a professional slacker I made slight modifications, in italics, which led to some pleasantly overbrowned and misshapen biscuits that my son christened biscookies. So here they are: biscuits, cookies, whatever. They’re just darned good, especially hot from the oven.

Ingredients

2 1/2 cups all-purpose flour
3/4 cup sugar
2 1/2 tsp baking powder
1 1/2 tsp kosher salt, plus more
1 cup (2 sticks) chilled unsalted butter, cut into pieces; plus 6 Tbsp. (3/4 stick), melted. Way too much. Half that for brushing on is plenty.
3/4 cup chilled buttermilk

Method

Preheat oven to 350°. Whisk flour, sugar, baking powder, and 1½ tsp. salt in a large bowl. Add chilled butter and toss to coat. Work butter into flour mixture with your fingers until mixture resembles coarse meal with several pea-size pieces of butter remaining.

Using a fork, gently mix in buttermilk, then gently knead just until dough comes together (do not overmix). Kneading was a sticky mess so I just stirred it up.

Pinch off pieces of dough and gently roll into 1” balls; place on 2 parchment-lined baking sheets, spacing 2” apart (you should have about 24). If butter softens too much while you are working, chill dough until firm before baking, 15–20 minutes. I just spooned them out like cookie dough.

Bake biscuits until golden brown, 25–30 minutes. Brush with melted butter and sprinkle with more salt. Serve warm.

Asparagus Panzanella

Spring fever in Doug and Kelley's asparagus patch.

Spring fever in Doug and Kelley’s asparagus patch. Arm yourself with a sharp knife and a healthy appetite.

As we come up on the one year anniversary of Bring It! we’re shaking it up a little (just a little, I promise) with the Ingredient of the Month. We pick something seasonal and feature it in a few posts that month. It’s not rocket science, but it’s progress. May’s ingredient is asparagus. We’re already getting to the end of the month but the tenacious winter kept those spears in hiding for quite some time. Now they’re out and those lucky enough (and smart enough) to have their own asparagus patch quite literally have their hands full.

Doug and Kelley Lewis are among the lucky/smart ones. Doug affirms that asparagus is indeed hard to start/plant, “but after two years of waiting for the roots to properly build, the harvests every spring are awesome. We got over 100 stalks just today!!!” Their typical spring dinner is grilled asparagus (preferably a bit scorched and black) with rice and cut veggies or grilled sweet potatoes as sides. Preferred cooking method is to lightly oil the spears with olive oil and a sprinkling of salt and throw them naked on the grill. “Steaming is easy, fast and inside,” says Doug. “Just sprinkle with a bit of salt and/or a squeeze of lemon. And they are yummy in scrambled eggs.”

Too much asparagus is a good problem to have, especially when you know about Asparagus Panzanella. Panzanella is one of those genius dishes that almost makes you feels like you’re cheating by calling it a meal—like eating cereal for dinner but way better. It’s basically a salad of toasted bread and whatever combination of fresh herbs and vegetables makes you happy. Pharrell Williams dancing-in-the-kitchen happy.

Naked Guns—pure, clean asparagus ready to grill.

Naked Guns—pure, clean asparagus ready to grill.

The Holy Grail of Panzanella’s is Ina Garten’s classic, so I used her method for toasting up the bread. Whereas hers uses cucumbers, tomatoes and basil, this one uses asparagus,  ricotta salata and spicy greens. You can go peas, mint and parm, or cilantro, corn and avocados. You get the picture.  

Taste-wise ricotta salata is sort of a mild feta with good structural integrity. Look at this as a way not only to eat bread for dinner but also to use whatever fresh stuff you have on hand. You can boil, roast or grill the asparagus.

Asparagus Panzanella

Adapted from Food and Wine

Ingredients

Asparagus Panzanella

The Food and Wine version of this feast. Let’s just double the bread shall we? Now we’re talking!

4 large eggs
2 pounds fat asparagus, peeled (if using thinner asparagus just trim or snap off the tough ends)
3 Tbsp good olive oil
1 small French bread or boule, cut into 1-inch cubes (6 cups)
1 tsp kosher salt
2 cups packed young mustard greens or chicory (or arugula)
1/2 small red onion, thinly sliced
1/4 lb ricotta salata, thinly sliced or crumbled
1 watermelon radish or 2 large red radishes, very thinly sliced

For the Vinaigrette

1 Garlic clove (minced)
1 tsp Dijon Mustard
3 Tbsp Sherry Vinegar
1/2 cup Olive Oil
Salt and Pepper to taste

Method

Put the eggs in a saucepan of water and bring to a simmer over moderately high heat. Simmer for 6 minutes. Drain the saucepan and fill it with cold water. Crack the eggs all over and let stand in the water for 1 minute. Peel and thickly slice the eggs; the yolks will be barely cooked but not runny.

Heat the oil in a large saute pan. Add the bread and salt; cook over low to medium heat, tossing frequently, for 10 minutes, or until nicely browned. Add more oil as needed. (Bread cubes can be toasted earlier in the day and left a room temp, and covered for God’s sake so nobody scarfs them down.)

Bring a medium saucepan of salted water to a boil; prepare an ice bath. Cook asparagus until bright green and just tender, 2 to 3 minutes. Transfer immediately to ice bath. Drain; place on a clean kitchen towel. (alternatively toss asparagus in olive oil and grill or roast). Cut stalks into fork-friendly pieces.

In a small bowl, whisk all vinaigrette ingredients together.
In a large bowl, toss the asparagus, toasted bread, greens, onion and cheese. Drizzle with the dressing, toss, taste, and adjust to desired dressy-ness. Let sit a few minutes for bread to absorb dressing. Garnish with the eggs and radish and serve.

Bring It!

This is a genius option to bring to a friend’s house, a picnic or a Drive-In. All the elements—toasted bread, veggies, dressing and cheese—can be prepped in advance, packaged separately and assembled on site.

Please do note that this is more method than recipe. Experiment with combinations that you like in other dishes or whatever fresh veggies and cheese you like and have on hand. Again, it’s toasted garlic bread for dinner. Don’t fight this. It’s all good!

Cranberry Buttermilk Scones

Idaho cobs

Scones, coffee and the first rays of sun. It doesn’t start out better than this. 

Oh the weekend. It is so full of promise, especially if you start it with hot-from-the-oven scones. It can be darned good with a box of Life cereal too, but why not bust out the extra credit points when you can?

These scones first caught my attention in a spiral bound Vermont community cookbook, and mostly because they did not involve eggs. The hacks I have made include using the food processor to cut the butter into the dry ingredients and blowing off the glaze altogether. I am sure the glaze is good, and that working the dough like Laura Ingalls Wilder has some merit but really, do we need overkill? Let me rephrase…do we need overkill in our scones?

Make these, blow off the cereal and enjoy the weekend.

 Ingredients

3 cups King Arthur Unbleached All-Purpose Flour
1/3 cup plus 2 tablespoons sugar, divided
2-1/2 teaspoons baking powder
3/4 teaspoon salt
1/2 teaspoon baking soda
3/4 cup cold butter
1 cup buttermilk
1 cup dried cranberries
1 teaspoon grated orange peel
1 tablespoon milk
1/4 teaspoon ground cinnamon

Method

In a bowl, combine the flour, 1/3 cup sugar, baking powder, salt and
baking soda; cut in butter until mixture is crumbly. Stir in the
buttermilk just until combined. Fold in the cranberries and orange
peel.
 
Turn onto a floured surface; divide dough in half. Pat each half
into a 6-in. circle. Cut each circle into six wedges. Separate
wedges and place 1 in. apart on a lightly greased baking sheet.
Brush with milk. Combine the cinnamon and remaining sugar; sprinkle
over scones. Bake at 400° for 15-20 minutes or until golden
brown. Remove from pan to a wire rack. Serve warm. Yield: 1 dozen.

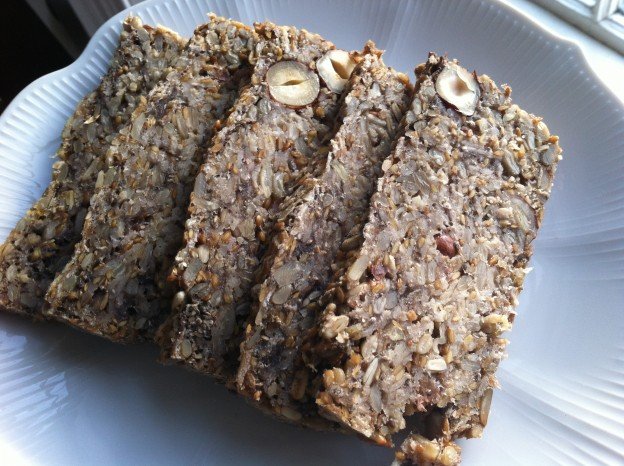
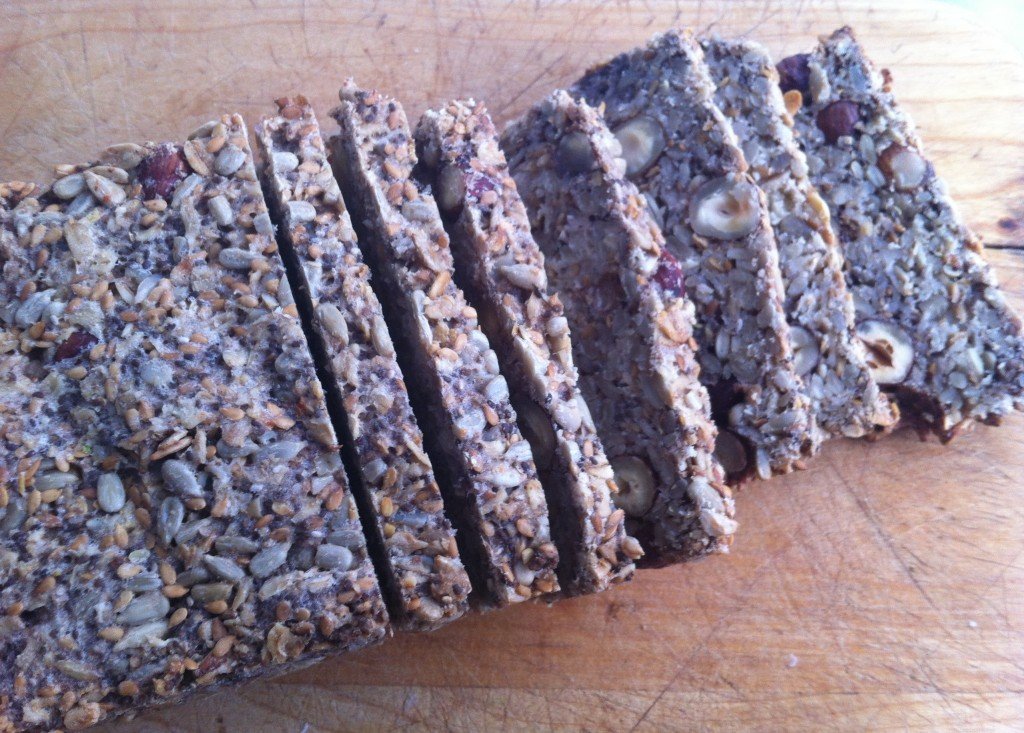
Bread of Life, sliced

The Bread of Life, or “That’s Life” Bread

Elsewhere on the Internet (namely on My New Roots) this seedy, flourless, unleavened, barely sweet and totally nutrition-packed bread is called the “Lifechanging Loaf of Bread.” That is quite a claim and one that begs to be debunked, particularly by my own family, some of whom refer to this as my “dirt bread.”

What can I say? Haters gonna hate. That’s life; hence, the abbreviated name for this bread. But for the right person—and you know who you are—this is, if not lifechanging, at least addictive. It relies on oats, chia seeds and psylium husks to hang together and get its breadiness. Whole hazelnuts give it texture and a touch of maple syrup makes it all just right. Toast it, or not, and top it with butter, honey, cheese, caramelized onion, roasted veggies or pretty much anything and give yourself a big fat gold star for healthy eating. Go you!

I’ll leave it to Sara Britton to answer any questions about substitutions and how in the heck she came to experiment with psylium husks. I will tell you, however, to find them in CVS with the Metamucil. Be sure to get the unflavored variety, unless you want your bread to actually taste like Metamucil.

A few other notes: She uses coconut oil or ghee (which I can’t pronounce let alone find) but you can also use butter; I add chopped dates for some chewiness and sweetness; she uses a flexible loaf pan for both mixing and baking. I don’t have one of those so I just used a regular loaf pan and lined the bottom with parchment paper to ease the first turnout (totally worth the effort, unless you want a bonus botched loaf to snack on); finally, I lived large and mixed it all in a bowl, which took away the stress of mixing in tight spaces, which I hate.

And now, just to go on record, for me this is absolutely addictive and perhaps even lifechanging, on a slow day that is.

That’s Life Bread

From My New Roots
Makes 1 loaf

Ingredients

1 cup / 135g sunflower seeds (or 1/2 cup each pumpkin seeds and sunnies)
½ cup / 90g flax seeds
½ cup / 65g hazelnuts or almonds, roughly chopped or sliced*
**½ cup dried dates or dried fruit of choice, roughly chopped 
1 ½ cups / 145g rolled oats
2 Tbsp chia seeds
4 Tbsp psyllium seed husks (3 Tbsp. if using psyllium husk powder)
1 tsp fine grain sea salt (add ½ tsp. if using coarse salt)
1 Tbsp maple syrup
3 Tbsp melted coconut oil or ghee (or butter)
1 ½ cups / 350ml water

*update: sliced almonds are my go-to for ease of both prep and slicing
**next update: Dates or dried fruit are optional but now an essential part of my dirt bread experience.

Method

1. In a flexible, silicon loaf pan (or a parchment lined regular loaf pan), combine all dry ingredients, stirring well. Whisk maple syrup, oil and water together in a measuring cup. Add this to the dry ingredients and mix very well until everything is completely soaked and dough becomes very thick (if the dough is too thick to stir, add one or two teaspoons of water until the dough is manageable). Smooth out the top with the back of a spoon. Let sit out on the counter for at least 2 hours, or all day or overnight. To ensure the dough is ready, it should retain its shape even when you pull the sides of the loaf pan away from it it.
2. Preheat oven to 350°F / 175°C.
3. Place loaf pan in the oven on the middle rack, and bake for 20 minutes. Remove bread from loaf pan, place it upside down directly on the rack and bake for another 30-40 minutes. Bread is done when it sounds hollow when tapped. Let cool completely before slicing (difficult, but important).
4. Store bread in a tightly sealed container for up to five days. Freezes well too – slice before freezing for quick and easy toast!

Life Bread by the loaf

Living life bread, a slice at a time.

Bring It

As mentioned above, for the right person this is the perfect host/hostess gift. If you’re bringing it to a mixed crowd you can always cover your bases (and maximize fans) by adding a loaf of easiest french bread ever or maple oat breakfast bread

Pain Perdu…ooh la la!

pain perdu

Pain perdu with warm maple syrup. Perfect for after Round 1 of shoveling.

 OK, some kids out there have been making a lot of snow ghost pies, because this winter thing is not slowing down! As we head into snow day #2 of the week, I feel it necessary to post one more cozy breakfast food, just because. Yes, this has been a very carb-heavy spell on Bring It, and I promise, the green is coming. But for now we still need some comfort food to get us over the snowbank and into spring.

So, voila! Here is another episode of overnight breakfast brilliance (with a fancy French name at no extra charge.) This came from Gourmet circa 2003. Imagine yourself at a friend’s house for a weekend. Big dinner Saturday night. As you are cleaning up afterwards, finishing a glass of wine, take one of the dishes you have just washed and instead of putting it away, butter it (with the nice soft butter that’s lying around), lay the uneaten baguette slices in it, and whip up the super easy custard to pour over it. Then stash the whole thing in the fridge. Nobody even noticed what you were doing and the next morning, Ta da! Pain perdu. AKA baked French toast for those of us on this side of the pond.

If you are not at a friend’s house having a big dinner party you can still whip this up and be a hero in your own home. Use whatever bread you have (you know, love the one you’re with), and don’t be afraid to use the rest of that Maple Oat Breakfast Bread for a double shot of maple.

Pain Perdu

Ingredients

1 – 13 to 14 inch long loaf of soft-crust supermarket Italian bread (without seeds)
1/2 stick (1/4 cup) softened unsalted butter
2 large eggs
1 2/3 cups whole milk
1/4 tsp salt
3 Tbsp sugar
Handful of chopped walnuts or pecans (optional)

Method

Cut 12 1-inch thick diagonal slices from bread (don’t use ends).

Butter 1 side of each slice and arrange slices, buttered sides up, in 1 layer in a buttered 13 by 9 inch glass baking dish, squeezing them in slightly to fit.

Whisk together eggs, milk and 1/4 tsp. salt until combined well, then pour evenly over bread.

Chill, covered until bread has absorbed all of custard – at least one hour and up to 1 day, depending on bread.

In the morning:  Take pan out of the refrigerator to bring  to room temperature and preheat oven to 425 degrees.

Sprinkle bread with 3 tablespoons of sugar. Sprinkle on chopped nuts, if using.

Bake, uncovered in middle of oven until bread is puffed, and top is golden – about 20 to 25 minutes. Serve immediately with topping and syrup of choice (as long as it involves real maple).

Pain Perdu

A breakfast puzzle? Main non! C’est pain perdu. This batch was made with maple oat breakfast bread.


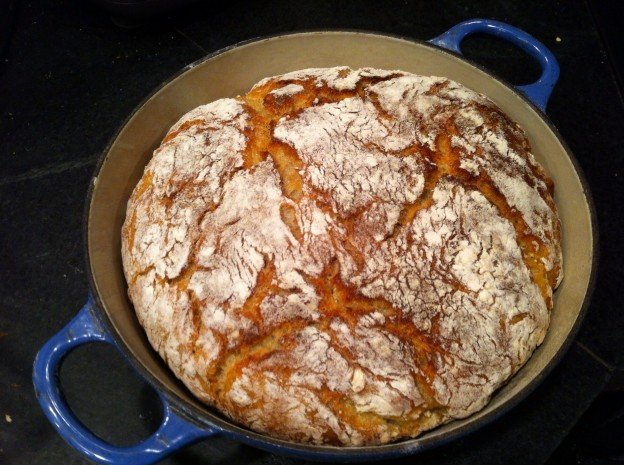
Maple oat breakfast bread

Maple Oat Breakfast Bread

This recipe had me at maple. I’m a simple person really. But maple syrup, oats and melted butter all cozied up into a crusty loaf of bread (that requires minimal effort and even less skill to make) would win over even the most complex of characters. There is no more appropriate time to celebrate maple syrup than on Vermont Town Meeting Day, the traditional time to tap one’s maple trees. It also happens to be when everyone needs a little comfort food to push through the final sub-zero throes of winter.

This comes from the “no knead” family of bread recipes, which, as you can imagine, is the only bread family in my recipe box. The no knead process is very easy but does require a few things, namely time (not work time, just hang time for the dough), a heavy duty cooking crock and a really hot oven. The perfect scenario is to take 5 minutes and mix all the ingredients at night then bake up a fresh loaf in the morning. Second to that is mixing the dough in the morning and baking it up for dinner. Either way, you’ll have plenty of time to get out there to the town hall and vote on wind farms, beaver dams and moose quotas.

Recipe tweaked from King Arthur Flour via Food52

Makes 1 large loaf

Ingredients

5 cups all-purpose flour (you can replace a couple cups with whole wheat if you wish)
11/2 cups rolled oats
1/3 cup maple syrup (preferably grade B)
1/4 cup melted butter or olive oil
2 tsp salt
1/2 tsp instant yeast
2 1/4 cups room temperature water

Method

1. Combine all of the ingredients in a large bowl and stir well until it becomes a tacky, messy dough. (You can also use your hands to work everything together.)

2. Cover with plastic wrap and allow to rise at room temperature) until poofed and bubbly, 8 hours or overnight.

3. Gently scrape the dough out onto a well floured surface and shape into a round loaf. Place the loaf on a well floured towel and allow to sit for an hour.

4. In the meantime preheat your oven to 450F with a 10-inch (about 8-quart) Dutch oven or baking crock with lid in it. When the dough is ready and the oven is hot, turn the dough off of the towel into the hot Dutch oven and cover with the lid. Bake covered for 30 minutes, then remove the lid and continue to bake until the crust is deep brown, another 15-30 minutes.

5. Remove the bread from the oven, turn it out of the pot and allow to cool completely before slicing.

Maple oat breakfast bread

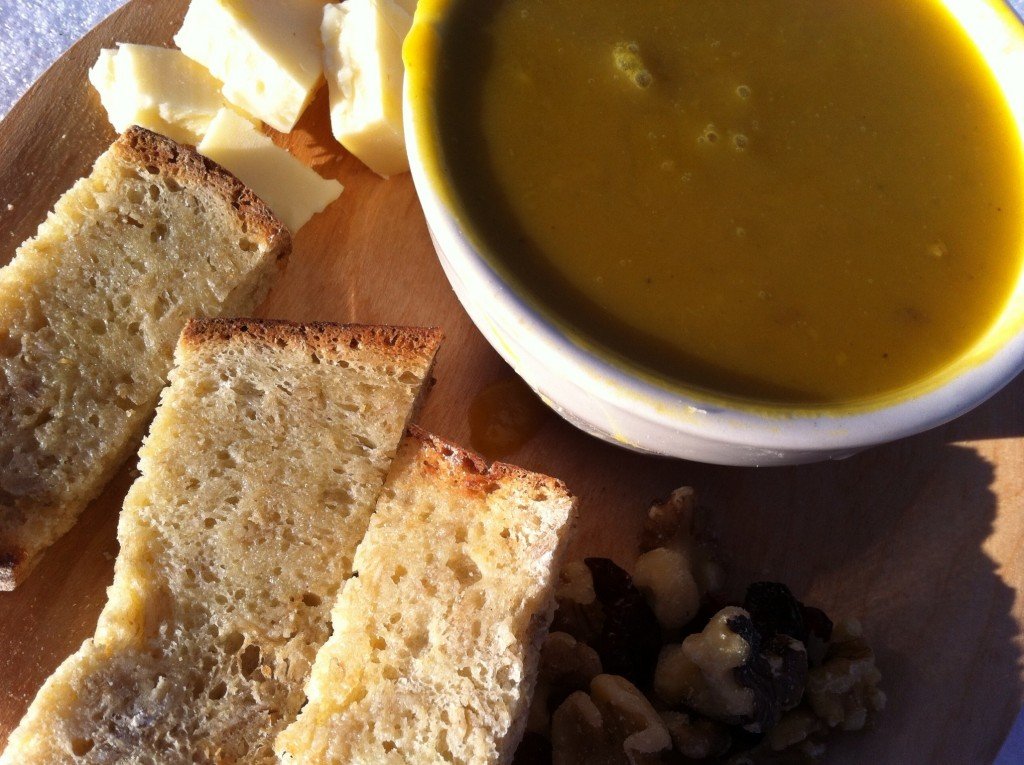
A fine lunch on a sunny late winter day.

Whole Wheat Cinnamon Scones

Scones Sugaring

What better treat to make for Christmas morning than a warm, melt-in-your-mouth scone!  I learned how to make these scones at the Baking Education Center at King Arthur Flour in Norwich Vermont.  It was phenomenal class.  I am a self-taught baker (i.e. I learn by baking experiments gone bad), which made this class very enlightening. I learned more about baking in the first 15 minutes than I’ve learned from years of baking in my home.  So, thank you King Arthur for your cooking classes.  If you live in the area, or even if you don’t, you should take a class. You can check out the school, the store, and the café here.  This recipe comes from King Arthur Flour as well so all credit to them for these wonderful scones.

I flavored my scones with cinnamon chips and a thick vanilla syrup (Madagascar Bourbon Pure Vanilla Bean Paste) which gives them an extra hit of flavor. I also topped them with sparkly white sugar.  But you can flavor your scones with whatever combination of flavors you want or whatever is on hand in your pantry.  When you take a class at King Arthur, they have every chip, dried fruit, nut, and spice available for you to choose from.  The selections are almost paralyzing.  Once I settled on cinnamon vanilla, I was quite happy. And I had already made a deal with my friend, who selected currants and walnuts, that we were to split our takes in half at the end of the class.  It was a win/win!

Ingredients

2 cups whole wheat flour
2 Tbsp sugar
2 tsp baking powder
1/2 tsp baking soda
1/2 tsp salt
1/2 cup chilled, unsalted butter
3/4 cup buttermilk
1 egg yolk (save the white for topping scones)
1/2 cup cinnamon chips (or whatever flavoring you like)

For the topping:
1 egg white
Sparkling sugar

Method

  1. Place the dry ingredients in a large bowl and mix well.
  2. Cut in butter with pastry blender or two knives.
  3. Whisk together buttermilk and egg yolk and stir into dry mixture until it a dough forms. Transfer dough to a lightly floured work surface and gently and quickly knead in the optional cinnamon chips (or dried fruit, nuts, etc…). Pat the dough into a flat disk about 7 inches across and cut it into wedges.
  4. Transfer the disk to a parchment-lined or lightly greased baking sheet. For crispier scones, separate the wedges.  For softer, higher rising scones, leave them in a circle.
  5. Brush the tops of the scones with the egg white and sprinkle with white sugar.
  6. Bake them in a preheated 375 degree oven for 25 to 27 minutes, inspecting at the midpoint to admire and turn.
  7. Remove scones from the oven when they are light, golden brown and cool on a wire rack.

I’m sure you noticed that these scones are made with whole wheat, so a tad on the healthier side. But if you want to go full tilt health nut, you can make the following substitutions:

1/2 cup canola oil instead of butter
3/4 no fat plain yogurt instead of buttermilk
1 Tbsp egg beaters instead of egg yolk
1/2 cup dried fruit instead of cinnamon chips
No sparkly sugar (eh, what the heck, live a little and keep the sparkly sugar!)

Bring It

These scones are the perfect gift to bring to a friend’s house if you are visiting for the holiday.  Bring them with a jar of your favorite jam and a bag of coffee beans.  You are sure to get invited back!

Scone Flavoring

People’s Choice Cornbread

Can you guess what season it is? Yep, tailgate season.

Can you guess what season it is? Yep, tailgate season.

Guess what day it is… No not that. It’s time to think about what you’re bringing to the tailgate or whatever event you are enjoying this weekend. I’m going to make it really easy on you. Bring this cornbread! After bringing it to a party a middle school kid actually sought me out on school grounds to ask how he could find the recipe to give to his mom. Any of you with middle schoolers know the magnitude of this. Suffice to say, this cornbread, like Hero Slaw, will make you popular…even in middle school.

I first had this, better known worldwide as Blanchard’s Caribbean Cornbread, at a tailgate and was immediately addicted. It’s pretty dangerous that way. You will notice it is most definitely NOT low fat, low calorie, gluten-free or anything like that, which makes it the perfect thing to share (and to not have lying around your own house in any emotionally weak moments). It is an excellent accompaniment to chili, soups, salads or just a glass of milk. And when you’ve had enough, it likes going to school in a lunchbox.

Before the recipe, however, a note on tailgates. For some reason tailgates seem to be a hall pass on healthy eating, an excuse to dive right into the goopy wings, crazy multi-cheese dips and bubbly meatballs of unknown composition. BUT it is also the perfect venue for a big roastarama with fall root vegetables and, say spicy chunky peanut dip or butternut squash hummus (coming soon). When you bring a big platter of roasted goodness with a few dips you won’t get hunted down at middle school but people will be psyched nonetheless.

So here it is. It works well as muffins but grease and flour the cups well or make your life easier and use liners. The only other note is to beware of addiction, as this almost crosses the bridge from bread to cake.

Ingredients

1 cup  all-purpose flour
1 cup  cornmeal
2 Tbsp baking powder
1 tsp salt
1⁄2 lb (2 sticks)  unsalted butter, at room temperature
3⁄4 cup  sugar
4  large eggs
1 1⁄2 cups  cream-style corn
1⁄2 cup  canned crushed pineapple, drained
1 cup  shredded Monterey jack cheese

Method

Preheat the oven to 325°. Butter and flour a 9-inch square glass cake pan (or up to 18 muffin cups.) Whisk together the flour, corn meal, baking powder and salt in a medium bowl and set aside.

In a mixer, cream the butter and sugar. While the mixer is running, add the eggs one at a time, beating well after each addition. Add the corn, pineapple and cheese and mix to blend. On a low speed, add the dry ingredients and mix until blended well.

Pour the batter into the prepared pan and bake until golden brown around the edges and a cake tester stuck in the center comes out clean, about 1 hour, checking at 50 minutes or so for doneness. (If your pan isn’t quite deep enough to hold the entire batch, just pour the extra into a muffin tin or mini loaf pan. If you’re making a double batch you can use a 9″ x 13″ pan and a smaller square pan.

Bring It!

These are a tad sticky, so if you are transporting muffins and not using liners be sure to separate each layer with parchment paper or plastic.

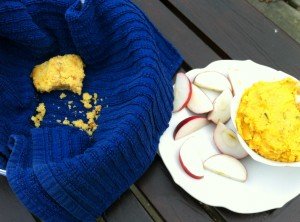
Cornbread shrapnel--that's what you get if you turn your back before taking some.

Cornbread shrapnel–that’s what you get if you turn your back before taking some.