Category Archives: Appetizers

Get Saucy With Me


Easy sauces

They say taste is free. It’s darned easy too when you just add some sauce.

If there was ever a time to go long on veggies and salads, it is now, in the dim days of January when we are warding off seasonal affective disorder, flu season, sub zero temperatures and the lingering effects of holiday excess. If none of the above applies to you it’s probably because you’ve been eating your veggies all along. It’s not hard to do that if you plan ahead a bit, and it’s downright easy if you have a repertoire of go-to sauces that give even the humblest of greens and veggies some soul-satisfying mojo.

This is the first of a two-part installment aimed at getting a whole lot of fresh into your fridge and opening up Bring It possibilities like Deconstructed Lunch (coming atcha soon) instead of a boring old sandwich or sad-looking leftovers.

These sauces are all easy to prepare and most are lightening quick as well. They dress up salads, sandwiches, vegetables, grains, and pretty much anything (inanimate) that can be dressed. With any of these kicking around your fridge your meals need never be uninspired. Let’s start with the easiest and work from there.

Mi So Easy, Mi So Good…

I was afraid of miso’s new ageyness until I discovered this dressing. Now I always have miso on hand. This could not be easier, and reminds me of the strangely addictive dressing that comes on that distressingly tiny salad served at Japanese steakhouses. It is great as is, or made with rice vinegar if you don’t have lemons. As an added bonus, this doesn’t even require a food processor or blender.

Miso Tahini Dressing

from The Kitchn

Makes about 6 ounces

1/4 cup tahini
1 Tbsp red miso
1 Tbsp lemon juice
1/4 cup or more warm water
freshly cracked black pepper

Method

In a small bowl or lidded jar, combine the tahini, miso and lemon juice. Mix with a spoon into a smooth paste. Add the warm water gradually, stirring or shaking (if using a jar) until the dressing reaches desired consistency. It may need more than 1/4 cup. Taste for seasoning. Add pepper if desired. Store in the refrigerator for about a week. Dressing thickens up as it sits, so you will need to add more water to thin.

Healthy and Hearty…

I got this in a roundabout way from Jane Esselstyn who lived in the schoolhouse next door way back before her brother Rip became famous with his Engine 2 diet book. This versatile three-ingredient (plus water) sauce is a healthy, Esselstyn family favorite, featured in Rip and Jane’s latest book, My Beef with Meat as well.  Put it on anything from kale and quinoa to pizza and grilled cheese (and probably burgers, but don’t tell Rip and Jane).

 OMG Walnut Sauce

1 cup of walnuts
1-2 cloves of garlic
1 Tbsp low-sodium tamari sauce (soy sauce)
1/4 – 1/2 cup water, for desired consistency

Method

Combine the walnuts, garlic and tamari in a food processor and blend, adding water until the desired texture is reached, (1/4 to 1/2 cup). Use more water for a thinner dressing, less water for a thicker dip.

Shalloticious…

Shallots are just plain magic. Mince them into any dressing, (like this one from Joy The Baker, also pictured above) and they make everything work.  This sauce is part of the more involved Spring Roll Salad  from 101 Cookbooks, which is a taste sensation. It requires roasting shallots, which is super easy and makes them even better if that is possible. As you know from roastarama. I can’t help filling up a high temp oven, so I threw more shallots and an unpeeled head of garlic onto the sheet as well. It’s pretty handy to have both on hand for anything that needs some cha-cha (dressings, hummus, stir fry’s, etc) throughout the week.

Roasted Shallot Peanut Sauce

Makes 2 cups

1 cup unsweetened coconut milk
1/2 cup smooth peanut butter
3 Tbsp natural sugar, preferably maple sugar or evaporated cane sugar
1/2 tsp cayenne pepper
1 Tbsp shoyu
3 medium shallots, unpeeled
2 Tbsp plus 1 teaspoon fresh lime juice

Method

Preheat the oven to 375 F.

Place the shallots on a parchment-covered baking sheet and roast until they are very tender and the juices have started to ooze out, 30 to 35 minutes. Let the shallots cool slightly, and then squeeze the pulp out of the skins. Place the shallot pulp and all the remaining ingredients in a food processor or blender, and blend until smooth. The sauce will keep, covered and refrigerated for up to a week. Heat or serve at room temperature.

And for some spice…

For a spicy girl trapped in a houseful of Yankees this sauce is money. Put it on anything that needs some zap, or just on toast or a piece of sharp cheddar. I love that it relies on jarred stuff from your pantry, and of course that it involves the blender. Oh, and it makes a great DIY gift.

Pantry Raid Spicy Sauce

From Food 52

Makes 2 cups (Where this recipe calls for ounces my guestimates are included. It’s not an exact science.)

4 ounces B&G hot cherry peppers or other pickled hot peppers, stemmed (a generous ¾ cup, or about 8)
2 ounces roasted red peppers (1/3 cup or so)
2 ounces crushed tomato  (same as above, about 1/3 cup)
1/4 cup olive oil
1/4 tsp chile flakes
1/4 tsp dried oregano
1/4 tsp sugar
Salt to taste

Method

Combine all ingredients in a food processor or blender, and mix until slightly smooth.

New Year’s Shrimp Appetizer

Shrimp and Artichoke App

Do you want the perfect appetizer for New Year’s Eve that will be the hit of the party?  If you answered yes to that question, read on.  This is a winner!  All you have to do is marinate shrimp and artichokes for 24 hours in an oil and vinegar marinade. That’s it.  It could not be easier.

I have to give credit to my friend Jane for this recipe.  Jane and I go on almost every vacation together.  Our vacations are always in remote areas with many challenges that present themselves daily while trying to cook for our families. We usually have a small camp stove which we hope works for the duration of our trip. Running out of fuel for the stove or better yet, having the fuel tip over onto our box of food can test even the most creative cook. The grocery stores can be 5-6 hours away or more making it essential to get all provisions days in advance.  Not to mention there is a huge output by our group each day creating a hunger that would put a 16 year old boy to shame.  We eat a lot of pasta and bagged salad (yes the kind that comes with the little bag of croutons, dressing, and cheese inside).  Sometimes we jazz things up with a meal as chic as quinoa but most often it is solid, hearty food that will fuel us for the day’s activities.  Jane is a foodie like me – so when we are preparing these camp meals we often talk about what we really like to cook and eat when we are home.  I asked her for one of her top recipes and immediately she said, “you have to make my shrimp and artichoke appetizer”.  And so, here it is, courtesy of my friend Jane – no modifications – straight up.  I saved it for New Year’s Eve because it is a special recipe that is perfect for a fun, festive New Year’s celebration!  Thank you Jane and I look forward to planning our 2014 vacations and menus!

Ingredients

2 pounds medium or large sized frozen cooked shrimp (tails on)
1 large red onion, sliced thin
2 8.5 oz cans artichokes, drained and quartered
16 bay leaves

Marinade:

1 1/2 cups canola oil
1 1/2 cups white wine vinegar
2 tsp ground celery seed (or 1 Tbsp celery seed)
6 Tbsp capers with juice
1 Tbsp salt (have a light hand with the salt)
20 drops Tabasco sauce (or hot sauce of your liking)

Method

Thaw shrimp in cold water.  Place shrimp, sliced onions, artichokes, and bay leaves in a large Tupperware.  Mix marinade in a separate bowl and then pour over shrimp mixture.  Marinade for 24 hours, flipping container a few times during the 24 hour period to make sure the marinade it mixing with well.

To serve, drain most of marinade and place shrimp mixture in a bowl.  I was worried about it being messy but nobody cared. Most people just grabbed the shrimp tail with their fingers and popped it in their mouth (and they weren’t afraid to dig in to the artichokes with their fingers either).  I had plenty of napkins and toothpicks nearby just in case someone preferred a more civilized approach!

Bring It

Make sure you have a good seal on your Tupperware because if this spills en route, your vehicle is going to smell like shrimp marinade for quite some time!  Maybe not the worst thing but at least you’ve been warned.

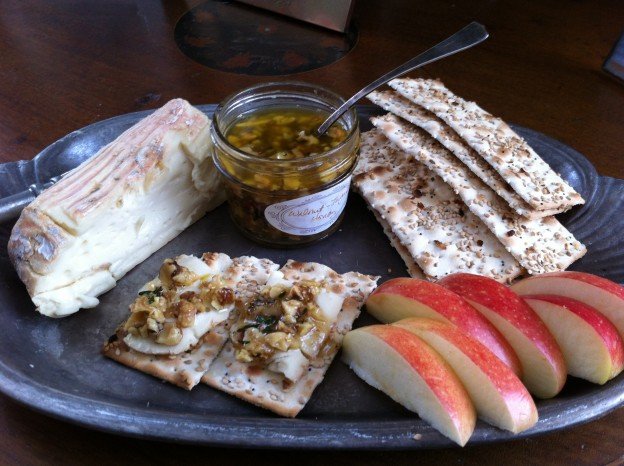
Honey thyme walnuts

It’s honey thyme…with walnuts.

Honey. Doesn’t the thought of it just make you feel calm? We need a bit of calm right now, and that’s why I’m here. Sit on down with a mug of tea, or just take a deep breath, and read this post because first I’m going to give you an awesomely easy recipe and then I’m going to remind you of all the delicious things you can make as gifts that will be much more appreciated than whatever you’re going to wrestle from the stores in a last minute frenzy. It’s time to look to your cupboards for sanity now.  Breathe in, breathe out. ‘Tis the season to give everyone a break, including yourself.

This recipe came from Bon Appetit a while back. They say to “drizzle this fragrant honey over your favorite cheese, or use it as a condiment on prosciutto panini.” I say it is also amazing with cambozola or any brie like cheese, makes a mean pizza or bruschetta topping and turns the humble grilled cheese into something you might refuse to share.

Ingredients

1 cup walnut pieces (or pecans)
3/4 cup orange blossom honey (or whatever you’ve got)
1/2 cup walnut oil or extra-virgin olive oil
Kosher salt, freshly ground pepper
1 tablespoon fresh thyme or rosemary leaves plus 2 sprigs
1/4 teaspoon finely grated lemon zest
4 whole dried chiles de árbol*

*I used Japones peppers, cut into thirds, because that’s all I could find. You can also use dried pepper flakes for more cha-cha throughout.

Method

Preheat oven to 325°F. Spread the walnuts on a rimmed baking sheet. Bake, stirring occasionally, until lightly browned and fragrant, about 15 minutes. Let cool. Coarsely chop; set aside.

Whisk honey and oil in a medium bowl to blend. (It may seem obvious, but measure the oil first so the honey will slide right out of the cup). Season to taste with salt and pepper (I am not shy with either). Fold in walnuts, thyme, and lemon zest. Add chiles. Divide between four “take me to a party” 4-ounce jars or two “I really love you”  8-ounce jars. Cover and chill.

Can be made 1 month ahead. Keep chilled. Bring to room temperature and stir before using.

More yum…

And now, here are some other great DIY food gifts to consider. Of all the things I make and give, the most requested/addictive is crackle, which breaks up nicely into treat bags.  Cholliesauce is another winner, and you may have all the ingredients in your kitchen right now. Peppermint or chocolate chip meringues are festive, tasty and pretty darned easy. And of course you can’t go wrong with roasted nuts. For savory Mediterranean types give a jar of sicilian caponata with some nice store bought crackers or (for the uber healthy friends, endurance crackers.  If you’re kicking around the house it takes time but next to no effort to mix up a batch of easiest French bread ever, and you’ll have two loaves to give. Package it with a dish towel and a French bread pan and BOOM you’ve made someone a baker.

And if you don’t feel like making a darned thing that’s fine too. Just remember to relax, breathe and have some good laughs with your friends. There’s always time for that!

An arsenal of holiday cheer. Ho-ho-ho baby!

An arsenal of holiday cheer. Ho-ho-ho baby!


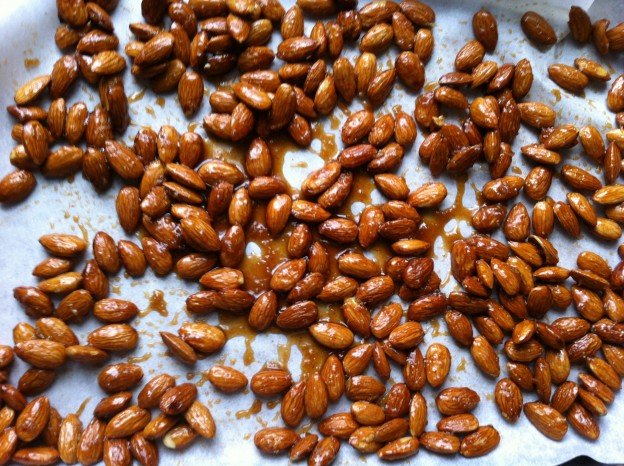
Ginger glazed almonds pre-baking

Nuts!

Nuts! What’s not to love about them? Ok, unless you have nut allergies, in which case you’ll want to skip right past this post and continue online shopping for yodeling marmots because one really can’t have enough of those this time of year. Roasted nuts are a perfect Bring It staple, because they do double duty as a host/hostess gift and a yummy contribution to any party or gathering. They beat myrrh and frankincense hands down. Also, nuts are the perfect candidates for showcasing your packaging savvy gleaned from Bringing It in Style.

Below are three favorite takes on three favorite nuts. All are easy to prepare (no beaten egg whites or fussy preparation) and all will disappear so fast you won’t  need to worry about a shelf life. That said, they include butter, so those of you with a measure of restraint will want to store them in the fridge. Oh yeah, and clean up is instant if you line your baking sheets with parchment paper.

Ginger Glazed Almonds

Makes 2 1/2 cups. Active time: 10 min Start to finish: 40 min

 Ingredients

2 Tbsp unsalted butter
3 Tbsp packed brown sugar
2 Tbsp water
1 Tbsp finely grated peeled fresh ginger
1 1/4 tsp kosher salt
1/4 tsp ground ginger
1/4 tsp cayenne
2 1/2 cups whole almonds with skins (9 oz)

Method

Preheat oven to 300°F. Melt butter in a 12-inch nonstick skillet over moderate heat. Add remaining ingredients except almonds and cook, stirring, until sugar is dissolved. Remove from heat, then add almonds and stir until coated.

Spread almonds in a lightly oiled or parchment-lined shallow baking pan and bake, stirring occasionally, until insides of nuts are golden (cut one to test), about 25 minutes. Cool completely.

Ginger glazed almonds pre-baking

GInger glazed almonds, pre baking

GInger glazed almonds

and apres baking.

Rosemary Walnuts

Adapted from Martha Stewart. Beyond the fresh rosemary you can use any combo of spices (or none at all) to suit your tastes. I went for chile powder and paprika, but many recipes call for the cha-cha of cayenne. Be bold. Be creative. Make Martha proud.

Ingredients

2 1/2 Tbsp unsalted butter
3 cups walnuts
1/2 tsp (or more) coarse salt
1 Tbsp chopped fresh rosemary
1/2 tsp chile powder
1/2 tsp paprika
2 Tbsp light-brown sugar
1 Tbsp water
1 Tbsp Worcestershire sauce

Method

Melt butter in a large skillet over medium heat. Add rosemary and chile powder. Cook, stirring, 15 seconds. Add walnuts, salt, sugar, water, and Worcestershire sauce. Stir to coat. Pour nuts on parchment lined baking sheet and bake 10-15 minutes, testing for doneness. Cool completely.

Note: If you don’t want to do the baking step you can keep stirring and cooking the mixture stovetop for 4-5 minutes until “glossy and fragrant” then spread nuts on the baking sheet to cool. I prefer the fully roasted flavor you get from baking.

Sea Salt Roasted Pecans

Honestly, you can’t improve much on a plain toasted pecan, and at a certain point in the holiday season your body will high-five you for anything in its natural state. But if you want to give your pecans that little black dress of specialness try this simple recipe.

Ingredients

2 cups pecan halves
3 Tbsp unsalted butter, melted
1 1/4 tsp fine sea salt

Method

Preheat oven to 325°F. Toss pecans and melted butter in medium bowl to coat. Add sea salt and toss. Spread pecans in single layer on rimmed baking sheet. Bake until fragrant and slightly darkened in color, about 15 minutes. Cool pecans on baking sheet.

The official word is that these roasted pecans keep 2 days if stored airtight at room temperature. That seems mighty conservative to me and they keep way longer in the fridge.

party time nuts


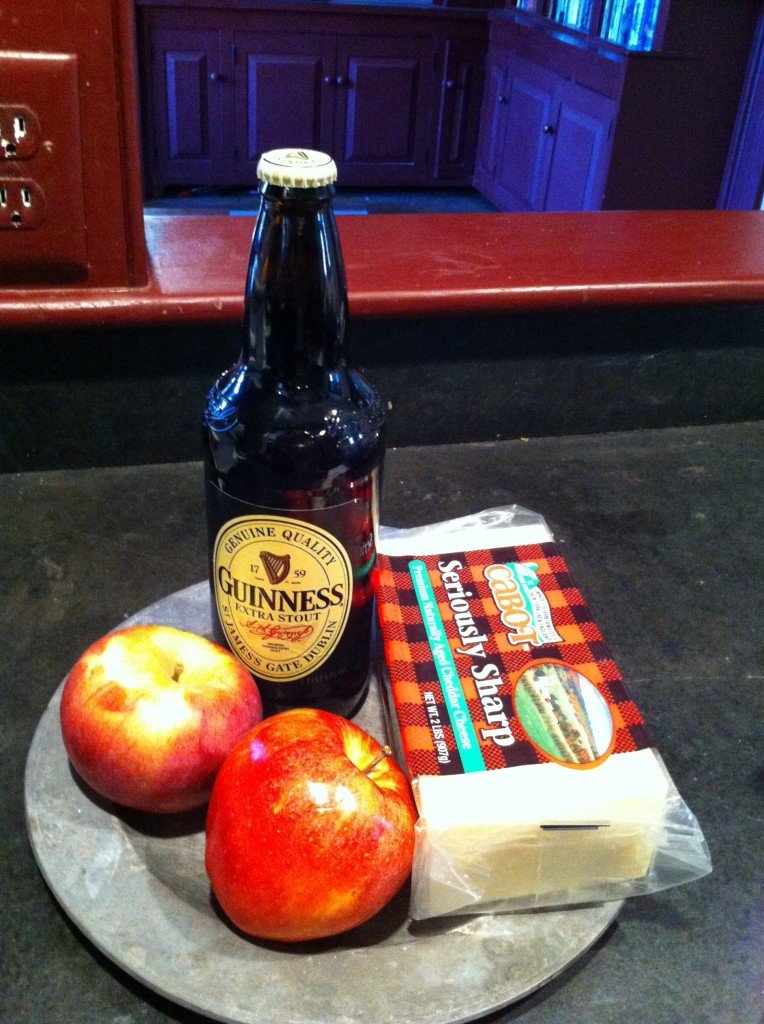
Guinness Fondue

Fondue Fixin's

Because we cannot live on bread alone, we have fondue.

Beer and cheese—it’s what’s for dinner. I realize I am pushing the season a bit with après ski fare, but we get really excited about the arrival of winter in this household. It’s also Friday, and in keeping with a tradition started by our dearly loved and sorely missed neighbors (come back from Sarajevo already you guys!), it’s the day of the week we collectively throw up our hands and say “Uncle!” to dinner planning. Friday is the day for take-out, appetizers, creative leftovers and raiding the Etna store on the way home. When it happens to be a chilly Friday It’s also a perfect night for fondue.

This came from an über healthy, fit mom who I never would have suspected loved beer and cheese so much. It made me like her immediately. Using a dark beer instead of wine is a different taste, and often more appealing to kids who don’t like the wine smell and taste. A little sweeter than traditional fondue, this is great with apples, grapes, potatoes, veggies, of course bread and quite possibly even cardboard. And it’s totally easy.

Ingredients

1 1/2 lb. Cabot cheddar (as sharp as you like it), grated
1 Tbsp flour
1 sprig fresh parsley
1 pinch garlic powder
1 tsp paprika
1 Tbsp butter
2 Tbsp green onion
1 cup Guinness beer- flat
2 tsp lemon juice
3 tsp worcestershire sauce

 Method

Open the beer today and let it get flat…

Combine flour, parsley, garlic powder and paprika.  Toss with cheese, set aside.

Saute butter & onion until soft – set aside

Warm, but do not boil beer, add lemon juice.  Slowly add cheese mixture, stirring constantly.  Do NOT let cheese come to a boil. Allow cheese to melt before adding more.

Add butter/ onion mixture when cheese is melted, turn up heat so cheese will thicken. Stir in worcestershire sauce. Transfer to fondue pot.

Bring It

Someone somewhere has to open a can of Guinness in the morning. Pre-grate and bag the cheese with garlic powder, flour, paprika and parsley. The rest of the chopping and prepping can be done with the group, by the group. You can be a really nice guest and do it all beforehand and arrived with pre-cut bags of veggies, bread, fruit etc. But that might make people envious of your organizational prowess. Your call.


Endurance Crackers

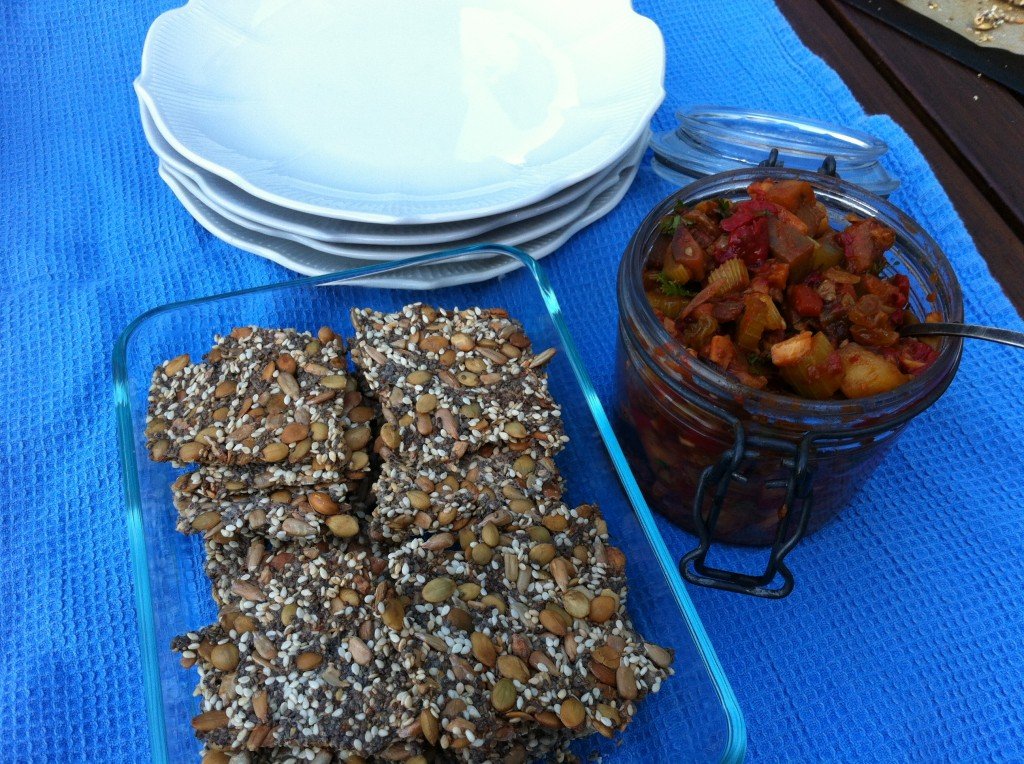
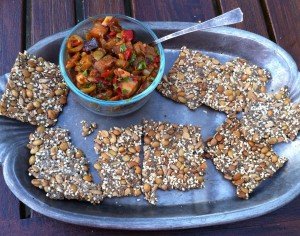
Caponata with Endurance crackers fresh from the cooler.

Caponata with Endurance crackers fresh from the cooler.

Because it is fall, and traditionally (for me) a time to cleanse (curse you watermelon sangria!), I was planning to do a cleans-y post. Mostly I needed a break from apple mania and an excuse to share the Endurance Crackers that I started making this summer and that, it turns out, are something of an Internet sensation. As far as I know they originally came from an excellent vegan site called Oh She Glows. I am very un-vegan but I love vegany things so naturally these seedy babies looked right up my alley. I made them a bunch this summer, and shared them around to universal approval from kids and adults, vegans and carnivores.  They are full of good stuff and free of all the usual perps—gluten, nuts, grains, sugar.

For a fleeting moment I even thought they would pass the paleo test.  But noooooooooo. Apparently chia seeds—like my beloved chickpeas and black beans—don’t make the cut. The little wonder food, secret pellets of the Incas, bearer of magical running power has a husk and therefore it’s a no-go with the cave man clan. But chia seeds are key to the whole gig because they have this crazy power of gelling things together which gives the simple mix a way to morph into a legit cracker.

Long intro. Here is the recipe, with advice and tweaks from myself and other cybercrackerphiles. There is even a sweet variation below (thank you Rowdy Baker) that is pretty tasty.  And paleo peeps, I have failed you again… unless…maybe…click here and see.

Original Endurance Crackers from Oh She Glows

Yields about 22-24 large crackers

Ingredients

½ cup chia seeds
½ cup sunflower seeds
½ cup pepita/pumpkin seeds
½ cup sesame seeds
1 cup water
1 large garlic clove, finely grated (I just used my garlic press.)
1 tsp grated sweet onion
¼ tsp. kosher salt (Crazy salt is darned good too.)
Olive oil for brushing, if desired

Optional: Herbamare, kelp granules and your choice of additional spices and fresh herbs to taste. (I’ve never jumped on the kelp wagon but have tried cumin, paprika and curry as well as chopped fresh rosemary, dried oregano, cracked pepper. You get the picture. One person adds a puree of six or so dates and cinnamon for a sweet version.)

Method

Preheat oven to 325° and line a large baking sheet with parchment paper.

In a large bowl, mix the seeds together. In a separate small bowl, mix the water, grated garlic and grated onion. Whisk well.

Add the water mixture to the seed mixture; stir until thick and combined. Season with salt and optional spices/fresh herbs.

Spread the mixture onto the prepared baking sheet with the back of a spoon (or your hands) until it’s less than ¼” thick.* It may be little runny, but just keep smoothing. If it becomes too thin in parts, just patch them up.  Bake for 30 minutes. Remove from oven. Loosen with a long flat spatula or pizza peel, cover with another greased or parchment lined cookie sheet, and invert. Alternatively cut into smaller squares and flip. Don’t worry if it breaks in a few places. They’re crackers, right?

At this point, you can deeply score the surface into whatever size crackers you like (diamonds are shmancy. Rectangles and squares are perfectly fine.) This is also when you can go pro and brush the surface lightly with oil to make them nice and crispy.

Bake for another 30 minutes, watching closely after about 25 minutes. The bottoms with be lightly golden in color. Allow to cool completely on the pan and break into pieces. Store in a covered container. They freeze well too.

*Newbie cracker maker? Make it even easier on yourself by using two baking sheets and forming smaller, easier to flip rectangles.

Sweet Version, care of The Rowdy Baker

½ cup raw sunflower seeds
½ cup raw sesame seeds
½ cup raw pumpkin seeds
½ cup raw chia seeds
1 tsp kosher salt
1 cup water
5 ounces dark (at least 70% cocoa) chocolate, finely chopped
1 cup raisins (optional)

Method

Prepare as above through final cooking and then:

Remove from oven and sprinkle evenly with the chopped chocolate. Wait a few minutes and then spread with a flat spatula. Sprinkle with raisins if desired.

When the chocolate has hardened (you may refrigerate it if you wish, to hurry it along) break into pieces and store in an airtight container.


Paleo Crack…ers

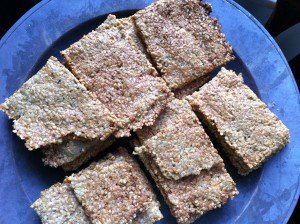
Plate of possibly paleo,  definitely delicious crackers

Plate of possibly paleo, definitely delicious crackers

And then it happened. Just when I thought I would never find a decent snack that would pass the paleo test (note: I do not have the discipline to be a paleo eater, but in case I find it someday I want to be sure I could eat something other than bacon, cauliflower and coconut oil), I found these crackers. Even better than how good they are, is the fact that they contain no exotic or expensive ingredients—sorta what you would expect from a site called “brokeassgourmet.”  Gabi, the aforementioned gourmet, describes her Simple Seed Crackers crackers as “shortbready” which I thought was odd, but after my 8th cracker or so I must say I agree. I suspect the sesame seeds may be in a gray area with paleos (they have a husk and all—see chia seed reality check in Endurance Crackers), but I’m going to enjoy these for a few days before I ask.

Paleo Crack AKA Simple Seed Crackers straight from brokeassgourmet.com

 Ingredients

1 cup unsalted roasted dry, shelled sunflower seeds (you could also use salted ones, but then make sure to use a bit less salt when you mix the dough)
1 cup sesame seeds
1/4 medium onion, minced
1/2 tsp salt, plus more for sprinkling
1/2 tsp pepper
2 Tbsp water (or more as needed)
extra virgin olive oil, for brushing
(FYI: Total Cost of Ingredients –$3.50)

Method

Preheat oven to 350 degrees. Place sunflower seeds in a food processor and process for about 2 minutes, until smooth (the mixture will resemble a dry peanut butter). Add onion, sesame seeds, salt, pepper and water and pulse or stir, just until a thick, paste-like dough comes together.

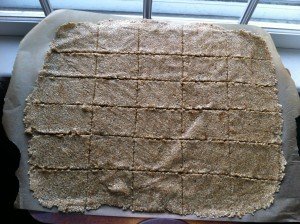
Uniform thickness is key.

Uniform thickness is key.

Place the dough on a piece of parchment paper and shape into a thick rectangle or square, to guide the dough’s shape while you roll it. Place a second piece of parchment paper over the dough and roll with a rolling pin until the dough is about 1/8” thick.

Remove the top piece of parchment paper and use a sharp knife or pizza cutter to lightly score (but not cut all the way through) the dough into squares (any size will work—mine were 2 1/2” squares). Slide the parchment paper with the dough on it onto a baking sheet and bake for 17-20 minutes, or until golden-brown (be careful not to let the crackers get too dark—burned sesame seeds have a foul flavor).

Let cool for 10 minutes, then gently break apart along the scored lines (don’t worry if they’re imperfect—they’ll still be delicious).

Makes 24-32 crackers, depending on size.


Sicilian Caponata

crackers-caponata-served

Sicilian caponata with endurance crackers

In case you can’t get to Italy this weekend this is your consolation prize.

It’s another find from Sunset magazine. So good, so satisfying. I started making this because I have a slight obsession with eggplant and because we were visiting Vegans (with a capital V–they were serious). I quickly realized this was equally appealing to carnivores, and downright meaty in texture and heartiness. The Vegans had to share. A vat of this in the fridge, with or without the toasts and ricotta cheese, and you are set to make a meal out of pretty much anything. Perfect for bruschetta deconstructed and as a spread/filling/topping with crackers, wraps, omelets, tortillas, or accompanied by your carb vehicle of choice.

Ingredients

1  loaf (1 lb.) crusty Italian bread such as ciabatta, cut into 1/3-in.-thick slices
About 6 tbsp. olive oil, divided
1  large eggplant, cut into 1/2-in. dice (about 4 cups)
2  Tbsp minced garlic
1  cup  chopped celery
1  cup  chopped red bell pepper
1  cup  chopped green olives (a few pulses in the food processor works too)
1/4 cup red-wine vinegar
1/4 cup tomato paste
1/2  cup  raisins
1/2  cup  toasted pine nuts
2 tsp kosher salt
2 tsp sugar
1/4 cup chopped fresh basil
1/4 cup chopped fresh oregano
1/4 cup chopped fresh flat-leaf parsley
1 cup ricotta cheese (or whipped cream cheese)

Method

Preheat oven to 350°. Lay bread on a baking sheet and drizzle with about 2 tbsp. oil. Bake until toasted and light golden brown, about 5 minutes. Set aside.

Heat 2 Tsp oil in a large nonstick frying pan over medium-high heat. Cook eggplant, stirring often, until softened and starting to brown, about 8 minutes. Transfer to a bowl and set aside.

In the same pan, cook garlic in remaining 2 Tsp oil, stirring, until fragrant, about 1 minute. Add celery, bell pepper, and olives, stirring to combine, and cook until softened, 5 to 8 minutes. Stir in 1/4 cup water, the vinegar, tomato paste, raisins, and pine nuts and cook until heated through. Stir in reserved eggplant, salt, and sugar, then mix in herbs.

Serve caponata with ricotta on the toasted bread (technically I think that turns it into bruschetta.)

Bring it!

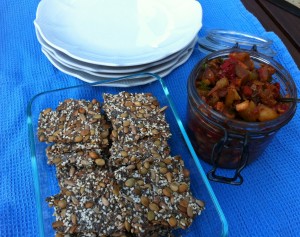
Spoon cooled caponata into one big or several small mason jars and make a label if you’re feeling fancy. Official word is to chill caponata up to 2 days in the fridge and store toasts airtight up to 2 days but I’ve pushed it out way longer with no scary consequences.

Caponata with Endurance crackers fresh from the cooler.

Caponata with Endurance crackers fresh from the cooler.


Spicy, Chunky Peanut Dip for the Fair

Oxen at Hanover Center Fair

A couple of locals

The Hanover Center Fair is the first stop on the ox pulling circuit and a slice of country life. Book sale, fair food, bouncy house, kids games, clowns, old cars, crafters, live music, cotton candy, parade, snowcones–it’s got it all. It also happens to be in our front yard, and so it’s a natural way to open patio season with a bang. This dip came from the first page of an appetizer book I bought one year at the fair in the church book sale. It’s so darned good I never bothered to get past page 1. It’s great as a dip with fresh or roasted veggies. And it’s E…Z! Leaving you more time to enjoy the fair and some frosty summer cheer!

Ingredients

1/2 cup chunky peanut butter
1/4 cup dry sherry
2 Tbsp honey
2 Tbsp white or red wine vinegar
2 Tbsp flavorless cooking oil
1 Tbsp dark sesame oil
1 Tbsp soy sauce
1 tsp Asian chile sauce
2 cloves garlic minced
2 Tbsp finely minced ginger
2 Tbsp finely minced green onion

Method

In a small bowl combine ingredients until well blended. If necessary thin with a few tsp cold water. Store in refrigerator. Will keep for up to one week in fridge.

Friday night fair food

Friday night fair food

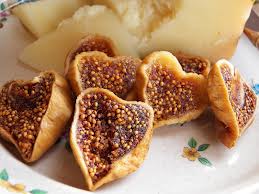
Pickled Fig, Creamy Cheese and Crunchy Nut Crostini

The happy figs at comfycooks.com

The happy figs at comfycooks.com


Inspired by Bon Appetit, but with much artistic license for slackers who will not likely track down Robiola cheese and will not make a special trip for pistachios. See Bruschetta Deconstructed for in-depth coverage on the topic.

Ingredients

12 slices ciabatta bread (or the toasts here)
1/2 cup red wine vinegar
2 Tbsp sugar
6 dried figs (or twice that depending on the size of fig.)
1/4 cup water
2 Tbsp pistachios, toasted and shelled (or almonds, walnuts or filberts)
1/4 cup extra-virgin olive oil
Robiola cheese (any soft brie-like cheese, or even cream cheese will work)

Method

Combine red wine vinegar, sugar, and dried figs with 1/4 cup water in a saucepan; bring to a simmer. Remove from heat and let sit until figs soften, about 30 minutes.
Halve figs lengthwise if small. Slice larger figs into several flat pieces.
Finely crush pistachios and combine with extra-virgin olive oil.
Grill bread slices (or use these toasts).
Smear room-temperature Robiola cheese onto warm toasts. Top with halved figs. Drizzle with pistachios and oil.

Bring it!

Store and transport figs and nuts in their own to-go containers, bring toasts in a ziploc bag and bring cheese in its original package. To make prep very easy pre-slice figs and return them to their liquid so they can steep in comfort.

The fig and nut combo is delish melted with sharp cheddar in quesadillas or on pizzas as an appetizer.