Tag Archives: healthy snacks

Crunch Time Tahini Granola

The internet is full of recipes that are made to look easy, but are a pain. This is especially true at the holidays where we are all looking for that holy grail food item—that thing to bring or give that is both delicious and memorable. Case in point, the Nutella puff pastry Christmas tree currently all over Instagram and so many other cleverly pieced-together videos. More often than not they lure you down the rabbit hole of something that may indeed be easy, but only after making it for a generation. And honey, we ain’t got no time for that during the holidays.

When I’ve tired of failed baking experiments I often go back to granola. In the pantheon of homemade treats—from this chocolate sauce that can be made in your sleep, to these GD chocolate dipped peanut butter balls (beware of anything that has to be rolled into individual balls! And/or dipped!)—granola is among the easiest. Not the cheapest, thanks to the precious nuts and honey/syrup, but the easiest. So, when I see easiest and granola together in one heading, I perk up.

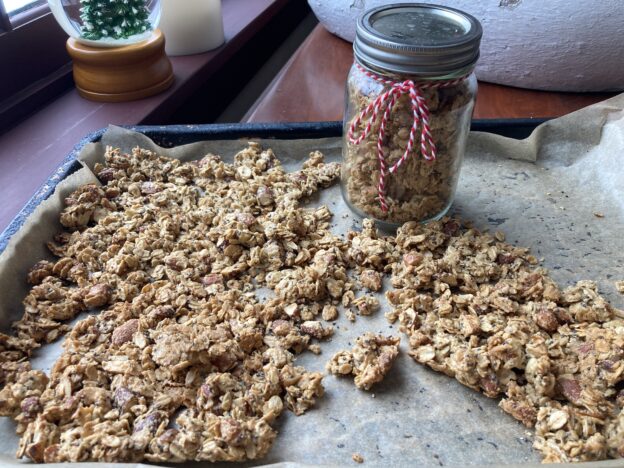
This recipe delivers on its claim. Of course the ease comes with a price. You’ll swap out some steps and ingredients by springing for the jar of tahini. And if you go with pistachios as written (I used roughly chopped almonds), they’re the priciest option. BUT, they also require zero chopping, bringing this recipe to Level 1 on the effort meter. You will be rewarded for your lack of work with a delicious, not-too-sweet, crunch-perfect granola and extra time on your hands.

As with every recipe there is a slight catch, something that keeps the trained monkeys from taking over production. The catch here is the step of spreading the thick granola mass evenly on the cookie sheet. I used little chopping motions with a rubber spatula. You do whatever it takes, and it does not need to be perfect—we’re just aiming for somewhat even thickness so the granola at the edges doesn’t burn up while the stuff in the center stays soft and cuddly.

I wish you success in all your experiments. No matter how they turn out you deserve a gold star and a chocolate kiss for trying.  

Easy Tahini Granola

From Jenné Claiborne via Food52 Genius Recipes

Prep time: 5 min
Cook time: 15 min

Ingredients

  • 1/2 cup (125g) well-stirred tahini
  • 1/3 cup (80ml) maple syrup
  • 1 teaspoon vanilla extract
  • 1/4 teaspoon fine sea salt
  • 2 cups (180g) old-fashioned rolled oats
  • 1/2 to 1 cup (60 to 120g) shelled raw pistachios (or another nut or pepitas)
  • 2 tablespoons chia seeds
  1. Stir everything together: Heat the oven to 350°F (175°C) with a rack in the center. Line a sheet pan with a silicone baking mat or parchment paper. In a large mixing bowl, stir together the tahini, maple syrup, vanilla, and salt with a silicone spatula until it’s smooth and evenly combined. Stir in the oats, pistachios, and chia seeds.
  2. Bake the granola: Spread the wet, sticky oats onto the sheet pan in a thin, even layer. Bake for 10 minutes, then, using oven mitts, take the pan out of the oven and stir the granola—this will help it finish baking evenly. Return the pan to the oven and bake until the granola is dry and golden brown, another 5 to 10 minutes. Keep a close eye toward the end to make sure it doesn’t start to burn at the edges.
  3. Eat, Store, Give: Let the granola cool completely to crisp up, about 20 minutes, before breaking it into clumps with your hands. Eat as one does with granola. Store in a sealed container at room temperature for a week or more if you are disciplined. Pack it up in mason jars or treat bags for giving.  

It’s crunch time!


Sabering champagne

Holiday Favorites: Stay Sane, Go Nuts, Be Happy!

Fluff up your marmots and break out all things sparkly, the holidays are here. This is the season for many things: fake fur, sequins, fizzy drinks, warm everything. This is not the season for experimentation. We’re keeping our heads above water here, which means sticking with what we know. tried and true meals that make us happy, and treats to give that make others happy.

Maple oat breakfast bread

With that in mind, in my own kitchen I’m revisiting whole lot of Bring It tried and trues. That means soups like Thai Coconut Corn Soup, or Sugar and Spice Squash Soup. And yep, that means a crock pot full of Chicken Taco Chili that feeds a crowd with about 6 minutes of prep. All of the above, of course, beg for People’s Choice Cornbread or No Knead Challah or a honkin’ slice of Maple Oat Breakfast Bread to dunk in there. That is, UNLESS dirt bread is your thing…you know who you are, you little hemp seed eating chia pets. I’m with you there.

You might be needing some holiday entertaining staples like pomegranate everything (along with a genius pomegranate wrangling technique). What’s winter without fondue, and the easiest in the world Guinness Fondue at that? And what’s “How the Grinch Stole Christmas” without snacks? I highly recommend a batch of Nootch Popcorn or a bowl of Hail Mary Coconut.

As far as gifting and hostess offerings, you will never go wrong with crackle and its intriguing, slightly sophisticated dark cousin, pretzel and beer Crackle 2.0. And cookies? Yeah we’ve got those, basics like my faves—champion chip cookies—as well as totally slacker kiss my crust cookies, made from refrigerated pie crust and whatever chocolates you have around. If you need to scare up a snowstorm, or a reason to start a sweet family tradition make up a snow ghost pie.

Snow Ghost pie ad

And lest this be a pure re-hash of deliciousness we have an actual new recipe. I realize this blog has a somewhat extensive nut treatment, including honey thyme walnuts, spicy rosemary maple walnuts and an entire holiday nut anthology. But it turns out you really do need one more way to make roasted almonds. These are very similar to ginger glazed almonds (see anthology above), but without the ginger and with a coating of sesame seeds. You can choose a mix of sweeteners for your preferred flavor dimension (honey and sesame were pretty much born for each other), but for the best texture and glaze use at least some brown sugar.  

We’re talking nuts here, not rocket science, so be bold and mess around with flavorings, spices, herbs, types of nuts etc. Above all, enjoy the madness of the season and, like James says, remember “Shower the people you love with love.”

Sesame Almonds

Makes 3 1/2 cups almonds

Ingredients:

  • 3 tablespoons packed light brown sugar (or sub out up to 2 tablespoons with honey or maple syrup)
  • 1 tablespoon coconut oil (or your healthy oil of choice)
  • 1 teaspoon kosher salt
  • 1 teaspoon paprika
  • 1 teaspoon rice vinegar
  • 1 pound raw almonds (a scant 3 ½ cups)
  • 2 tablespoons (or more) white sesame seeds

Method:

Arrange a rack in the middle of the oven and heat to 350°F. Line a rimmed baking sheet and 2 wire cooling racks with parchment paper and set aside.

Pour the almonds into a mixing bowl. (If you keep your nuts in the freezer, warm them up in the oven for a few minutes first). In the microwave or on the stovetop stir together the brown sugar/honey/syrup, oil, salt, paprika, and vinegar over low heat. Pour mixture over the almonds and toss until the almonds are thoroughly coated. Transfer the almonds to the prepared baking sheet and spread into an even layer.

Bake, stirring every 5 minutes, until the almonds are brown and fragrant, 12 to 15 minutes total. They should be a rich brown color and just start to smell toasted as you open the oven door.

Sprinkle the sesame seeds over the hot almonds and stir to evenly distribute the seeds. This is where I go a little overboard, and try to get as many sesame seeds as possible to coat the almonds. Divide the nuts between the 2 prepared cooling racks and use a spatula to spread the nuts out so they do not touch. Cool completely, about 30 minutes.

Break apart any nut clusters that are stuck together if needed.

Bringing It:

Pour these babies into a treat bag, jar, tin or a cardboard takeout container lined with festive tissue paper, and store them in the fridge until you are ready to give them or devour them.


Brussels Sprouts Chips

Mtn Roots Food truck and brussels sprouts chips

Want some taro fries with that? Localvore ski bums rejoice at the Mtn. Roots truck in Squawllywood.

You know you don’t get out much when your culinary discoveries come from a food truck at a ski area. Granted, this was a California ski area, and the truck was a tricked out Mystery Machine called “Mtn Roots.” But still. On a recent visit home to Squaw Valley my sister snagged “us” some crispy Brussels sprouts chips off the truck and a new addiction was born. And no, she did not get anywhere near her fair share.

That was a month ago, so I was beyond psyched when a post for these very delicacies came to me via Bevin Wallace’s Real Life Delicious blog. RLD is a great site for fuss-free healthy eating, and Bevin is in to the paleo thing now, so its all healthy and paleo, which is totally overachieving. But as long as it tastes good I’m good with it. If you live in the Denver area get on over to Bevin’s kitchen classes. If you don’t, hunker in for some Beviliciousness right now.

Brussels Sprouts chips, New England style

Brussels sprouts chips, New England style

There are a few things to love about this recipe, beyond the sheer yum factor. First Bevin tells you exactly what types of tools and containers to use. Less guesswork. More direction. All good. As you are trimming your sprouts you may be thinking, “Boy this is a lot of work for one snack,” until you realize that you are actually doing the prep work you have to do anyway for Brussels sprouts, which brings me to the next stroke of recipe brilliance here—it’s two-fer! You get ready-to-roast Brussels sprouts AND some yummy snacks out of the deal. (Who loves ya baby? I would never ever make you work too hard.)

I’d say the kids loved them but that would be overselling because only one kid was around. But he is a bit of a Russian judge of my food and I had to beg him to leave some for his Dad. (I ate them anyway because when  Dad arrived he wasn’t quick enough.)

And now, here it is— Groovy California ski area food right in your own kitchen. My only suggested tweaks would be to up the temp to 375, expect them to take at least 15 minutes, and make a real effort to get those suckers in only one layer so they really crisp up. Now dig in!

Ingredients

1 bunch Brussels sprouts (about 2 lbs)
1 tbs. olive oil
Pinch of salt

Method

Preheat the oven to 350 degrees. Start by getting out a cutting board, a bowl, and a lidded storage container. Trim the ends off the Brussels sprouts and then remove the darker-green outer leaves; some will fall off when you cut the ends, some you might need to pull off. Put the leaves in one bowl; cut the remaining sprouts in half or quarters and put them in the lidded container. When you’re done, put the container of trimmed sprouts in the fridge for later use.

Toss the leaves with the oil and salt (go easy on the salt; it’s easy to get too much) and spread them in a single later on a baking sheet lined with parchment paper (you might need to do this in two batches). Bake for 10 mins. and check to see if they’re done to your liking. They should be somewhat crispy and brown on the edges. If not, rotate the pan and bake another 3-5 mins., watching closely so they don’t burn. When they’re done, lift the parchment with two hands and use it as a spout to pour the delicate chips into a bowl.

Now, try to eat just one.

Note: When you want to roast your trimmed sprouts, just toss them with some olive oil and salt, spread them on a baking sheet and pop them into a hot (400 or so) oven until they look awesomely roasty.

California-green-dreaming

Who said it ain’t easy being green?


Endurance Crackers

Caponata with Endurance crackers fresh from the cooler.

Caponata with Endurance crackers fresh from the cooler.

Because it is fall, and traditionally (for me) a time to cleanse (curse you watermelon sangria!), I was planning to do a cleans-y post. Mostly I needed a break from apple mania and an excuse to share the Endurance Crackers that I started making this summer and that, it turns out, are something of an Internet sensation. As far as I know they originally came from an excellent vegan site called Oh She Glows. I am very un-vegan but I love vegany things so naturally these seedy babies looked right up my alley. I made them a bunch this summer, and shared them around to universal approval from kids and adults, vegans and carnivores.  They are full of good stuff and free of all the usual perps—gluten, nuts, grains, sugar.

For a fleeting moment I even thought they would pass the paleo test.  But noooooooooo. Apparently chia seeds—like my beloved chickpeas and black beans—don’t make the cut. The little wonder food, secret pellets of the Incas, bearer of magical running power has a husk and therefore it’s a no-go with the cave man clan. But chia seeds are key to the whole gig because they have this crazy power of gelling things together which gives the simple mix a way to morph into a legit cracker.

Long intro. Here is the recipe, with advice and tweaks from myself and other cybercrackerphiles. There is even a sweet variation below (thank you Rowdy Baker) that is pretty tasty.  And paleo peeps, I have failed you again… unless…maybe…click here and see.

Original Endurance Crackers from Oh She Glows

Yields about 22-24 large crackers

Ingredients

½ cup chia seeds
½ cup sunflower seeds
½ cup pepita/pumpkin seeds
½ cup sesame seeds
1 cup water
1 large garlic clove, finely grated (I just used my garlic press.)
1 tsp grated sweet onion
¼ tsp. kosher salt (Crazy salt is darned good too.)
Olive oil for brushing, if desired

Optional: Herbamare, kelp granules and your choice of additional spices and fresh herbs to taste. (I’ve never jumped on the kelp wagon but have tried cumin, paprika and curry as well as chopped fresh rosemary, dried oregano, cracked pepper. You get the picture. One person adds a puree of six or so dates and cinnamon for a sweet version.)

Method

Preheat oven to 325° and line a large baking sheet with parchment paper.

In a large bowl, mix the seeds together. In a separate small bowl, mix the water, grated garlic and grated onion. Whisk well.

Add the water mixture to the seed mixture; stir until thick and combined. Season with salt and optional spices/fresh herbs.

Spread the mixture onto the prepared baking sheet with the back of a spoon (or your hands) until it’s less than ¼” thick.* It may be little runny, but just keep smoothing. If it becomes too thin in parts, just patch them up.  Bake for 30 minutes. Remove from oven. Loosen with a long flat spatula or pizza peel, cover with another greased or parchment lined cookie sheet, and invert. Alternatively cut into smaller squares and flip. Don’t worry if it breaks in a few places. They’re crackers, right?

At this point, you can deeply score the surface into whatever size crackers you like (diamonds are shmancy. Rectangles and squares are perfectly fine.) This is also when you can go pro and brush the surface lightly with oil to make them nice and crispy.

Bake for another 30 minutes, watching closely after about 25 minutes. The bottoms with be lightly golden in color. Allow to cool completely on the pan and break into pieces. Store in a covered container. They freeze well too.

*Newbie cracker maker? Make it even easier on yourself by using two baking sheets and forming smaller, easier to flip rectangles.

Sweet Version, care of The Rowdy Baker

½ cup raw sunflower seeds
½ cup raw sesame seeds
½ cup raw pumpkin seeds
½ cup raw chia seeds
1 tsp kosher salt
1 cup water
5 ounces dark (at least 70% cocoa) chocolate, finely chopped
1 cup raisins (optional)

Method

Prepare as above through final cooking and then:

Remove from oven and sprinkle evenly with the chopped chocolate. Wait a few minutes and then spread with a flat spatula. Sprinkle with raisins if desired.

When the chocolate has hardened (you may refrigerate it if you wish, to hurry it along) break into pieces and store in an airtight container.