Cranberry Buttermilk Scones

Idaho cobs

Scones, coffee and the first rays of sun. It doesn’t start out better than this. 

Oh the weekend. It is so full of promise, especially if you start it with hot-from-the-oven scones. It can be darned good with a box of Life cereal too, but why not bust out the extra credit points when you can?

These scones first caught my attention in a spiral bound Vermont community cookbook, and mostly because they did not involve eggs. The hacks I have made include using the food processor to cut the butter into the dry ingredients and blowing off the glaze altogether. I am sure the glaze is good, and that working the dough like Laura Ingalls Wilder has some merit but really, do we need overkill? Let me rephrase…do we need overkill in our scones?

Make these, blow off the cereal and enjoy the weekend.

 Ingredients

3 cups King Arthur Unbleached All-Purpose Flour
1/3 cup plus 2 tablespoons sugar, divided
2-1/2 teaspoons baking powder
3/4 teaspoon salt
1/2 teaspoon baking soda
3/4 cup cold butter
1 cup buttermilk
1 cup dried cranberries
1 teaspoon grated orange peel
1 tablespoon milk
1/4 teaspoon ground cinnamon

Method

In a bowl, combine the flour, 1/3 cup sugar, baking powder, salt and
baking soda; cut in butter until mixture is crumbly. Stir in the
buttermilk just until combined. Fold in the cranberries and orange
peel.
 
Turn onto a floured surface; divide dough in half. Pat each half
into a 6-in. circle. Cut each circle into six wedges. Separate
wedges and place 1 in. apart on a lightly greased baking sheet.
Brush with milk. Combine the cinnamon and remaining sugar; sprinkle
over scones. Bake at 400° for 15-20 minutes or until golden
brown. Remove from pan to a wire rack. Serve warm. Yield: 1 dozen.

Jicama Slaw

Add a little Jicama to your repertoire this spring!

Add a little Jicama to your repertoire this spring!

How many of you (I’m not counting you, Californians) first pronounced jicama with a “J”?  I know I did and I was quickly corrected.  It’s HEE-KAH-MA.  You only make that mistake once!  This edible root resembles a turnip.  It has a thin brown skin and crisp, juicy, white flesh that is mild in flavor. Think of it as a cross between a water chestnut and a pear.  To prepare, remove the skin with a vegetable peeler and then cut the flesh into cubes, strips, or shred.  You can cook it or serve it cold.  And, big bonus here, it doesn’t become soggy or brown after cutting so you won’t have to worry about advance prep.  Serve this slaw with Jerk Ribs, on a fish taco, in sushi, in stir fries, or as a side.

Below is a recipe for Jicama slaw.  This side dish has a great kick and you’ll be super hip with jicama which is all the rage these days!

Ingredients

8 oz jicama, peeled and coarsely shredded
1 medium carrot, coarsely shredded
1 small red pepper, stemmed, seeded, and thinly sliced
1 small red onion, halved lengthwise and thinly sliced
2 Tbsp extra virgin olive oil
2 Tbsp fresh lime juice
1/2 tsp sugar
1/4 tsp cumin
1/4 tsp kosher salt
1/4 tsp fresh ground black pepper

Method

Mix jicama, carrot, pepper and onion in a bowl.  Whisk olive oil, lime juice, sugar, and spices in separate bowl.  Pour dressing on vegetables. Serve.

Bread of Life, sliced

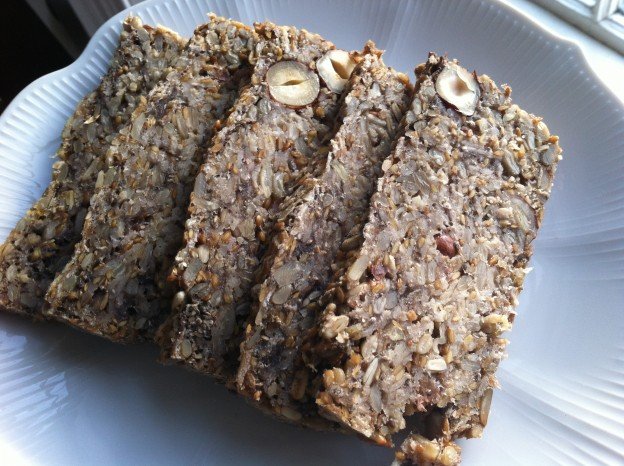
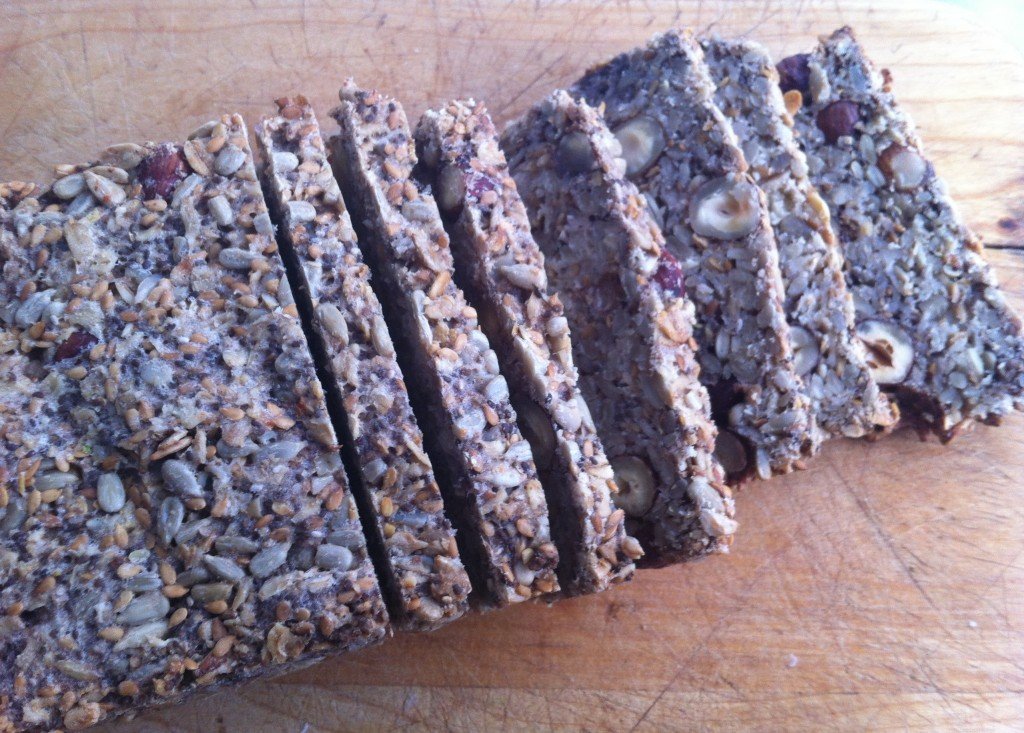
The Bread of Life, or “That’s Life” Bread

Elsewhere on the Internet (namely on My New Roots) this seedy, flourless, unleavened, barely sweet and totally nutrition-packed bread is called the “Lifechanging Loaf of Bread.” That is quite a claim and one that begs to be debunked, particularly by my own family, some of whom refer to this as my “dirt bread.”

What can I say? Haters gonna hate. That’s life; hence, the abbreviated name for this bread. But for the right person—and you know who you are—this is, if not lifechanging, at least addictive. It relies on oats, chia seeds and psylium husks to hang together and get its breadiness. Whole hazelnuts give it texture and a touch of maple syrup makes it all just right. Toast it, or not, and top it with butter, honey, cheese, caramelized onion, roasted veggies or pretty much anything and give yourself a big fat gold star for healthy eating. Go you!

I’ll leave it to Sara Britton to answer any questions about substitutions and how in the heck she came to experiment with psylium husks. I will tell you, however, to find them in CVS with the Metamucil. Be sure to get the unflavored variety, unless you want your bread to actually taste like Metamucil.

A few other notes: She uses coconut oil or ghee (which I can’t pronounce let alone find) but you can also use butter; I add chopped dates for some chewiness and sweetness; she uses a flexible loaf pan for both mixing and baking. I don’t have one of those so I just used a regular loaf pan and lined the bottom with parchment paper to ease the first turnout (totally worth the effort, unless you want a bonus botched loaf to snack on); finally, I lived large and mixed it all in a bowl, which took away the stress of mixing in tight spaces, which I hate.

And now, just to go on record, for me this is absolutely addictive and perhaps even lifechanging, on a slow day that is.

That’s Life Bread

From My New Roots
Makes 1 loaf

Ingredients

1 cup / 135g sunflower seeds (or 1/2 cup each pumpkin seeds and sunnies)
½ cup / 90g flax seeds
½ cup / 65g hazelnuts or almonds, roughly chopped or sliced*
**½ cup dried dates or dried fruit of choice, roughly chopped 
1 ½ cups / 145g rolled oats
2 Tbsp chia seeds
4 Tbsp psyllium seed husks (3 Tbsp. if using psyllium husk powder)
1 tsp fine grain sea salt (add ½ tsp. if using coarse salt)
1 Tbsp maple syrup
3 Tbsp melted coconut oil or ghee (or butter)
1 ½ cups / 350ml water

*update: sliced almonds are my go-to for ease of both prep and slicing
**next update: Dates or dried fruit are optional but now an essential part of my dirt bread experience.

Method

1. In a flexible, silicon loaf pan (or a parchment lined regular loaf pan), combine all dry ingredients, stirring well. Whisk maple syrup, oil and water together in a measuring cup. Add this to the dry ingredients and mix very well until everything is completely soaked and dough becomes very thick (if the dough is too thick to stir, add one or two teaspoons of water until the dough is manageable). Smooth out the top with the back of a spoon. Let sit out on the counter for at least 2 hours, or all day or overnight. To ensure the dough is ready, it should retain its shape even when you pull the sides of the loaf pan away from it it.
2. Preheat oven to 350°F / 175°C.
3. Place loaf pan in the oven on the middle rack, and bake for 20 minutes. Remove bread from loaf pan, place it upside down directly on the rack and bake for another 30-40 minutes. Bread is done when it sounds hollow when tapped. Let cool completely before slicing (difficult, but important).
4. Store bread in a tightly sealed container for up to five days. Freezes well too – slice before freezing for quick and easy toast!

Life Bread by the loaf

Living life bread, a slice at a time.

Bring It

As mentioned above, for the right person this is the perfect host/hostess gift. If you’re bringing it to a mixed crowd you can always cover your bases (and maximize fans) by adding a loaf of easiest french bread ever or maple oat breakfast bread

Jerk Ribs

What a way to kick off the grilling season!

What a way to kick off the grilling season!

Okay, not the post you would expect from a vegetarian, but my meat-eating boys love these ribs.  They ask for them repeatedly.  And every time I serve to guests or bring anywhere, I get asked for the recipe.  These puppies are good (so I’ve been told!).  Plus, what is easier than mixing some spices in a jar, rubbing it onto the meat, and throwing the whole mess in the oven or onto the grill. It really doesn’t get any easier than that.  You can prep these ribs in about 5 minutes and that is it.

So, this post is about as quick and easy as the recipe – enjoy!

Ingredients

2  lbs pork loin back ribs
1 Tbsp dried minced onion
1 1/2 tsp onion powder
2 tsp thyme
1 tsp salt
1 tsp allspice
1/4 tsp nutmeg
1/4 tsp cinnamon
1 1/2 tsp sugar
1 tsp black pepper
1/2 tsp cayenne

Method

Preheat oven to 350 degrees or preheat grill to medium low. In small jar with tight fitting lid, shake together all dry ingredients until well mixed.  Rub dry mixture onto all surfaces of ribs.  Make a container for ribs by taking double layer of heavy duty foil just large enough to hold ribs; crimp edges to make 1” sides. Place ribs on shallow baking pan with rack and bake for 1 1/4 to 1 1/2 hours. Or place on grill for same amount of time. Cut into 1 rib portions. Serve!

Balsamic Black Beans

Balsamic black beans

Fiesta- It’s always the right thing to do. And frijoles Italiano are the right thing to bring.

Let’s be honest. It is never too early to prepare for Cinco de Mayo. If you haven’t perfected your margs, your guac, your mango salsa, your chicken enchiladas there’s still some time. But you’ve got to get on it! I’m going to take on the black bean situation for you and solve it the easy way.

Buy yourself a can of Pastene black beans (playing it incognito in the Italian section), turn the can around, and make the recipe that’s always been right there. It’s easy, fresh and the balsamic gives it a zing that makes these beans more abondanza than just plain bueno. Ok, I have no idea if abondanza is even a word, but they used it in an Olive Garden commercial so I’m going with it.

These beans are great as a dip for chips or sturdy veggies, as a filling for quesadillas, as a component of lunch deconstructed, as a topping for huevos or as something to put on your spoon as you stand in front of the fridge craving protein. By the way if you see limes on sale, go long! I hear they are in short supply in Mexico and you’ll be needing lots of those tangy babies in the weeks ahead.

 Ingredients

1 15.5 oz. can black beans
3 Tbsp olive oil
1 medium onion
1Tbsp balsamic vinegar
1/2 jar (7 oz. size) roasted red peppers, diced
1/4 cup (or more) chopped celery
salt and pepper to taste
dash of oregano
splash of maple syrup (optional, unless you are in New England, then mandatory)

Method

Saute onion and celery in olive oil until clear. Add roasted peppers and cook for a very short time. Add beans (with liquid), vinegar and seasonings. Simmer for 5-10 minutes.

Pastene black beans

Not so secret Pastene family recipe

Pastene black beans

Black Beauties


Polenta with Kale, Balsamic, & Goat Cheese

Stir, stir, stir for a creamy consistency

Stir, stir, stir for a creamy consistency

My friend Teresa is not only a great cook, but she is also my food emergency hotline. If I’m in the kitchen and things are going awry, it is Teresa I get on the line.  She can talk me through any kitchen disaster with her simple tips and tricks.  Teresa has been cooking Italian and teaching Italian for many years.  She is brilliant in the kitchen no matter what the meal, and truly a shining star when it comes to Italian cooking. Teresa wrote a book called Pass the Polenta and so I thought it only appropriate dedicate this post to her.

As Teresa says,Food is not merely about calories and minimum daily requirements and metabolic pathways.  At its very heart food is about people.” 

I love that quote. At Bring It blog, we are also all about people. Who wants to create all this great food and not have people to share it with, right?  So, bring some polenta and enjoy with friends.  I topped this recipe with sautéed kale, goat cheese, with a balsamic drizzle, but you can top with anything such as ratatouille, chicken stew, roasted vegetables, and the list goes on.

Il cibo è molto meglio con gli amici!

Savory Polenta

Ingredients

2 Tbsp olive oil
1 medium red onion, finely chopped
2 cloves garlic, finely minced
2 cups vegetable broth
2 cups water
1 cup coarse ground cornmeal
3 Tbsp unsalted butter (I use Earth Balance butter substitute)
1 1/2 tsp salt (I cut back on this amount because the Earth Balance butter substitute is salted)Couple grinds of fresh ground black pepper
1/4 cup fresh grated Parmesan cheese

Method

Preheat oven to 350 degrees.

In large, oven-safe saucepan, heat olive oil over medium heat.  Add onions and salt and sauté until onions are soft and translucent, approximately 4-5 minutes. Reduce heat to low, add garlic and sauté for 1-2 minutes. Be careful not to burn garlic.

Turn up heat to high and add vegetable stock and water. Bring to a boil. Gradually add cornmeal while continually whisking. Once all cornmeal has been added, cover the pan and place in oven for 35-40 minutes, stirring every 10 minutes to prevent lumps from forming.  Once mixture is creamy, remove from the oven and add butter, salt and pepper to taste.  Gradually add Parmesan, mix completely. 

Serve as is or pour into 8″ x 8″ or 9″ x 9″ baking pan coated with cooking spray.  Place in refrigerator to cool completely.  Once set, re-heat in 350 degree oven until warmed through, approximate 30 minutes.

Balsamic Drizzle

Ingredients

1 cup Balsamic vinegar
1/4 cup honey

Method

Bring Balsamic vinegar and honey to a boil in a small saucepan.  Once boiling, turn burner to low and let simmer for approximately 10 minutes.  Sauce should reduce by about half or until desired thickness. 

Sautéed Kale

Ingredients

1 large bunch of kale
3 Tbsp olive oil
Salt & Pepper 

Method

Heat olive oil over medium heat in large saucepan.  Turn down heat to medium-low, add kale, salt and pepper.  Sauté kale until wilted and soft, approximate 7-8 minutes.  Turn off heat.

Final Preparation

Take warm polenta out of oven, place kale over top of polenta and drizzle with Balsamic sauce.  Crumble goat cheese on top, cut and serve.  Yum, yum, yum!

Makes for a warm comforting side dish

Makes for a warm comforting side dish

Bombproof Mac and Cheese

Bombproof mac and cheese

Still chili? A little cranky even? Crunchy-topped mac and cheese to the rescue!

Here it is, the end of March, and we’re still in search of comfort food. Well, I for one will take depressing rain at the end of March over depressing rain in February any day! All well and good, but it leaves us with depressing rain. Which leaves us with a need for mac and cheese. My kids would argue that this need is equally urgent in any season. Their gold standard for homemade mac and cheese involves the crunchy breadcrumbs on top and absolutely no green of any kind. Boys, as long as we hold the parsley your ship has come in.

This recipe comes straight from a fellow ski racer Mom in Colorado who frequently finds herself with a houseful of hungry teenagers. As she says, “The true beauty of this is that two ski race dads dumped the whole casserole in a crock pot at Winter Park and served it for lunch with a ladle into plastic cups—genius!” Dads in a ski lodge dishing out hot food into plastic cups? I am so in! Thank you Tania (who clearly knows that parsley can be a deal killer) and I hope you are seeing some sun out in Colorado.

 And now, we bring you…

Bombproof No-Boil Mac and Cheese   

From Bon Appetit, by way of our Rocky Mtn correspondent Tania

Makes 8 servings

Ingredients

1/2 cup butter divided
1/4 flour
3 cup whole milk
3 cups water
1 Tbsp kosher salt
1 tsp pepper
1 lb elbow mac (or bigger tubes like rigatoni, medium shells, etc)
2 cups shredded cheddar divided
2 cloves garlic chopped
1 cup panko
2 Tbsp chopped flat leaf parsley (never used it)

Method

Preheat oven to 400.

Melt 1/4 c butter in a large saucepan over med-high heat. Add flour whisking constantly for 1 min. Whisk in milk and 3 c water and bring to a boil. Reduce to a simmer, cook, whisking often, for 10 min.  It should be a thin glossy sauce. Add salt and pepper. Remove sauce from heat.

Toss pasta and 1 1/2 cups of cheese in a 3 quart baking dish.  Pour sauce over pasta.  It should be submerged.  Don’t stir.  Cover with foil and bake 20 min.

Meanwhile, melt 1/4 c butter in large skillet over med heat.  Add garlic, panko and parsley and toss to combine. Season with salt and pepper.

Remove foil from dish.  Sprinkle with remaining cheese.  Cover with panko mixture.
Bake, uncovered, for 10 more minutes or until pasta is tender, edges are bubbling and top is golden brown.

Mint Chocolate Milk

Mint chocolate milk

The first of many satisfied and non-paying customers for mint chocolate milk.

Oh to hell with it. I know Sue just posted the ridiculously decadent Peanut Butter Krispy Fudge Bars, and that we all need something super green and good for us right now. But it’s still snowing outside, and when I made this batch of chocolate milk syrup my son took one sip and said, “MOM! You should sell this!” to which I responded, “Ok, that’ll be one dollar please.” He slurped it down without a flinch.

The next day his friend came over and had at it with much approval. So, I made another batch and the rest of the family got wind of it so that, too, disappeared. By the time I was making my third batch I had the bright idea of doubling it. (Yeah, yeah…I’m not the quickest bunny). But the point is, this stuff is good! And it’s probably way better than a green smoothie for washing down a Peanut Butter Krispy Fudge Bar.

Strangely enough, this too (like the crazy-good bars) comes from Joy the Baker. I guess I am fixated on joy right now. All joys—the person, the state of being, the act of mixing chocolate in milk, which is always pure joy.

I promise—the smoothies will come in due time, as will spring. But for now and until then, let there be plenty of chocolate. Incidentally, I have not received one dime from my children, but I think they love me more than they did before this all started. 

Mint chocolate milk

A nice, cold, swirling glass of mint chocolate milk–the antidote for a late spring.

Mint Chocolate Milk

Makes about 1 1/2 cups chocolate sauce

Ingredients

3/4 cup light brown sugar, packed
1/4 cup granulated sugar
1 cup unsweetened cocoa powder (I have used natural, Dutch process and a combo of both)Pinch of salt
1 cup water
1 Tbsp pure vanilla extract (real,real,real!)
1/2 tsp pure peppermint extract (did I mention real?)
Whole or reduced fat cow’s milk, soy milk, or almond milk

Method

In a medium saucepan, whisk together sugars, cocoa powder, and salt.  Place saucepan over low heat and add water.  Whisk until thoroughly combined and no lumps remain.

Bring the chocolate mixture to a low boil, whisking frequently. Whisk for 8 to 10 minutes, until mixture is thickened.

Remove from heat and whisk in vanilla and peppermint extracts.  Allow to cool to room temperature.

Transfer to an airtight jar and refrigerate until ready to use.

To make chocolate milk, stir together 2 tablespoons of chocolate syrup per one cup of cold milk.  Stir and enjoy!

chocolate milk vs green smoothie

Chocolate milk vs green smoothie. Two yummy earth tones, two forms of therapy. Which would you choose?

Peanut Butter Krispy Fudge Bars

Sugar high about to ensue!

Sugar high about to ensue!

This dessert is insanely good.  I am not kidding! It is a three-tiered bar starting with a Rice Krispy treat on the bottom.  Then a peanut butter fudge layer in the middle.  Lastly a chocolate fudge layer on top.  You will be addicted in no time.

I haven’t eaten or made Rice Krispy treats in ages, so it was fun to get my hands sticky with that part of the recipe.  I took few bites as I worked and yum, it was good.  Then I moved onto the peanut butter fudge layer which was dangerous for me give my love of peanut butter.  And last but not least, the chocolate topping was a great way to finish off the recipe and finish my sampling as I worked.

Despite the 3 layers, it is really easy.  You just stack it up, let it sit, and in no time, you are on a sugar high to beat the band.  Bring these to a friend’s house, a school event, or anywhere you need to bring a dessert.  I got this recipe from Joy the Baker.  As she says in her blog, “Give to your friends, they will thank you, sort of”.

Rice Krispy Treat

Ingredients

3 Tbsp butter
1 10 oz package marshmallows (approximately 40)
6 cups Rice Krispy cereal (or any puffy rice cereal)

Method

1) Melt butter in large saucepan over medium heat.  Add marshmallows and stir constantly until marshmallows are melted.  Remove from heat.
2) Add Rice Krispy cereal and stir to mix completely.
3) Use spatula coated with cooking spray or butter to press into 9” x 13” baking pan.
4) Let cool while making peanut butter fudge.

Peanut Butter Fudge

Ingredients

1 cup butter
1 cup peanut butter (I used Teddies Natural Smooth but any kind of peanut butter will work)
1 tsp vanilla
1 pound powdered sugar 

Method

1) Microwave butter and peanut butter for 2 minutes on high.  Remove from microwave, stir, and microwave for 1 more minute on high (you might need to microwave for longer depending on the strength of your microwave – you want the butter to be melted and for it to stir into a smooth sauce when done).
2) Add vanilla and powdered sugar and stir to mix completely. Pour over Rice Krispy treats and spread evenly.  Put in refrigerator to cool while you make the chocolate fudge. 

Easy Chocolate Fudge

Ingredients

2 Tbsp butter
2/3 cup evaporated milk
1 2/3 cup sugar
1/2 tsp salt
2 cups mini marshmallows
1 1/2 cups semisweet chocolate chips
1 tsp vanilla

Method

1) Combine butter, milk, sugar, and salt in small saucepan over medium heat.  Bring to a boil and cook 4-5 minutes, stirring constantly.  Remove from heat. 
2) Stir in marshmallows, chocolate, and vanilla.  Beat by hand for about 1 minute until marshmallows and chocolate are melted and mixture is thoroughly combined.
3) Pour over peanut butter mixture and spread evenly.
4) Place in refrigerator to cool completely and set.
5) When ready to serve, remove from refrigerator and bring to room temperature.  Cut into small pieces and enjoy!   


Melted Mellows

Melted Mellows

Smooth and creamy!

Smooth and creamy!

Chocolate fudge

Rich blobs of chocolate fudge as a topper

Clean Livin’ Edamame Citrus Avocado Salad

edamame-citrus-avocado-salad

Bring on the sun, the citrus, the color. Hello Spring, goodbye scurvy!

I was going to riff about the psychically curative powers of the Shamrock Shake yesterday, but if you know anything about McDondald’s supply chains, that ship has sailed. After St. Patty’s Day the shakes are only available on a hit and miss basis until each outlet runs out. But keep asking through the month–you may get lucky!

The intended post was actually going to be about grown up shamrock shakes, aka green smoothies. So that’s coming at you soon, in a version that is entirely drinkable thanks to some trial and error and the eventual abandonment of expensive hard to clean juicers. Yeah baby, something to live for.

In the meantime let’s stick with the green theme. In fact, we need color all the way around right about now…big time…which makes this salad from Joy the Baker the perfect candidate. Fresh, colorful, crunchy, juicy, healthy, easy to make and easy to bring. It’s got it all. Except for bacon, which probably would taste darned good in it too. But let’s give the Vegans a shout out and run with it as is.

Note: This says it serves two, but it serves more as a side salad, and if you double up on ingredients there will still be plenty of dressing.

Note Part Deux: If you want to be pro about segmenting citrus check out the Kitchn’s  How to Segment Citrus. If not just peel, cut and be happy.

Clean Livin’ Edamame Citrus Salad

serves 2

Ingredients

About 2 cups leafy greens (I used arugula. Remember–just love the one you’re with)
1 grapefruit, segmented
1 blood orange, segmented (Cara Cara oranges rock as well)
1 cup shelled edamame
2 celery stalks, sliced
1 small (or half of a large) ripe avocado, peeled and sliced

For the Dressing

3 tablespoons finely diced shallots
1 tablespoon honey (for vegans substitute a bit of agave)
1 tablespoon dijon or whole grain mustard
2 tablespoons apple cider vinegar
1/4 cup plus 1 tablespoon olive oil
sea salt and fresh cracked black pepper

Method

In a medium bowl, combine all of the salad ingredients:  greens, citrus segments, edamame, celery, and avocado.

In a small jar with a tight-fitting lid combine shallots, honey, mustard, vinegar, olive oil, a pinch of salt, and a few pinches of pepper.  Place the lid on the jar and shake it up until the mixture is emulsified. Taste the dressing and season to taste, adding more salt, pepper, or acid as necessary.  Pour the dressing (as much as you’d life) over the salad.  Sprinkle with salt and pepper.  Enjoy immediately!

Bonus recipe

Shamrock Shake

Shamrock Shake. Therapy in a cup.

Homemade Shamrock Shake

thanks to Epicurious and Paul B

Ingredients

1 1/2 cups vanilla ice cream
1/2 cup whole milk
10 drops green food coloring
1 teaspoon peppermint extract
Whipped cream (optional)
1 maraschino cherry

Method

In a blender, combine the vanilla ice cream, milk, green food coloring, and peppermint extract, and process until smooth, about 30 seconds. Pour the shake into a glass and top with the whipped cream and maraschino cherry.