Category Archives: Start it up

Furikake Fireworks Popcorn

Weird as hell? Yes. Delicious? Yes, yes and more yes!!!

Weird food on the weekend. It’s a thing. Ok, maybe it’s not a thing, but it’s a thing this weekend if you make this. Spoiler alert: you won’t be sorry! You will, however, have to get a few things you might not have in your pantry. And you will have to suspend your disbelief that this bizarre mix of ingredients can combine to make a snack that is not only edible but also addictive.

Now for a little background. I’ve been meaning to make this ever since I saw it on Joy the Baker nearly three years ago, but I got stuck at Furikake—both the pronunciation and the procurement. As for pronunciation, say Foo-ree-kah-kay, and you are close enough. Say furry cocky and you are either a teenage boy or an adult who can’t help yourself. You know who you are.   

As for procurement, Furikake must be having its moment because the day I finally broke down and got it on Amazon, I found it at our awesome Coop. Only later did I discover that there are several flavors of furikake. Mine from the Coop was yasai fumi— “vegetable” flavor.” The yet-to-be used one from Amazon—Nori Komi—is seaweed flavor. Scary? A little.

Honestly, even harder to find than Furikake were the Corn Pops. Props to the Coop for taking the high road and not carrying Corn Pops, but in this case it sure would have helped. I considered buying two packs of mini cereals at the mini mart just to cobble together the cup of Corn Pops but dang—that’s a lot of surplus Fruit Loops and Apple Jacks.

On to the recipe. You’re going to cook up some bacon—good and crispy like you mean it. You’re going to chop it up fine. You’re going to make your own kettle corn—in your Whirly Pop, your big covered pot or your cracked Mickey Mouse popcorn maker. You’re going to brown some butter. Then you’re going to marry it all together with some additional weirdness including chopped up dried pineapple, corn pops and the precious furikake. And you’re not going to substitute anything for anything, because Joy said not to. After seeing this popcorn disappear with both kids and adults, I trust her on this.

So here you go. I hope this brings you and your people joy and weirdness this weekend.  

Roy Choi’s Furikake Kettle Corn

Ingredients

For the Kettle Corn

  • 3 tablespoon canola oil
  • 1/4 cup corn kernels
  • 1 tablespoon granulated sugar
  • salt to taste

For the Mix

  • 4 heaping cups kettle corn
  • 1 cup Corn Pops (the cold cereal)
  • 2 tablespoons furikake, plus more for topping if desired
  • 1 teaspoon red pepper flakes
  • pinch of cayenne pepper
  • 3 tablespoons finely chopped dried pineapple
  • 3 tablespoons finely chopped crisp bacon
  • 4 tablespoons unsalted butter, melted and browned
  • 2 tablespoons minced chives

Instructions

  1. To make the kettle corn, in a medium saucepan with a tight-fitting lid (or your weapon of choice), heat the canola oil over medium heat. Add the corn kernels and sprinkle with granulated sugar. Place the lid over the pan, keeping the lid slightly ajar. 
  2. Allow popcorn to begin popping. Once or twice, cover the pan completely, and use pot holders to lift the pan and shake it. When popping slows, remove from heat and sprinkle lightly with salt. Shake into a large bowl. 
  3. Add Corn Pops, furikake, red pepper flakes, pinch of cayenne, diced pineapple, and diced bacon. Drizzle the melted butter over the mixture and toss to combine. Place in a serving bowl and sprinkle with more furikake and minced chives. 
  4. Serve and enjoy! 

Bringing it: 

Shovel that good stuff right into a ziplock bag and take it where you will. I’m talking to you hikers, road trippers, party hoppers, fireworks watchers, Drive In goers…

 

Summer Perfection Watermelon Tomato Feta Salad

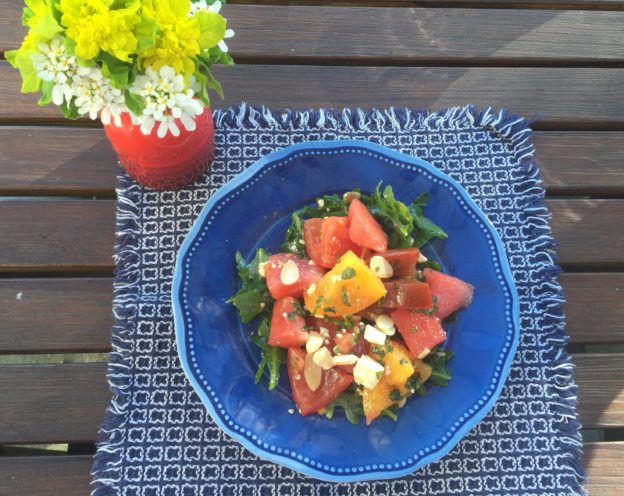
I had a feeling that Memorial Day weekend would deliver. It did in the form of this watermelon salad. Quite simply, you need this in your summer life. I’ve seen watermelon feta salads aplenty but for some reason have never made them. Perhaps too many failed attempts at grilling watermelon “steaks” killed my ambition to bridge the sweet/salty gap with watermelon.

But thanks to Jenny—who not only brought this salad to a party, but also preemptively tracked me down to deliver the recipe because she heard from so many people that I wanted it—here it is! Thank you to Jenny for saving me so much anxiety and sticky kitchen experimentation.

Looking through the notes on the original recipe there are all kinds of variations. While I applaud the will to experiment, for me, if it ain’t broke…After all, it’s only early June. We have all summer to try it with lime juice instead of vinegar, to saute the sliced almonds in a little butter first, or maybe to add some jalapenos or spice. But then again, maybe not. It may be as close to perfection as I can bear.

This recipe does make a ton, so adjust amounts accordingly if that concerns you. A platter of this salad atop arugula looks pretty darned impressive. Made as directed, the watermelon chunks, are big, which seems a little odd. But that also makes it a knife and fork salad, which is somehow more satisfying.

Summer Perfection Watermelon Tomato Feta Salad

From Epicurious

Makes 6 to 8 servings

Ingredients

  • 8 cups 1 1/4-inch chunks seedless watermelon (about 6 pounds)
  • 3 pounds ripe tomatoes (preferably heirloom) in assorted colors, cored, cut into 1 1/4-inch chunks (about 6 cups)
  • 1 teaspoon (or more) fleur de sel or coarse kosher salt
  • 5 tablespoons extra-virgin olive oil, divided
  • 1 1/2 tablespoons red wine vinegar
  • 3 tablespoons chopped assorted fresh herbs (such as dill, basil, and mint)
  • 6 cups fresh arugula leaves or small watercress sprigs
  • 1 cup crumbled feta cheese (about 5 ounces)
  • 1/2 cup sliced almonds, lightly toasted

Method

    1. Combine melon and tomatoes in large bowl. Sprinkle with 1 teaspoon fleur de sel and toss to blend; let stand 15 minutes. Add 4 tablespoons oil, vinegar, and herbs to melon mixture. Season to taste with pepper and more salt, if desired.
    2. Toss arugula in medium bowl with remaining 1 tablespoon oil. Divide arugula among plates. Top with melon salad; sprinkle with feta cheese and toasted almonds and serve.

Bringing It:

Keep the watermelon cold as long as possible before serving, and cut up the watermelon and tomatoes as close to serving time as you can. If you need to cut them up at home, hold off on tossing them with the salt until 15 minutes before serving. This looks beautiful on a platter atop the arugula, or in a big bowl with the arugula tossed right in.


Cinco de Derby

With this in your house, how can your weekend go wrong?


What we have here, my friends, is a dream Double Header. Cinco de Mayo and the Kentucky Derby, on successive non-school nights. If there was ever a time to have a cool, refreshing  drink in your hand (and a snazzy hat on your head) this is it.

In honor of creative cocktails and mocktails, below are two infused simple syrups that will give your drinks a fresh twist appropriate for the upcoming occasions. And what the hell—keep scrolling for a few cocktail concoctions as well, though they are only a starting point. Don’t be afraid of using the jalapeno syrup in your mint julep (or even subbing cilantro for the mint) for some south of the border cha-cha.

Have fun and if you’re placing bets, good luck!

Jalapeño Simple Syrup

  • 1 cup sugar
  • 1 cup water
  • 2 jalapeños, seeded and halved lengthwise (or not seeded if you are brave)

In a small saucepan over high heat, combine 1 cup water, sugar, and jalapeños. Bring to a boil, stirring to dissolve sugar. Reduce heat to medium and allow to simmer to three to four minutes, stirring frequently. Remove from heat and let steep 20 minutes.

Strain syrup, discard jalapeños (or chop up the now mild pepper and use as desired), and cool syrup. (Simple syrup can be refrigerated, in an airtight container, for up to 6 months. It keeps even better if you add a capful of vodka.)

Cilantro Simple Syrup

  • 1 cup sugar
  • 1 cup water
  • 1 large handful cilantro leaves

Combine water and sugar in a saucepan, and bring it to a slow boil while stirring continuously until all the sugar has dissolved. Just as the mixture begins to boil, add 1 cup of fresh cilantro. Simmer for 5-10 minutes and let cool (this syrup will keep in your fridge for about a month. More if you add a capful of vodka).

Now how do we use them? Below are two ideas, but this is no time to follow directions. Use these in whatever cocktail or mocktail could use some salsa sass.

Each makes two drinks:

Cilantro coolers: wayyyy better than a kale smoothie on a fine spring night

Cucumber Cilantro Cooler

Cool. Hot. Fresh. This one has it all. slightly adapted from organic authority

To a cocktail shaker add:

  • 1 cup chopped cucumber (seeds removed) and a large handful of cilantro leaves (cilantro haters use mint instead, and maybe extra vodka to get over the cilantro glut)

Muddle well with a muddler or a heftier pestle. Then add:

  • 4 ounces vodka
  • Juice from 2 limes
  • 1 1/2 ounce jalapeno simple syrup
  • ICE! Don’t be shy here.

Shake well for twenty seconds and then strain* into a lowball glass filled with ice. Garnish with a wheel of cucumber and a sprig of cilantro.

*brave multi taskers, fans of zero waste, and those desperate for a meal idea because they spent so much time prepping cocktails will love this: fully drain the remaining cucumber and cilantro shrapnel and mix it in with Chinese noodles, a few more veggies and soy dressing for a summery salad.

 Jalapeno Cilantro Margarita

To a shaker add:

  • Juice of two limes
  • 1 ounce cilantro syrup
  • 1 ounce Blanco tequila
  • 1 ounce Reposado tequila and 6-8 slices of jalapeno (seeds removed).

Shake it like you mean it, then strain into a cocktail glass. Garnish with a slice of lime, a slice of jalapeno and a sprig of cilantro.

And finally, if making margs for a bigger crew…

Spicy Margaritas by the Pitcher

  • 2 cups of tequila
  • 1 1/4 cup lime juice
  • 1/2 cup of orange liqueur
  • 1/2 cup of jalapeno simple syrup

Stir together with ice in a large pitcher and pour into 8 glasses.

Get Your Picnic On: Lemony Shrimp and Bulgur Salad

Driver Ed Lesson of the Day:Taking your shrimp show on the road.

Driver’s Ed is taking me down. This is my second round of Driver’s Ed, the five weeks of captivity that will eventually lead to liberty. This time it is in St Johnsbury—again nowhere near where I live—so it involves lots of scheduling and shuttling of hungry kids. It can also involve a boatload of cash if you’re not careful. Whether it’s Driver’s Ed or spring sports turning your car into a food truck, this is the time to get your picnic on.

One week in and I have already overworked my chicken rotation (oven fried chicken totally goes the distance).There is a tomato hater on board so the Panzanella of the Gods is out. I’m also not yet ready to surrender to the quick fix of pasta and meatballs, so I turned to a super easy, substantial and delish salad.

This salad is a brilliant go-to for potlucks and picnics. It stars bulgur, which is sort of my new best friend. The beauty of bulgur is that it requires no cooking AND it’s cheap cheap cheap. Bulgur just needs to soak for a bit and it’s ready to use, making is a nice alternative to overnight oats…but that’s another meal and another conversation. We’re sticking with the picnic message here.

What else makes this salad so great? It’s quick and easy to prep and pack, requires zero to minimal stove time and few ingredients, can be eaten at any temp and does leftovers like a boss. The spinach holds its own on Day 2, so even if you are an avowed leftover salad hater (helloooo entire rest of my family), this might entice you to change your ways.

The recipe calls for cooked shrimp. I usually start with raw, defrosted shrimp, and cook them in a pan with some olive oil and/or butter, and a squeeze of lemon or a splash of vinegar. Do shrimp how you do shrimp. It’s all good.

Grab that bag of shrimp from the freezer, soak some bulgur and make this salad. Then you’ll have all the time in the world to worry about having another driver in the house.

Lemon Bulgur Salad with Shrimp

This came from Food and Wine, but, as you can see in my notes nimbly veers to many variations. If you forget to get radishes you can go with any crisp, thinly sliced vegetable. No pine nuts? Use what you’ve got. Here, I used pecans.

Ingredients:

  • 1 1/2 cups coarse bulgur
  • 1 teaspoon finely grated lemon zest
  • 1/4 cup fresh lemon juice
  • 3 tablespoons chopped dill
  • 1/2 cup extra-virgin olive oil
  • 1 pound large cooked shrimp, shelled
  • 3 cups baby spinach
  • 4 radishes (or another crisp veggie), thinly sliced
  • 2 tablespoons pine nuts (or nuts/seeds of choice)
  • Kosher salt and freshly ground pepper

Method:

  1. In a bowl, cover the bulgur with warm tap water. Let stand until the grains are tender, about 2 hours. Drain the bulgur well. (If needed, speed up the process with hot water.)
  1. In a large bowl, whisk the lemon zest with the lemon juice and chopped dill. Whisk in the olive oil. Add the bulgur, shrimp, baby spinach, sliced radishes and pine nuts and toss to coat. Season with salt and pepper and serve.

Bringing It

The salad can be refrigerated for up to 1 day. Add the spinach, radishes and pine nuts just before serving. (It can also totally be eaten in the parking lot of a Driver’s Ed class, or wherever you can find free parking and wifi. )


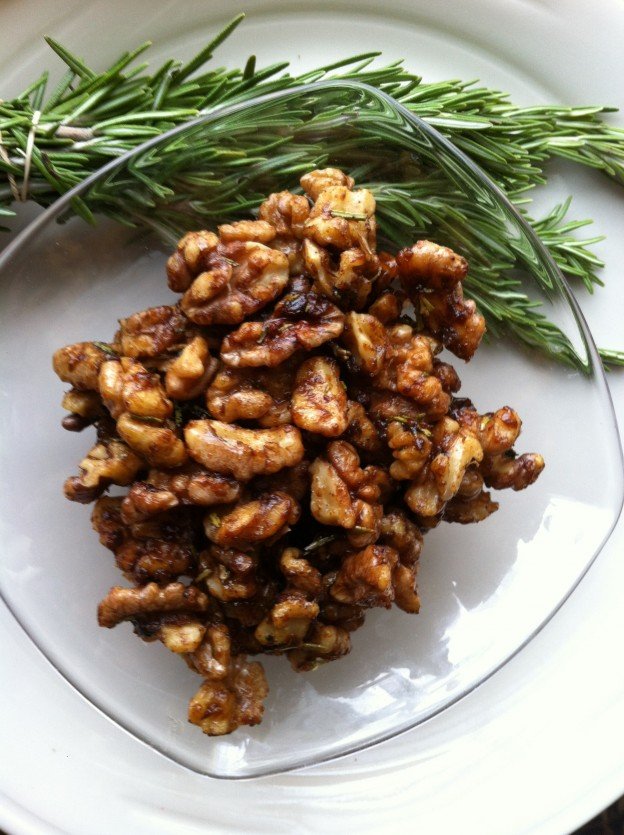
rosemary walnuts

Spicy Rosemary Maple Nuts

It’s here people. Crunch time. This is your week to bake or cook your way out of small gift madness.  Let’s review some options: We have, of course, the standby Crackle, and the more grown up Guinness and dark chocolate version. We have easy as pie (crust) cookies and jars of salted caramel cholliesauce or honey thyme walnuts. And speaking of nuts…we now also have an updated riff on sweet and savory roasted nuts.

Sadly, I have no kill switch when it comes to sweet and spicy roasted nuts. Until now the men in my house have allowed me to make them, give them and sample (hoard) them with no interference. This year, however, when I made these for Thanksgiving they disappeared before they were cool enough to hide. Either the locals’ tastes have evolved or this recipe is just that good.  It calls for fresh rosemary, maple syrup and cayenne—standard issue stuff amongst us nut fans. What takes them over the edge is the amount of rosemary (lots) added both before and after baking. Oh, and flaky sea salt. No secrets here.

They’re sweet but not too sweet, and have enough heat to get your attention but not in a scary way. Best of all, there are no egg whites or other fussy things involved. Yes, those are angels singing. You’ve got to get fresh rosemary—I’m not letting you off the hook there—but you can use a mix of whatever raw nuts strike your fancy. Pictured is the full walnut monty, but a mix with pecans, almonds and/or cashews is divine. Love the one you’re with, baby.

Make a lot so you don’t have to be stingy with your family. It’s so close to Christmas and all.

Spicy Rosemary Maple Nuts

From Kitchen Konfidence

Ingredients

  • 1 pound unsalted mixed nuts (cashews, walnuts and almonds are delish)
  • 1 tablespoon melted butter
  • 1 tablespoon maple syrup
  • 2 tablespoons + 1 teaspoon chopped fresh rosemary, divided
  • 1 tablespoon dark brown sugar
  • ½ teaspoon cayenne pepper
  • 2 teaspoons flaky sea salt or kosher salt, plus more to taste

Method

  1. Preheat oven to 350°F. In a large bowl, toss mixed nuts with melted butter and maple syrup. Add 2 tablespoons chopped rosemary, dark brown sugar, cayenne pepper and 2 teaspoons flaky sea salt, mixing until the nuts are well coated . Spread nuts out onto a rimmed baking sheet lined with parchment paper. Bake until glazed and golden (about 18 – 20 minutes), stirring twice during the cooking process.*
  2. As soon as the nuts come out of the oven, season with an additional 1 teaspoon chopped fresh rosemary, and flaky sea salt to taste (I added an additional 3/4 teaspoon). Serve warm immediately or store in an airtight container at room temperature for up to 5 days.

Notes

  • Set the timer and If your oven runs hot, be sure to check the nuts a bit early. Nuts can turn on you and go from golden to bitter if you ignore them.

Up next: What if you find out Santa is gluten free….and you only have access to a mini mart? Got ya covered.

nuts-n-stuff


Of Empty Nests and Butternut Squash


butt-pizzaSometimes—most times really—I’m not the quickest to pick up on the obvious. When I was wondering why it had been so hard to get inspired for fall a post I looked within, to all manner of character flaws, for an explanation. It took a friend in the grocery store, mocking the paltry contents of my grocery cart to make it obvious. I no longer have two of my biggest, loudest, stinkiest, most wonderful reasons to cook. If, like me, you are slow to notice signs here some dead giveaways.

You might be an empty nester if:

  • You no longer park near the cart collection stands at the grocery store.
  • You buy milk in half gallons, then quarts, and still wonder if it’s gone bad.
  • You put everything you can imagine needing into your cart and it still costs less than $50.
  • Your ice cream has freezer burn.
  • You actually pay attention to special diets, and try to accommodate them.

This last point is what today’s post is about. Well, that and butternut squash, my food champion of fall. (Let’s remember squash on toast, sugar and spice soup and Halloween Soup and on and on in the butternut/kabocha hall of fame.) The empty nest is suddenly available for visitors, which is awesome, and they bring with them special diets. At one point recently three guests joked that one was gluten free, one was sugar free and one was calorie free. Guest Number 4 was Vegan. This all worked because a: They all had a sense of humor and adventure, and b: I had time to care (see above).

In my quest as a Vegan sympathizer I’ve tried a lot of things recently. I’ve tried to make both cheese and pizza crust out of cauliflower. No and no. I’ve made Reuben sandwiches out of seitan, a thousand times NO. I’ve also found some reasonably good stuff like grain-free carrot bread, and mayonnaise made with chickpeas. And, with much inspiration from Minimalist Baker and other sites, I’ve made some unbelievable stuff, like butternut squash pizza, the key ingredients of which I share below.

It’s been a fun experiment, and I like being able to find things that can broaden my own food horizons and make people on special diets happy. That said, life is about finding the right balance. When I asked my husband if he was game to try black bean sweet potato burgers for dinner, he merely went to the freezer, removed a steak and thunked it on the counter. Know your audience, people, and enjoy whoever is in your nest.

Butternut Squash Sauce

From the Minimalist Baker, with amounts adjusted

butt-pizza2

Also makes a mean pizzadilla, on a corn tortilla procured by the Vegan for the gluten-free girl.

Ingredients

For every cup of cubed butternut squash you will need:

  • 2 tsp olive oil ( 1 tsp oil for roasting and another tsp for adding to the sauce)
  • 1 garlic clove, whole, skin removed
  • 1 tsp maple syrup
  • a pinch of salt and pepper.

Keep in mind 1 Tbsp is 3 tsp. Sooooo, math whiz that I am, for 3 cups squash you will need 1 Tbsp of oil for roasting, and another Tbsp oil to add to the sauce, and 1 Tbsp maple syrup. A baking sheet easily holds 4 cups, so amp up ingredients if you’ve got the squash.

Method:

Preheat oven to 400 degrees F and position a rack in the middle of the oven.

Add cubed butternut squash and peeled garlic cloves to a baking sheet and drizzle with half total olive oil and a pinch each salt and pepper. Toss to combine.

Bake for 15-20 minutes, or until all squash is fork tender.

Transfer squash and garlic to a blender or food processor with remaining olive oil and maple syrup. Purée until creamy and smooth, adding more olive oil or a touch of water if it’s too thick. The consistency should be creamy and spreadable (not pourable). Taste and adjust seasonings as needed.

Use sauce as you would pizza sauce, topping it with your desired cheese and toppings and baking the pizza at 425. Make a great Pizzadilla as well, as evidenced on the fine corn tortilla pictured above.

fall-food

Old fall favorites and some new ones

Vegan Parmesan Cheese

Also from Minimalist Baker

This is surprisingly good. As with any imposters, better to think of it as its own thing. (I’m looking at you, black bean “brownies”). It’s sort of a weird craving now. Like I needed another.

Ingredients

  • 3/4 cup (90 g) raw cashews (try raw slivered almonds or brazil nuts too)
  • 3 Tbsp (9 g) nutritional yeast
  • 3/4 tsp sea salt
  • 1/4 tsp garlic powder

Method

Add all ingredients to a food processor and mix/pulse until a fine meal is achieved. Store in the refrigerator to keep fresh. Lasts for several weeks.

But that’s not all! Some bonus fall accessories:

Tahini Miso Sauce

If you don’t have miso in your fridge, do yourself a favor and get some. Merely figuring out how to use it up you will take you on a flavor adventure. Toss this sauce with pretty much anything roasted, but especially cauliflower, brussels sprouts, butternut squash, sweet potatoes, etc, etc.

Ingredients:

  • 2 Tbsp. tahini
  • 1 Tbsp. white miso
  • 2 tsp. red wine vinegar
  • 1 tsp maple syrup
  • optional: grated fresh ginger, pinch of red pepper flakes, splash of Tamari. Do experiment here!

Whisk or stir all ingredients, adding enough water, a spoonful at a time, to make a smooth sauce.

Fried Sage Leaves

Put them on anything for fall goodness

Ingredients:

  • Olive oil
  • Fresh sage leaves, twice as much as you think you want
  • Coarse salt

Method:

Heat oil in a pan. Fry sage leaves 6 or so at a time until crisp. Remove to a paper towel with slotted spoon and sprinkle with salt. Repeat until you have enough to actually share with others.

sage-coffee

Fried sage next to the very best Vitamin C!


California Dreamin’: Pickled Grapes and other Weird Things

Pickled grapes, accessorized for fall.

Pickled grapes, accessorized for fall.

Well hello fall! I’m not sure how we got from frosé season to apple season so fast, but here we are. Have we all fit an unreasonable amount of fresh corn and tomatoes into our diets these past few weeks? And rescued every last watermelon from the cardboard bins? If so, good job. If not, there’s still time…but barely!

I’m just back from a long trip to Cali, and it of course involved lots of weird food. Why even go to California if you’re not going to dive all in? My weird food fest got rolling at Jack London Square in Oakland, first at a vegetarian restaurant with a mushroom pecan pate that still haunts me in the best way, and then at an event called Eat Real. Very groovy indeed. Super tart, super strong Red Branch hard cherry cider kicked it off. Fabulous street eats ensued, including sesame peanut zucchini salad with furikake…Damn! So good and so fun to say. The miso sesame muffin from Berkeley’s own Sam’s Patisserie wrapped it all up with an oddly addictive bow.

A beer drinker's decision tree. Takes the pressure off.

A beer drinker’s decision tree at Eat Real.

From there I went south, for pink pepperberry gin and tonics in Santa Monica, Tuna poke and tamales in Pasadena, and then—because you’ve got to be on your A game of weirdness in Topanga—rosemary-brined grapes and basil pickled cantaloupe.

Today, I’m bringing you the grapes, because they are stupid easy and crazy good. Plus, they are red and green and would be a perfect offering for any holiday feast. Make them now, try them in a week or so, and if you like them you’ll have plenty of time to go into production. So, let’s not be sad as we let summer and linen and the quest for perfect toenail color drift away. There are apples to be eaten, pies to be baked and ciders of all potencies to be quaffed.

This comes straight from the Wall St. Journal food section, which is awesome. Read the article for other pickled fruit recipes, including cantaloupe. And if there’s a deal on grapes just make a ton. As the article instructs, their flavors improve after about a week, and they’ll keep in the fridge for months… unless I come over.

Pickled Grapes

Adapted from “The Lee Bros. Simple Fresh Southern” by Ted and Matt Lee

Active time: 15 minutes Total time: 45 minutes Makes: 1 pint

  • 2 cups seedless red and/or green grapes (about 10 ounces)
  • ¾ cup distilled white or white wine vinegar
  • ¾ cup water
  • 1 teaspoon kosher salt, plus more to taste
  • 1 teaspoon sugar
  • 2 small cloves garlic, peeled and crushed
  • Leaves from 1 (2-inch) sprig rosemary
  • ⅛ teaspoon dried red chili flakes
  1. Pack grapes into a glass jar or airtight plastic container. Pour vinegar and water into a saucepan over medium-high heat. Add salt, sugar, garlic, rosemary and chili flakes. Bring to a simmer and cook 1 minute.
  2. Remove pan from heat and pour brine over grapes to fill container. Strain remaining brine into a measuring cup (you should have a little less than ½ cup left over) and reserve for making butter lettuce salad with pickled grapes, toasted pecans and soft goat cheese (recipe below). Transfer any garlic, rosemary and chili flakes remaining in strainer to container with grapes.
  3. Cover container tightly, shake to distribute seasonings, uncover and let cool to room temperature, about 30 minutes. Cover again, and transfer container to refrigerator to chill further, about 15 minutes more.
Among the least weird things in Topanga

Among the least weird things in Topanga

img_5160

Straight up awesomeness in the East Bay


Frosé and Frosecco: Summer’s Coolest Celebs


You say frosé, I say "Be right over!"

You say frosé, I say “Be right over!”

It’s been called the summer of Frosé, the “it” drink of summer, even the “God of summer.” Suffice to say, Frosé is a thing. At first I resisted jumping on the Frosé bicyclette. We are, after all, no stranger to the slushy drink rodeo. Plus, I learned the hard way that there is significant recovery involved after an entire summer quenching one’s thirst with things like watermelon sangria. All that said, I also have obligations to the Bring It devoted, so at my cousin D’s urging I took the plunge into trying, tweaking and bringing Frosé. While I was at it, I decided to try the same method with the beverage mascot of brunch, Prosecco, subbing peaches for strawberries to get the Bellini effect.

I’m happy to say the experiment was a grand success and I can bring you not one but two fun, fabulous, delicious summer drinks that can be made and transported in large quantities with little effort. Cue the late summer victory dance here.

The premise is simple: frozen rosé or prosecco, emboldened with fresh fruit-infused syrup then sweetness-balanced with fresh lemon juice. Some versions add more complicated mixers or liqueurs and even fresh herbs. I’m all for experimentation, but there’s not a thing wrong (and a whole lot right) with the basic version.

I started with this one in Bon Appetit, added a splash of vodka to keep it loose, and then slackerized it by eliminating pretty much every step beyond dumping it in the container. This is because summer entertaining at the beach, the lake or even the patio is ideally a “no host” experience. As in no host needed to get yourself a damn drink.

This is very easily scaled up, based on the size of your container. My two vintage yard sale gallon-plus Tupperware beverage containers hold 5 bottles of wine so I used 4 bottles in each to make room for the other ingredients and freezing expansion. When finished they pop right into a cooler, doing double duty as ice packs, and are ready for action at your destination.

Use the leftover fruit in smoothies, over yogurt and ice cream, or stirred with cubed watermelon and fresh mint into a batch of limeade for the world’s easiest aqua fresca. Kids and your wiser, sober friends, will worship you for this.

Here, my pretties, is your date for hot the summer nights ahead:

Frosé and Frosecco

Servings: Makes 4–6

Ingredients:

  • 1 750 ml bottle hearty, bold rosé (such as a Pinot Noir or Merlot rosé) or Prosecco
  • ¼ cup vodka (optional but helps keep it a little looser and sassier)
  • ½ cup sugar
  • 8 ounces strawberries, hulled, quartered (or peaches, raspberries, based on flavor and color preference)
  • 2½ ounces fresh lemon juice

Note: Here are at Bring It central, we’re pretty much done after Step 2. There is no blender involved. The cooled syrup goes right into the semi frozen Rosé or Prosecco and into the freezer. Extra points if you stir it and scrape it with a big spoon every few hours while it is freezing.

Preparation

  • Pour rosé into a 13×9″ pan (or, a transportable Tupperware/beverage container of choice) and freeze until almost solid (it won’t completely solidify due to the alcohol), at least 6 hours. Allow longer if working with multiple bottles.
  • Meanwhile, bring sugar and ½ cup water to a boil in a medium saucepan; cook, stirring constantly, until sugar dissolves, about 3 minutes. Add strawberries, remove from heat, and let sit 30 minutes to infuse syrup with strawberry flavor. Strain through a fine-mesh sieve into a small bowl (do not press on solids); cover and chill until cold, about 30 minutes. (Reserve still-delicious berries for another use.)
  • Scrape rosé into a blender. Add lemon juice, 3½ ounces strawberry syrup, and 1 cup crushed ice and purée until smooth. Transfer blender jar to freezer and freeze until frosé is thickened (aim for milkshake consistency), 25–35 minutes.
  • Blend again until frosé is slushy. Divide among glasses.

Bringing It:

Transport the entire container in a cooler, using it to cool your other offerings.  At your destination, pull out the container, stir or scrape frosé/frosecco to a uniform consistency and pour into glasses. You might need a spoon at first, but a hot summer day will soon take care of that!


Pumping up Breakfast— no PSL required

Fall-leaf

The look of fall, without the latte.

Pumpkin, what have they done to you? They’ve made your name synonymous with every fall food creation, from the ubiquitous pumpkin spice latte (now known simply as PSL) to pumpkin spiced popcorn, bagels, pop-tarts, waffles, yogurt, truffles, ice cream and even Oreo’s. For the savory minded there are pumpkin spiced tortilla chips, crackers, cheese dip, hummus…and at the end of the day you can unwind with a pumpkin spiced ale or tea or stir up a martini made with pumpkin spiced vodka.

Enough already! All these processed pumpkin things make me crave food made with the earthy flavor and texture of actual pumpkin and butternut squash.

I looked no further than the Bring It! archives to satisfy my craving, and used the excuse to do some experimenting. First, there is the ridiculously easy—Halloween Soup, which you may want to make for sustenance tonight. For apps, my fall fave is squash on toast featuring spicy roasted squash and maple caramelized onion. Deconstructed, the elements of this make amazing pizzas, quesadillas, grilled cheeses and, with a little more tweaking, a rustic bread pudding (ready for prime time soon I hope). Until then, get your casserole fix with butternut squash casserole or commit to butternut squash lasagnePumpkin rosemary hummus has the flavors of fall without the cloying PSL signature, and by subbing pumpkin or squash for banana in buckwheat granola, you’ve got a new, weird classic.

But let’s revisit that PSL. Its popularity underscores our need for something a little more substantial in our cups and on our plates for breakfast this time of year. Wrangling a good breakfast—that can be portable, reheatable, and versatile—into the household every morning  can take you down! Crustless breakfast quiches to the rescue. They make a brilliant go-to for any meal or snack and can be made in mini or regular muffin tins (though  mini versions seem a little bit mean). The cornstarch keep the texture silky even through freezing and reheating, and the filling can be tweaked with whatever you have on hand (hello roasted butternut squash and caramelized onion!) I meant to stage a proper photo shoot with them, but in one of those ironies of food blogging, the best things disappear before they can be properly photographed. So just trust me—these are man-, boy- and mom-tested and approved. Girls? Please report!

fall-quiche-uncooked

Before. Add whatever filling makes you happy.

fall-quiches-cooked

After. Fully self contained–no utensils required.

Crustless Zucchini and Basil (or whatever) Mini-Quiches

Makes 48 mini quiches or 14 ish muffin sized quiches; adapted from Fine Cooking Magazine

Ingredients:

  • 1/4 cup cornstarch
  • 1 1/4 cup whole milk
  • 2 large eggs
  • 2 large egg yolks
  • 1 cup heavy cream (if no cream, a combo of milk and sour cream works too)
  • 3/4 teaspoon kosher salt
  • 1/8 teaspoon nutmeg
  • Oil, for the pan

Filling*

  • 1 tablespoon olive oil
  • 4 cloves garlic, minced
  • 2 shallots, minced
  • 2 small zucchini, grated (or chopped vegetable of choice)
  • 1/2 cup or more grated Gruyere or Parmesan cheese (it has to be a hard cheese to make a crust. You can add other cheese on top if desired)
  • Fresh basil, finely chopped (or herb of choice, all optional)

* filling can be adapted to use anything you like. Try chopped up ham and broccoli, apples and walnuts, sautéed corn and peppers, spinach and mushrooms, or of course roasted squash and caramelized onions.

Method:

Heat oven to 450°F.

Prepare Batter: Put the cornstarch in a medium bowl. Whisking steadily, slowly pour in 1/2 cup of the milk, mixing until quite smooth. Whisk in the whole eggs and egg yolks, mixing again until smooth, then gradually whisk in the rest of the milk, the cream, salt, and nutmeg. Use immediately or refrigerate, covered, for up to one day. If using the next day, be sure to re-whisk.

Prepare Zucchini/Veggie Mixture: In a nonstick pan, heat oil over medium heat. Add garlic and shallots and stir until fragrant, about 2 minutes. Add grated zucchini, and stir until just softened, another 3-4 minutes. Remove from heat. (This is where you can freelance with other vegetables, herbs, meat, dollops of soft cheese or whatever you like)

Oil mini muffin tins well. Put a pinch grated cheese into each muffin cup, a teaspoon of zucchini mixture, and pinch of chopped fresh basil. Pour 1 tablespoon of the batter into each muffin cup. (adjust amounts for regular muffin cups, making sure there is enough cheese to cover the bottom of the pan.)

Bake until the quiches puff and start to turn golden, 15-18 minutes (a bit longer for regular muffin cups) Let cool for 10 minutes and then carefully run a paring knife around the rim of each muffin cup. Carefully lift each quiche out of its cup.

Mini quiches freeze very well. Let cool, then freeze in a single layer in a covered container. Reheat on a cookie sheet in a 400 degree oven for about 5-10 minutes. They will also keep a few days in the fridge, to be reheated as needed.


Potato Bites—Get Your Tail (gate) in Gear

Score! A sackful of potatoes turns into road ready snacks.

    Score! A sackful of potatoes turns into road ready snacks.

It’s tailgate season. This is no time to mess around with overly fancy, delicate or time-sensitive creations. This is the time to bust out your EZ Foil pans with their plastic lids and put together bombproof snacks that can withstand half a day on a table (like the fine one below made in an afternoon by local boy Charlie), or many too many hours in a battered crock-pot. We’re talking about snacks that can be eaten standing up. Plates—and utensils beyond toothpicks—are a bonus but not a requirement. Think Peoples Choice Cornbread, game day pulled pork, buffalo meatballs, bruschetta galore, nootch popcorn, nuts, bars etc etc etc…tailgate2

If all that sounds a little unhealthy, it’s because it usually is. But it is totally possible and appreciated to throw together healthy fare that is more creative than hummus and carrots. Case in point: The roasted Brussels sprouts (intended for dinner) I brought to a recent tailgate was happily gobbled up. So were these hastily conceived baked potato bites, born out of desperation and a glut of purple potatoes grown by my neighbor.

They were inspired by the sweet potato recipe (below), and the basic concept of using potatoes—vs bread slices, chips or crackers—as the snack canvas. They can be doctored up with condiments and whatever fancy dips, sauces, garnishes or spreads are on hand. And of course bacon.

Some of you will be open to the daring weirdness of sweet potatoes. You will have miso in your fridge and procure black sesame seeds (rather than burning white ones and calling it good). Others of you will look in your potato drawer, breathe a sigh of relief and proceed. You all know who you are. I love you on both sides of the divide.

This first offering is more method than recipe, so we can work on relaxing our need for perfection and control WHILE making a crowd-pleasing appetizer. Win Win! The second recipe comes from the Kitch’n, so it is actually precise, though I suggest taking license with toppings. Just make sure you have some savory going on so you don’t double down on sweet. Bacon would be awesome here as well, or Hail Mary Coconut as a sassy Vegan stand-in. So here’s your two-fer, and here’s to happy tailgating.

Straight-up Baked Potato Bites

Ingredients:

  • Purple, red or yellow potatoes, peeled if desired (or excessively earthy)
  • Olive oil to coat
  • Kosher salt
  • Sour cream
  • Green onions, sliced
  • Toppings of choice… Corn salsa? Guac? Have I mentioned bacon?

Method:

Preheat over to 375 (fudge on this if you are baking the sweet potatoes at the same time)

Cut potatoes into ½” thick (or less) rounds. Toss them with oil and a generous sprinkle of kosher salt. (Rogues may prefer to do this straight on the baking sheet). Arrange potato slices in one layer on a baking sheet.

Bake potatoes for 25 minutes or so. Turn them over and bake another 10 minutes. Use your judgment here—you know how you like your taters. Remove potatoes to paper towel lined plate and let cool a bit. Arrange on serving dish and top with a small dollop of sour cream, and a sprinkle of green onions.

Bringing it:

Load them onto a covered travel platter (or foil pan) and position them next to fancy condiments and salsas so people can create their own potato masterpiece.

Miso Sweet Potato Bites

From the Kitchn. Makes approximately 30 rounds depending on potato shape

Ingredients:

  • 2 pounds unpeeled sweet potatoes (for the most attractive presentation, select sweet potatoes that are fairly uniform in diameter and shape)
  • Oil for baking sheet
  • 1/4 cup mayonnaise (the vegan kind if that matters to you) 
  • 2 tablespoons white miso
  • 2 tablespoons tahini
  • 1 teaspoon lemon juice
  • 1/2 teaspoon grated ginger
  • Small pinch of cayenne pepper
  • 4 scallions, green parts only, thinly sliced on the diagonal
  • 1 tablespoon toasted sesame seeds (preferably black for contrast) 

Method:

Preheat oven to 400°F and lightly oil a baking sheet. Slice the sweet potatoes into 1/2-inch-thick rounds and place in a single layer on the baking sheet. Bake for about 30 minutes until the potatoes are brown on the bottom and tender but not mushy. 

To make the spread, whisk together the mayonnaise, miso, tahini, lemon juice, ginger, and cayenne. Taste and adjust any ingredients as desired. 

To serve, spread the miso mixture on top of warm (not hot) or room temperature sweet potato rounds. Garnish with scallions and sesame seeds.

Bringing it:

Same as above, but move them closer to the vegetarians.