Category Archives: Dessertalicious

fully popped popover

Overnight Blender Cardamom Popovers

There’s a lot going on in that title, but it needs every word to do this recipe justice. First off, I am all about make-ahead breakfasts, especially in the dead of winter when rallying out of bed and getting psyched to embrace the great outdoors can be a challenge. In fact, the pursuit of easy yet yummy breakfasts is such a priority this time of year that I’m going to make it my January theme. Stay tuned for overnight waffles and French toast, but for now we’ll start with these popovers.

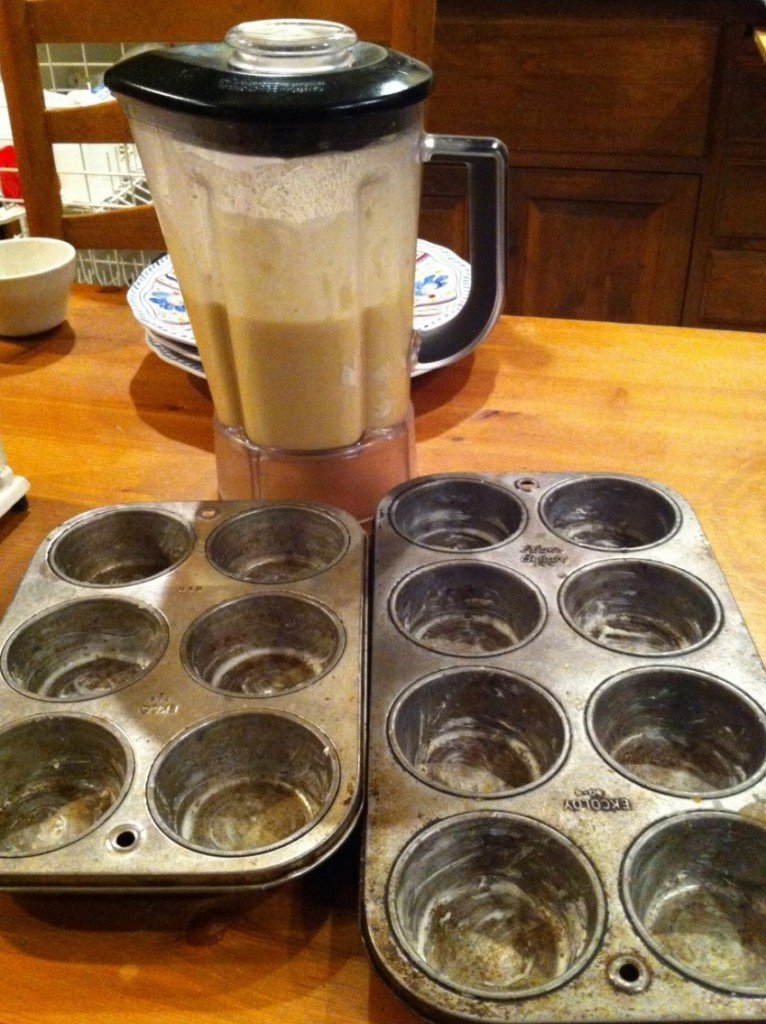
They are a golden example of overnight brilliance, made even more convenient by the fact that you make, blend and store the batter in the same container. (If there isn’t one already, there should be an entire cookbook devoted to blender cuisine. Anyone?) Wake up, turn on the oven, pour the batter into some muffin tins or, better yet,  a shmancy popover pan and you’re good to go. Without the filling, these popovers are a perfect breakfast—barely sweet and subtly spiced. Spread them with a little butter, jam or honey and they are perfect for grab and go, eat-in-the-car-on-the-way-to-the-race scenarios. The options of storing the batter overnight or all day, and turning it into a dessert with a delish filling (the one below or really anything creamy that floats your boat) make this recipe even more versatile.

This originally came from AP Food Editor J.M. HIRSCH.

Start to finish: 45 minutes
Servings: 12

For the popovers:
2 cups all-purpose flour
2 cups milk
4 large eggs
2 tablespoons butter, melted
1 tablespoon sugar
1 teaspoon salt
1/2 teaspoon ground cardamom

For the filling:
Two 8-ounce tubs mascarpone
2 tablespoons honey
Juice and zest of 1 lemon
2 teaspoons cinnamon
Sliced strawberries or other fresh berries, to serve.

Heat the oven to 400 F. Coat a 6-cup popover pan or 8-cup muffin pan with cooking spray (or be kind to the ozone and butter the heck out of said pan).

In a blender, combine the flour, milk, eggs, butter, sugar, salt and cardamom. Blend until the ingredients form a very smooth batter, about 1 minute. At this point you can: proceed as directed, making half now and half later; make them all now if you have enough pan space; or put the entire blender in the refrigerator for up to 24 hours.

popovers ready to bake

Barely conscious? Perhaps. But popovers are on deck.


Fill each of the prepared popover pan cups about halfway with batter. You should use only half of the batter in the blender.

Bake for 30 minutes. Remove the popovers from the pan and use a knife to cut a small hole in the top of each to let the steam escape. Cool slightly.

Meanwhile, to prepare the filling, in a medium bowl gently stir together the mascarpone, honey, lemon juice and zest, and the cinnamon. When the popovers have cooled just enough to handle, carefully tear the opening in each just enough to be able to spoon in about 1/4 cup of the filling. Serve each with berries.
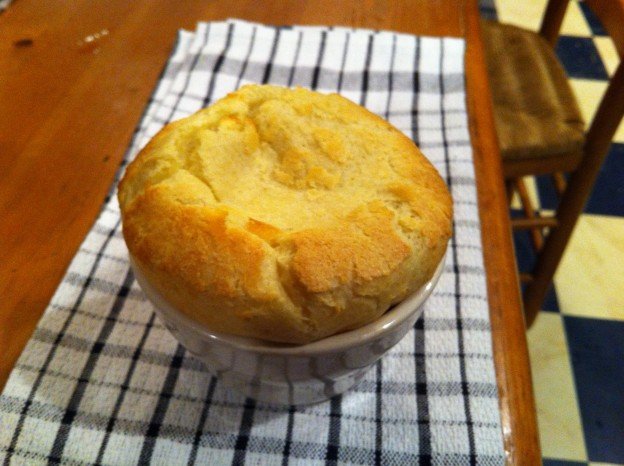
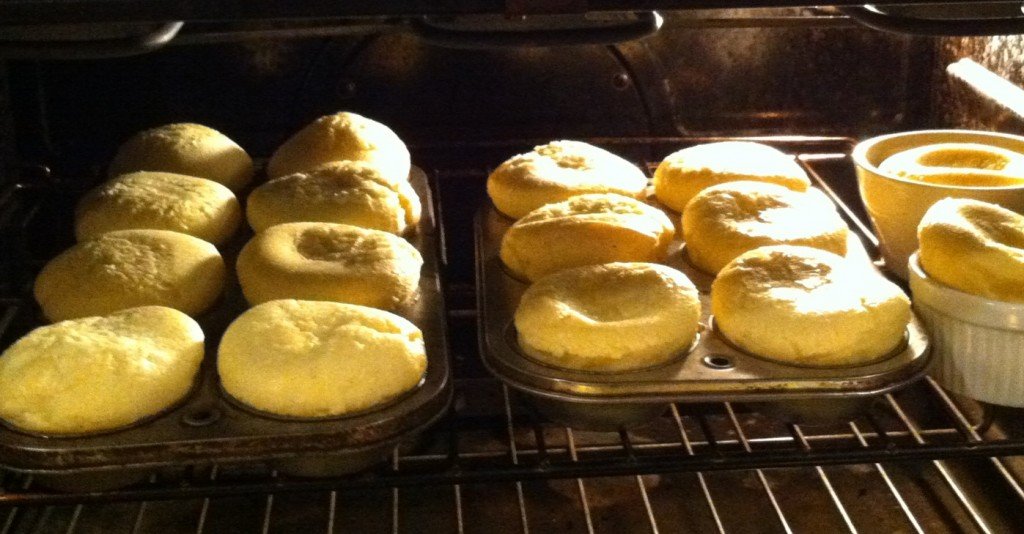
Popovers in oven

Almost there…a few more sips of coffee and these babies will be ready.


White Peppermint Meringues

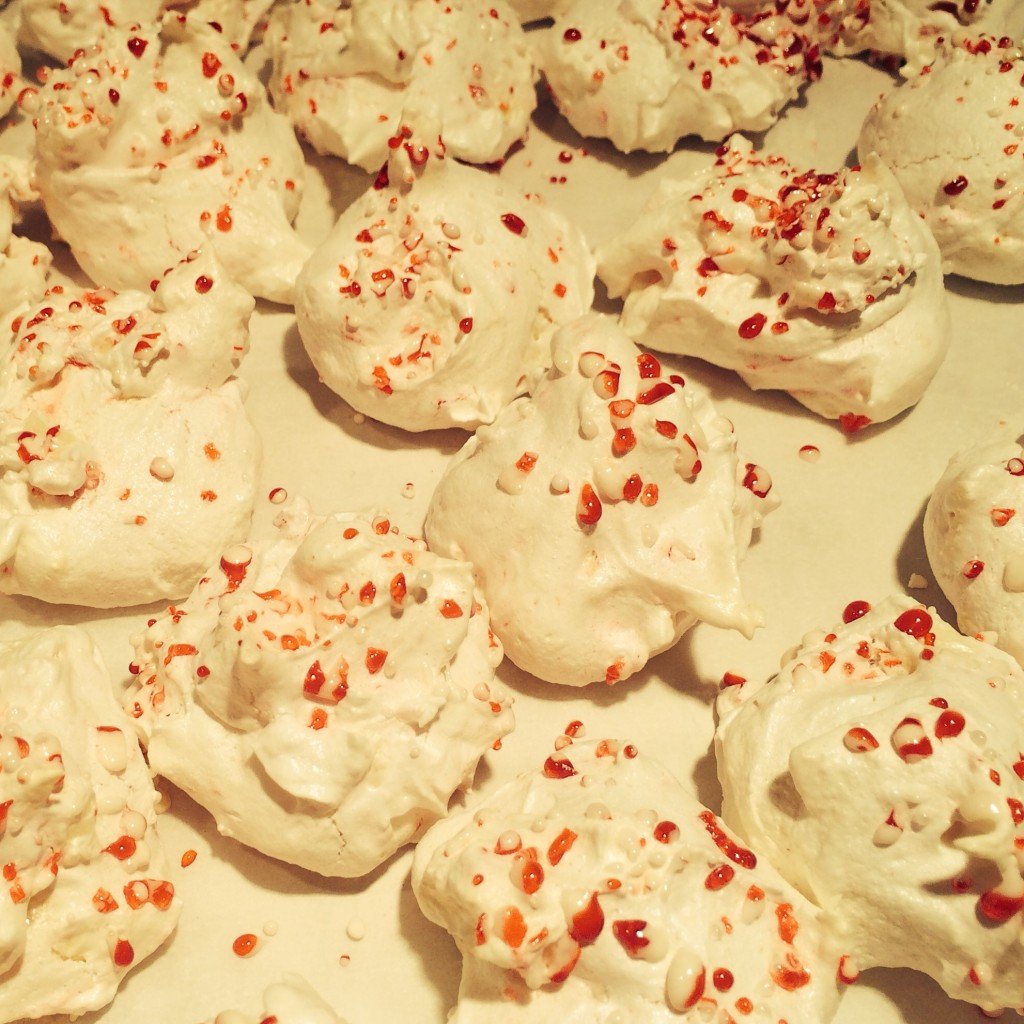
Beautifully baked meringues

Beautifully baked meringues

This recipe comes to you from our very own Boot Camp Bonnie.  She brought these tasty delights to boot camp class and we gobbled them up right after finishing our killer work out.  They were beautiful when wrapped (see Bringing It In Style: Boot Camp Bonnie) and so delicious that I just had to have the recipe. These meringues are jammed packed with flavor. They are little bursts of sweet and pepperminty, soft and crunchy, light and delectable!  You will love them as will everyone around you.

I’ve learned that there are 2 keys to mastering the art of the meringue…

1) Make sure the eggs are not straight out of the refrigerator (difficult for someone like me who NEVER remembers to take eggs or butter out of the fridge until right before I need them). The eggs whites should be brought to room temperature, or more optimally, 70 degrees (again not something I would ever measure, but for those of you who want more specifics, there you go).

2) Make sure there is not a smidgen of yolk left  in the egg whites.  This will make it difficult for the meringues to form stiff peaks.

Attaining virtuosity is not something I’m willing to strive for, especially when it comes to whipping egg whites, but I’d say I’m somewhere on the “ethereal” spectrum and getting better all the time!

Ingredients

2 large egg whites (at room temperature)
1/8 tsp cream of tartar
1/2 tsp vanilla extract
1/8 tsp salt
3/4 cup sugar
1 cup white chocolate chips
1/3 cup, plus 3 Tbsp coarsely crushed peppermints

Method

Preheat oven to 250 degrees.  Beat egg whites and cream of tartar in a deep bowl with a mixer (using whisk attachment) until soft peaks form.  Add vanilla and salt.  With motor running and mixer on high speed, pour in 1 Tbsp of sugar and beat 10-15 seconds, then repeat until all sugar has been added.  At this point, meringue should form straight peaks when beaters are lifted. Fold in white chocolate chips and 1/3 cup peppermint candies with a flexible spatula.

Line 2 baking sheets with parchment paper.  Using a soup spoon, drop meringue in rounded 1 Tbsp portions slightly apart onto the baking sheets. Sprinkle remaining 3 Tbsp of peppermint candy evenly on top of meringues.

Bake until meringues feel dry and stiff when touched but still pale.  This will take approximately 30-35 minutes.  Switch pans halfway through to ensure even baking.  Once you feel you have reached the dry, stiff, yet pale point in the baking, turn off oven, open door, and let cookies stand about 10 more minutes in oven.  Let cool completely.  Makes approximately 32 cookies.

NOTE: These meringues are meant to be soft in the middle.  They are not undercooked when you try one and it melts so easily in your mouth.  Also, you can skip the peppermint and use chocolate chips instead of white chips for the chocolate lovers in the crowd.

Bring It

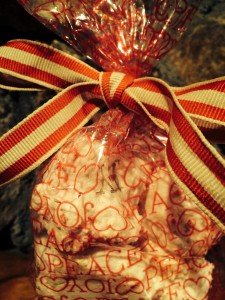
Try your hand at Bringing it in Style.  You’re sure to be successful with all the options available there. Even I had success in wrapping these cookies. I put them in little plastic holiday bags and wrapped a ribbon around the top.  I felt like Martha Stewart…. well….for a few minutes anyway!

Christmas giving!

Christmas giving!

Snow Ghost Pie

Snow Ghost

The first snow ghost of the season waits for his chance to steal a piece of pie.

Newsflash for you: We love winter.

And we love snow even more. Every year, in a bid for the weather Gods to answer our prayers for the first snow, we make Snow Ghost Pie. It originally appeared—along with a legend of the snow ghost— in a Hershey’s ad circa 1972. I clearly remember reading the story then, and of course making and eating the chocolate pie which, incidentally, requires no shmancy ingredients. The pie is as brilliant as the story, which convinces kids to offer up the pie to the snow ghost (who in the story was really the creepy handyman who had enlisted the kid to steal a piece of his grandma’s cooling chocolate pie). At any rate, if the ghost takes a piece of the pie, it will keep snowing and you won’t have school the next day. Not surprisingly I am asked to make snow ghost pie—and jumpstart winter— a lot this time of year. The filling also makes a great chocolate pudding on its own, but it’s the decorating and ghost-baiting that makes it fun.

Snow Ghost Pie story

The story of the Snow Ghost, as told by Hersheys

Snow Ghost pie ad

The original Snow Ghost Pie ad

 Ingredients

1 (9 inch) baked pastry shell or graham cracker/shortbread crust
1/2 cup Hershey cocoa
1 1/4 cup sugar
1/3 cup cornstarch
1/4 tsp. salt
3 cup milk
3 Tbsp. butter
1 1/2 tsp vanilla
1 1/2 sweetened whipped cream

Method

Combine cocoa, sugar, salt and cornstarch in a medium saucepan. Gradually blend milk into dry ingredients, stirring until smooth. Cook over medium heat, stirring constantly until filling boils; boil 1 minute.  Remove from heat, blend in butter and vanilla. Pour into  pie crust, carefully press plastic wrap directly into pie filling. Chill 3 to 4 hours.

Garnish with whipped cream, creating a cute little snow ghost if you like. And now for the totally unnecessary step that is key to keeping the legend alive. Set pie outside again to “cool” after decorating. Do your best to forget about it for a bit then check to see if the snow ghost visited and took a piece.

Snow ghost pie after ghost

Apres ghost. He wasn’t very hungry this time.

Snow ghost pie pre ghost

Pre-ghost pie


Bringing it:

This is an excellent dessert to bring to a family or kid gathering. Whip the cream and bring it separately so you can decorate the pie there and then set it out to “cool” before dessert. Just make sure it is not anywhere enticing to dogs (or squirrels).


Blue Ribbon Banana Cake

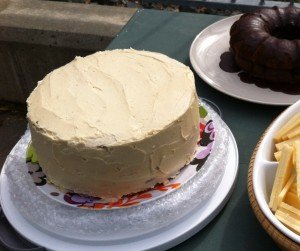
Blue-ribbon-banana-cake-amateur

Banana cake: the amateur version

Officially this is called double banana cake and it hails from a restaurant in Winnipeg via Bon Appetit’s Favorite Restaurant Recipes. That’s the official story of provenance. But in these parts, it is called *Blue Ribbon Banana Cake because it won first prize at the Sandwich Fair. If you have ever seen the line of entries for baking contests at this particular country fair, you are by now suitably impressed.

My dear friend, a humble, wildly talented cook and baker (whose masterpieces are created in a galley-sized kitchen) prefers to live in the witness protection program when it come to her prowess. So she spent years quietly contemplating entering one of her fabulous desserts in the fair. My only advice to her was to avoid the pie category, the judging of which I suspect is rife with nepotism. Pie, it seems, is the signature specialty of practically every revered country cook. And besides, who wants to spend weeks or months perfecting a pie crust when there are masses of women who can whip up a better one guided solely by instinct? After making this suggestion I tried her banana cake and there was no longer any doubt about how to make her fair debut.

With six bananas in the cake and two more layered in between, this cake is dense, moist and oh-so-fresh tasting. The real secret, however, is in the kosher salt, that gives both cake and frosting the blue ribbon sass. In deference to the champ, I made my version just as the recipes says and did not attempt to copy her tweak, which is to make it in three pans as a triple layer cake. Desserts are not my specialty, so the prospect of two layers of slippery bananas vs one was just too daunting. As it was, the actual blue ribbon winning cake had to be hastily rebuilt just prior to its fair entrance thanks to a surprise boulder in the parking field.

At any rate, if you have an occasion or a special meal or a whole lot of ripe bananas make this cake! And if you’re bringing it somewhere, do not expect to return with leftovers. Guests WILL divvy up any remains and spirit them away.

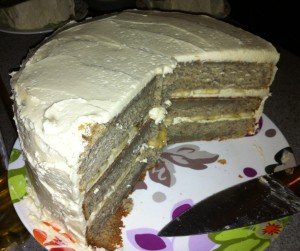
Blue-ribbon-banana-cake-pro

Blue Ribbon Banana cake: the Pro version. Even the grand marnier chocolate cake takes a back seat.

Double-banana- cake-served

The triple layer pro version, up close and personal.

 Ingredients

CAKE

1 1/2 cups (3 sticks) unsalted butter plus more for pans, room temperature
3 3/4 cups all-purpose flour
1 1/2 tsp baking soda
1 1/4 tsp kosher salt
2 1/4 cups sugar
6 large eggs
3 cups coarsely mashed very ripe bananas (about 6 large)
3/4 cup sour cream

FROSTING

1 cup (2 sticks) unsalted butter, room temperature
4 cups powdered sugar
1/2 cup heavy cream
1 tsp vanilla extract
1/2 tsp kosher salt
2 ripe but not mushy bananas, cut crosswise into 1/8-inch slices

Method

CAKE

Preheat oven to 325°. Butter two 8″-diameter cake pans with sides 2″ high. (The pro uses 3 pans for triple layer). Line bottoms of pans with parchment paper rounds. Whisk flour, baking soda, and salt in a large bowl. Using an electric mixer, beat 1 1/2 cups butter and sugar in another large bowl until light and fluffy, 2–3 minutes. Add eggs one at a time, beating to blend between additions. With mixer on low, gradually beat in flour mixture, scraping sides of bowl. Mix in bananas, then sour cream. Divide batter between pans.

Bake cakes until a tester inserted into the center comes out clean, 50–55 minutes. Let cool for 20 minutes in pans on wire racks.

Invert cakes onto wire racks; let cool completely. Remove parchment. Using a serrated knife, trim off rounded tops. (Slacker alert–I did not do this because my cakes were not very rounded. However, this is probably key to sound architecture.)

FROSTING

Using an electric mixer, beat first 5 ingredients in a large bowl until light and fluffy, 6–7 minutes.

Place 1 cake on a plate. Spread 1 cup frosting over. Arrange banana slices on top. Top with second cake. Spread a thin layer of frosting over top and sides of cake; chill for 30 minutes. Spread remaining frosting over top and sides of cakes.

Bring It!

After being in the fridge the cake is plenty sturdy and can simply be covered in plastic wrap on its platter. See story above and do position the cake wisely in case of any unforseen bumps. Those bananas can get mighty slippery.

*An observer did quietly admit that the first reaction by a judge upon tasting this cake was “Holy Crap!” Even though that sums up everyone’s first reaction to this cake, “Holy Crap Cake” just didn’t sound right.

Banana cake with first prize ribbons

To the victors, the spoils.


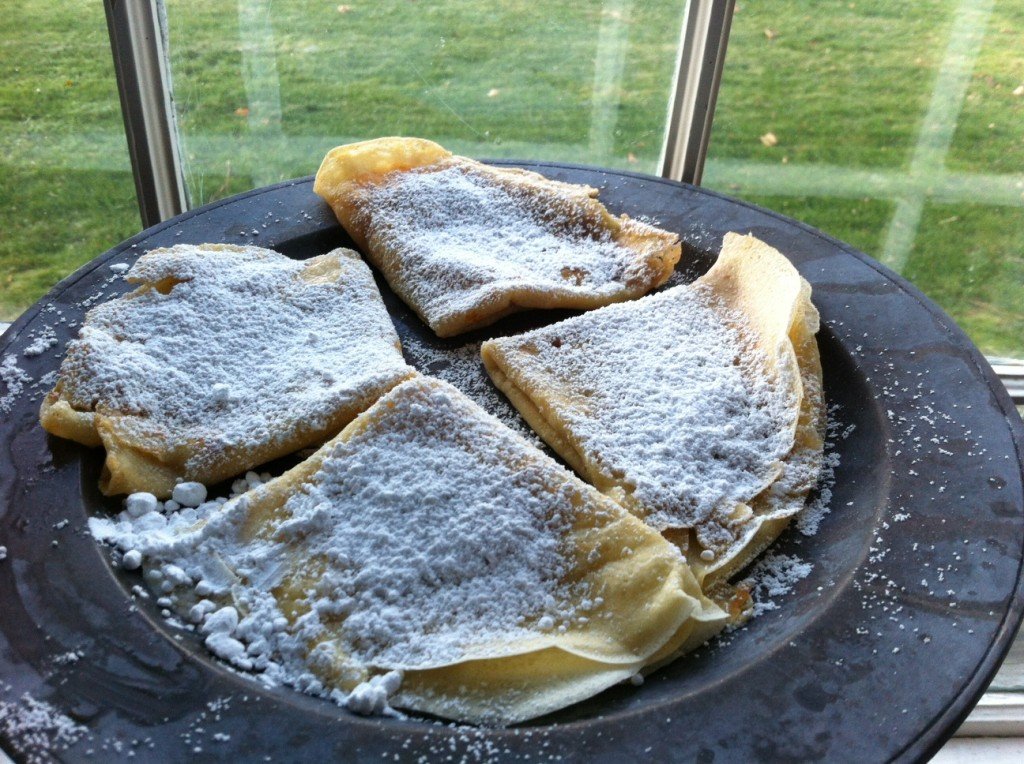
3-3/2-2 Crepes

windoe-2

Four very good reasons to get out of bed in November.

Stick season. Oh yeah. It’s cold, there’s no snow on the ground and its too early for Christmas lights and cookie making therapy. What we need now is a reason to get out of bed. Boom—got you covered! I know, I know. Crepes sound so high maintenance, so NOT what the average person would contemplate whipping up, especially for a weekday breakfast. But I promise you these will set you free, and take barely more time than it takes to toast up some Eggo’s.

The timesaving is twofold. First, the recipe is so simple to remember that your won’t be futzing around finding it. And second, it makes enough that you can use the same batter for two or three days. And I know I said twofold but I forgot a major benny. On any given morning you probably have all the stuff on hand.

If you’re going for sweet you can fill these with any type of jam, or with a bit of granulated sugar. If you’re feeling more meaty cheesy than sweet, then go for a bit of ham and cheese. And if you’re feeling like you need some serious love from your peeps you can fill them with Nutella or Cholliesauce.

Trust me on this: you do NOT have to be French or kitchen savvy in any way to master these—all it takes is a few rounds of practice. If you blow a few just call it crepe shrapnel dust it with a lot of powdered sugar and move on.

Ok, here we go.

Ingredients

3 eggs
3 Tbsp melted butter
2 cups flour
2 cups milk

½ fresh lemon
A wrapped stick of butter for greasing pan (you wont use much of it).

Method

Whirl eggs in a blender. Add butter, flour and milk.

Heat a frying pan (I use my All-Clad double handled one) over medium heat. Hold a stick of butter and coat the hot pan to create a layer. Pour (or ladle) about 1/3 cup batter into pan and tilt the pan to coat the bottom evenly. When the sides lift easily flip entire crepe. Spread desired filling on half of crepe, and fold crepe in half then in quarter. Lift crepe from pan to a serving plate. Dust with powdered sugar and a squeeze of fresh lemon juice.

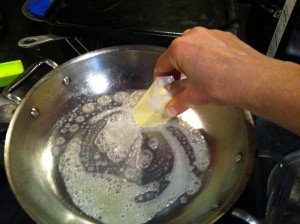
Butter-in-pan

Greasing the easy way.

crepes-side-1

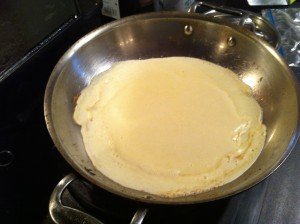
Side 1, ready to flip.


crepes-side-two

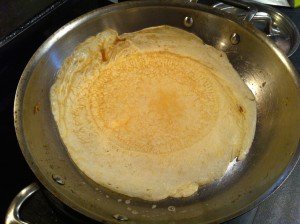
Side 2, ready to fill.

crepes-with-jam

Blurry, but you get the idea.


Store the batter for tomorrow’s breakfast, for an afternoon snack or for any moment that stick season is getting to you. Slip a couple of crepes into a baggie for a great school snack too.

Salted Caramel “Cholliesauce”


Halloween and Easter are my favorite holidays. The bar is low, family travel is typically not required and the popular traditions surrounding them involve candy. Candy makes people happy. Temporarily at least. So let’s live in the moment and make some creamy caramel sauce to celebrate Halloween and all the apples just begging to be dipped.

This particular golden elixir is a Bring It! all- star. It features only four ingredients, all of which—if not in your kitchen already—can be procured at a mini mart (ok, not the Maldon sea salt, but nobody will arrest you for using kosher salt). It is easy to make, you can memorize the recipe after one go round, it travels in its own storage jar and it will be a welcome contribution or hostess gift for any occasion. Oh, and it is fabuloso! Use it on ice cream and in 2-2/3-3 crepes (coming soon), drizzle it on pretty much anything or use it as a dip for pretzels, apples or just your spoon.

As for the name, it is a merging of our three sons’ names. We knew we wanted something to be called Cholliesauce, and after Sawyer took one taste he decided this was it. Ollie and Chauncey wholeheartedly agreed.


Ice cream: good

Ice cream: good

Ice cream with Cholliesauce: wayyyyyy better!

Ice cream with Cholliesauce: wayyyyyy better!

Ingredients

2 cups granulated sugar
12 Tbsp unsalted butter, at room temperature, cut into pieces
1 cup heavy cream, at room temperature
1 Tbsp fleur de sel or Maldon sea salt flakes

Method

1. First, make sure you have all of the ingredients ready. Once you start the caramel sauce you have to pay close attention so you don’t burn it. To begin, heat the sugar over medium high-heat in the bottom of a heavy 2-3 quart saucepan. When the sugar starts to melt, start whisking the sugar, making sure to reach into the sides of the pan. The sugar will clump up, but keep whisking. It will continue to melt. When the sugar is melted, stop whisking. You can swirl the pan to move the sugar around.

2. Continue cooking the sugar until it reaches a deep amber color. Make sure you watch the pan very closely. This is where it is easy to burn the caramel. If you are using a candy thermometer (I have tried but am better off eyeing it) you want the caramel to reach 350 degrees F.

3. As soon as the sugar reaches the dark amber color, carefully add the butter. Whisk until butter is melted. If the sugar gets stuck to the whisk, you can switch to a wooden spoon.

4. Remove the pan from the heat and slowly pour in the heavy cream. Whisk until cream is incorporated and caramel is smooth. Whisk in the fleur de sel or Maldon sea salt flakes.

5. Let the caramel sauce cool for about 10 minutes in the pan. Pour the caramel into a large jar or smaller jars and cool to room temperature. Put the salted caramel sauce in the refrigerator and store it there for about a month. Yeah, a month. Good luck with that.


Easy as Pie!

Pie Lou's Apple

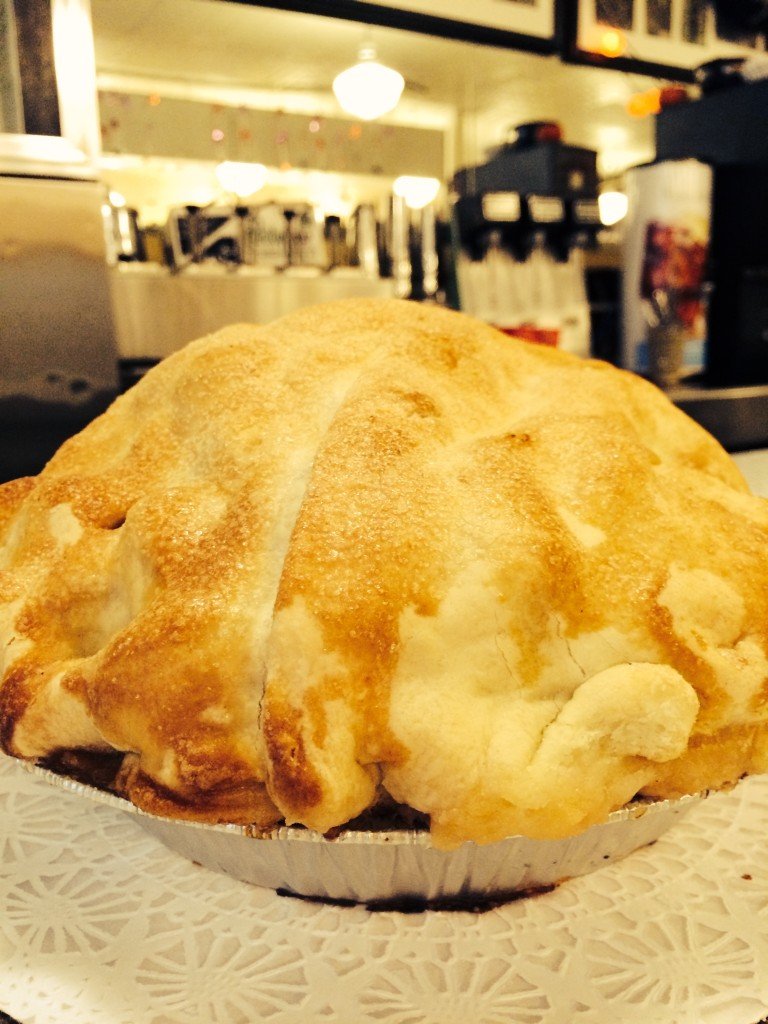
Before a recent dinner party a friend asked if he could bring a pie for dessert.   Perfect I thought.  I love pie but can’t bake one to save my life.  And, being the neat freak that I am, having a pie brought to my house sounded so….well….. tidy!  (For those of you who don’t know me, I am a neat freak. It’s not the best quality to have in life, but at this point, I’m stuck with it)

Fast forward to the night of the dinner party and guests begin to arrive.  The “pie guy” shows up with a brown paper bag in hand. He puts the bag on the counter and reaches into the bag.  I assume he is going to pull out a full baked pie.  Not so.  The first thing he pulls out of the bag is a small bag of apples.  Next is flour, then butter, sugar, and so on.  Is he going to make a pie right here, right now?  Is he going to interrupt my carefully orchestrated workflow?  After a few minutes of disbelief, I realized, yes in fact, he is going to make the pie right here, right now.  Thoughts were buzzing though my head….. how could I avert the chaos that was about to ensue?

Before I could make a move, the pie making commenced.   Flour was everywhere, precious counter space was gobbled up, guests were moving their drinks to accommodate rolling, chopping, slicing and dicing, and I was trying to remember to breathe!  After a few minutes of a rapid pulse and a few beads of sweat I realized, this wasn’t so bad.  Nobody cared.  And the pie turned out great.

So, beware all you hosts out there…. when you ask people to bring food to your house, it can really run the gamut.  But, not to worry, all you really need is good friends, good beverages, an open door, and all will be a success!

Recipe

As I mention above, I am not a pie baker, but my blog partner Edie is!  Click here to get a great, and very easy pie recipe.   Or, if you are like me, and want all pies to be made by someone else, go to Lou’s Bakery in Hanover if you live in the area.  Or find your favorite local bakery and ask them to hook you up.

Sue’s editorial comments

I’ve never been a big fan of the cliché “easy as pie” because it just isn’t true.


Best Joni Mitchell Apple Pie

As apple season comes to a close it would be a crime to miss the topic of apple pie. And it would be more of a crime if you did not make an apple pie because you were daunted by making the crust. Despite what the aggro bakers say, it is not a crime to use Betty’s little helper, the refrigerated roll-out crust. I’ll never reveal them, but I know bakers at the highest level who resort to the Pillsbury solution on occasion with no damage to their reputations.

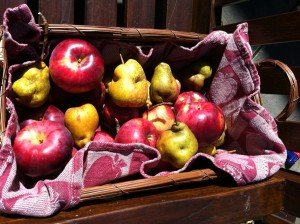
So let’s get to it. I made this pie with the last of our organic (read untended) pears and “Joni Mitchell” apples. You know, “…Give me spots on my apples, but let alone the birds and the bees now…”. I based it on the King Arthur Flour best apple pie recipe with the following slacker alterations:

Obviously, I skipped the homemade crust. I used pears and apples, did not peel them (they’re organic fergawdssake), and grated half the apples before I realized I had the wrong blade on the cuisinart. I subbed maple syrup for the apple cider syrup, used flour instead of “pie enhancer,” and subbed cinnamon and ginger for apple pie spice. Alright already! Here it is, and it was outstanding.

Ingredients

Crust:
Your favorite refrigerated roll-out pie crusts.

Filling:

3 1/4 pounds (about 9 whole apples, 10 cups) Cortland or other baking apples or pears, cored and sliced
3/4 cup (5 1/4 ounces) sugar
1 tsp cinnamon
1/2 tsp ground ginger
1/4 cup (scant) maple syrup
1 Tbsp rum (optional. I didn’t go there, but why not?)
2 Tbsp flour
1/8 tsp salt
2 tsp vanilla extract
juice of 1/2 lemon (about 2 Tbsp)

Method

To make the crust:  Take the box out of the fridge and let it warm up a bit.

To make the filling: In a large bowl, stir together the filling ingredients, mixing till well-combined. Set aside. (I LOVE that part!)

Assembly: Unfurl one piece of pie crust and lay it into a 9-inch pie plate. Spoon in the filling. Unfurl the other piece, lay it atop the filling, and seal and crimp the edges. Brush the top crust with milk, and sprinkle it with coarse sugar, if desired. Or, save out a bit of the crust, and cut decorative leaf designs, laying them in the center of the crust or around the edges. (yeah, right.)

Baking: Place the pie on a baking sheet to catch any drips. Bake in a preheated 425°F oven for 15 minutes. Reduce the heat to 375°F, and bake for an additional 45 minutes, or until the top is brown and filling is bubbly. Yield: 1 pie, about 10 servings.

pears-and-apple

Joni Mitchell apples and pears–not the prettiest, but darned tasty.


Crackle Bars

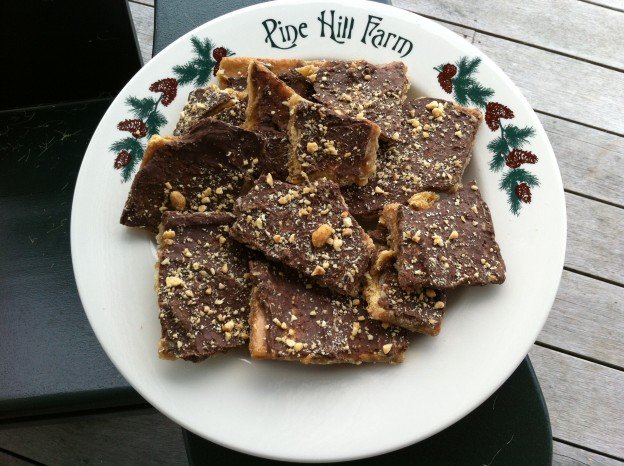
To balance all those healthy paleo and endurance crackers, I present to you a very unhealthy form of crack…er. This is ridiculously yummy and easy. Healthy? Not so much. Somebody brought a batch of this to book group and warned of its addictiveness. I started giving it as a neighborhood holiday gift and it quickly became an all-season, all-occasion favorite. It makes excellent bake sale material (which puts it in the Positive Snacks category), is darned good on a hike (add it to Better in a Backpack) and is a huge hit with hungry, sports-playing teenagers, who inspired the current batch.

Crackle-love

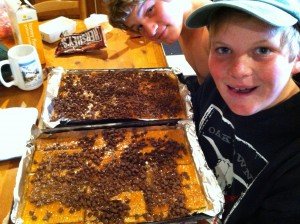
Child Labor–Happy and ready to spread.

And on the topic of kids, they can help you out here. They love the process of making it, especially spreading the melted chocolate chips (Hello bake sales!). It’s equally good with saltines or graham crackers, so use what you prefer or what is in your cupboard. These were introduced to me as “4th of July Bars” but the name did not stick. You do need to crack them to break them into pieces. And they’re made with crackers. The fact that they are as frighteningly addictive as something with a similar name is purely coincidental.

Ingredients

1 cup light brown sugar
1 cup butter
Saltines or graham crackers
12 oz milk chocolate chips (ultra cheapo brands do not always melt as well)
Chopped nuts, roasted and salted (your choice–I love tamari almonds but my kids prefer peanuts which are easy and cheap so I don’t argue.)

Method

Have ready a 13 x 9 pan: foil lined and lightly greased. Preheat oven to 400 degrees.

Line the pan with a single layer of crackers. (saltines fit perfectly)

Combine sugar and butter in saucepan.  Bring to a boil and boil for 4 minutes exactly – no more.

Pour boiled mixture over the crackers. Bake for 5 minutes – no longer!

Remove from oven and while very hot scatter the chocolate chips on the surface. Spread chips out evenly as they melt and soften.

Scatter with chopped nuts. Refrigerate until hardened.  Then cut or break into pieces.

Makes a bunch.

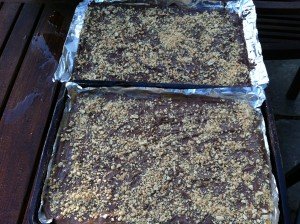
crack-cooling

The cool down phase.

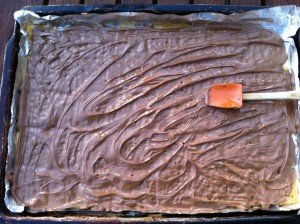
crack-smooth

The smoothing phase.


Bring It!

Store in a gallon-sized ready to tote ziploc bag in the fridge, or in individual plastic baggies that you can dole out as necessary. Make it fancy with tissue paper and a ribbon.

Glazed Lemon Cake

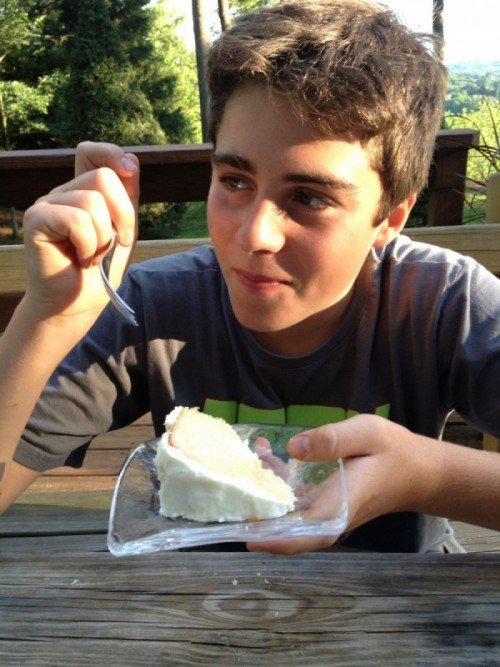
Sawyer on his 2nd piece!

Sawyer on his 2nd piece!


Edie’s son told her she had to post “those bacon wrapped thingies” on our blog.  My son told me I had to post “that lemon-y lemon cake”.  He said that lemon cake is the best dessert he has ever tasted IN HIS LIFE!  At 13, he’s not exactly a connoisseur but, he’s been around long enough and sampled enough desserts to be a trusted source.  So here it is, courtesy of my son Sawyer, the Glazed Lemon Cake straight from the Silver Palate Cookbook. If you own the cookbook, grab it off your shelf and make this cake now.  If you don’t own the cookbook, you should strongly consider this purchase. Every recipe is a winner. In the meantime, here is the recipe, straight up, no modifications.  And my motto…..if you have lemons, make lemon cake!

Ingredients

2 sticks salted butter, softened
2 cups sugar
3 eggs
3 cups all-purpose flour, sifted
½ tsp baking soda
½ tsp salt
1 cup buttermilk
2 tightly packed Tbsp grated lemon zest
2 Tbsp fresh lemon juice
Lemon Icing (see below)

Method

Preheat oven to 325 and grease 10 inch tube pan. Cream butter and sugar until light and fluffy.  Beat in eggs, one at a time, blending well after each addition.

Sift together flour, baking soda, and salt. Stir dry ingredients into egg mixture alternating with buttermilk, beginning and ending with dry ingredients. Add lemon zest and lemon juice.

Pour batter into prepared tube pan. Place in oven and bake for 1 hour 5 minutes or until cake pulls away from the sides of the pan and a tester inserted into the middle of the cake comes out clean. (I only bake this cake for 50-55 mins but my oven tends to cook things faster than what most recipes call for – so check cake early to see if it’s done early),

Cook cake in pan for 10 minutes.  Remove cake from pan and spread icing on it while cake is still hot.

Lemon Icing

1 pound confectioners’ sugar
1 stick salted butter, softened
3 tightly packed Tbsp grated lemon zest
½ cup fresh lemon juice

Method

Cream sugar and butter thoroughly.  Mix in lemon zest and juice. Spread on warm cake.


Pucker up!

Pucker up!

Lemon cake pre frosting

Lemon cake pre frosting

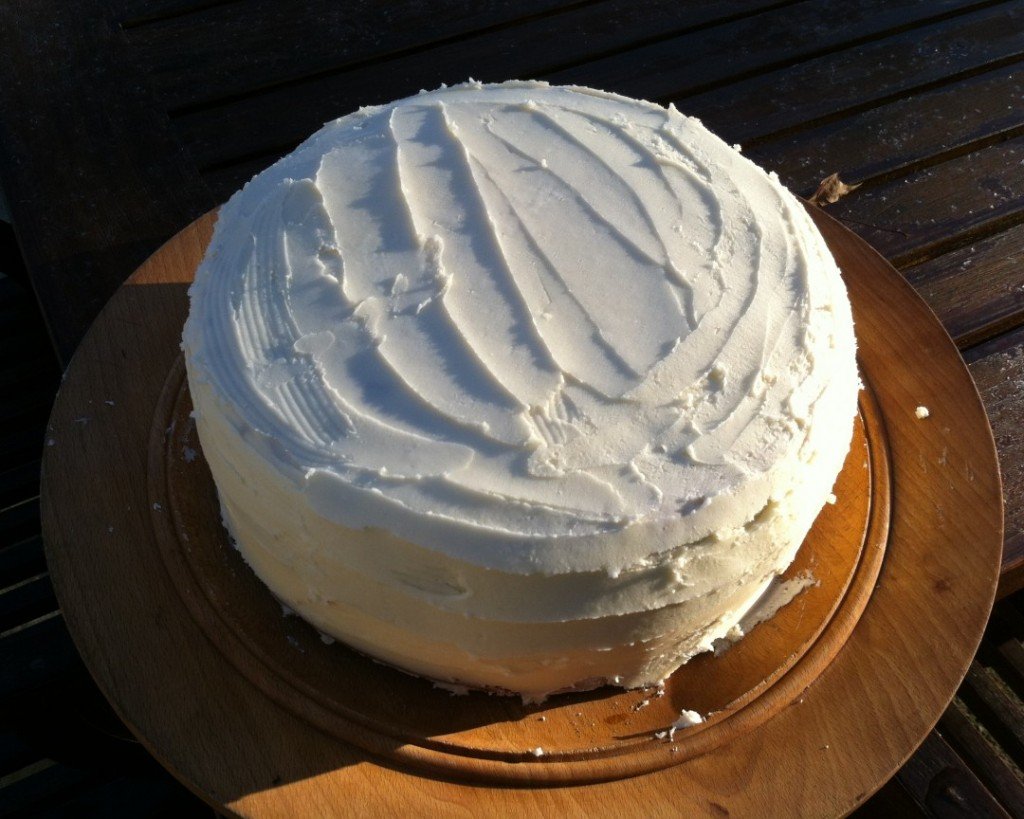
Lemon cake frosted

Lemon cake frosted

Editorial comments from Sue

The frosting can pack quite a PUCKER. You can tone it down a bit depending on your tastes by cutting the lemon zest and lemon juice amounts by maybe a third.  We all love the pucker at my house so we go full tilt.

Bring It!

Full disclosure, this cake is a bit of a mess.  Bringing this cake from your kitchen to a party, well, it might not be pretty but it will still taste great. If you have one of those round cake Tupperware containers, perfect. Use that.  Or, you can bring the cake unfrosted on a plate wrapped in foil. Transport the icing in a separate container and frost when you get there. Also, adding fresh fruit to the top, such as blueberries or strawberries would be a great addition.  Enjoy and pucker up!