Category Archives: Dessertalicious

Pear Tarte Tatin

The branches practically touching the ground they are so pear laden.

The branches practically touching the ground they are so pear laden.

When it comes to fruit, I rarely pick the pear as my first, second, third, or even tenth choice. I don’t know why, but they are just not high on my list of fruit. Pears are really good, don’t get me wrong, but there are so many other fruits that trump the pear (in my book anyway)….especially right now with apples falling off almost every tree you pass. Having said this, I recently found myself with a bag full of pears from a neighbor’s pear tree so I was in a situation where pears suddenly moved to the #1 spot on my list. This was fortuituous because pears don’t get nearly enough play in my house. And so I went to my stand by cookbooks and websites and found Pear Tarte Tatin. What a fun idea – make a pie-like dessert (NOTE: this is not a pie but pie-like….for those of you who know me you know I don’t make pies) and then flip it upside down. I was all in.

As an aside, I learned that a tatin is an upside-down pasty in which the fruit is caramelized  in butter and sugar before the tarte is baked.  It is gooey and yummy and great for this time of year.  I would even suggest this as a Thanksgiving dessert to go along with your pumpkin pie!

Enjoy and happy Fall season!

Ingredients

1/2 cup superfine sugar
1 tsp vanilla extract
3 firm, slightly under ripe pears, peeled, cored, and rubbed with lemon juice
1 1/2 Tbsp unsalted butter
1/2 tsp ground ginger
1/2 cup walnuts, toasted and chopped
9 oz. frozen pastry puff, defrosted and brought to room temperature
1 large egg
1 tsp milk

Method

Preheat oven to 375 degrees.

Put sugar, vanilla, and 1/2 cup water into an 8 inch ovenproof, heavy bottom fry pan and bring to a boil. Simmer this syrup until it thickens to become a deep brown caramel (when making caramel, do not be tempted to stir the sugar, as it will impact the process of making the caramel).

Cut each pear into 6 wedges.   Put pears in the caramel and gently toss until coated. Stir in butter and continue to reduce until you have a thick, buttery, caramel sauce. Carefully take off the heat and sprinkle on the ginger and walnuts.

Next, roll out the puff pastry until it’s the thickness of a 1/2 dollar and cut into a circle that it is about the size of your fry pan. You will want to tuck the edges down into the pan so leave a little extra. Mix the egg with the milk, then lay the pastry on top of the pears and tuck in around the edges. Brush the top of the pastry with the milk/egg mixture.   Put the pan in the preheated oven for about 20 minutes, until the puff pastry is nicely browned on top.

Once the pear tarte is cooked, now comes the super fun part – you have to flip it upside down for it to be a tatin!   To do this flipping, place a plate on top of your fry pan and using an oven mitt (or maybe two), flip the pan upside down and give it a little jiggle. With any luck, the pear tarte will fall out onto the plate. Voila, pear tarte tatin! Way to go.  If it doesn’t slide out easily, get creative and ask others in the house to help.  They will all want to be a part of this success.

Serve warm with whipped cream or vanilla ice cream. Enjoy the fall and make pears a top choice. They are really good. 

Classic Champion Chip Cookies

Pro move: Lila's got the tools of the trade—parchment paper and high tech oven mitts.

Pro move: Lila’s got the tools of the trade—parchment paper and high tech oven mitts.

Honestly, do you really need another chocolate chip cookie recipe? Apparently, yes! These come to you from US Ski Team rising star Lila Lapanja, who contributed mightily to my condo survival guide in Ski Racing. Lila’s mom Margie is the baking legend behind Margie’s Cowboy Cookies and the author of four cookbooks that meld life and kitchen wisdom with soul-satisfying recipes. Margie is all about comfort food, so of course her chocolate chip cookies would be good.

I am not sure what makes these so fool-proof, but they are. Maybe it’s the combo of margarine and butter, or the nice round numbers that make the proportions easy to remember even if you cut the recipe in half or in quarters; or the way dough stays soft and easy to scoop even if it’s in the fridge for a while; or the way they cook evenly and stay just soft enough when cool. I’m not sure what the magic is, but it just is. The next time you’re making a care package (surely someone you know needs a boost!) try baking these and you won’t go wrong.

According to Margie and Lila, these cookies will bring you good luck if you eat them the night before your ski races or at lunch between runs.

Champion Chip Cookies

Ingredients:

  • 1 cup margarine, room temperature
  • 1 cup butter, room temperature
  • 2 cups brown sugar
  • 2 cups white sugar
  • 4 eggs
  • 2 teaspoons pure vanilla extract
  • 1 teaspoon salt
  • 2 teaspoons baking soda
  • 2 teaspoons baking powder
  • 6 cups unbleached flour
  • 4 cups chocolate chips*

(You can cut this recipe in half to make it more manageable. No calculator required!)

Method:

Preheat the oven to 350 degrees. In a large (at least 13-quart) mixing bowl, whip up margarine, butter, and sugars until fluffy with an electric mixer.  Add the eggs, vanilla, and salt and mix well. (Slackers note—if a fork is all you’ve got just make sure the butter and margarine are soft and whip it good!)

Blend the baking soda and baking powder into the flour and tap into the creamed mixture on low speed. Mix until it comes together. Stir in the chocolate chips with a strong wooden spoon.

Line a cookie sheet with baking parchment and scoop the dough with a small (1- to 2-ounce) ice cream scoop or with a large spoon. Bake for 9 to 11 minutes (depending on your stove…), until lightly golden in color with tiny cracks on top of the cookies. Note your baking time for the rest of the batch. Makes about 4 dozen 2-ounce (Mrs. Fields’-size) cookies.

* Yes, there is a secret to this recipe: the chocolate chips. My favorite baking chips are, have been, and will always be Hershey‘s…or Trader Joe’s. I like to use half semi-sweet and half milk chocolate. On festive occasions, try tossing in white chocolate chips, a few toffee chips, or mini-kisses.


Triple Crunch Sesame Peanut Coconut Snack Bars

Sweet, salty, crunchy goodness to ease you into fall. No bridge tolls or taxi rides needed.

Sweet, salty, crunchy goodness to ease you into fall. No bridge tolls or taxi rides needed.

Boom! And just like that it’s fall. A week ago we were in oppressive humidity, and now we’re looking for anything orange to wear. Not blaze orange just yet, but something subtler to ease our transition and go with all the pumpkin ale and pumpkin lattes they’ve been forcing on us since mid August. We’re supposed to be putting away the linen, and the white, but let’s do that slowly to ease the pain. How do we ease out foodwise?

First of all, we eat up all that watermelon in the fridge. If you need ideas, how about one more batch of watermelon lemonade, one ingredient watermelon sorbet , watermelon gazpacho or Joy the Baker’s groovy, spicy watermelon wedge salad that uses watermelon as the plate (it’s really good, but it was too much of a leap for my people).

What else? Keep eating corn like it’s your job. If you haven’t made the Colorado corn souper chowder please do so before I have to have a word with you in private. Charred and raw corn salad is also a good call as is this super quick and easy raw corn and radish salad from Food and Wine . And beets! We’ll be dealing much more with those soon, but in the meantime don’t forget this awesome beet salad. What else? Take that John Boy Peach Crostata recipe and substitute pears and walnuts for peaches and pecans. Transition, done!

If all that clicking and looking tired you out, you may need a salty, sweet, satisfying, easy-to-make snack that will hang out and wait patiently for your eventual cravings. Look no further. These sesame peanut bars (from Bon Appetit), remind me of the ones by the cash register at virtually every Korean deli in New York City…the same ones that taunted and tempted me at every transaction. These bars are softer (and easier on your dental work), healthier (they have coconut fergawdsakes), and do not require a trip to New York City, though that is another darned good thing to do in the fall.

One final note…ok three: I used maple syrup instead of honey for local flavor. An 8” pan makes thicker bars than what you’ll see at the deli counter. You may want to try adjusting pan size and reducing baking time for thinner bars. I haven’t tried it. Do use parchment paper like the recipe says. It may work without it but that’s not a risk I’m willing to take.

Ingredients

Servings: Makes about 16

  • Unsalted butter (for pan)
  • 1¼ cups white and/or black sesame seeds (slackers be assured, all white is fine)
  • ¾ cup unsweetened shredded coconut
  • ¼ cup unsalted, roasted peanuts
  • ¼ teaspoon kosher salt
  • ¼ cup honey (or maple syrup or a mix of both. c’mon New England…show your stuff!)
  • 2 tablespoons creamy peanut butter
  • ¼ teaspoon vanilla extract

Method

Preheat oven to 350°. Butter an 8×8″ glass baking dish (or larger you want thinner, crunchier bars); line with parchment paper, leaving a generous overhang (I mean it) on all sides. Mix sesame seeds, coconut, peanuts, and salt in a large bowl. Mix honey, peanut butter, and vanilla in a small bowl. Add to sesame seed mixture and mix well.

Scrape mixture into prepared baking dish; press firmly into an even layer. Use that generous overhang of parchment paper to really tamp down on the mix so it’s good and dense and holds together. Bake until golden brown around the edges, 20–25 minutes. Transfer to a wire rack and let cool until firm, 30–40 minutes. Lift out of baking dish (if it starts to crumble, let cool longer) and cut into 16 bars. Let cool completely.

Bringing it: Bars can be made 3 days ahead. Store tightly wrapped at room temperature. They do just fine in the fridge too (and last longer).


John Boy’s Rustic Peach Crostata

crostata1

Just peachy. And rusticy. And easy. Oooh la la!

I am chomping at the bit for apple season. And yet, there are still watermelons and peaches and fresh corn to be had, not to mention the low maintenance fish tacos (coming soon) that can be the dinner anchor for all that fresh fruit. So back off, fall. Today we’re all about peaches.

So good, so luscious, so hard to bake them in to anything before eating them all fresh. BUT here is your best chance of that. I started summer by making a rustic blueberry crostata with a homemade crust. The crust had some whole wheat goodness and toasted pecans mixed in. It was indeed really good. But it involved crust making, which takes time and actual care. Let’s be honest. Homemade crust can be a dealbreaker. This recipe is built on a premade roll out crust, which I believe is one of the most life-enhancing low-tech inventions of the late 20th century. It brings pie and crostata making within reach of everyone who can cut a piece of fruit.

I was introduced to this by my sister who was introduced to it by our brother-in-law. As far as I am concerned, a man who makes crostata (and he made his own crust by the way) gets all the credit for its invention. Hence the name. The “Boy” is added in a nod to those pie-making Waltons of yore. I added the slacker reliance on premade dough, the optional rustic tweak of pecans and cornmeal to the crust, and the suggestion of yogurt whipped cream.

With that I give you a taste of late summer, and a solid stand against the inevitable onslaught of apples and pumpkins.

John Boy Rustic Peach Crostata

Makes 6 servings

Ingredients:

  • Prepared pastry dough (uncooked), enough for a 9-inch pie pan
  • 1 Tbsp or so cornmeal (optional)
  • 1/3 cup chopped toasted pecans (optional)
  • 4 large peaches, thinly sliced
  • 1/2 cup sugar
  • 2 tablespoons all-purpose flour
  • 1/2 teaspoon or more cinnamon if that’s your thing (totally optional and awesome)
  • 1 tablespoon butter
  • 1 whole egg, beaten
  • Ice cream, whipped cream or whipped yogurt cream (recipe below) for serving

Method:

Preheat oven to 375 degrees F.

Prepare a baking sheet by lining it with parchment paper. (A large rimmed baking sheet is best, as long as you can fit the dough into it. If using an un-rimmed baking sheet put another pan underneath to catch the drippings.) Sprinkle cornmeal (is using) on parchment paper and set the uncooked pie dough onto the baking sheet.

Sprinkle the dough with pecans, if using. Roll dough lightly with a rolling pin to smoosh them in.

In a bowl, gently mix peaches, sugar, flour (and cinnamon if using) together. Pour fruit mixture into the center of the pastry round, leaving about 2 1/2 inches around the edge. Fold up the edge of the pastry dough over the filling to make a rim. Fan the edge as you go around folding the dough.

Brush pastry with the beaten egg (milk and a sprinkle of sugar works too) and place the pat of butter on top of the fruit mixture. Bake for 30 to 45 minutes or until the pastry is golden brown and the fruit is bubbling. Cool the crostata on a rack and serve warm or at room temperature  with your favorite ice cream or whipped cream.

Yogurt Whipped Cream

Courtesy of Food52 and Saveur and dairy farmers everywhere

Makes about 3 cups of whipped cream

Ingredients:

  • 1 cup heavy cream, chilled
  • 1/2 cup plain yogurt, Greek or otherwise, full-fat or otherwise, chilled (I used nonfat Greek)

Method:

In the bowl of a stand mixer fitted with a whisk, or with a hand mixer or whisking by hand like Grandma Walton, beat heavy cream and yogurt on medium-high speed until soft peaks form. Taste and add more yogurt or cream to taste and whisk again to soft peaks.

Bringing it:

Don’t try to transfer this off the parchment paper…even if you really want to get a nice picture for a blog. High chance of failure, and possibly tears. Transport it on the baking sheet and rewarm it in the over, or put the crostata, parchment and all, onto a platter and serve it up at room temperature.

Lemon Beach Pie

Must...eat...more...pie. Sweet, salty, sweet, salty, and oh yeah—creamy, crunchy, cool and tart.

Must…eat…more…pie. Sweet, salty, sweet, salty, and oh yeah—creamy, crunchy, cool and tart.

If you love your people—and I know you do—make this pie now. In the wilds of the Internet it is known as Bill Smith’s Atlantic Beach pie. Anything called Beach Pie gets my attention. When its maker also calls it the “easiest recipe in the world,” I’m all in. This pie is not a secret. In fact, way before Ms. Kardashian tried to break the Internet I think this pie came close. For some reason, however, it took me until recently to make it.

What pushed me over the edge was the entire stick of butter on my counter, barely maintaining its solid form on a sweltering summer day. “Mix me with Saltines and a touch of sugar, then turn me into the crust of a glorious pie,” it seemed to be saying.

Perhaps that was the heat. At any rate, I obeyed the voice. The aforementioned Bill Smith created this version of a pie that is served up at coastal seafood restaurants in the North Carolina. It tastes darned good far from the beach too, and if for some reason you don’t finish it, just pop it in the freezer and bust it out whenever you need a taste of the beach. 

Make One Beach Pie

For the crust:

  • 1 1/2 sleeves of saltine crackers
  • 1/3 to 1/2 cup softened unsalted butter
  • 3 tablespoons sugar

For the filling:

  • 1 can (14 ounces) sweetened condensed milk
  • 4 egg yolks
  • 1/2 cup lemon or lime juice or a mix of the two
  • Fresh whipped cream and coarse sea salt for garnish

Method:

Preheat oven to 350 degrees.

Crush the crackers finely, but not to dust. You can use a food processor or your hands. Add the sugar, then knead in the butter until the crumbs hold together like dough. Press into an 8 inch pie pan. (If you only have a 9-inch pan just top the pie with more whipped cream.)  Chill for 15 minutes, then bake for 18 minutes or until the crust colors a little.

While the crust is cooling (it doesn’t need to be cold), beat the egg yolks into the milk, then beat in the citrus juice. It is important to completely combine these ingredients. Pour into the shell and bake for 16 minutes until the filling has set. The pie needs to be completely cold to be sliced. Load it up with fresh whipped cream give it a sprinkling of sea salt.

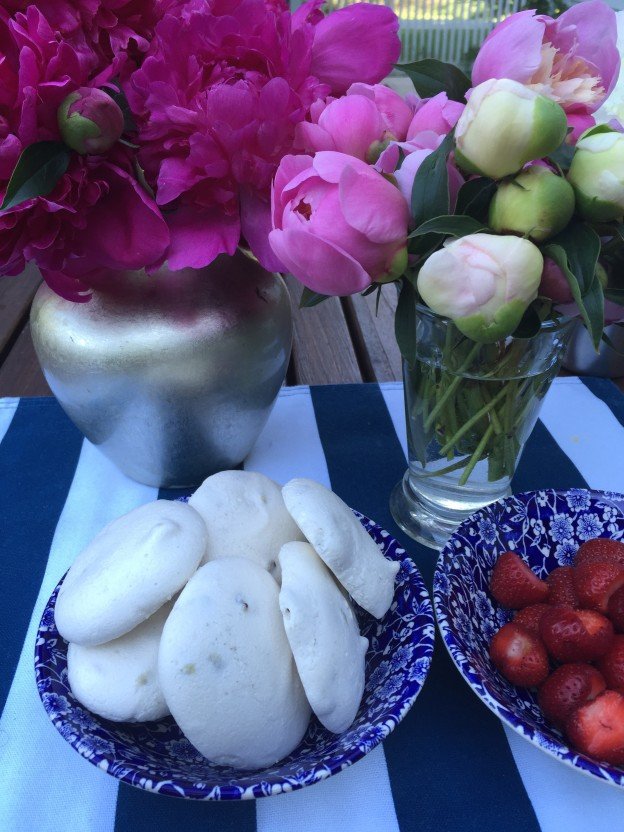
Ooh la la Vegan Meringues

And this just in from the land of weird food science… Don’t pour that chickpea liquid down the drain! That murky stuff has a name (Aquafaba) a purpose (egg white imposter), it’s own site and of course a few facebook pages, of which this is the prettiest.

Does it work in making edible confections? When it comes to edible, I am not the best one to ask (I eat pineapple cores, chunks of raw ginger and watermelon seeds), but trust the 16-year old boy who is skeptical of every “secret ingredient” and super food in his mother’s kitchen. In two days I made two batches of these, and only salvaged three to take to book group. He definitely approved!

So yes, this indeed works. Should you make them? Well heck yes! Here’s the thing. I’m, not really sure what is in chickpea juice, or if it is any better for you than egg whites. This recipe still involves all the same sugar you’d be using with the real thing.

BUT, it may save you: if you run out of eggs, because chances are pretty high you have a can of chickpeas in the pantry; if by dessert time you still need a conversation starter; if Vegans come a visitin’. They will be especially grateful specially if you whip up some coconut cream to go with the meringues.

In honor of French chef Joël Roessel the original aquafabaliste, I give you my version of…

Ooh la la Vegan Meringues

Yield: 30 to 35 meringues
Time: About 2 hours, mostly and happily unattended

Ingredients:

  • Liquid from one 15-ounce can of chickpeas (about ¾ cup)
  • 1 heaping cup granulated sugar
  • 1 tablespoon vanilla extract
  • ¾ cup mini chocolate chips (optional)

Method:

Heat the oven to 250°F and line 2-3 baking sheets with parchment paper. Pour the chickpea liquid (aquafaba) into the bowl of a stand mixer and beat with the whisk attachment until stiff peaks form, about 15 minutes. Gradually beat in the sugar, then the vanilla. Gently fold in chocolate chips, if using.

Scoop or pipe the aquafaba mixture into mounds onto the baking sheets and bake for up to 90 minutes. Start checking them at 1 hour, to make sure they do not start to brown. (The meringues will be hard to the touch.)

Let meringues cool on the baking sheet for 10 minutes, then serve. (Meringues can be stored in an airtight container for up to three days.)


Banana Berry Smoothie

Banana Berry SmoothieThis recipe is really cool – both temperature cool and hipster cool. And just in time for the start of summer which is only a couple days away!  It is simply frozen bananas and berries in a blender with a touch of almond milk (or whatever milk you have on hand).  Yes, that’s right – bananas, berries, milk, blender. That’s it!  It’s smooth and frosty, light and healthy.  Not to mention good for all ages and can be served any time – breakfast, lunch, snack, or dessert.  What are you waiting for-  get that fruit in the freezer asap so you can make this smoothie soon.

And, wait, there is a bonus, you can add in anything like.  The frozen bananas are merely a vehicle for anything else that floats your smoothie boat.  You can add coconut, chocolate, cherries, strawberries, ginger, nuts, sprinkles, cinnamon, mint, cacao powder, vanilla, almond, Nutella, caramel, sprinkles, whipped cream, blueberries, carob, and oh gosh, I almost forgot – peanut butter (how could I almost forget peanut butter – shame on me!). The list goes on…  

And so, here you go, the recipe (although you don’t really need one -just throw the stuff in the blender, it practically makes itself!).

Rah, Rah Summer!

Ingredients

2 ripe bananas, peeled and chopped into 1 inch pieces
1 cup berries (I used a mixture of raspberries and blueberries)
1/4 cup almond milk, soy milk, coconut milk or any milk of your liking (more as needed)

Method

Place bananas and berries in freezer for at least 6 hours or overnight.

Take bananas and berries out of freezer and let thaw for approximately 45 minutes to an hour (they need to soften a bit before you put them in the food processor but you still want them to be somewhat frozen – you may have to experiment a bit to get the right consistency).

Place bananas, berries and almond milk in food processor and pulse until desired consistency. You will need to stop and scrape down the sides intermittently. Add more milk as needed.

Stir in any add ins such as chocolate chips or nuts, OR blend in any add ins such as peanut butter or vanilla extract.

Peanut Butter Coconut Bites

These are so easy they practically make themselves.

These are so easy they practically make themselves.

These are tasty little energy bites that go a long way with flavor and energy. They are super easy to make, no bake and a vehicle for any flavor, chip, dried tidbit, or other food item you have on hand. I made half of these with chocolate chips and the other half with cinnamon chips. Both worked really well.  I bring them on hikes. bikes, or other vigorous outings. They travel well and provide a “zip” when you need it.

I got this recipe from a friend of mine who likes to eat super healthy and bring ‘good-for-you’ goodies to all those around her. She brought these to work one day and everyone raved about them. The original recipe is adapted from the Oh She Glows cookbook which we know and love at Bring It Eats!

These take about 10 minutes to make. Go for it and share. You will be happy with the results and they are a fun food to pass around at any time.

Ingredients

1 cup rolled oats (not instant)
2 TBSP coconut oil
2 TBSP peanut butter (or almond butter)
1/4 cup maple syrup (or other sweetener)
1 tsp vanilla
1/2 cup almond flour (or use whole wheat pastry flour – remember previous posts, we should not use almonds right now because of the drought in CA)
1/4 tsp salt (go light)
2 TBSP chocolate chips or any flavoring you like.

Method

Blend oats in blender until a fine flour forms.

Combine coconut oil, peanut butter, maple syrup, and vanilla with a hand mixer. Add almond (or other) flour, oat flour, and salt. Beat until combined. Add chocolate chips.

Form into 14 balls and freeze on parchment paper. Store in Tupperware in refrigerator until you are ready to eat. You can eat them cold or bring to room temperature.

Snowy Mountain Top Chocolate Crackle Cookies

Pure as the driven snow!

Pure as the driven snow!

You don’t need to look far to find snowy mountain tops in these parts. This winter has brought snow storm, after snow storm, after snow storm to the northeast. It just keeps coming and it’s great. Right out the front door is waist deep powder and more of the fine white fluffy stuff is on the way. I saw this recipe for ‘snowy mountain top’ chocolate crackle top cookies and I thought…. “bingo”! It says it all.

We took these cookies back country skiing this past weekend. They got eaten at the top of a run where it was hard to transition due to the waist deep powder (see photo below). But the cookies helped us power through and the skiing was phenomenal.

This recipe comes to you from one of my favorites, Whitewater Cooks, which is a collection of recipes from the Fresh Tracks Café in Nelson, British Columbia.  That is where I was supposed to be this week but due to the poor snow conditions out west and the great snow conditions here, we made a last minute change of plans and cancelled our trip. This is as close as I’ll get to the Fresh Tracks Café this week, but at least I’m skiing fresh tracks (literally!)

Ingredients

8 oz. semi sweet dark chocolate
1 1/4 cup flour
1/2 cup cocoa powder
2 tsp baking powder
1/4 tsp salt
1/2 cup butter
1 1/3 cups packed light brown sugar
2 large eggs
1 tsp vanilla
1/3 cup milk
1 cup icing sugar

Method

Coarsely chop chocolate and melt over a pan of simmering water. Set aside to cool.

Sift together flour, cocoa, baking powder, and salt. Beat butter and light brown sugar until fluffy, 3 to 4 minutes. Add eggs and vanilla and beat until well combined. Add the cooled melted chocolate. Add flour alternatively with milk. When the dough comes together shape into flattened disk and wrap in plastic. Chill for at least 2 hours, until the dough is firm.

Using a heaping teaspoon of dough, shape into 1 inch balls. Roll each ball in icing sugar until completely coated. If an cocoa colored dough is visible, roll in sugar again.

Place cookies on a parchment covered cookie sheet 2 inches apart. Make sure they don’t roll around when you put them in the oven. Bake at 350 degrees until flat and the sugar coating (snow) splits, 12 to 15 minutes.

Let them cook completely and then store in an airtight container for up to 2 weeks.

Truly waist deep

Truly waist deep

Be your own Valentine

Put a little love on your plate.

Put a little love on your plate.

Valentine’s Day. So much pressure. So many expectations. So few scenarios that live up to the romantic ideal portrayed in the jewelry commercials. But on the plus side, Valentine’s Day always seems to involve chocolate. This year, instead of waiting for the right someone to do the right thing and get the right chocolate, make something chocolate for yourself—something you can put on toast, or on ice cream, or on a spoon or on something else chocolate. Yep, something like Nutella. But even better than Nutella because you made it yourself.

While you are waiting for your hot date to show up for that romantic dinner (or for the pizza guy to arrive) you might want to check out these 8 facts about Nutella. It’ll make for some  good conversation between those 5 overwrought and way-too-small courses at Cafe Shmancy.

This is not quite as silky smooth as the real thing, but it’s pretty darned close, and it’s so easy to make you’ll be bringing it to grateful hosts often. It’s also dang good in 3-3/2-2 Crepes.

Ingredients

1 cup hazelnuts, toasted*
¼ cup granulated sugar
1 tablespoon cocoa powder
1 teaspoon salt
3 tablespoons coconut oil
10 ounces dark chocolate, melted and cooled slightly

Method

1. Toast the hazelnuts: Heat the oven to 350°. Spread the hazelnuts on a baking sheet and toast until the nuts are fragrant and slightly golden, 4 to 6 minutes. Let cool. *if you can find hazelnuts without the skin, get those. If not, roll the toasted hazelnuts in a towel after toasting to remove as much of the flaky skin as you can. If you have OCD about your hazelnuts and want them totally naked, try this technique.

2. Make the spread: In the bowl of a food processor, grind the hazelnuts with the sugar, cocoa powder and salt until the mixture begins to form a coarse paste.

3. Add the coconut oil and continue to process until the mixture is nearly smooth.

4. Add the slightly cooled chocolate and process until fully combined. Transfer the mixture to a large jar and cool completely (it may be a tad on the thin side until fully cool). The spread will keep in the jar at room temperature for up to two weeks.

Oh, and by the way, do not refrigerate this. If you forget to read this the first time, then put the jar in some warm water on the stove until it gets back to a speadable consistency.

Happy Valentines Day and be good to yourself!