Category Archives: Breakfasty

Biscookies

Biscookies

Hot, sweet, buttery. Let’s not worry about what to call them (or that this picture looks like a mug shot). Let’s eat!

Who loves ya baby? Your family. First, you gave them Dutch Bunny, and now you’re going to give them Sunday morning biscuits. Not just any biscuits but biscuits brushed with melted butter and sprinkled with kosher salt. Yeah, now we’re talking. These come from the basement of Del Posto restaurant via Bon Appetit. I love the story of Rosa, the “linen lady” who was transferred to pastry duty in desperation and now practically runs the place. Go Rosa! She makes these for the staff so you know they’re full of love and goodness (and butter).

As a professional slacker I made slight modifications, in italics, which led to some pleasantly overbrowned and misshapen biscuits that my son christened biscookies. So here they are: biscuits, cookies, whatever. They’re just darned good, especially hot from the oven.

Ingredients

2 1/2 cups all-purpose flour
3/4 cup sugar
2 1/2 tsp baking powder
1 1/2 tsp kosher salt, plus more
1 cup (2 sticks) chilled unsalted butter, cut into pieces; plus 6 Tbsp. (3/4 stick), melted. Way too much. Half that for brushing on is plenty.
3/4 cup chilled buttermilk

Method

Preheat oven to 350°. Whisk flour, sugar, baking powder, and 1½ tsp. salt in a large bowl. Add chilled butter and toss to coat. Work butter into flour mixture with your fingers until mixture resembles coarse meal with several pea-size pieces of butter remaining.

Using a fork, gently mix in buttermilk, then gently knead just until dough comes together (do not overmix). Kneading was a sticky mess so I just stirred it up.

Pinch off pieces of dough and gently roll into 1” balls; place on 2 parchment-lined baking sheets, spacing 2” apart (you should have about 24). If butter softens too much while you are working, chill dough until firm before baking, 15–20 minutes. I just spooned them out like cookie dough.

Bake biscuits until golden brown, 25–30 minutes. Brush with melted butter and sprinkle with more salt. Serve warm.

How About Them Apples?

Full disclosure. This post is really an excuse to put up my favorite video clip of the season. Behold the way one chef dealt with a huge order of tarte tatins.   

https://www.youtube.com/watch?v=nbzw6y0pF3U

If more men knew that this was a step in the process of making apple pie we’d have a whole lot more male pie bakers. And while we are on the subject of men and food prep, you might enjoy the exploits of our favorite Russian Food hacker  (the kiwi and the pomegranate hacks were news to me).

But power tools aside, this is also the right time to remind everyone of all the great things to do with apples. There are lots of them this year, though not really in our orchard, which is a mixed blessing. No hauling bushels and grain sacks full of apples to the cider maker, but no homegrown apple cider. There are, however, more apples than we can possibly use, and here are my favorite ways to approach the task.

For Snacks:

Best, of course, is just eating these crisp juicy apples, which are the ideal for taking on the road or the trail. But when you need something a little more interesting, get dipping. Peanut butter and almond butter are excellent, healthy options, as is vanilla yogurt or one of my faves, a mixture of ground flaxseed and cinnamon. If you really need to make the hard sell on apple slices serve them with Nutella or, even better, with homemade salted caramel Cholliesauce.

For Breakfast:

It’s time for apple cheddar scones. It just is. Trust me on this. For apple cheddar pancakes (thank you Doug Haney) thinly slice up some Granny Smith or Mac- like apples and cook them down. Slice up sharp cheddar. Add both to the pancake right after you pour it on the griddle and cook the cakes as usual. You know to top them with–only real stuff!

For Lunch:

Add thinly sliced apples to your sandwich, especially if it’s in turkey and cheddar or grilled cheese family. Make a frittata with chopped apples and cheddar. Make an apple/ butternut squash soup like this one , or my slacker no recipe version that I swear I will post soon.

For Dinner:

Dip them in Guinness Fondue. Serve up some pork tenderloin with homemade caramelized applesauce. See below.

For Dessert:

If you haven’t already made this Apple Cake, do it! If you don’t have the mojo to make the cake at least make the brown sugar frosting and just smear it on an apple and call it good. Really good. The frosting is totally easy and all-time delish. And, especially if your apples aren’t winning any beauty contests make a Joni Mitchell apple pie.

For Fun:

Finally, if you prefer to drink your apples, mix up some hard cider sangria and enjoy the season!

Caramelized Applesauce Plus

rosy applesauce

Rosy pink applesauce from tree to table with one little stop on the stove.

This came about as a total mistake, after I got distracted while making a batch of applesauce with the thin-skinned apples that come off my favorite tree.  It appeared to be yet another burned disaster, another charred pot headed to the graveyard, but it did smell pretty good. The happy result was Applesauce Plus, which is sweet without added sugar and prettily pink. It was an instant family fave.

Ingredients:

  • As many tart, unpeeled red-skinned apples as you want.
  • Squeeze (or more) of fresh lemon juice.

Method:

Cut the cores from the apples and put them in a pot, barely covered with water. Boil until the water is thick and bubbly and the pot smells a bit like caramel. This takes a while, so you’ll want to ignore them for a while, but not be so far away that all the water boils away and you ruin your pot.

When the apples are sticking to the bottom just a bit and the pot smells really good, turn off the stove and let the whole thing cool. Smash the apples through a sieve or a food mill like this one (which is totally worth having), and add a squeeze of lemon. Enjoy it as is or on pretty much anything.

Hakuna Frittata


Hakuna-Frittata

Lots of garden-fresh zucchini finds a happy home (and some sweet camouflage) in this frittata. Watch out–that freaky ceramic salt guy wants a bite of yours.

Stay with me here. This will all make sense. I promise. One of my favorite food sites is Food52, but sometimes I avoid clicking on their emails because it opens a time-sucking Pandora’s box of recipes and ideas. The whole concept of spending oodles of time looking for timesaving ideas is perverse and ends up making me angry, after much time is gone forever. BUT, all that anxiety aside, one of my go-to features on Food 52 is their “How to make X without a recipe.” Learning a method vs a recipe really sets you free because you never have to worry about having exact ingredients, exact amounts or an Internet connection.

One anytime meal for which I never ever use a recipe is a frittata. I can’t be 100 percent certain on this but I read (while looking for something else no doubt) that frittatas were actually invented to use up leftovers. If that’s not enough to make them the home cook’s best friend, consider these features: they use simple ingredients that are pretty universally loved and that you usually have on hand; they are infinitely tweakable for food issues (unless you are Vegan); they are cheap, quick, comforting and tasty. Yes folks, frittatas will indeed set you free.

When you are thinking of something simple yet substantial to serve for dinner or breakfast, or of something nutritious that you can eat hot or cold on the road, or of a quick, easy dish to bring to a pot luck, or of what you can make right now (when you are not busy), to eat later (when you are so busy you can’t take time to boil water)—in all these situations you can either starve, lament your inability to plan menus, buy $60 of takeout or…you can Hakuna Frittata.

That’s right. Go ahead and sing the rest of the verse, if only to pay back your kids for years of Lion King songs stuck in your head….It means don’t worry, as long as you have some eggs.

I went ahead and looked on Food52 and sure enough they beat me to it with How to Make Any Frittata in Five Steps. If you think you can resist the rabbit hole of fabulous recipes, pictures and ideas on Food 52 check theirs out. If, like me, you thrive within Internet boundaries, check out my version here. I have purposefully not included exact amounts, but rather loose guidelines which beg to be challenged:

Ingredients:

  • Onions etc: 1 cup or so of diced onions or something in the onion family, like leeks, shallots, scallions. You can use a combo of them as well.
  • Seasonings: salt, pepper, dried or fresh savory herbs of choice.
  • Vegetables: Any veggies you like or have on hand: Broccoli and cauliflower–good. Leftover roasted potatoes–so Spanish of you! Fresh corn and peppers–yum. Last night’s roasted root vegetables–yep. A whole lot of zucchini from the neighbor? Bring it on!
  • Meat option: Cooked meat like bacon, crumbled sausage, ham, cut up chicken or turkey.
  • Eggs: Start with about eight for a normal frying pan. You can work up or down from there depending on what you have.
  • Cheese: A handful or more of your favorite. Cheddar is king here, but dollops of soft goat or ricotta works well too. Go Gruyere to pretend you’re in the Alps. If you’re feeling a little mean or lactose intolerant or both you can skip the cheese.

 Method:

Saute the onions in some olive oil or butter or a mix of both. Sprinkle some salt on them as they cook. If you are cooking for someone on a low sodium diet make sure they are not looking during this step.

When softened add other veggies. Cook them up until all browned and yummy looking. Here is where to add fresh or dried herbs of choice and let them ramble around with the veggies at the end of cooking.

This is a good time to stir in the meat, if you are using it.

Whip up eggs with a fork or in a blender, and pour them into hot skillet. Lift up the edges a bit as the eggs cook so that the uncooked parts run onto the hot part of the skillet. A little omelet art is in order here.

When the eggs are getting near set, sprinkle on the cheese and put the whole shebang under the broiler until is it browned to your liking.

Serve it up hot or at room temp and enjoy realizing that there is only one pan to clean. Go you!


Dutch Bunny

Dutch Bunny

    A bunny for breakfast—isn’t that veird? Nah!

Happy Sunday! The second half of your weekend is going to be great, especially with your new weekend pal, the Dutch Bunny. Elsewhere known as a Swedish pancake or a Dutch Baby, this somehow became the Dutch Bunny in our household, and it is an all-time favorite. There are many versions of this breakfast treat, but this recipe—slightly adapted from Sunset magazine longish ago—is about as easy as it gets. Quietly whip it up and slip it in the oven while everyone is having their coffee, grab it in all its puffy greatness out of the oven, and you’ll be a welcome guest or favorite mom forever.

It is great as is or fancied up with fresh berries (like the blueberries that are still going off around here) and whipped cream. If you want to add some seasonal shmance in the fall, lay some thinly sliced apples in the pan with the melted butter, sprinkle them with sugar and brown them before pouring the batter on top. Bad a bing! A fall classic.

Yield: Serves 4, or one hungry teenager.

Ingredients

3  Tbsp butter
3  large eggs
3/4  cup  milk
1/2  tsp vanilla
1/2  cup  all-purpose flour
2  Tbsp sugar
1/8  tsp salt
Powdered sugar and fresh lemon wedge for topping
Raspberry sauce (optional, recipe follows)

Method

1. Melt butter in a 10-inch ovenproof frying pan over low heat. Remove from heat.

2. In a large bowl or blender, beat or whirl eggs until light and pale. Beat or blend in milk, vanilla, flour, sugar, and salt.

3. Pour batter into prepared pan and bake in a 425° oven until pancake is puffed and lightly browned, 15 to 20 minutes. Dust with powdered sugar and squeeze fresh lemon on top. Slice into wedges and serve immediately. Top with fresh berries or raspberry sauce if desired.

Raspberry sauce

In a food processor or blender, whirl 4 cups rinsed fresh or thawed frozen raspberries until smooth. Rub purée through a fine strainer into a bowl; discard seeds. Stir 1/4 cup sugar into raspberry purée; taste, and add more sugar if desired. Makes 1 1/4 cups.

Hit the Trail Scones

Not just for tea time. These trail mix-y scones can go the distance.

Not just for tea time. These trail mix-y scones can go the distance.

Scones. They sound so proper, so fancy, so….much of a pain to make. I used to think scones were too labor intensive to consider for every day food. That was until early one morning I was confronted with the task of making something get-out-of-bed worthy and take-on-the-road worthy within an hour. Scones saved my butt.

Here’s why: They call for cold butter vs softened; they involve no eggs and therefore no separate mixing vessels; they require only one baking sheet vs muffin tins that must be greased or lined with the ever-elusive muffin liners. Scones vs muffins? No contest! And that’s before the short cuts.

I know the sermon—baking is a science, weigh vs measure, be exact, blah blah, blah. But in the real world short cuts are important. Sometimes knowing they are there, whether or not you use them, gives you the mojo you need to embark on creating something delicious. That is why I am including my own short cut version along with the legit directions.  

There’s nothing really trail-like about these scones, other than the fact that I made them as I was leaving on a long hike and wanted to bring something that was sturdy enough to travel but more enticing than trail mix. I needed a way to use up some cream and incorporate the chocolate chips and nuts that were just begging for the proper vehicle. Knowing that I could use a food processor, dump the whole shebang on a baking sheet and form the scones right on that same sheet made them a possibility. Out of this scenario, the Hit the Trail Scone, and it’s slightly healthier cousin, the Almond Joy scone, were born.

“Are they ok?” I asked my son who shies away from my more adventurous creations, particularly those involving nuts. “They’re ridiculous!” he said. “Don’t put them on the blog—keep them secret!” But you know how I feel about secret recipes, so here they are.

Please customize them to make them all yours!

Ingredients

2 cups (10 oz) all-purpose flour
1/4 cup (1 3/4 oz) granulated sugar
2 1/2 tsp baking powder
1/4 tsp salt
1 stick butter (4 oz) (cold, cut into pieces)
1 cup (8 oz) heavy cream (cold)
*1/2 – 3/4 c miniature chocolate chips (depending on preference)
*½ cup roasted almonds, coarsely chopped

* any combo of dried fruits, nuts and/or chips will work, so use what you love or what you have on hand. Think dried cranberries and walnuts, dried figs and almonds, white chocolate and macadamia nuts, butterscotch chips and walnuts for Ron Burgundy fans, peanut butter chips and crumbled bacon for Elvis fans, etc.

Topping
1 egg, lightly beaten (or more of that cream you need to use up)
2 Tbsp sanding sugar, granulated sugar or coconut sugar.

Official Method

Preheat over to 425 degrees

Mix together dry ingredients. Cut in butter with pastry blender, two knives or your  fingers.

Add chopped nuts, chocolate and cream to ingredients in the bowl and blend together quickly with a spatula. Do not overmix.

Turn dough on floured board and pat into a big square or round, 1-inch or so thick. Cut dough into shapes of roughly equal size. Move pieces to parchment or Silpat lined baking sheet.

Bake as directed below.

Short Cut Method

The short-cut method begs for artistic license.

The short-cut method begs for artistic license.

Mix together dry ingredients in bowl of food processor. Add butter to processor and pulse until the butter is in smallish bits. Do not over process!  (Butter bits give scones their flakiness. Without the bits, scones become not very excellent muffins.) Pour contents of food processor into a large bowl. Add nuts and chocolate chips to food processor and pulse several times until they are broken into bite-friendly bits.

Pour chocolate chips and almonds into bowl with other ingredients and stir until just mixed. Add cream and blend together quickly. Do not overmix.

Roughly divide dough into two equal mounds. Plop each mound onto it’s own side of one baking sheet and shape each into a round or square. Do not over handle the dough (body heat and scones do not mix! See above butter bits intel).

Score each circle deeply into 8 wedges (or cut all the way through and move pieces slightly apart to allow them to cook more quickly. If you go with the square, score or cut it into similarly sized shapes of your choice.

Baking for both methods

Brush with egg wash or with cream. Sprinkle with sugar, or coconut sugar if you want to take this tropical theme seriously.

Bake for 14-16 minutes (or more depending on size) until golden brown.

Almond Joy Scones

Make as above but substitute well-mixed, full-fat coconut milk for cream, and if you’re a real coconut freak like me mix in ½ cup toasted, unsweetened coconut flakes with the chocolate chips and almonds. These take a few minutes longer to bake.

Bring it

These grab and go babies travel well in the car, in a pack, in a picnic basket, on a boat or to any gathering anywhere.

Just the Rhubarb Scones

Fresh rhubarb scones

Fresh rhubarb scones holding court, with nary a strawberry in sight.

Here it is strawberry season, so you’re probably thinking strawberry rhubarb scones would be appropriate. After all, sweet strawberries and tart rhubarb show up in the garden around the same time and perfectly complement each other. But just because the two ingredients hang out a lot, doesn’t mean they’re married. Today I’m giving some props to straight rhubarb, hoping it steals the show for breakfast this weekend.

The deal with scones is that you want the butter to remain in little bits, rather than creaming it into the mixture. Those butter bits are what gives scones their flaky excellence, and why scone recipes call for chilled butter. Trust the bakers on this. If you make scones with softened butter, or over mix the butter into the batter you’ll end up with a bunch of big muffins. It’s not a tragedy, but not what you envisioned. And once you get hooked on good scones you won’t be truly satisfied with anything but the real, flaky, crumbly thing.

These babies, known elsewhere in the cyber food world as Naughty Rhubarb Scones, are delish as is, with whipped or clotted cream (for Brits) or, of course, with strawberry jam.

Makes 12-16 scones

Ingredients

3 stalks rhubarb (roughly 1½ cups when sliced)
2 1/2 cups flour
1 Tbsp baking powder
1/2 tsp salt
8 Tbsp unsalted butter
1/2 cup vanilla sugar (if using regular sugar add up to 1 tsp vanilla with the cream)
2/3—3/4 cups heavy cream

Method

Preheat oven to 425.

Slice rhubarb stalks 1/4 ” thick. Toss with 3 tablespoons of the sugar.

Sift flour, baking powder and salt together in large bowl or bowl of food processor.

Cut butter into flour mixture by hand (or pulse in food processor) until butter is the size of small peas.

Blend in 1/4 cup of the sugar.

Blend in sliced rhubarb. (If using the food processor, just pulse — you want the slices left mostly intact.)

Blend in cream until a soft dough forms. (note: you may need to add more than 2/3 cup depending on the weather,etc.)

Transfer dough to floured surface and divide in half. To make triangular scones, flatten into 6-inch disks and deeply score or cut each circle into 6-8 scones. Sprinkle with remaining sugar.

Arrange scones on ungreased or parchment-lined cookie sheet and bake about 20 minutes or until reddish-brown on top.

Enjoy and cheerio!


Cranberry Buttermilk Scones

Idaho cobs

Scones, coffee and the first rays of sun. It doesn’t start out better than this. 

Oh the weekend. It is so full of promise, especially if you start it with hot-from-the-oven scones. It can be darned good with a box of Life cereal too, but why not bust out the extra credit points when you can?

These scones first caught my attention in a spiral bound Vermont community cookbook, and mostly because they did not involve eggs. The hacks I have made include using the food processor to cut the butter into the dry ingredients and blowing off the glaze altogether. I am sure the glaze is good, and that working the dough like Laura Ingalls Wilder has some merit but really, do we need overkill? Let me rephrase…do we need overkill in our scones?

Make these, blow off the cereal and enjoy the weekend.

 Ingredients

3 cups King Arthur Unbleached All-Purpose Flour
1/3 cup plus 2 tablespoons sugar, divided
2-1/2 teaspoons baking powder
3/4 teaspoon salt
1/2 teaspoon baking soda
3/4 cup cold butter
1 cup buttermilk
1 cup dried cranberries
1 teaspoon grated orange peel
1 tablespoon milk
1/4 teaspoon ground cinnamon

Method

In a bowl, combine the flour, 1/3 cup sugar, baking powder, salt and
baking soda; cut in butter until mixture is crumbly. Stir in the
buttermilk just until combined. Fold in the cranberries and orange
peel.
 
Turn onto a floured surface; divide dough in half. Pat each half
into a 6-in. circle. Cut each circle into six wedges. Separate
wedges and place 1 in. apart on a lightly greased baking sheet.
Brush with milk. Combine the cinnamon and remaining sugar; sprinkle
over scones. Bake at 400° for 15-20 minutes or until golden
brown. Remove from pan to a wire rack. Serve warm. Yield: 1 dozen.

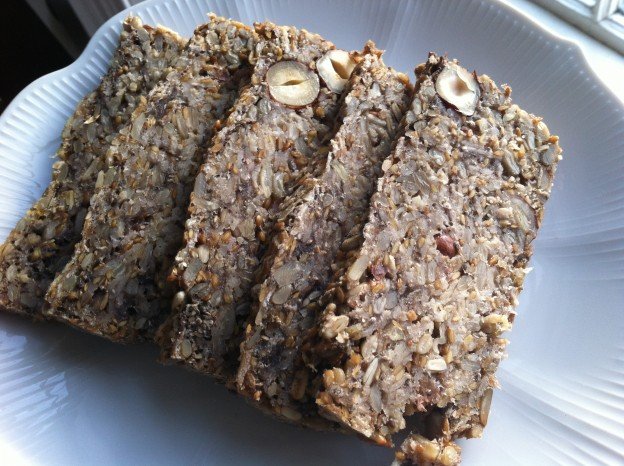
Bread of Life, sliced

The Bread of Life, or “That’s Life” Bread

Elsewhere on the Internet (namely on My New Roots) this seedy, flourless, unleavened, barely sweet and totally nutrition-packed bread is called the “Lifechanging Loaf of Bread.” That is quite a claim and one that begs to be debunked, particularly by my own family, some of whom refer to this as my “dirt bread.”

What can I say? Haters gonna hate. That’s life; hence, the abbreviated name for this bread. But for the right person—and you know who you are—this is, if not lifechanging, at least addictive. It relies on oats, chia seeds and psylium husks to hang together and get its breadiness. Whole hazelnuts give it texture and a touch of maple syrup makes it all just right. Toast it, or not, and top it with butter, honey, cheese, caramelized onion, roasted veggies or pretty much anything and give yourself a big fat gold star for healthy eating. Go you!

I’ll leave it to Sara Britton to answer any questions about substitutions and how in the heck she came to experiment with psylium husks. I will tell you, however, to find them in CVS with the Metamucil. Be sure to get the unflavored variety, unless you want your bread to actually taste like Metamucil.

A few other notes: She uses coconut oil or ghee (which I can’t pronounce let alone find) but you can also use butter; I add chopped dates for some chewiness and sweetness; she uses a flexible loaf pan for both mixing and baking. I don’t have one of those so I just used a regular loaf pan and lined the bottom with parchment paper to ease the first turnout (totally worth the effort, unless you want a bonus botched loaf to snack on); finally, I lived large and mixed it all in a bowl, which took away the stress of mixing in tight spaces, which I hate.

And now, just to go on record, for me this is absolutely addictive and perhaps even lifechanging, on a slow day that is.

That’s Life Bread

From My New Roots
Makes 1 loaf

Ingredients

1 cup / 135g sunflower seeds (or 1/2 cup each pumpkin seeds and sunnies)
½ cup / 90g flax seeds
½ cup / 65g hazelnuts or almonds, roughly chopped or sliced*
**½ cup dried dates or dried fruit of choice, roughly chopped 
1 ½ cups / 145g rolled oats
2 Tbsp chia seeds
4 Tbsp psyllium seed husks (3 Tbsp. if using psyllium husk powder)
1 tsp fine grain sea salt (add ½ tsp. if using coarse salt)
1 Tbsp maple syrup
3 Tbsp melted coconut oil or ghee (or butter)
1 ½ cups / 350ml water

*update: sliced almonds are my go-to for ease of both prep and slicing
**next update: Dates or dried fruit are optional but now an essential part of my dirt bread experience.

Method

1. In a flexible, silicon loaf pan (or a parchment lined regular loaf pan), combine all dry ingredients, stirring well. Whisk maple syrup, oil and water together in a measuring cup. Add this to the dry ingredients and mix very well until everything is completely soaked and dough becomes very thick (if the dough is too thick to stir, add one or two teaspoons of water until the dough is manageable). Smooth out the top with the back of a spoon. Let sit out on the counter for at least 2 hours, or all day or overnight. To ensure the dough is ready, it should retain its shape even when you pull the sides of the loaf pan away from it it.
2. Preheat oven to 350°F / 175°C.
3. Place loaf pan in the oven on the middle rack, and bake for 20 minutes. Remove bread from loaf pan, place it upside down directly on the rack and bake for another 30-40 minutes. Bread is done when it sounds hollow when tapped. Let cool completely before slicing (difficult, but important).
4. Store bread in a tightly sealed container for up to five days. Freezes well too – slice before freezing for quick and easy toast!

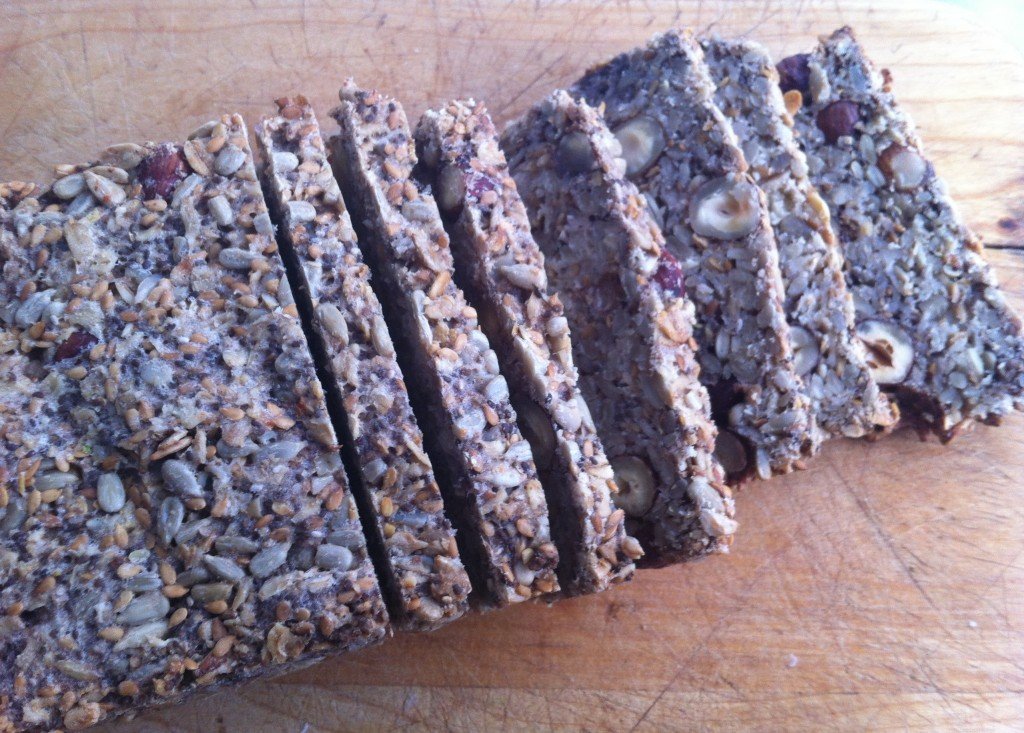
Life Bread by the loaf

Living life bread, a slice at a time.

Bring It

As mentioned above, for the right person this is the perfect host/hostess gift. If you’re bringing it to a mixed crowd you can always cover your bases (and maximize fans) by adding a loaf of easiest french bread ever or maple oat breakfast bread

Pain Perdu…ooh la la!

pain perdu

Pain perdu with warm maple syrup. Perfect for after Round 1 of shoveling.

 OK, some kids out there have been making a lot of snow ghost pies, because this winter thing is not slowing down! As we head into snow day #2 of the week, I feel it necessary to post one more cozy breakfast food, just because. Yes, this has been a very carb-heavy spell on Bring It, and I promise, the green is coming. But for now we still need some comfort food to get us over the snowbank and into spring.

So, voila! Here is another episode of overnight breakfast brilliance (with a fancy French name at no extra charge.) This came from Gourmet circa 2003. Imagine yourself at a friend’s house for a weekend. Big dinner Saturday night. As you are cleaning up afterwards, finishing a glass of wine, take one of the dishes you have just washed and instead of putting it away, butter it (with the nice soft butter that’s lying around), lay the uneaten baguette slices in it, and whip up the super easy custard to pour over it. Then stash the whole thing in the fridge. Nobody even noticed what you were doing and the next morning, Ta da! Pain perdu. AKA baked French toast for those of us on this side of the pond.

If you are not at a friend’s house having a big dinner party you can still whip this up and be a hero in your own home. Use whatever bread you have (you know, love the one you’re with), and don’t be afraid to use the rest of that Maple Oat Breakfast Bread for a double shot of maple.

Pain Perdu

Ingredients

1 – 13 to 14 inch long loaf of soft-crust supermarket Italian bread (without seeds)
1/2 stick (1/4 cup) softened unsalted butter
2 large eggs
1 2/3 cups whole milk
1/4 tsp salt
3 Tbsp sugar
Handful of chopped walnuts or pecans (optional)

Method

Cut 12 1-inch thick diagonal slices from bread (don’t use ends).

Butter 1 side of each slice and arrange slices, buttered sides up, in 1 layer in a buttered 13 by 9 inch glass baking dish, squeezing them in slightly to fit.

Whisk together eggs, milk and 1/4 tsp. salt until combined well, then pour evenly over bread.

Chill, covered until bread has absorbed all of custard – at least one hour and up to 1 day, depending on bread.

In the morning:  Take pan out of the refrigerator to bring  to room temperature and preheat oven to 425 degrees.

Sprinkle bread with 3 tablespoons of sugar. Sprinkle on chopped nuts, if using.

Bake, uncovered in middle of oven until bread is puffed, and top is golden – about 20 to 25 minutes. Serve immediately with topping and syrup of choice (as long as it involves real maple).

Pain Perdu

A breakfast puzzle? Main non! C’est pain perdu. This batch was made with maple oat breakfast bread.


Maple oat breakfast bread

Maple Oat Breakfast Bread

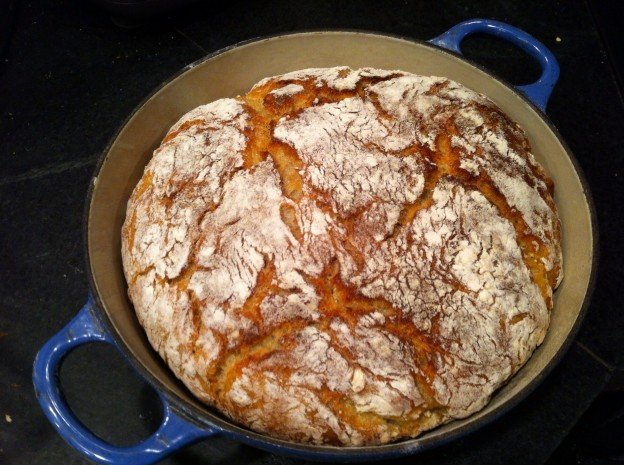
This recipe had me at maple. I’m a simple person really. But maple syrup, oats and melted butter all cozied up into a crusty loaf of bread (that requires minimal effort and even less skill to make) would win over even the most complex of characters. There is no more appropriate time to celebrate maple syrup than on Vermont Town Meeting Day, the traditional time to tap one’s maple trees. It also happens to be when everyone needs a little comfort food to push through the final sub-zero throes of winter.

This comes from the “no knead” family of bread recipes, which, as you can imagine, is the only bread family in my recipe box. The no knead process is very easy but does require a few things, namely time (not work time, just hang time for the dough), a heavy duty cooking crock and a really hot oven. The perfect scenario is to take 5 minutes and mix all the ingredients at night then bake up a fresh loaf in the morning. Second to that is mixing the dough in the morning and baking it up for dinner. Either way, you’ll have plenty of time to get out there to the town hall and vote on wind farms, beaver dams and moose quotas.

Recipe tweaked from King Arthur Flour via Food52

Makes 1 large loaf

Ingredients

5 cups all-purpose flour (you can replace a couple cups with whole wheat if you wish)
11/2 cups rolled oats
1/3 cup maple syrup (preferably grade B)
1/4 cup melted butter or olive oil
2 tsp salt
1/2 tsp instant yeast
2 1/4 cups room temperature water

Method

1. Combine all of the ingredients in a large bowl and stir well until it becomes a tacky, messy dough. (You can also use your hands to work everything together.)

2. Cover with plastic wrap and allow to rise at room temperature) until poofed and bubbly, 8 hours or overnight.

3. Gently scrape the dough out onto a well floured surface and shape into a round loaf. Place the loaf on a well floured towel and allow to sit for an hour.

4. In the meantime preheat your oven to 450F with a 10-inch (about 8-quart) Dutch oven or baking crock with lid in it. When the dough is ready and the oven is hot, turn the dough off of the towel into the hot Dutch oven and cover with the lid. Bake covered for 30 minutes, then remove the lid and continue to bake until the crust is deep brown, another 15-30 minutes.

5. Remove the bread from the oven, turn it out of the pot and allow to cool completely before slicing.

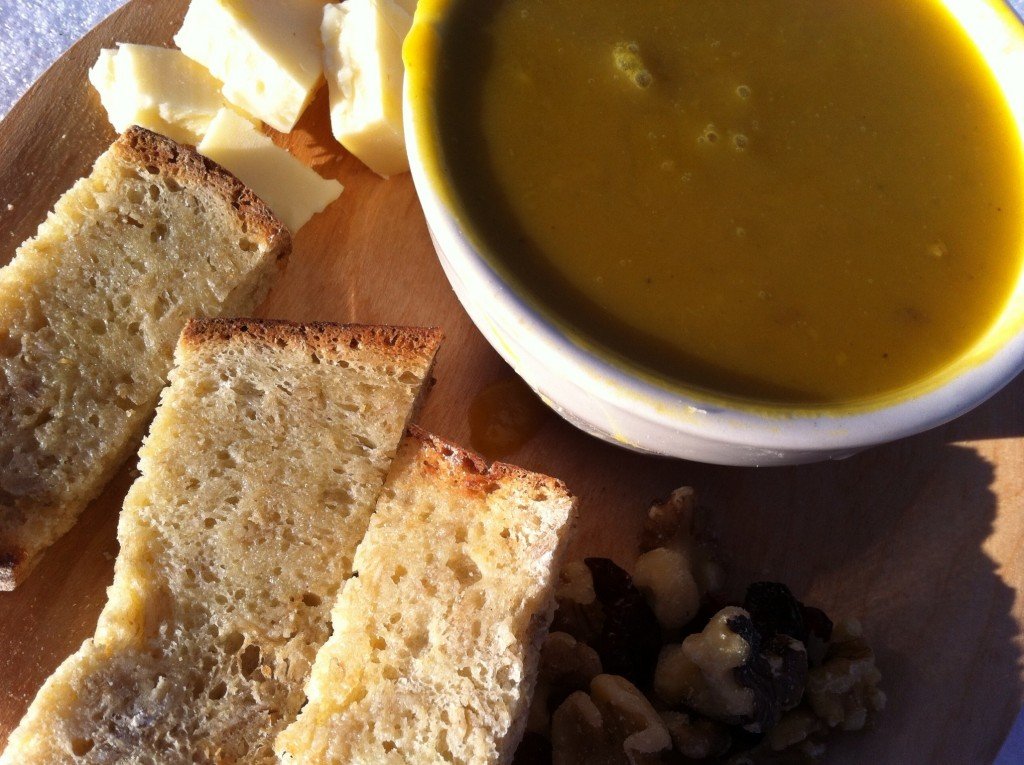
Maple oat breakfast bread

A fine lunch on a sunny late winter day.