Category Archives: Veggie Delight

Clean Livin’ Edamame Citrus Avocado Salad

edamame-citrus-avocado-salad

Bring on the sun, the citrus, the color. Hello Spring, goodbye scurvy!

I was going to riff about the psychically curative powers of the Shamrock Shake yesterday, but if you know anything about McDondald’s supply chains, that ship has sailed. After St. Patty’s Day the shakes are only available on a hit and miss basis until each outlet runs out. But keep asking through the month–you may get lucky!

The intended post was actually going to be about grown up shamrock shakes, aka green smoothies. So that’s coming at you soon, in a version that is entirely drinkable thanks to some trial and error and the eventual abandonment of expensive hard to clean juicers. Yeah baby, something to live for.

In the meantime let’s stick with the green theme. In fact, we need color all the way around right about now…big time…which makes this salad from Joy the Baker the perfect candidate. Fresh, colorful, crunchy, juicy, healthy, easy to make and easy to bring. It’s got it all. Except for bacon, which probably would taste darned good in it too. But let’s give the Vegans a shout out and run with it as is.

Note: This says it serves two, but it serves more as a side salad, and if you double up on ingredients there will still be plenty of dressing.

Note Part Deux: If you want to be pro about segmenting citrus check out the Kitchn’s  How to Segment Citrus. If not just peel, cut and be happy.

Clean Livin’ Edamame Citrus Salad

serves 2

Ingredients

About 2 cups leafy greens (I used arugula. Remember–just love the one you’re with)
1 grapefruit, segmented
1 blood orange, segmented (Cara Cara oranges rock as well)
1 cup shelled edamame
2 celery stalks, sliced
1 small (or half of a large) ripe avocado, peeled and sliced

For the Dressing

3 tablespoons finely diced shallots
1 tablespoon honey (for vegans substitute a bit of agave)
1 tablespoon dijon or whole grain mustard
2 tablespoons apple cider vinegar
1/4 cup plus 1 tablespoon olive oil
sea salt and fresh cracked black pepper

Method

In a medium bowl, combine all of the salad ingredients:  greens, citrus segments, edamame, celery, and avocado.

In a small jar with a tight-fitting lid combine shallots, honey, mustard, vinegar, olive oil, a pinch of salt, and a few pinches of pepper.  Place the lid on the jar and shake it up until the mixture is emulsified. Taste the dressing and season to taste, adding more salt, pepper, or acid as necessary.  Pour the dressing (as much as you’d life) over the salad.  Sprinkle with salt and pepper.  Enjoy immediately!

Bonus recipe

Shamrock Shake

Shamrock Shake. Therapy in a cup.

Homemade Shamrock Shake

thanks to Epicurious and Paul B

Ingredients

1 1/2 cups vanilla ice cream
1/2 cup whole milk
10 drops green food coloring
1 teaspoon peppermint extract
Whipped cream (optional)
1 maraschino cherry

Method

In a blender, combine the vanilla ice cream, milk, green food coloring, and peppermint extract, and process until smooth, about 30 seconds. Pour the shake into a glass and top with the whipped cream and maraschino cherry.

Mexican Lasagna

Crowd pleasing for sure!

Crowd pleasing for sure!

I love Mexican food!  Well, everything except for the Chimichanga – why you’d fry all that wonderful food is a mystery to me. But other than that, Mexican is way at the top of my list.  This recipe for Mexican lasagna is great and super easy.  Tortillas replace the normal lasagna noodle, salsa replaces the normal red sauce, and jack cheese replaces the normal mozzarella.  You can add anything from ground beef to lots of veggies (that’s me!) to many different kind of Tex Mex sides….think black beans, corn, chili peppers, and lots of cilantro.  Plus you can make this to bring anywhere.   Don’t forget to bring a small bottle of hot sauce for those that want to ramp up the spice.  I eat this lasagna with a bottle of chipotle Cholula hot sauce in one hand and a fork in the other.  Bueno!

Ingredients

1 cup fresh cilantro
4 scalllions, coarsely chopped
10 oz fresh baby spinach
 8 corn tortillas (6 inch)
1 can (15.5 oz) black beans, drained and rinsed
2 cup of your favorite salsa (Green Mountain Gringo Medium is the only kind I buy!)
2 cups pepper jack cheese 

Method

1) Preheat oven to 425 degrees.   

2) Coat bottom of baking pan with oil or cooking spray.

3) Spread 1/2 cup of salsa on the bottom of the pan and cover with tortillas (they will overlap).

4) Layer with cilantro, scallions, spinach, beans, cheese, salsa.  Try to divide the fillings so that you have enough for 2 layers plus some cheese to sprinkle on top. Once you’ve put down one layer, start your second layer with tortillas and then add the fillings. End with cheese on top.

5) Cover with foil and bake 25-30 minutes; remove foil and continue baking until golden 15-20 minutes more. Cool 5 minutes before serving if your crowd can wait!

Quinoa Stuffed Peppers

Stuffed and ready to eat!

Stuffed and ready to eat!

I’ve never made stuffed peppers.  It seemed like something my family would have no interest in. Then we went to a friend’s house for dinner recently and he made stuffed peppers. Well, you would have thought I was holding out on my family for all these years! When they tasted the stuffed peppers, they turned to me and said, “Why don’t you ever make these”?  And so, this recipe immediately went on the list of things to make and bring anywhere!   I now make stuffed peppers, stuffed zucchini, stuffed acorn squash and anything else I can stuff on a regular basis. I use brown rice, cous cous, quinoa (as in this recipe) and I mix it up with meat and veggie so everyone is happy.  My family and friends love them and what a great way to add another vegetable to the meal.  Plus, how easy is this recipe?

Ingredients

4 large red bell peppers, halved lengthwise
2 Tbsp vegetable oil
1 large onion, chopped (2 cups)
2 large carrots, diced (1 cup)
4 tsp curry powder
1 Tbsp garam masala
2 tsp grated fresh ginger
2 cups cooked quinoa
1 15 oz can chick peas
1/2 cup raisins (optional)
1/2 cup unsalted peanuts, coarsely chopped (optional)
Grated sharp cheese (optional)

Method

1) Cut peppers in half lengthwise by cutting right through the top of the pepper and the stem.  Scoop out seeds and inner membrane from pepper but leave the stem (this will help hold the pepper together when you stuff it).
2) Preheat oven to 350 degrees. Place halved peppers cut side down on a large baking sheet. Cover with foil, and bake 25 minutes, or until peppers begin to soften.
3) Heat oil in large saucepan over medium heat.  Sauté onions and carrots for 5-7 minutes.  Add curry powder, garam masala, and ginger and cook 1 minute.  Stir in chick peas and cooked quinoa until they are warm.  Mix in raisins and peanuts if using.
4) Fill each pepper half with 3/4 cup quinoa mixture. Top with cheese if using. Re-cover and bake 15 minutes. Uncover and bake 5-10 minutes until cheese or top starts to brown.

Massaged (and composed) Kale Salad

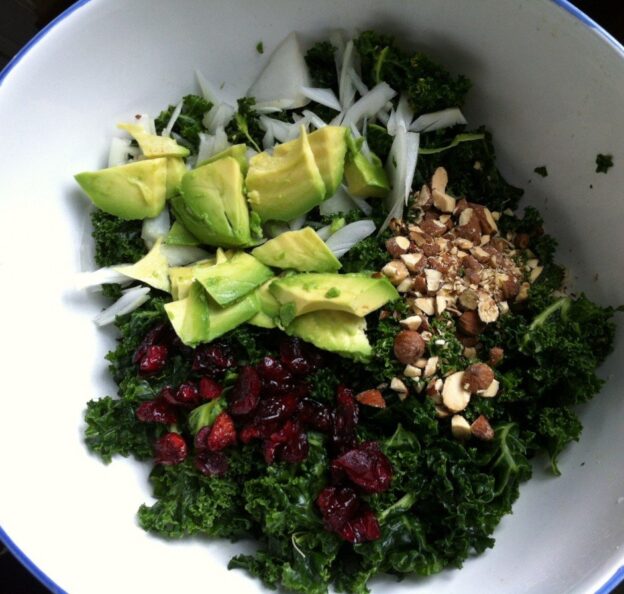
Massaged Kale Salad


I’ve been holding out on you. Not on purpose of course. But somehow, in all this time of being with each other, I still have not shared my absolute favorite, go-to, eat-your-greens-and-feel-like-Popeye kale salad. Massaging may seem like an excessive step to take with your kale (I mean really, is it that deserving?), but trust me—it is a worthwhile technique to have in your repertoire.

This recipe calls just for salt in the massaging process. Other recipes call for olive oil alone or with lemon juice or with the entire dressing. Hey, you’re massaging your kale–it’s not going to complain. Massaging makes raw kale way more friendly, and with a batch of massaged kale at the ready, your options for creating quick, delicious, deconstructed meals soar.

As with other recipes, this is more about technique than hard and fast ingredients and proportions. Live loud and large—mix that kale with something crunchy, something creamy and something sweet and the rest will take care of itself.

Before my cousin Danielle beats me to the punch, I urge those of you who dabble in organic produce to buy organic kale. Danielle, the ultimate caregiver (and least righteous mostly Vegan I know) reminds us that kale is among the “Dirty dozen” of produce items that pack the nastiest pesticide punch. Thanks Little Dan, for always having our backs! (and forgive me for all the gratuitous bacon talk.)

Without further ado I give you:

Massaged Kale Salad

Ingredients

1 bunch kale (I use curly because that’s what we get)
1 t salt
1/4 medium-small red onion, thinly sliced or diced
1/3 cup chopped toasted almonds or nuts of choice
1/3 cup raisins, currants or dried fruit of choice
1/2 large avocado, diced
1/4 cup olive oil
2 Tbsp apple cider vinegar

Method

Soak kale in water to loosen any dirt. Wash individual leaves as you de-stem them (pull leaf away from thickest parts of stem). Shake dry. Chiffonade leaves (stack, roll and slice into thin ribbons) and put in a large bowl. (Edie’s note: Chiffonade if you must, but tearing the kale in pieces works just fine and sort of makes me feel like a Tuscan). Sprinkle salt over kale and, using hands, massage kale for 3-4 minutes. After about a minute you’ll notice a big difference in the leaves – they’ll start to soften and turn a dark green almost as though you were steaming them. When done, drain off any liquid that collects on bottom of bowl (may or may not happen) and set kale aside.

If you are starting with raw nuts…Heat a small sauce pan, toss in whole nuts and toast until nuts start to brown slightly. Shake pan on occasion to brown nuts evenly and to keep from burning them. Walnuts, pecans, filberts or even sunflower seeds are great in this salad too. Remove nuts from pan and give them a rough chop on your cutting board. Add nuts to bowl of kale.

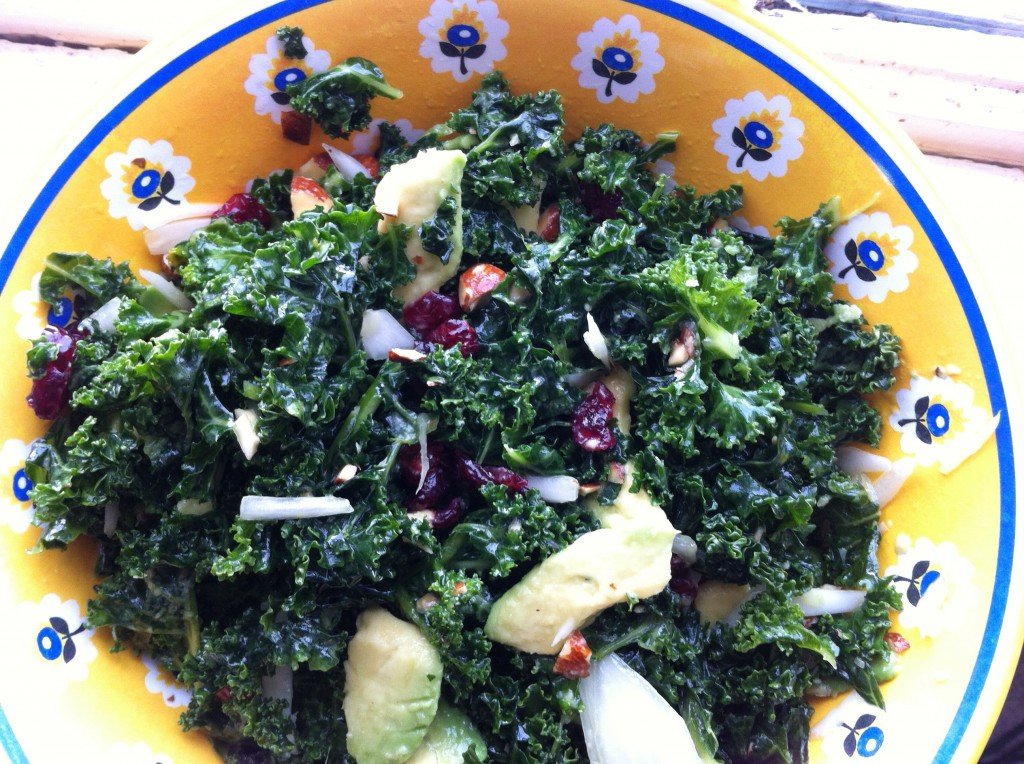
Add diced avocado, onions and raisins to bowl (again, raisins, currants, your fave dried fruit in raisin-sized pieces or whatever you have on hand). Pour olive oil and apple cider vinegar evenly over bowl of goodness, then toss until all ingredients are thoroughly mixed.

Kale salad, post massage, fully dressed.

Kale salad, post massage, fully dressed.

Bring It

One of the many beauties of kale is its indestructibility (if that’s a word). You can bring this anywhere in anything, store it wherever and it will not suffer. I have transported it in everything from ziploc bags to salad bowls to recycled takeout containers and it has survived in backpacks for hours before being enjoyed for lunch or apres ski.

Farro Risotto with Asparagus and Tofu

Grainy goodness with faro, mushrooms, asparagus, and tofu

Grainy goodness with faro, mushrooms, asparagus, and tofu

Before I get into this recipe, let me first say, I’m happy to be back!  I was away with work and family travel for a few weeks and, oh how I missed my food blog and foodie friends. I thought about the posts I would do when I got back, so get ready, because I have lots of ideas.  Also, a big thank you to my blog partner Edie for keeping the posts coming while I was away!

Next, let’s get started with this delicious vegetarian, über grainy recipe.  If you haven’t tried farro, it is a great grain to add to your repertoire with one caveat, it takes a while to cook. It’s not the easy-peasy quinoa that you throw in a pot of water and it’s cooked before you even have time to grab a fork or a spoon. This requires a little more time and effort, so plan ahead.

Next, it is grainy. Did I mention that already? Well, it’s worth re-iterating.  I kept thinking it wasn’t cooked, but in the end I realized, it is just chewy.  You won’t have to try to eat this meal slow because there is no other choice!  I love it and I think you will too.  I added asparagus, dried mushrooms, and of course, cubed tofu (which I seem to add to just about everything!), but you can add whatever you like.

Ingredients

1 oz. dried mushrooms (any kind will do)
1 lb. asparagus
4 Tbsp extra virgin olive oil
5 cups vegetable stock (you can use the water left over from soaking the mushrooms as part of this vegetable stock, plus a vegetable stock – see below)
1 1/2 cups uncooked farro
1 small onion, chopped
2 cloves garlic, minced
4 oz. variety of mushrooms (shiitake, chanterelle, crimini, oyster, porcini), sliced
1/2 cup dry white wine
1 tsp fresh thyme
1/4 cup grated fresh Parmigiano-Reggiano cheese
1/4 cup fresh flat-leaf parsley, chopped
Salt & pepper to taste

Method

Place dried mushrooms in medium bowl and cover with boiling water. Let stand 30 minutes or until tender.  Drain and coarsely chop.  Use mushroom water as part of vegetable stock if desired.

Toss asparagus in 2 Tbsp olive oil on baking sheet and roast in 425 degree oven for 10 minutes or until tender, stirring half way through.  Cut stalks into thirds and set aside to add to farro later.

Sauté cubed tofu in a little olive oil with the smallest dash of cayenne pepper. Set aside to add to farro later (you can totally skip the tofu if this adds too much work).

Bring vegetable broth to a simmer in a small saucepan. Keep stock warm over low heat.

Heat remaining olive oil in Dutch oven over medium heat.  Add farro and onion; cook 5 minutes, stirring occasionally. Add garlic and cook 1 minute, stirring constantly.  Add all mushrooms (rehydrated and fresh).  Cook 5 minutes or until mushrooms are tender, stirring occasionally.  Add wine and thyme and cook until liquid almost evaporates.

Add 1/2 cup broth to farro mixture; cook over medium heat for approximately 4 minutes or until the liquid is almost absorbed, stirring occasionally.  Add remaining 4 1/2 cups broth, 1/2 cup at a time until liquid is almost absorbed each time, stirring occasionally. This will take about 50 minutes so you are definitely committed for the long haul, but as stated above, it is worth it.

Add salt and pepper to taste.

Once farro is cooked, add in asparagus, cubed tofu, and top with fresh parsley and cheese.

Cooked and ready to CHEW!

Cooked and ready to CHEW!

Prep for adding later

Prep for adding later

Pre-cooked Farro sautéing in oil

Pre-cooked Farro sautéing in oil

Lunch, Deconstructed

Deconstructed lunch

Deconstructed lunch elements, waiting to meet each other.

Lunch can take me down, especially in winter. When we are scrambling to get out the door to training or a race, the idea of preparing lunch, after making breakfast, cleaning up and gathering/loading gear is a major buzz kill. But the penalty for not making lunch is hunger or French Fries. Lots of French Fries. NOT that I have anything against French Fries, and particularly the ones at the Dartmouth Skiway that must be double fried because they are so good. But we all know, the sad, cumulative consequence of too many French Fries.

My solution is (to try at least) to have a fridge full or delicious and healthy lunch fixings, ready to be combined the night before, or easily enough in the morning. Below are basic recipes for some essential elements, along with suggestions for the makings of the best darned lunch you can cram into a takeout container.  The recipes for the beets, lentils and onions come from Stone Soup. Build an arsenal of sauces from Get Saucy With Me to have on hand and you’re good to go, to the Skiway and beyond.

Skiway Deconstructed Lunch Basics:

  • Baked Sweet Potatoes
  • Roasted Beets
  • Massaged Kale
  • Parisian Lentils
  • Balsamic Onions

A few suggestions for other awesome things to have on hand:

  • Roasted nuts and seeds
  • Avocado
  • Roasted vegetables
  • Cooked grains like brown rice, quinoa and millet
  • Hummus
  • Hard boiled eggs
  • Chopped olives or tapenade
  • Cooked BACON, chicken and other protein. Did I say bacon?
Salads for two, in brilliant take out containers. Dressing in a repurposed caper bottle.

Salads for two, in brilliant take out containers. Dressing in a repurposed caper bottle.

Sweet Potatoes

Ingredients

  • However many sweet potatoes you want to cook in your hot oven.

Method

Turn oven on to 400.

Wash potatoes and dry them with a paper towel. Prick all over with a fork. (One exploded potato will cure you from ever forgetting this step.) Put potatoes on a cookie sheet to catch the goo that escapes from the holes. Line the sheet with foil if you want zero cleanup.

Bake potatoes for about an hour, squeezing them to test for doneness starting at about 45 minutes. I like mine to have some structural integrity for slicing later.

When done, let potatoes cool. They can be easily peeled by hand if desired. Store covered in the fridge.

Massaged Kale

There are many methods for this so don’t worry too much about the ingredient measurements or timing. Some recipes only call for salt in the massaging, others only for oil, others for oil, lemon juice and salt and still others for the entire dressing. The point is just to break down the kale a bit so it is still raw but friendly and makes a worthy bed for all kinds of other good stuff.

Ingredients

  • One or two bunches kale, washed, spun dry, stemmed and shredded or torn. *
  • Olive oil, salt, lemon juice

*(You can easily stem kale with a big sharp knife by holding it vertically from the stem end and running the knife down the stem. Or you can go rogue and use your fingers. Grip the stem between thumb and forefinger and zip down the stem.)

Method

Put kale into a big bowl. Drizzle with a Tablespoon or more of olive oil, a splash of lemon juice and a good sprinkling of salt. Massage kale with your hands until it softens a bit and is a shinier, dark green. Store covered in the fridge until  ready to use.

Roasted Beets

These keep a week or more in the fridge, so I generally make enough to fill up a large 9 x13 baking dish.

Ingredients

  • 1-2 bunches beets, or a few large ones.
  • Balsamic vinegar
  • Olive oil

Method

Preheat oven to 400.

Remove stalks from beets and scrub them well. Chop into wedges – either quarters, sixths or eighths. The smaller you chop, the faster they will cook. I like big wedges because I have more slicing and dicing options later

Splash with a few tablespoons of balsamic vinegar and the same of olive oil. Sprinkle with kosher salt.

Cover tightly with foil and roast for 45 minutes to 1 hour or until beets are tender. Season to taste. When cooled you can easily peel them by hand or with a knife, or just eat them with the peels.

Parisian Lentils

I love these any time of day, even for breakfast with an egg on top. Full disclosure: I never measure these. I just boil a bunch of lentils and add equal splashes of the seasonings at the end. And if I don’t have sherry vinegar I cut to the chase with a splash of straight sherry. Saves you the trouble of having a separate glass of wine with dinner (or breakfast in some cases). The recipe calls for topping these with fresh ricotta and parsley, which sounds awesome.

Ingredients

  • 7 oz French style green lentils (aka puy lentils)
  • 2 tablespoons sherry vinegar
  • 2 tablespoons soy sauce

Method

Place lentils in a medium saucepan and cover generously with water. Cover and bring to the boil.

Remove lid and simmer for 10-15 minutes or until the lentils are tender.

Drain lentils and return to the pan. Season with vinegar, soy and 2 tablespoons extra virgin olive oil. Taste and add salt as needed.

Balsamic Onions

I wasn’t going to include these but they are so good on pizza, sandwiches, salads and soups that they need to  be in. If you’re over the taste of balsamic at this point just use a combo of olive oil and butter and sprinkle generously with salt. This clearly makes a ton, but they keep for a long time and are addictive so a ton is a good thing. Feel free to halve of quarter, but don’t complain when you are out of them so soon!

Ingredients

  • 8 onions
  • 1/2 cup olive oil
  • 1/2 cup balsamic vinegar

(No need to use your best olive oil and balsamic)

Method

Heat oil in a large heavy based saucepan over a medium heat.

Halve onions, lengthwise, then remove the skins and slice into half moons. Adding chopped onions to the oil as you go.

Cover and cook on a medium low heat, stirring occasionally for about 1/2 hour or until onions are very soft but not browned.

Remove cover and add balsamic. Bring to a simmer and cook, again stirring from time to time for about 20 minutes or until the sauce has reduced a little and the onions are slightly brown.

Get Saucy With Me


Easy sauces

They say taste is free. It’s darned easy too when you just add some sauce.

If there was ever a time to go long on veggies and salads, it is now, in the dim days of January when we are warding off seasonal affective disorder, flu season, sub zero temperatures and the lingering effects of holiday excess. If none of the above applies to you it’s probably because you’ve been eating your veggies all along. It’s not hard to do that if you plan ahead a bit, and it’s downright easy if you have a repertoire of go-to sauces that give even the humblest of greens and veggies some soul-satisfying mojo.

This is the first of a two-part installment aimed at getting a whole lot of fresh into your fridge and opening up Bring It possibilities like Deconstructed Lunch (coming atcha soon) instead of a boring old sandwich or sad-looking leftovers.

These sauces are all easy to prepare and most are lightening quick as well. They dress up salads, sandwiches, vegetables, grains, and pretty much anything (inanimate) that can be dressed. With any of these kicking around your fridge your meals need never be uninspired. Let’s start with the easiest and work from there.

Mi So Easy, Mi So Good…

I was afraid of miso’s new ageyness until I discovered this dressing. Now I always have miso on hand. This could not be easier, and reminds me of the strangely addictive dressing that comes on that distressingly tiny salad served at Japanese steakhouses. It is great as is, or made with rice vinegar if you don’t have lemons. As an added bonus, this doesn’t even require a food processor or blender.

Miso Tahini Dressing

from The Kitchn

Makes about 6 ounces

1/4 cup tahini
1 Tbsp red miso
1 Tbsp lemon juice
1/4 cup or more warm water
freshly cracked black pepper

Method

In a small bowl or lidded jar, combine the tahini, miso and lemon juice. Mix with a spoon into a smooth paste. Add the warm water gradually, stirring or shaking (if using a jar) until the dressing reaches desired consistency. It may need more than 1/4 cup. Taste for seasoning. Add pepper if desired. Store in the refrigerator for about a week. Dressing thickens up as it sits, so you will need to add more water to thin.

Healthy and Hearty…

I got this in a roundabout way from Jane Esselstyn who lived in the schoolhouse next door way back before her brother Rip became famous with his Engine 2 diet book. This versatile three-ingredient (plus water) sauce is a healthy, Esselstyn family favorite, featured in Rip and Jane’s latest book, My Beef with Meat as well.  Put it on anything from kale and quinoa to pizza and grilled cheese (and probably burgers, but don’t tell Rip and Jane).

 OMG Walnut Sauce

1 cup of walnuts
1-2 cloves of garlic
1 Tbsp low-sodium tamari sauce (soy sauce)
1/4 – 1/2 cup water, for desired consistency

Method

Combine the walnuts, garlic and tamari in a food processor and blend, adding water until the desired texture is reached, (1/4 to 1/2 cup). Use more water for a thinner dressing, less water for a thicker dip.

Shalloticious…

Shallots are just plain magic. Mince them into any dressing, (like this one from Joy The Baker, also pictured above) and they make everything work.  This sauce is part of the more involved Spring Roll Salad  from 101 Cookbooks, which is a taste sensation. It requires roasting shallots, which is super easy and makes them even better if that is possible. As you know from roastarama. I can’t help filling up a high temp oven, so I threw more shallots and an unpeeled head of garlic onto the sheet as well. It’s pretty handy to have both on hand for anything that needs some cha-cha (dressings, hummus, stir fry’s, etc) throughout the week.

Roasted Shallot Peanut Sauce

Makes 2 cups

1 cup unsweetened coconut milk
1/2 cup smooth peanut butter
3 Tbsp natural sugar, preferably maple sugar or evaporated cane sugar
1/2 tsp cayenne pepper
1 Tbsp shoyu
3 medium shallots, unpeeled
2 Tbsp plus 1 teaspoon fresh lime juice

Method

Preheat the oven to 375 F.

Place the shallots on a parchment-covered baking sheet and roast until they are very tender and the juices have started to ooze out, 30 to 35 minutes. Let the shallots cool slightly, and then squeeze the pulp out of the skins. Place the shallot pulp and all the remaining ingredients in a food processor or blender, and blend until smooth. The sauce will keep, covered and refrigerated for up to a week. Heat or serve at room temperature.

And for some spice…

For a spicy girl trapped in a houseful of Yankees this sauce is money. Put it on anything that needs some zap, or just on toast or a piece of sharp cheddar. I love that it relies on jarred stuff from your pantry, and of course that it involves the blender. Oh, and it makes a great DIY gift.

Pantry Raid Spicy Sauce

From Food 52

Makes 2 cups (Where this recipe calls for ounces my guestimates are included. It’s not an exact science.)

4 ounces B&G hot cherry peppers or other pickled hot peppers, stemmed (a generous ¾ cup, or about 8)
2 ounces roasted red peppers (1/3 cup or so)
2 ounces crushed tomato  (same as above, about 1/3 cup)
1/4 cup olive oil
1/4 tsp chile flakes
1/4 tsp dried oregano
1/4 tsp sugar
Salt to taste

Method

Combine all ingredients in a food processor or blender, and mix until slightly smooth.

Whole Wheat Pasta with Spicy Peanut Sauce

Whole Wheat Pasta with Spicy Peanut Sauce

How often do you make pasta with some variation of red sauce or pesto?  A lot?  Well, try a peanut sauce!  Everyone loves it and it is so easy and forgiving.   I got this recipe from Naturally Ella’s which is a site I go to often.   I want to make and eat every recipe Ella posts.   If it weren’t for my day job, I might give it a try. She says this recipe is tied with her sweet potato tacos as one of her two favorite meals.  I’m making those tomorrow night.   But back to the peanut sauce… I’ve made a lot of peanut sauces in the past and this one is by far the best.  You should really try this recipe.  It will end up in your repertoire of “recipes you must make again and again”.  Ella uses rice noodles in her recipe, but I made mine with whole wheat pasta.  In the end, any kind of noodle will work. Okay, get to it!

Ingredients

Sauce:
1/2 cup peanut butter
1 1/3 cup vegetable broth
1 tsp crushed red pepper
1/4 cup honey
2 cloves garlic, minced
1 Tbsp fresh ginger, minced
1/4 cup tamari (soy sauce)

Other Ingredients:
1 lb. whole wheat pasta
1 Tbsp olive oil
1 large onion
4 cups assorted vegetables ( such as broccoli, cauliflower, carrots)

Toppings:
Bean Sprouts
Cilantro
Peanuts

Method

1) In a bowl, whisk together ingredients for sauce.  Taste sauce and add more of whatever you like.  Set aside.
2) In a large skillet, heat olive oil over medium heat.  Add onion and cook until onion is fragrant and translucent, 6-7 minutes.  Stir in your choice of vegetables and cook for 2 more minutes. Add peanut sauce and reduce temperature to low. Cover and let vegetables cook, 6-8 minutes.
3) While vegetables are cooking, cook pasta according to instructions.
4) Mix pasta with peanut sauce and vegetables and serve with toppings for everyone to pick what they like.
5) Feel free to throw in cooked shrimp or tofu – Yum!

Whitewater Veggie Burgers

Backcountry skiing BC

Fredrik Marmsater Photography LLC
[email protected]
303-506-6200
fredrikmarmsater.com

I was backcountry skiing with some friends near Nelson, British Columbia recently. We decided to spend the first day skiing the terrain off the backside of Whitewater Ski area before flying into the Carlyle Hut to backcountry ski for the week. The group was stout to say the least and I spent the entire day “off the back” hyperventilating. After 7-8 hours of trying to hang on at their blistering pace, I headed back to the lodge to lick my wounds and re-fuel my depleted body. I pictured the normal ski lodge food scene were you grab a tray and head to the hot beverage machine, then help yourself to burgers and fries that have been under the warming lamp for hours. Much to my surprise, the charming and welcoming Fresh Tracks Café was open for business and looked like an oasis in the desert. I stumbled into the café, grabbed a seat and ordered the first thing I saw on the menu which happened to be the Whitewater Veggie Burger. I loaded it up with gruyere cheese, sautéed mushrooms, caramelized onions, ketchup, mustard, pickles, tomatoes all on a toasted whole wheat bun (is your mouth watering yet?). It saved me!  Well, truthfully it was the greasy French fries that saved me but I’m trying to think healthy after the holiday blitz I’ve been on for the past 2 weeks!

Your search for the perfect veggie burger has ended. This is it – load it up and enjoy! For more Fresh Tracks Café recipes, click here.

And why is there no photo of the veggie burgers, you ask.  Have you ever tried to take a photo of a veggie burger? Not exactly easy!

Ingredients

1 Tbsp vegetable oil
1 onion, diced
1 clove garlic, minced
1 Tbsp cumin
2 Tbsp chili powder
1 19oz can black beans, drained, rinsed, roughly pureed
1 tsp oregano
¼ cup parsley or cilantro, chopped
2 tsp seasame oil
1 cup sunflower seed, roasted
½ cup almonds, roasted and chopped
3 cups fine bread crumbs
½ cup soy sauce
5 eggs (I use 2 egg whites as a substitute for whole eggs but that’s a lot of eggs!)
2 cups carrots, grated
2 cups oats
Flour for dredging
2 Tbsp vegetable oil

Method

In a large skillet, sauté onions and garlic in oil. Place in large bowl and let cool a little. Add remaining ingredients. Mix well and shape into patties. Dredge lightly in flour. Heat vegetable oil in a large pan to brown burgers on both sides and warm through. You will probably need to cook these in 2 or 3 batches. Add 2 Tbsp vegetable oil for each batch.

Bring It!

For all my vegetarian friends, how many times have you gone to a cookout only to see the grill loaded up with hamburgers, chicken, hot dogs, and steaks? Grills are meat magnets.  Here is what I do to manage these meat laden meals.  I ask the host if I can bring veggie burgers to feed any vegetarians in the crowd. I pre-cook the burgers at home, wrap them individually in foil, and then heat them on the grill (in the foil). Everyone is happy!  Oh, and make sure to freeze some so they are at the ready whenever you need them at home.

Load it up burger toppings

Load it up burger toppings

Maybe don't look great but taste great!

Maybe don’t look great but taste great!

Battle of the Butternut Squash Lasagna

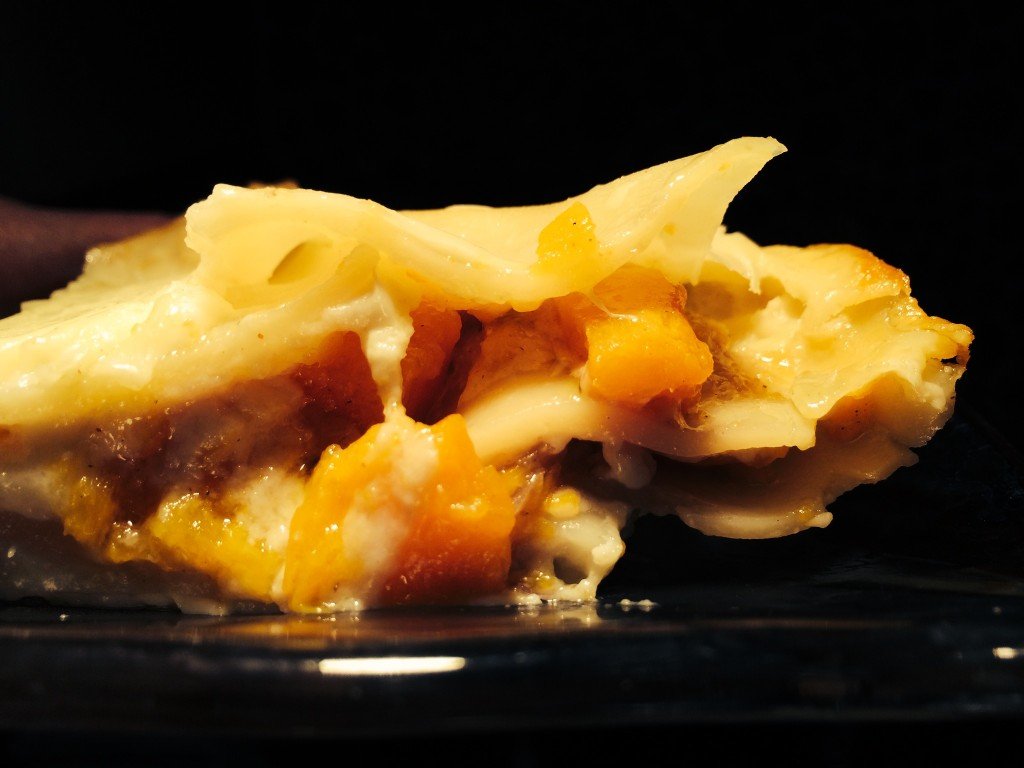
Butternut squash lasagna - a winner!

Butternut squash lasagna – a winner!

I have a foodie friend who claims to have a better butternut squash lasagna recipe than mine.  I’ve tested his claim many times with friends and family, and hands down, this one is the winner.   His recipe is good, but it does not compare to this masterpiece.  He is a far better cook than me so I have to take the advantage where I can!

This is the perfect recipe for a vegetarian main dish at your Thanksgiving meal.  Having said that, this recipe is not for the cook who is short on time.   I once made this lasagna for a friend and he loved it. He asked for the recipe, counted the ingredients, and quickly responded with, “18 ingredients, I’m out”!  Prepare for about 2 hours of prep, cooking, assembly, and clean up. That is about what it takes me and I’ve made this lasagna at least a dozen times.  However, I must say, it is worth it.

Ingredients

Squash Filling:
1 large onion
3 Tbsp unsalted butter
3 lbs butternut squash, peeled, seeded, and cut into ½ inch pieces
1 tsp minced garlic
1 tsp salt
½ tsp white pepper
2 Tbsp chopped fresh flat-leafed parsley
4 Tbsp chopped fresh sage
1 cup hazelnuts (4 oz) toasted, loose skins rubbed off, coarsely chopped

Sauce:
1 tsp minced garlic
3 Tbsp unsalted butter
5 Tbsp all-purpose flour
5 cups milk (I used 1%)
1 bay leaf
1 tsp salt

Assembling lasagna:
½ lb fresh mozzarella, coarsely grated (about 2 cups)
1 cup finely grated Parmigiano-Reggiano (3 oz)
12 sheets no-boil lasagna

Method

Make filling:
Cook onion in butter in a deep, 12-inch skillet over moderate heat, stirring occasionally until golden (about 10 minutes).  Add squash, garlic, salt, and white pepper. Cook, stirring occasionally, until squash is tender (about 15 minutes).  Remove from heat and stir in parsley, sage, and hazelnuts. Cool filling.

Make sauce while squash cooks:
Cook garlic in butter in 3-quart sauce pan over moderately low heat, stirring, 1 minute.  Whisk in flour and cook roux, whisking, 3 minutes.  Add milk in a stream, whisking.  Add bay leaf and bring to a boil, whisking constantly. Then reduce heat and simmer, whisking occasionally, 10 minutes.  Whisk in salt and white pepper and remove from heat.  Remove bay leaf. Cover surface of sauce with wax paper if not using immediately.

Assemble lasagna:
Preheat oven to  425 degrees.  Toss cheeses together.  Spread ½ cup sauce on bottom of buttered 9×13 inch pan, cover with 3 pasta sheets, leaving space between sheets.  Spread 2/3 cup sauce and one third of filling, then sprinkle with heaping ½ cup cheese.  Repeat, layering 2 more times beginning with pasta sheets and ending with cheese.  Top with remaining 3 pasta sheets, remaining sauce, and remaining cheese.

Bake covered 30 minutes, then uncovered for 10 – 15 minutes.  Let sit 10 minutes before serving.

Note: Sauce and filling can be made 1 day before, kept separate, covered and chilled.  Bring to room temperature before assembling.

Bring It

Make sure your host has room in the oven to heat the lasagna and probably a good idea to bring printed copies of the recipe because there is no doubt you will be asked!


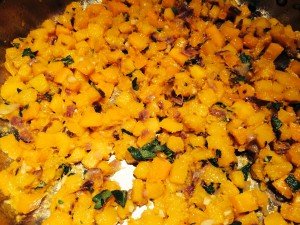
Sautéed squash would be a great side dish even without the lasagna

Sautéed squash would be a great side dish even without the lasagna

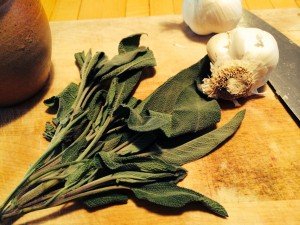
Sage and garlic make a great accompaniment

Sage and garlic make a great accompaniment