Category Archives: Uncategorized

Olympic Snow Drinking. Let the Games Begin!

Stronger, colder, yummier

Stronger, colder, yummier. The Olympic credo of cocktails.

From Russia with Love…and Vodka.

The following were created in honor of the 2014 Olympics and thirsty spectators everywhere. But they are really just launching pads for your own winter-coping creations. This winter thing is serious stuff. You can either complain about it or embrace it. Being outdoor people, we of course choose the latter, though often we embrace with one hand while holding a frosty cold drink in the other. Really, when you gather round a bonfire with friends and pour something sweet and boozy over snow what can possibly go wrong?

For all the following drinks the set-up is the same:

Fill and pack your desired vehicle with clean snow (or finely crushed/pulverized ice). Mix all liquid ingredients in a separate container (*or mix and store in a lidded container for transport. All these individual recipes can be made in higher volumes, something strongly encouraged on a cold winter night). Pour carefully and evenly over snow. Stir, enjoy, repeat as necessary.

The Snowchi

(A Moscow Mule on snow. The unofficial off-site drink of the 2014 Games)

The Vehicle: For individual drinks, a small soup Thermos (It stays cold and if they think it is borscht you may be able to sneak it through security.) For high volume a sap bucket with the super long straws used in scary communal Scorpion Bowls.

  • ¾ ounce ginger simple syrup (you know you are wondering how to use yours up)
  • ½ ounce lime juice
  • 2 ounce vodka

The twist: No ginger syrup? Make it with 2 parts ginger beer, one part vodka and a splash of lime juice. It will be more liquidy but will do the trick. Feel more aligned with Team Bermuda than Mother Russia? Sub dark rum for vodka. to make it a dark and stormy night.

Snowchis

Snowchis in formation, awarded to the worthy (or thirsty).

Booze-free snow drinks

Our 12-year-old server confirms these are quite versatile. Try straight OJ, or the Polar Vortex sans vodka.

The Polar Vortex

As comfort to all who are freezing their butts off this winter, this elixir is white as snow with a sweet whisper of the tropics.

The vehicle: something clear to show off the frigid Polar whiteness of it all.

  • ¼ cup light coconut milk
  • ½ ounce Maple syrup
  • 1½ ounce vodka

The twist: If you are trying to bulk up for your luge run use half and half or cream for the coconut milk. If you’re in training for your figure skating frock sub Coconut Dream or Almond milk for the coconut milk. It’ll be more slurpee-like than creamy but still effective. Aesthetics of clean white not an issue? Then give dark rum a shot, because we all know that dark rum goes with coconut like brooms go with curling, like Jamaicans go with bobsleds, like Russian judges go with cold hard cash.

*Coconut milk needs some serious shaking to mix evenly, so go with a lidded container and shake vigorously. Small caper bottles (see photo below) are perfect individual to-go containers.

The Alpen Pro

As a nod to après skiers everywhere, a classic rendezvous of bubbly Italian chic and sophisticated elderberry liqueur distilled in the heart of the French Alps.

The vehicle: A plastic champagne glass or something similarly shmancy. Individual servings only, unless you are drinking straight from the bottle.  Above all, keep it classy!

  • 4 ounce Prosecco
  • ½ ounce St. Germain

The twist: Champagne is of course an option here as well, and sabering the bottle will earn you extra points among your bonfire mates.

This whole enterprise might need some exhaustive research to fine tune, but come on— it’s Olympic season and we have nearly three weeks to peak. I know you can all rise to the challenge.

set up for polar vortex drinks

The Set-Up. Some of the fixings, plus a couple of race ready Polar Vortexes to-go.


slow cooker chicken chili

Fi-Fi to the Rescue (with chicken taco chili)

I have a friend (and you know who you are) who refers to her slow cooker as FiFi, short for “Fix It and Fugget It.” Of course, she is on her second slow cooker because she forgot about FiFi for three months while it was filled with leftover Chicken Marbella. But let’s fuggedabout that image right now, and focus on dinner….tonight…with zero effort. This recipe comes from Amy, who I am calling right out because she deserves credit on at least two fronts.

First, Amy appreciates the vast the difference between crockpot cookery and crockpot warmery, an issue discussed in the Fast and Slow Lasagna post. Other than chopping up one onion (and some cilantro unless you are a slacker like me and blew it right off), the only effort involved here is opening cans, and FiFi is the only dish called into service.

Second, Amy offered up a recipe that is as delish as it is easy. With a whole lot of cold winter nights and aprés ski opportunities in the forecast, and with the Super Bowl right around the corner this comes just in time. We ate this for dinner, for lunch the next two days and were not the least bit relieved when it was gone.

Ingredients

Makes 10 servings

1 onion, chopped
1 16-oz can black beans
1 16-oz can kidney beans
1 16-oz can of cannelli beans (use whatever combo of beans you have)
1 8-oz can tomato sauce
10 oz package frozen corn kernels (canned works too)
2 14.5-oz cans diced tomatoes
1 packet taco seasoning
1 Tbsp cumin
1 Tbsp chili powder
4 boneless skinless chicken breasts (or equivalent weight boneless, skinless thighs)
chopped fresh cilantro (for overachievers)

Method

Combine beans, onion, corn, tomato sauce, cumin, chili powder and taco seasoning in a slow cooker. Place chicken on top and cover. Cook on low for 10 hours or on high for 6 hours. Half an hour before serving, remove chicken and shred. Return chicken to slow cooker and stir in. Top with fresh cilantro. Dig deep and serve with cheese and sour cream to show you care.

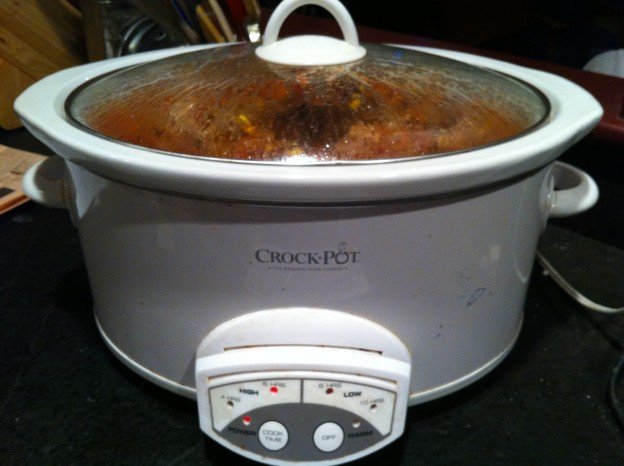
OK we're ready. Bring on FiFi's finest chicken chili!

OK we’re ready. Bring on FiFi’s finest chicken chili!

Lunch, Deconstructed

Deconstructed lunch

Deconstructed lunch elements, waiting to meet each other.

Lunch can take me down, especially in winter. When we are scrambling to get out the door to training or a race, the idea of preparing lunch, after making breakfast, cleaning up and gathering/loading gear is a major buzz kill. But the penalty for not making lunch is hunger or French Fries. Lots of French Fries. NOT that I have anything against French Fries, and particularly the ones at the Dartmouth Skiway that must be double fried because they are so good. But we all know, the sad, cumulative consequence of too many French Fries.

My solution is (to try at least) to have a fridge full or delicious and healthy lunch fixings, ready to be combined the night before, or easily enough in the morning. Below are basic recipes for some essential elements, along with suggestions for the makings of the best darned lunch you can cram into a takeout container.  The recipes for the beets, lentils and onions come from Stone Soup. Build an arsenal of sauces from Get Saucy With Me to have on hand and you’re good to go, to the Skiway and beyond.

Skiway Deconstructed Lunch Basics:

  • Baked Sweet Potatoes
  • Roasted Beets
  • Massaged Kale
  • Parisian Lentils
  • Balsamic Onions

A few suggestions for other awesome things to have on hand:

  • Roasted nuts and seeds
  • Avocado
  • Roasted vegetables
  • Cooked grains like brown rice, quinoa and millet
  • Hummus
  • Hard boiled eggs
  • Chopped olives or tapenade
  • Cooked BACON, chicken and other protein. Did I say bacon?
Salads for two, in brilliant take out containers. Dressing in a repurposed caper bottle.

Salads for two, in brilliant take out containers. Dressing in a repurposed caper bottle.

Sweet Potatoes

Ingredients

  • However many sweet potatoes you want to cook in your hot oven.

Method

Turn oven on to 400.

Wash potatoes and dry them with a paper towel. Prick all over with a fork. (One exploded potato will cure you from ever forgetting this step.) Put potatoes on a cookie sheet to catch the goo that escapes from the holes. Line the sheet with foil if you want zero cleanup.

Bake potatoes for about an hour, squeezing them to test for doneness starting at about 45 minutes. I like mine to have some structural integrity for slicing later.

When done, let potatoes cool. They can be easily peeled by hand if desired. Store covered in the fridge.

Massaged Kale

There are many methods for this so don’t worry too much about the ingredient measurements or timing. Some recipes only call for salt in the massaging, others only for oil, others for oil, lemon juice and salt and still others for the entire dressing. The point is just to break down the kale a bit so it is still raw but friendly and makes a worthy bed for all kinds of other good stuff.

Ingredients

  • One or two bunches kale, washed, spun dry, stemmed and shredded or torn. *
  • Olive oil, salt, lemon juice

*(You can easily stem kale with a big sharp knife by holding it vertically from the stem end and running the knife down the stem. Or you can go rogue and use your fingers. Grip the stem between thumb and forefinger and zip down the stem.)

Method

Put kale into a big bowl. Drizzle with a Tablespoon or more of olive oil, a splash of lemon juice and a good sprinkling of salt. Massage kale with your hands until it softens a bit and is a shinier, dark green. Store covered in the fridge until  ready to use.

Roasted Beets

These keep a week or more in the fridge, so I generally make enough to fill up a large 9 x13 baking dish.

Ingredients

  • 1-2 bunches beets, or a few large ones.
  • Balsamic vinegar
  • Olive oil

Method

Preheat oven to 400.

Remove stalks from beets and scrub them well. Chop into wedges – either quarters, sixths or eighths. The smaller you chop, the faster they will cook. I like big wedges because I have more slicing and dicing options later

Splash with a few tablespoons of balsamic vinegar and the same of olive oil. Sprinkle with kosher salt.

Cover tightly with foil and roast for 45 minutes to 1 hour or until beets are tender. Season to taste. When cooled you can easily peel them by hand or with a knife, or just eat them with the peels.

Parisian Lentils

I love these any time of day, even for breakfast with an egg on top. Full disclosure: I never measure these. I just boil a bunch of lentils and add equal splashes of the seasonings at the end. And if I don’t have sherry vinegar I cut to the chase with a splash of straight sherry. Saves you the trouble of having a separate glass of wine with dinner (or breakfast in some cases). The recipe calls for topping these with fresh ricotta and parsley, which sounds awesome.

Ingredients

  • 7 oz French style green lentils (aka puy lentils)
  • 2 tablespoons sherry vinegar
  • 2 tablespoons soy sauce

Method

Place lentils in a medium saucepan and cover generously with water. Cover and bring to the boil.

Remove lid and simmer for 10-15 minutes or until the lentils are tender.

Drain lentils and return to the pan. Season with vinegar, soy and 2 tablespoons extra virgin olive oil. Taste and add salt as needed.

Balsamic Onions

I wasn’t going to include these but they are so good on pizza, sandwiches, salads and soups that they need to  be in. If you’re over the taste of balsamic at this point just use a combo of olive oil and butter and sprinkle generously with salt. This clearly makes a ton, but they keep for a long time and are addictive so a ton is a good thing. Feel free to halve of quarter, but don’t complain when you are out of them so soon!

Ingredients

  • 8 onions
  • 1/2 cup olive oil
  • 1/2 cup balsamic vinegar

(No need to use your best olive oil and balsamic)

Method

Heat oil in a large heavy based saucepan over a medium heat.

Halve onions, lengthwise, then remove the skins and slice into half moons. Adding chopped onions to the oil as you go.

Cover and cook on a medium low heat, stirring occasionally for about 1/2 hour or until onions are very soft but not browned.

Remove cover and add balsamic. Bring to a simmer and cook, again stirring from time to time for about 20 minutes or until the sauce has reduced a little and the onions are slightly brown.

Bringing it in Style: Boot Camp Bonnie


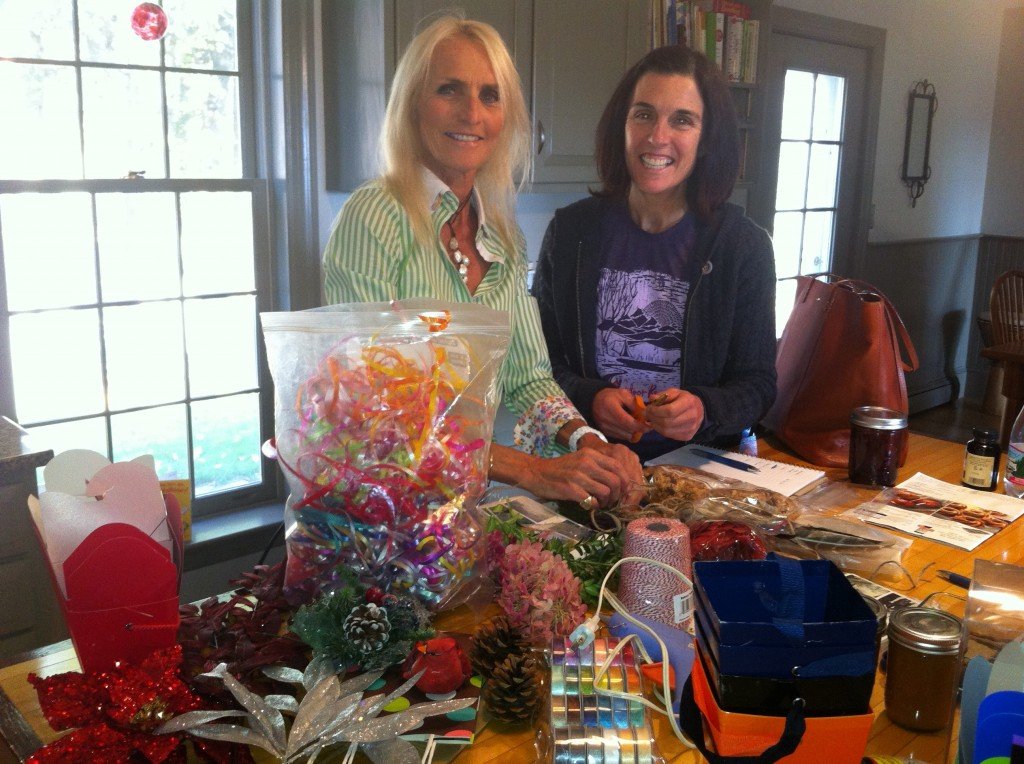
Bonnie and Sue with just a smattering of supplies.

Bonnie and Sue with just a smattering of supplies.

The best defense is a good offense. I’m not talking football here— I’m talking about the holidays. All that giving and sharing and jolly spirit is a whole lot easier if you are prepared. We’re pretty good on the cooking end of it, but when it comes to presentation we went to a pro. We went to Bonnie, AKA Boot Camp Bonnie (because of her dedication to early morning sweating).

Bonnie is not only incredibly generous, but also creative, which is a killer combo this time of year. She doesn’t just show up with cookies for the group—she shows up with a candy-striped hat box brimming with individually wrapped packages of peppermint meringues. Starting with a paper bag she ends up with something that could grace the cover of Martha Stewart magazine (if Martha ever shared the stage, that is). Bonnie was kind enough to share some of her tricks, and the arsenal of staples she keeps on hand to turn humble mason jars, paper bags and boxes into gift-worthy pieces of art. Everything can be found at party stores, craft stores, department stores, pharmacies and even grocery stores. Bonnie looks out for deals year round and stocks up when the getting is good. Here are some things to look out for:

Gift bags

Daunting, yes, but your friendly neighborhood craft or dollar store has plenty to offer.

The Basics: Containers in a variety of shapes and sizes–these can range from cardboard boxes, wire-handled takeout containers, fancy embellished boxes and hat boxes to coffee mugs, decorative bowls, paper bags and metal pails or buckets; lots of ribbon, bows, raffia and raffia wrap; festive plastic bags and twist ties; washed and repurposed bottles or jars and the never fail mason jars.

 Accent materials: Sparkly stuff like leaves, stars and snowflakes; silk flowers and greenery; fancy ribbon like moss ribbon, textured or stretchy ribbon; stray jewels, bling and beads.

Natural materials: Boxwood and evergreen sprigs; hardy fresh herbs like rosemary and bay leaves; flowers in season like hydrangeas and sunflowers; dried flowers; shells and sand dollars; feathers; pinecones, acorns, seeds, pods and whole nuts; whole spices like cinnamon sticks and star anise.

Ornaments and decorations: miniature bells, toys, figures, props; clip on birds and mini stuffed animals; seasonal cookie cutters or small kitchen novelties.

One word--Clearance!

One word–Clearance!

Stamps (rubber and stick-on), seals and stickers: These are great to close up takeout containers or to write gift messages on. Get them at stationery and sundry stores.

Tools: If you have but one tool, make it the small but mighty glue gun. Use it to affix or join ribbons, put pine cones and shells on packaging. Gold and silver metallic sharpies in wide and fine tips. Scissors and both single side and double stick tape.

Gift tags and labels: You can never have enough! If you keep them on the plain side you can use them year round.

Wrapping and Tissue Paper: Again, be an opportunist and keep a good supply, especially of tissue paper which does everything from adding a decorative touch to a gift bag to protecting a stack of fresh baked cookies. Also, keep a stash of heavy duty paper for the good stuff and for gifts that need to stand up to transport.

This is just a partial list. As Bonnie reminds us, the main thing is to be creative and have fun with it. If you need a little inspiration on what to wrap here’s the recipe for some killer Christmas cookies, courtesy Bonnie our Good Gifting Goddess.


Don’t Bring It: A Guide to TSA Approved Fare


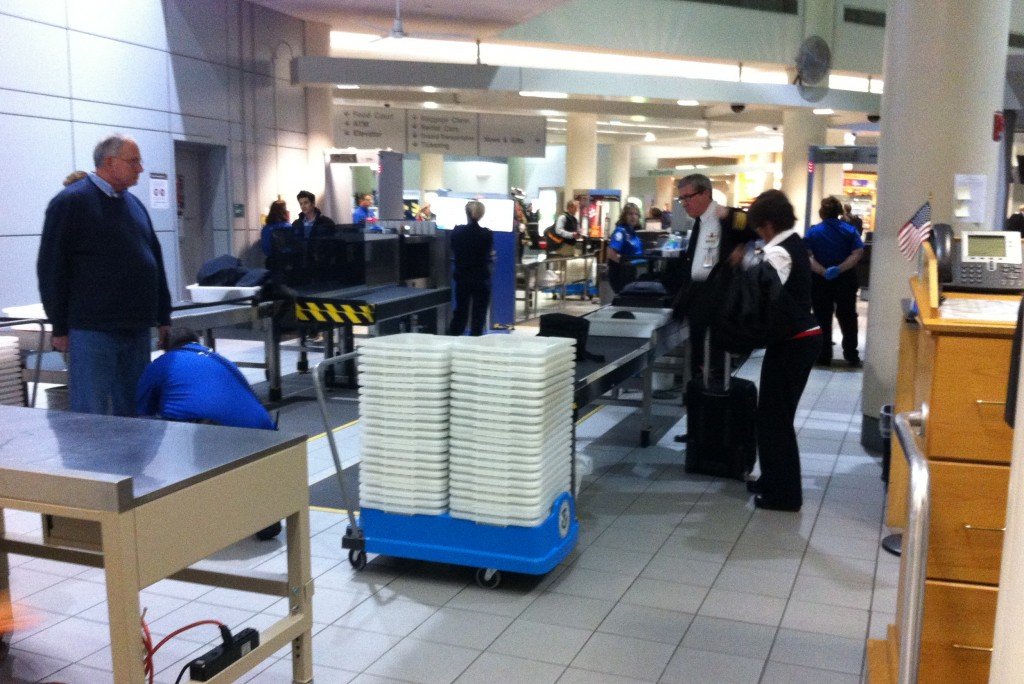
Taking it off for the TSA in MHT

Taking it off for the TSA in MHT

Holiday Fun: Yay! Holiday Travel: Argh!

In anticipation of the inevitable shake downs at airport security, we thought it might be helpful to write about what edible fare NOT to bring if you take to the friendly skies this holiday season. Consider it a little PSA on the TSA.

Being stranded with toddlers on thwarted cross-country holiday treks (at both the Mall of America in Minneapolis and the Coca Cola Museum in Atlanta), instilled my routine of doomsday preparation when embarking on any multi-stop journey this time of year. The loss of in flight meals (not a huge loss in retrospect) and the advent of no frills airlines without buy-on-board options only heighten the need to be armed against long flights and too close connections.

To deal with this I used to spend precious time at home packing slick little soft coolers and snack bags of healthy foods–cut up apples, carrots and hummus, sliced cheese, tortilla/turkey roll ups lovingly cut into bite-sized spirals. The family shunned it all in favor of expensive snack boxes full of empty calories and near-empty packaging or copious amounts of the nasty snacks that, sadly, are still provided for free. But I persevered for my own benefit only, my family openly mocking my attempts at healthy travel fare. This is what I have learned:

First, one must work around the list of banned substances which includes all fluids, like puddings, soups, and drinks of any kind (oh the wasted lattes). If it pours, forget it. Other things on the banned list, I learned the hard way, are yogurt and its evil twin go-gurt. There is a gray area of judgment when distinguishing between the liquid and solid realms of food. I discovered this when flying out of Manchester, NH. Upon passing through X-ray TSA spirited me out of line, did the full shake down, dusted my hands for contraband and then pointed accusingly to my Tupperware container of homemade hummus. “What’s that?” asked a burly agent, perhaps getting a suspicious whiff of middle eastern spice. “Hummus.” “Humma what?” “Hummus” I repeated. He brought over a female agent who looked at it with similar disdain and simply shook her head while pointing to the garbage can.

This brought my family much entertainment, but nothing compared to my next bust, when, once again with my TSA friends in Manchester, I tried to ferry chia seed breakfast pudding through security. When made properly chia seed pudding might resemble a poppy-seed studded tapioca. When hastily thrown together the night before travel it can resemble slimy frogs eggs. The agent pointed to my opaque container and raised an eyebrow. “What’s this?” “Chia seed pudding,” I answered, suddenly having a hummus flashback (Duh!) and fatalistically eyeing the garbage can. She peeled back the lid optimistically and gamely refrained from gagging while gently suggesting I could eat “whatever that is” outside security. I quickly grabbed it and tossed it into the can while my kids convulsed with laughter.

Other things don’t make the travel cut on a purely practical level. No matter how firm the banana, it will find a way to over ripen the moment you take it on the road. Big sandwiches overflowing with awesomeness will overflow into your own lap as will anything goopy, mushy, crumbly or grainy. Speaking of grainy, rice will escape containment, guaranteed, as will rogue streams of juice, sauce or dressing from items in the wrap family. Breakfast burrito at Cafe Rio in SLC–good way to start the day. Hot sauce in your lap–bad way to start the day.

Then we have the matter of etiquette. Unless you and your people have taken over an entire row, anything too outrageously yummy creates a “have’s and have-not’s” scenario. It just feels weird to be chowing down right next to someone with nothing but a bag of pretzels. It’s also common courtesy to avoid anything really smelly or pungent–eggs and tuna for sure, but also things like the roasted cabbage that was tasty, healthy high-fiber fare but made row 17 smell like a Balkan road house.

I recently discovered another issue, when I had broken my own rice rule and packed a luscious brown rice and roasted vegetable melange. It would have been great had I remembered to bring utensils. Airport restaurants, now savvy to brown bagging passengers like myself, no longer offer easy access to free utensils, and neither do the low-fare airlines we fly. (After all, you don’t need a fork to eat peanuts, Ritz bits and pretzels). I ended up using a hunk of bagel from yet another sandwich shunned by my family. It sort of all worked out, but it further weakened my resolve to BYO in-flight.

So what do you bring when you take flight? Leave the hummus behind and go for anything that’s better in a backpack (without the Swiss Army knife of course). Or keep it simple and just bring money–lots of it. Pockets and pockets full of grindels. Wherever you head for the holidays, safe travels, stay loose and pack your sense of humor!

Half Century (and no, it’s not a bike ride)

I turned 50 last Wednesday – GULP!  The actual day was a lot of fun.  I heard from many friends and family, wishing me well as I embark on the next half century.  For those of you close to this milestone, fifty is not so bad.  It is a rite of passage….. a new decade…..a fresh start.  Everyone tells me life just keeps getting better so I say – BRING IT ON!

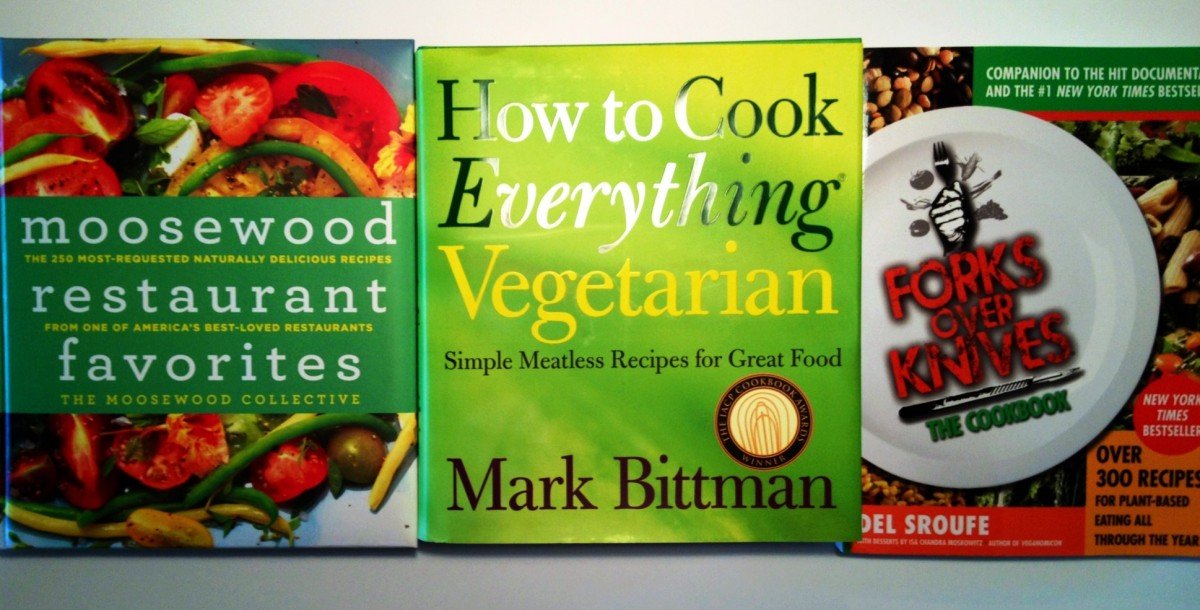
How does this milestone birthday involve my blog?  Well, I’ll tell you…..I got three awesome vegetarian cookbooks (do my friends and family know me or what?).  I am practically giddy!  So, stick with me vegetarians, partial vegetarians, and non-vegetarians because there is something here for everyone.  Check them out!

Birthday Books

Moosewood Restaurant Favorites

How to Cook Everything Vegetarian

Forks Over Knives, The Cookbook