Monthly Archives: December 2015

Holiday Hybread: Pumpkin Gingerbread with Cream Cheese Filling

Banana-gingerbread

Two breads in one, with a tasty filling. C’mon, who’s better than you at this party?

Ok my pretties (and I know you are bringing your A-game tonight), this is going to be a quick one. Quick because I left posting this until New Year’s Eve on an airplane and quick because you have places to go, things to do and fun people to see! So, go ahead and read this recipe tomorrow when you are reclined on the couch. But before you go, please do three things for me:

  1. Review this party trick just in case. Your A Game, remember?
  2. If you happen to find yourself with leftover champagne (imagine?), SAVE IT! Here are 16 uses for leftover champagne and one of them surely will sound good tomorrow, even if it’s the ice cubes for your oj. If you can only manage to pour it into a mason jar, then do that and you’ll have awesome vinegar by Valentines Day.
  3. Get fancy and celebrate New Years however the heck you want, whether that means ditching champagne entirely or crawling into your new flannel jammies at 9.

Now, go have fun and be safe out there! When you come back…

Slacker bakers unite for Round 2. We’re in the home stretch. You’ve got one more weekend of planned and spontaneous get-togethers, of late nights and chocolate for breakfast, of “how-long-does-that-stuff-in-the-foil-keep?”  What you need here is something edible that is easy to throw together, widely appreciated, mostly homemade and somewhat more impressive than a regifted box of chocolates (not that there is one single thing wrong with that!)

You can get on your pomegranate game, and it never hurts to have fondue fixin’s at the ready, but if you’re still up for baking, here is a little slice of brilliance which involves boxed bread mixes. Now you’re with me, right? This comes from Sister B, who has made it more times than she can count in the past few weeks. The original version combines gingerbread with pumpkin bread, but she prefers it with banana bread (and includes a recipe for that below, so keep your scrolling skills up).banan-gingerbread-ingredients

This Holiday Hybread is nothing gourmet, but it’s yummy, and it can say a lot about you. Like… “I’ve still got some holiday swagger in me,” or, “I know exactly what to get at Trader Joe’s,” or “See what I can do with all that cream cheese I never used for the shrimp dip?” My only note is that this recipe calls for half boxes of both breads. My suggestion is to double it, make two loaves and do away your need for higher math.

And now, I turn it entirely over to sister B, AKA Beatie the Artiste, who took the edible peppermint plate to an entirely new level. More on that later.

Holiday Hybread: Pumpkin Gingerbread with Cream Cheese Filling

Easy, yummy, and  holiday-ish!  A crowd pleaser.

Note: If you don’t have a Trader Joe’s Betty Crocker mixes work too, but TJ’s (or an upscale boxed version) is way better.

Makes one loaf

Ingredients:

  • ½  package Trader Joe’s pumpkin bread mix plus what the box asks for (egg, water, oil)
  • ½ package Trader Joe’s gingerbread mix (plus, egg, water oil)   
  • 12-oz  cream cheese (1 ½  8 oz. packages)
  • 3/8 cup sugar
  • a few drops vanilla

Method:

Preheat oven to 350.

Grease the bottom of a 9” x 5” ish bread pan or spray with cooking spray.

Make your gingerbread and pumpkin bread batters, according to package directions.

Make cream cheese filling:  place cream cheese in microwave safe bowl and zap for
40 seconds.  Stir in sugar and few drops of vanilla until smooth.  Set aside.

SCRAPE pumpkin bread mixture into loaf pan.  Level it as best you can.

PLOP the cream cheese mixture all over the top of the pumpkin bread batter, covering it.  It may be lumpy and uneven…that’s ok, so are some of the best of us. If you care, level it carefully with a knife…but try to let it go.

Now TOP that with your gingerbread batter.  

Bake for about an hour…maybe a little more.  Check it with a toothpick to know for sure.  Cool on a wire rack and then remove from pan. Slice, impress and enjoy!

And now for Sister B’s sister recipe to the above. This was discovered by happy accident, some overripe bananas in the freezer and a WHAT IF inspiration. As in, WHAT IF I tried the same thing but with a layer or banana bread instead of pumpkin this time? Insane, right?  And yet, banana/gingerbread bumped pumpkin/gingerbread off the top of the podium and into the silver medal position.

This recipe uses a proper (and awesome) banana bread recipe from Cooks Illustrated. It’s not out of a box, but it’s already halved for your convenience.

Banana Gingerbread with Cream Cheese Filling

Proceed exactly as above, but for the pumpkin bread part substitute this:

Banana Bread (this is the half recipe. Double it for two loaves of Holiday Hybread or one loaf of straight banana bread)

Ingredients:

  • 1 cup flour
  • 3/8 cup sugar
  • 3/8 tsp baking soda
  • ¼ tsp salt
  • 2  very ripe bananas, mashed well (3/4 cup)
  • 1/8 cup plain yogurt
  • 1 egg, lightly beaten
  • 3 tablespoons unsalted butter, melted and cooled
  • ½ tsp vanilla

Method:

Whisk flour, sugar, baking soda, salt together in a large bowl and set aside.
Mix the mashed bananas, yogurt, eggs, butter, vanilla in a medium bowl.
Lightly fold banana mixture into the dry ingredients until just combined.

Crackle 2.0—Toffee meets dark chocolate pretzels and beer


crackle2

Just when you thought you had covered everyone on your list…surprise! That’s why it makes darned good sense to cook up obscene quantities food gifts, put them in jars and cute boxes and have them at the ready.

My faves are salted caramel Cholliesauce, roasted and glazed nuts and of course, a constantly replenished stash of crackle. We’ve learned to love Crackle over the years, but it’s time to shake it up a little. It’s time to go to the Dark Side. Behold Crackle 2.0, a more grown up version of decadence from a favorite site: thebeeroness.com.

I love the idea of cooking with beer, and the whole consequence of recipes only calling for half a can (at most) of some shmancy beer, making it perfectly ok—even responsible—to finish the rest. There are lots of things I love about this, including of course the taste, which really isn’t beer-like or even alcoholic after all that boiling.

This recipe lets you decide on the thickness of both the toffee and the chocolate layers. Also, it does not require oven time, leaving your oven free for baking things like these and these and these. No baking means also no urgency between steps, which is nice. You can make the toffee part and then come back to slay the rest.

crackle3

Extra points if you make the edible peppermint plate.

Finally, the dark chocolate is a more sophisticated touch (even if you hedge and add some milk chocolate chips when you run out of the good stuff).

I have made this with Guinness and most recently with Lagunitas Little Sumpin ale, subscribing once again to the “love the one you’re with” method of ingredient selection. Do keep it to craft beer or something more complex than Bud. If you want to really experiment, read up on the Beeroness wisdom. Alternatively, just wing it, and try a new beer with each batch. Oh, and for presentation points, make this edible plate out of peppermint candies. You’re soooo Martha!

Chocolate Pretzel Beer Toffee

Adapted from The Beeroness

Ingredients:

Toffee:

1 Cup Sugar
1 Cup Butter (2 sticks)
1/2 Cup Amber Ale

Topping:

2 Cups Pretzels, Smashed
2 Cups Dark Chocolate Chips (60% cacao content)
1/4 Cup Amber Ale or Chocolate Stout
1 Tbsp or so coconut oil (optional but it gives the chocolate a nice gloss)

Method:

In a large pot over high heat add the sugar, butter and 1/2 cup amber ale, it will triple in volume during the cooking process so make sure to use a large pot. Stir until the mixture starts to boil. Allow to boil untouched until the mixture starts to darken and thicken at about 230 degrees. Stir continuously until it turns a very dark amber and hits 290 degrees. (Use the color as your guide. Too light means less caramel flavor. Be patient but vigilant!) This process will take between 15 and 20 minutes from start to finish. Pour onto a baking sheet covered with parchment paper or a Silpat. Immediately spread to desired thickness before it starts to harden. Allow to cool.

Add the chocolate to a large bowl. Heat the beer until hot but not boiling. You can heat it on a pot on the stove or microwave it in a microwave safe bowl. If you use the microwave, know that the beer will foam up once it reaches it’s boiling point. Pour the hot beer over the chocolate chips and stir until well combined and melted. (Alternatively, and preferably to SOME, do the whole shebang in a double boiler. See Edie notes below.)

Pour the chocolate over the toffee and smooth out in an even layer. Sprinkle the crushed pretzels over the chocolate and chill until the chocolate has set. Cut into pieces.

Beeroness Notes: If you use a chocolate with less than 60% cocoa content, it will have higher levels of milk solids, because of this it will have a more difficult time hardening once the beer is added. Try to find 60% and chill it to set.

Edie Notes: In my microwave-deprived house I made this as directed a few times but could not get the chocolate to be as glossy as I wanted. I had better results melting the chocolate and beer over water in a double boiler, and adding a bit of coconut oil. For chocolate I used a combo of 2 Ghirardelli Intense Dark 72 % Cacao bars, and enough milk chocolate chips to get to the right amount.

Crackle1

Why are you looking at this? Aren’t you at the store yet?


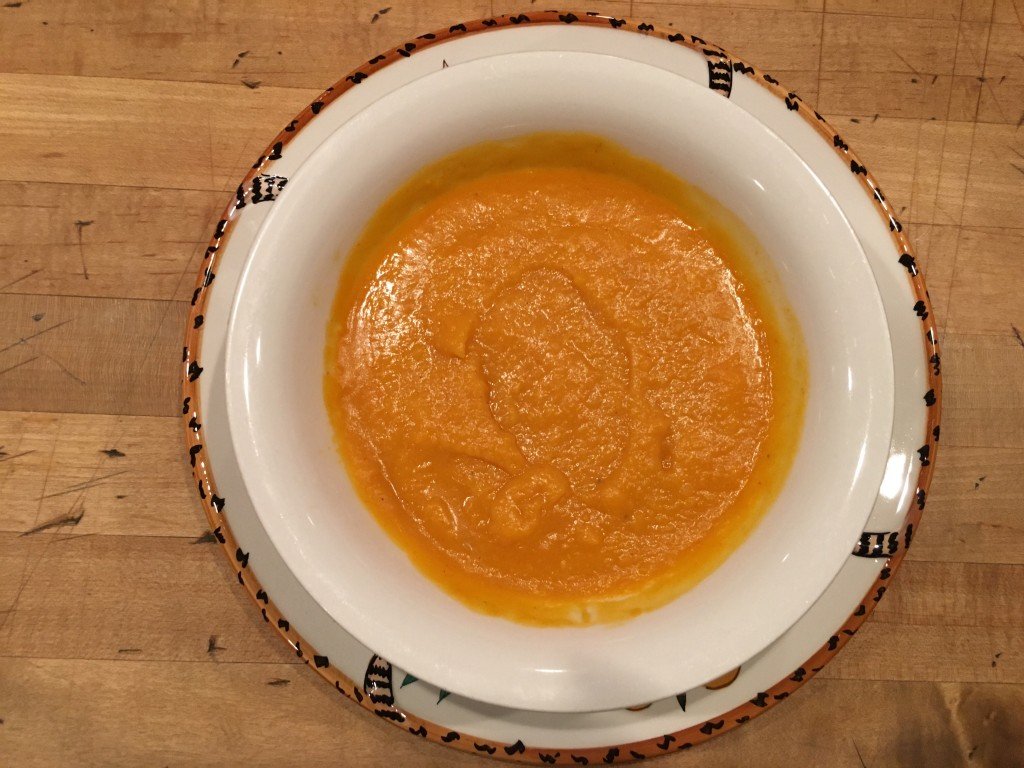
Sugar and Spice Squash Soup

Tick Tick Tick. It’s happening, snow or no snow. A certain person in our house wore an elf suit for an entire weekend, the Christmas music on the radio is running 1:1 with Adele, and I’m pretty sure I’ve had at least some chocolate by 10 am for the past five days. Oh yeah…’tis the season.

This sweet, spicy, ginger squash soup is another fabulous contribution from Steamboat Tania, who holds the bar so much higher than me that I almost just posted this without trying it. Almost. But the whole candied ginger thing was intriguing, and I figured before descending into holiday carb overload I owed it to my people to produce one last healthy, unique, yet broadly appealing dish.

It’s a more sophisticated version of Halloween Soup, with creaminess from coconut milk, spice from red curry paste and sweet holiday sparkle from the candied ginger. (You know you were wondering how to use up the tub of candied ginger you got for fruitcake or ginger libations or various gingery creations.)

If I have not sold you on this soup yet, it’s also pretty hard to screw up. I didn’t have a full jar of red curry paste, used bouillon cubes instead of broth and misread the recipe, using only one butternut squash. It was still incredible, and an acorn squash out there lives for another day. Oh, and Tania’s tip on heating the squash in the oven first is sheer brilliance.

I urge you to make this, as a gift to yourself or to share with your holiday squad. Extra points if you enjoy it in your elf suit.

Ingredients:

  • 1 large acorn squash
  • 1 large butternut squash
  • 3 Tbsp olive oil (plus more to rub on squash)
  • 2 T butter
  • 1 large onion diced
  • 3 cloves garlic minced
  • 32 oz chicken stock
  • 1 jar red curry paste
  • 1 can coconut milk (Full fat tastes best. Hide the can if you must)
  • 1/3 cup candied ginger
  • salt and pepper

Method:

Preheat oven to 350.
Put uncut squash on baking tray while the oven is preheating (do this so the squash cuts easily and you don’t lose fingers), 10 minutes or so.
Cut squash in half, discard seeds, rub cut side with olive oil and place cut side down on baking sheet. Cook until soft, half an hour or so depending on size.
While squash is cooking warm 3T olive oil and butter in a large sauce pan. Add onion, cook until translucent. Add garlic and cook until fragrant.
Remove squash from oven and scoop flesh into onion/garlic mixture. Add chicken stock, curry paste, coconut milk and candied ginger. Stir over low-med heat until blended.

Ladle lumpy soup into vitamix/blender (or use an immersion blender). You will need two pots because this was 2 vitamix loads. Blend until smooth. Return to stovetop to warm. Add salt and pepper to taste. Warm and serve. (P.S. It’s also really good cold)


Kiss My Crust Christmas Cookies

kiss-cookies

Kiss meets crust. Angels sing.

Welcome to Part 1 of Slacker’s Delight Holiday Baking.

These cookies are brilliant: they’re like Mexican wedding cookies without the work and with a big fat Hershey’s kiss in the middle. They come from Averie Cooks, and though I don’t know Averie I think she needs to be worshipped. Why? Because holiday baking is WAY OVERRATED. I mean, like we need one more thing to do? But the thing is, baking just seems like the right instinct at this crazy time of year.  And so we bake. And it makes our people happy which makes us happy. When we can all be happy with next to no effort, well, that’s the real  miracle of Christmas.

So enough talk. I give you three-ingredient cookies that require no mixing or creaming and, best of all, no thank-you note. Happy Baking and you slackers—stay tuned for Part 2!

Kiss My Crust Cookies

Very slightly amended from Averie Cooks

Makes about 16 cookies
Prep Time: 10 minutes
Cook Time: about 15 to 17 minutes
Total Time: about 45 minutes, for cooling

Ingredients:

  • 1 roll out refrigerated or frozen pie crust for a 9-inch pie, thawed.
  • 16 or so chocolate kisses (or Mini Peanut Butter Cups or Rolos or Andes Mints)
  • confectioners’ sugar (about 3/4 cup), for dredging

Method:

  1. Preheat oven to 350F. Line a baking sheet with a Silpat or spray with cooking spray; set aside.
  2. Place pie crust on a piece of parchment paper or lightly floured surface and roll it it out just a bit with a rolling pin or hefty bottle. Using a sharp knife or pizza wheel, slice into approximately 16 sections, about 2-inch squares. If you cut your circle into 4 rows of 4, a couple sections may be a bit skimpy. Do some cutting and smooshing to make those sections big enough to contain a Kiss. It won’t be perfect. Stay calm. Channel John Tesh.
  3. Place one chocolate kiss in the center of each section.
  4. Using your fingertips, seal the dough at the top to fully contain the kiss. Pat smooth with your palms and flatten slightly into a mound; repeat with remaining crust sections and kisses until gone. Transfer mounds to prepared baking sheet or, if working on parchment, scootch the whole piece onto the baking sheet and rearrange the cookies so they look happy.
  5. Bake for about 15 to 17 minutes, or until crust is just set and done; cookies firm up as they cool. The tops will appear fairly pale while the undersides will be more golden; don’t overbake or the undersides could burn. Watch cookies closely starting at about 13 minutes and use your good judgement.
  6. Allow cookies to cool on baking tray for about 15 minutes, or until cool enough to handle before dredging each one liberally in confectioners’ sugar. Serve immediately. Cookies will keep airtight for up to 1 week at room temp or in the freezer for up to 4 months.