Category Archives: Veggie Delight

Stuffed Spaghetti Squash

Squash goodness is always worth the effort!

Squash goodness is always worth the effort!

With the start of fall, who doesn’t want to enjoy the fall vegetables to their fullest?  I thought what better way to start the season than with spaghetti squash.  However, when you buy a spaghetti squash, it is a commitment. Not only do you have to haul the thing home, but once you get it into your kitchen, you actually have to do something with it. If you are like me, it sits on the counter for a day or so while you think, eh, I’ll deal with that another day. But once you roll up your sleeves and dig in you realize, it’s not that bad. You cut it, cook it, and then savor the goodness of your efforts.

There are a million things you can do with spaghetti squash. It is one of the more versatile vegetables out there. It makes a great side dish no matter what you are serving and you can pair it with just about anything.  I choose to make this stuffed spaghetti squash with curry seasoning and chick peas, but really, anything goes! Try this recipe out or send us your favorite.  Enjoy the squash, enjoy the start of fall, and here’s to a fun transition into all the goodness this season has to offer.

Ingredients

2 small spaghetti squash (about 1 1/2 lbs each)
1 cup cooked chick peas
1 small red onion, sliced
1/2 cup oil-packed sun-dried tomatoes, drained and thinly sliced
1/3 cup golden raisins
1 Tbsp finely chopped jalapeno chili
1/2 cup light coconut milk
1 1/2 tsp curry powder
2 Tbsp thinly sliced basil, optional

Method

Preheat oven to 375 degrees.

Pierce squash in several places with knife. Microwave on high for 3 minutes to soften. Slice off ends, and stand squash upright. Cut straight down length of squash. Remove seeds with spoon. Place halves cut side down on rimmed baking sheet and add 1 1/2 cups water to cover surface. Bake 30 minutes or until squash yields when pressed.

Cool squash cut side up 10 minutes. Scrape squash halves with fork to release strands. Transfer strands to a large bowl and stir in chick peas, onion, sun-dried tomatoes, raisins, and jalapeno. 

Whisk together coconut milk and curry powder in bowl. Stir into squash mixture and toss to combine. Season with salt and pepper to taste.

Fill squash shells with mixture and return to baking sheet, cut side up.  Bake 20 minutes or until heated through. Top with basil and serve.

Bring It!

Wrap each half in foil and ask host if you can place in oven when you get there.


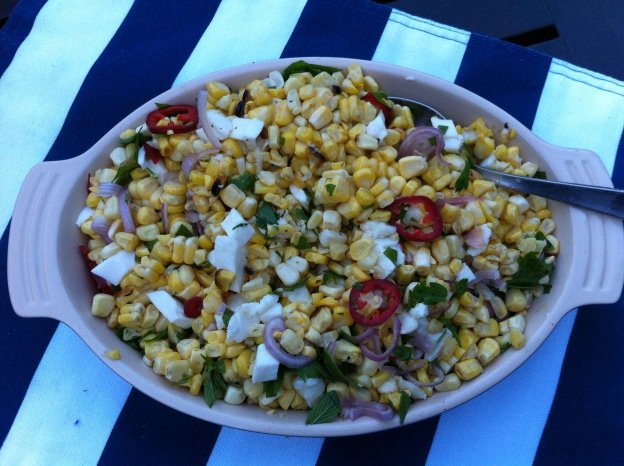
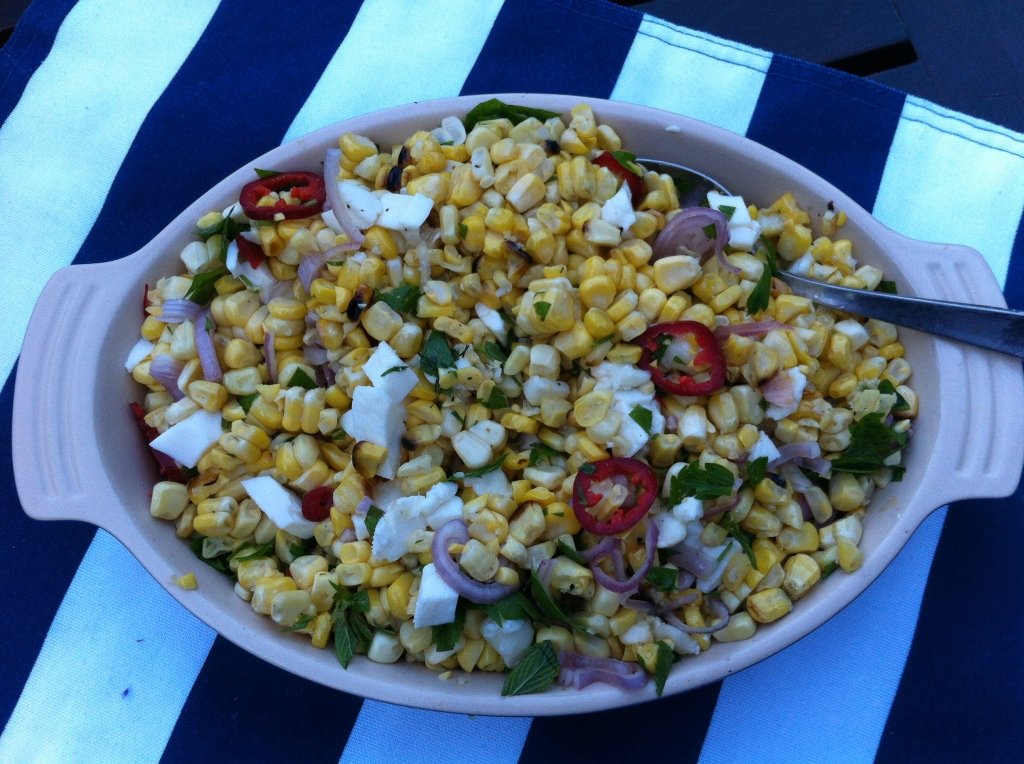
Corn a plenty! Charred and Raw Corn Salad


When you can't quite make it to your favorite Mexican food truck, try this.

Can’t quite make it to your favorite Mexican food truck? I feel your pain. But try this and you’ll feel better.

This just in: You can refrigerate fresh tomatoes with no ill effects to their taste or texture. I realize this may seem of little consequence to many. But for those of you who have pounds of luscious fresh tomatoes on your counter tops, diligently saving them from “ruin” in the fridge while trying to think of ways to use them before they rot…for you this is a revelation. Read all about the science of it here at Serious Eats, or just take my word for it and reclaim your counter space right now. You’re welcome.

And now, on to the pure gold of the late summer harvest. Fresh corn. Oooh baby do we have fresh corn and is it ever good! Around this time every year my kids ask when we are going to stop having fresh corn every night. My answer is always the same: “Until it’s gone.”

In my search for a fabulous recipe using fresh corn, I made some pretty good savory corn pancakes and explored all the “easiest ways to grill corn” including soaking and removing the silk but not the husks (got an update for you: not that easy!), but none of the recipes really seemed blog worthy. My very favorite uses for fresh corn are inevitably not recipes but impulses: adding it to jarred salsa; making it the star if its own salsa with leftover guacamole fixings; or just tossing it into a salad or frittata. It sort of becomes a happy, use-me-capriciously-while-I’m-here condiment.

Indeed, no fresh corn recipe really spoke to me until Tania, my Rocky Mountain correspondent, sent me this Charred and Raw Corn recipe from Bon Appetit, which has all the goodness of fully-loaded Mexican grilled corn without the hand-held mess. After making it four times in a week I can say it is one of my faves, in taste and in method. It features a truly easy way to grill corn, for use in salads or salsa or for just plain eating off the cob, which to me is still the best way to eat fresh corn.

So, enjoy this totally portable side/salad in the glow of Indian Summer, and get yourself some extra cilantro and peppers just in case you find yourself making it a few more times than you anticipated.

Ingredients

4 ears of corn, husked
1 large shallot, thinly sliced into rings
½ red chile (such as Holland or Fresno), with seeds, thinly sliced into rings
¼ cup fresh lime juice
Kosher salt and freshly ground black pepper
4 tablespoons vegetable oil, divided
2 oz. fresh Cotija cheese or queso fresco, crumbled (I used goat cheese. (*LTOYW)
¼ cup cilantro leaves with tender stems

Method

  • Prepare grill for medium heat. Cut kernels from 1 corn cob and toss with shallot, chile, and lime juice in a large bowl; season with salt and pepper and set aside.
  • Brush remaining 3 ears of corn with 2 Tbsp. oil and grill, turning occasionally, until very tender and charred in spots, 10–12 minutes. Let cool.
  • Cut kernels from cobs and add to reserved corn mixture along with cheese, cilantro, and remaining 2 Tbsp. oil. Toss to combine; season with salt and pepper.

Bring it

Tupperware baby! This dish all about picnics and tailgates.

*I use this often enough that it deserves it’s own acronym. Love The One You’re With. As in, embrace what you’ve got. As in don’t let a few missed ingredients spoil the moment. As in, when you live in New Hampshire you won’t find Mexican specialty cheese at the corner store.

Summer Vegetable Curry

Beautiful summer vegetables in full swing

Beautiful summer vegetables in full swing

I saw this recipe for summer vegetable curry and I thought, what better way to round out the summer than to make a dish that uses lots of summer vegetables that are in full harvest right now. You can either go to your local farm stand or farmers market to load up on these vegetables.  Or, if you are talented enough to grow your own vegetables, then a short trip to your garden will probably do it.  Take the vegetables and add the curry spices found in this recipe, and you’ll have a dish packed with flavor.

This is a simple recipe.  All you need to do is prep the veggies and mix the spices first.  Then, it’s just a matter of throwing things in from longest cooking time to shortest. You can serve over brown rice or quinoa. And definitely have a chutney on hand. Or, I used this amazingly good tomato chile sauce that I found at the farm stand where I bought the vegetables.  But, whatever the topping, you’ll feel like you’re maximizing summer for all that it has to offer.

Ingredients

2 Tbsp vegetable oil
1 large onion (2-3 cups sliced)
2 cloves garlic, minced
1 Tbsp peeled and grated fresh ginger
1 tsp salt
2 tsp ground cumin
2 tsp ground coriander
1 tsp ground turmeric
½ tsp ground fennel
½ tsp ground cardamom
¼ tsp cayenne 
1 cup sliced carrots
3 cups sliced zucchini or summer squash
1 red, yellow, or orange bell pepper
1 1/2 cups water
2 cups chopped fresh tomatoes
1 1/2 cups corn kernels
4 cups chopped kale or baby spinach
1/2 cup chopped cilantro

Method

Before you begin to cook, shuck the corn and steam for 10 minutes.  Let cool and cut kernels off the husks.

To prep the onion, slice in half end to end and cut into half inch thick slices. Mince the garlic and grate the ginger. Then cut the carrots into 1/4 inch thick rounds, then halve or quarter depending on the diameter of the carrot. Same with the zucchini. Chop the pepper into roughly ½ inch pieces.

In a large skillet or soup pot, warm the oil over medium low heat. Add the onion, garlic, ginger and salt and cook for 5 minutes. Increase the heat to medium and add the spices. Stir for a minute or so. Add the carrots and 1 1/2 cups of water and bring to a simmer. Cover and simmer gently for 3-4 minutes. Add the bell pepper, zucchini, and kale, stir well, cover, and cook for about 5 minutes, stirring frequently. Stir in tomatoes, cover and cook until the tomatoes release their liquid. Stir in the corn and cook covered for 5 minutes. Add the cilantro, stir, and serve right away with chutney or tomato chili topping.

Watermelon Gazpacho

Swimsuit season calls for your inner cool. Hello watermelon gazpacho!

Swimsuit season calls for your inner cool. Hello watermelon gazpacho!

When summer really heats up there comes a day when we ask ourselves, “Can we just eat watermelon all day long?” Well of course we can! Watermelon can feature in everything from smoothies to salsa to salad to soup. Yes, soup. Gazpacho is typically a tomato affair, but it has many delicious riffs.

The official definition of Gazpacho calls it “a liquid salad from the southern Spanish region of Andalusia, made of ripe tomatoes, bell peppers, cucumbers, garlic, and bread moistened with water that is blended with olive oil, vinegar, and ice water and served cold.” Blah, blah, blah. In my mind the main criteria of good gazpacho are that it is cold, fresh and refreshing. And it cannot involve heating you or your kitchen up in any way.

This gazpacho in particular, from a long ago Cooking Light recipe, is a favorite of mine. As far as gazpachos go it is pretty easy prep, with minimal chopping thanks to the food processor involvement. I am not the only one who thinks it might be really good with a shot of vodka swirled in. Sort of a sweet and crunchy Bloody Mary, yes? Alas, I haven’t tried that yet, but let me know if you do. If you’re really taking this watermelon thing seriously though, enjoy this just before dinner alfresco, after a good siesta and some lunchtime Watermelon Sangria.

Watermelon Gazpacho à la Cooking Light

Yield: 8 servings (serving size: 3/4 cup)

Ingredients

6 cups cubed seeded watermelon
1 cup coarsely chopped peeled English cucumber
1/2 cup coarsely chopped yellow bell pepper
1/3 cup chopped green onions
3 Tbsp chopped fresh mint
3 Tbsp fresh lime juice
1Tbsp extra virgin olive oil
3/4 tsp salt
1/2 tsp hot sauce
1 garlic clove, minced
1 cup cranberry-raspberry juice

Method

Combine first 10 ingredients. Place half of watermelon mixture in a food processor, and pulse 3 or 4 times or until finely chopped. Spoon into a large bowl. Repeat procedure with remaining watermelon mixture. Stir in cranberry-raspberry juice. Chill thoroughly.

Bring It!

Pour this into a Tupperware pitcher, put it in a cooler with some paper cups and you’re picnic ready!

Cauliflower Couscous

Cauliflower, really?

Cauliflower, really?


This dish is definitely a sleeper. It doesn’t’ look like much but tastes great and nobody can guess that it’s cauliflower. They think it is rice. It looks like rice and is soft like rice, so that is not a bad guess.  And cauliflower rice is all the rage with the Paleo dieters these days, so you’ll be spot on should you serve it to someone on that diet. Also, cauliflower can be used as a pizza crust – who knew?   You can click here for a cauliflower pizza crust recipe, which by the way, I’m going to try next.

I brought this dish to a lacrosse party last night and it was a perfect complement to the plethora of side dishes. We had the standard green salads and pasta salads and potato salads, which were all delicious, and it would have been disappointing not to have them. But nobody had a cauliflower salad. It was fun to have something different and it was fun to play the game of “guess the main ingredient”. So, bust a move and make this for your next party.  It will be both delicious and a conversation piece for sure!

I got this recipe from Green Kitchen Stories and made some very small tweaks. Green Kitchen Stories is a great site and the little girl, Elsa, who helps her mom and dad with the website is just so darn cute! Enjoy the side dish and enjoy Green Kitchen Stories website (beautiful photos too!).

Ingredients

 1 head of raw cauliflower
2 handfuls of parsley and basil (I used cilantro)
1/2 cup toasted pumpkin seeds (I used sunflower seeds)
Juice of 1/2 lemon
Drizzle of olive oil
Salt and pepper
2 cups frozen (thawed) or fresh peas
1 cup feta cheese, crumbled
1/2 red pepper, chopped

Method

Bring saucepan with water to a boil. Meanwhile coarsely chop cauliflower and place florets and stem in a feed processor or blender and process until it is a rice-like texture (don’t process too long or it will be too mushy). You may need to process in 2 batches. Pour blended cauliflower in boiling water and boil 2 minutes. While cauliflower is cooking, chop herbs. Drain the cauliflower ‘couscous’ in a sieve and place in a large serving bowl, toss with olive oil and cool. Once cool to room temperature, add herbs, lemon juice, salt, pepper, and mix well. Then add peas, pumpkin seeds, feta cheese and toss to mix. Garnish with red pepper or whatever you have on hand that has some color. Serve warm or chilled.


Asparagus Panzanella

Spring fever in Doug and Kelley's asparagus patch.

Spring fever in Doug and Kelley’s asparagus patch. Arm yourself with a sharp knife and a healthy appetite.

As we come up on the one year anniversary of Bring It! we’re shaking it up a little (just a little, I promise) with the Ingredient of the Month. We pick something seasonal and feature it in a few posts that month. It’s not rocket science, but it’s progress. May’s ingredient is asparagus. We’re already getting to the end of the month but the tenacious winter kept those spears in hiding for quite some time. Now they’re out and those lucky enough (and smart enough) to have their own asparagus patch quite literally have their hands full.

Doug and Kelley Lewis are among the lucky/smart ones. Doug affirms that asparagus is indeed hard to start/plant, “but after two years of waiting for the roots to properly build, the harvests every spring are awesome. We got over 100 stalks just today!!!” Their typical spring dinner is grilled asparagus (preferably a bit scorched and black) with rice and cut veggies or grilled sweet potatoes as sides. Preferred cooking method is to lightly oil the spears with olive oil and a sprinkling of salt and throw them naked on the grill. “Steaming is easy, fast and inside,” says Doug. “Just sprinkle with a bit of salt and/or a squeeze of lemon. And they are yummy in scrambled eggs.”

Too much asparagus is a good problem to have, especially when you know about Asparagus Panzanella. Panzanella is one of those genius dishes that almost makes you feels like you’re cheating by calling it a meal—like eating cereal for dinner but way better. It’s basically a salad of toasted bread and whatever combination of fresh herbs and vegetables makes you happy. Pharrell Williams dancing-in-the-kitchen happy.

Naked Guns—pure, clean asparagus ready to grill.

Naked Guns—pure, clean asparagus ready to grill.

The Holy Grail of Panzanella’s is Ina Garten’s classic, so I used her method for toasting up the bread. Whereas hers uses cucumbers, tomatoes and basil, this one uses asparagus,  ricotta salata and spicy greens. You can go peas, mint and parm, or cilantro, corn and avocados. You get the picture.  

Taste-wise ricotta salata is sort of a mild feta with good structural integrity. Look at this as a way not only to eat bread for dinner but also to use whatever fresh stuff you have on hand. You can boil, roast or grill the asparagus.

Asparagus Panzanella

Adapted from Food and Wine

Ingredients

Asparagus Panzanella

The Food and Wine version of this feast. Let’s just double the bread shall we? Now we’re talking!

4 large eggs
2 pounds fat asparagus, peeled (if using thinner asparagus just trim or snap off the tough ends)
3 Tbsp good olive oil
1 small French bread or boule, cut into 1-inch cubes (6 cups)
1 tsp kosher salt
2 cups packed young mustard greens or chicory (or arugula)
1/2 small red onion, thinly sliced
1/4 lb ricotta salata, thinly sliced or crumbled
1 watermelon radish or 2 large red radishes, very thinly sliced

For the Vinaigrette

1 Garlic clove (minced)
1 tsp Dijon Mustard
3 Tbsp Sherry Vinegar
1/2 cup Olive Oil
Salt and Pepper to taste

Method

Put the eggs in a saucepan of water and bring to a simmer over moderately high heat. Simmer for 6 minutes. Drain the saucepan and fill it with cold water. Crack the eggs all over and let stand in the water for 1 minute. Peel and thickly slice the eggs; the yolks will be barely cooked but not runny.

Heat the oil in a large saute pan. Add the bread and salt; cook over low to medium heat, tossing frequently, for 10 minutes, or until nicely browned. Add more oil as needed. (Bread cubes can be toasted earlier in the day and left a room temp, and covered for God’s sake so nobody scarfs them down.)

Bring a medium saucepan of salted water to a boil; prepare an ice bath. Cook asparagus until bright green and just tender, 2 to 3 minutes. Transfer immediately to ice bath. Drain; place on a clean kitchen towel. (alternatively toss asparagus in olive oil and grill or roast). Cut stalks into fork-friendly pieces.

In a small bowl, whisk all vinaigrette ingredients together.
In a large bowl, toss the asparagus, toasted bread, greens, onion and cheese. Drizzle with the dressing, toss, taste, and adjust to desired dressy-ness. Let sit a few minutes for bread to absorb dressing. Garnish with the eggs and radish and serve.

Bring It!

This is a genius option to bring to a friend’s house, a picnic or a Drive-In. All the elements—toasted bread, veggies, dressing and cheese—can be prepped in advance, packaged separately and assembled on site.

Please do note that this is more method than recipe. Experiment with combinations that you like in other dishes or whatever fresh veggies and cheese you like and have on hand. Again, it’s toasted garlic bread for dinner. Don’t fight this. It’s all good!

Brussels Sprouts Chips

Mtn Roots Food truck and brussels sprouts chips

Want some taro fries with that? Localvore ski bums rejoice at the Mtn. Roots truck in Squawllywood.

You know you don’t get out much when your culinary discoveries come from a food truck at a ski area. Granted, this was a California ski area, and the truck was a tricked out Mystery Machine called “Mtn Roots.” But still. On a recent visit home to Squaw Valley my sister snagged “us” some crispy Brussels sprouts chips off the truck and a new addiction was born. And no, she did not get anywhere near her fair share.

That was a month ago, so I was beyond psyched when a post for these very delicacies came to me via Bevin Wallace’s Real Life Delicious blog. RLD is a great site for fuss-free healthy eating, and Bevin is in to the paleo thing now, so its all healthy and paleo, which is totally overachieving. But as long as it tastes good I’m good with it. If you live in the Denver area get on over to Bevin’s kitchen classes. If you don’t, hunker in for some Beviliciousness right now.

Brussels Sprouts chips, New England style

Brussels sprouts chips, New England style

There are a few things to love about this recipe, beyond the sheer yum factor. First Bevin tells you exactly what types of tools and containers to use. Less guesswork. More direction. All good. As you are trimming your sprouts you may be thinking, “Boy this is a lot of work for one snack,” until you realize that you are actually doing the prep work you have to do anyway for Brussels sprouts, which brings me to the next stroke of recipe brilliance here—it’s two-fer! You get ready-to-roast Brussels sprouts AND some yummy snacks out of the deal. (Who loves ya baby? I would never ever make you work too hard.)

I’d say the kids loved them but that would be overselling because only one kid was around. But he is a bit of a Russian judge of my food and I had to beg him to leave some for his Dad. (I ate them anyway because when  Dad arrived he wasn’t quick enough.)

And now, here it is— Groovy California ski area food right in your own kitchen. My only suggested tweaks would be to up the temp to 375, expect them to take at least 15 minutes, and make a real effort to get those suckers in only one layer so they really crisp up. Now dig in!

Ingredients

1 bunch Brussels sprouts (about 2 lbs)
1 tbs. olive oil
Pinch of salt

Method

Preheat the oven to 350 degrees. Start by getting out a cutting board, a bowl, and a lidded storage container. Trim the ends off the Brussels sprouts and then remove the darker-green outer leaves; some will fall off when you cut the ends, some you might need to pull off. Put the leaves in one bowl; cut the remaining sprouts in half or quarters and put them in the lidded container. When you’re done, put the container of trimmed sprouts in the fridge for later use.

Toss the leaves with the oil and salt (go easy on the salt; it’s easy to get too much) and spread them in a single later on a baking sheet lined with parchment paper (you might need to do this in two batches). Bake for 10 mins. and check to see if they’re done to your liking. They should be somewhat crispy and brown on the edges. If not, rotate the pan and bake another 3-5 mins., watching closely so they don’t burn. When they’re done, lift the parchment with two hands and use it as a spout to pour the delicate chips into a bowl.

Now, try to eat just one.

Note: When you want to roast your trimmed sprouts, just toss them with some olive oil and salt, spread them on a baking sheet and pop them into a hot (400 or so) oven until they look awesomely roasty.

California-green-dreaming

Who said it ain’t easy being green?


Ollie’s Trip Salsa

Ollies trip salsa

La Salsa. Prepared and photographed by the chef. #nofilter, #yeah…right!

Happy Ocho de Mayo! I know, I know. You thought I forgot about the annual excuse for midday margaritas. Not on your life! I merely saved it for a day more conducive to celebrating. God knows there are enough margarita recipes floating around so I’m giving you a healthier gift. In fact, I’m not even the one giving it—my son Oliver is.

Two summers ago we sent the lad into the wilderness in a canoe for three weeks, and he came back knowing how to make his own salsa. Better yet, he knew how to make it by a campfire armed with nothing but a cutting board, a can opener and a knife. And the very best part was that he came back loving his homemade salsa. This from a kid, who, though good with roasted vegetables and the occasional carrot, had never previously eaten a raw tomato or pepper. “That was pretty much the beginning of my salsa eating career,” he reflects.

I love this recipe because it is easy and infinitely tweakable for individual tastes. Some of us would add more onion and perhaps jalapeno, or maybe some additional seasonings. Others might get crazy and add mango or even jicama. But this is a great place to start, will be appreciated at any gathering, might just get your kids eating veggies and, if you keep your pantry somewhat stocked, will set you free from store bought salsa forever.

 Ingredients

1 red (or any color) pepper, finely chopped
I large clove garlic, minced
2 cans diced tomatoes (preferable petite diced), lightly drained
1/2 medium onion, finely chopped
1 cup (+/-) Niblets corn (it’s gotta be Niblets I’m told), drained
1 tsp oregano
1/2 tsp paprika
1/2 tsp chili powder
1/2 tsp salt
2 tsp fresh lime juice
2/3 cup cilantro, finely chopped

Method

Mix it all in a bowl. Enjoy it on chips, in burritos or by the spoonful, at home or by the closest campfire.

Note: Chop the vegetables as fine as your patience allows. Our early versions were decidedly large format, but a finer texture gives your awesome salsa more versatility.


Balsamic Black Beans

Balsamic black beans

Fiesta- It’s always the right thing to do. And frijoles Italiano are the right thing to bring.

Let’s be honest. It is never too early to prepare for Cinco de Mayo. If you haven’t perfected your margs, your guac, your mango salsa, your chicken enchiladas there’s still some time. But you’ve got to get on it! I’m going to take on the black bean situation for you and solve it the easy way.

Buy yourself a can of Pastene black beans (playing it incognito in the Italian section), turn the can around, and make the recipe that’s always been right there. It’s easy, fresh and the balsamic gives it a zing that makes these beans more abondanza than just plain bueno. Ok, I have no idea if abondanza is even a word, but they used it in an Olive Garden commercial so I’m going with it.

These beans are great as a dip for chips or sturdy veggies, as a filling for quesadillas, as a component of lunch deconstructed, as a topping for huevos or as something to put on your spoon as you stand in front of the fridge craving protein. By the way if you see limes on sale, go long! I hear they are in short supply in Mexico and you’ll be needing lots of those tangy babies in the weeks ahead.

 Ingredients

1 15.5 oz. can black beans
3 Tbsp olive oil
1 medium onion
1Tbsp balsamic vinegar
1/2 jar (7 oz. size) roasted red peppers, diced
1/4 cup (or more) chopped celery
salt and pepper to taste
dash of oregano
splash of maple syrup (optional, unless you are in New England, then mandatory)

Method

Saute onion and celery in olive oil until clear. Add roasted peppers and cook for a very short time. Add beans (with liquid), vinegar and seasonings. Simmer for 5-10 minutes.

Pastene black beans

Not so secret Pastene family recipe

Pastene black beans

Black Beauties


Polenta with Kale, Balsamic, & Goat Cheese

Stir, stir, stir for a creamy consistency

Stir, stir, stir for a creamy consistency

My friend Teresa is not only a great cook, but she is also my food emergency hotline. If I’m in the kitchen and things are going awry, it is Teresa I get on the line.  She can talk me through any kitchen disaster with her simple tips and tricks.  Teresa has been cooking Italian and teaching Italian for many years.  She is brilliant in the kitchen no matter what the meal, and truly a shining star when it comes to Italian cooking. Teresa wrote a book called Pass the Polenta and so I thought it only appropriate dedicate this post to her.

As Teresa says,Food is not merely about calories and minimum daily requirements and metabolic pathways.  At its very heart food is about people.” 

I love that quote. At Bring It blog, we are also all about people. Who wants to create all this great food and not have people to share it with, right?  So, bring some polenta and enjoy with friends.  I topped this recipe with sautéed kale, goat cheese, with a balsamic drizzle, but you can top with anything such as ratatouille, chicken stew, roasted vegetables, and the list goes on.

Il cibo è molto meglio con gli amici!

Savory Polenta

Ingredients

2 Tbsp olive oil
1 medium red onion, finely chopped
2 cloves garlic, finely minced
2 cups vegetable broth
2 cups water
1 cup coarse ground cornmeal
3 Tbsp unsalted butter (I use Earth Balance butter substitute)
1 1/2 tsp salt (I cut back on this amount because the Earth Balance butter substitute is salted)Couple grinds of fresh ground black pepper
1/4 cup fresh grated Parmesan cheese

Method

Preheat oven to 350 degrees.

In large, oven-safe saucepan, heat olive oil over medium heat.  Add onions and salt and sauté until onions are soft and translucent, approximately 4-5 minutes. Reduce heat to low, add garlic and sauté for 1-2 minutes. Be careful not to burn garlic.

Turn up heat to high and add vegetable stock and water. Bring to a boil. Gradually add cornmeal while continually whisking. Once all cornmeal has been added, cover the pan and place in oven for 35-40 minutes, stirring every 10 minutes to prevent lumps from forming.  Once mixture is creamy, remove from the oven and add butter, salt and pepper to taste.  Gradually add Parmesan, mix completely. 

Serve as is or pour into 8″ x 8″ or 9″ x 9″ baking pan coated with cooking spray.  Place in refrigerator to cool completely.  Once set, re-heat in 350 degree oven until warmed through, approximate 30 minutes.

Balsamic Drizzle

Ingredients

1 cup Balsamic vinegar
1/4 cup honey

Method

Bring Balsamic vinegar and honey to a boil in a small saucepan.  Once boiling, turn burner to low and let simmer for approximately 10 minutes.  Sauce should reduce by about half or until desired thickness. 

Sautéed Kale

Ingredients

1 large bunch of kale
3 Tbsp olive oil
Salt & Pepper 

Method

Heat olive oil over medium heat in large saucepan.  Turn down heat to medium-low, add kale, salt and pepper.  Sauté kale until wilted and soft, approximate 7-8 minutes.  Turn off heat.

Final Preparation

Take warm polenta out of oven, place kale over top of polenta and drizzle with Balsamic sauce.  Crumble goat cheese on top, cut and serve.  Yum, yum, yum!

Makes for a warm comforting side dish

Makes for a warm comforting side dish