Category Archives: Salads and Sides

Asparagus Panzanella

Spring fever in Doug and Kelley's asparagus patch.

Spring fever in Doug and Kelley’s asparagus patch. Arm yourself with a sharp knife and a healthy appetite.

As we come up on the one year anniversary of Bring It! we’re shaking it up a little (just a little, I promise) with the Ingredient of the Month. We pick something seasonal and feature it in a few posts that month. It’s not rocket science, but it’s progress. May’s ingredient is asparagus. We’re already getting to the end of the month but the tenacious winter kept those spears in hiding for quite some time. Now they’re out and those lucky enough (and smart enough) to have their own asparagus patch quite literally have their hands full.

Doug and Kelley Lewis are among the lucky/smart ones. Doug affirms that asparagus is indeed hard to start/plant, “but after two years of waiting for the roots to properly build, the harvests every spring are awesome. We got over 100 stalks just today!!!” Their typical spring dinner is grilled asparagus (preferably a bit scorched and black) with rice and cut veggies or grilled sweet potatoes as sides. Preferred cooking method is to lightly oil the spears with olive oil and a sprinkling of salt and throw them naked on the grill. “Steaming is easy, fast and inside,” says Doug. “Just sprinkle with a bit of salt and/or a squeeze of lemon. And they are yummy in scrambled eggs.”

Too much asparagus is a good problem to have, especially when you know about Asparagus Panzanella. Panzanella is one of those genius dishes that almost makes you feels like you’re cheating by calling it a meal—like eating cereal for dinner but way better. It’s basically a salad of toasted bread and whatever combination of fresh herbs and vegetables makes you happy. Pharrell Williams dancing-in-the-kitchen happy.

Naked Guns—pure, clean asparagus ready to grill.

Naked Guns—pure, clean asparagus ready to grill.

The Holy Grail of Panzanella’s is Ina Garten’s classic, so I used her method for toasting up the bread. Whereas hers uses cucumbers, tomatoes and basil, this one uses asparagus,  ricotta salata and spicy greens. You can go peas, mint and parm, or cilantro, corn and avocados. You get the picture.  

Taste-wise ricotta salata is sort of a mild feta with good structural integrity. Look at this as a way not only to eat bread for dinner but also to use whatever fresh stuff you have on hand. You can boil, roast or grill the asparagus.

Asparagus Panzanella

Adapted from Food and Wine

Ingredients

Asparagus Panzanella

The Food and Wine version of this feast. Let’s just double the bread shall we? Now we’re talking!

4 large eggs
2 pounds fat asparagus, peeled (if using thinner asparagus just trim or snap off the tough ends)
3 Tbsp good olive oil
1 small French bread or boule, cut into 1-inch cubes (6 cups)
1 tsp kosher salt
2 cups packed young mustard greens or chicory (or arugula)
1/2 small red onion, thinly sliced
1/4 lb ricotta salata, thinly sliced or crumbled
1 watermelon radish or 2 large red radishes, very thinly sliced

For the Vinaigrette

1 Garlic clove (minced)
1 tsp Dijon Mustard
3 Tbsp Sherry Vinegar
1/2 cup Olive Oil
Salt and Pepper to taste

Method

Put the eggs in a saucepan of water and bring to a simmer over moderately high heat. Simmer for 6 minutes. Drain the saucepan and fill it with cold water. Crack the eggs all over and let stand in the water for 1 minute. Peel and thickly slice the eggs; the yolks will be barely cooked but not runny.

Heat the oil in a large saute pan. Add the bread and salt; cook over low to medium heat, tossing frequently, for 10 minutes, or until nicely browned. Add more oil as needed. (Bread cubes can be toasted earlier in the day and left a room temp, and covered for God’s sake so nobody scarfs them down.)

Bring a medium saucepan of salted water to a boil; prepare an ice bath. Cook asparagus until bright green and just tender, 2 to 3 minutes. Transfer immediately to ice bath. Drain; place on a clean kitchen towel. (alternatively toss asparagus in olive oil and grill or roast). Cut stalks into fork-friendly pieces.

In a small bowl, whisk all vinaigrette ingredients together.
In a large bowl, toss the asparagus, toasted bread, greens, onion and cheese. Drizzle with the dressing, toss, taste, and adjust to desired dressy-ness. Let sit a few minutes for bread to absorb dressing. Garnish with the eggs and radish and serve.

Bring It!

This is a genius option to bring to a friend’s house, a picnic or a Drive-In. All the elements—toasted bread, veggies, dressing and cheese—can be prepped in advance, packaged separately and assembled on site.

Please do note that this is more method than recipe. Experiment with combinations that you like in other dishes or whatever fresh veggies and cheese you like and have on hand. Again, it’s toasted garlic bread for dinner. Don’t fight this. It’s all good!

Quinoa Spinach Salad

Happy Spring Greens!

Happy Spring Greens!

It’s that time of year when salad greens are growing fresh everywhere and the excitement of gardening season is here. I love this short window in May where there are NO bugs and NO weeds. It won’t be long before both start to invade, but that’s okay because we live in New England and so we know how to cope. It’s part of the privilege of living in this paradise.

This recipe is for quinoa, spinach, peppers and avocado, tossed in a ginger, lime dressing. It’s got some interesting twists and some deep flavors. You can substitute the spinach for any green and add other vegetables as you like. I think it is the almonds and dressing that give it the real kick.

Enjoy your salads….enjoy your gardens…. and enjoy your spring!

Coming soon to Bring It food blog….INGREDIENT of the MONTH. Watch for it in the next post.

Ingredients

Almonds
1/2 cup raw almonds
2 tsp sesame seeds
2 tsp honey
2 tsp soy sauce 

Dressing
1 Tbsp minced ginger
2 Tbsp olive oil
2 Tbsp lime juice
1 Tbsp soy sauce
1 Tbsp honey
1 tsp tamarind paste
1/2 tsp crushed red pepper 

Salad
4 cups packed baby spinach
2 cups cooked quinoa
1 red pepper, diced
1/2 cup cilantro, chopped
1 ripe avocado, cubed 

Method

1)      Preheat oven to 325. In a bowl, toss together almonds, sesame seeds, honey and soy sauce until almonds are well coated. Spread into a single layer on a parchment covered baking sheet. Roast for 12-14 minutes (check after 10 minutes to make sure they are not getting too toasty!). Once seeds start to brown, remove from oven and set aside to cool completely.

2)      Combine all dressing ingredients in airtight container and shake until well mixed. Taste and adjust seasoning if needed.

3)      To assemble the salad, combine spinach, quinoa, red pepper, and cilantro. Drizzle with salad dressing and toss. Then top with almonds and avocado.

Fiddlehead Season is Here!

I'm not sure if he wants to eat them or throw them!

I’m not sure if he wants to eat them or throw them!

It is fiddlehead season in New England! Fiddleheads are the furled fronds of young ferns (say that 10 times fast!). If you don’t pick them early in their growth cycle, they grow into beautiful ferns. But if you get them before they unravel, you will have delectable vegetable to serve fresh at the start of spring!

Fiddleheads grow wild in wet areas of Northeastern North America. Foraging for fiddlehead is relatively easy. Once you find a patch, you will easily fill up bag fulls. But don’t eat them raw… they are toxic until thoroughly cooked.

To me, fiddleheads are a cross between asparagus, spinach, artichoke and maybe even a hint of mushroom. They are both grassy and nutty. Suffice it to say, there is a lot going on with the fiddlehead in terms of flavor and they are delicious! Get them before the season passes because soon the morels will be popping up and we’ll have to move on.

Below is a simple recipe for cooking fiddleheads.  Happy Spring!

Ingredients

1 Tbsp. salt, plus more to taste
1 lb. fiddlehead ferns
2 tsp. grapeseed or vegetable oil
1 – 2 cloves garlic, thinly sliced or 1 small shallot, sliced
1/8 – 1/4 tsp. red pepper flakes (optional)

Method

Trim and rinse fiddleheads, removing any brown ends or mushy parts.

In a large pot bring 2 quarts water to a boil. Add salt and fiddleheads. Cook 1 minute. Drain and rinse with cold water.

In a large frying pan, heat oil over medium-high heat. Add fiddleheads. Cook, stirring, until they start to brown, about 5 minutes. Add garlic and red pepper flakes, if you like, and cook, stirring, until garlic is fragrant and just starting to color, about 1 minute. Salt to taste. Serve immediately.

My niece foraging for dinner.

My niece foraging for dinner.

Spring Roll Salad

Eli showing us how it's done at the Coop Cooking class

Eli showing us how it’s done at the Coop Cooking class


I was inspired to make this spring roll salad after taking a cooking class at my local food Coop. The class was so fun and the instructor was terrific. I highly recommend taking a class there if you haven’t done so already. Above is a photo of our instructor, Eli Sunrise Morse, in his element, teaching our class. For more information on the cooking classes, click here.

After this class I thought I’d start my spring posts with this light and refreshing Spring Roll Salad. This noodle salad can be served as a main meal or a side dish, either cold or at room temperature (very versatile!). It has all the ingredients of a spring roll but you use rice noodles instead of rice papers, and you eat it with a fork or chopsticks (depending on your chop stick prowess). The great thing about a spring roll salad is that you won’t need to worry about dipping the spring roll in the sauce and losing all the ingredients into the sauce bowl (don’t you hate when the contents of the spring roll end up in the sauce and then you have to fish them out).

This spring roll salad is fully loaded with roasted shallots, roasted shiitake mushrooms, peanut sauce, and a tamarind dipping sauce. If you are short on time, I’d skip this recipe and go right to one of our other salads such as the jicama slaw or the edamame citrus salad. However, if you have time, it will be time well spent. The shiitake mushrooms are the real clincher to this whole deal. They taste like bacon and even non-mushroom lovers were scarfing them down.

Ingredients

1 lb fresh shiitake mushrooms
3 Tbsp extra virgin olive oil
3 Tbsp shoyu
12 oz fettuccine style rice noodles
3 carrots, sliced into matchsticks
3 Tbsp chopped fresh mint
3 Tbsp chopped fresh cilantro
3 Tbsp chopped fresh chives
Roasted shallot peanut sauce (recipe follows)
Tamarind dipping sauce (recipe follows)
1/2 cup dry-roasted peanuts, chopped, for garnish

Method

Preheat oven to 375 degrees. Cut stems of shiitake mushrooms and discard or save for another use (stock). Thinly slice the mushroom caps for a total of 5 cups sliced. Toss shiitakes in a bowl with olive oil and shoyu. Spread mushrooms on baking sheet and place in oven. Roast, stirring twice, until mushrooms are bacon-like (what is bacon-like…. believe me, you will know it when you see it and taste it!). Place mushrooms in a small bowl and set aside.

Bring pot of water to rolling boil. Cook rice noodles according to package (I waited until sauces were done to cook the noodles because you are going to want to toss the sauces on immediate to make sure the noodles don’t stick).

Ingredients Roasted Shallot Peanut Sauce

3 medium shallots
1 cup unsweetened coconut milk
1/2 cup smooth peanut butter
3 Tbsp sugar
1/2 tsp cayenne
1 Tbsp shoyu
2 Tbsp fresh lime juice

Method

Preheat oven to 375 degrees. Place shallots on parchment covered baking sheet and roast until they are very tender and juices have started to ooze out, about 30-35 minutes. Let shallots cool and then squeeze pulp out of skins. Place shallot pulp and all other ingredients in food processor and blend until smooth. The sauce will keep, covered and refrigerated for up to one week. Warm before serving.

Ingredients Tamarind Dipping Sauce

2 Tbsp sugar
6 Tbsp water
1 Tbsp fresh lime juice
1 Tbsp tamarind concentrate
1 Tbsp shoyu
1 tsp fresh chopped cilantro
1 clove garlic, minced
1 tsp slivered seeded serrano chili or Thai Bird chili
(*note I used jalapeno because that is what I had on hand)

Method

Combine sugar and water in small sauce pan and warm over medium heat until sugar is dissolved. Remove from pan and mix in lime juice, tamarind, shoyu. Stir until smooth. Let mixture cool slightly then add cilantro, garlic, and chili. This sauce will also keep covered and refrigerated for up to one week.

Final Prep

Toss noodles, carrots, and herbs. Then add both sauces and mix until well blended. Sprinkle with bacon, I mean mushrooms, and peanuts to top it off.

So darn good….

Jicama Slaw

Add a little Jicama to your repertoire this spring!

Add a little Jicama to your repertoire this spring!

How many of you (I’m not counting you, Californians) first pronounced jicama with a “J”?  I know I did and I was quickly corrected.  It’s HEE-KAH-MA.  You only make that mistake once!  This edible root resembles a turnip.  It has a thin brown skin and crisp, juicy, white flesh that is mild in flavor. Think of it as a cross between a water chestnut and a pear.  To prepare, remove the skin with a vegetable peeler and then cut the flesh into cubes, strips, or shred.  You can cook it or serve it cold.  And, big bonus here, it doesn’t become soggy or brown after cutting so you won’t have to worry about advance prep.  Serve this slaw with Jerk Ribs, on a fish taco, in sushi, in stir fries, or as a side.

Below is a recipe for Jicama slaw.  This side dish has a great kick and you’ll be super hip with jicama which is all the rage these days!

Ingredients

8 oz jicama, peeled and coarsely shredded
1 medium carrot, coarsely shredded
1 small red pepper, stemmed, seeded, and thinly sliced
1 small red onion, halved lengthwise and thinly sliced
2 Tbsp extra virgin olive oil
2 Tbsp fresh lime juice
1/2 tsp sugar
1/4 tsp cumin
1/4 tsp kosher salt
1/4 tsp fresh ground black pepper

Method

Mix jicama, carrot, pepper and onion in a bowl.  Whisk olive oil, lime juice, sugar, and spices in separate bowl.  Pour dressing on vegetables. Serve.

Bombproof Mac and Cheese

Bombproof mac and cheese

Still chili? A little cranky even? Crunchy-topped mac and cheese to the rescue!

Here it is, the end of March, and we’re still in search of comfort food. Well, I for one will take depressing rain at the end of March over depressing rain in February any day! All well and good, but it leaves us with depressing rain. Which leaves us with a need for mac and cheese. My kids would argue that this need is equally urgent in any season. Their gold standard for homemade mac and cheese involves the crunchy breadcrumbs on top and absolutely no green of any kind. Boys, as long as we hold the parsley your ship has come in.

This recipe comes straight from a fellow ski racer Mom in Colorado who frequently finds herself with a houseful of hungry teenagers. As she says, “The true beauty of this is that two ski race dads dumped the whole casserole in a crock pot at Winter Park and served it for lunch with a ladle into plastic cups—genius!” Dads in a ski lodge dishing out hot food into plastic cups? I am so in! Thank you Tania (who clearly knows that parsley can be a deal killer) and I hope you are seeing some sun out in Colorado.

 And now, we bring you…

Bombproof No-Boil Mac and Cheese   

From Bon Appetit, by way of our Rocky Mtn correspondent Tania

Makes 8 servings

Ingredients

1/2 cup butter divided
1/4 flour
3 cup whole milk
3 cups water
1 Tbsp kosher salt
1 tsp pepper
1 lb elbow mac (or bigger tubes like rigatoni, medium shells, etc)
2 cups shredded cheddar divided
2 cloves garlic chopped
1 cup panko
2 Tbsp chopped flat leaf parsley (never used it)

Method

Preheat oven to 400.

Melt 1/4 c butter in a large saucepan over med-high heat. Add flour whisking constantly for 1 min. Whisk in milk and 3 c water and bring to a boil. Reduce to a simmer, cook, whisking often, for 10 min.  It should be a thin glossy sauce. Add salt and pepper. Remove sauce from heat.

Toss pasta and 1 1/2 cups of cheese in a 3 quart baking dish.  Pour sauce over pasta.  It should be submerged.  Don’t stir.  Cover with foil and bake 20 min.

Meanwhile, melt 1/4 c butter in large skillet over med heat.  Add garlic, panko and parsley and toss to combine. Season with salt and pepper.

Remove foil from dish.  Sprinkle with remaining cheese.  Cover with panko mixture.
Bake, uncovered, for 10 more minutes or until pasta is tender, edges are bubbling and top is golden brown.

Clean Livin’ Edamame Citrus Avocado Salad

edamame-citrus-avocado-salad

Bring on the sun, the citrus, the color. Hello Spring, goodbye scurvy!

I was going to riff about the psychically curative powers of the Shamrock Shake yesterday, but if you know anything about McDondald’s supply chains, that ship has sailed. After St. Patty’s Day the shakes are only available on a hit and miss basis until each outlet runs out. But keep asking through the month–you may get lucky!

The intended post was actually going to be about grown up shamrock shakes, aka green smoothies. So that’s coming at you soon, in a version that is entirely drinkable thanks to some trial and error and the eventual abandonment of expensive hard to clean juicers. Yeah baby, something to live for.

In the meantime let’s stick with the green theme. In fact, we need color all the way around right about now…big time…which makes this salad from Joy the Baker the perfect candidate. Fresh, colorful, crunchy, juicy, healthy, easy to make and easy to bring. It’s got it all. Except for bacon, which probably would taste darned good in it too. But let’s give the Vegans a shout out and run with it as is.

Note: This says it serves two, but it serves more as a side salad, and if you double up on ingredients there will still be plenty of dressing.

Note Part Deux: If you want to be pro about segmenting citrus check out the Kitchn’s  How to Segment Citrus. If not just peel, cut and be happy.

Clean Livin’ Edamame Citrus Salad

serves 2

Ingredients

About 2 cups leafy greens (I used arugula. Remember–just love the one you’re with)
1 grapefruit, segmented
1 blood orange, segmented (Cara Cara oranges rock as well)
1 cup shelled edamame
2 celery stalks, sliced
1 small (or half of a large) ripe avocado, peeled and sliced

For the Dressing

3 tablespoons finely diced shallots
1 tablespoon honey (for vegans substitute a bit of agave)
1 tablespoon dijon or whole grain mustard
2 tablespoons apple cider vinegar
1/4 cup plus 1 tablespoon olive oil
sea salt and fresh cracked black pepper

Method

In a medium bowl, combine all of the salad ingredients:  greens, citrus segments, edamame, celery, and avocado.

In a small jar with a tight-fitting lid combine shallots, honey, mustard, vinegar, olive oil, a pinch of salt, and a few pinches of pepper.  Place the lid on the jar and shake it up until the mixture is emulsified. Taste the dressing and season to taste, adding more salt, pepper, or acid as necessary.  Pour the dressing (as much as you’d life) over the salad.  Sprinkle with salt and pepper.  Enjoy immediately!

Bonus recipe

Shamrock Shake

Shamrock Shake. Therapy in a cup.

Homemade Shamrock Shake

thanks to Epicurious and Paul B

Ingredients

1 1/2 cups vanilla ice cream
1/2 cup whole milk
10 drops green food coloring
1 teaspoon peppermint extract
Whipped cream (optional)
1 maraschino cherry

Method

In a blender, combine the vanilla ice cream, milk, green food coloring, and peppermint extract, and process until smooth, about 30 seconds. Pour the shake into a glass and top with the whipped cream and maraschino cherry.

Massaged (and composed) Kale Salad

Massaged Kale Salad


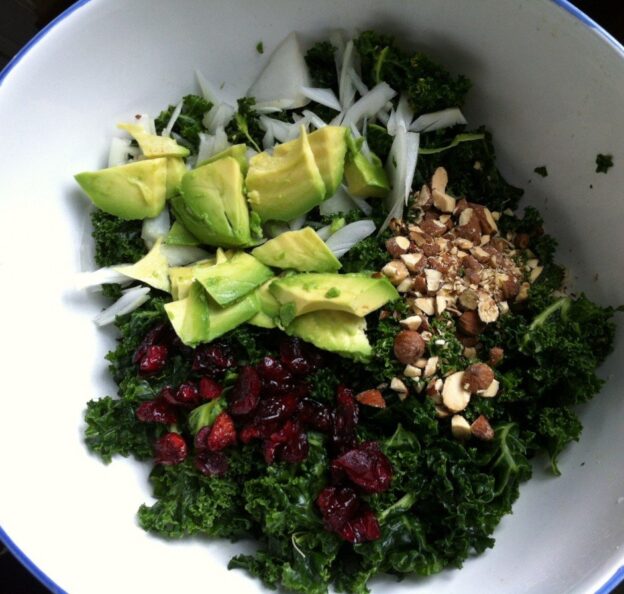
I’ve been holding out on you. Not on purpose of course. But somehow, in all this time of being with each other, I still have not shared my absolute favorite, go-to, eat-your-greens-and-feel-like-Popeye kale salad. Massaging may seem like an excessive step to take with your kale (I mean really, is it that deserving?), but trust me—it is a worthwhile technique to have in your repertoire.

This recipe calls just for salt in the massaging process. Other recipes call for olive oil alone or with lemon juice or with the entire dressing. Hey, you’re massaging your kale–it’s not going to complain. Massaging makes raw kale way more friendly, and with a batch of massaged kale at the ready, your options for creating quick, delicious, deconstructed meals soar.

As with other recipes, this is more about technique than hard and fast ingredients and proportions. Live loud and large—mix that kale with something crunchy, something creamy and something sweet and the rest will take care of itself.

Before my cousin Danielle beats me to the punch, I urge those of you who dabble in organic produce to buy organic kale. Danielle, the ultimate caregiver (and least righteous mostly Vegan I know) reminds us that kale is among the “Dirty dozen” of produce items that pack the nastiest pesticide punch. Thanks Little Dan, for always having our backs! (and forgive me for all the gratuitous bacon talk.)

Without further ado I give you:

Massaged Kale Salad

Ingredients

1 bunch kale (I use curly because that’s what we get)
1 t salt
1/4 medium-small red onion, thinly sliced or diced
1/3 cup chopped toasted almonds or nuts of choice
1/3 cup raisins, currants or dried fruit of choice
1/2 large avocado, diced
1/4 cup olive oil
2 Tbsp apple cider vinegar

Method

Soak kale in water to loosen any dirt. Wash individual leaves as you de-stem them (pull leaf away from thickest parts of stem). Shake dry. Chiffonade leaves (stack, roll and slice into thin ribbons) and put in a large bowl. (Edie’s note: Chiffonade if you must, but tearing the kale in pieces works just fine and sort of makes me feel like a Tuscan). Sprinkle salt over kale and, using hands, massage kale for 3-4 minutes. After about a minute you’ll notice a big difference in the leaves – they’ll start to soften and turn a dark green almost as though you were steaming them. When done, drain off any liquid that collects on bottom of bowl (may or may not happen) and set kale aside.

If you are starting with raw nuts…Heat a small sauce pan, toss in whole nuts and toast until nuts start to brown slightly. Shake pan on occasion to brown nuts evenly and to keep from burning them. Walnuts, pecans, filberts or even sunflower seeds are great in this salad too. Remove nuts from pan and give them a rough chop on your cutting board. Add nuts to bowl of kale.

Add diced avocado, onions and raisins to bowl (again, raisins, currants, your fave dried fruit in raisin-sized pieces or whatever you have on hand). Pour olive oil and apple cider vinegar evenly over bowl of goodness, then toss until all ingredients are thoroughly mixed.

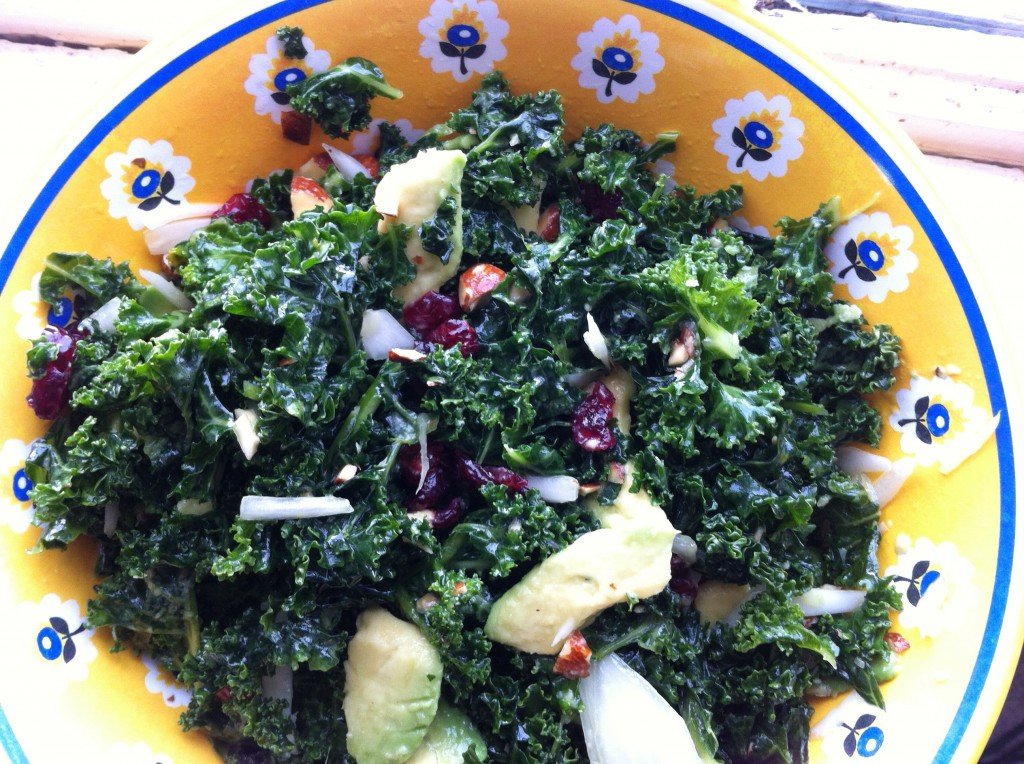
Kale salad, post massage, fully dressed.

Kale salad, post massage, fully dressed.

Bring It

One of the many beauties of kale is its indestructibility (if that’s a word). You can bring this anywhere in anything, store it wherever and it will not suffer. I have transported it in everything from ziploc bags to salad bowls to recycled takeout containers and it has survived in backpacks for hours before being enjoyed for lunch or apres ski.

Winter Fruit Salad

Enjoy this refreshing winter fruit salad après ski?

Enjoy this refreshing winter fruit salad après ski?

Yes, technically it is winter. Yes, our kids are finishing up with winter break.  Yes, I’m still trying to ski.  However, the almost 50 degree weather this past weekend and the sun-baked snow made it feel like spring. And so I bring you what I call winter fruit salad in what I call “winter”.  Alas, it is New England, and so I take whatever weather comes my way – which this week means back to single digit temperatures and more snow.   It also means, I bring to you this yummy fruit salad to brighten your days as you plug along through the remainder of this wonderful season. Besides anyone can make a fruit salad in the summer.  Try making one in February – not exactly high fruit season!  This fruit salad is tropical, spicy, and light.  It is great for breakfast, lunch, dinner, dessert, snacks, and of course, to you can BRING IT anywhere.  Enjoy!

I got this recipe from a great magazine – Cook’s Illustrated. I’ve gotten this magazine for years and I love it. It has really taught me how to cook.  Each recipe goes through the trials and tribulations faced by the person creating the recipe.  By reading the techniques of what to do and what not to do, I have learned a lot (like do not add herbs to this fruit salad unless you want to move into the salsa territory). I wish I went to some famous culinary institute to learn to cook, but for now, this type of learning will have to do.

Ingredients

3 Tbsp sugar
1/4 tsp grated lime zest plus 3 Tbsp juice (approx. 2 limes)
1/4 tsp red pepper flakes
Pinch salt
12 oz. jicama, peeled and cut into 1/4 inch dice (approx. 1 1/2 cups)
2 oranges
2 mangos, peeled, pitted, and cut into 1/2 inch dice

Method

1) Bring sugar, lime zest, lime juice, red pepper flakes, and salt to simmer in small saucepan over medium heat, stirring constantly until sugar is dissolved.  Remove pan from heat, stir in jicama, and let syrup cool for 20 minutes

2) Meanwhile, cut away peel and pith from oranges. Slice into 1/2 inch rounds, then cut rounds into 1/2 inch pieces. Place oranges and mangos in a large bowl.

3) When syrup with jicama is cool, pour over oranges and mangos and toss to combine.  Refrigerate for 15 minutes before serving.

Lunch, Deconstructed

Deconstructed lunch

Deconstructed lunch elements, waiting to meet each other.

Lunch can take me down, especially in winter. When we are scrambling to get out the door to training or a race, the idea of preparing lunch, after making breakfast, cleaning up and gathering/loading gear is a major buzz kill. But the penalty for not making lunch is hunger or French Fries. Lots of French Fries. NOT that I have anything against French Fries, and particularly the ones at the Dartmouth Skiway that must be double fried because they are so good. But we all know, the sad, cumulative consequence of too many French Fries.

My solution is (to try at least) to have a fridge full or delicious and healthy lunch fixings, ready to be combined the night before, or easily enough in the morning. Below are basic recipes for some essential elements, along with suggestions for the makings of the best darned lunch you can cram into a takeout container.  The recipes for the beets, lentils and onions come from Stone Soup. Build an arsenal of sauces from Get Saucy With Me to have on hand and you’re good to go, to the Skiway and beyond.

Skiway Deconstructed Lunch Basics:

  • Baked Sweet Potatoes
  • Roasted Beets
  • Massaged Kale
  • Parisian Lentils
  • Balsamic Onions

A few suggestions for other awesome things to have on hand:

  • Roasted nuts and seeds
  • Avocado
  • Roasted vegetables
  • Cooked grains like brown rice, quinoa and millet
  • Hummus
  • Hard boiled eggs
  • Chopped olives or tapenade
  • Cooked BACON, chicken and other protein. Did I say bacon?
Salads for two, in brilliant take out containers. Dressing in a repurposed caper bottle.

Salads for two, in brilliant take out containers. Dressing in a repurposed caper bottle.

Sweet Potatoes

Ingredients

  • However many sweet potatoes you want to cook in your hot oven.

Method

Turn oven on to 400.

Wash potatoes and dry them with a paper towel. Prick all over with a fork. (One exploded potato will cure you from ever forgetting this step.) Put potatoes on a cookie sheet to catch the goo that escapes from the holes. Line the sheet with foil if you want zero cleanup.

Bake potatoes for about an hour, squeezing them to test for doneness starting at about 45 minutes. I like mine to have some structural integrity for slicing later.

When done, let potatoes cool. They can be easily peeled by hand if desired. Store covered in the fridge.

Massaged Kale

There are many methods for this so don’t worry too much about the ingredient measurements or timing. Some recipes only call for salt in the massaging, others only for oil, others for oil, lemon juice and salt and still others for the entire dressing. The point is just to break down the kale a bit so it is still raw but friendly and makes a worthy bed for all kinds of other good stuff.

Ingredients

  • One or two bunches kale, washed, spun dry, stemmed and shredded or torn. *
  • Olive oil, salt, lemon juice

*(You can easily stem kale with a big sharp knife by holding it vertically from the stem end and running the knife down the stem. Or you can go rogue and use your fingers. Grip the stem between thumb and forefinger and zip down the stem.)

Method

Put kale into a big bowl. Drizzle with a Tablespoon or more of olive oil, a splash of lemon juice and a good sprinkling of salt. Massage kale with your hands until it softens a bit and is a shinier, dark green. Store covered in the fridge until  ready to use.

Roasted Beets

These keep a week or more in the fridge, so I generally make enough to fill up a large 9 x13 baking dish.

Ingredients

  • 1-2 bunches beets, or a few large ones.
  • Balsamic vinegar
  • Olive oil

Method

Preheat oven to 400.

Remove stalks from beets and scrub them well. Chop into wedges – either quarters, sixths or eighths. The smaller you chop, the faster they will cook. I like big wedges because I have more slicing and dicing options later

Splash with a few tablespoons of balsamic vinegar and the same of olive oil. Sprinkle with kosher salt.

Cover tightly with foil and roast for 45 minutes to 1 hour or until beets are tender. Season to taste. When cooled you can easily peel them by hand or with a knife, or just eat them with the peels.

Parisian Lentils

I love these any time of day, even for breakfast with an egg on top. Full disclosure: I never measure these. I just boil a bunch of lentils and add equal splashes of the seasonings at the end. And if I don’t have sherry vinegar I cut to the chase with a splash of straight sherry. Saves you the trouble of having a separate glass of wine with dinner (or breakfast in some cases). The recipe calls for topping these with fresh ricotta and parsley, which sounds awesome.

Ingredients

  • 7 oz French style green lentils (aka puy lentils)
  • 2 tablespoons sherry vinegar
  • 2 tablespoons soy sauce

Method

Place lentils in a medium saucepan and cover generously with water. Cover and bring to the boil.

Remove lid and simmer for 10-15 minutes or until the lentils are tender.

Drain lentils and return to the pan. Season with vinegar, soy and 2 tablespoons extra virgin olive oil. Taste and add salt as needed.

Balsamic Onions

I wasn’t going to include these but they are so good on pizza, sandwiches, salads and soups that they need to  be in. If you’re over the taste of balsamic at this point just use a combo of olive oil and butter and sprinkle generously with salt. This clearly makes a ton, but they keep for a long time and are addictive so a ton is a good thing. Feel free to halve of quarter, but don’t complain when you are out of them so soon!

Ingredients

  • 8 onions
  • 1/2 cup olive oil
  • 1/2 cup balsamic vinegar

(No need to use your best olive oil and balsamic)

Method

Heat oil in a large heavy based saucepan over a medium heat.

Halve onions, lengthwise, then remove the skins and slice into half moons. Adding chopped onions to the oil as you go.

Cover and cook on a medium low heat, stirring occasionally for about 1/2 hour or until onions are very soft but not browned.

Remove cover and add balsamic. Bring to a simmer and cook, again stirring from time to time for about 20 minutes or until the sauce has reduced a little and the onions are slightly brown.