Category Archives: Breakfasty

Winter Fruit Salad

Enjoy this refreshing winter fruit salad après ski?

Enjoy this refreshing winter fruit salad après ski?

Yes, technically it is winter. Yes, our kids are finishing up with winter break.  Yes, I’m still trying to ski.  However, the almost 50 degree weather this past weekend and the sun-baked snow made it feel like spring. And so I bring you what I call winter fruit salad in what I call “winter”.  Alas, it is New England, and so I take whatever weather comes my way – which this week means back to single digit temperatures and more snow.   It also means, I bring to you this yummy fruit salad to brighten your days as you plug along through the remainder of this wonderful season. Besides anyone can make a fruit salad in the summer.  Try making one in February – not exactly high fruit season!  This fruit salad is tropical, spicy, and light.  It is great for breakfast, lunch, dinner, dessert, snacks, and of course, to you can BRING IT anywhere.  Enjoy!

I got this recipe from a great magazine – Cook’s Illustrated. I’ve gotten this magazine for years and I love it. It has really taught me how to cook.  Each recipe goes through the trials and tribulations faced by the person creating the recipe.  By reading the techniques of what to do and what not to do, I have learned a lot (like do not add herbs to this fruit salad unless you want to move into the salsa territory). I wish I went to some famous culinary institute to learn to cook, but for now, this type of learning will have to do.

Ingredients

3 Tbsp sugar
1/4 tsp grated lime zest plus 3 Tbsp juice (approx. 2 limes)
1/4 tsp red pepper flakes
Pinch salt
12 oz. jicama, peeled and cut into 1/4 inch dice (approx. 1 1/2 cups)
2 oranges
2 mangos, peeled, pitted, and cut into 1/2 inch dice

Method

1) Bring sugar, lime zest, lime juice, red pepper flakes, and salt to simmer in small saucepan over medium heat, stirring constantly until sugar is dissolved.  Remove pan from heat, stir in jicama, and let syrup cool for 20 minutes

2) Meanwhile, cut away peel and pith from oranges. Slice into 1/2 inch rounds, then cut rounds into 1/2 inch pieces. Place oranges and mangos in a large bowl.

3) When syrup with jicama is cool, pour over oranges and mangos and toss to combine.  Refrigerate for 15 minutes before serving.

A Real Belgian’s Waffle

Waffle love

Ooh La La! A plate full of waffle happiness.

Full disclosure. My grandfather was full-on Belgian. In fact my maiden name, Thys, is like Smith or Jones in the Antwerp phone book. Nonetheless, it’s fair to say the Belgians deserve huge thanks from all of us on this side of the pond for their addictive culinary contributions. No, not eels in green sauce (they still haunt me)—I’m talking about chocolate, beer, fries and of course, the almighty Belgian waffle.

This recipe comes from Sophie, a fellow ski racer parent (and genuine Belgian) who kindly shared her cherished family recipe for “Gauffres Quatre-Quart” AKA Belgian waffles. “My aunt used to make them by the dozens, to be shared with everyone,” Sophie recalls. “We loved when she would stop by!” Sophie humbly claims her waffles aren’t quite the same as her aunt’s, but her family eats them for breakfast, snack and basically anytime. “They are favorites at bake sales, and perfect for thank you gifts! We keep them in a box for a few days—they might dry out a bit, but are still delicious.”

All of the above makes them Bring It all-stars. Sophie thinks any kind of waffle maker would work except, ironically, the very large Brussels waffle makers.

Edie’s note: The original recipe is by weight. Approximate cup measurements are my addition, which worked perfectly when I halved the recipe and used four eggs. 

Sophie’s Gauffres Quatre-Quart

Makes about 20-24 mid-sized waffles, or 12-15 large ones

Ingredients

1 pound salted butter. If using unsalted, I would add some salt
1 pound sugar, or a little less (2 cups)
1 tsp vanilla extract (optional)
1 pound flour (4 cups)
2 tsp baking powder
7 or 8 eggs, depending on their size

Method

Melt the butter.
Beat the eggs until blended (or foamy if you are ambitious)
Add the sugar and vanilla. Blend in.
Add the melted butter. Blend in.
Add the flour and baking powder, about 1/4 pound at a time.
Let it rest for a few minutes while you warm up your waffle maker. The consistency should be thick on a spoon.

I scoop the mixture with a wooden spoon and place the equivalent of a large egg on the grid. Of course you can put more or less to make different size waffles. I cook each waffle for about 3 minutes until golden. The longer they stay, the crunchier/harder they get. Let it cool down on a rack— that is if you have the patience. We always eat the first one warm.

Et voila!

Belgian waffle with sugar

Sugar? Syrup? Ice cream? Bacon? It’s all good!

More note from a quasi Belgian: These waffles are substantial and structurally sound. They can stand up to strawberries and whipped cream, Nutellla, peanut butter and bacon or whatever you care to put on them. The best part is that they turned out great on my first try with no tweaking, babysitting or special handling.

Touché, Waffle Huts!

Wake up to Waffles

waffles hot off the griddle

For the love of waffles!

What’s in a name? A classic, when it comes to Marion Cunningham’s Yeast-Raised Waffles. I was late to discover these, but after much hounding from my kids and far too many waffle huts I found these babies that strike a nice balance between Eggo convenience and professional waffle master taste.  The only tweaks I added are in process, not ingredients.

There are two schools of thought on prep. The original recipe calls for mixing everything but the baking soda and eggs and leaving the batter at room temp overnight. Other versions include the eggs the night before and store the batter in the fridge. One time I added the eggs and forgot to put the batter in the fridge. The waffles still tasted great and nobody died or even got sick. Still, you’d better not tempt fate with that.

Either way you mix them yields buttery, almost sourdough-like waffles (especially if you opt for the original version and leave the batter out all night). These belong with the cardamom blender popovers  and  the yummy muffins in the Overnight Sensations realm because they require minimal effort  in the morning. That said, there is a learning curve involved and each waffle maker has its own sweet spot. Hopefully the notes below will help minimize your trial and error, and maximize your happy waffle moments.

MAKES 20 WAFFLES

Ingredients

1 (1⁄4-oz.) package active dry yeast
2 cups milk (or, even better, buttermilk)
1⁄2 cup unsalted butter, melted, plus more for serving
1 tsp. kosher salt
1 tsp. sugar
2 cups flour
2 eggs
1⁄4 tsp. baking soda
canola oil for coating the waffle maker
Maple syrup, for serving

Method

1. Dissolve yeast in 1⁄2 cup warm water; set aside until foamy, 8 to 10 minutes. Add milk, butter, salt, sugar, flour, and eggs; whisk until combined. Cover with plastic wrap; refrigerate overnight.

2. Heat a nonstick waffle iron. Whisk baking soda into batter. It will become very thin. Pour 1⁄4 cup batter onto iron; let set for 30 seconds.* Lower lid; cook until golden and crisp, 4 to 5 minutes. Repeat with remaining batter. Serve with maple syrup and butter.

*This took some experimenting and messy overflows but I have perfected the technique for my waffle maker. Brush the bottom of the waffle iron with some oil, pour in the batter, then lower the lid but prop it open with the down-turned bowl (the business end) of a long-handled serving spoon so the top of the iron hovers over the batter. When the batter is starting to set on the top, open the lid, brush the top of the iron with oil and quickly close it all the way to cook the waffle. This assures a super crispy and non-exploding waffle.

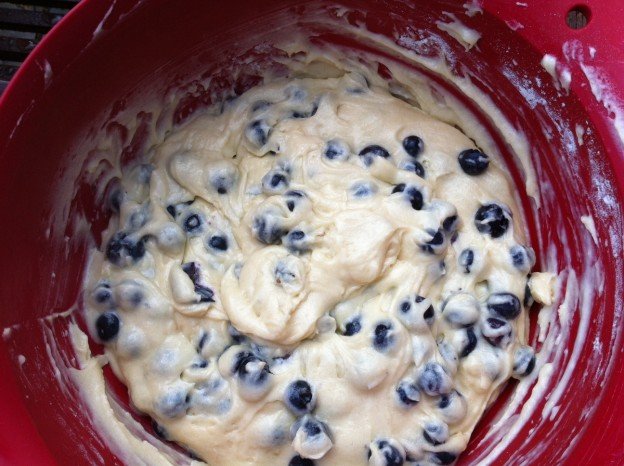
Blueberry muffin batter

Overnight Sensations

In our next installment of overnight breakfasts (see Overnight Blender Cardamom Popovers), we present two delish muffin options. I have long been a fan of blueberry overnight muffins (see above, and below) but the most favored muffins of both my sons are the lemon poppy seed ones from their Montessori preschool. That was the last time they got fresh muffins once a week, and because that particular recipe involves creaming butter there is not a chance my kids will get them on any winter morning. My search for an overnight  version of lemon poppy seed Nirvana led me to these from Bouchon Bakery. I liked the recipe immediately because it enlisted the blender, an overnight nap AND melted butter (no need to think ahead and soften butter).

These are from a super high-end baker so of course I had to make some adjustments for the real world. First off, they are jumbo, and I am without jumbo muffin pans. Second, all ingredients are based on weight so the measurements are odd (1 cup plus 3 Tbsp, etc). I know I know…baking is chemistry and only a fool messes with it. With that in mind, I left the real instructions and noted my fool short-cuts in bold. The muffins—very dense and almost pound cake-like—turned out great, and I was assured by children not related to me that they would be much appreciated for breakfast, at home or in the car at 0-dark-30.

 Lemon-Poppy Seed Muffins

From “Bouchon Bakery” by Thomas Keller and Sebastien Rouxel

Makes 6 jumbo-sized muffins or at least 14 regular ones.
*The batter must be refrigerated overnight, so plan accordingly.

Ingredients

161 grams (1 1/4 cups) cake flour (see how to make your own w/flour and cornstarch here)
3.4 grams (1/2 + 1/8 teaspoon) baking powder
1.7 grams (1/2 teaspoon) kosher salt
234 grams (1 cup + 3 tablespoons) granulated sugar
170 grams (1/2 cup + 3 tablespoons) eggs (4 large)
4.5 grams (3/4 teaspoon) vanilla paste (I really do wish I could but…1 tsp vanilla)
194 grams (6.8 ounces) unsalted butter, melted and still warm
60 grams (1/4 cup) fresh lemon juice
6 grams (generous 1 tablespoon) grated lemon zest (takes about 1 ½ lemons)
4 grams (1 1/2 teaspoons) poppy seeds

Method

Sift the cake flour and baking powder into a medium bowl. Add the salt and whisk to combine.   I made my own cake flour, and whisked it all together in the same step, no sifting

Combine the sugar, eggs, and vanilla paste or vanilla in a deep medium bowl and mix with an immersion blender or just chuck it all in the real blender.

Add the dry ingredients in 2 additions, mixing until just combined. 

With the blender running, pour in the butter in a steady stream, and continue to mix until the batter is smooth.  Add the lemon juice and blend again to combine. 

Fold in the lemon zest and poppy seeds. 

Transfer the batter to a covered container keep it right in that blender, baby and refrigerate overnight, or for up to 36 hours.

When ready to bake:

Preheat the oven to 425F. 
Line a 6-cup jumbo muffin pan with muffin papers and spray the papers with non-stick spray.  I used no spray, regular muffin liners and pans, and greased the pans when I ran out. The muffins released easily from both.

Transfer the batter (which has a firm, gelato-like texture) to a pastry bag, fitted with a 3/4 inch plain tip, (or use a spoon), and pipe or spoon (can you guess which I did?) the batter evenly into the papers, stopping 3/8 inch from the top (135 grams each). Rest assured, no measuring here.

Place the pan in the oven, lower the oven temperature to 325F, and bake for 34 to 37 minutes, or until the muffins are golden brown and a skewer inserted in the center comes out clean. I started checking at 28 and took them out at 30 minutes.

Set the pan on a cooling rack and cool completely
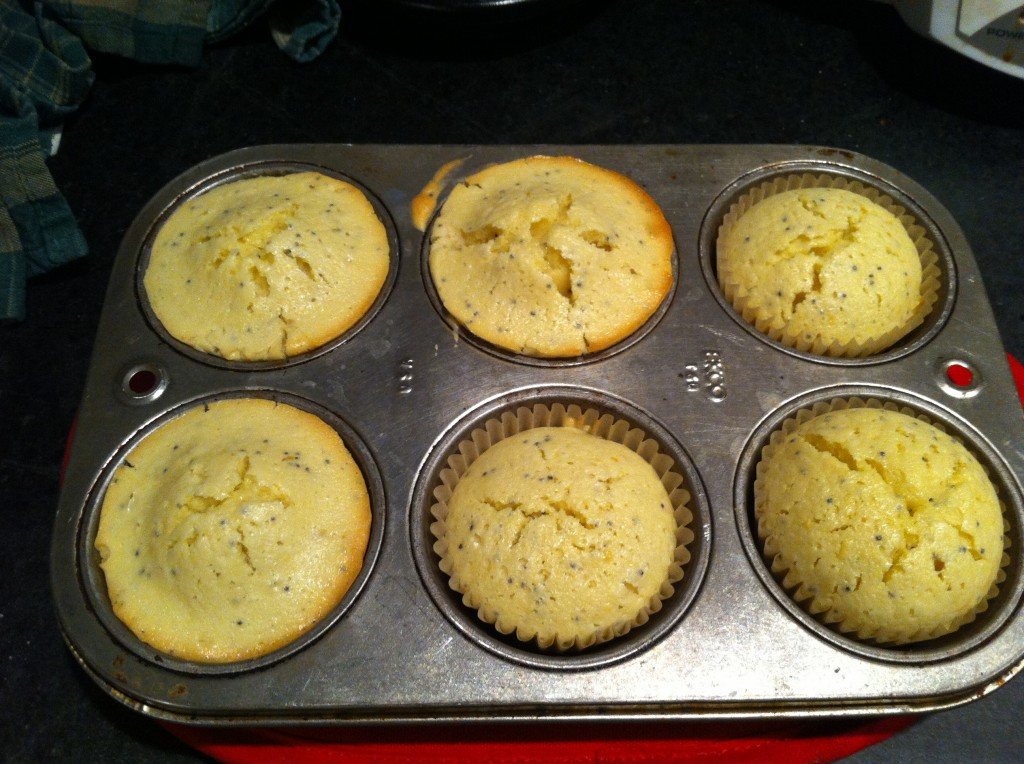
lemon poppyseed muffins

Luscious lemony poppyseed muffins


…and here is a much less fussy, straight up and easy blueberry version that we all love.

Overnight Blueberry Muffins

 From The Inn at the Round Barn Farm in Waitsfield, VT.

 Ingredients

6 Tbsp butter
1 ¼ cup sugar
2 eggs
2 cups flour
2 teaspoon baking powder
½ teaspoon salt
½ cup milk
1 pint (2 cups) fresh or frozen blueberries
4 teaspoons sugar, divided
2 teaspoons flour
¼ teaspoon cinnamon

Method

Cream the butter and 1 ¼ cup sugar in a mixer bowl until very light and fluffy. Add the eggs. Beat for 2 minutes. Combine the 2 cups flour, baking powder and salt in a bowl. Add to the butter mixture alternately with the milk. Place the blueberries in a bowl. Sprinkle with 2 teaspoons sugar and 2 teaspoons flour. Toss gently. Fold the blueberries gently into the batter just until blended. Refrigerate, covered, overnight.

Wake up happy. Preheat oven to 375. Spoon the batter into 12 greased muffin cups, filling almost to the top. Combine the remaining 2 teaspoons sugar and cinnamon in a bowl. Sprinkle over the tops of the muffins. Bake for 25 minutes or until golden brown.

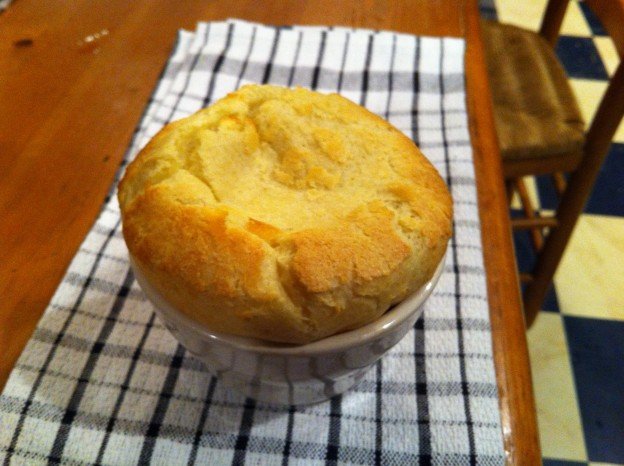
fully popped popover

Overnight Blender Cardamom Popovers

There’s a lot going on in that title, but it needs every word to do this recipe justice. First off, I am all about make-ahead breakfasts, especially in the dead of winter when rallying out of bed and getting psyched to embrace the great outdoors can be a challenge. In fact, the pursuit of easy yet yummy breakfasts is such a priority this time of year that I’m going to make it my January theme. Stay tuned for overnight waffles and French toast, but for now we’ll start with these popovers.

They are a golden example of overnight brilliance, made even more convenient by the fact that you make, blend and store the batter in the same container. (If there isn’t one already, there should be an entire cookbook devoted to blender cuisine. Anyone?) Wake up, turn on the oven, pour the batter into some muffin tins or, better yet,  a shmancy popover pan and you’re good to go. Without the filling, these popovers are a perfect breakfast—barely sweet and subtly spiced. Spread them with a little butter, jam or honey and they are perfect for grab and go, eat-in-the-car-on-the-way-to-the-race scenarios. The options of storing the batter overnight or all day, and turning it into a dessert with a delish filling (the one below or really anything creamy that floats your boat) make this recipe even more versatile.

This originally came from AP Food Editor J.M. HIRSCH.

Start to finish: 45 minutes
Servings: 12

For the popovers:
2 cups all-purpose flour
2 cups milk
4 large eggs
2 tablespoons butter, melted
1 tablespoon sugar
1 teaspoon salt
1/2 teaspoon ground cardamom

For the filling:
Two 8-ounce tubs mascarpone
2 tablespoons honey
Juice and zest of 1 lemon
2 teaspoons cinnamon
Sliced strawberries or other fresh berries, to serve.

Heat the oven to 400 F. Coat a 6-cup popover pan or 8-cup muffin pan with cooking spray (or be kind to the ozone and butter the heck out of said pan).

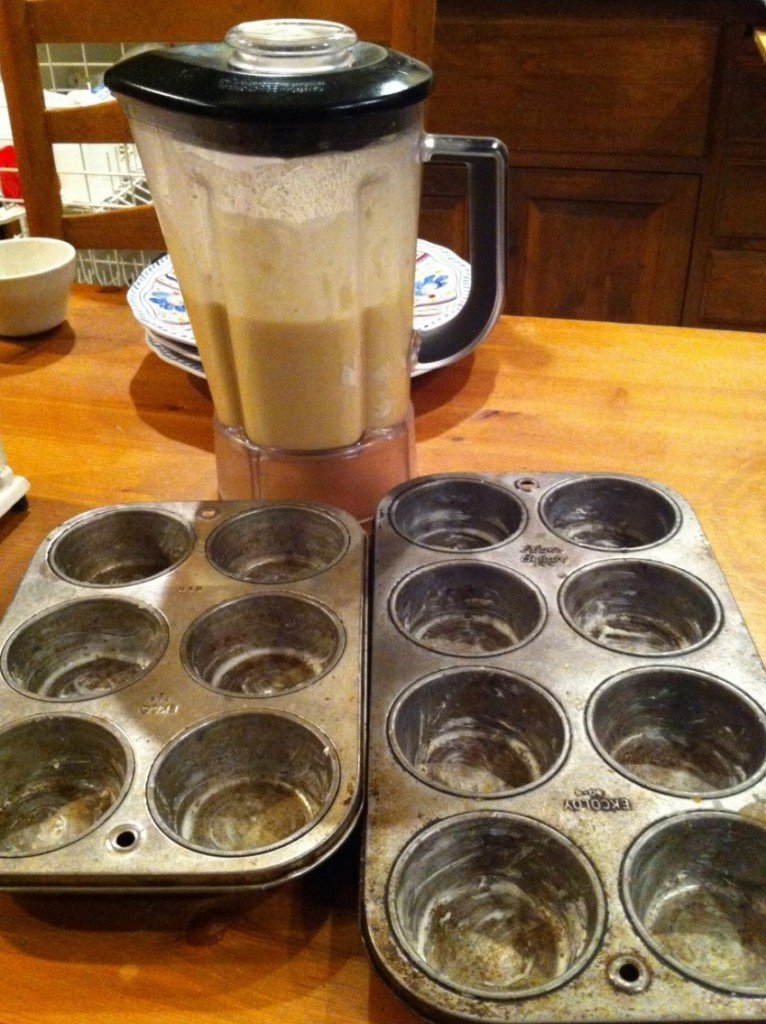
In a blender, combine the flour, milk, eggs, butter, sugar, salt and cardamom. Blend until the ingredients form a very smooth batter, about 1 minute. At this point you can: proceed as directed, making half now and half later; make them all now if you have enough pan space; or put the entire blender in the refrigerator for up to 24 hours.

popovers ready to bake

Barely conscious? Perhaps. But popovers are on deck.


Fill each of the prepared popover pan cups about halfway with batter. You should use only half of the batter in the blender.

Bake for 30 minutes. Remove the popovers from the pan and use a knife to cut a small hole in the top of each to let the steam escape. Cool slightly.

Meanwhile, to prepare the filling, in a medium bowl gently stir together the mascarpone, honey, lemon juice and zest, and the cinnamon. When the popovers have cooled just enough to handle, carefully tear the opening in each just enough to be able to spoon in about 1/4 cup of the filling. Serve each with berries.

Popovers in oven

Almost there…a few more sips of coffee and these babies will be ready.


Whole Wheat Cinnamon Scones

Scones Sugaring

What better treat to make for Christmas morning than a warm, melt-in-your-mouth scone!  I learned how to make these scones at the Baking Education Center at King Arthur Flour in Norwich Vermont.  It was phenomenal class.  I am a self-taught baker (i.e. I learn by baking experiments gone bad), which made this class very enlightening. I learned more about baking in the first 15 minutes than I’ve learned from years of baking in my home.  So, thank you King Arthur for your cooking classes.  If you live in the area, or even if you don’t, you should take a class. You can check out the school, the store, and the café here.  This recipe comes from King Arthur Flour as well so all credit to them for these wonderful scones.

I flavored my scones with cinnamon chips and a thick vanilla syrup (Madagascar Bourbon Pure Vanilla Bean Paste) which gives them an extra hit of flavor. I also topped them with sparkly white sugar.  But you can flavor your scones with whatever combination of flavors you want or whatever is on hand in your pantry.  When you take a class at King Arthur, they have every chip, dried fruit, nut, and spice available for you to choose from.  The selections are almost paralyzing.  Once I settled on cinnamon vanilla, I was quite happy. And I had already made a deal with my friend, who selected currants and walnuts, that we were to split our takes in half at the end of the class.  It was a win/win!

Ingredients

2 cups whole wheat flour
2 Tbsp sugar
2 tsp baking powder
1/2 tsp baking soda
1/2 tsp salt
1/2 cup chilled, unsalted butter
3/4 cup buttermilk
1 egg yolk (save the white for topping scones)
1/2 cup cinnamon chips (or whatever flavoring you like)

For the topping:
1 egg white
Sparkling sugar

Method

  1. Place the dry ingredients in a large bowl and mix well.
  2. Cut in butter with pastry blender or two knives.
  3. Whisk together buttermilk and egg yolk and stir into dry mixture until it a dough forms. Transfer dough to a lightly floured work surface and gently and quickly knead in the optional cinnamon chips (or dried fruit, nuts, etc…). Pat the dough into a flat disk about 7 inches across and cut it into wedges.
  4. Transfer the disk to a parchment-lined or lightly greased baking sheet. For crispier scones, separate the wedges.  For softer, higher rising scones, leave them in a circle.
  5. Brush the tops of the scones with the egg white and sprinkle with white sugar.
  6. Bake them in a preheated 375 degree oven for 25 to 27 minutes, inspecting at the midpoint to admire and turn.
  7. Remove scones from the oven when they are light, golden brown and cool on a wire rack.

I’m sure you noticed that these scones are made with whole wheat, so a tad on the healthier side. But if you want to go full tilt health nut, you can make the following substitutions:

1/2 cup canola oil instead of butter
3/4 no fat plain yogurt instead of buttermilk
1 Tbsp egg beaters instead of egg yolk
1/2 cup dried fruit instead of cinnamon chips
No sparkly sugar (eh, what the heck, live a little and keep the sparkly sugar!)

Bring It

These scones are the perfect gift to bring to a friend’s house if you are visiting for the holiday.  Bring them with a jar of your favorite jam and a bag of coffee beans.  You are sure to get invited back!

Scone Flavoring

Pumpkin Millet Muffins

Pumpkin Patch extraordinaire!

Pumpkin Patch extraordinaire!

In case you haven’t noticed, there has been a common theme to many of my postings lately – MILLET!  I can’t get enough of the stuff. This millet muffin recipe rocks like all the other recipes containing this fabulous grain.  They add a crunch that makes everyone light up and smile.

In addition to my fondness for millet, I was feeling remiss in not posting a recipe with pumpkin yet this season.  I have cut, carved, scooped out, and cooked many a pumpkin over the past couple months so for this round, I took the cheater’s route and bought a can of pumpkin puree.  But no shame in making things easy for yourself, right?  And the canned pumpkin works really well!

I adapted this recipe from one of my favorite websites – Joy the Baker. She used chocolate chips in her recipe, which is a great way to go.  I decided to go the healthier route and use walnuts and raisins instead.   Either way, it’s a win-win.  These muffins are dense, filling, yummy, and mostly healthy.  Enjoy!

Makes about 16 smallish muffins

Ingredients

1/2 cup vegetable oil
1/2 cup honey
1/4 cup brown sugar
2 large eggs
1 cup pureed pumpkin
2 tsp pure vanilla extract
2 cups whole wheat flour
1/2 tsp salt
1 tsp baking soda
1 tsp ground cinnamon
1/4 tsp ground nutmeg
1/2 cup dry millet
1/4 cup buttermilk
1/4 generous cup chopped walnuts
1/4 generous cup cranberries

 Method

Preheat oven to 325 degrees and line muffin tins with paper or foil liners.

In a large bowl, mix together oil, honey, brown sugar, eggs, pureed pumpkin, and vanilla extract.

In a medium bowl, mix together flour, salt, baking soda, spices, and millet.

Add dry ingredients, all at once, to wet ingredients.  Add buttermilk and fold together.  When batter is almost completely mixed add in walnuts and cranberries.  Mix to combine well but do not over mix.

Spoon into prepared muffins tins.  Fill 3/4 full. Bake 20-24 minutes, until toothpick inserted into the center of a muffin comes out clean. Serve warm  and eat immediately  store in plastic bags and eat over several days, or freeze and pull them out as needed.


3-3/2-2 Crepes

windoe-2

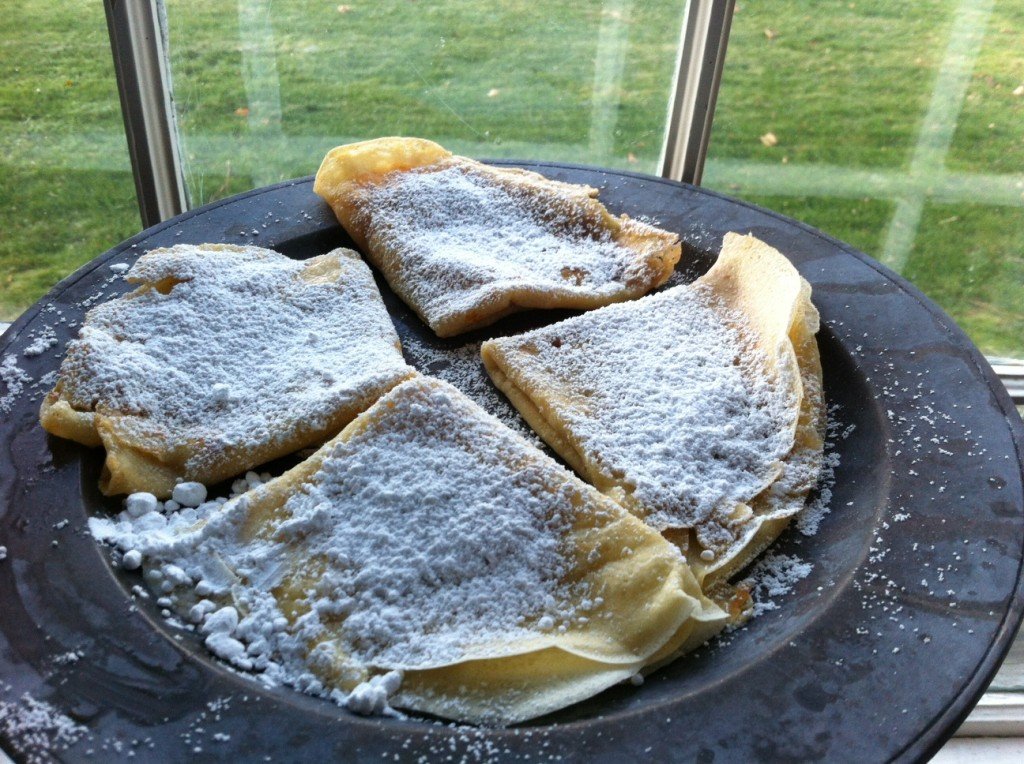
Four very good reasons to get out of bed in November.

Stick season. Oh yeah. It’s cold, there’s no snow on the ground and its too early for Christmas lights and cookie making therapy. What we need now is a reason to get out of bed. Boom—got you covered! I know, I know. Crepes sound so high maintenance, so NOT what the average person would contemplate whipping up, especially for a weekday breakfast. But I promise you these will set you free, and take barely more time than it takes to toast up some Eggo’s.

The timesaving is twofold. First, the recipe is so simple to remember that your won’t be futzing around finding it. And second, it makes enough that you can use the same batter for two or three days. And I know I said twofold but I forgot a major benny. On any given morning you probably have all the stuff on hand.

If you’re going for sweet you can fill these with any type of jam, or with a bit of granulated sugar. If you’re feeling more meaty cheesy than sweet, then go for a bit of ham and cheese. And if you’re feeling like you need some serious love from your peeps you can fill them with Nutella or Cholliesauce.

Trust me on this: you do NOT have to be French or kitchen savvy in any way to master these—all it takes is a few rounds of practice. If you blow a few just call it crepe shrapnel dust it with a lot of powdered sugar and move on.

Ok, here we go.

Ingredients

3 eggs
3 Tbsp melted butter
2 cups flour
2 cups milk

½ fresh lemon
A wrapped stick of butter for greasing pan (you wont use much of it).

Method

Whirl eggs in a blender. Add butter, flour and milk.

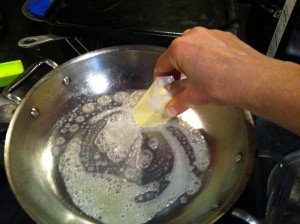
Heat a frying pan (I use my All-Clad double handled one) over medium heat. Hold a stick of butter and coat the hot pan to create a layer. Pour (or ladle) about 1/3 cup batter into pan and tilt the pan to coat the bottom evenly. When the sides lift easily flip entire crepe. Spread desired filling on half of crepe, and fold crepe in half then in quarter. Lift crepe from pan to a serving plate. Dust with powdered sugar and a squeeze of fresh lemon juice.

Butter-in-pan

Greasing the easy way.

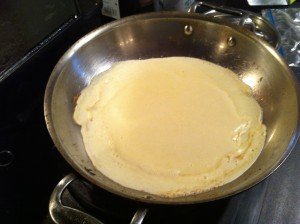
crepes-side-1

Side 1, ready to flip.


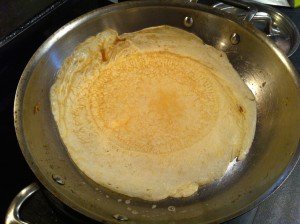
crepes-side-two

Side 2, ready to fill.

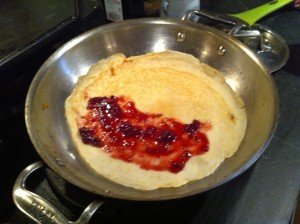
crepes-with-jam

Blurry, but you get the idea.


Store the batter for tomorrow’s breakfast, for an afternoon snack or for any moment that stick season is getting to you. Slip a couple of crepes into a baggie for a great school snack too.

apples

Apple Cheddar Scones

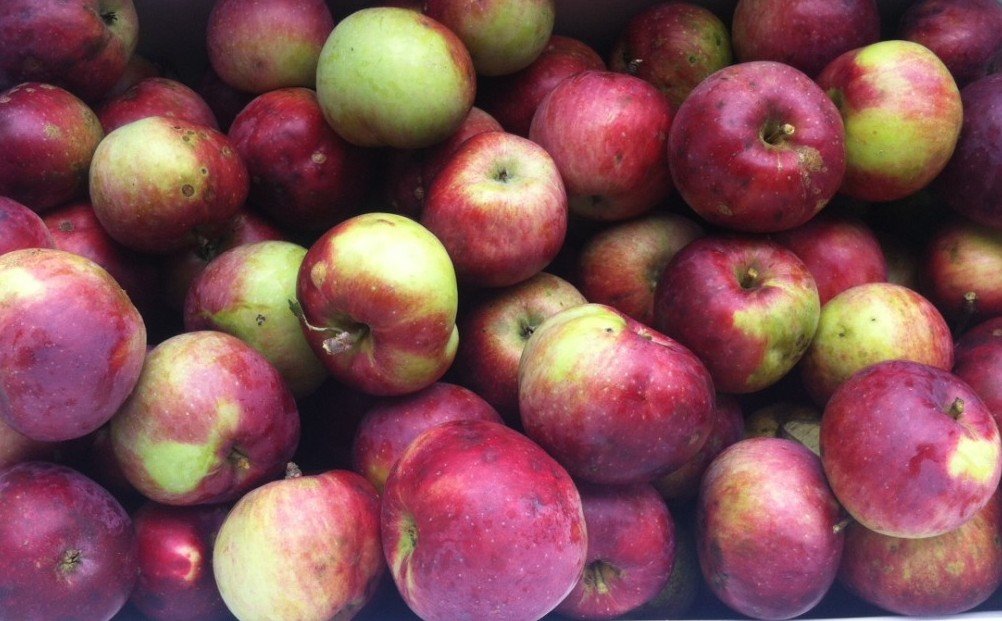
Summer is skipping out and it’s just plain sad every year. But on the bright side, it’s apple season! We’ve only got a row of apple trees—six or so, with two pear trees thrown in—but darned if that doesn’t serve up more fruit than I can handle. It hasn’t even gotten chilly yet and already the apple fest has begun. We’ve made applesauce, apple cider, apple cider syrup (yum!), apple muffins, apple pie, apple compote and just now the first batch of apple cheddar scones. Oooh baby–they are the ultimate in apple goodness. Sadly, they don’t use many apples (get into cider and sauce for that), and they have a few more steps than my favorite slacker scones. They even require eggs fergawdssake, which is so un scone-y. But they’re worth it, and they work any time of day for any type of occasion, from picnic to shmancy party.  This recipe, slightly tweaked at every stop, came via The Bitten Word and they got it from a book called The Perfect Finish. So there’s the provenance. If you need apples come on over.

Ingredients

Makes 6 generous scones (at least 8 normal sized ones).

2 firm tart apples (1 pound. I used about 5 small ones)
1 1/2 cups all-purpose flour
1/4 cup sugar plus 1 1/2 tablespoons for sprinkling
1/2 Tbsp baking powder
1/2 tsp salt plus additional for egg wash
6 Tbsp unsalted butter, chilled and cut into 1/2-inch cubes plus additional for baking sheet if not lining it with parchment
1/2 cup sharp cheddar, shredded (white is recommended, rogue westerners.)
1/4 cup heavy cream
2 large eggs

Method

Position a rack at the center of oven and preheat oven to 375 °F. Line baking sheet with parchment paper.

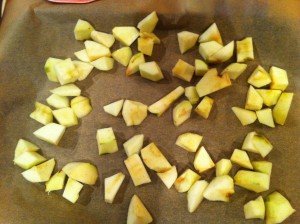
Peel and core apples, then cut them into chunks. Placed them in a single layer on a baking sheet lined with parchment paper and bake them until they take on a little color and feel dry to the touch, about 20 minutes. They will be about half-baked. Let them cool completely (in the fridge if you are eager). Leave oven on.

roasted-apples

roasted-apples

Sift or whisk flour, sugar, baking powder and salt together. Set aside. Place butter in the bowl of an electric mixer with a paddle attachment (or a hand mixer or by hand, but it is more work), along with cooled apple chunks, cheese, cream and one egg. Sprinkle flour mixture over the top and mix on low speed until the dough just comes together. Do not overmix.

Generously flour your counter top and place the scone dough on top of it. Sprinkle with flour. Use a rolling pin to gently roll (or use your hands to pat) the dough into a 1 1/4-inch thick, 6-inch circle. Cut circle into 6 wedges. Transfer them to a baking sheet that has either been buttered or lined with a fresh sheet of parchment paper. Leave at least 2 inches between each scone.

scones pre baking

Ready to bake

Beat remaining egg in a small bowl with a pinch of salt. Brush the scones with egg wash and sprinkle them with remaining tablespoon of sugar. (I have blown off the egg wash on occasion, which is just fine, but it actually does make it better.) Bake until firm and golden, about 30 minutes. With a spatula, lift them to a wire rack to cool for 10 minutes. Eat. Enjoy. Repeat.

Bring It!

Baked apple cheddar scones

Fully baked and ready to be demolished

Scones can be made ahead of time and stored unbaked in the freezer until you need them. Just take them on their baking sheet and at your destination brush them with the egg wash, sprinkle them with sugar, and bake them still frozen for just a couple extra minutes. Full disclosure, I have never done this, but it seems like a good idea. I hear these are not so awesome the next day, but ours have never lasted long enough to test that.


Eliteam Healthy Go-Go Donuts

Baked-donutsAnd now for another episode of Positive Snacks, courtesy of Doug Lewis and the Eliteam campers. Doug is in the midst of his fourth eliteam session of the summer, and he’s kept the kids on the go, made them sweat a whole lot and taught them a ton about sports psychology, sports physiology and sports nutrition. Read more about Doug, Eliteam and Positive Snacks here, or just keep reading for another great recipe that will get kids psyched to be in the kitchen. And, ahem kiddos, the eliteam cooking experience includes clean-up as well.

Here’s what Doug says about his recent donut making experience:

“This is a great recipe that is healthy with the squash and pumpkin puree—PLUS they are donuts! They’re packed full of good nutrients and baked, not fried, which makes them healthier. Also, it requires an egg white and separating an egg is always a fun activity to try with the kids.

We invested a few dollars in the donut pans. Be sure not to overfill them before baking or else the donuts will become muffins with holes in the bottoms. We made 120 donuts for the 50 kids and they were gone in seconds!!!”
Here is the recipe, which came from “Deceptively Delicious” by Jessica Seinfeld

Go-Go Donuts (Full disclosure: I added the Go-Go, because these kids never, ever stop.)

Ingredients

Nonstick cooking spray
½ cup firmly packed light or dark brown sugar
½ cup canned pumpkin puree
½ cup sweet potato puree
½ cup nonfat (skim) milk, or lowfat (1%) buttermilk
1 large egg white
1 tablespoon trans-fat-free soft tub margarine spread, melted
1 teaspoon pure vanilla extract
1 cup all-purpose flour, or whole-wheat pastry flour
1 teaspoon baking soda
½ teaspoon baking powder
½ teaspoon cinnamon or pumpkin pie spice

Method

Preheat the oven to 350 degrees F. Coat a doughnut mold or 12 cup mini-muffin tin with cooking spray.

In a large bowl, beat together the sugar, pumpkin and sweet potato purees, milk, egg white, margarine, and vanilla. Add the flour, baking soda, baking powder, and spice, and mix until completely incorporated.

Pour the batter into a gallon-sized plastic bag ( or pastry bag if you have one) and cut the bottom tip off of one side of the bag. Squeeze the batter through, into the donut mold. Bake until the tops are lightly browned and a toothpick comes out clean when inserted, 20-25 minutes. Turn the doughnuts out onto a rack to cool. When cool, dust with confectioners’ sugar.

Store in an airtight container at room temperature for up to 2 days, or freeze for up to 1 month.

donut-batter boys-mixing-donuts