Category Archives: Apres Anything

Quick, Easy, Cheap Salsa

I know, it’s summer and we should be all about fresh tomatoes (and corn of course). That said, when it comes to salsa, you can really never have enough. So, when there is a quick, easy and cheap way to make a boatload of salsa yourself, bring on the can opener. (For further proof of canned tomato greatness, see Funitella Bruschetta.)

No need to belabor the intro here. I love a chunky fresh salsa with all kinds or weirdness in it: beans, corn, mango, etc. I also love a straight up tomato salsa with fresh jalapeno, lime and cilantro. This is that salsa, AKA Pioneer Woman’s Restaurant Salsa (she even gives you a video in case pushing buttons is a challenge). It makes a TON, so get a few jars ready, fire up your food processor and be ready for the weekend.

Coming up next: The third of three must-have condiments. Get a playlist and a sharp knife and prepare for some chopping. I promise it’s worth it!

Quick, Easy, Cheap Salsa

Ingredients

Two 10-ounce cans diced tomatoes and green chiles, such as Rotel
One 28-ounce can whole tomatoes with juice 
1/2 cup fresh cilantro leaves (or more to taste)
1/4 cup chopped onion
1 clove garlic, minced
1 whole jalapeno, quartered and sliced thin, with seeds and membrane (2 is perfectly reasonable)
1/4 teaspoon ground cumin
1/4 teaspoon salt
1/4 teaspoon sugar
1/2 whole lime, juiced

Method

This is a very large batch. you’re totally safe with a 12-cup food processor, or you can process the ingredients in batches and then mix everything together in a large mixing bowl.

  • Combine the cilantro, onions, garlic and jalapeno in a blender or food processor and pulse a few times to get them in the same zone size wise, not too pulverized. (If you do this step you can be a little lazier with your chopping). Add the diced tomatoes, whole tomatoes, cumin, salt, sugar and lime juice.
  • Pulse until you get the salsa to the consistency you’d like. I do about 10 to 15 pulses. Test seasonings with a tortilla chip and adjust as needed. 
  • Refrigerate the salsa for at least an hour before serving.

Bringing it:

Divide the batch into as many jars as you like and you are ready to take your show on the road. This is NOT shelf stable, so keep it in the fridge.


Tomato Overload

Guess what didn’t take Labor Day off? The tomatoes in your garden. It’s hard to keep up with the crop, though I’m trying my darndest, and probably headed for whatever toxic event occurs from too many tomatoes. I swear those suckers ripen by the hour. It’s all good though, except that there’s this one doctor out there on the interwebs who gets really bad on tomatoes. I just have to ignore his advice for the next couple of weeks. Same with the corn haters. Now is NOT the time.

Rather than reinvent the wheel, let’s just revisit some of our all-time tomato season favorites. Purists of course will go no further than the white bread and mayo tomato sandwich. Solid. But it uses exactly one tomato. Not helpful. When you’re looking for mass consumption of the bounty, I suggest a batch or two of sweet and spicy tomato jam. For the easiest dinner on the planet, totally appropriate for hands off entertaining, go for Best of Summer Simmer Chicken. If your job is to bring a side, embrace the heat with Summer Perfection Watermelon Tomato Feta Salad, or just go straight for Most Popular with THE Panzanella.

If those don’t use up your tomato backlog, here is an easy way to give your tomatoes (and the taste of summer) a little more staying power.

If nothing else you should go to Smitten Kitchen just to look at the picture of the pre-roasting tomato rainbow. Impressive. Mine do not look like that. BUT I assure you they taste darned good, and they are perfect to throw on a pizza, spoon on bruschetta, toss into a salad, smoosh on bread, mix in pasta, etc. You get the picture.

Slow roasted tomatoes, just hanging with the fresh crowd.

Slow Roasted Tomatoes

From Smitten Kitchen

Ingredients

  • Cherry, grape or small Roma tomatoes
  • Whole gloves of garlic, unpeeled
  • Olive oil
  • Herbs such as thyme or rosemary (optional)

Method

Preheat oven to 225°F. Halve each cherry or grape tomato crosswise, or Roma tomato lengthwise and arrange on a parchment-lined baking sheet along with the cloves of garlic. Drizzle with olive oil, just enough to make the tomatoes glisten. Sprinkle herbs on, if you are using them, and salt and pepper, though go easily on these because the finished product will be so flavorful you’ll need very little to help it along.

Bake the tomatoes in the oven for about 3 hours. You want the tomatoes to be shriveled and dry, but with a little juice left inside–this could take more or less time depending on the size of your tomatoes. When they are done, you can remove the cloves of garlic and save them for another use. They’re a delish side bennie.

Use the tomatoes right away or let them cool, cover them with some extra olive oil and keep them in the fridge for the best summer condiment, ever.

Double Down Derby Day Guacamole

Some days we have difficult choices. Saturday will be one such day. Do you wear a fine hat and celebrate the first Saturday in May according to Kentucky tradition, or do you scarf down some tacos and join the Cinco de Mayo party?

Or, do you do the sensible thing and celebrate both? Well duh! I do not normally do this, but I am posting two untried recipes. Whyyyyyy? Because it’s important! Because it’s Kentucky Derby Day and Cinco de Mayo AND its almost summer. That means it’s high time to get your guac on.

I am a wing it kind of guac maker. As a Californian that is my birthright. That said, you can always improve. These two new takes on guac are both from Mexican food jefe Roberto Santibañez by way of Food52.  The first is unique in approach but features totally classic ingredients. It hits all the must haves and nothing more: lime, cilantro, jalapeño, onion are all pulverized FIRST then added to avocados. As Santibañez says, “There is a very important textural thing to guacamole — we never really mush up the avocado.” I knew I liked this guy. I really felt the love though when I read about his second creation, which is totally wacky. It involves a splash of tequila (he had me there), apples (hello New England) and pecans (a nod to the America south and more weirdness). My awesome neighbor just came back from Georgia bearing two bags of pecans that she harvested and shelled herself. Fate. Kismet. Weird guacamole.

Anyway, here are the recipes. I will be making and testing them both on Saturday, celebrating both occasions of course.  If you do the same please tell me what you think and we can discuss. Whatever you choose to celebrate, have a fantabulous weekend!

P.S. Post time is 6:12. For the worst odds and the best name I’m taking Patrona Margarita, with 50-1.

Numero Uno:

Roberto Santibañez Classic Guacamole

Adapted slightly from Truly Mexican (Wiley, 2011)

Makes: about 1 3/4 cups

  • 2 tablespoons finely chopped white onion
  • 1 tablespoon minced fresh serrano or jalapeno chile, including seeds, or more to taste
  • 1/2 teaspoon kosher salt, or 1/4 teaspoon fine salt (or to taste)
  • 1/4 cup chopped cilantro, divided
  • 1 large or 2 small ripe Mexican Hass avocados, halved and pitted
  • A squeeze of lime, if desired
  1. Mash the onion, chile, salt (the coarseness of kosher salt helps you make the paste), and half of the cilantro to a paste in a molcajete or other mortar. You can also mince and mash the ingredients together on a cutting board with a large knife or a fork, and then transfer the paste to a bowl.
  2. Score the flesh in the avocado halves in a crosshatch pattern (not through the skin) with a knife and then scoop it with a spoon into the mortar or bowl. Toss well (it should be like salad properly dressed in vinaigrette), then add the rest of the cilantro and mash very coarsely with a pestle or a fork. Season to taste with lime juice (if you’d like) and additional chile and salt.
  3. Guac Uno, as made beautiful on Food52

Numero Dos:

Roberto Santibañez’ Guacamole with Tequila & Apples

Author Notes: Roberto says:” The apple needs to be sweet and crunchy (not Granny Smith-tart) and diced not too fine, to contrast just vocally enough with the guac’s salty heat and richness. The pecans should be tossed in butter after toasting, not before, so you get fresh, unbrowned butter flavor, too. Adapted slightly from Truly Mexican (Houghton Mifflin Harcourt, 2011).

Makes: 2 cups
For the apples & pecans

  • 1 large crisp, sweet apple, such as Gala or Macintosh, peeled, cored, and finely diced
  • 1 tablespoon silver (blanco) tequila
  • 1 tablespoons freshly squeezed lime juice
  • 1/4 cup pecan halves, sliced crosswise or coarsely chopped
  • 1 teaspoon butter
  • 1/8 teaspoon fine salt, or 1/4 teaspoon kosher salt (or to taste)

For the guacamole

  • 1 fresh serrano or jalapeño chile, stemmed
  • 2 tablespoons finely chopped white onion
  • 1 teaspoon coarse salt, or 1/2 teaspoon fine salt (or to taste)
  • 3 tablespoons chopped cilantro, divided
  • 1 large or 2 small ripe Mexican Hass avocados, halved and pitted
  1. Toss the apple with the tequila and lime juice in a bowl and let the mixture stand for 30 minutes to 1 hour.
  2. Heat the oven or toaster oven to 350° F. Spread the pecans on a small baking pan and bake until golden and fragrant, 7 to 8 minutes. Add the butter to the pan and toss to melt the butter and coat the pecans. Sprinkle with salt, tossing to coat.
  3. Heat a comal, griddle, or heavy skillet over medium-low heat and roast the chile, turning it over with tongs once or twice, until tender, blistered all over, and blackened in spots, 10 to 15 minutes. Once cool enough to handle, remove the skin from the chile (you might have to use a paring knife).
  4. Mash the chile, onion, salt (the coarseness of the kosher salt will help you make the paste), and 2 tablespoons of the cilantro to a paste in a molcajete or other mortar. You can also mince and mash the ingredients together on a cutting board with a large knife, and then transfer the paste to a bowl.
  5. Score the flesh in the avocado halves in a crosshatch pattern (not through the skin) with a knife and then scoop it with the spoon into the mortar or bowl. Toss well, mashing the avocado coarsely with a pestle or fork, taking care to keep the avocado chunky.
  6. Gently stir in the apple mixture and most of the pecans just until it holds together. Garnish with the remaining pecans and cilantro. Serve right away with tortilla chips.


Spring Chicken Soup


This recipe is straight outta Steamboat from Tania, Bring It’s Rocky Mountain correspondent. Along with her husband, she invented this by merging three Thai recipes. As Tania  says,  “It can be tweaked anyway you want, but it is pretty amazing as written.” She also admits it’s a pain in the butt to make, but it’s really nothing more than a a few rounds of chopping sautéing and stirring. 

What I love about this soup, beyond it’s sheer freshness, is the way it builds in the pot, kind of like stone soup. I guess this is how Stone Soup would evolve in a community with really well stocked veggie drawers. It features a lot of greens, and can handle a lot of flexibility. That said, the first time I made it I was missing key ingredients—fish sauce, mint, red peppers—and used the wrong mushrooms and imposter jalapeños. (It’s New Hampshire. It happens).The result was ok but underwhelming. The next time I made it, with the right stuff, it got the kind of unsolicited rave reviews I NEVER get from soup.

There are no amounts listed for the fresh herbs, but be generous with them, according to your taste. If you want to freelance, I suggest doing it on the amount of oil and butter used at each phase, using whatever amount looks and feels right to you. It makes a lot, so as you reheat it during the week, give it fresh cha-cha  by adding more ginger, garlic and lime. 

Spring Chicken Soup

Courtesy of Chuck and Tania Coffey

Ingredients:

  • 8 cups of chicken stock
  • *olive oil
  • *butter
  • 1 ½ lb boneless/skinless chicken breasts
  • 6 cloves garlic minced
  • 3” ginger root peeled and minced
  • 2 red peppers sliced thinly
  • ¾ lb shitake mushrooms sliced
  • 3 limes (skin from one lime)
  • ¼ c fish sauce
  • fresh basil
  • fresh mint
  • fresh cilantro (leaves and stems)
  • 3 jalapenos diced
  • 2 fresnos cut in rings (easterners, you are forgiven if you can’t track these downw)
  • 2 cans coconut milk
  • 1 1/2 T brown sugar
  • red pepper flakes to taste
  • 11 oz  baby spinach (1 entire plastic coffin)
  • i package straight cut rice noodles

Method:

Pour all the stock into a big pot and heat on medium high.

Grill chicken (or cook up however works for you) 8-10 minutes per side. The breasts are undercooked because they are going in the soup.  When cool enough to cut, cube into 1” pieces and add to soup.

In a nonstick pan heat 1 T butter and 1T olive oil and cook garlic and ginger until fragrant.  Pour into pot.

In a large nonstick pan heat 2 T butter and 1T olive oil (I used less here) and cook mushrooms until fragrant and starting to brown. Add a half cup or so water to the cooking mushrooms if they seem dry.  Add to soup.

Add 1-2 T butter to pan and cook red peppers until slightly soft. Add to soup. You’re done with that pan now.

Grate the skin of a lime into soup. Add juice of 3 limes and the fish sauce to soup.Cut stems of cilantro into ½” pieces and add to soup.
Slice fresnos and mince jalapenos and add to soup.
Add coconut milk, red pepper flakes to taste and  brown sugar.
Chop basil, cilantro and mint leaves and add to soup with all of the spinach (you really have to use a big spoon to get it all in there).
Cover soup partially and cook until the spinach wilts (this happens fast).
In another pot bring water to boil and cook rice noodles according to directions. (alternatively serve this over jasmine rice)
To serve put noodles in a bowl and cover with soup.  Add red pepper flakes to taste.
The soup gets better the next day especially if you add a bit more garlic, ginger and jalapeno.

Looking for other fresh spring recipes? How about minty snap pea salad, or of course Marcharitas. And because it’s the confluence of soup season and sugaring season—what we lack in peppers around here, we make up for in maple—don’t forget maple oat breakfast bread.


Sabering champagne

Holiday Favorites: Stay Sane, Go Nuts, Be Happy!

Fluff up your marmots and break out all things sparkly, the holidays are here. This is the season for many things: fake fur, sequins, fizzy drinks, warm everything. This is not the season for experimentation. We’re keeping our heads above water here, which means sticking with what we know. tried and true meals that make us happy, and treats to give that make others happy.

Maple oat breakfast bread

With that in mind, in my own kitchen I’m revisiting whole lot of Bring It tried and trues. That means soups like Thai Coconut Corn Soup, or Sugar and Spice Squash Soup. And yep, that means a crock pot full of Chicken Taco Chili that feeds a crowd with about 6 minutes of prep. All of the above, of course, beg for People’s Choice Cornbread or No Knead Challah or a honkin’ slice of Maple Oat Breakfast Bread to dunk in there. That is, UNLESS dirt bread is your thing…you know who you are, you little hemp seed eating chia pets. I’m with you there.

You might be needing some holiday entertaining staples like pomegranate everything (along with a genius pomegranate wrangling technique). What’s winter without fondue, and the easiest in the world Guinness Fondue at that? And what’s “How the Grinch Stole Christmas” without snacks? I highly recommend a batch of Nootch Popcorn or a bowl of Hail Mary Coconut.

As far as gifting and hostess offerings, you will never go wrong with crackle and its intriguing, slightly sophisticated dark cousin, pretzel and beer Crackle 2.0. And cookies? Yeah we’ve got those, basics like my faves—champion chip cookies—as well as totally slacker kiss my crust cookies, made from refrigerated pie crust and whatever chocolates you have around. If you need to scare up a snowstorm, or a reason to start a sweet family tradition make up a snow ghost pie.

Snow Ghost pie ad

And lest this be a pure re-hash of deliciousness we have an actual new recipe. I realize this blog has a somewhat extensive nut treatment, including honey thyme walnuts, spicy rosemary maple walnuts and an entire holiday nut anthology. But it turns out you really do need one more way to make roasted almonds. These are very similar to ginger glazed almonds (see anthology above), but without the ginger and with a coating of sesame seeds. You can choose a mix of sweeteners for your preferred flavor dimension (honey and sesame were pretty much born for each other), but for the best texture and glaze use at least some brown sugar.  

We’re talking nuts here, not rocket science, so be bold and mess around with flavorings, spices, herbs, types of nuts etc. Above all, enjoy the madness of the season and, like James says, remember “Shower the people you love with love.”

Sesame Almonds

Makes 3 1/2 cups almonds

Ingredients:

  • 3 tablespoons packed light brown sugar (or sub out up to 2 tablespoons with honey or maple syrup)
  • 1 tablespoon coconut oil (or your healthy oil of choice)
  • 1 teaspoon kosher salt
  • 1 teaspoon paprika
  • 1 teaspoon rice vinegar
  • 1 pound raw almonds (a scant 3 ½ cups)
  • 2 tablespoons (or more) white sesame seeds

Method:

Arrange a rack in the middle of the oven and heat to 350°F. Line a rimmed baking sheet and 2 wire cooling racks with parchment paper and set aside.

Pour the almonds into a mixing bowl. (If you keep your nuts in the freezer, warm them up in the oven for a few minutes first). In the microwave or on the stovetop stir together the brown sugar/honey/syrup, oil, salt, paprika, and vinegar over low heat. Pour mixture over the almonds and toss until the almonds are thoroughly coated. Transfer the almonds to the prepared baking sheet and spread into an even layer.

Bake, stirring every 5 minutes, until the almonds are brown and fragrant, 12 to 15 minutes total. They should be a rich brown color and just start to smell toasted as you open the oven door.

Sprinkle the sesame seeds over the hot almonds and stir to evenly distribute the seeds. This is where I go a little overboard, and try to get as many sesame seeds as possible to coat the almonds. Divide the nuts between the 2 prepared cooling racks and use a spatula to spread the nuts out so they do not touch. Cool completely, about 30 minutes.

Break apart any nut clusters that are stuck together if needed.

Bringing It:

Pour these babies into a treat bag, jar, tin or a cardboard takeout container lined with festive tissue paper, and store them in the fridge until you are ready to give them or devour them.


Of Empty Nests and Butternut Squash


butt-pizzaSometimes—most times really—I’m not the quickest to pick up on the obvious. When I was wondering why it had been so hard to get inspired for fall a post I looked within, to all manner of character flaws, for an explanation. It took a friend in the grocery store, mocking the paltry contents of my grocery cart to make it obvious. I no longer have two of my biggest, loudest, stinkiest, most wonderful reasons to cook. If, like me, you are slow to notice signs here some dead giveaways.

You might be an empty nester if:

  • You no longer park near the cart collection stands at the grocery store.
  • You buy milk in half gallons, then quarts, and still wonder if it’s gone bad.
  • You put everything you can imagine needing into your cart and it still costs less than $50.
  • Your ice cream has freezer burn.
  • You actually pay attention to special diets, and try to accommodate them.

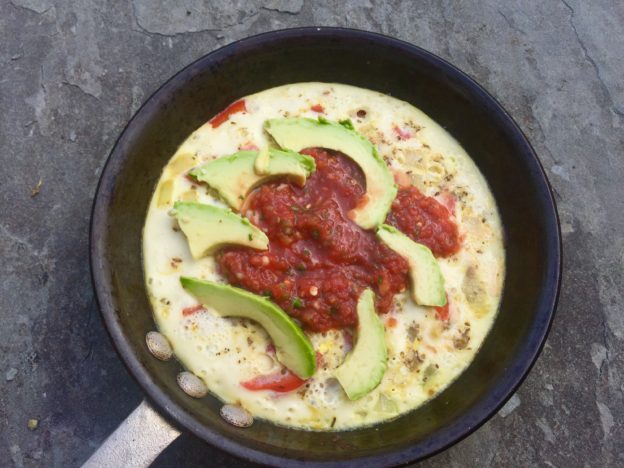
This last point is what today’s post is about. Well, that and butternut squash, my food champion of fall. (Let’s remember squash on toast, sugar and spice soup and Halloween Soup and on and on in the butternut/kabocha hall of fame.) The empty nest is suddenly available for visitors, which is awesome, and they bring with them special diets. At one point recently three guests joked that one was gluten free, one was sugar free and one was calorie free. Guest Number 4 was Vegan. This all worked because a: They all had a sense of humor and adventure, and b: I had time to care (see above).

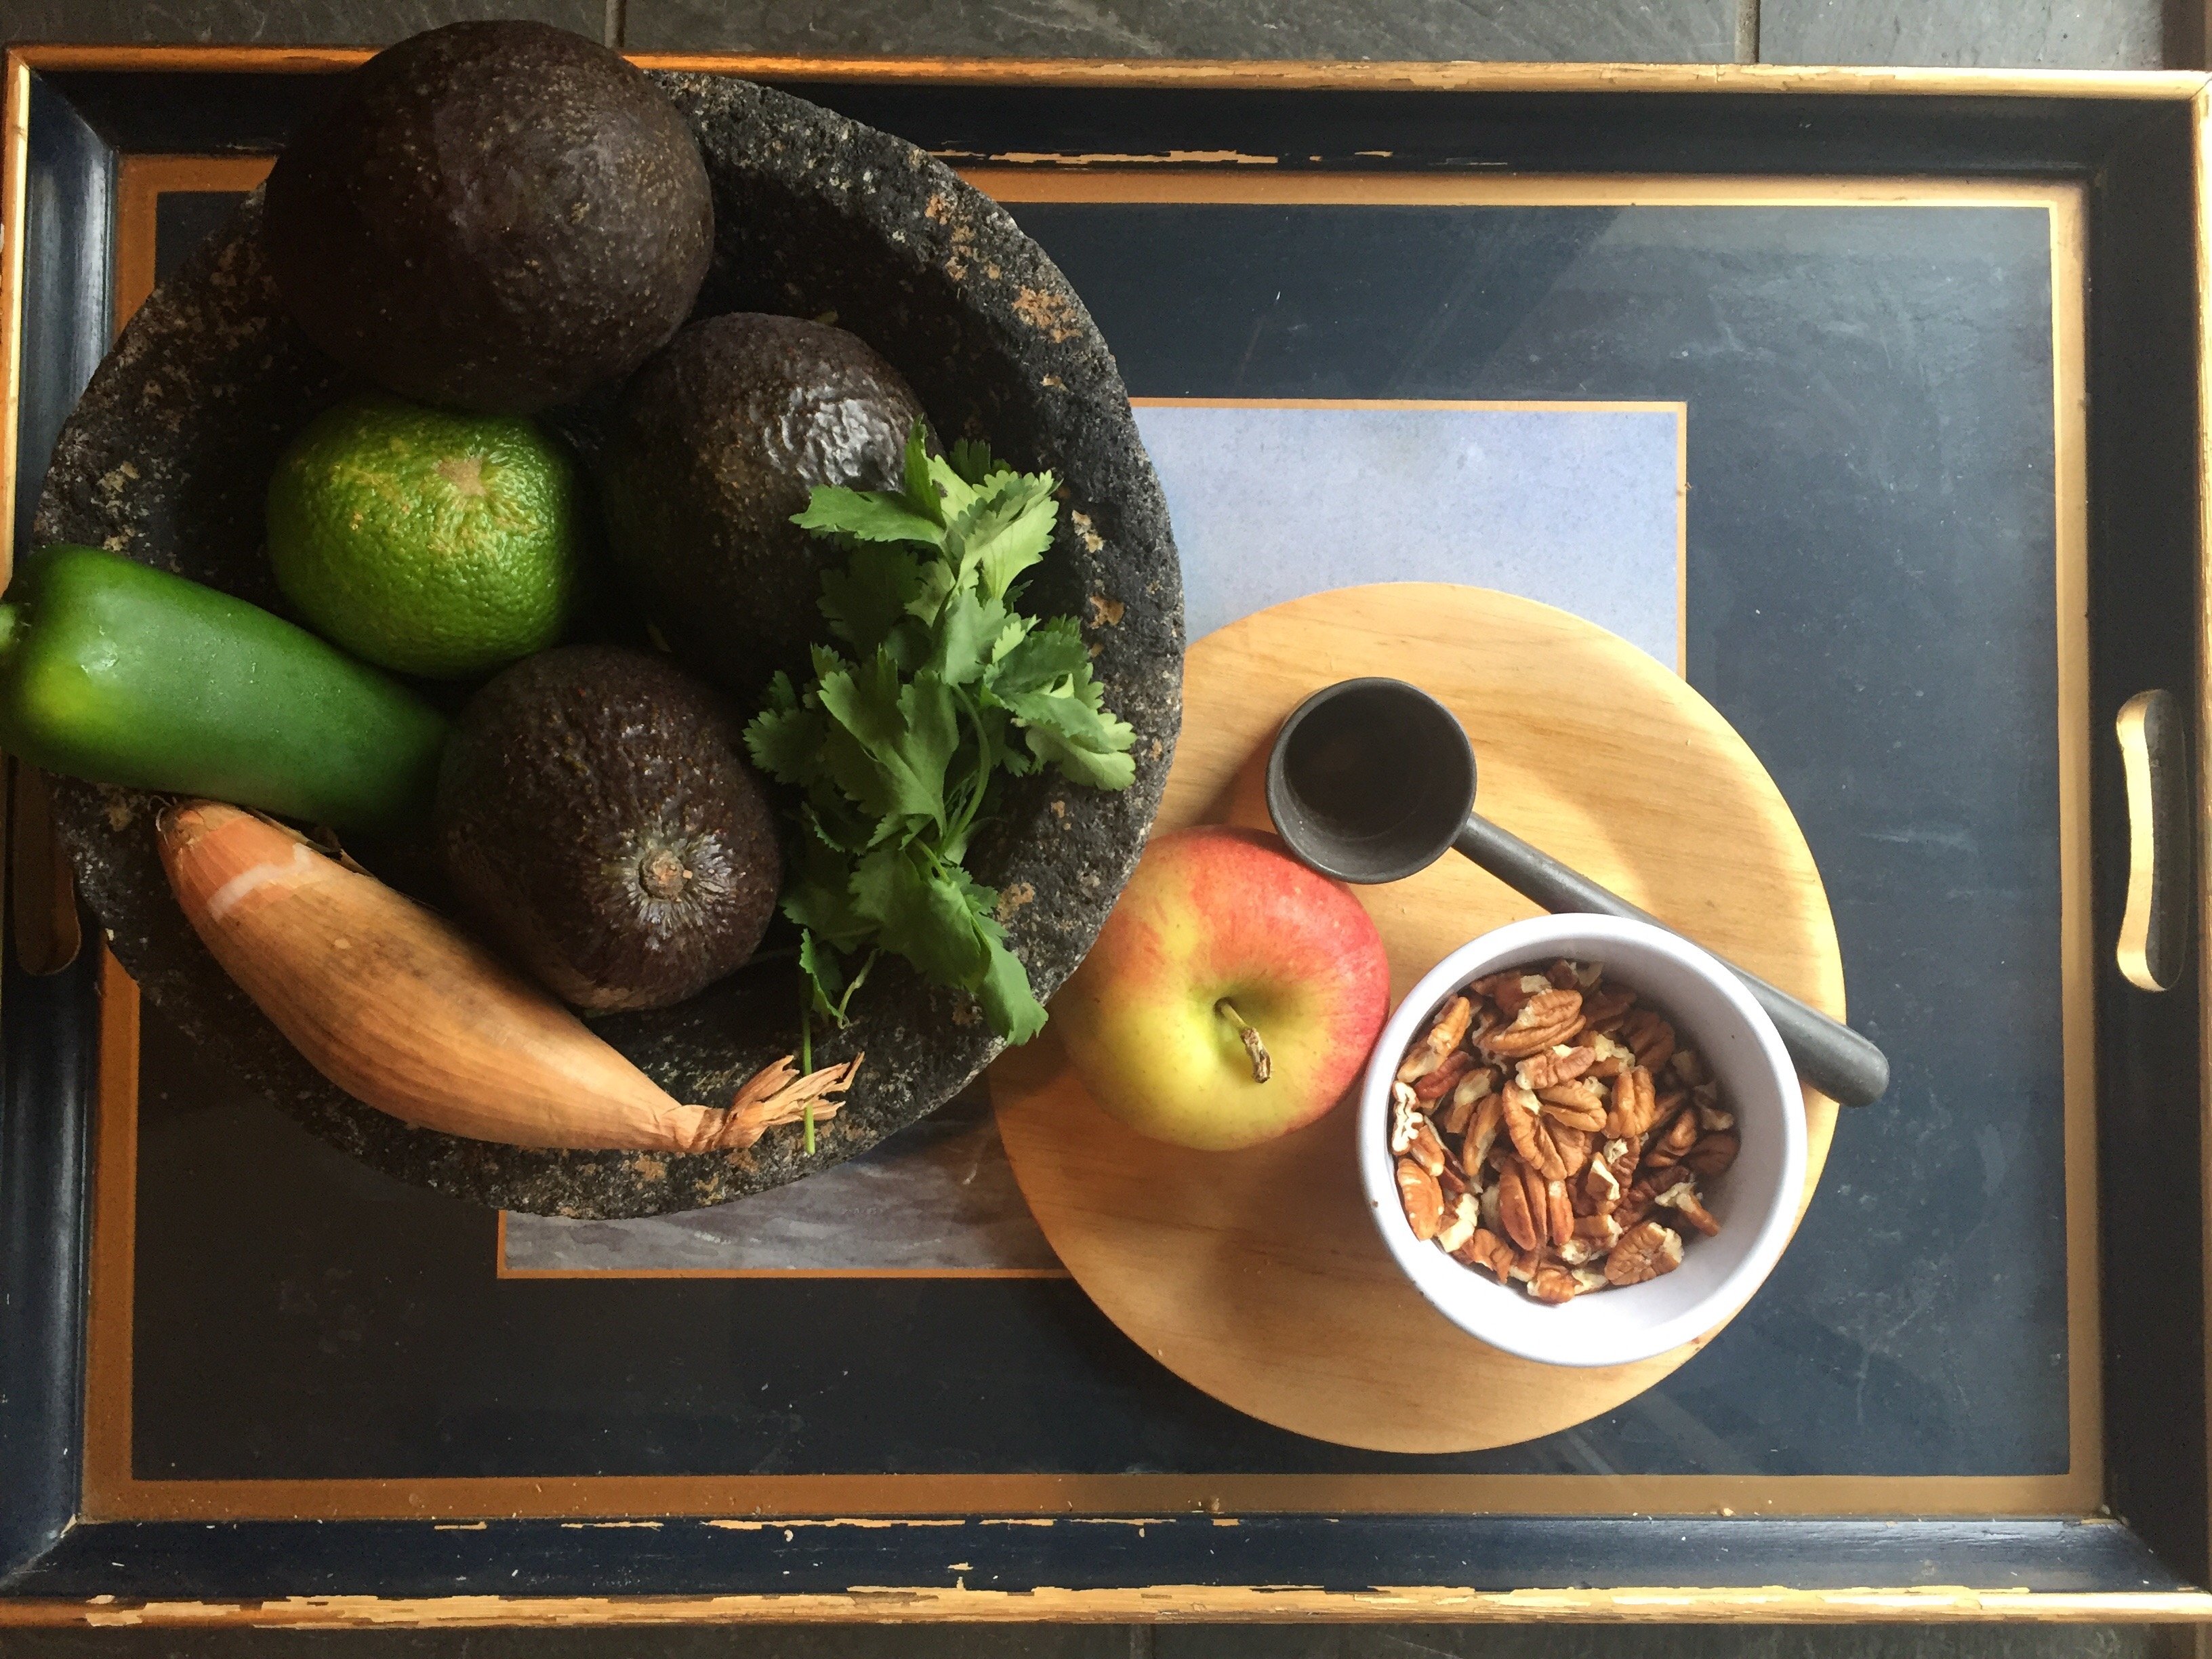
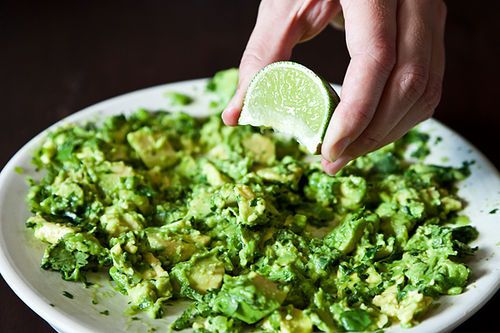
In my quest as a Vegan sympathizer I’ve tried a lot of things recently. I’ve tried to make both cheese and pizza crust out of cauliflower. No and no. I’ve made Reuben sandwiches out of seitan, a thousand times NO. I’ve also found some reasonably good stuff like grain-free carrot bread, and mayonnaise made with chickpeas. And, with much inspiration from Minimalist Baker and other sites, I’ve made some unbelievable stuff, like butternut squash pizza, the key ingredients of which I share below.

It’s been a fun experiment, and I like being able to find things that can broaden my own food horizons and make people on special diets happy. That said, life is about finding the right balance. When I asked my husband if he was game to try black bean sweet potato burgers for dinner, he merely went to the freezer, removed a steak and thunked it on the counter. Know your audience, people, and enjoy whoever is in your nest.

Butternut Squash Sauce

From the Minimalist Baker, with amounts adjusted

butt-pizza2

Also makes a mean pizzadilla, on a corn tortilla procured by the Vegan for the gluten-free girl.

Ingredients

For every cup of cubed butternut squash you will need:

  • 2 tsp olive oil ( 1 tsp oil for roasting and another tsp for adding to the sauce)
  • 1 garlic clove, whole, skin removed
  • 1 tsp maple syrup
  • a pinch of salt and pepper.

Keep in mind 1 Tbsp is 3 tsp. Sooooo, math whiz that I am, for 3 cups squash you will need 1 Tbsp of oil for roasting, and another Tbsp oil to add to the sauce, and 1 Tbsp maple syrup. A baking sheet easily holds 4 cups, so amp up ingredients if you’ve got the squash.

Method:

Preheat oven to 400 degrees F and position a rack in the middle of the oven.

Add cubed butternut squash and peeled garlic cloves to a baking sheet and drizzle with half total olive oil and a pinch each salt and pepper. Toss to combine.

Bake for 15-20 minutes, or until all squash is fork tender.

Transfer squash and garlic to a blender or food processor with remaining olive oil and maple syrup. Purée until creamy and smooth, adding more olive oil or a touch of water if it’s too thick. The consistency should be creamy and spreadable (not pourable). Taste and adjust seasonings as needed.

Use sauce as you would pizza sauce, topping it with your desired cheese and toppings and baking the pizza at 425. Make a great Pizzadilla as well, as evidenced on the fine corn tortilla pictured above.

fall-food

Old fall favorites and some new ones

Vegan Parmesan Cheese

Also from Minimalist Baker

This is surprisingly good. As with any imposters, better to think of it as its own thing. (I’m looking at you, black bean “brownies”). It’s sort of a weird craving now. Like I needed another.

Ingredients

  • 3/4 cup (90 g) raw cashews (try raw slivered almonds or brazil nuts too)
  • 3 Tbsp (9 g) nutritional yeast
  • 3/4 tsp sea salt
  • 1/4 tsp garlic powder

Method

Add all ingredients to a food processor and mix/pulse until a fine meal is achieved. Store in the refrigerator to keep fresh. Lasts for several weeks.

But that’s not all! Some bonus fall accessories:

Tahini Miso Sauce

If you don’t have miso in your fridge, do yourself a favor and get some. Merely figuring out how to use it up you will take you on a flavor adventure. Toss this sauce with pretty much anything roasted, but especially cauliflower, brussels sprouts, butternut squash, sweet potatoes, etc, etc.

Ingredients:

  • 2 Tbsp. tahini
  • 1 Tbsp. white miso
  • 2 tsp. red wine vinegar
  • 1 tsp maple syrup
  • optional: grated fresh ginger, pinch of red pepper flakes, splash of Tamari. Do experiment here!

Whisk or stir all ingredients, adding enough water, a spoonful at a time, to make a smooth sauce.

Fried Sage Leaves

Put them on anything for fall goodness

Ingredients:

  • Olive oil
  • Fresh sage leaves, twice as much as you think you want
  • Coarse salt

Method:

Heat oil in a pan. Fry sage leaves 6 or so at a time until crisp. Remove to a paper towel with slotted spoon and sprinkle with salt. Repeat until you have enough to actually share with others.

sage-coffee

Fried sage next to the very best Vitamin C!


California Dreamin’: Pickled Grapes and other Weird Things

Pickled grapes, accessorized for fall.

Pickled grapes, accessorized for fall.

Well hello fall! I’m not sure how we got from frosé season to apple season so fast, but here we are. Have we all fit an unreasonable amount of fresh corn and tomatoes into our diets these past few weeks? And rescued every last watermelon from the cardboard bins? If so, good job. If not, there’s still time…but barely!

I’m just back from a long trip to Cali, and it of course involved lots of weird food. Why even go to California if you’re not going to dive all in? My weird food fest got rolling at Jack London Square in Oakland, first at a vegetarian restaurant with a mushroom pecan pate that still haunts me in the best way, and then at an event called Eat Real. Very groovy indeed. Super tart, super strong Red Branch hard cherry cider kicked it off. Fabulous street eats ensued, including sesame peanut zucchini salad with furikake…Damn! So good and so fun to say. The miso sesame muffin from Berkeley’s own Sam’s Patisserie wrapped it all up with an oddly addictive bow.

A beer drinker's decision tree. Takes the pressure off.

A beer drinker’s decision tree at Eat Real.

From there I went south, for pink pepperberry gin and tonics in Santa Monica, Tuna poke and tamales in Pasadena, and then—because you’ve got to be on your A game of weirdness in Topanga—rosemary-brined grapes and basil pickled cantaloupe.

Today, I’m bringing you the grapes, because they are stupid easy and crazy good. Plus, they are red and green and would be a perfect offering for any holiday feast. Make them now, try them in a week or so, and if you like them you’ll have plenty of time to go into production. So, let’s not be sad as we let summer and linen and the quest for perfect toenail color drift away. There are apples to be eaten, pies to be baked and ciders of all potencies to be quaffed.

This comes straight from the Wall St. Journal food section, which is awesome. Read the article for other pickled fruit recipes, including cantaloupe. And if there’s a deal on grapes just make a ton. As the article instructs, their flavors improve after about a week, and they’ll keep in the fridge for months… unless I come over.

Pickled Grapes

Adapted from “The Lee Bros. Simple Fresh Southern” by Ted and Matt Lee

Active time: 15 minutes Total time: 45 minutes Makes: 1 pint

  • 2 cups seedless red and/or green grapes (about 10 ounces)
  • ¾ cup distilled white or white wine vinegar
  • ¾ cup water
  • 1 teaspoon kosher salt, plus more to taste
  • 1 teaspoon sugar
  • 2 small cloves garlic, peeled and crushed
  • Leaves from 1 (2-inch) sprig rosemary
  • ⅛ teaspoon dried red chili flakes
  1. Pack grapes into a glass jar or airtight plastic container. Pour vinegar and water into a saucepan over medium-high heat. Add salt, sugar, garlic, rosemary and chili flakes. Bring to a simmer and cook 1 minute.
  2. Remove pan from heat and pour brine over grapes to fill container. Strain remaining brine into a measuring cup (you should have a little less than ½ cup left over) and reserve for making butter lettuce salad with pickled grapes, toasted pecans and soft goat cheese (recipe below). Transfer any garlic, rosemary and chili flakes remaining in strainer to container with grapes.
  3. Cover container tightly, shake to distribute seasonings, uncover and let cool to room temperature, about 30 minutes. Cover again, and transfer container to refrigerator to chill further, about 15 minutes more.
Among the least weird things in Topanga

Among the least weird things in Topanga

img_5160

Straight up awesomeness in the East Bay


A Lasagne For All Seasons

Daffy

Daffodils are way prettier than even the best looking lasagne, AND proof that we’re in the heart of spring.

True—the last post had a picture of daffodils. Also true, the last post and this one have nothing to do with daffodils. But they’re pretty aren’t they?

Today we’re taking a moment to breathe between seasons, to make sure we have one more solid meal before we’re all about veggies and salads, strawberries and spritzers. Because, even though linen and sandals are on the near horizon, we also have end of year sports parties, late night studying, school reunions, graduation visitors, all night studying, prom shenanigans, etc, etc, etc. There is always a need for a go-to lasagne. This one, thanks to Sister B, is now mine.

Like all of the most useful recipes, this is more about a solid method than about exact measurements and complicated ingredients. It comes straight off the package of Trader Joe’s no boil lasagne noodles and uses a mascarpone/parmesan mixture (vs ricotta/mozzarella) to coat the noodles between layers of red sauce and Italian sausage (vs spreading blobs of cheese between layers). This makes it both smoother in the middle and crunchier on the top than traditional lasagnes.

It is awesomely perfect as is, however it is also infinitely tweakable, with or without meat and with any combination of roasted vegetables. I recently made it with layers of roasted cabbage and walnuts, omitting the red sauce, and pouring a little water over it at the end for extra liquid to cook the noodles. Onions and butternut squash would be excellent in an all white sauce version or you could try a Mexican twist with chile-spiced mascarpone, chicken and corn. And of course kale will always try find it’s way into the party.

Once you’ve got the basic method down don’t be afraid to experiment and make it your own. Or just follow the directions and make it again and again. After all, who ever had too many lasagnes at the ready?

Note: I highly recommend using a big rectangular pan (up to 10″ x 15″) and doubling it. Trust me–you’ll go through it. And you won’t be left with half a container of mascarpone cheese. Sister B also swears by using one extra noodle per layer. I just swear too much.

All Season Lasagne a la Trader Joe’s

Lasagne

Yep–not pretty at all. But you know you want that crunchy top layer.

Ingredients:

1/2 package no-boiling lasagne noodles (Any brand would work)
1 lb. uncooked sweet Italian pork sausage (or any sausage you prefer)
1 jar Trader Joe’s Bolognese meat sauce (or your favorite jarred or homemade red sauce)
12 oz. mascarpone cheese (1 1/2 small containers)
1/2 cup 1% milk
1 1/2 cups grated Parmesan cheese
1/2 tsp. nutmeg
pepper to taste

Method:

Preheat oven to 375 degrees F. Remove the casing from all the sausage links; place sausage in a large skillet; break up sausage with a fork or spoon while it pan fries until cooked. Add Bolognese sauce to pan; mix, warm through and set aside.

In a separate bowl cream together mascarpone, milk, and 3/4 cup of the Parmesan cheese; mix in nutmeg. Season with pepper to taste. Spread a thin layer of the mascarpone mixture on the bottom of an 8 x 8 baking dish. Dip lasagne noodles into mascarpone mixture one at a time to cover completely; place in a single layer in the baking dish; top with meat sauce and evenly sprinkle on some of the grated Parmesan cheese.

Keep layering in the same order until all of the meat sauce is used (this should make three layers). For the top layer (4th layer): dip the noodles; make the layer; pour remainder of mascarpone mixture over top and sprinkle on the remainder of the Parmesan.

Rest lasagne for about 30 minutes to allow noodles to absorb liquid. Place in the oven and bake for 40 to 45 minutes or until the top is brown and bubbly. Rest at least 20 minutes before cutting.

Serves six.


Cold Comfort Creamed Spinach and Such

Spinach-on-woodstove

Chilly? Tired? Cranky? Pale? A wood stove and a couple of cheesy dishes ought to cozy you right up.

January can get pretty dark, in every way. As it trudges along glacially, the time we do not spend pulling ourselves upright is spent talking our loved ones off a ledge. Particularly in the ski racing world—the world of my people—January gets harsh. Wind, cold, ice, wet socks and crowded  vans. Combine that with a stretch of injuries, illness and crashes (sometimes all three) and you’ve got your perfect storm of yuck.

We know it’s coming—post holiday blues, failed resolutions, short cold gray days, translucent skin, not-quite-right windshield wipers…and yet, it gets us every time. In the beginning our plan for January is all about kicking butt, but it ends up being more about getting by. Non skiers, I know you’re with me now.

Because my soft spot for underdogs is especially mushy in January, I’m marching through Food52’s best, yet most ignored recipes for 2015. These are things from odd and humble ingredients like burnt toast and lentils. I’m starting with everything on the list that’s green because, well, it’s January. See failed resolutions and cold gray days, above.

Up first, creamed spinach without the actual cream, a comfort food involving some vegetables and fiber and not a lot of work. Next on my list is a green soup suitable for Vegans, gluten-frees and paleos. But today, we’re all about easing into this gently with frozen spinach and just a few ingredients you probably already have plus a fresh green kick. I’m looking at you, jalapeño. Nothing fancy. Not even grating. We’re just getting through this together.

We all need a big hug in January. Here’s yours.

Cold Comfort Creamed Spinach (or Squash)

Barely tweaked from Laurie Colwin’s Creamed Spinach

Spinach-on-table

Overachievers Anonymous, here we come

Notes: I made this with cheddar because, well, I’m in New England. Must we discuss? For jalapeños I used fresh—half of one of those huge mutant ones you sometimes find in the grocery store. I was in my groove so I did the same thing with half a cooked butternut squash (here’s a clinic on that), using chicken broth instead of spinach liquid, the other half of the mutant jalapeno and the rest of the evaporated milk. I liked that even better. Let’s hear it for green AND orange.

Serves 6 to 8

  • 2 10-ounce packages frozen chopped spinach
  • 4 tablespoons butter
  • 2 tablespoons flour
  • 2 tablespoons chopped onion
  • 1 clove garlic, minced
  • 1/2 cup evaporated milk (or equivalent amount of cream and milk)
  • 1/2 teaspoon black pepper
  • 3/4 teaspoon celery salt, seasoned salt or plain old salt
  • 6 ounces Monterey Jack, Cheddar, Muenster, Gruyere or some such cheese, cubed
  • 1 or more jalapeño peppers (fresh or pickled)
  • Buttered bread crumbs (use 2 tablespoons melted butter for 1/2 cup breadcrumbs, making as much as it takes to make you happy)

Method:

Cook the spinach. Drain, reserving one cup of liquid, and chop fine if not chopped already.
Melt the butter in a saucepan and add the flour. Blend and cook a little. Do not brown.
Add onion and garlic.

Add one cup of spinach liquid slowly, then add evaporated milk, black pepper, celery salt, and cheese. Add one or more jalapeño peppers (know thyself and thy heat tolerance), and the spinach. Cook until all is blended.

Turn into a buttered casserole topped with buttered bread crumbs, and bake for about 45 minutes at 300° F until the top is crisp and golden. If you want to speed up the browning, toast under the broiler.

Cold Comfort Creamed Squash

Follow directions above, substituting cooked winter squash for spinach, and 1 cup chicken broth for the spinach liquid.

Bringing it:

This is the type of thing that begs to be put in a dish, covered snugly and carried elsewhere to someone who needs a little comfort.


Crackle 2.0—Toffee meets dark chocolate pretzels and beer


crackle2

Just when you thought you had covered everyone on your list…surprise! That’s why it makes darned good sense to cook up obscene quantities food gifts, put them in jars and cute boxes and have them at the ready.

My faves are salted caramel Cholliesauce, roasted and glazed nuts and of course, a constantly replenished stash of crackle. We’ve learned to love Crackle over the years, but it’s time to shake it up a little. It’s time to go to the Dark Side. Behold Crackle 2.0, a more grown up version of decadence from a favorite site: thebeeroness.com.

I love the idea of cooking with beer, and the whole consequence of recipes only calling for half a can (at most) of some shmancy beer, making it perfectly ok—even responsible—to finish the rest. There are lots of things I love about this, including of course the taste, which really isn’t beer-like or even alcoholic after all that boiling.

This recipe lets you decide on the thickness of both the toffee and the chocolate layers. Also, it does not require oven time, leaving your oven free for baking things like these and these and these. No baking means also no urgency between steps, which is nice. You can make the toffee part and then come back to slay the rest.

crackle3

Extra points if you make the edible peppermint plate.

Finally, the dark chocolate is a more sophisticated touch (even if you hedge and add some milk chocolate chips when you run out of the good stuff).

I have made this with Guinness and most recently with Lagunitas Little Sumpin ale, subscribing once again to the “love the one you’re with” method of ingredient selection. Do keep it to craft beer or something more complex than Bud. If you want to really experiment, read up on the Beeroness wisdom. Alternatively, just wing it, and try a new beer with each batch. Oh, and for presentation points, make this edible plate out of peppermint candies. You’re soooo Martha!

Chocolate Pretzel Beer Toffee

Adapted from The Beeroness

Ingredients:

Toffee:

1 Cup Sugar
1 Cup Butter (2 sticks)
1/2 Cup Amber Ale

Topping:

2 Cups Pretzels, Smashed
2 Cups Dark Chocolate Chips (60% cacao content)
1/4 Cup Amber Ale or Chocolate Stout
1 Tbsp or so coconut oil (optional but it gives the chocolate a nice gloss)

Method:

In a large pot over high heat add the sugar, butter and 1/2 cup amber ale, it will triple in volume during the cooking process so make sure to use a large pot. Stir until the mixture starts to boil. Allow to boil untouched until the mixture starts to darken and thicken at about 230 degrees. Stir continuously until it turns a very dark amber and hits 290 degrees. (Use the color as your guide. Too light means less caramel flavor. Be patient but vigilant!) This process will take between 15 and 20 minutes from start to finish. Pour onto a baking sheet covered with parchment paper or a Silpat. Immediately spread to desired thickness before it starts to harden. Allow to cool.

Add the chocolate to a large bowl. Heat the beer until hot but not boiling. You can heat it on a pot on the stove or microwave it in a microwave safe bowl. If you use the microwave, know that the beer will foam up once it reaches it’s boiling point. Pour the hot beer over the chocolate chips and stir until well combined and melted. (Alternatively, and preferably to SOME, do the whole shebang in a double boiler. See Edie notes below.)

Pour the chocolate over the toffee and smooth out in an even layer. Sprinkle the crushed pretzels over the chocolate and chill until the chocolate has set. Cut into pieces.

Beeroness Notes: If you use a chocolate with less than 60% cocoa content, it will have higher levels of milk solids, because of this it will have a more difficult time hardening once the beer is added. Try to find 60% and chill it to set.

Edie Notes: In my microwave-deprived house I made this as directed a few times but could not get the chocolate to be as glossy as I wanted. I had better results melting the chocolate and beer over water in a double boiler, and adding a bit of coconut oil. For chocolate I used a combo of 2 Ghirardelli Intense Dark 72 % Cacao bars, and enough milk chocolate chips to get to the right amount.

Crackle1

Why are you looking at this? Aren’t you at the store yet?