Tag Archives: snacks

Coo Coo for Koulourakia

Today I am getting my Greek on. I have exactly zero Mediterranean blood in my veins, but I have some in my heart. This thanks to my favorite Greek friends, who are warm and sometimes fiery; they are generous in spirit, passionate in their beliefs and above all FUN.

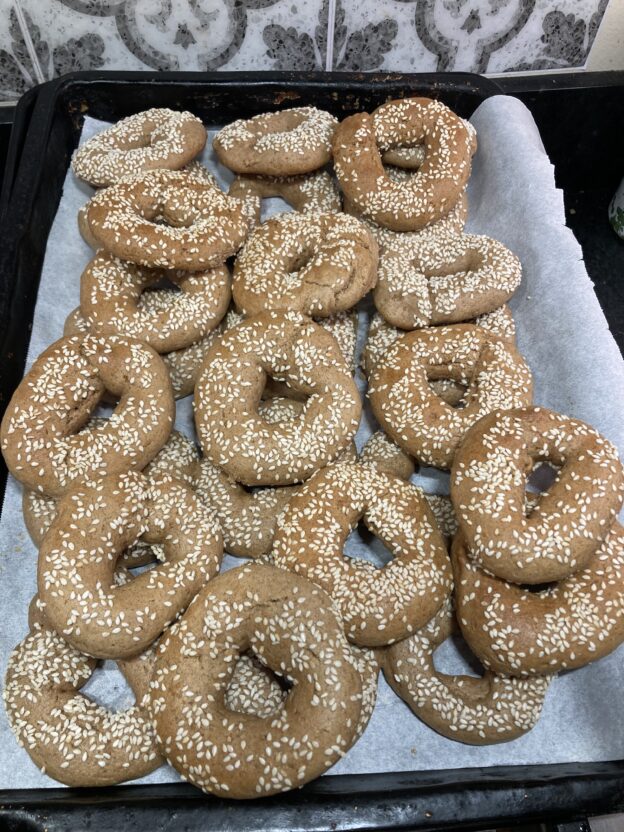
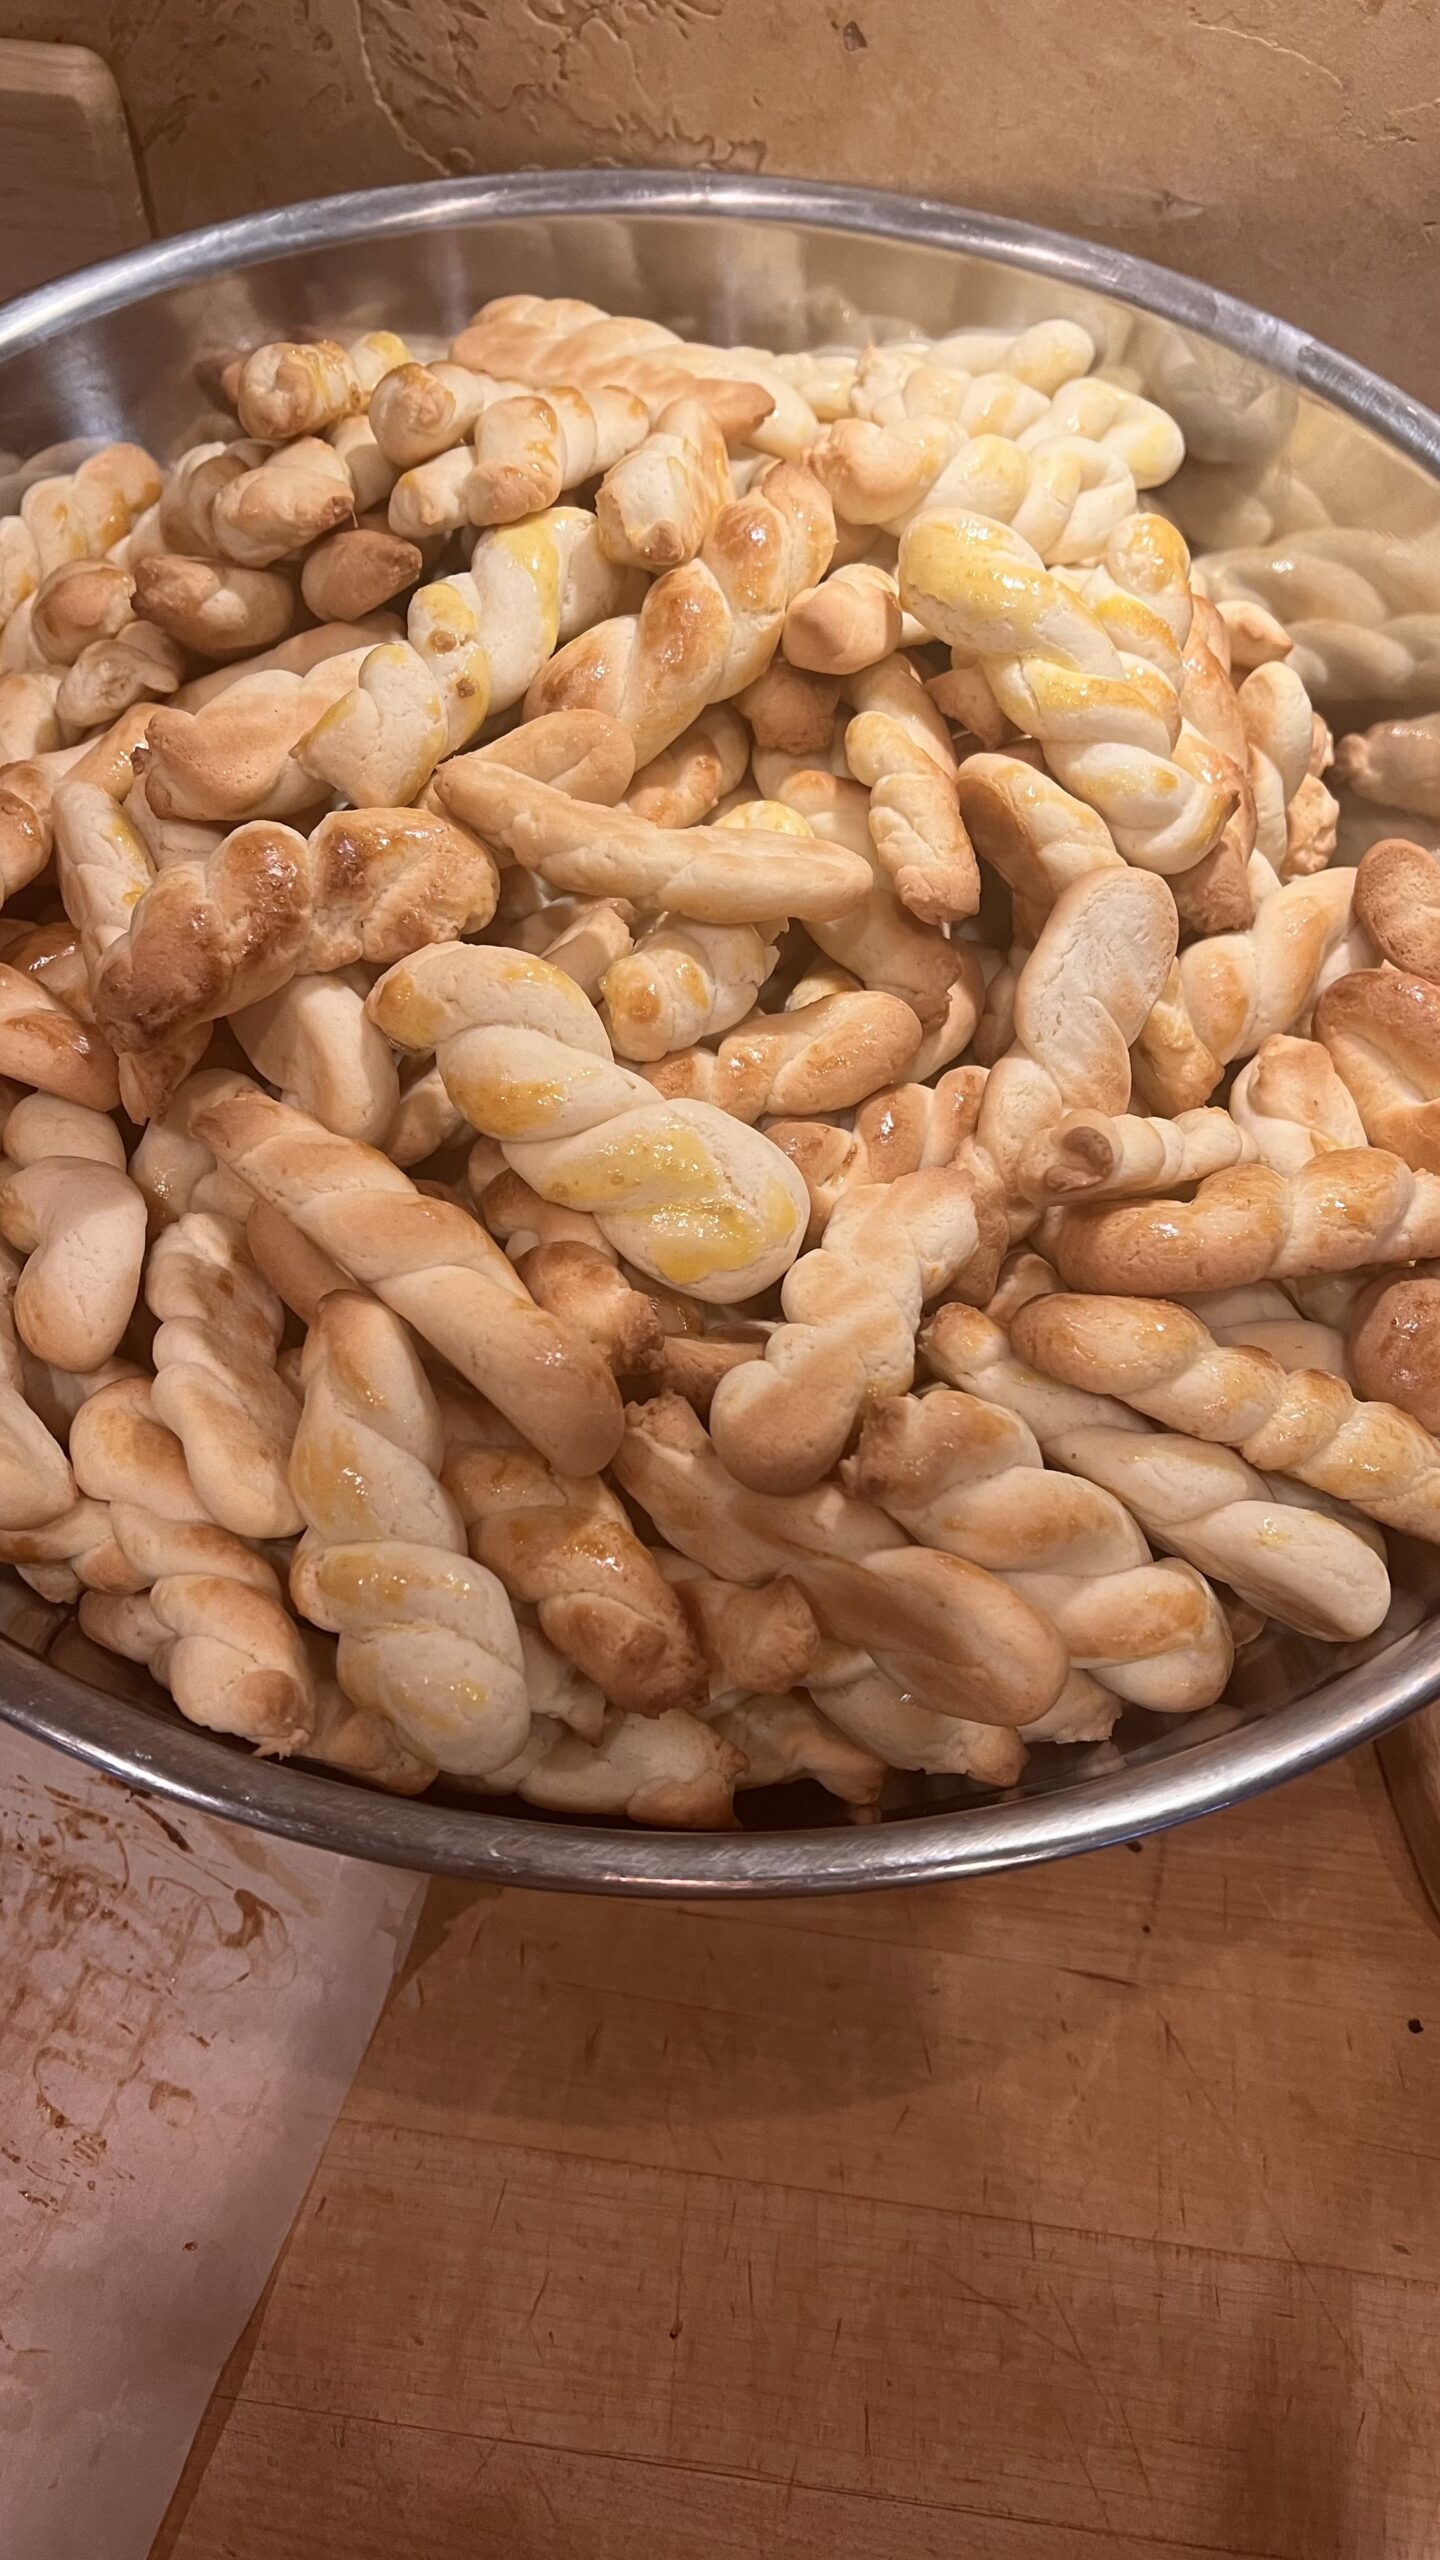
One of my faves recently enlisted my son in making a mega batch of traditional Greek cookies, Koulourakia. Seeing them in the kitchen together via Facetime, working on the cookie-production line, made me smile. It reminded me of being in the kitchen with my own mom.

As we have documented here on this blog, Nina was not invested in cooking unless the cooking was collateral necessity for some messy crafting or shenanigans that brought together kids or grandkids. Despite her own holiday baking ennui, she encouraged us to pursue our own culinary itches, which were usually things that bore little resemblance to the magazine pictures that had inspired us. Cases in point: rock-hard pretzels from ZOOM (the show not the app), a gloppy soft cheese “pine cone” flavored with bacon bits and studded with almonds, dentally challenging popcorn balls, and so, so many more.  

My point is….Nina had her priorities straight. Our holiday kitchen experiments brought us together in one place. The only really important part about the holidays are the people—the family you are born into and the family you grow into. If you’re living a rich life, that family ends up being big and varied and sprinkled all over the country, if not the globe.

That is why seeing the kitchen production half a country away inspired me to try out the Koulourakia recipe I’ve been eyeing (and trying to pronounce) for quite a while. The cookies did not disappoint and will be a holiday staple here. They are sturdy, keep well, travel well and as a bonus are both nut-free and Vegan. They’re low-key addictive—not quite as sweet as a cookie, and less of a commitment than a muffin, making them the perfect late morning or mid-afternoon accompaniment to a cup of something comforting. Book group? Cookie exchange? Hostess gift? Holiday snack arsenal for unexpected guests? Yes and yes on down the line.

There are admittedly many versions of Koulourakia, using seasonal flavors and sweeteners, or butter vs olive oil. I went with Mina Stone’s favorite orange- and cinnamon-flavored version, from her book Lemon, Love and Olive Oil, (purchased at the always magical Woody’s Mercantile). She does the pro option of brushing the tops with honey water and pressing the cookies in sesame seeds. Other versions skip the honey wash and simply roll the rope in sesame seeds before forming the cookies into a circle. You do you, preferably in a messy kitchen with good company and an excellent playlist!

       Koulourakia, Colorado version

Koulourakia

From Lemon, Love and Olive Oil

 Ingredients

The Wet Ingredients:

  • 1/2 cup (120 ml) light olive oil or vegetable oil
  • 1/2 cup tahini (120 ml)
  • 1 cup (240 ml) orange juice
  • 1 cup (200g) granulated sugar

The Dry Ingredients:

  • 4 cups (480g) all-purpose flour
  • 1 teaspoons baking powder
  • 1 teaspoons baking soda
  • 2 teaspoons kosher salt
  • 4 teaspoons ground cinnamon

Topping:

  • 1 Tbsp honey
  • ½ cup water
  • ½  cup sesame seeds

Method

Preheat the oven to 350 °F, 180 °C

Line 2-3 baking trays with parchment paper.

Make the Cookie Dough:

  • Combine all of the dry ingredients in a bowl and whisk them together.
  • Combine all of the wet ingredients in a large bowl and whisk them together. Add the dry ingredients in 2-3 batches and whisk together. Switch to a spatula and mix until a smooth soft dough, adding another spoonful of flour if it’s too sticky. Cover loosely with a towel and set aside to rest for 20 minutes.

Make the Cookies:

  • Take about a tablespoon of dough and roll it into a ball. Roll the ball into a 5-inch (12-13 cm) long rope. Shape it into an S or into a circle.
  • Dissolve 1 Tbsp honey in 1 cup water. Form the cookies on the baking tray, brush tops with honey/water mixture then press each cookie into sesame seeds and replace on sheet. Alternatively, roll the rope in the sesame and then place on the prepared baking pan. 
  • Bake the cookies 13-15 minutes, until golden brown on the bottom and lightly toasted on top). Cool on rack.
  • Transfer the cookies to cookie jars or to an airtight container and store at room temperature up to 2 weeks.

Serve with cozy bevvie of choice, or go full Greek and shake up a cold frappe. It’s totally a thing.

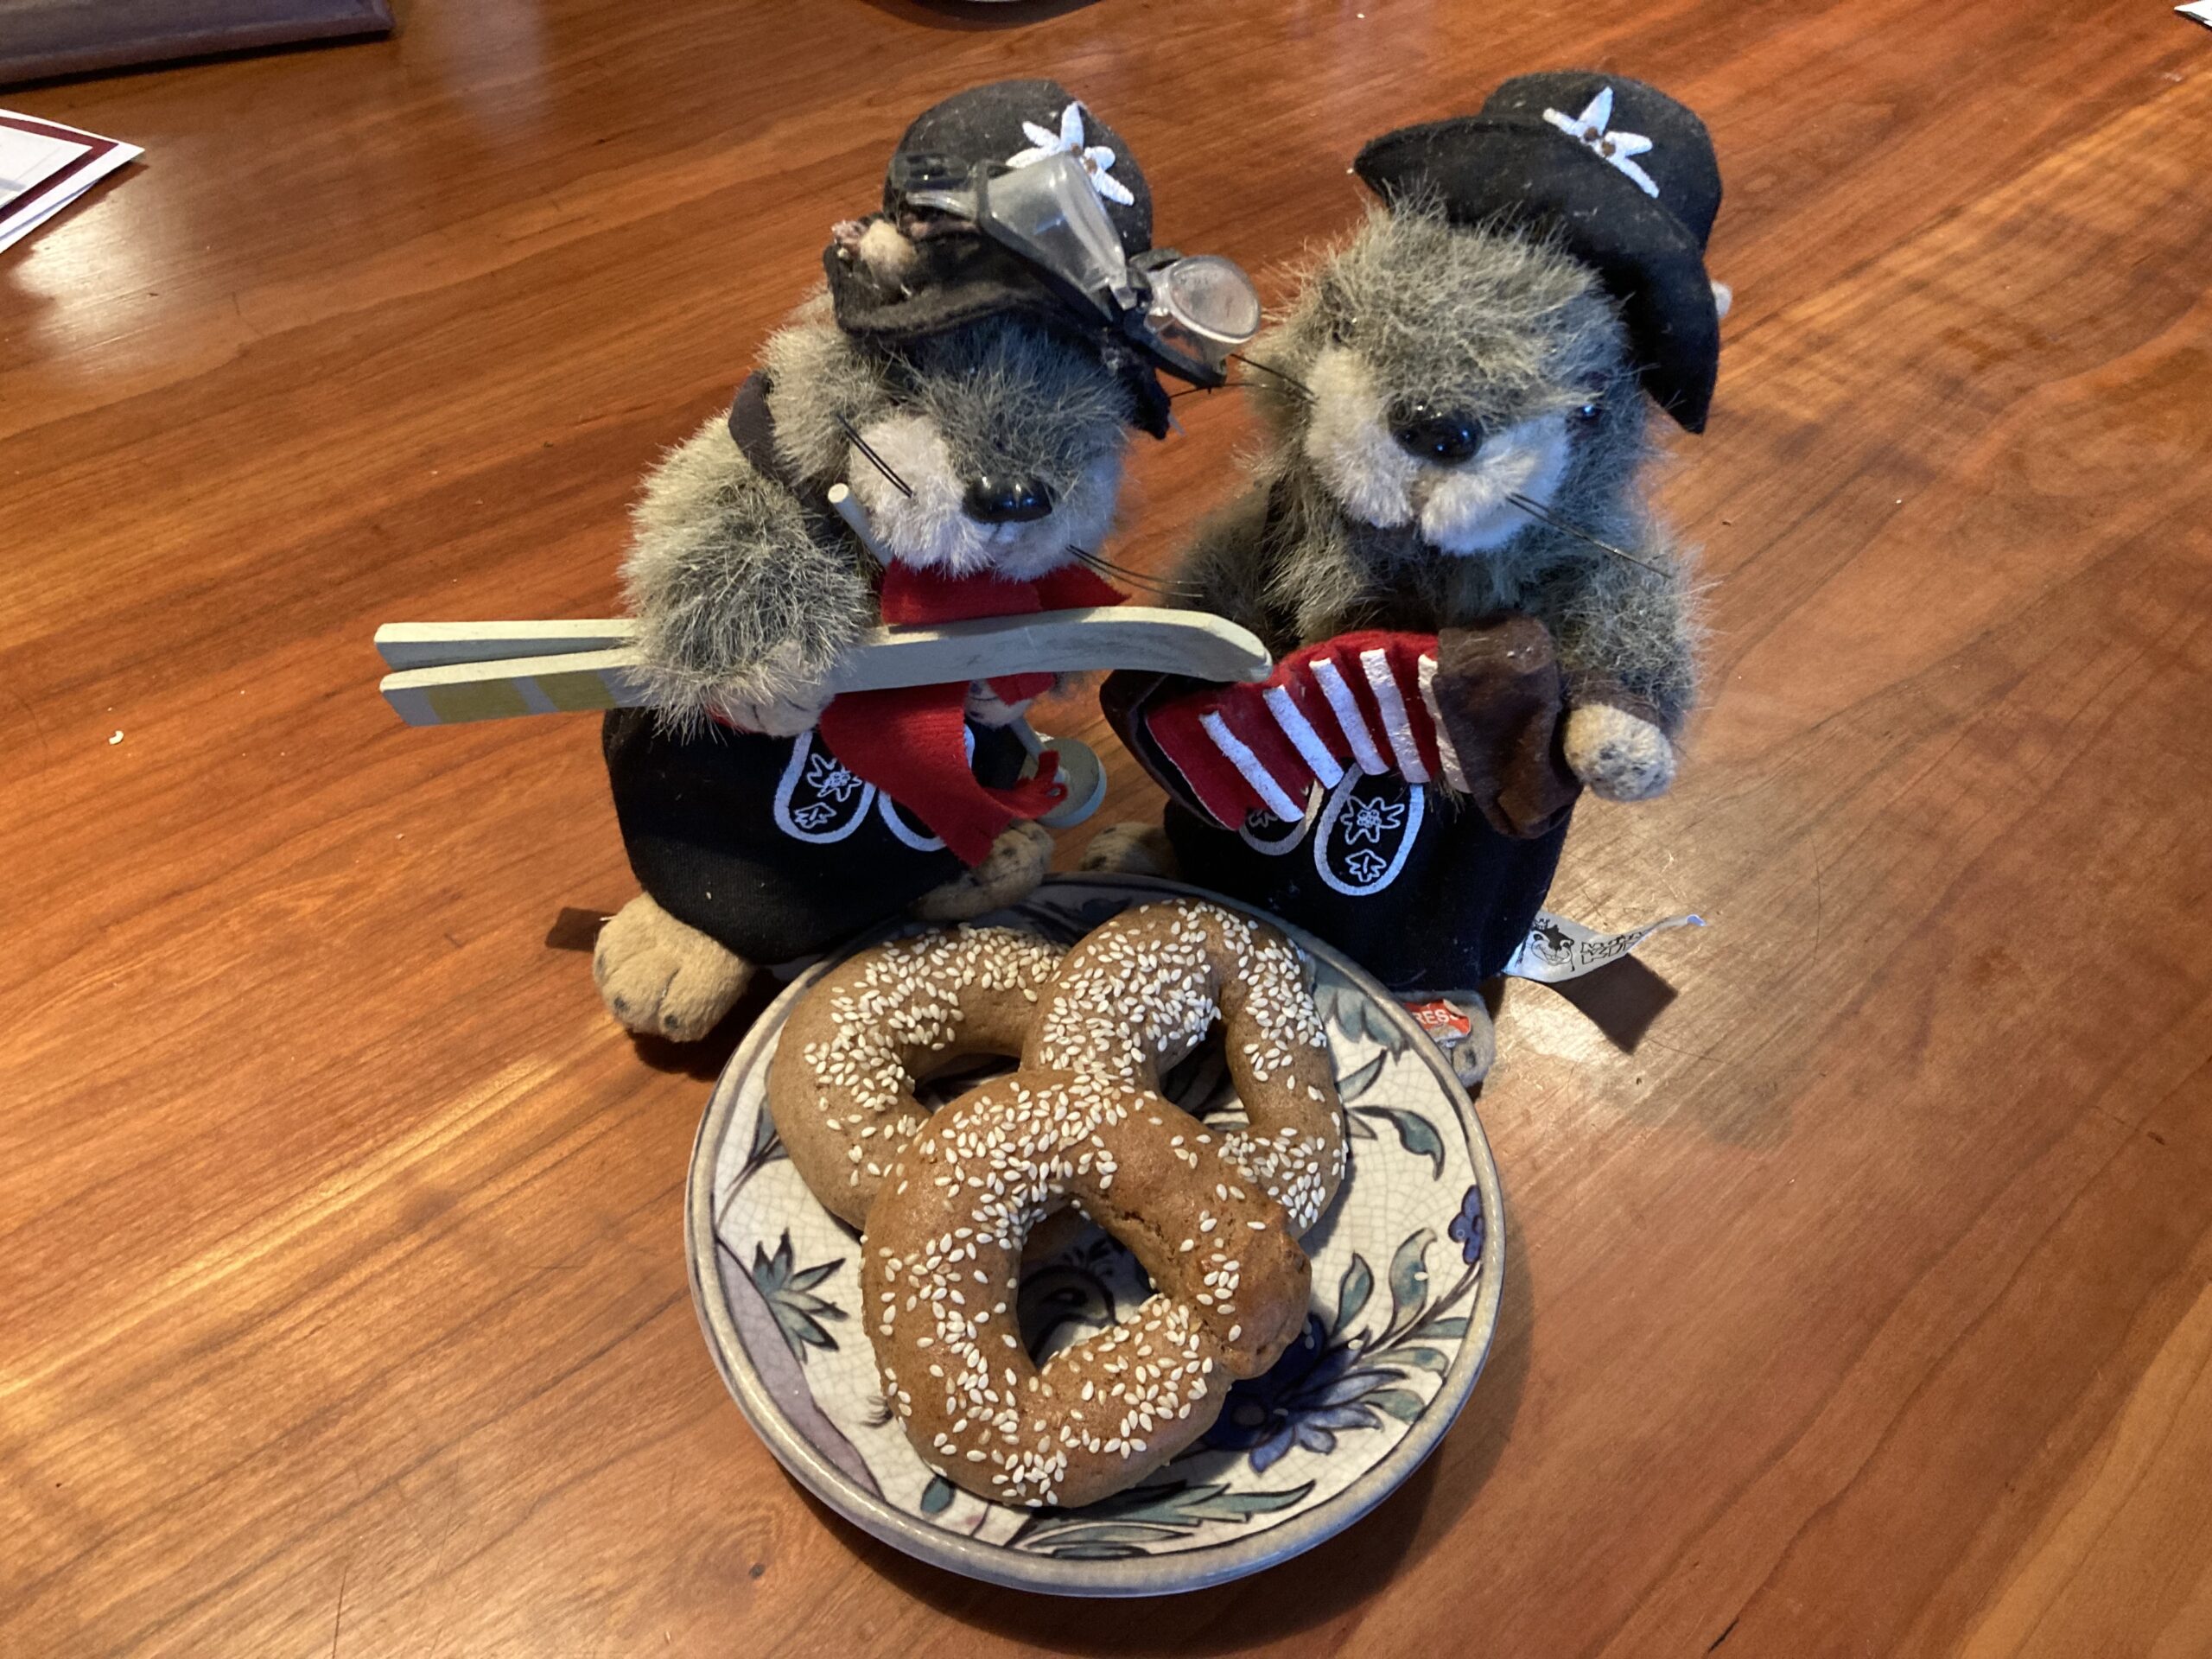
     Traditional yodeling marmots and Koulourakia unite!

Blueberry Breakfast Cake

And, an entire summer later, we’re back in the blogosphere. Long story short, there has been plenty of cooking and feeding going on, but not a ton of uploading and chronicling. Thanks to some kind friends I’ve gotten back to using real, hard copy cookbooks, and the Internet has been as relentless as ever serving up delicious wins and epic fails. Now, it’s time to revisit these favorite recipes so I, a: remember where they are, and b: can share them with my peeps!

We’re going to start back nice and easy. Then we’re going to get a little weird. I promise it’s all good stuff, but weird nonetheless. For now, we have Blueberry Breakfast Cake that I made more times than I can remember last summer. It’s like a delicious collision of a Dutch Bunny a blueberry muffin and a cheesecake.

This comes straight from King Arthur Flour, and it is foolproof. My only additional note is to use a cookie sheet on the rack below if you are using a springform pan, so you don’t bake any blueberry goodness onto your oven floor. Yes, I learned that the hard way.

Other than that, this is bombproof, and perfect for those late harvest blueberries or the ones in your freezer. I hope you love it!

Blueberry Breakfast Cake

Ingredients:

  • 3 large eggs
  • 1/2 cup + 2 tablespoons (124g) granulated sugar
  • 6 tablespoons (85g) melted unsalted butter
  • 1 cup (227g) ricotta cheese
  • 1 cup (227g) sour cream
  • 1 teaspoon vanilla extract
  • 1 cup (120g) King Arthur Unbleached All-Purpose Flour
  • 1/2 teaspoon salt
  • 1 1/4 teaspoons baking powder
  • 1 1/2 cups (255g) blueberries, fresh or frozen
  • cinnamon or confectioners’ sugar, for serving (optional)

Method:

  1. Preheat the oven to 350°F. Lightly grease an 8″ round cake or springform pan that’s at least 2″ deep. 
  2. In a large mixing bowl, using a whisk attachment (or by hand Laura Ingalls Wilder style), beat together the eggs and sugar until thick and lighter in color. Add the butter, ricotta, sour cream, and vanilla.
  3. Add the flour, salt, and baking powder, mixing until combined.
  4. Pour the batter into the pan and scatter the berries evenly over the top.
  5. Bake the cake for 45 to 50 minutes if using fresh berries (55 to 65 minutes for frozen), until the edges of the cake are lightly browned. The cake should be set throughout, although it will still jiggle when gently shaken.
  6. Remove from the oven and let rest at room temperature for 30 minutes to firm up. Serve warm with cinnamon or confectioners’ sugar (if desired).
  7. Store leftovers in the fridge for up to 5 days.


Liquid Gold

At a time like this, we all have questions. For the less pressing ones, I have an answer, and it involves sauce. The one, big, solvable daily question we are all facing is this: how am I going to make all these random leftovers into a meal without going to the store? This leads to satellite questions like, how much broccoli salad can one person eat in a day (answer: a shocking amount); and, when we’ve reached that point, what am I going to do with all this tahini I bought for that recipe

I’m so glad you asked. Thankfully the internet is now mobbed with tips like this on how to use the things that have been hanging in your pantry, waiting for their moment and your desperation. As mentioned in “get saucy with me,” (a darned useful collection of taste sensations), the right sauce or dressing is sometimes all you need to pull together humble ingredients and make them a feast.

Even though tahini opens up many options, you may need to wait for your next store run to make this baby that minimalist baker calls “liquid gold.” It is easy, fast and delicious, but requires some advanced pantry staples, all of which I promise we’ll use in the weeks to come. Namely, you’ll probably need to wrangle up some nutritional yeast and chickpeas* (Vegans can relax–I know you have these on auto delivery). The rest of you for sure have curry powder, right? And likely turmeric, from that time you vowed to mix up a comforting mug of golden milk to drink after your daily yoga. Or maybe because you actually are drinking golden milk after daily yoga. Namaste you! The rest is all pretty standard pantry fare.

This goes well as a dip or a dressing, and can transform rice, pasta, baked potatoes, sandwiches, quesadillas, salads, etc into something a little more exciting that “that stuff in Tupperware.” Bake up a couple loaves of easiest French bread ever, and you’ve just bought yourself a day off from lunch and snack duty.

Check out Lunch Deconstructed as a solid starting point for how to make leftovers into a feast, and stay tuned for some crock pot clinics on mass production of foundational lunch/snack fare. Does it get more exciting???

I hope you all are staying healthy, sane and well-fed!

*careful and prompt readers will note that the first version of this called out raw cashews. In my isolated state I somehow forgot that no cashews will be pulverized for this sauce. Bonus!

Liquid Gold Sauce

From Minimalist Baker

Ingredients

  • 1/2 cup chickpeas (rinsed and drained)
  • 1 Tbsp nutritional yeast
  • 2 small cloves garlic, skin removed
  • 1 Tbsp lemon juice (or sub lime)
  • 1 Tbsp tahini (or cashew butter)
  • 1/4 tsp sea salt, plus more to taste
  • 1/4 tsp ground turmeric
  • 1/4 tsp curry powder
  • 1/8 tsp ground cumin (for milder sauce, omit the cumin and use only curry powder)
  • 1 dash cayenne pepper (optional // omit for less heat)
  • 2 tsp maple syrup (plus more to taste)
  • 1/3 cup water, plus more as needed

Method

  1. To a small blender or food processor (though it won’t be as creamy), add chickpeas, nutritional yeast, garlic, lemon, tahini, salt, ground turmeric, curry powder, ground cumin, cayenne (optional, but c’mon), maple syrup, and water.
  2. Blend on high until creamy and smooth. Add more water as needed until a thick, pourable sauce is achieved.
  3. Taste and adjust flavor as needed, adding more salt to taste, curry powder for spice, tahini for creaminess / nuttiness, lemon for acidity, cayenne for heat, or maple syrup for sweetness.
  4. Use immediately or store covered in the refrigerator up to 1 week. You can also freeze it up to 1 month and thaw before use (do not heat) although best when fresh.
  5. Perfect for use on just about anything — think roasted sweet potatoes, burrito bowls, salads, and more!

Going for the gold!

Furikake Fireworks Popcorn

Weird as hell? Yes. Delicious? Yes, yes and more yes!!!

Weird food on the weekend. It’s a thing. Ok, maybe it’s not a thing, but it’s a thing this weekend if you make this. Spoiler alert: you won’t be sorry! You will, however, have to get a few things you might not have in your pantry. And you will have to suspend your disbelief that this bizarre mix of ingredients can combine to make a snack that is not only edible but also addictive.

Now for a little background. I’ve been meaning to make this ever since I saw it on Joy the Baker nearly three years ago, but I got stuck at Furikake—both the pronunciation and the procurement. As for pronunciation, say Foo-ree-kah-kay, and you are close enough. Say furry cocky and you are either a teenage boy or an adult who can’t help yourself. You know who you are.   

As for procurement, Furikake must be having its moment because the day I finally broke down and got it on Amazon, I found it at our awesome Coop. Only later did I discover that there are several flavors of furikake. Mine from the Coop was yasai fumi— “vegetable” flavor.” The yet-to-be used one from Amazon—Nori Komi—is seaweed flavor. Scary? A little.

Honestly, even harder to find than Furikake were the Corn Pops. Props to the Coop for taking the high road and not carrying Corn Pops, but in this case it sure would have helped. I considered buying two packs of mini cereals at the mini mart just to cobble together the cup of Corn Pops but dang—that’s a lot of surplus Fruit Loops and Apple Jacks.

On to the recipe. You’re going to cook up some bacon—good and crispy like you mean it. You’re going to chop it up fine. You’re going to make your own kettle corn—in your Whirly Pop, your big covered pot or your cracked Mickey Mouse popcorn maker. You’re going to brown some butter. Then you’re going to marry it all together with some additional weirdness including chopped up dried pineapple, corn pops and the precious furikake. And you’re not going to substitute anything for anything, because Joy said not to. After seeing this popcorn disappear with both kids and adults, I trust her on this.

So here you go. I hope this brings you and your people joy and weirdness this weekend.  

Roy Choi’s Furikake Kettle Corn

Ingredients

For the Kettle Corn

  • 3 tablespoon canola oil
  • 1/4 cup corn kernels
  • 1 tablespoon granulated sugar
  • salt to taste

For the Mix

  • 4 heaping cups kettle corn
  • 1 cup Corn Pops (the cold cereal)
  • 2 tablespoons furikake, plus more for topping if desired
  • 1 teaspoon red pepper flakes
  • pinch of cayenne pepper
  • 3 tablespoons finely chopped dried pineapple
  • 3 tablespoons finely chopped crisp bacon
  • 4 tablespoons unsalted butter, melted and browned
  • 2 tablespoons minced chives

Instructions

  1. To make the kettle corn, in a medium saucepan with a tight-fitting lid (or your weapon of choice), heat the canola oil over medium heat. Add the corn kernels and sprinkle with granulated sugar. Place the lid over the pan, keeping the lid slightly ajar. 
  2. Allow popcorn to begin popping. Once or twice, cover the pan completely, and use pot holders to lift the pan and shake it. When popping slows, remove from heat and sprinkle lightly with salt. Shake into a large bowl. 
  3. Add Corn Pops, furikake, red pepper flakes, pinch of cayenne, diced pineapple, and diced bacon. Drizzle the melted butter over the mixture and toss to combine. Place in a serving bowl and sprinkle with more furikake and minced chives. 
  4. Serve and enjoy! 

Bringing it: 

Shovel that good stuff right into a ziplock bag and take it where you will. I’m talking to you hikers, road trippers, party hoppers, fireworks watchers, Drive In goers…